This post contains affiliate links, meaning that if you click on a link I will recieve a small comission. This costs you nothing extra and I only promote products I use and love! You can read our full disclosure here
If you’ve been keeping up with my DIY projects over the last month, you know it’s been devoted to learning about and creating different styles of wax seals for future stationery and party projects; and all that inspiration began thanks to my newest supplier and affiliate partner for everything wax seals, Artisaire!
Artisaire specializes in creating beautiful custom wax stamps and sealing waxes to create one of a kind mailable wax seals for party and wedding stationery, details, and accents. I found them on Instagram after being less than impressed with the starter wax seal pack I had purchased, and now they are one of my favorite shops for DIY stationery supplies thanks to their high quality sealing wax and beautiful modern wax stamps.
Based in Canada, Artisaire hosts a large collection of beautifully designed brass stamps, sealing waxes in a variety of modern hues, and all the accessories you need for creating your own custom wax seals with them!


When I contacted them, Artisaire happily sent me a beautiful assortment of their products to try, then I couldn’t resist getting more to make a whole assortment of wax seals for my future party projects! So with all sorts of sealing wax options, a new melting spoon, and a new gorgeous stamp, I struck out to see how their products compared to what I have tried in the past, all while learning more about making wax seals along the way.
I absolutely love Artisaire for the variety of different sealing waxes, where they have so many beautiful hues you can easily create a modern color palette out of them for any event, but what’s even more beautiful is their assortment of different wax stamps to choose from! So this review of their products starts with the wax stamp I received, then all the different sorts of sealing wax with their melting accessories that I’ve tried so far!
WAX STAMPS
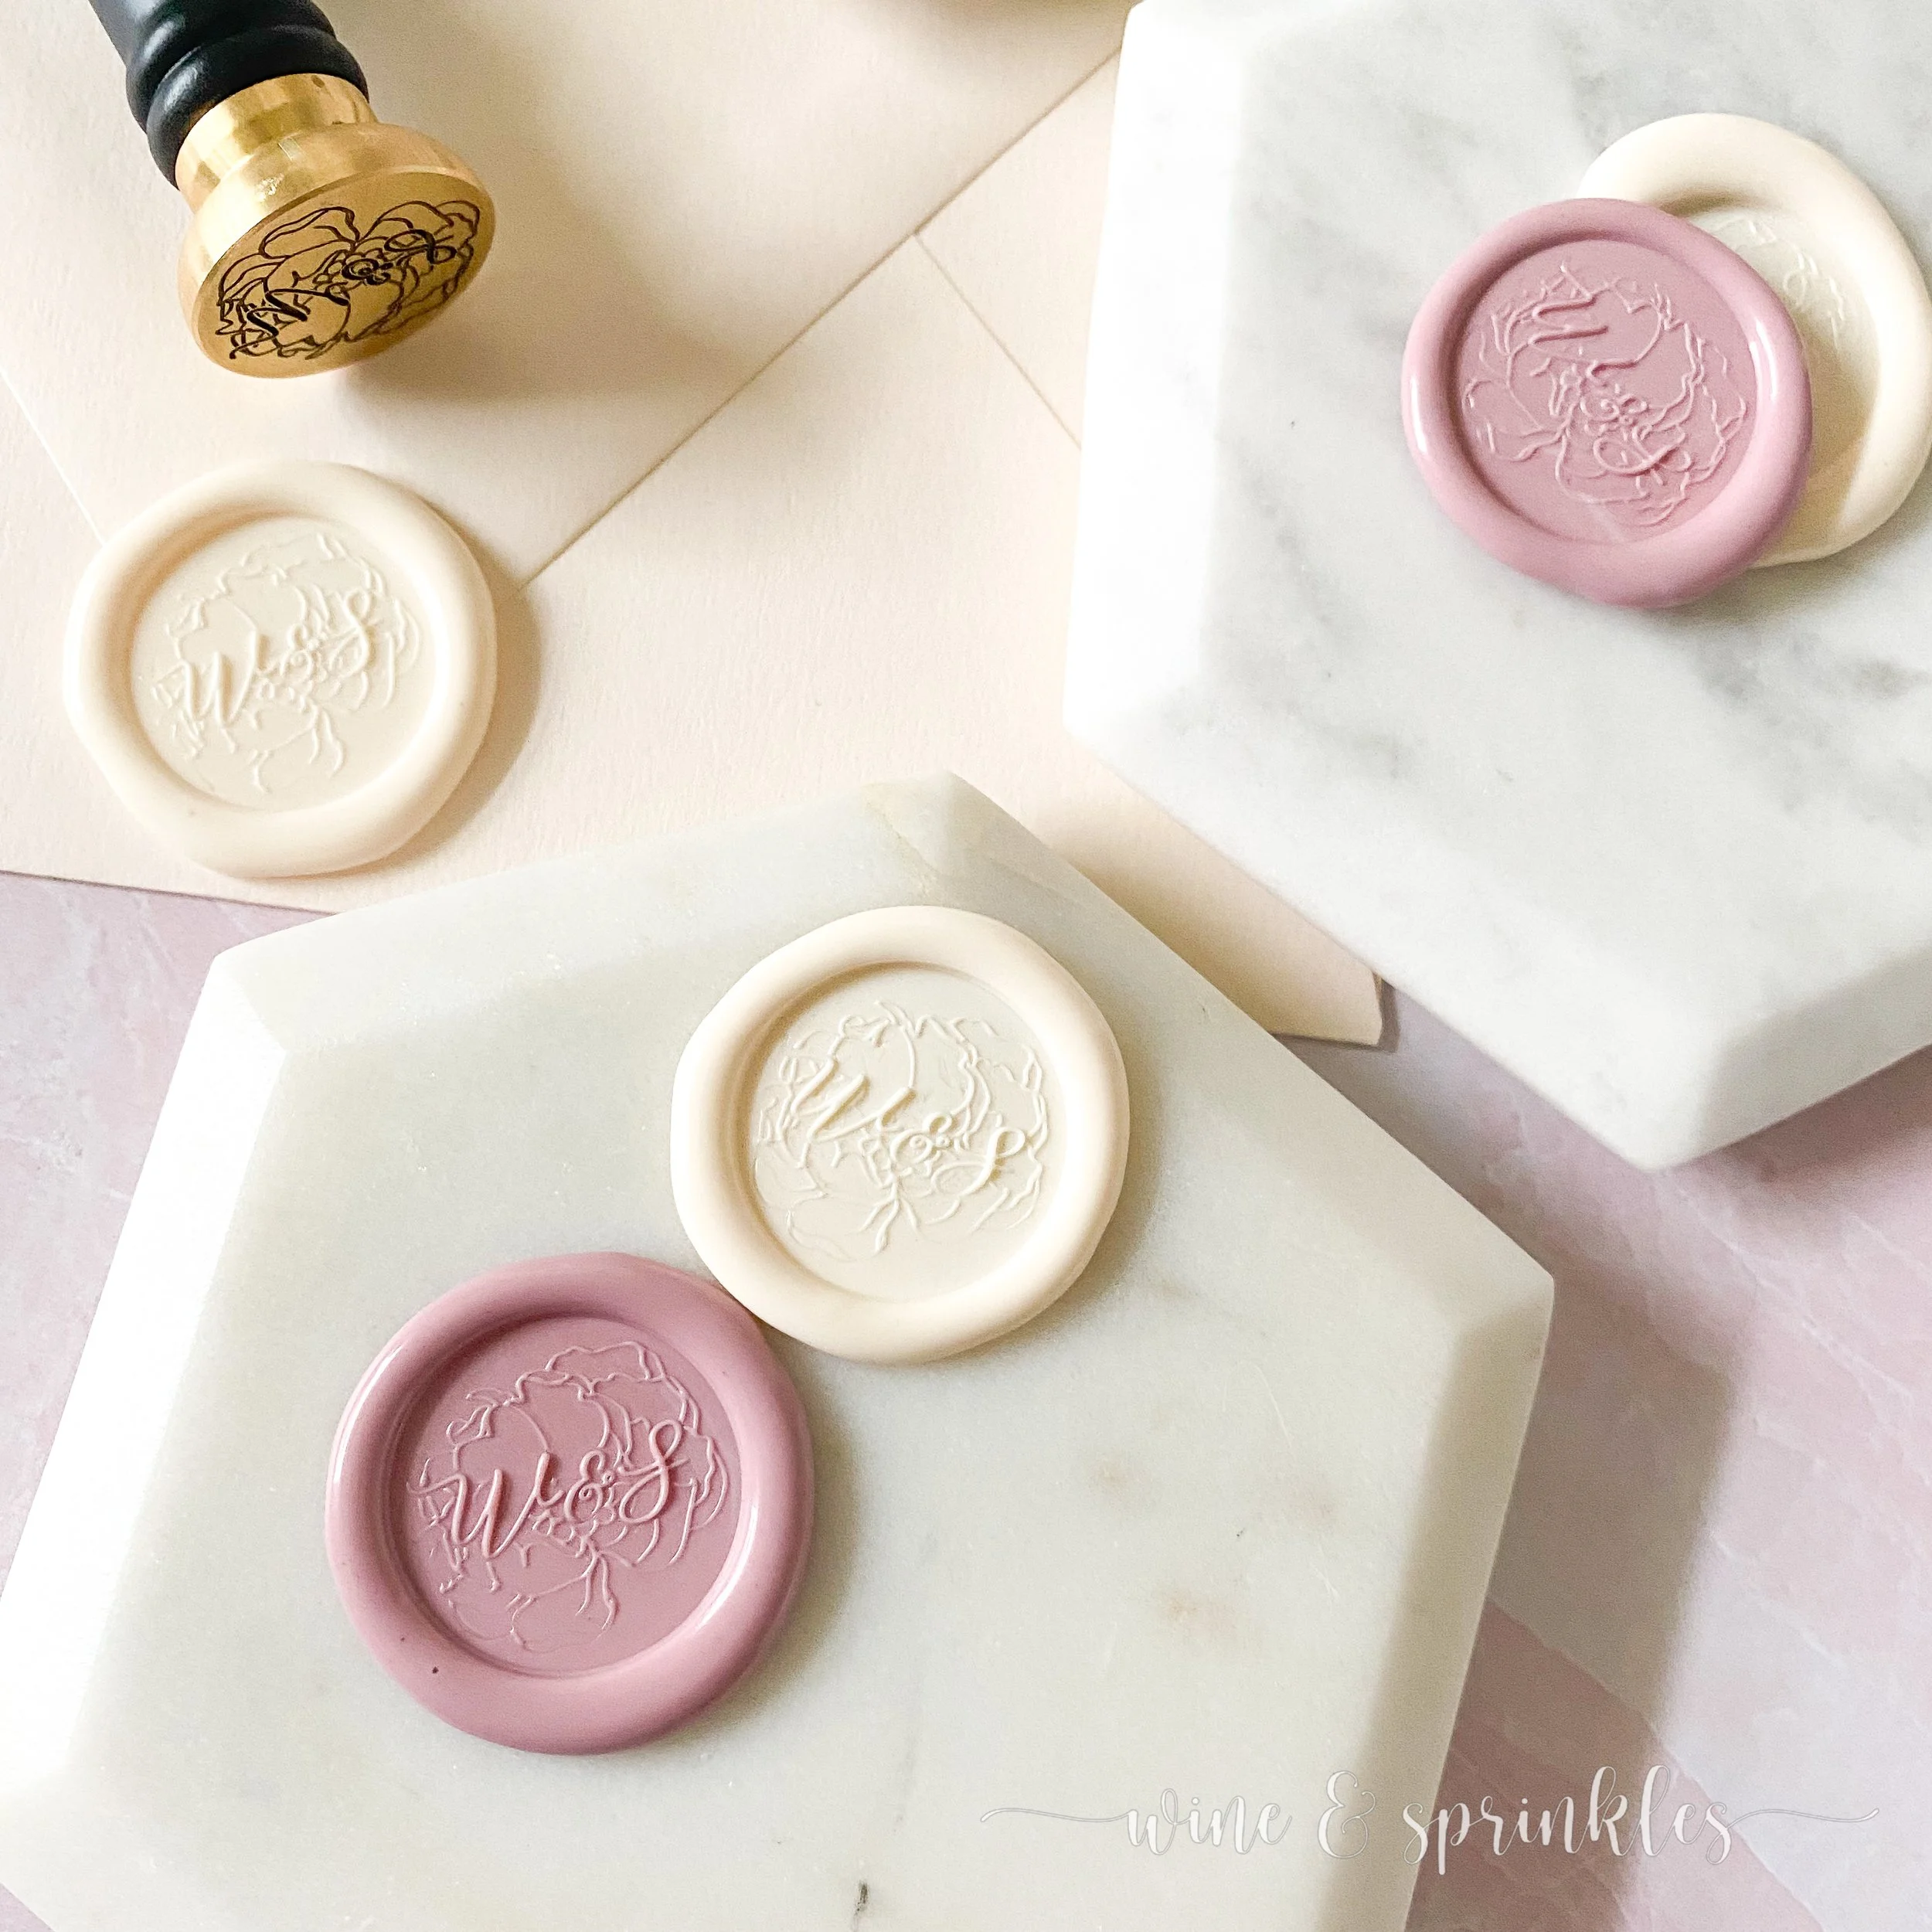
When I first contacted Artisaire about their different products, I knew one that I had to try was one of their monogrammed wax stamps, but I had no idea that the quality of this stamp would be so much better than others I had tried before!
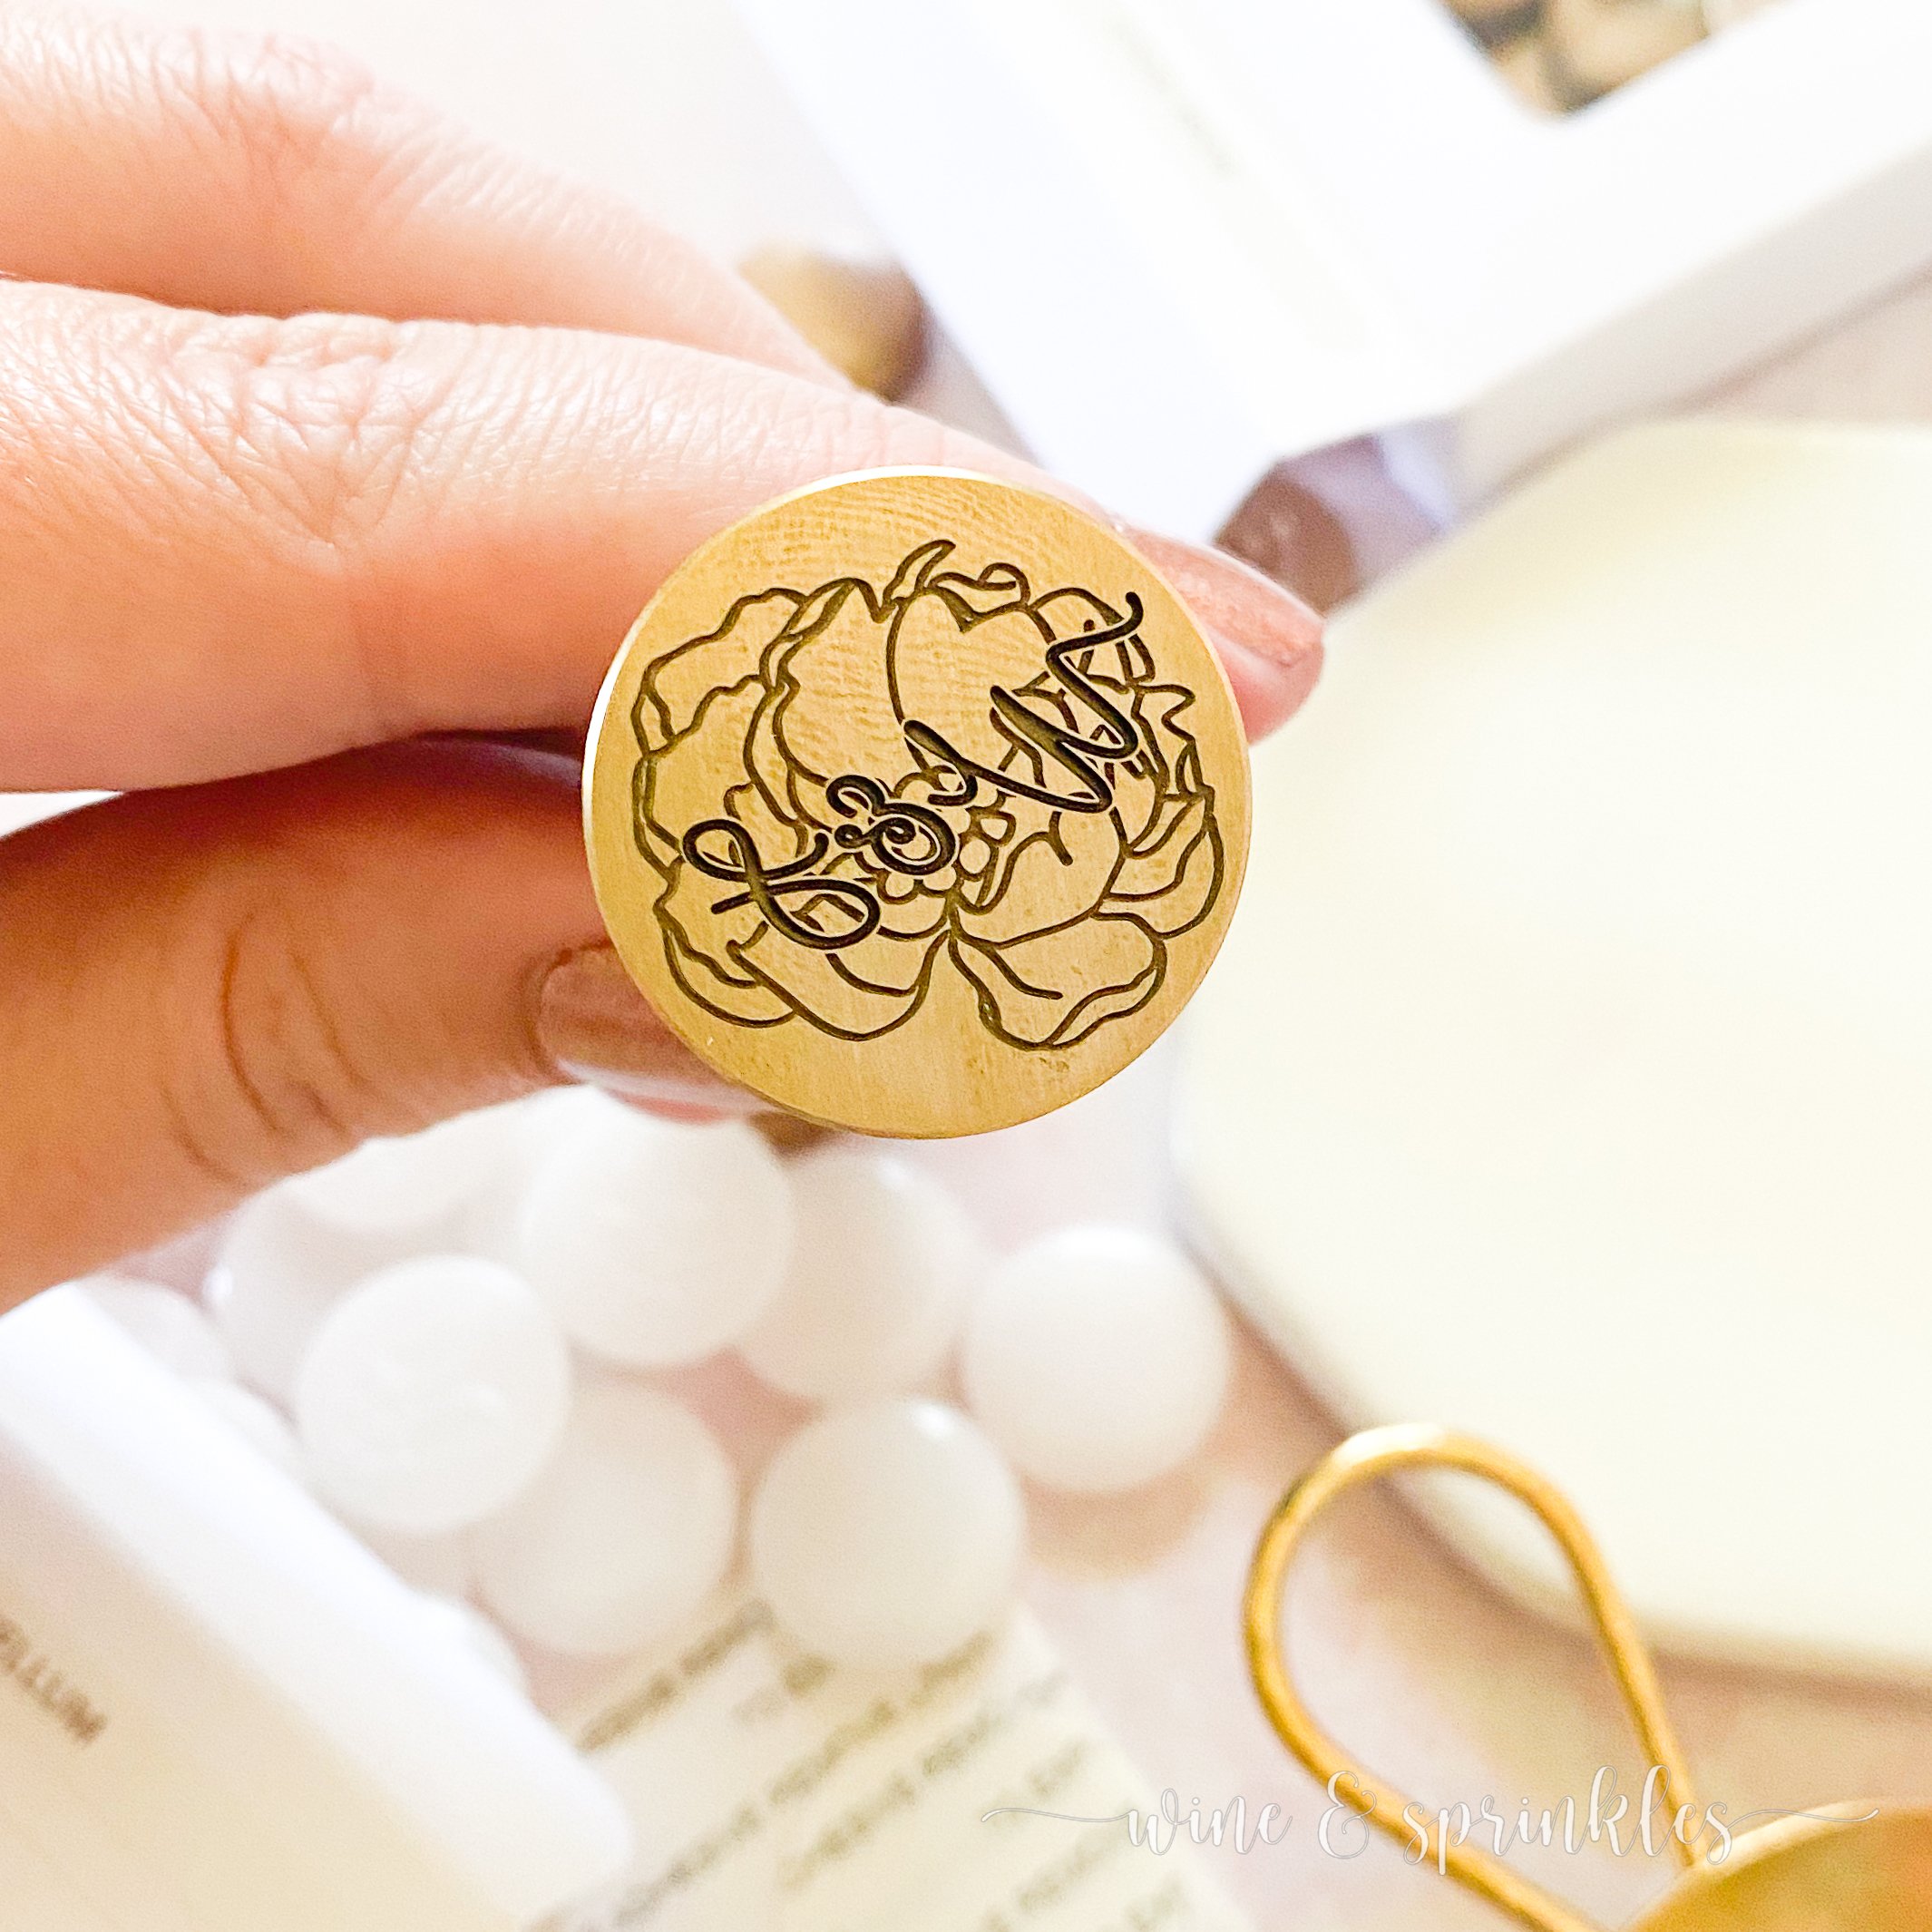
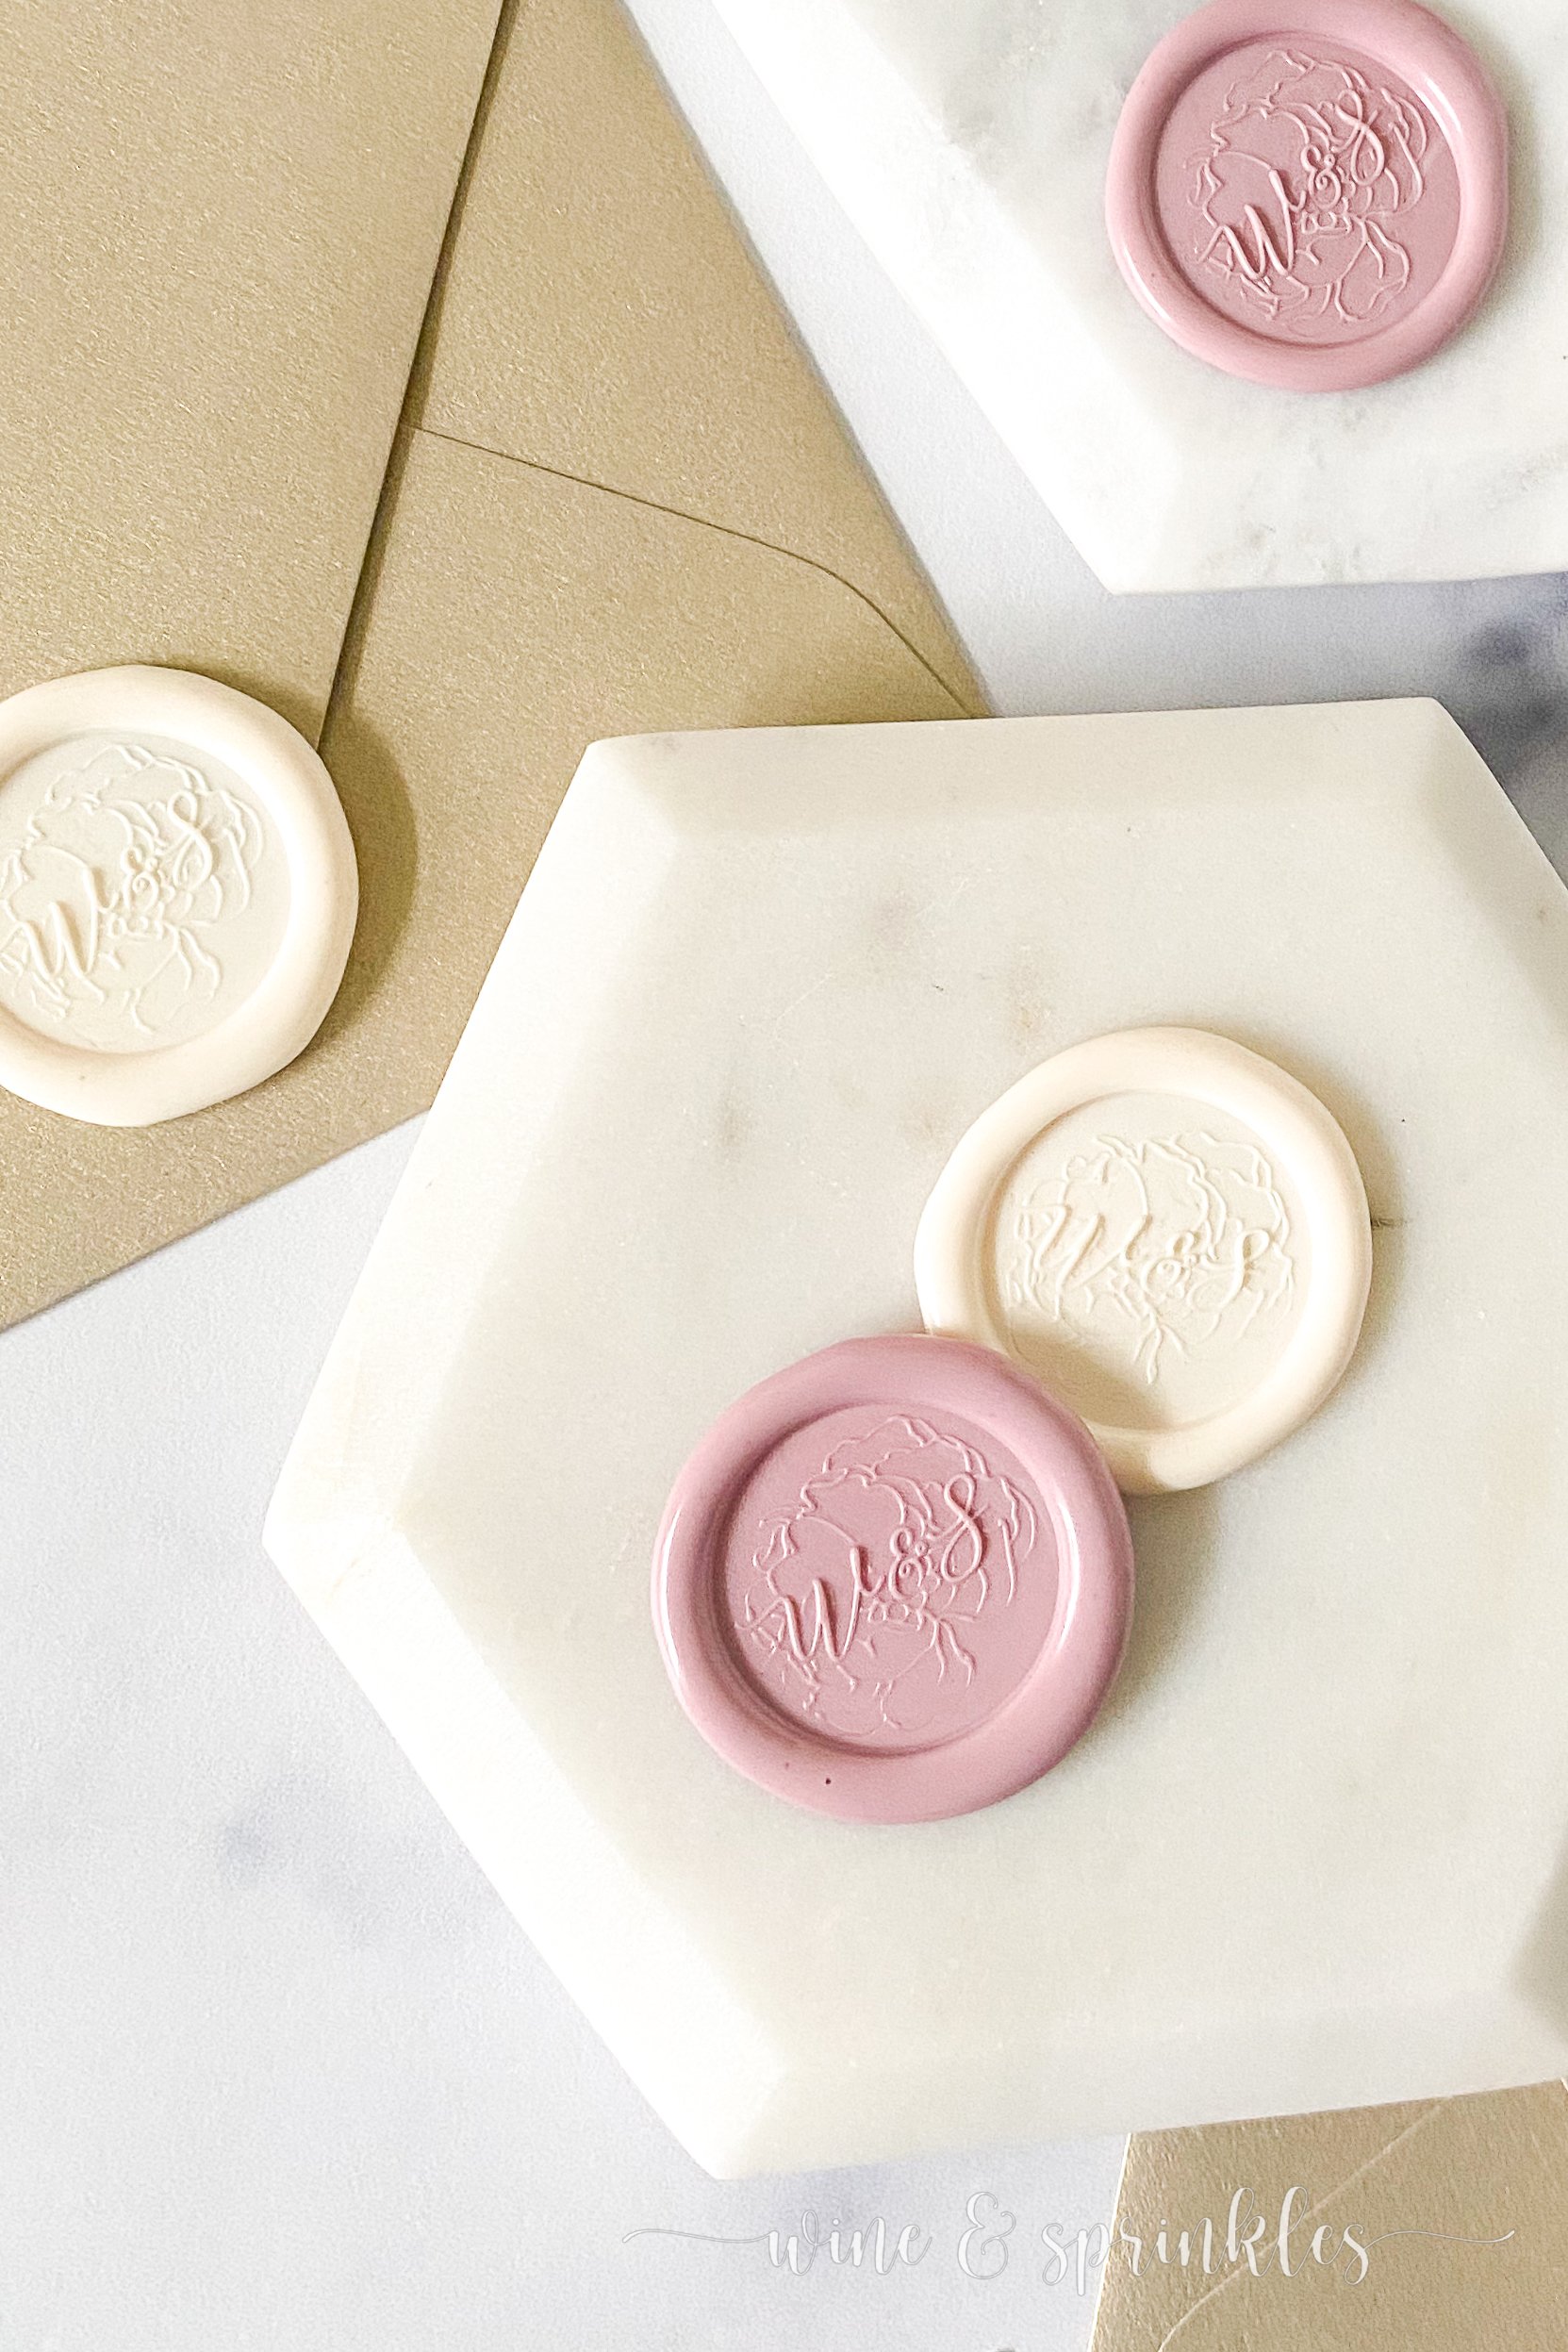
During my first trials at making seals, I used stamps that I had found from a variety of different sources, so I concluded that most stamps would feel and behave the same, but that changed after using the Pascala Monogram Stamp I received from Artisaire for my Marbled Self Adhesive Wax Stamps. As soon as I opened it, the delicate and intricate design as well as the beautiful curves and weight of the stamp head surprised me. But what surprised my more was how much better the molten sealing wax behaved for this stamp than my previous, cheaper choices.
For being by far the most delicate stamp design I have, pressing firmly into the wax with this stamp always left the full impression without problems cooling, the wax bubbling around the sides of the stamp, and despite the delicate impression the script lettering still coming through beautifully with the open blooming background flower; where depending on the stamp I often had problems with little air bubbles and bad impressions for my other bolder designs. Another cool feature of these stamps? They also have a little notch on the outside edge of the stamp head to show where the bottom of the stamp is, so your impression is perfectly positioned every time!
In addition to beautifully designed monogrammed stamps like the one I received, you can also work directly with Artisaire to have your own designs custom printed on a stamp, or choose from a variety of different designs in their every changing collection. Each season, they collaborate to create several new, beautiful stamps to add to their store, ranging from personalizable stamps like the Pascala Monogram Stamp but also featuring beautiful floral and wildlife inspired stamps you can use for a variety of events and stationary occasions.
While I am hardly going to throw away the other stamps in my collection, I know where I will always be buying a couple each season, starting with the favorites I’ve been eyeing: Vintage Peonies, Fable and French Botany.
While I build up my collection of beautiful brass stamps, there’s one product Artisaire offers that now I only buy through them because I’m so impressed with it, and that’s their assortment of sealing wax!
There are two ways to create wax seals, so I tried both with Artisaire’s products over the course of my wax seal projects. I have given an overview below of each method of making seals, so you can decide what method goes best with your wax seal ideas!
For combining colors or for the fun old fashioned feel of creating wax stamps, sealing wax beads are the perfect choice for you! It is my preferred method when I’m creating Marbled Wax Seals or if I’m creating only a couple seals at a time.
Using a sealing spoon and beads is what most people think of when making wax seals, including myself, so when I first started experimenting with seal making I purchased a starter set of beads that came with a spoon and tea light holder. For this method you light a candle under your melting spoon, then melt down beads in the colors of your choice to pour and stamp with your impression. Multiple beads are used for each seal, which can be marbled together for more creativity with color.

That cheap starter seal pack made creating seals with this method feel very cumbersome, and after making one set of gift bags and some gift tags, I wondered how anyone every made seals in bulk for their special events! The wax wouldn’t melt consistently over different colors and it felt like each seal required a different amount of tiny sealing beads, so none of my seals felt consistently sized either. When I found Artisaire’s sealing spoon and beads; however, I found a whole new love for making seals with this method!
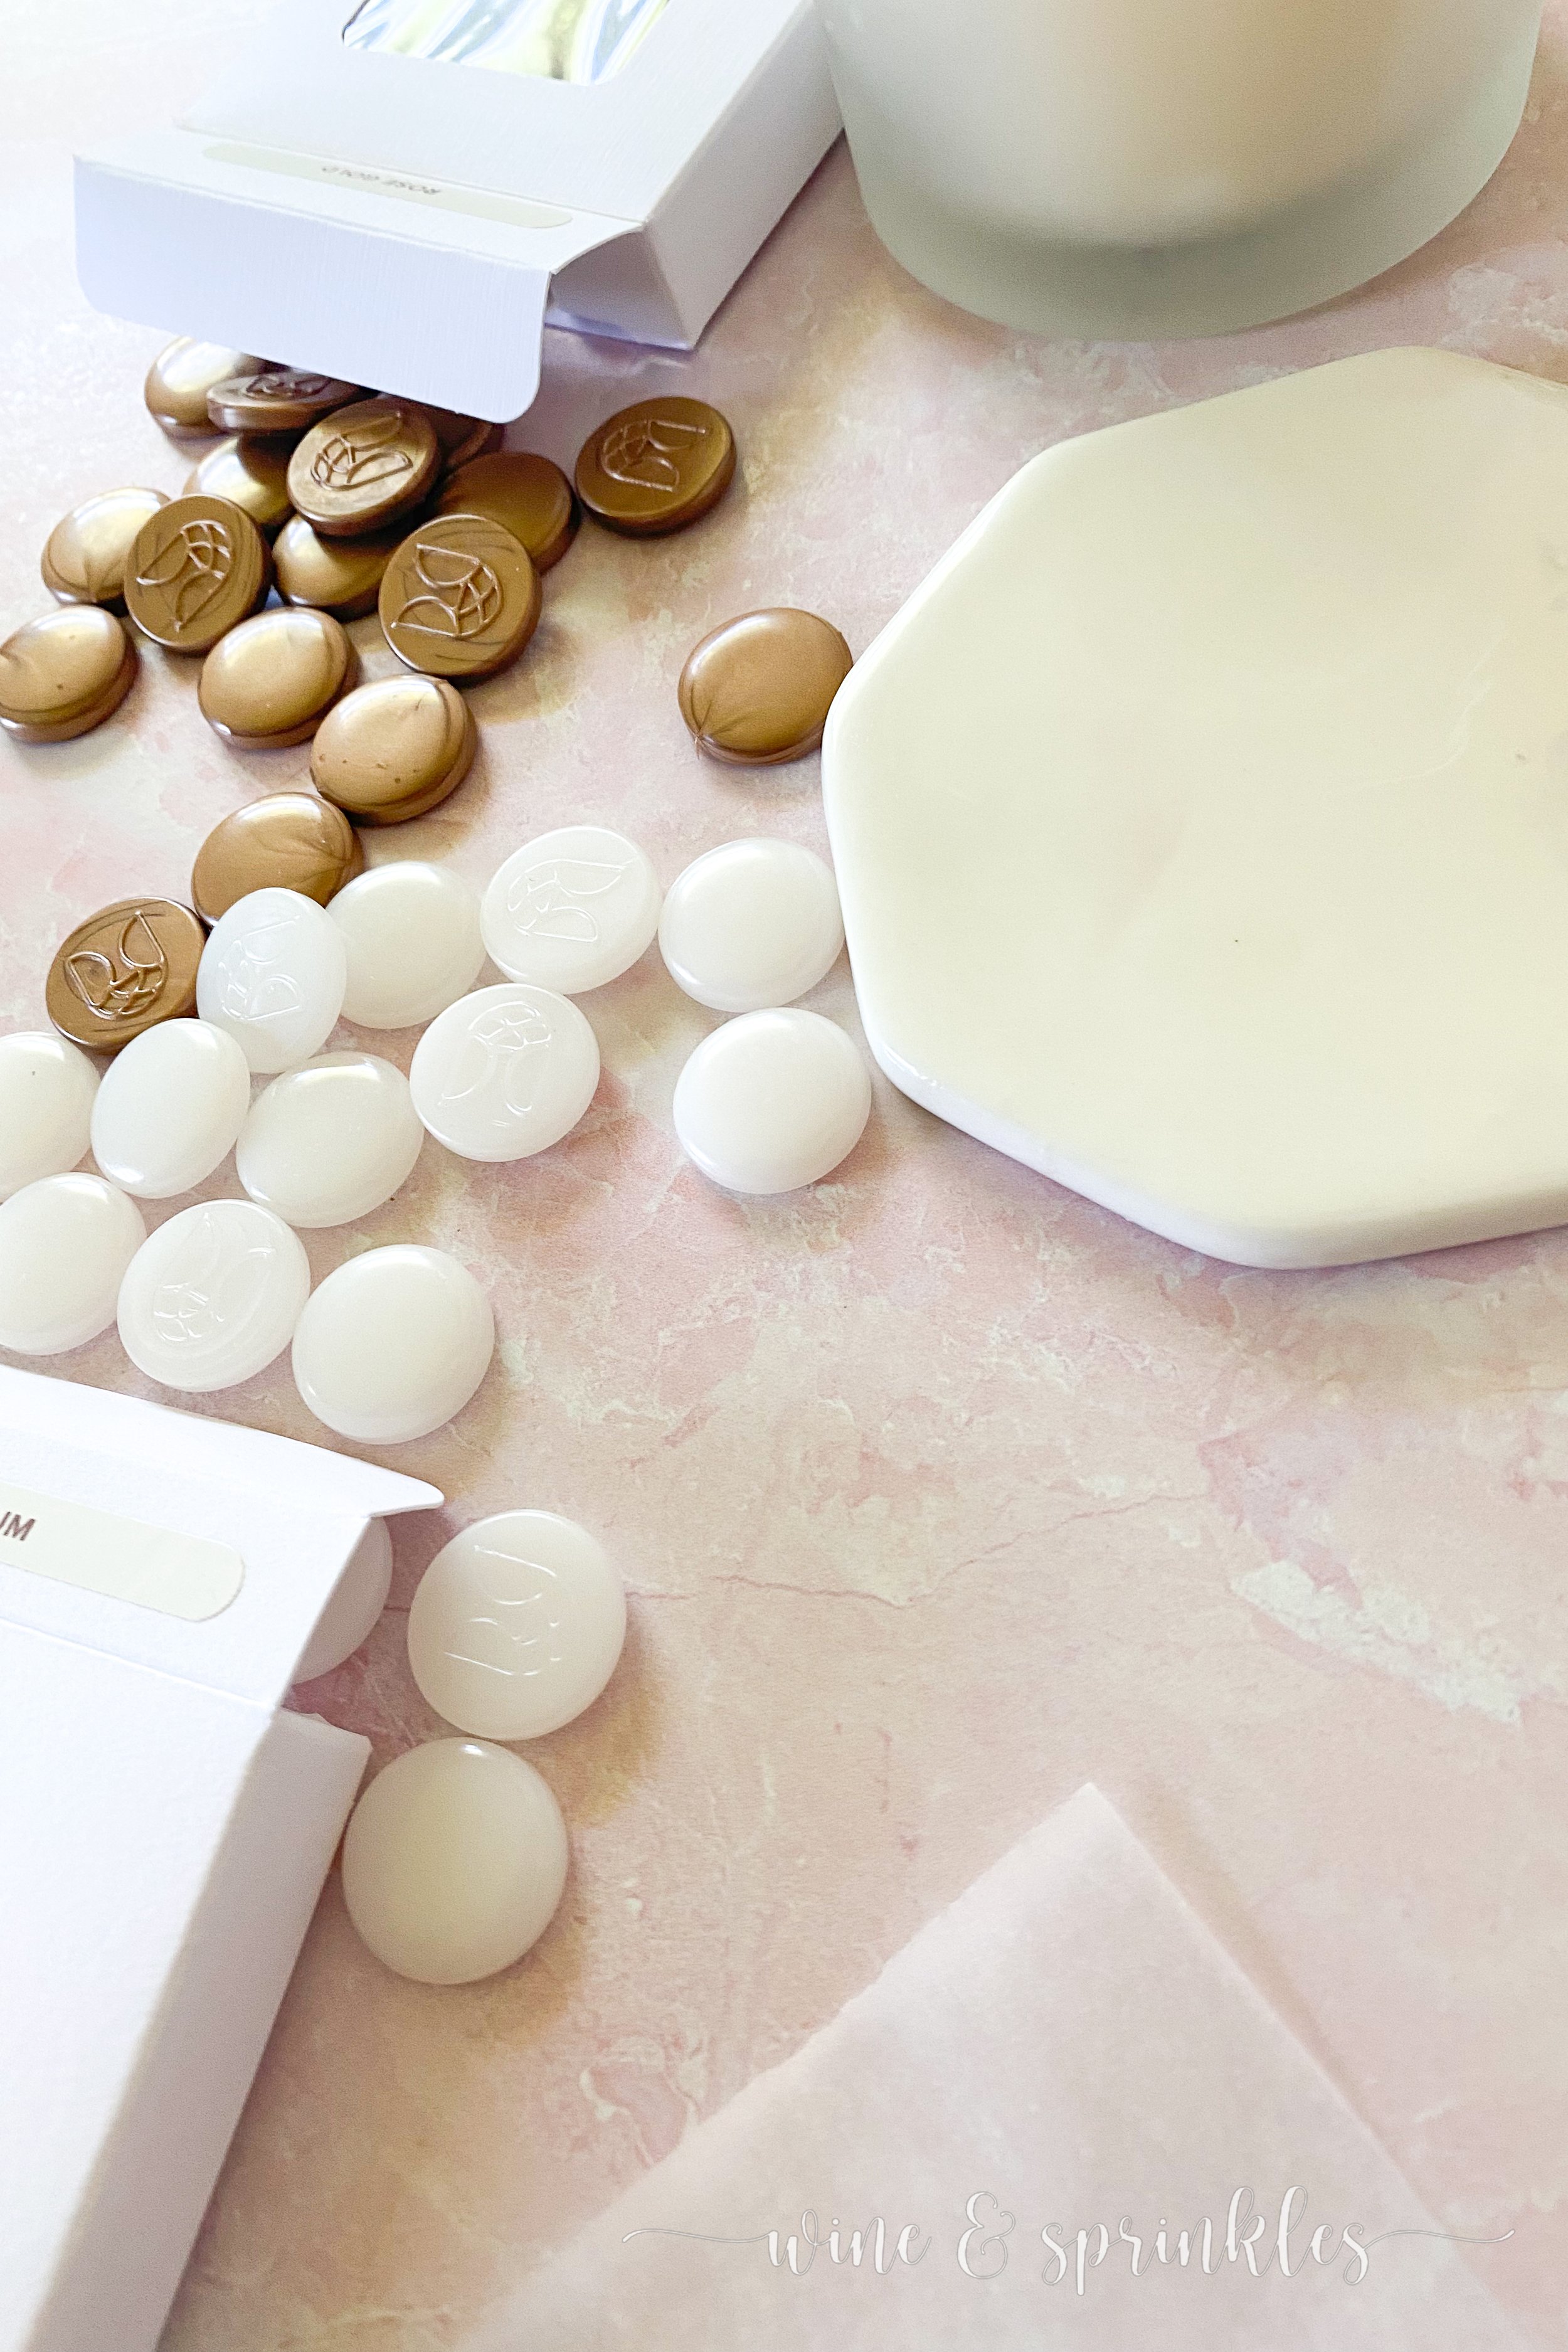
I was sent the beautiful combo of Rose Gold Sealing Beads and Vellum Sealing Beads which I used to create some gorgeous Marbled Self Adhesive Wax Seals for my future party projects, which gave me the chance to change my tune on both wax seal beads and melting spoons!
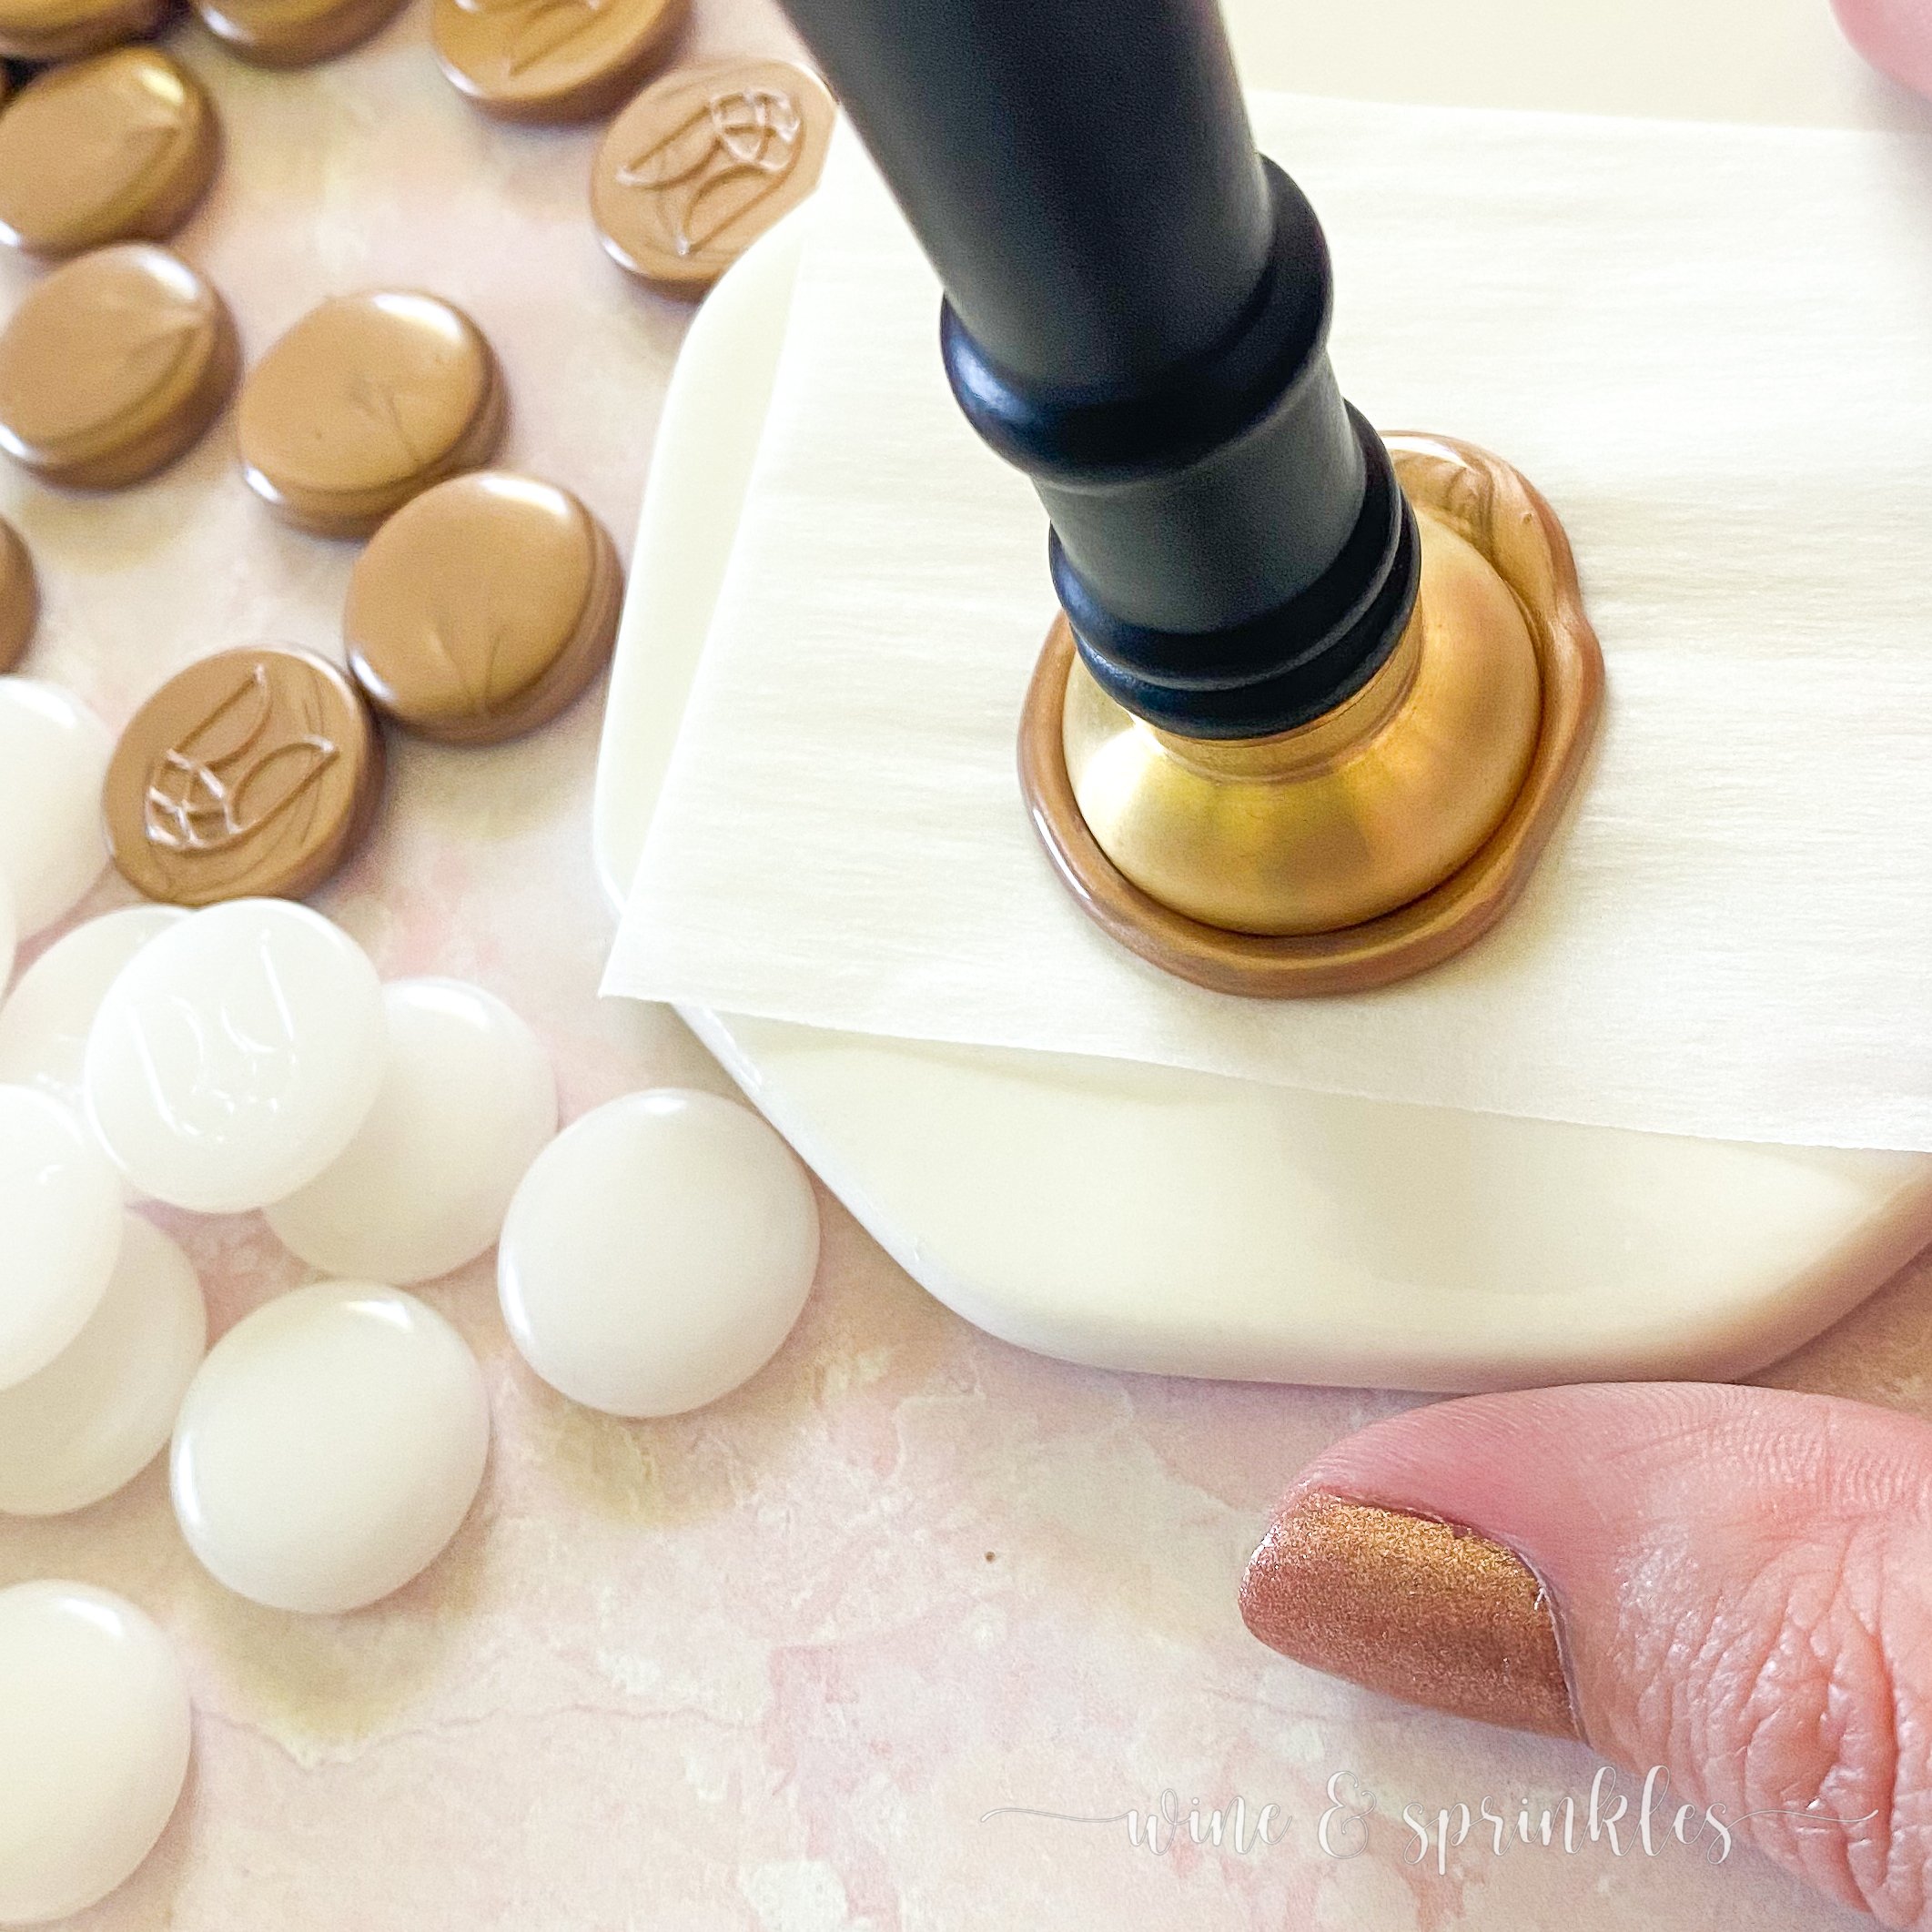
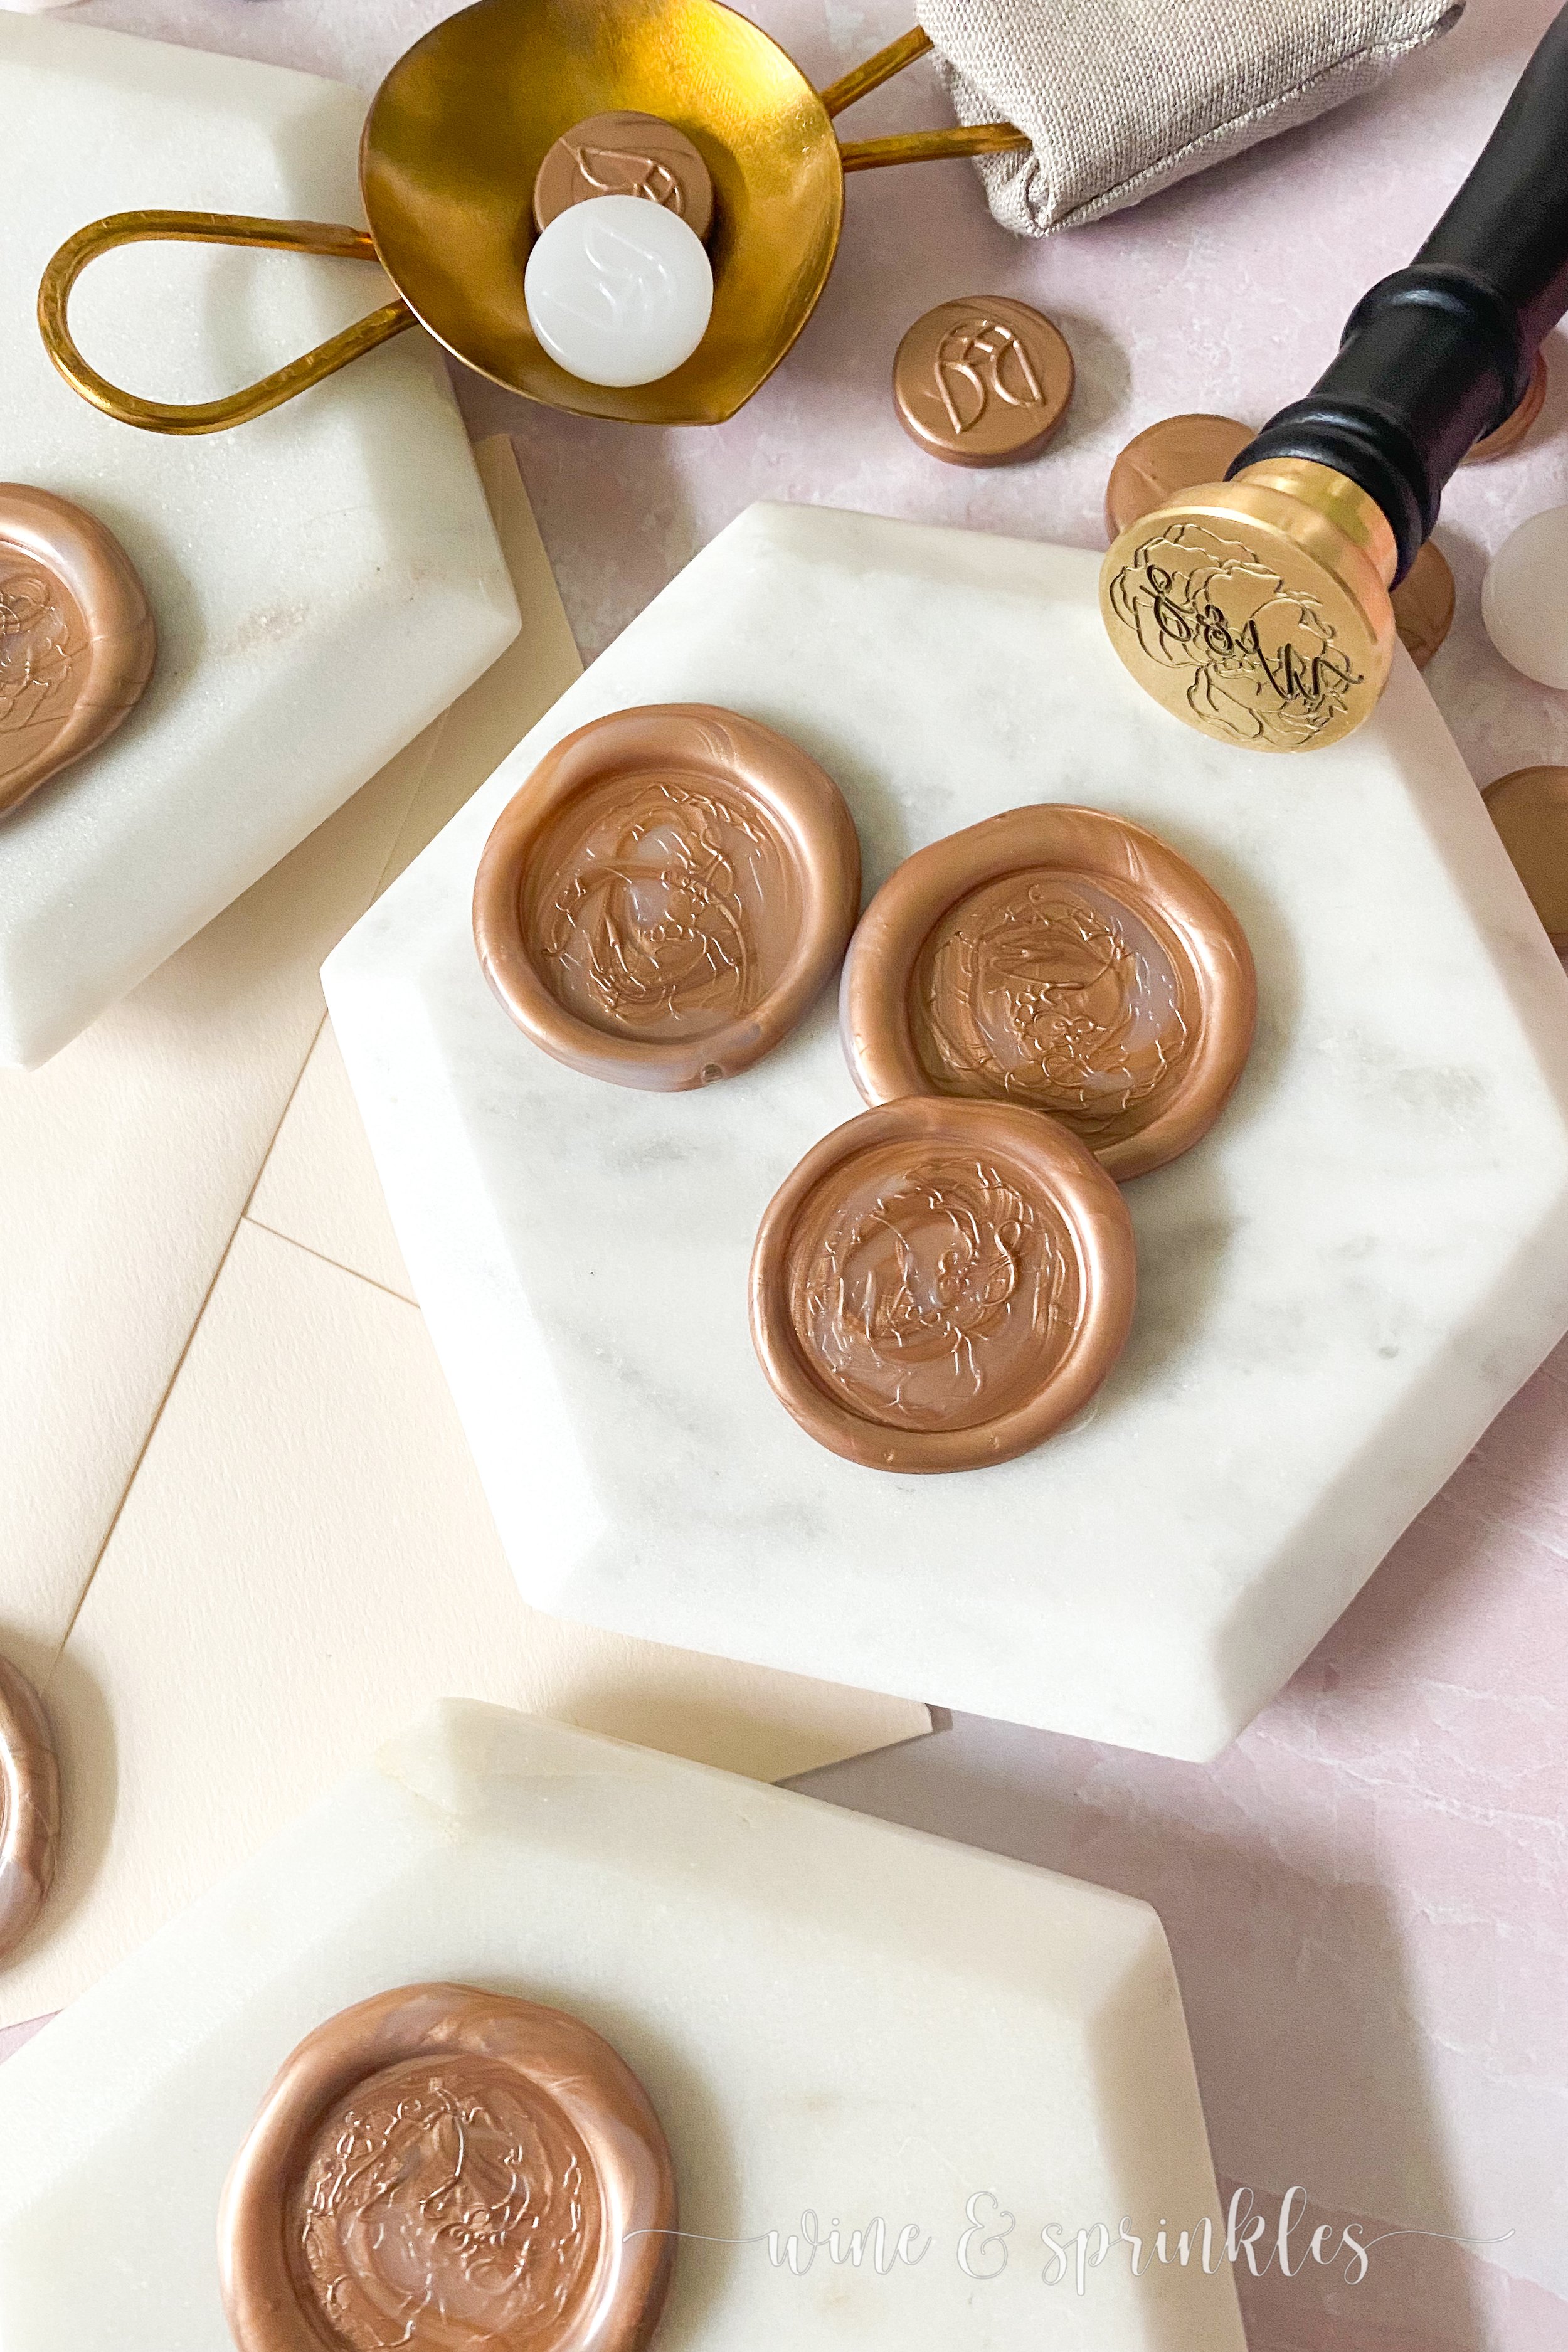
First, let’s talk about the beads, which compared to the beads I had before, were a revelation! While my other set would take anywhere from 4-6 beads, all of which would melt at different times, Artisaire’s Sealing Wax Beads required only two beads per spoon that melted beautifully evenly, every time! I loved that with their beads, I could actually create high quality marbled seals that melted evenly and it was so much easier to pour than the others I’d tried, before I knew it I had made a dozen marbled seals, smoothly and easily, where that same feat with my old beads would have taken at least twice the time with far more frustration! But what really helped me find a new love for wax beads was the Grace Sealing Wax Spoon that I used for melting them down, the perfect piece for making my sealing beads shine!
When I first saw the Grace Sealing Wax Spoon, I absolutely loved how modern and elegant it looked, but that pales in comparison to how much better it was to use that my last spoon and candle set! Instead of hunching over a little tea light contraption while a little spoon did its best to melt beads, the big beautiful brass spoon can be placed over a small candle in a jar instead, with its large shallow spoon creating a nice even surface to melt wax into. With it’s even heating, I wasn’t constantly burning wax, not melting it enough, or having other issues, instead I was relaxed and having so much fun watching the beads liquify and making seals! The spoon worked like a dream for pouring too, and I think its larger surface area helped both with that and not leaving a. Lot of excess wax behind, I could make a couple seals easily without excess wax in the spoon or interfering, only cleaning it every few seals by wiping it out with a folder dry paper towel. And to top all of this off, it was genuinely fun to use, I’ve never felt so fancy crafting as I did making seals with it and can’t wait to improve my collection of wax beads to keep using it!!


When you are creating seals in bulk or are just looking for an easy method of stamp making, using sealing wax sticks with a low temperature glue gun is the way to go! I actually didn’t even know this method existed until I found Artisaire when I started my wax seal research, and it has been a game changer for me in being able to create wax seals where larger quantities are required, like gift bags and favor tags!
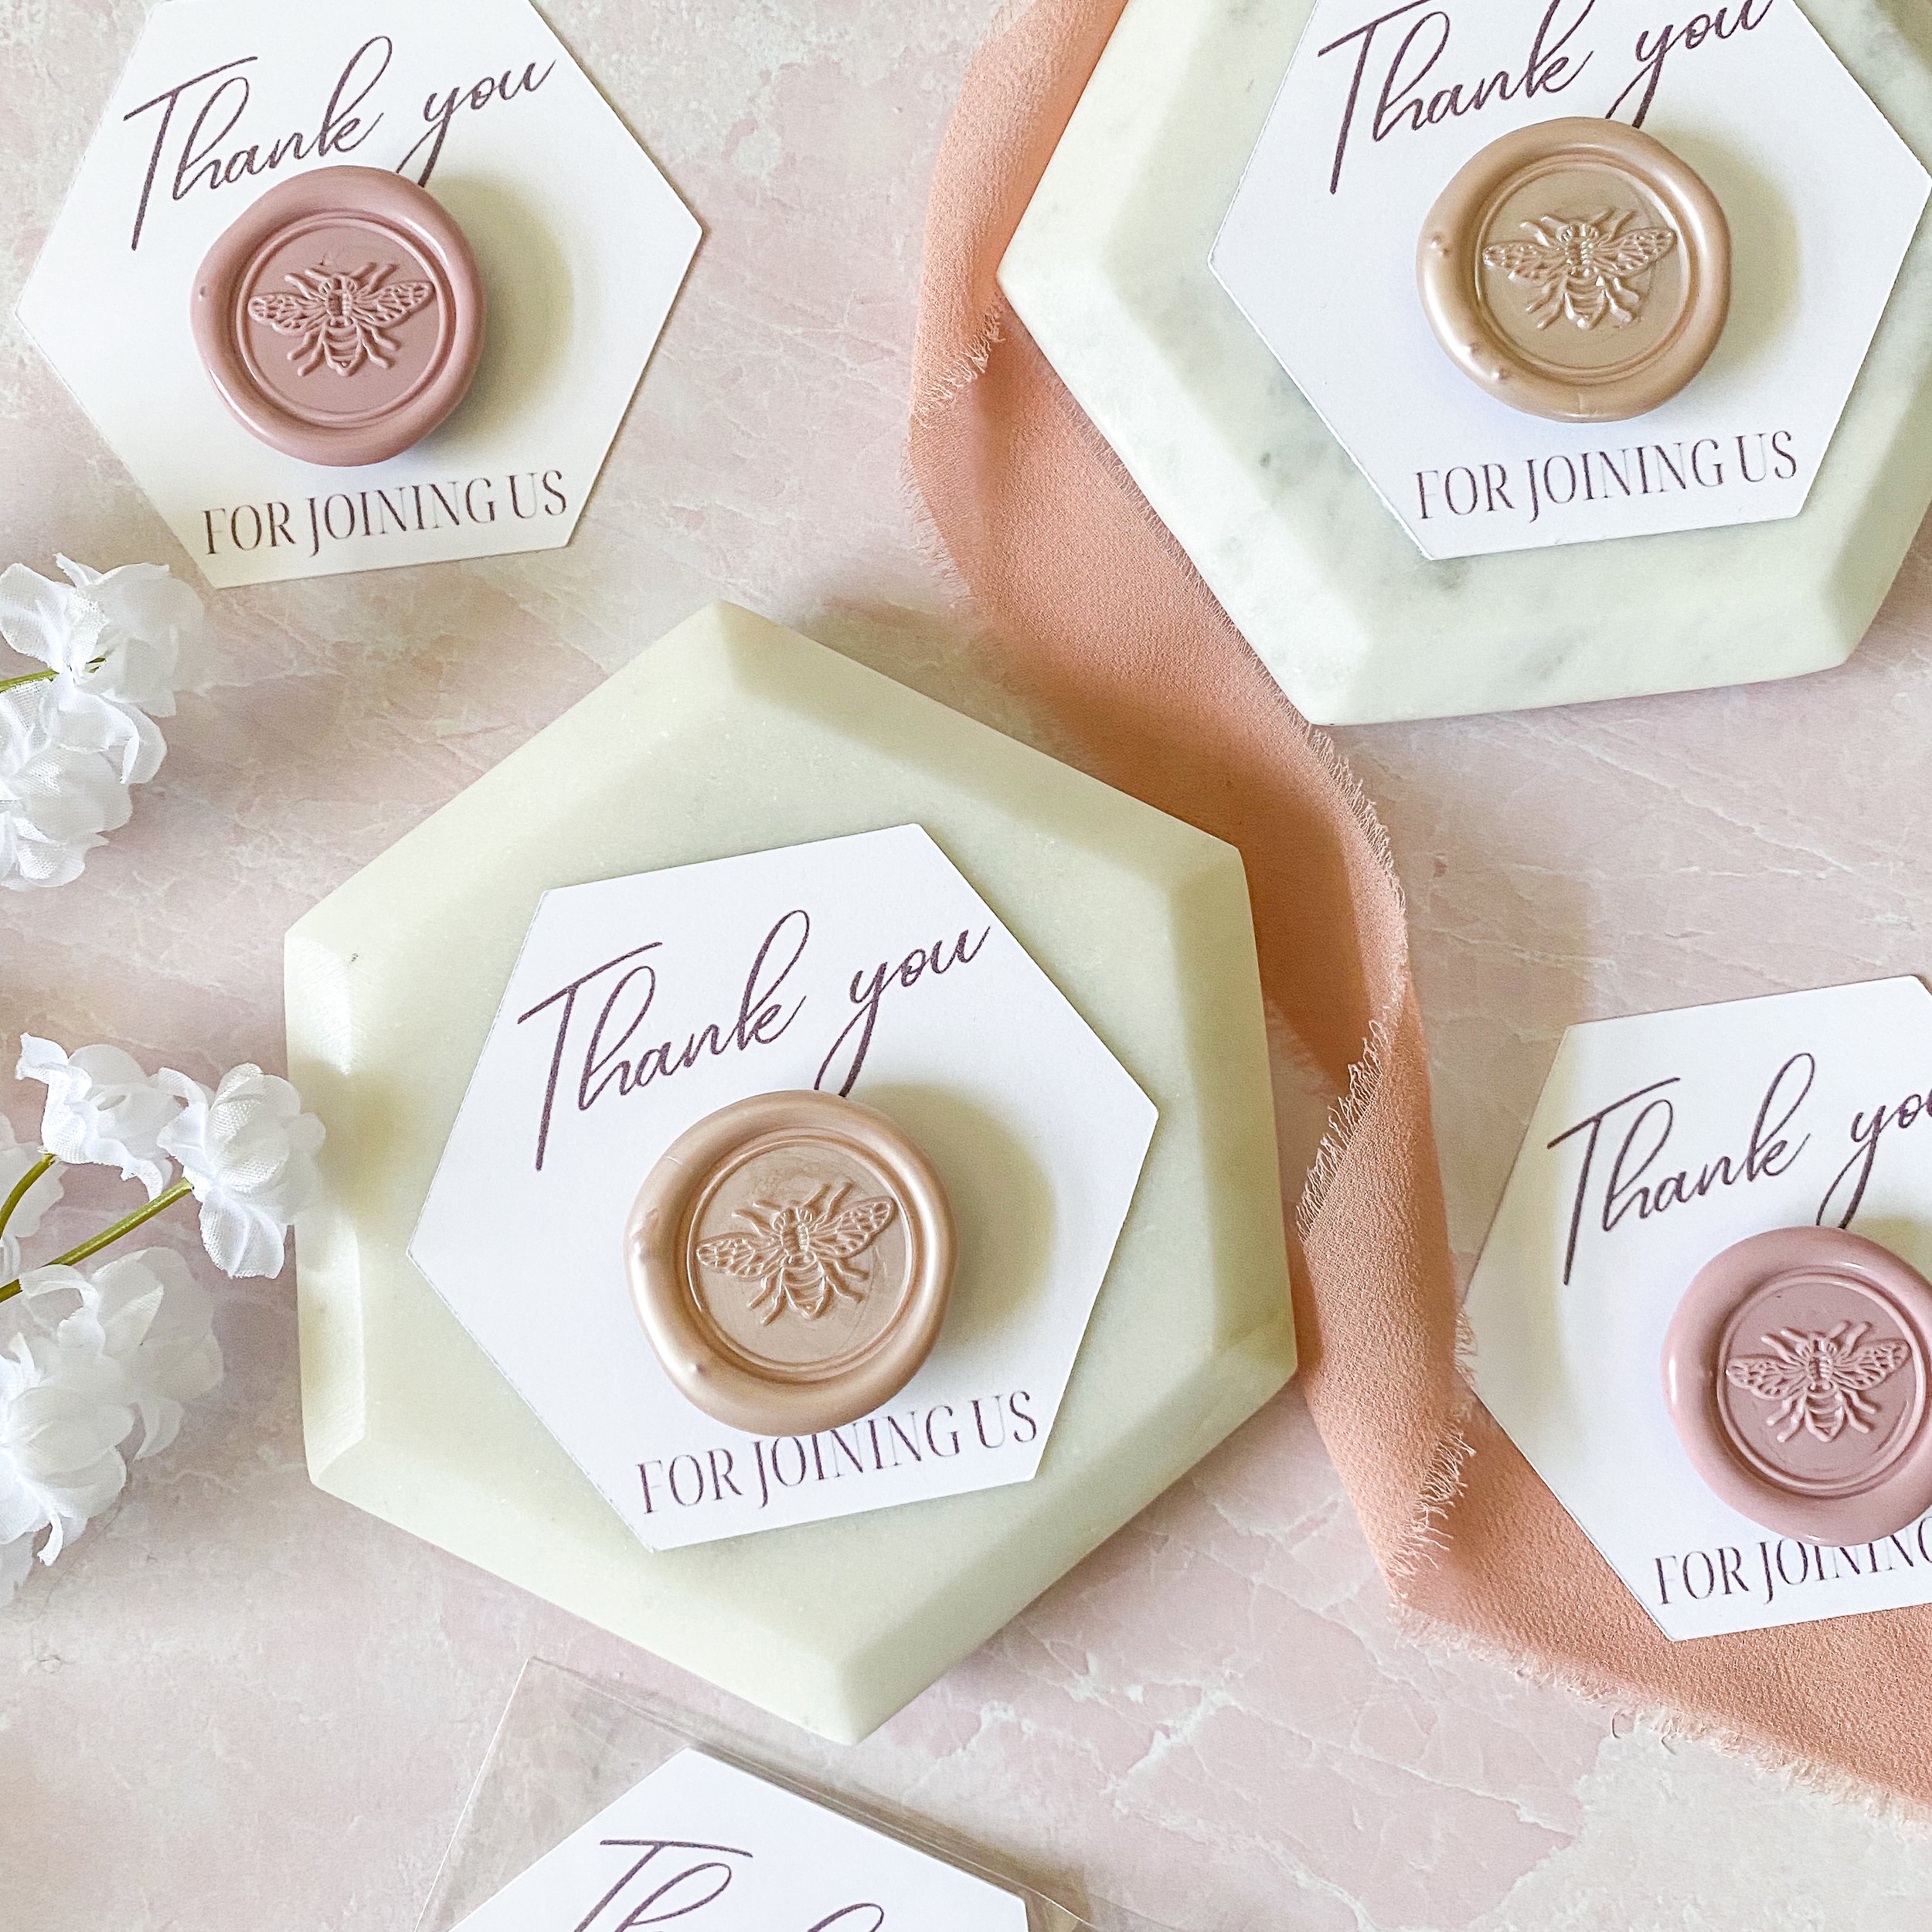
For this method it's as easy as using your everyday glue gun, but instead of glue sticks you’re using sealing wax! After depositing a small pool of molten wax once your low temperature melting gun is heated, you simply press it with your stamp of choice, let it cool and you are done! This method is perfect for making large quantities of stamps like I did for my Simple Self Adhesive Wax Seals, or really for any styles of wax seals where I’m not mixing colors.
Artisaire supplies both these wax seal sticks and the low temperature glue gun to use with their products, so I bought a collection of Buttercream, Champagne, and Dusty Rose Sealing Wax Sticks for my first round of projects creating self adhesive seals; and the results were fabulous for all of my projects! The buttercream wax wax the perfect background for the petite petals in my Pressed Flower Wax Seals, and the champagne wax the perfect complement to my rose gold glitter for my Metallic Flake Wax Seals, with all of these colors also making an assortment of Simple Wax Seals to add to my collection.


The downside to this simple method? You can’t play with color like you can with sealing wax beads, and likewise changing colors in your glue gun is a bit of a process, where multiple seals that are marbled between the two colors are created before you can start a new set of seals. I kept these separate to use in my future wax seal projects, but if you are making colored seals in bulk for wedding stationary or other large projects, you will waste a few seals worth of wax when you change colors.
PROS & CONS
As each of these methods has decided pros and cons to using it, I’ve also outlined those below so you can easily compare the two methods of seal making, then decide which works for you!
PROS:
Color Creativity: You can easily make marbled seals or multiple seals in different colors.
Easier Color Change Cleanup: Wiping out the spoon after using makes making different colored seals easy, while using sealing sticks requires several marbled seals to be made of the two colors before the color shifts.
CONS:
Time Consuming: Even with these beads melting so smoothly and quickly, it takes a couple minutes for each seal, where sealing sticks make melting wax more immediate to easily create more seals quickly.
PROS:
Making lots of Seals: This method is perfect for making seals in bulk, every few seconds you can pour wax to create a stamp
Easy to Use: This method is as easy as glue gunning and stamping, with no candles or spoon cleaning necessary
Easy Cleanup: You don’t have to constantly clean a spoon to make new seals, deal with ash or excess dried ash. The glue gun cools quickly and makes it easy to use and store when you’re done.
CONS:
Changing Wax Colors: Changing sealing wax color in your gun will always give a couple marbled wax seals before the color shifts, so you can’t easily change to another color without blending colors of wax.
Single Colors only: While you get a couple marbled seals when you switch colors, in general you can only make single color seals with wax sticks, unlike marbling colors with the melting spoon.
Regardless of the sealing method you choose, Artisaire should be the shop you visit for your waxes and stamps to create beautiful and unique sealing wax projects of your own! You can find all the projects where I have used either their sealing waxes, stamps, or both below; and enjoy all the fun of working with these seals yourself!

OUR PROJECTS WITH ARTISAIRE STAMPS & SEALS:


OUR MOST RECENT BLOG POSTS:


