This post contains affiliate links, meaning that if you click on a link I will recieve a small comission. This costs you nothing extra and I only promote products I use and love! You can read our full disclosure here

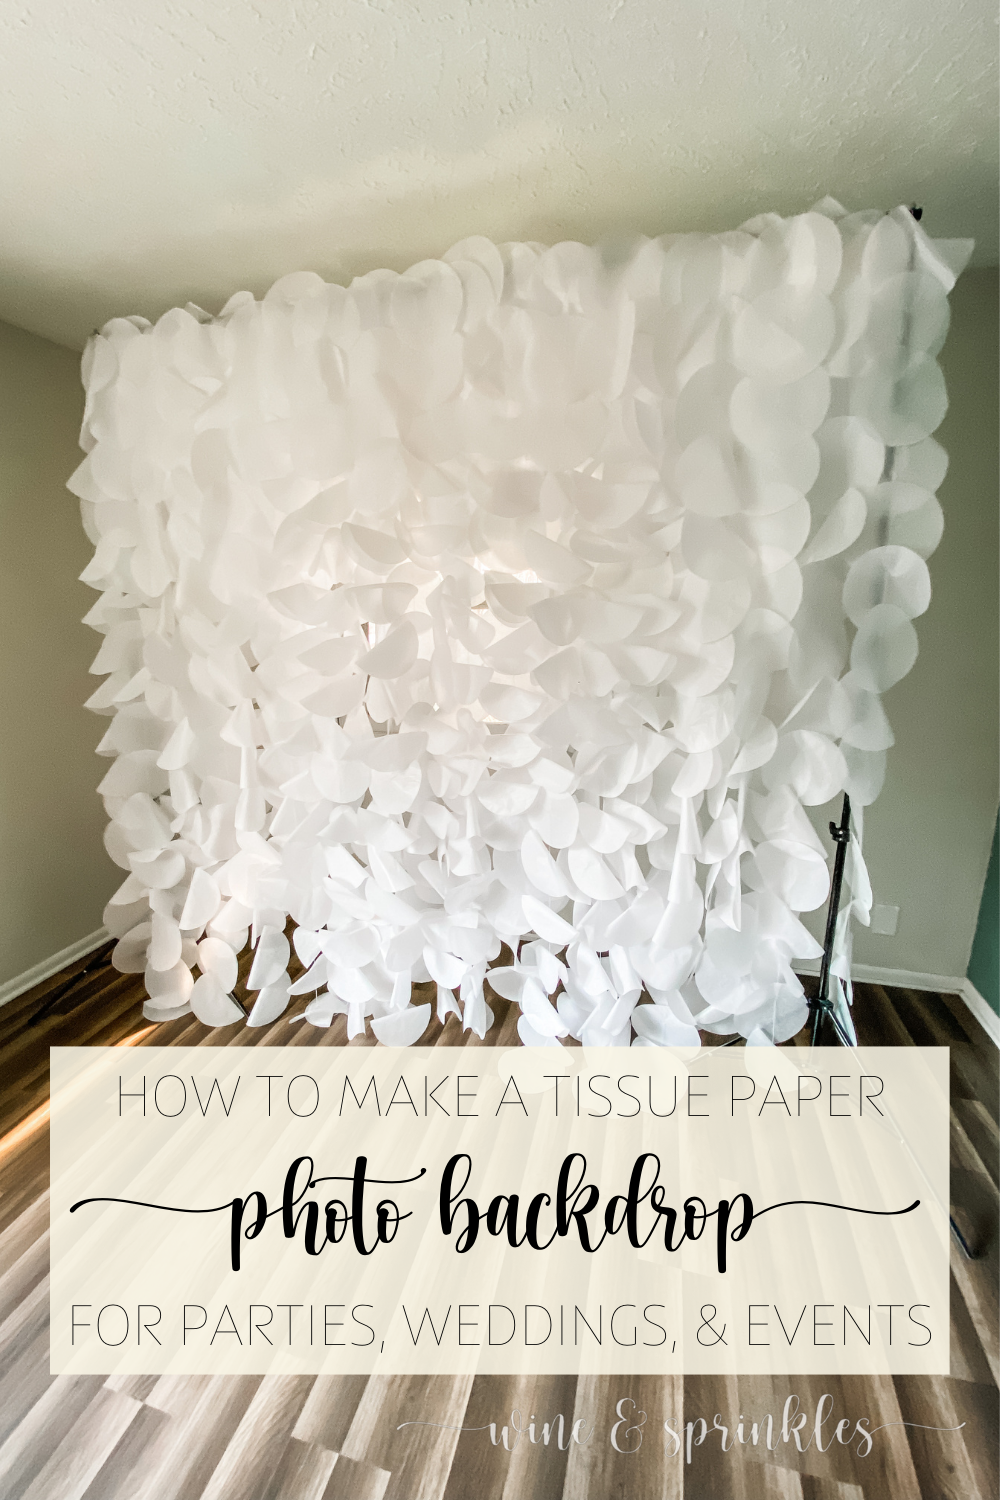
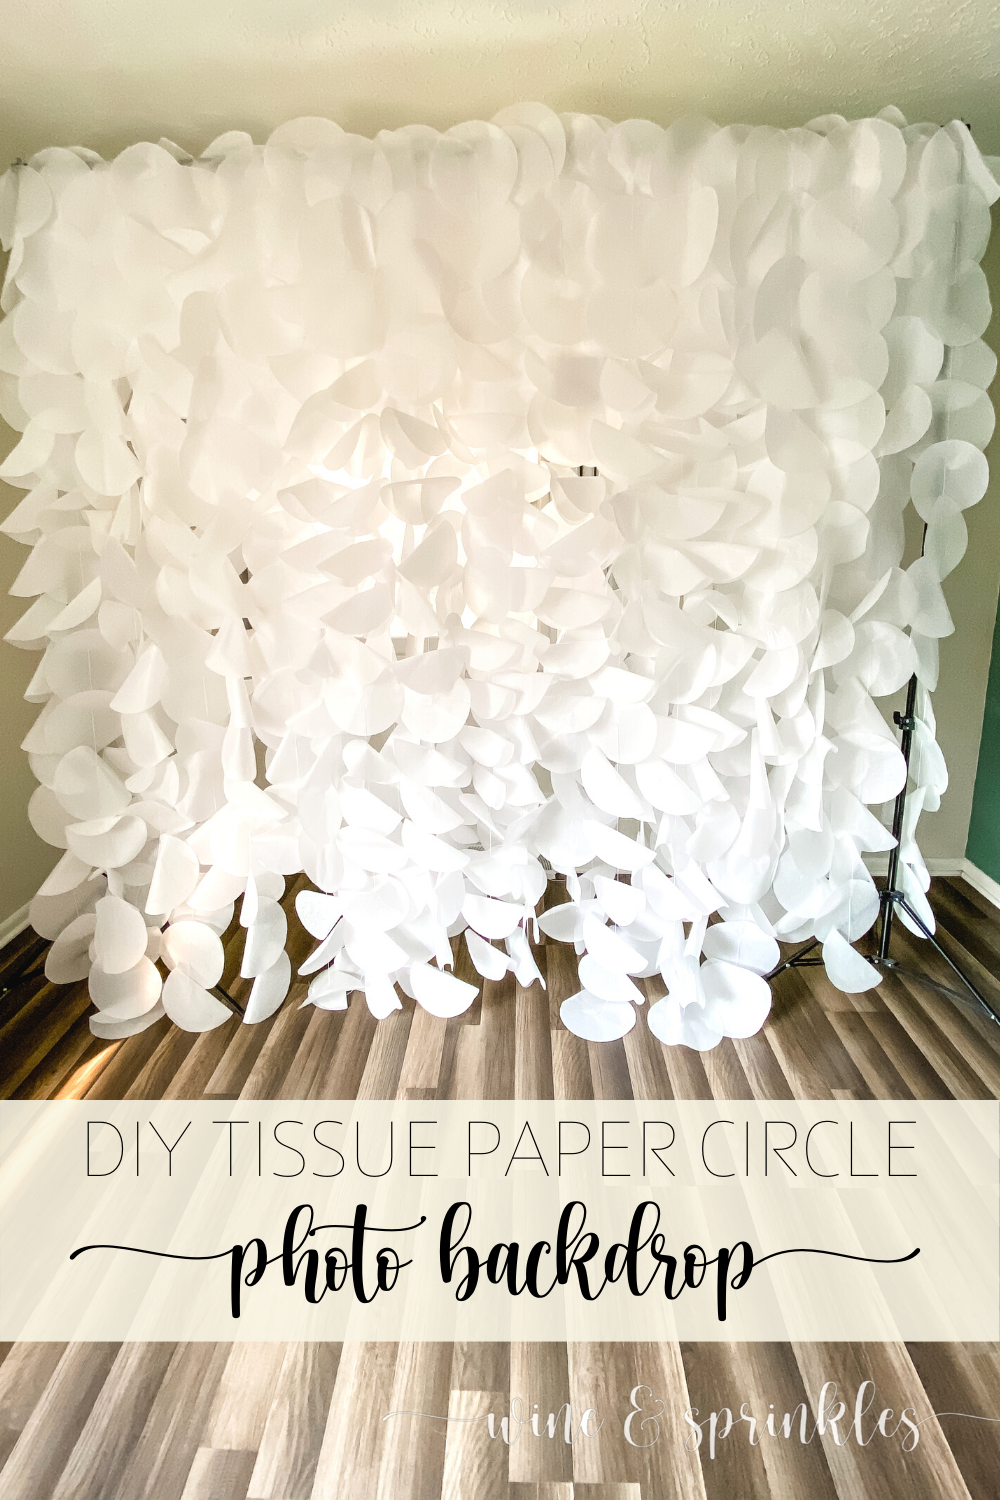
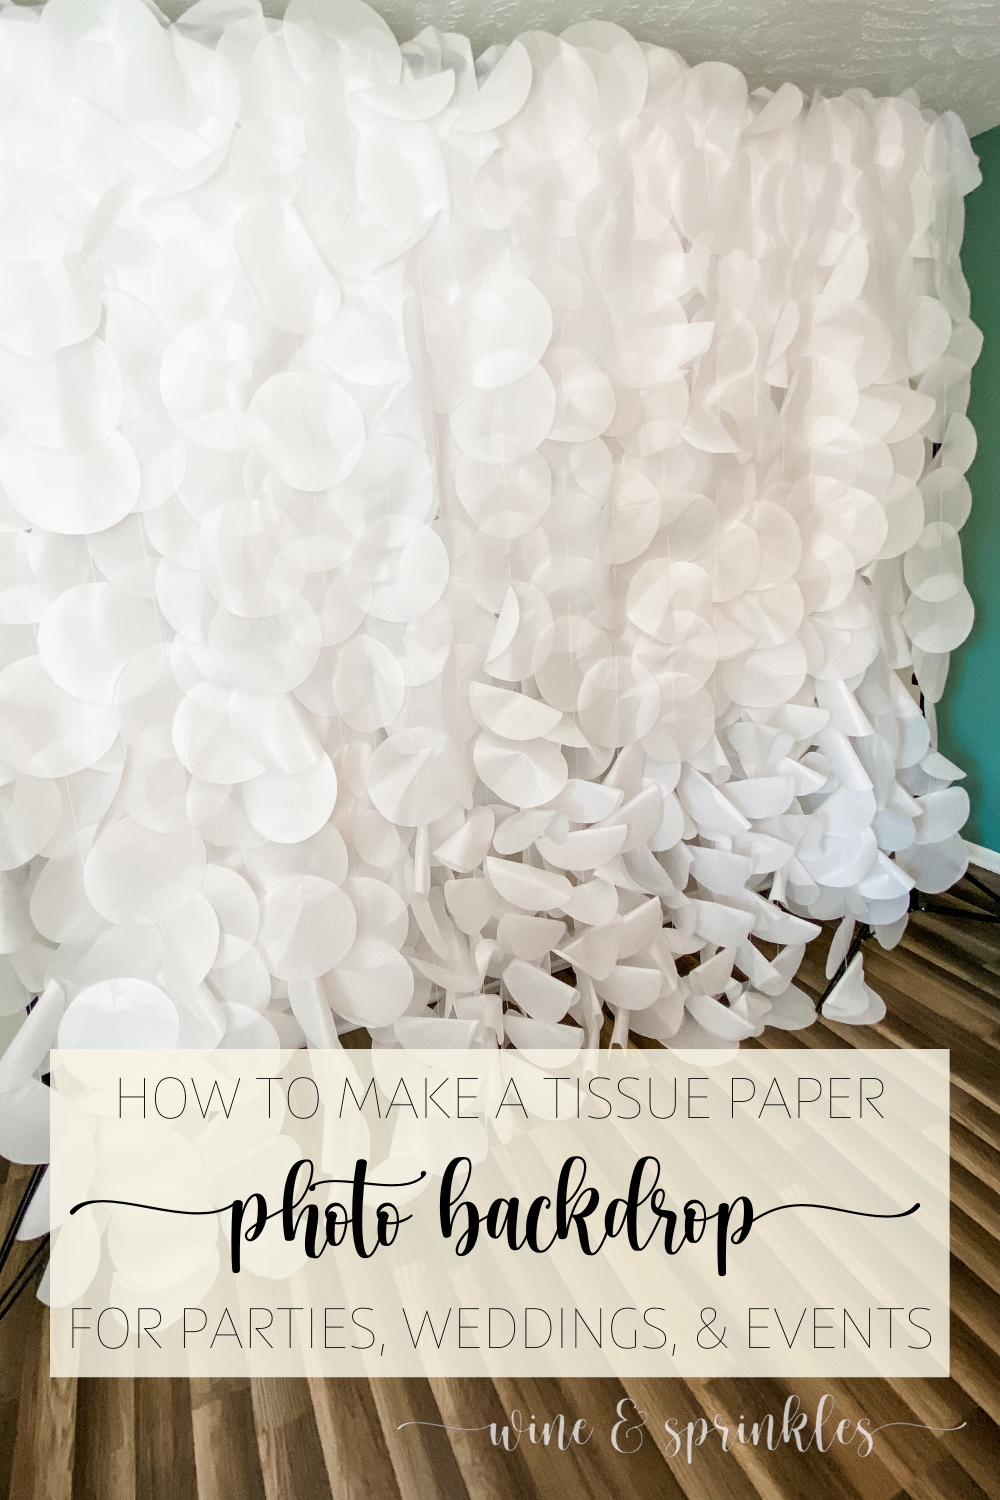
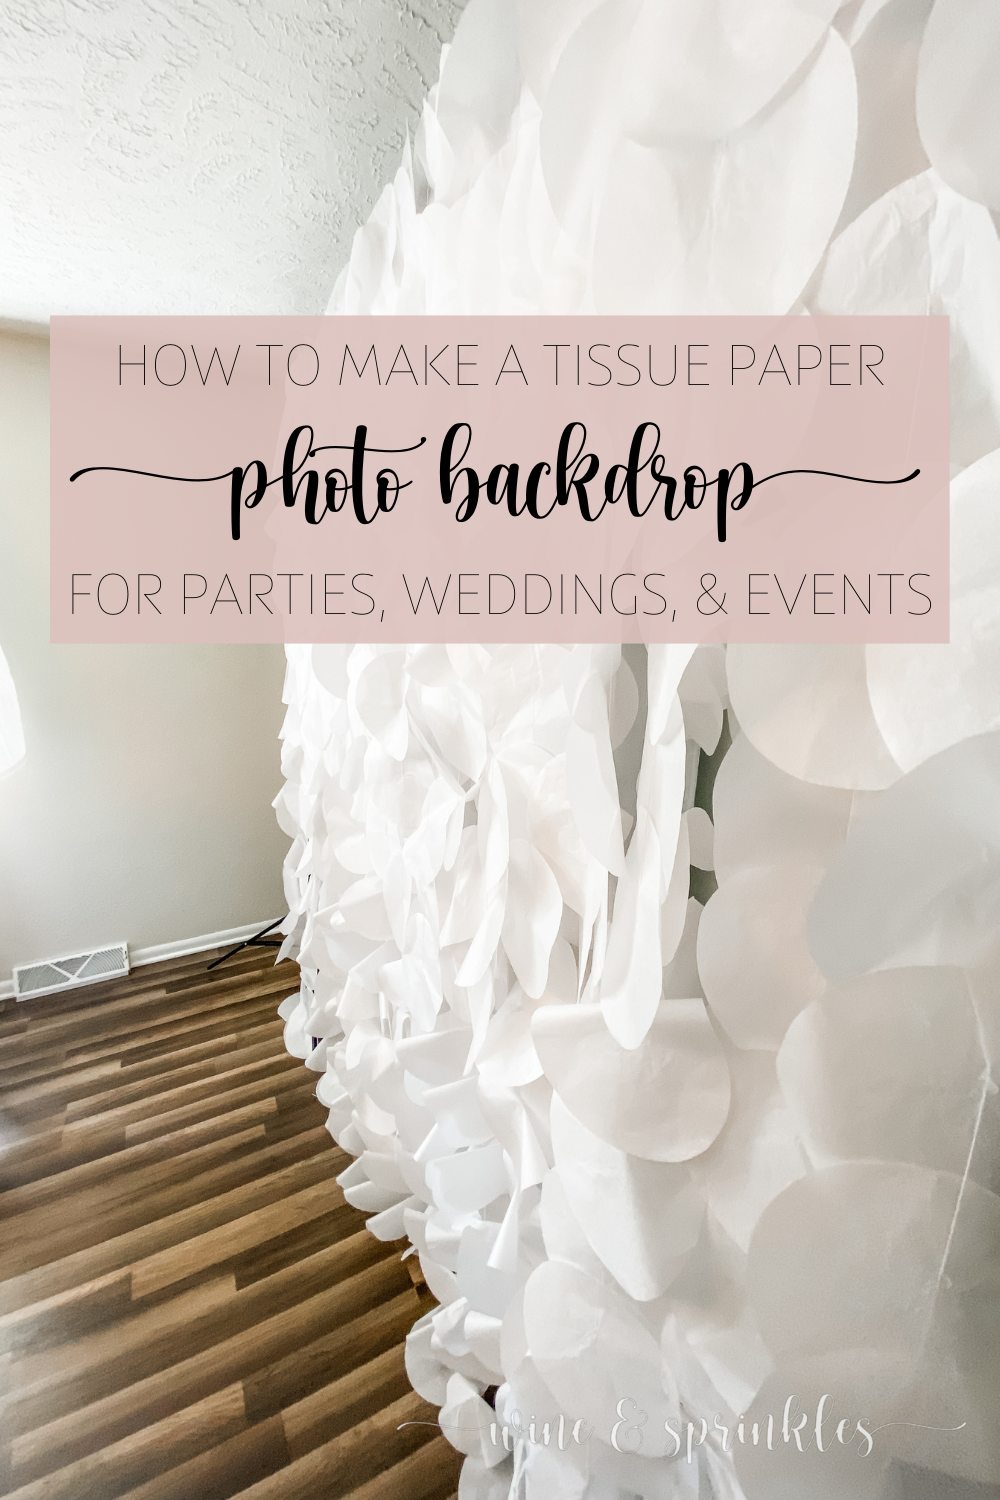
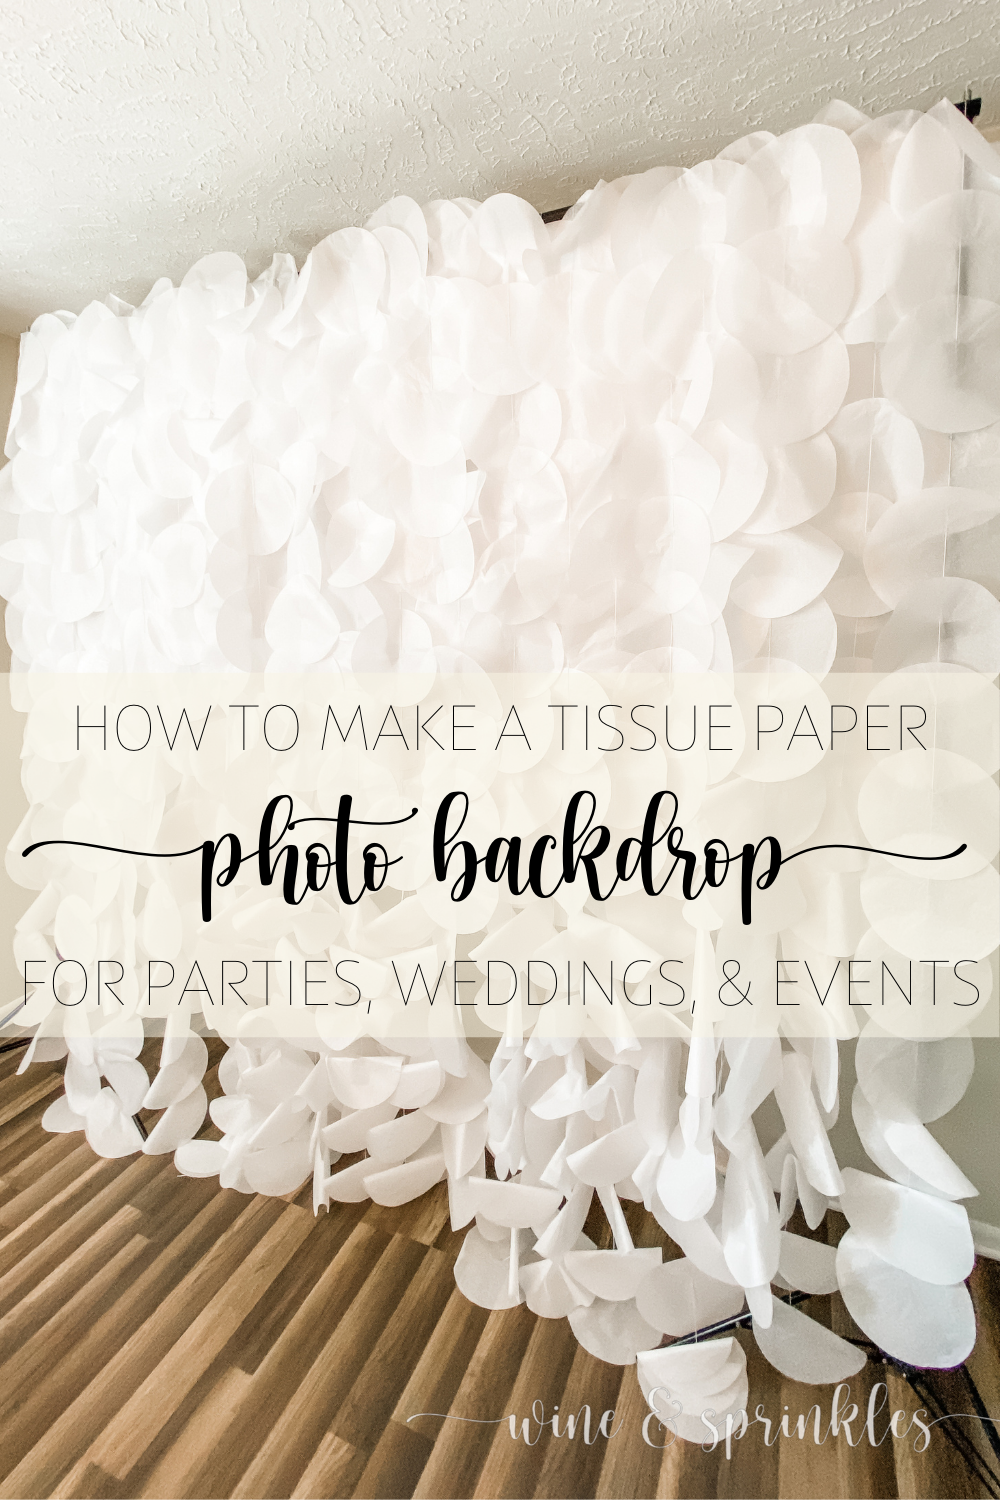
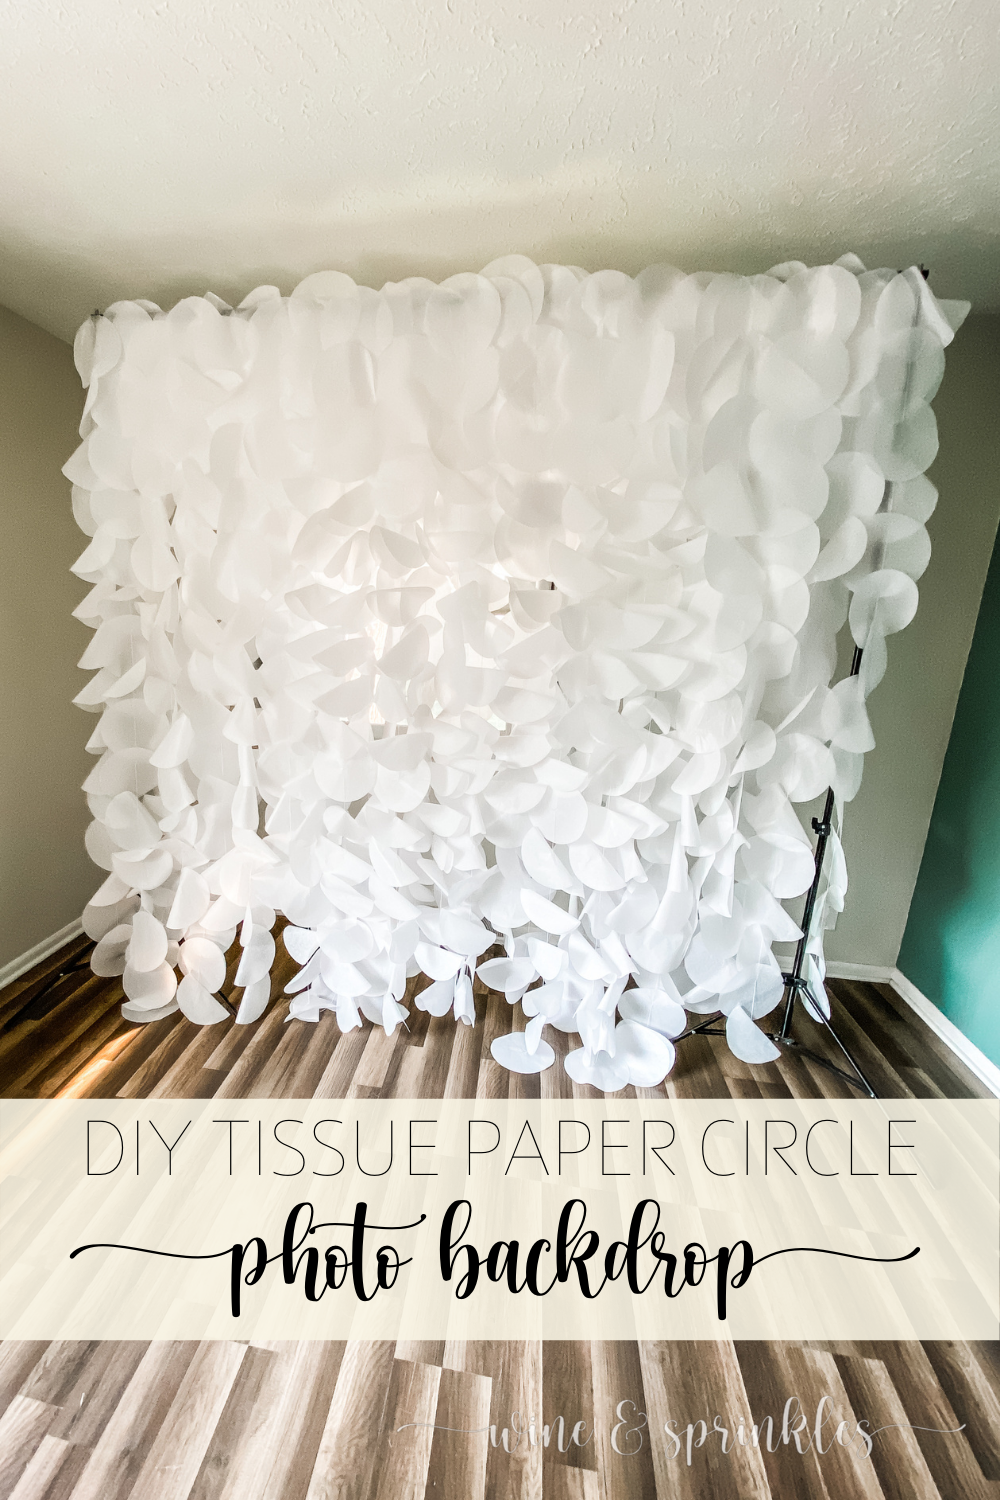
Every great party needs a photo booth! Whether it's a wedding, bachelorette party, bridal shower, baby shower or anything in between, having a decorated wall that your guests can pose in front of is always a crowd pleaser! There’s so many photo booth options out there so for my first homemade photo booth, I wanted something easy to make but that would be a fun textured backdrop that could be used for a variety of events. Enter this tissue paper circle photo booth, with its layers of inexpensive tissue paper turning my blank wall into a light and bright backdrop for fabulous photos!
I first used this photo booth for my underworld themed basement during my 30th Birthday Party, then brought it back with more layers to make a background for a paper lantern backdrop for my Zodiac Summer’s Eve Party, and while I used it in different ways for both, it was a great choice for both events. The white being easily backlit with colored light bulbs, my dimly lit basement got a pink and purple glow with the backdrop diffusing the color. For my summer party, its light and airy cloudlike feel was the perfect backdrop to the colored dresses and outfits of my guests.


This photo booth is also simple to make in that it is an easy project, you simply trace and cut your circles from tissue paper, thread them onto a string, and glue them to the string to create long lines of paper circles. Those paper circles are draped over and taped to a Photo booth Frame in multiple layers, creating the backdrop. Anyone can make it and hang it, the hardest part is detangling the paper layers and strings when it's being taken down. While I used white tissue paper for my photo booth, I can’t wait to start trying combinations of different colored papers and backdrops, and with so many tissue paper colors out there, I would love to have a few different styles for different events.
But while the tissue paper may be easy to come by, the time required to make all the paper circle strings for a photo booth could be called a labor of love. Though it is essentially hot gluing paper circles on a string, the spacing, gluing, and letting things dry makes it a long process when you are making dozens of strings. It's easy but slow work, perfect for watching shows in the background while doing, and the bright side is once you finish your strings, you can store them and use them again for future parties! Long story short, starting this project well in advance is helpful

SUPPLIES
PHOTO BOOTH SUPPLIES
Tissue Paper: The obvious leading lady of this project is the tissue paper, and while I always love white for a classy, easy and neutral backdrop; but you can always make yours out of colored tissue paper for a unique twist! It is also the supply you’ll need to buy the most of, with one piece of standard tissue paper making 4 circles. For 50 strings of 16-20 circles, it took about 250 sheets of tissue paper
White Thread: I considered using fishing line at first for this project, but I chose a big spool of white thread instead and can’t say I regret it. The white easily blends into the tissue circles and it is both cheaper and easier to work with. For each tissue paper string you need approximately 12 ft of string, so for so much length, cotton thread was the perfect choice
Photo Booth Backdrop Stand: these metal frames are the skeletons of photo booths and are used both for fabric backdrop photo booths as well as ones like this for weddings and events. You can get a basic photo booth frame like this one inexpensively online and it's a great investment not only for this project but for any photo booth or backdrop you want to make for any event.
TOOLS & OTHER SUPPLIES
Scissors: to cut out tissue paper into circles and to cut the string when you are done with each paper string.
Nail or Needle, & Hammer: for poking holes into stacks of the tissue paper. You can use a needle and thimble, but my husband used a nail to put holes in a whole group, then threaded them to be glued into place as a group and it worked well for a bulk hole punching project like this.
Glue Gun & Glue Sticks: for gluing tissue paper to the strings
Washi or Masking Tape: for keeping the strings secure while on the photo booth frame that also removes cleanly for storing the paper circles. I used washi tape because it's pretty and was easy to adhere and remove, but palin old masking tape works great too!
SUPPLIES LIST:
[for 1 photo backdrop]
PHOTO BOOTH SUPPLIES
Tissue Paper x 200-250 sheets
White Thread x 1
Photo Booth Backdrop Stand x 1
TOOLS & OTHER SUPPLIES
Scissors
Nail & Hammer
Glue Gun & Glue Sticks
Masking Tape

DIRECTIONS
PART 1: MAKE TISSUE PAPER CIRCLE STRINGS

1. Fold a stack of four to five pieces of tissue paper in quarters, stacking on top of each other to be cut. Using a dinner plate or other 10” circular item, trace a circle onto the top layer of the folded tissue paper stack. Paper clip the stacks together along the folded sides, and using scissors, cut out the stack of folded tissue paper into a stack of twelve circles. Paper clip circle stacks together. Repeat this process for all the tissue paper so that you are left with a set of paper clipped, cut paper circle stacks, with each stack being one string of the photo backdrop (16 - 20 circles).
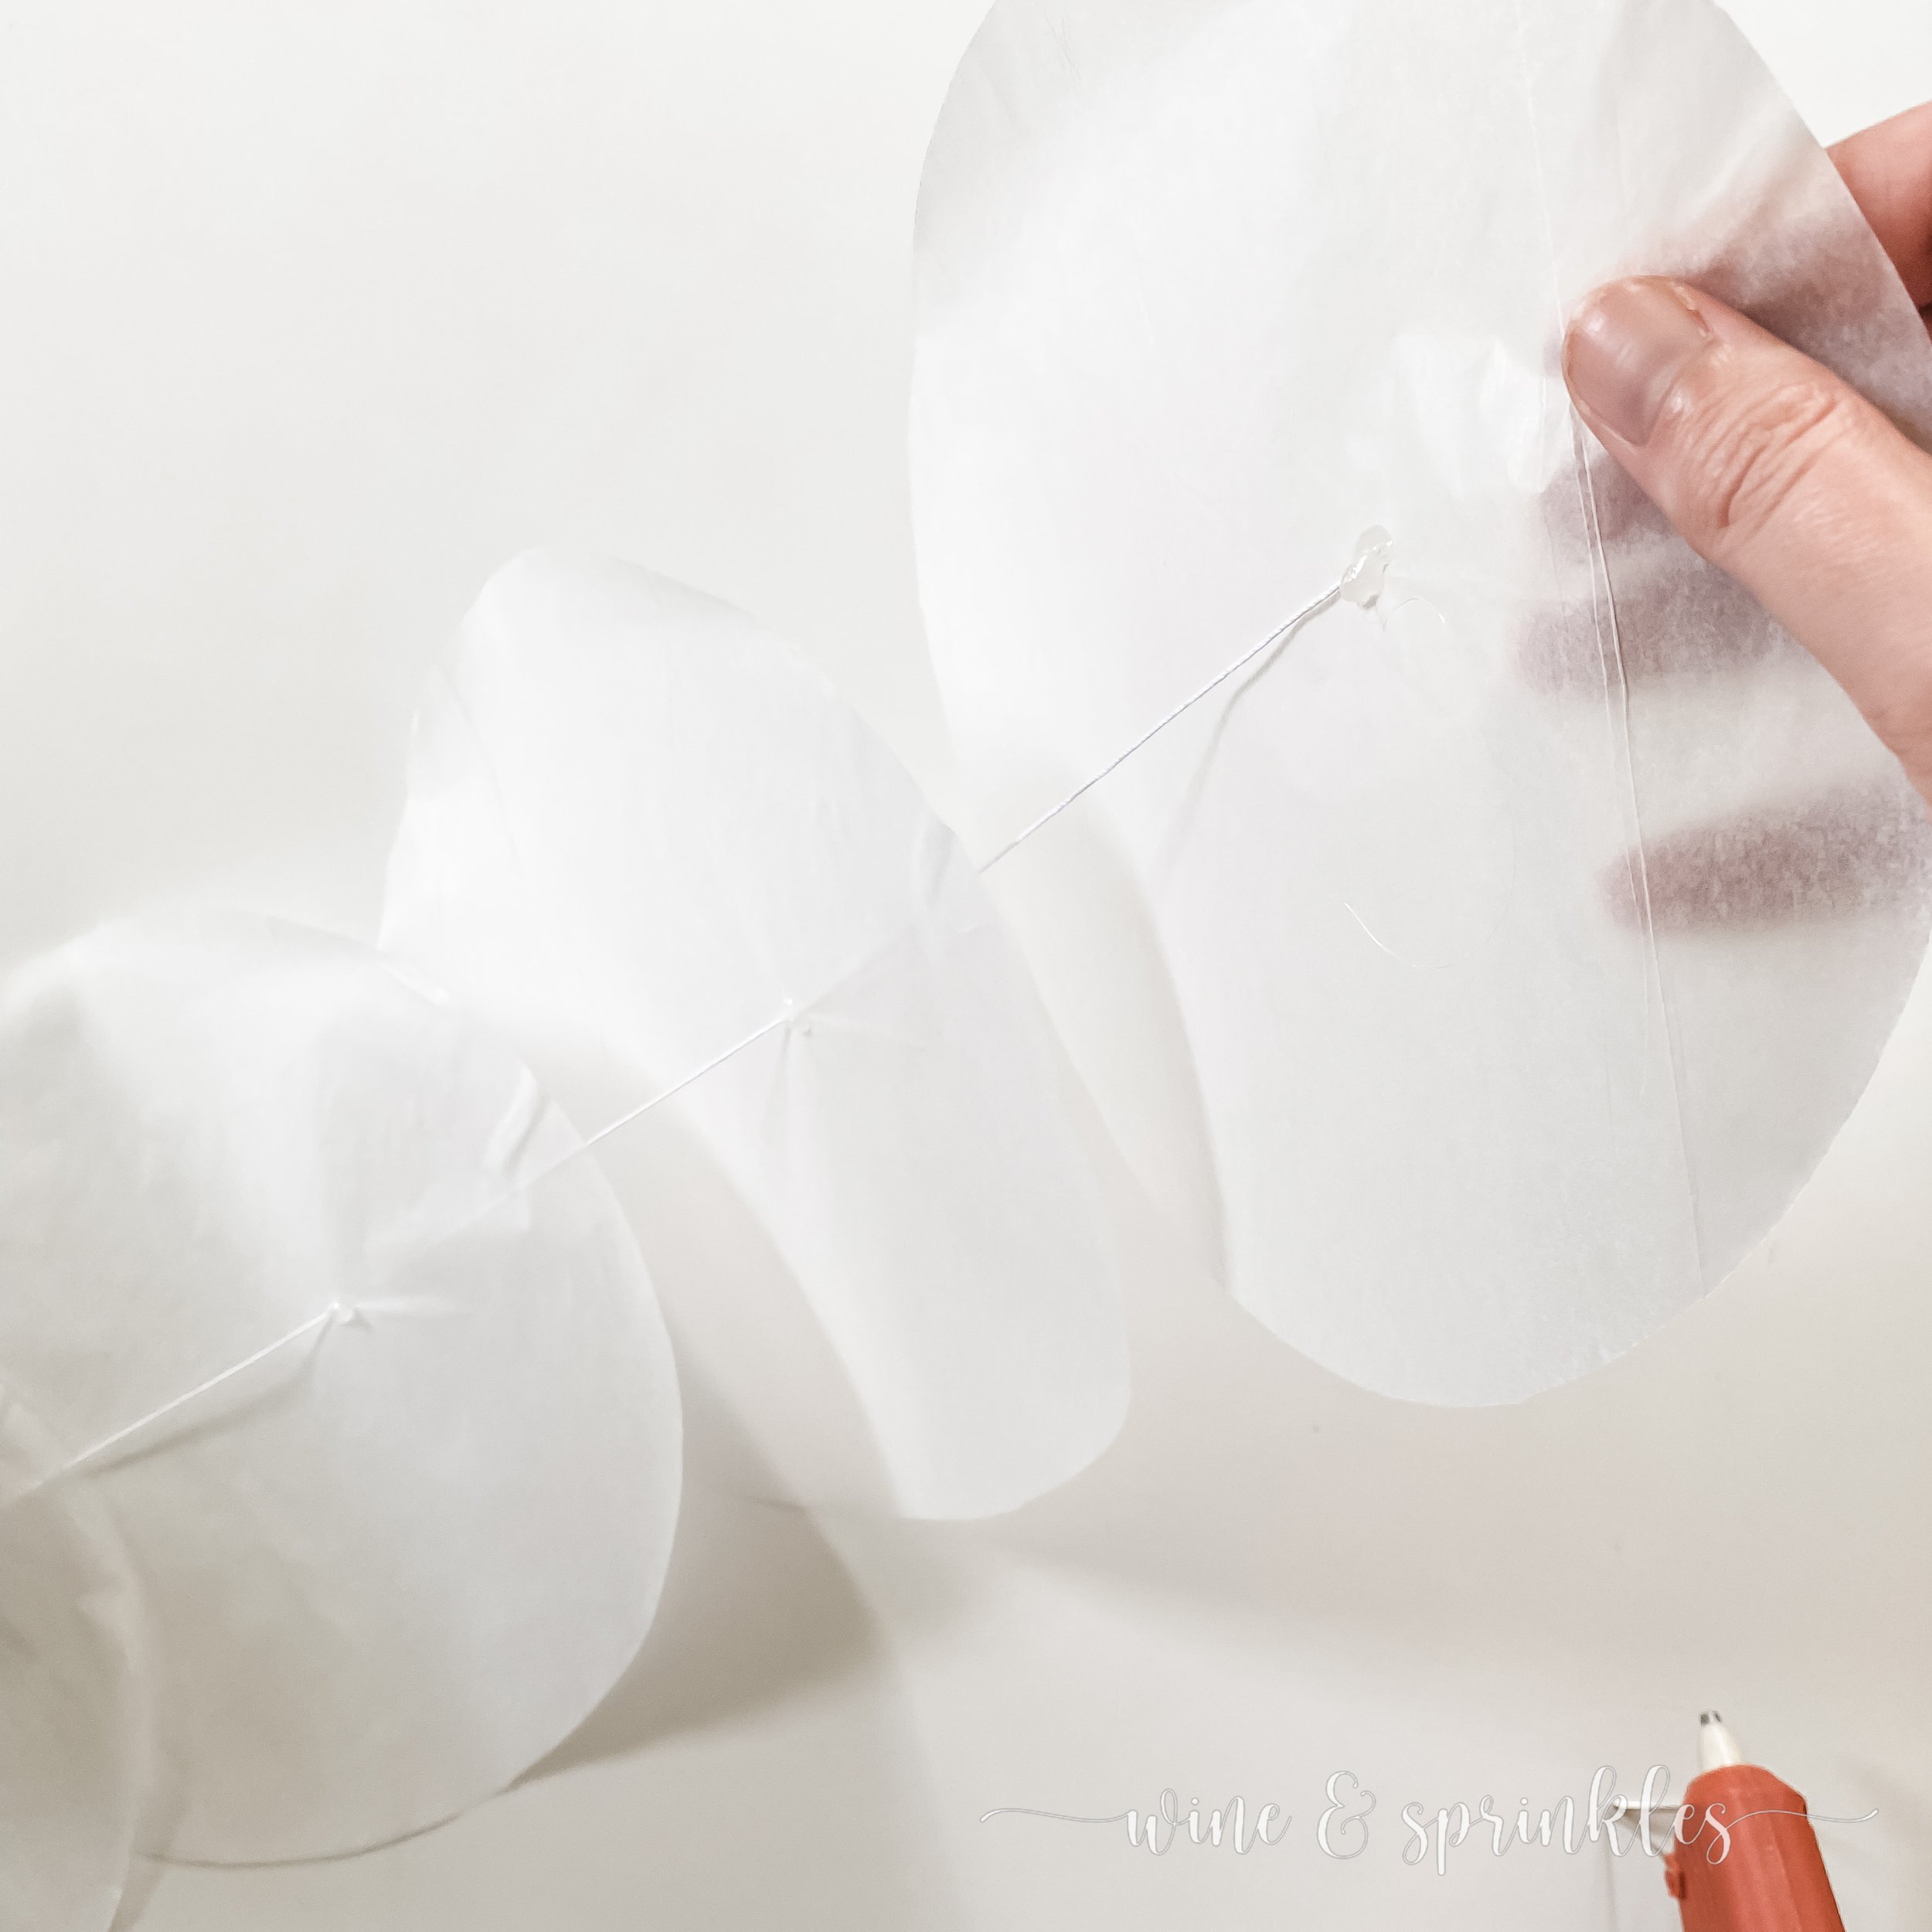
2. A third of the way from the top of the circle, use a nail and hammer to poke a hole through the stack of paper circles. Thread the cotton string using a needle through the stack of tissue circles, unrolling your string but not cutting it so that you have a long string that threads through your stack of circles.


3. Slide the bottom tissue paper circle of the stack to the end of the string. Using hot glue, glue the first circle on the stack to the end of the string, using the hole the string is threaded through as the glue point. Slide the next paper circle to overlap the first, covering the glue dot, then likewise secure it with hot glue. Repeat this process with the remaining 10 circles until they are all spaced out and glued to the string, then cut the string from the ball, leaving you with a tissue paper string.


4. Repeat this string threading, gluing, and cutting process with the rest of your stack of paper circles, creating a string from each stack to layer on your photo booth. To store your strings before assembly, I stack them in groups of 5 and store them in gallon sized plastic bags, where they also live after parties to be used in future photo backdrops.
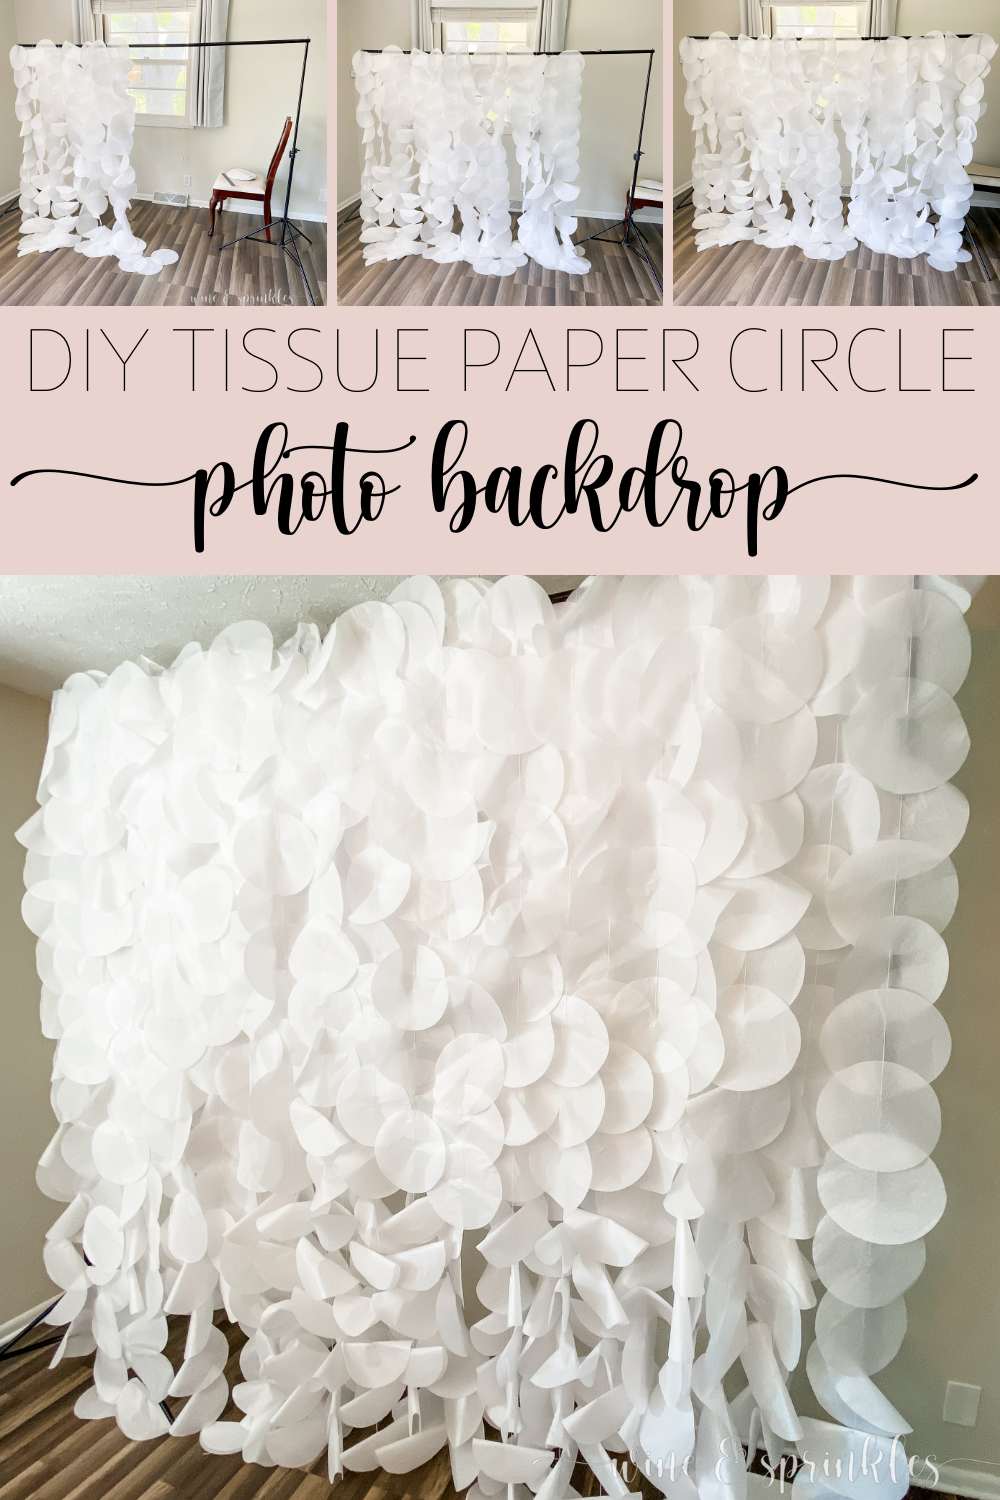
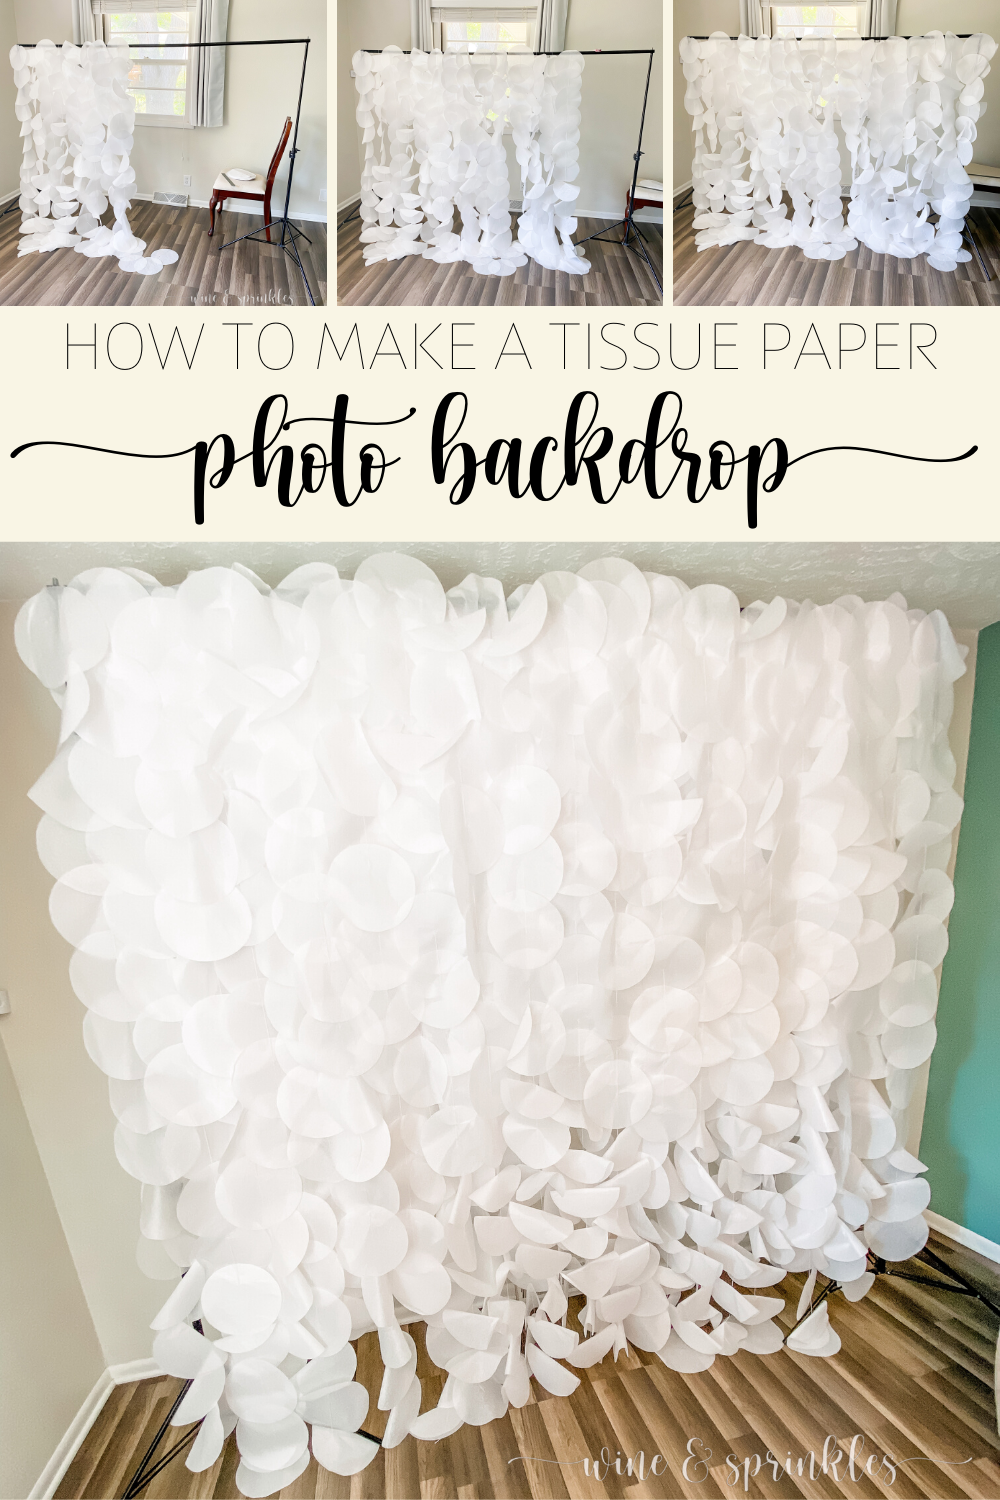
PART 2: SETUP PHOTO BACKDROP STAND & HANG FIRST LAYER OF TISSUE PAPER STRINGS
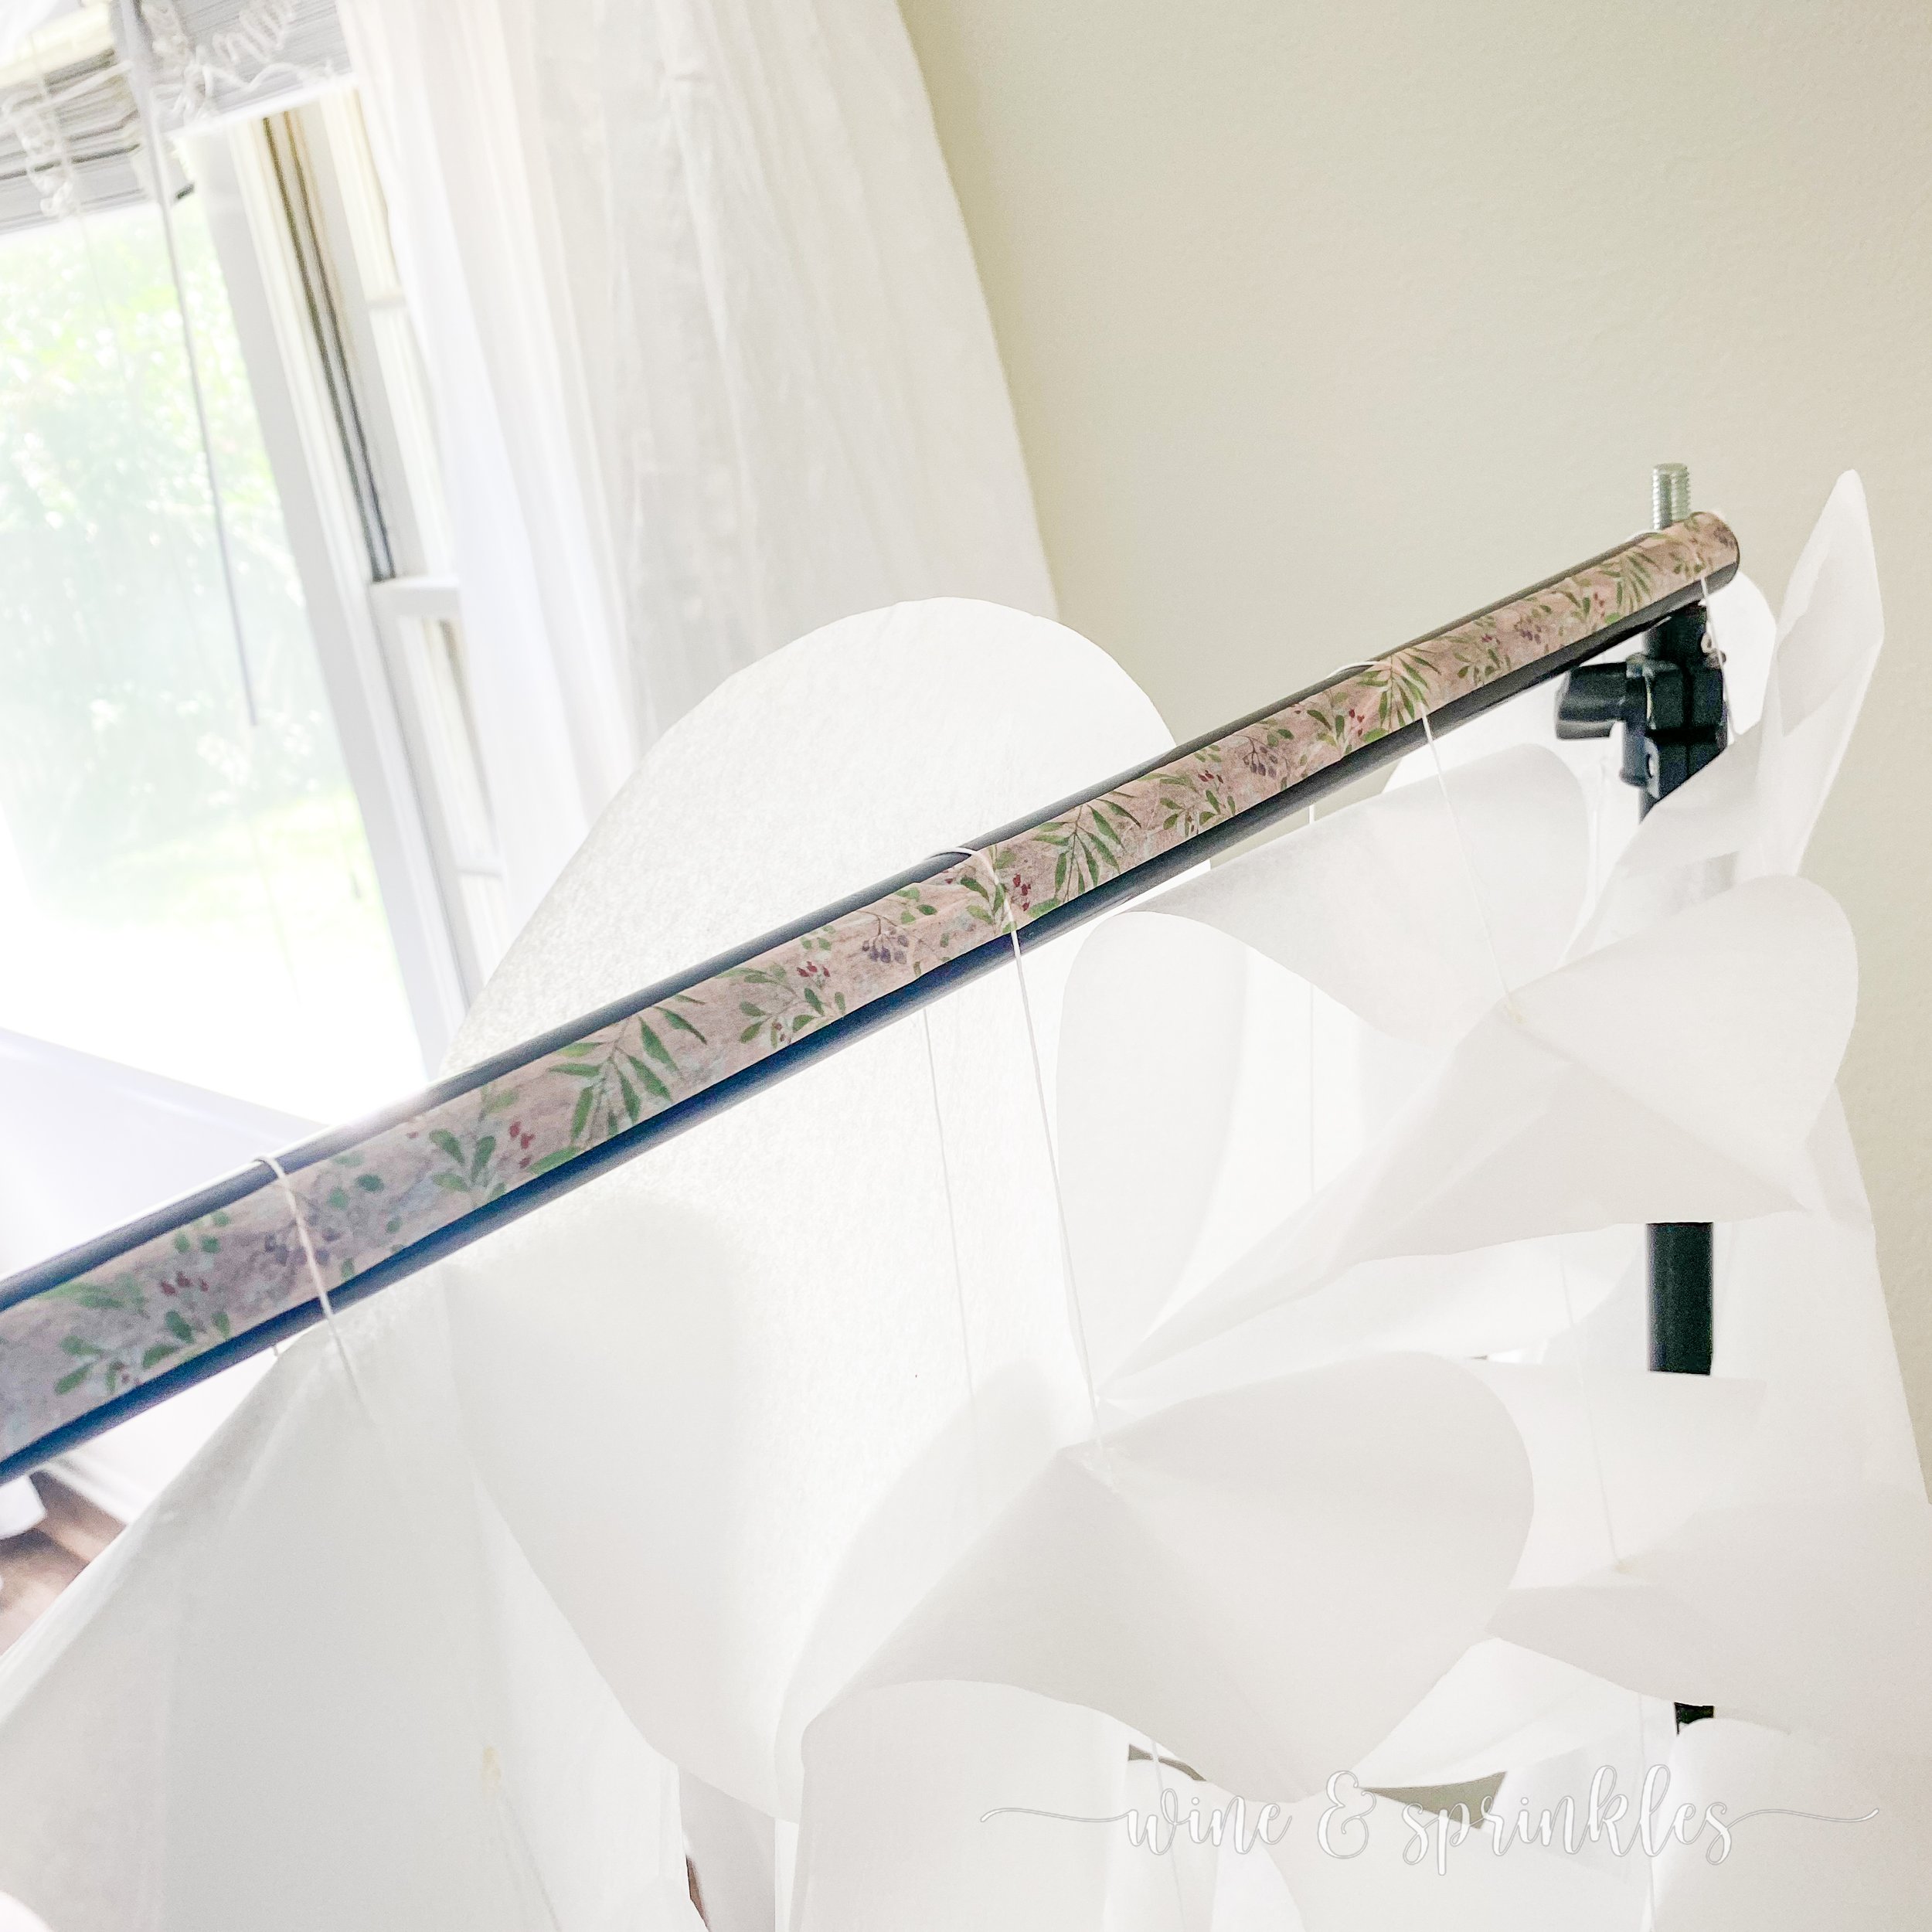
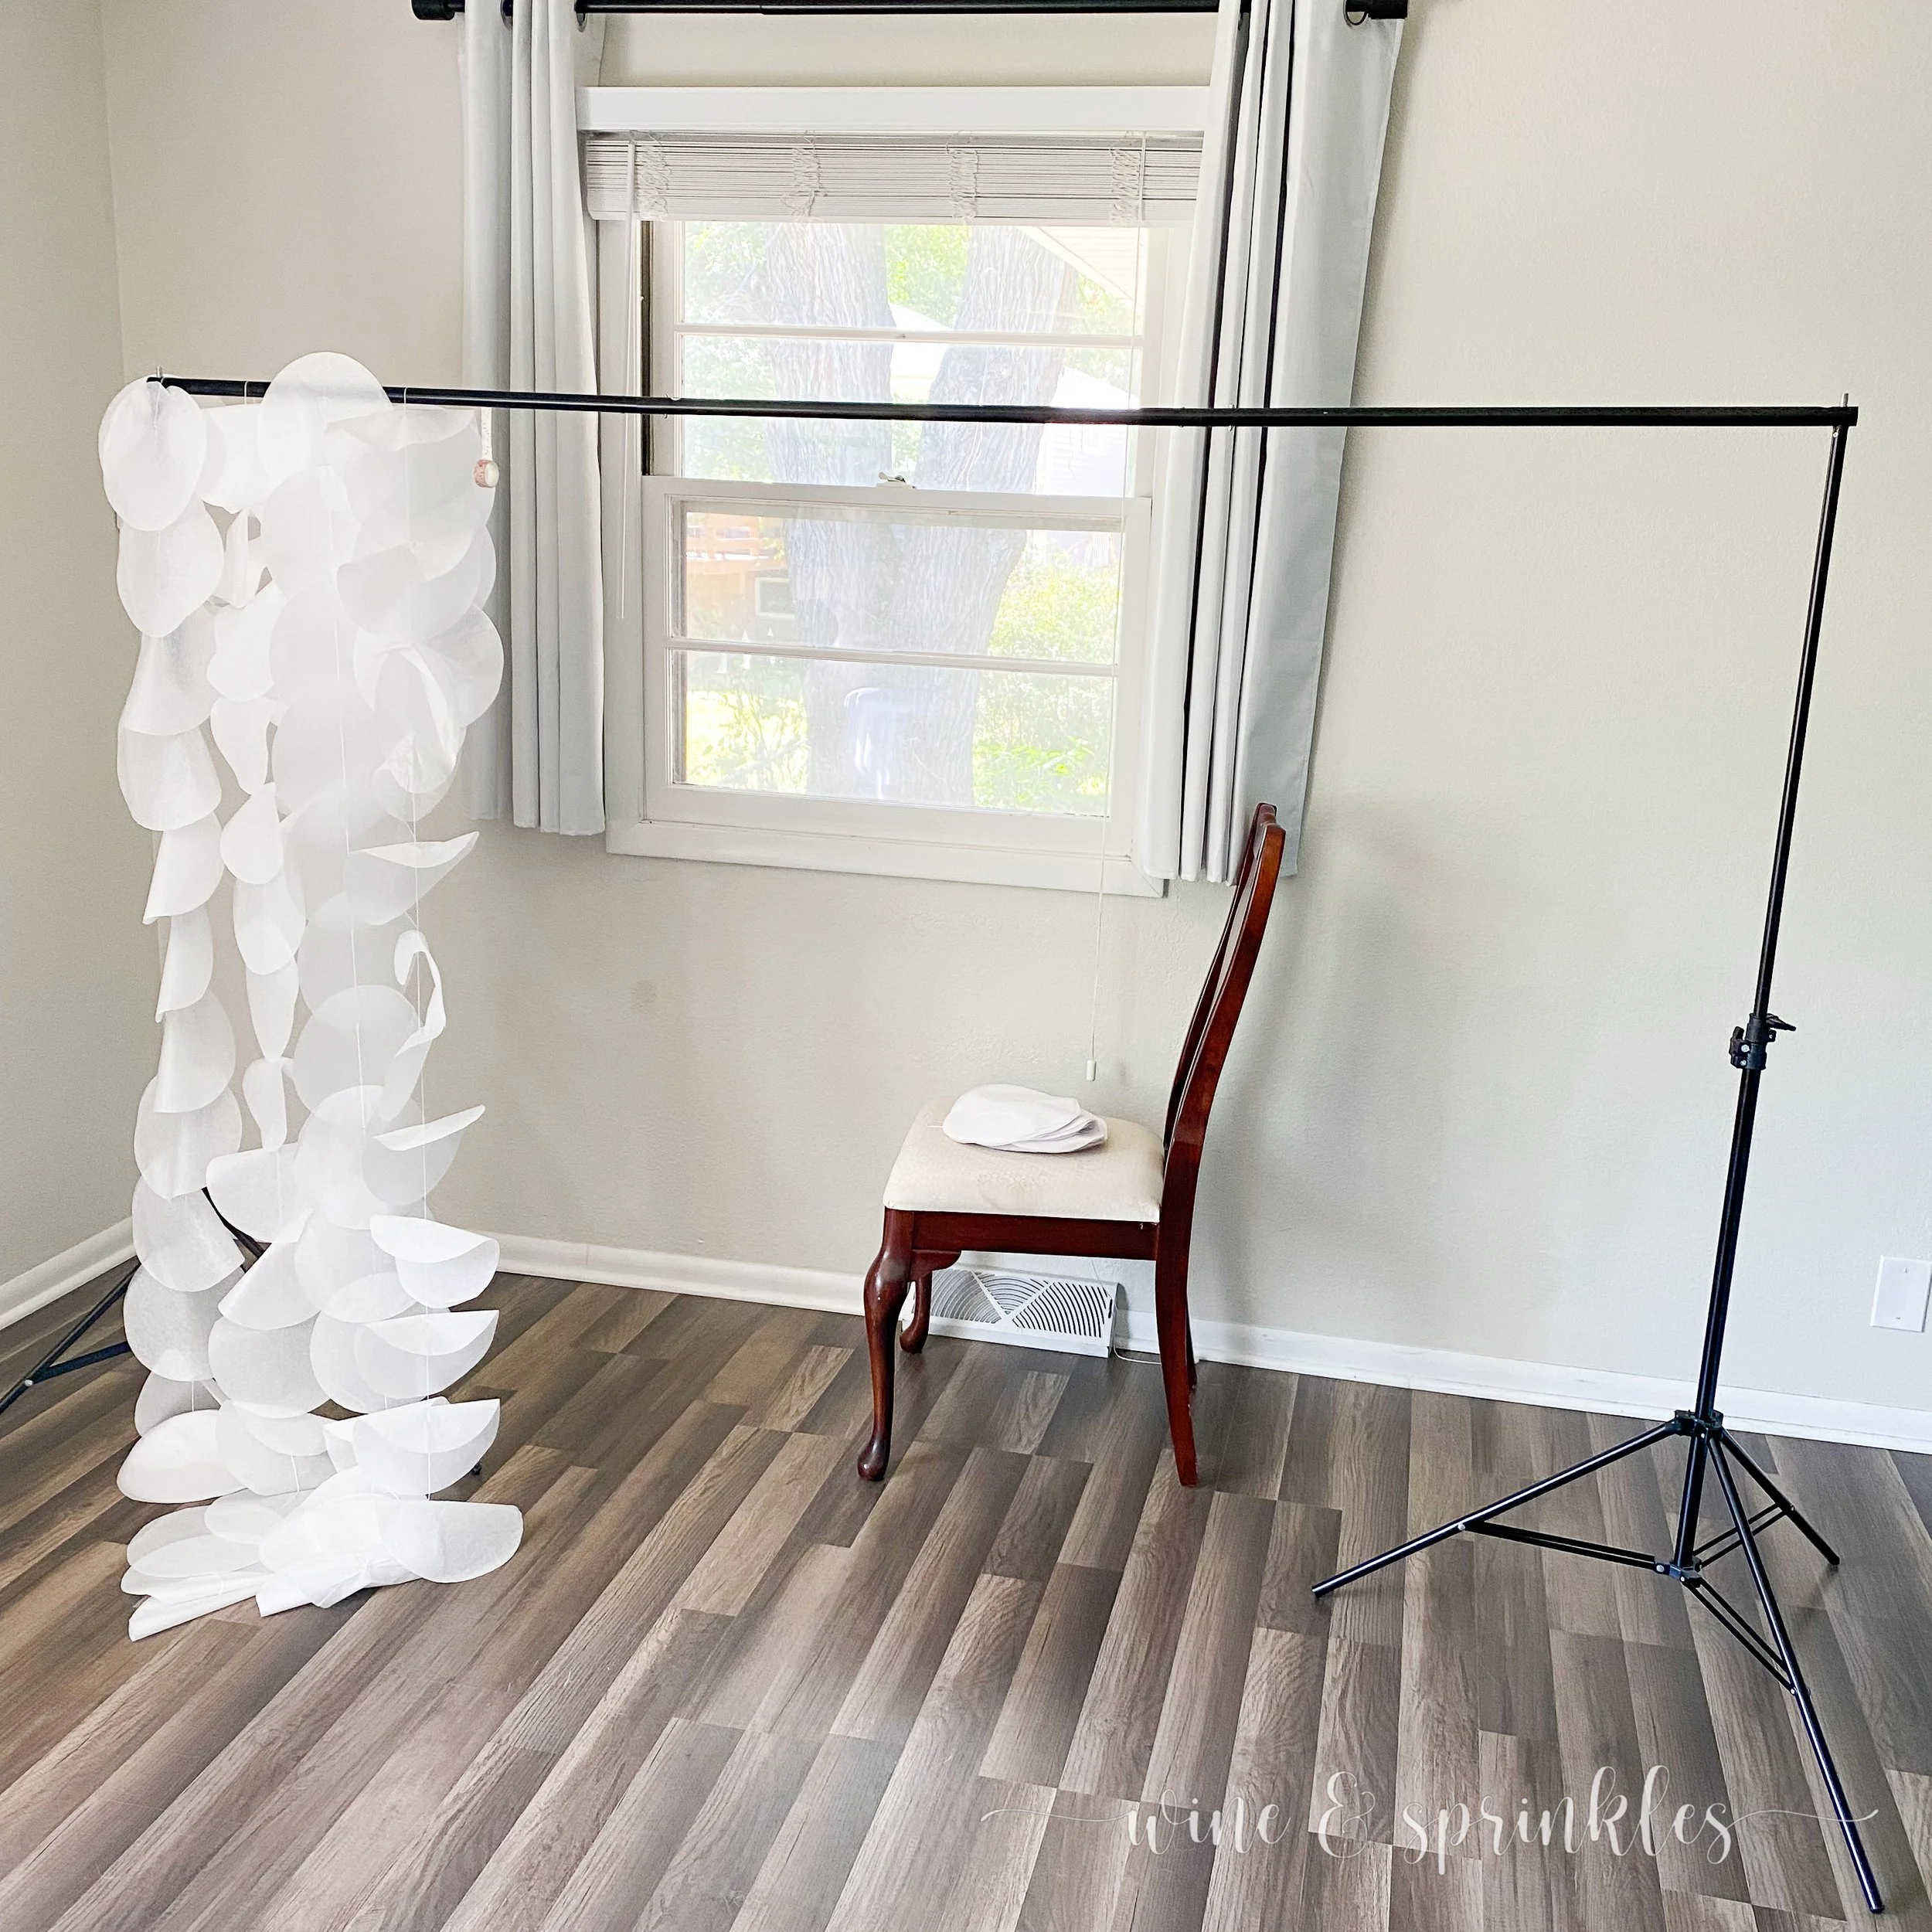
1. Set up your photo backdrop frame according to manufacturer instructions, adjusting it to be about 5 feet tall, tall enough to tape and layer circles over the top but also with as much of the circles off the ground as possible.


2. Drape circle strings over the top of the frame, with most of the circles on the front side and 2-6 over the back, securing the strings as you place them with washi tape so that they don’t slide off. Drape and tape the strings along the full length of the photo backdrop frame to create the first layer, close enough so that the circles overlap but don’t tangle, about 6 inches apart. Hang and tape your strings from the back of the Photo Booth, so that as you let down the long sides of the strings they go away from your feet towards the front so you’re not stepping on strings as you work.


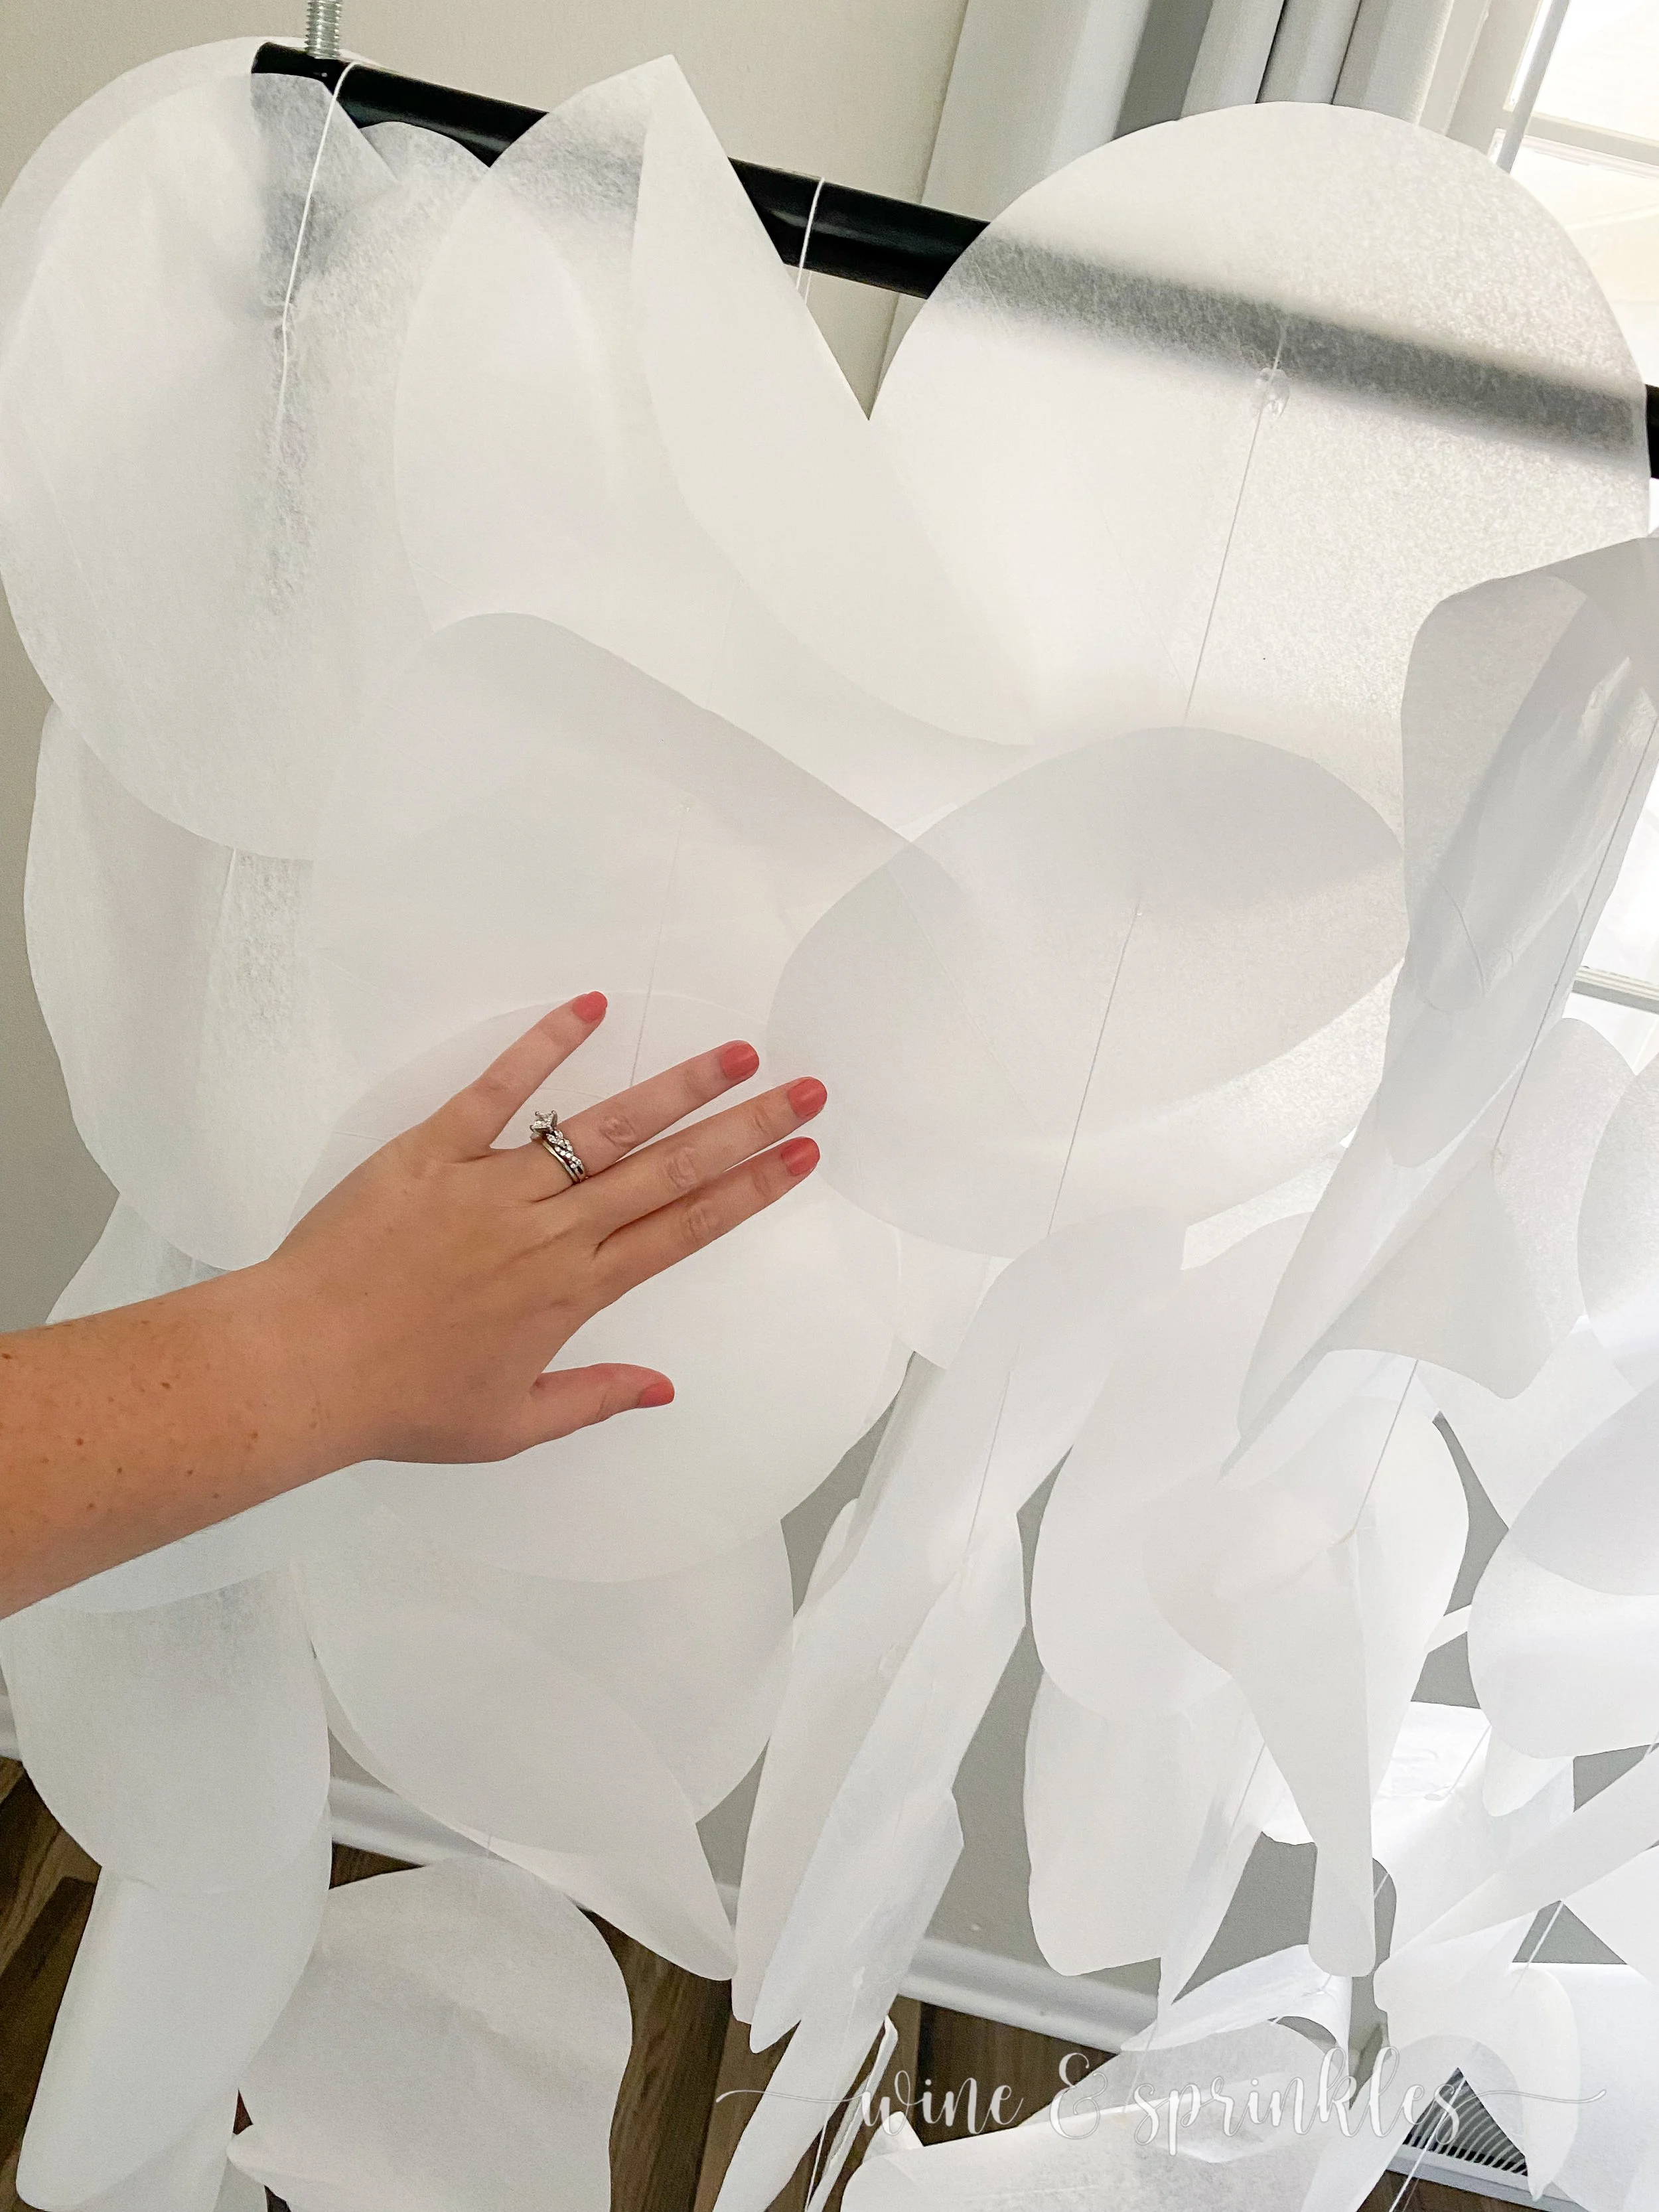
3. Once you have hung and taped the first layer of circles, use your hand to overlap them along the top third of the frame to fill in empty spaces and complete the first layer of your backdrop.


PART 3: ADD SECOND LAYER OF TISSUE PAPER STRINGS

4. Using the same process as the first set of paper strings, start layering your second set over the first, taping the second layer of strings between the strings of the first layer, securing likewise with washi or masking tape. Continue draping the circle string to create layers of the photo backdrop until you can no longer see through your backdrop to the back wall. As needed, you can add a third layer of strings between the first, which I did with my extra shorter strings of paper circles that weren’t long enough to be full length layers, but helped add to the overall volume of the backdrop.


5. Once you have layered and taped two layers of tissue circles, it is time to arrange and flip circles along the top of the backdrop. When you start layering you will notice that the circles start going every which way instead of being in a nice pattern like you see on the lower right picture. That is because after I hang and tape them I gently rearrange each circle so that they are overlapping and not fold it over. Generally, as you rotate the circle around the thread you will notice there is a way that it lays where it more easily stays flat and out as opposed to folded over. Gently twist and rotate the circles, overlapping the two layers as it helps each circle stand up best, and do this for the top quarter to a third of your photo booth Once these are arranged, raise your photo backdrop frame to its full height and finish this process on the bottom half of the backdrop until it's as voluminous and full as possible.

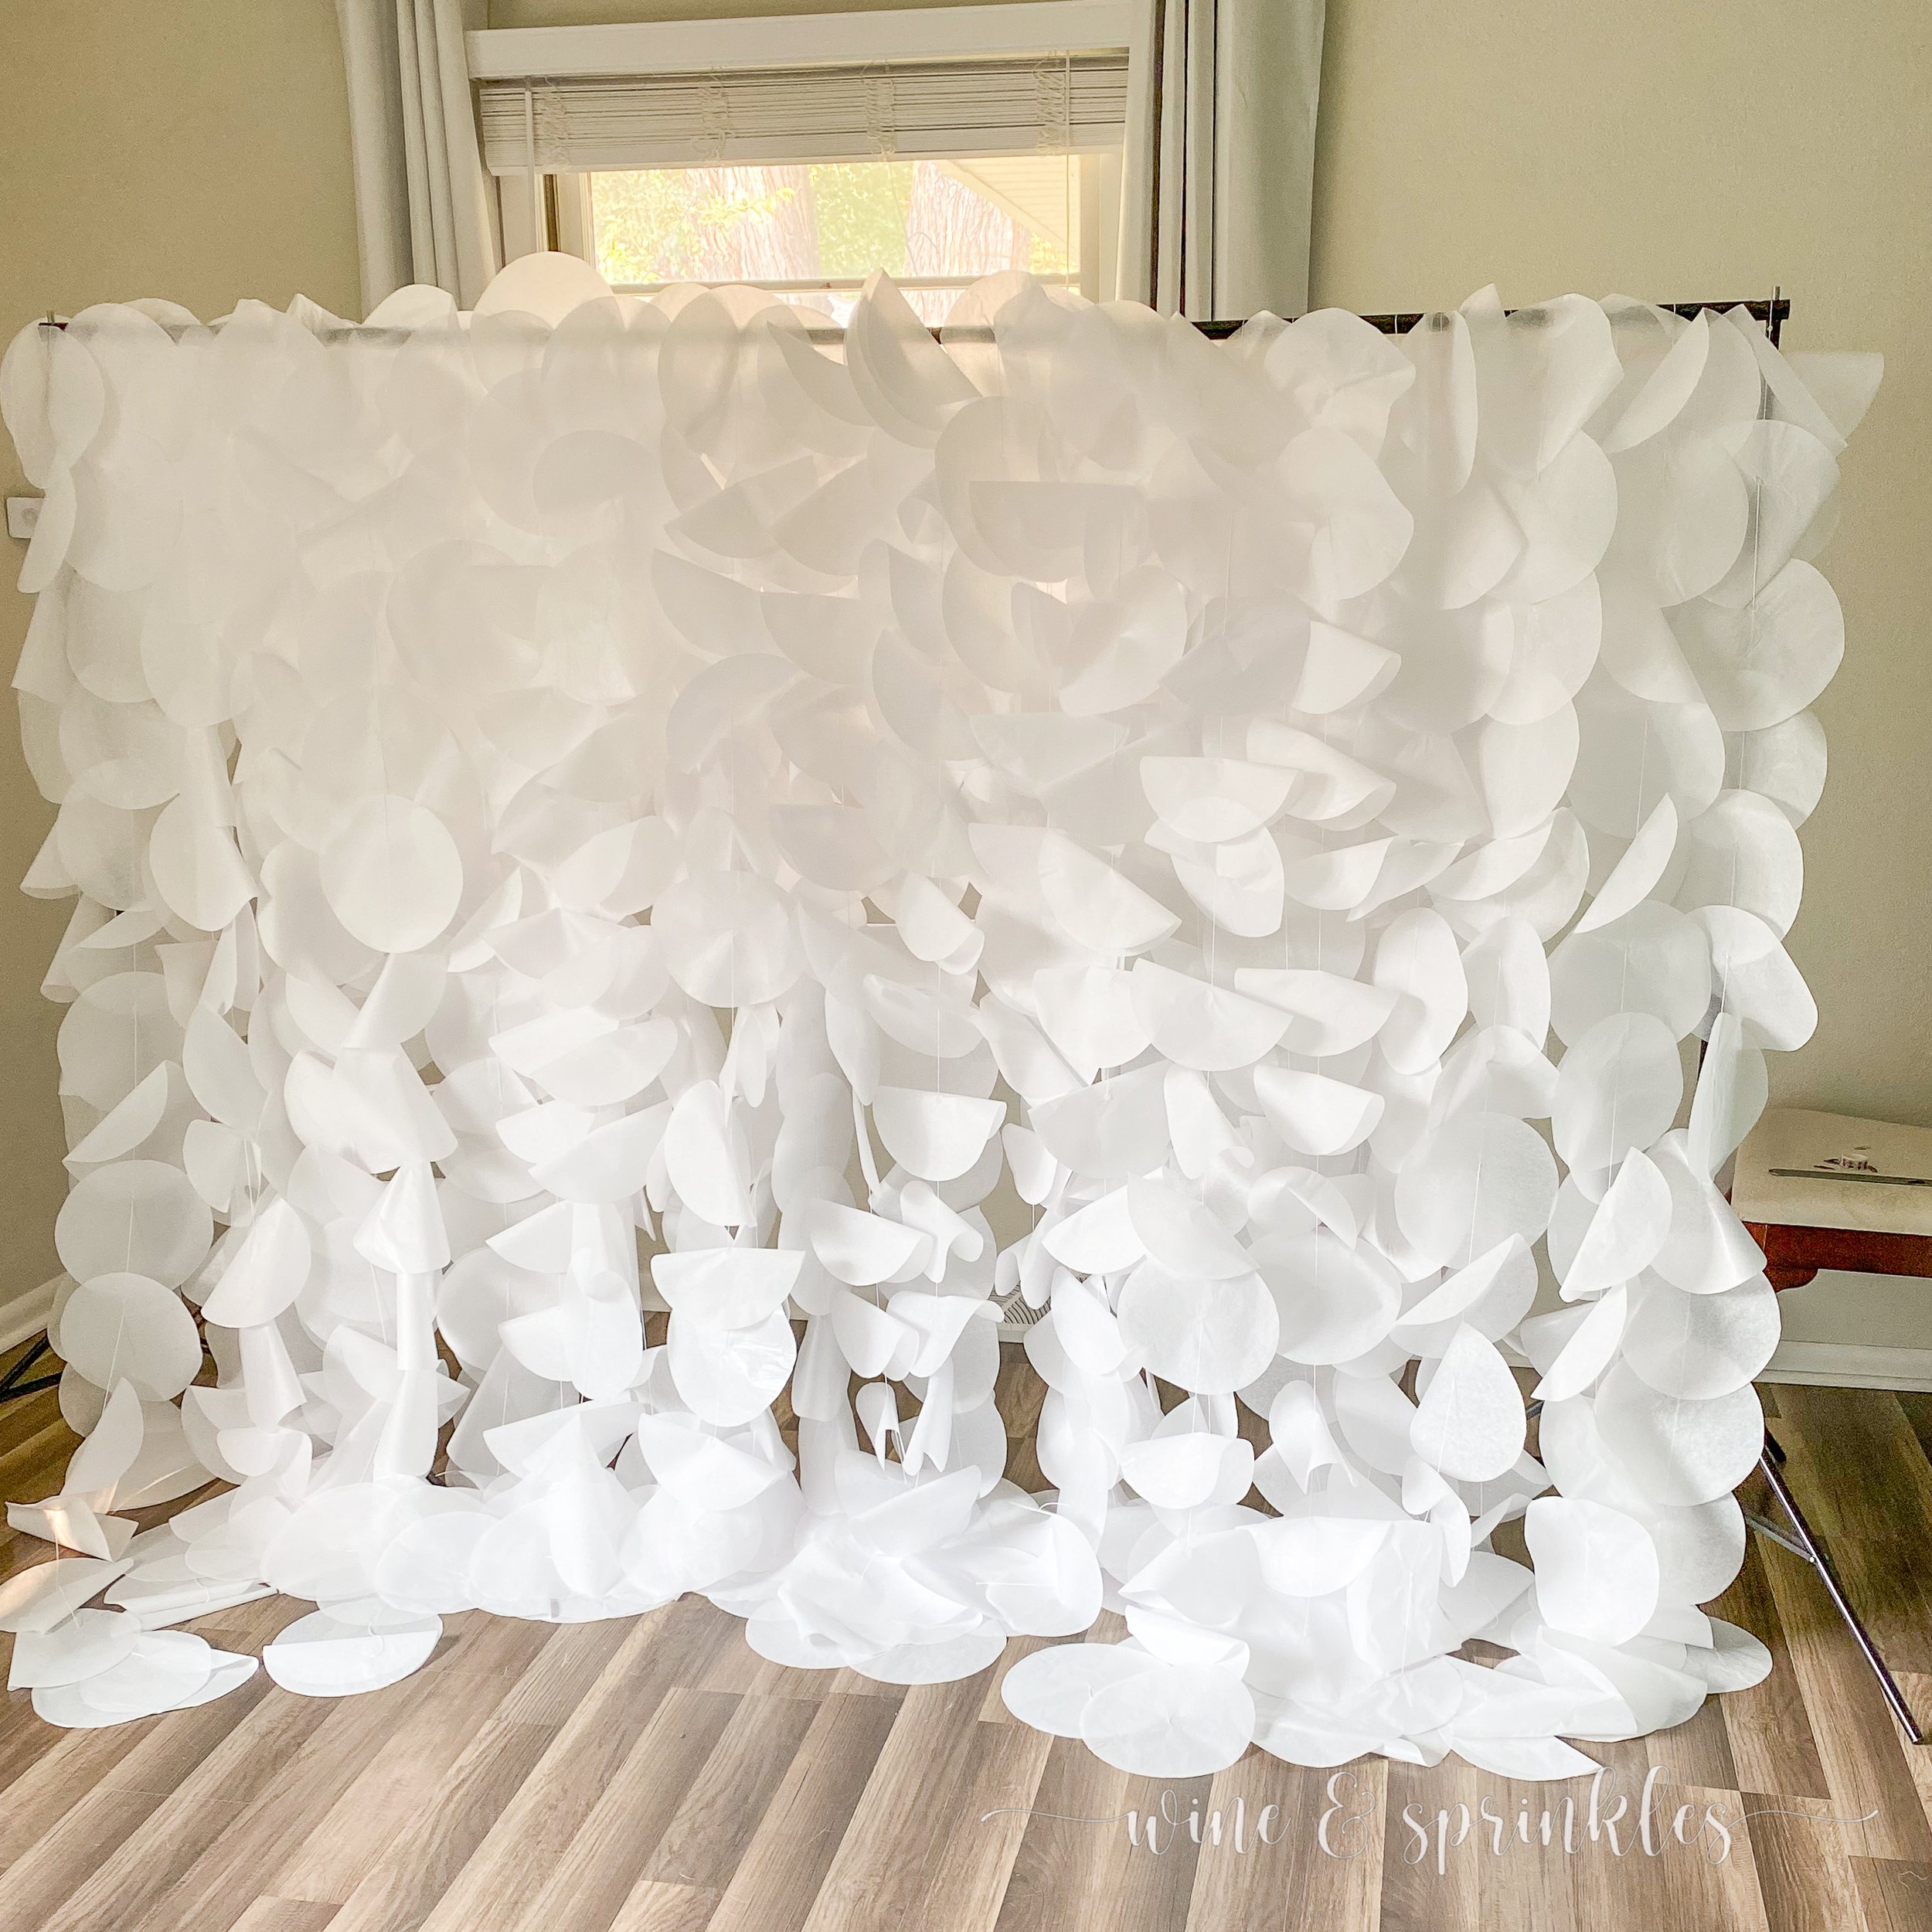


To make a thick and luxe style photo booth, the more paper strings you have, the better! For my backdrop, I started with as many as I could make for my Goddess of Spring Party, and not feeling like it was enough, added the second and third layers for my Zodiac Summer’s Eve Party. For the fully fluffed photo backdrop above, I used 18 strings for the first and second layers, then 12 shorter strings for the third layer, for a total of 50 paper circle strings!

While these are a little labor of love-like, I keep each string that I can as I carefully dissemble this backdrop, and each time I make a few more strings to add, creating a prettier backdrop every time!
SEE OUR RELATED POSTS HERE:


OUR PINS FOR THIS POST: