This post contains affiliate links, meaning that if you click on a link I will recieve a small comission. This costs you nothing extra and I only promote products I use and love! You can read our full disclosure here
As you read this post, you’ll notice a lot of bolded words, some that highlight pink and link to other posts and products, and others that don’t do anything. That’s because I am still writing and working on the posts those words go to! As these posts get published, I’ll be updating this post until all the projects are complete! Subscribe to my Newsletter or Follow me on Facebook to keep updated on when I post new content!
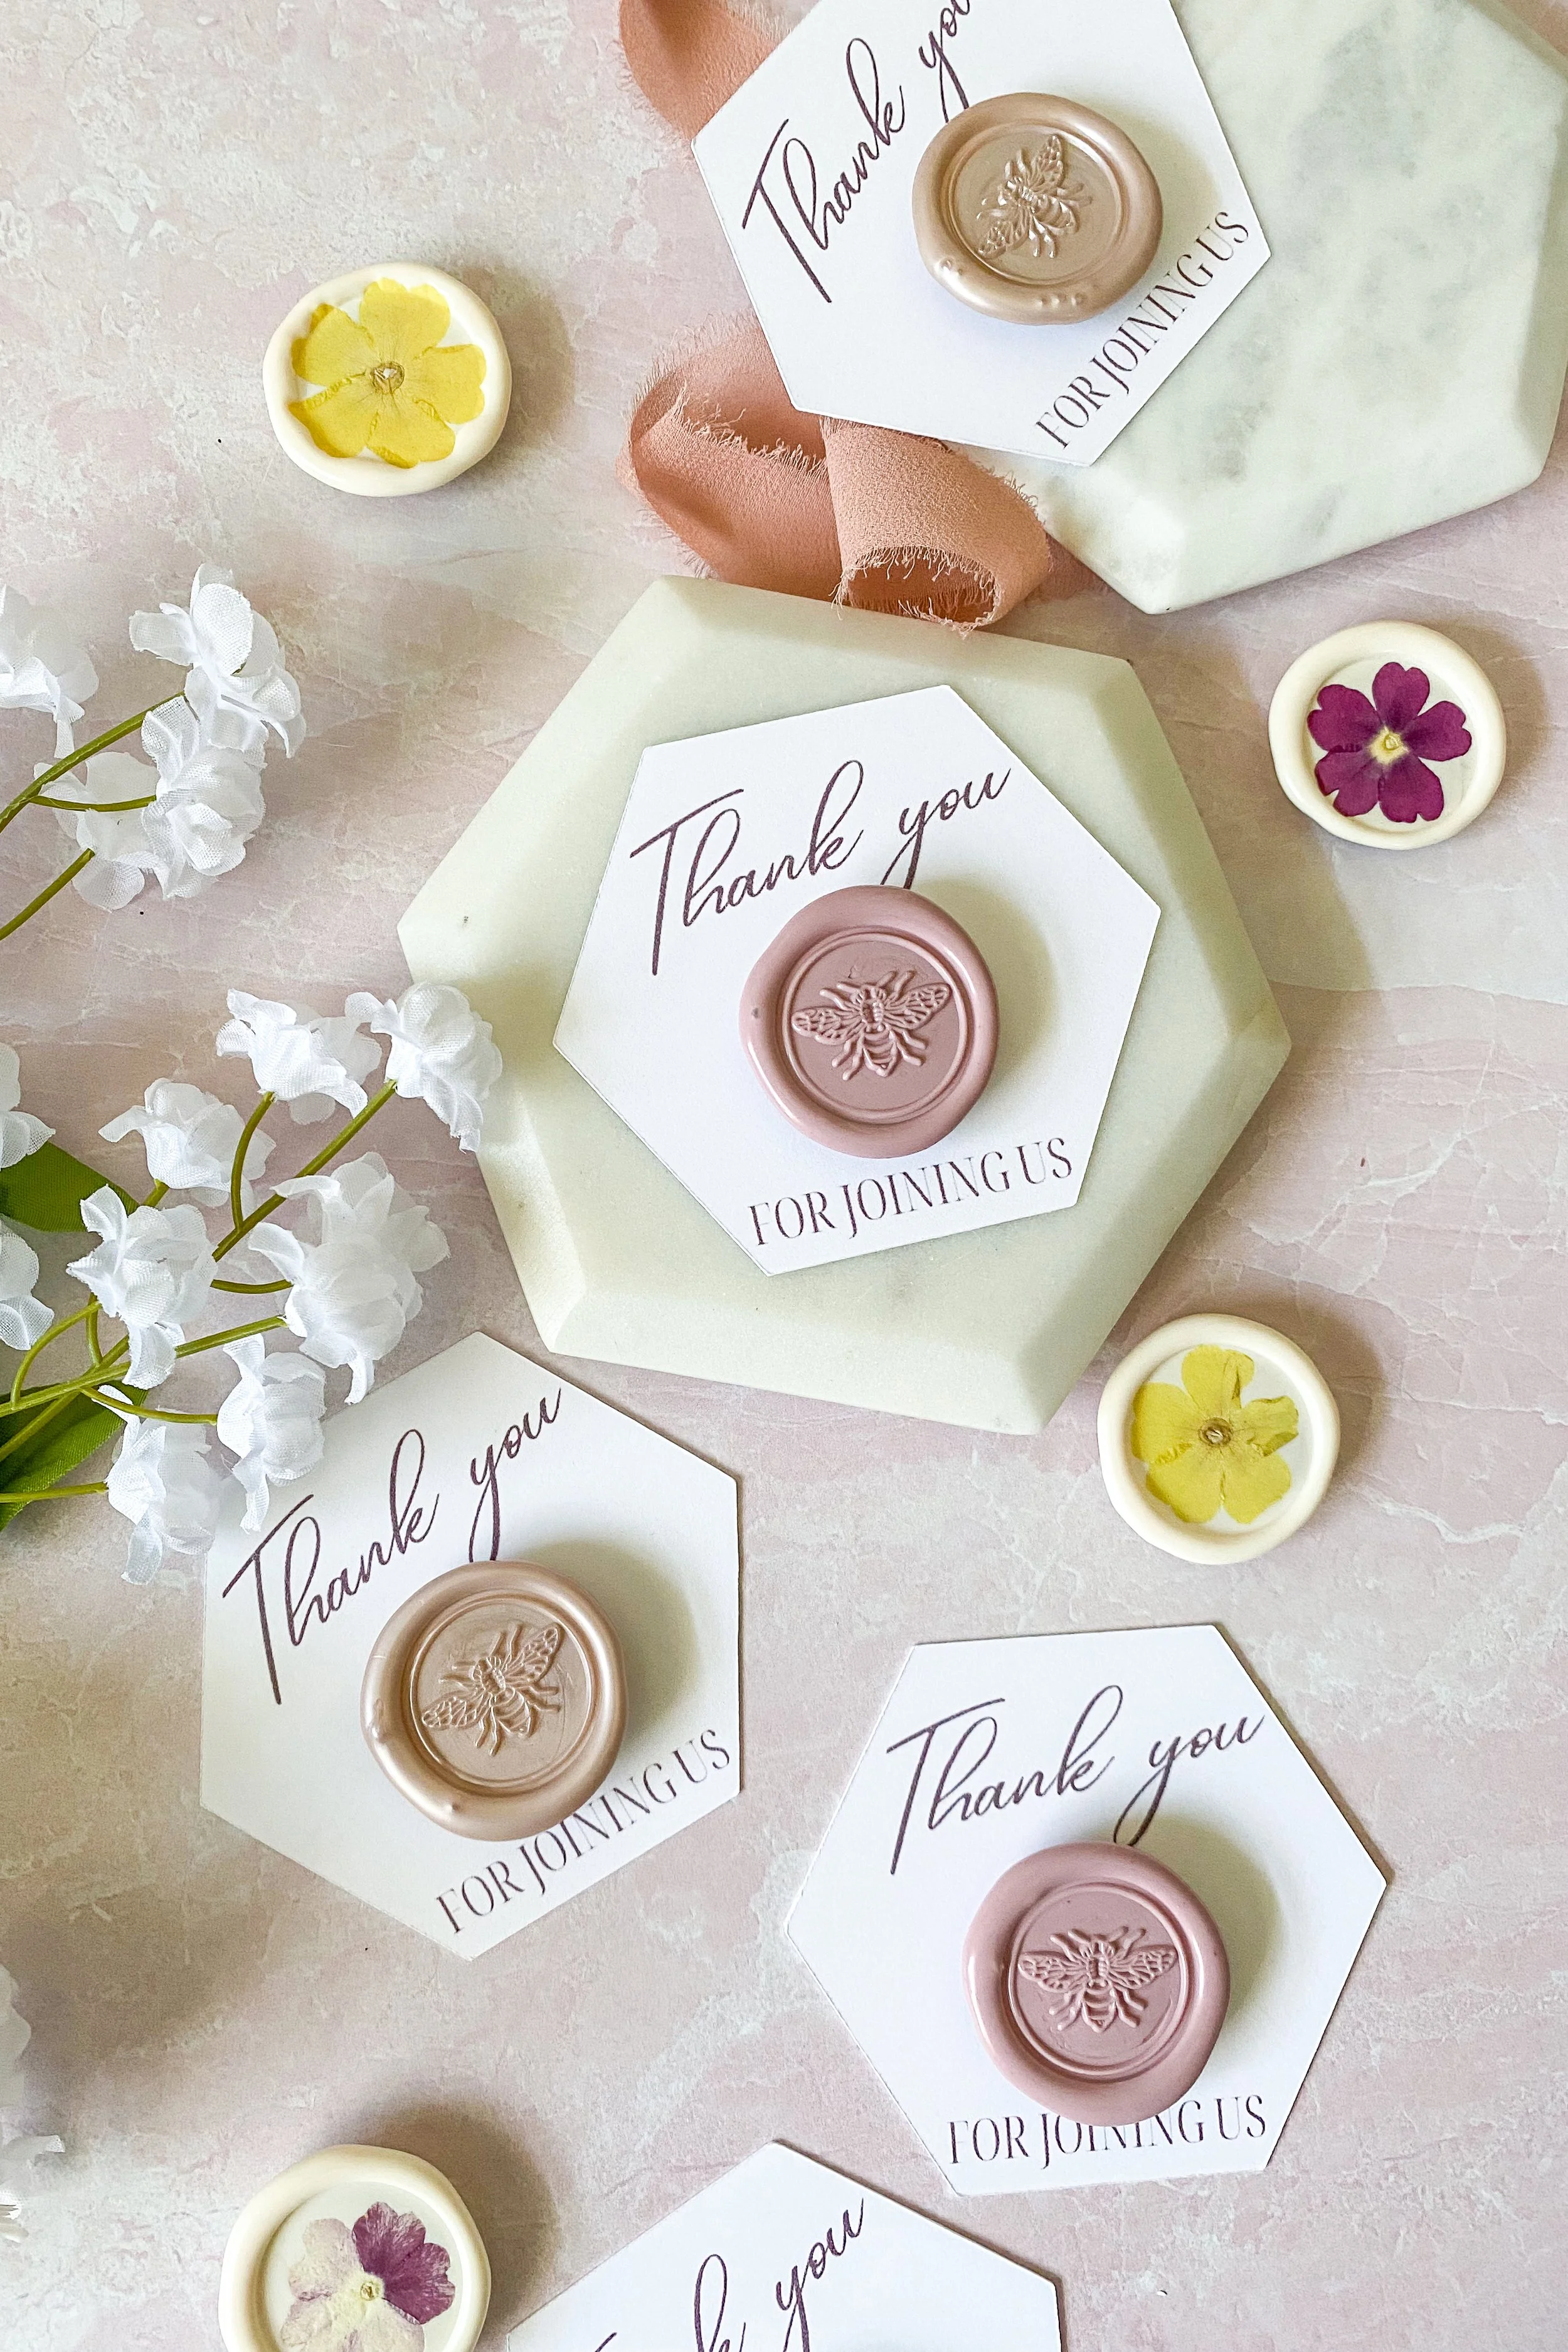
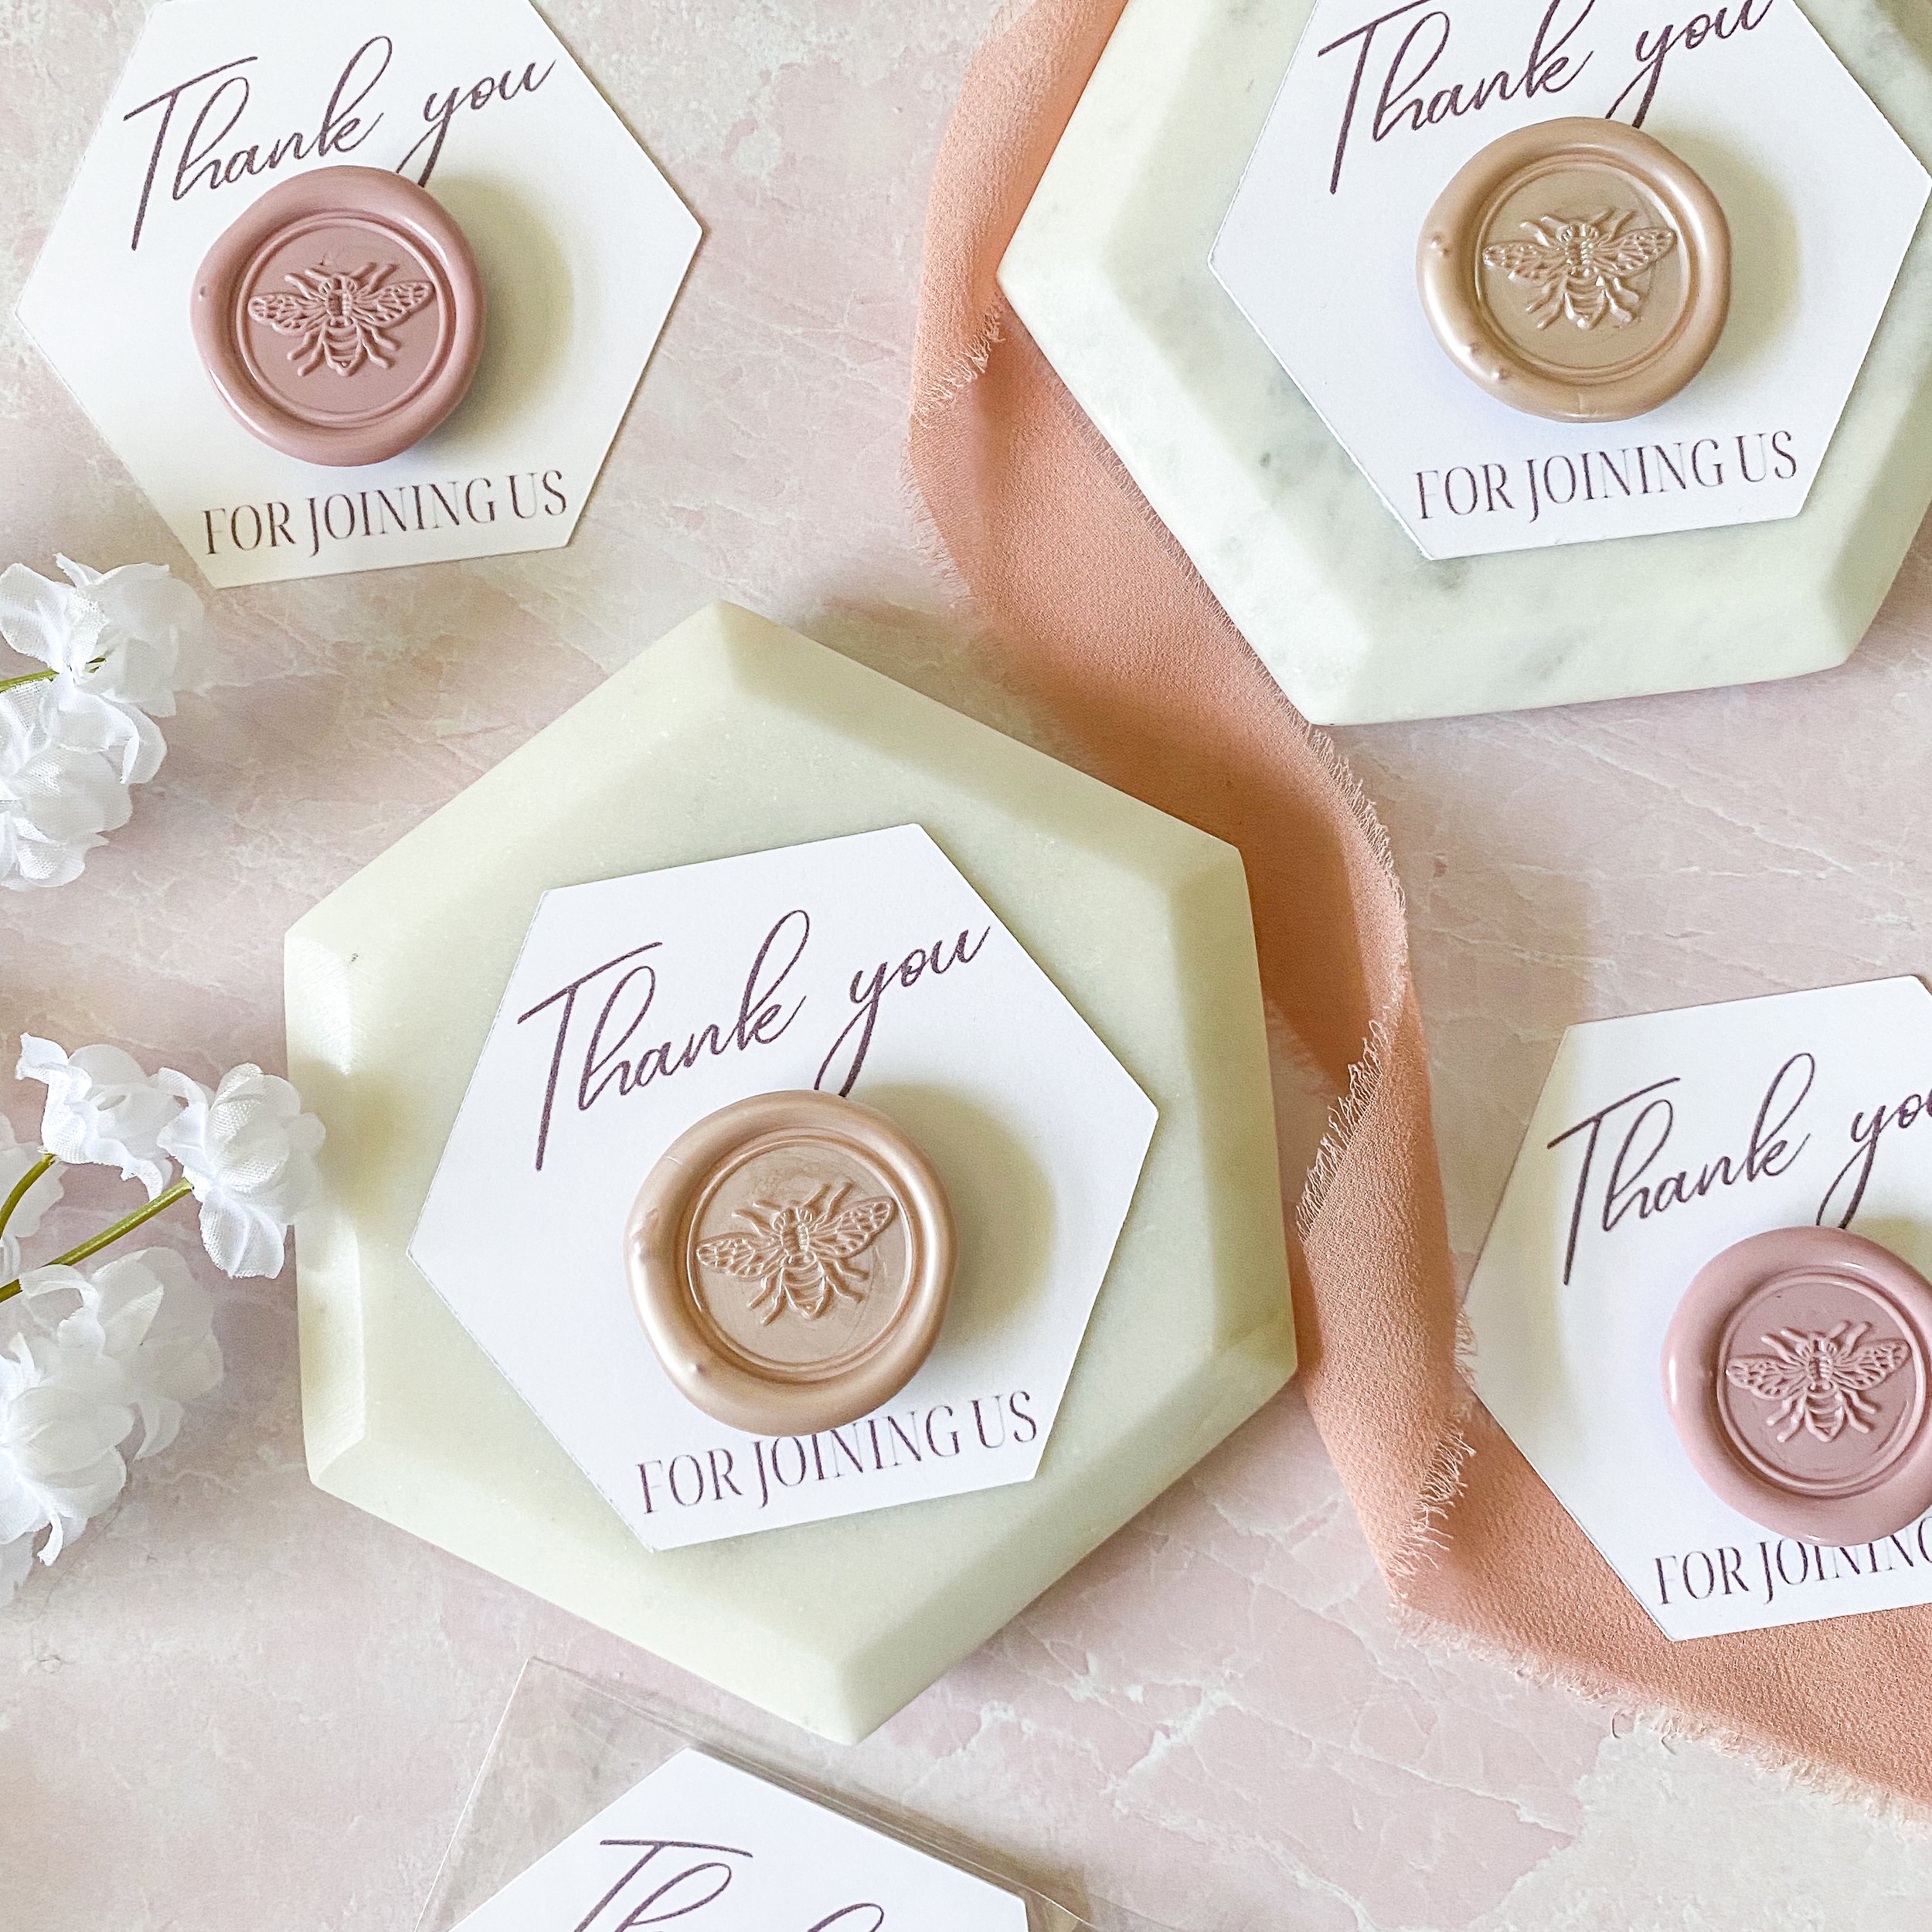
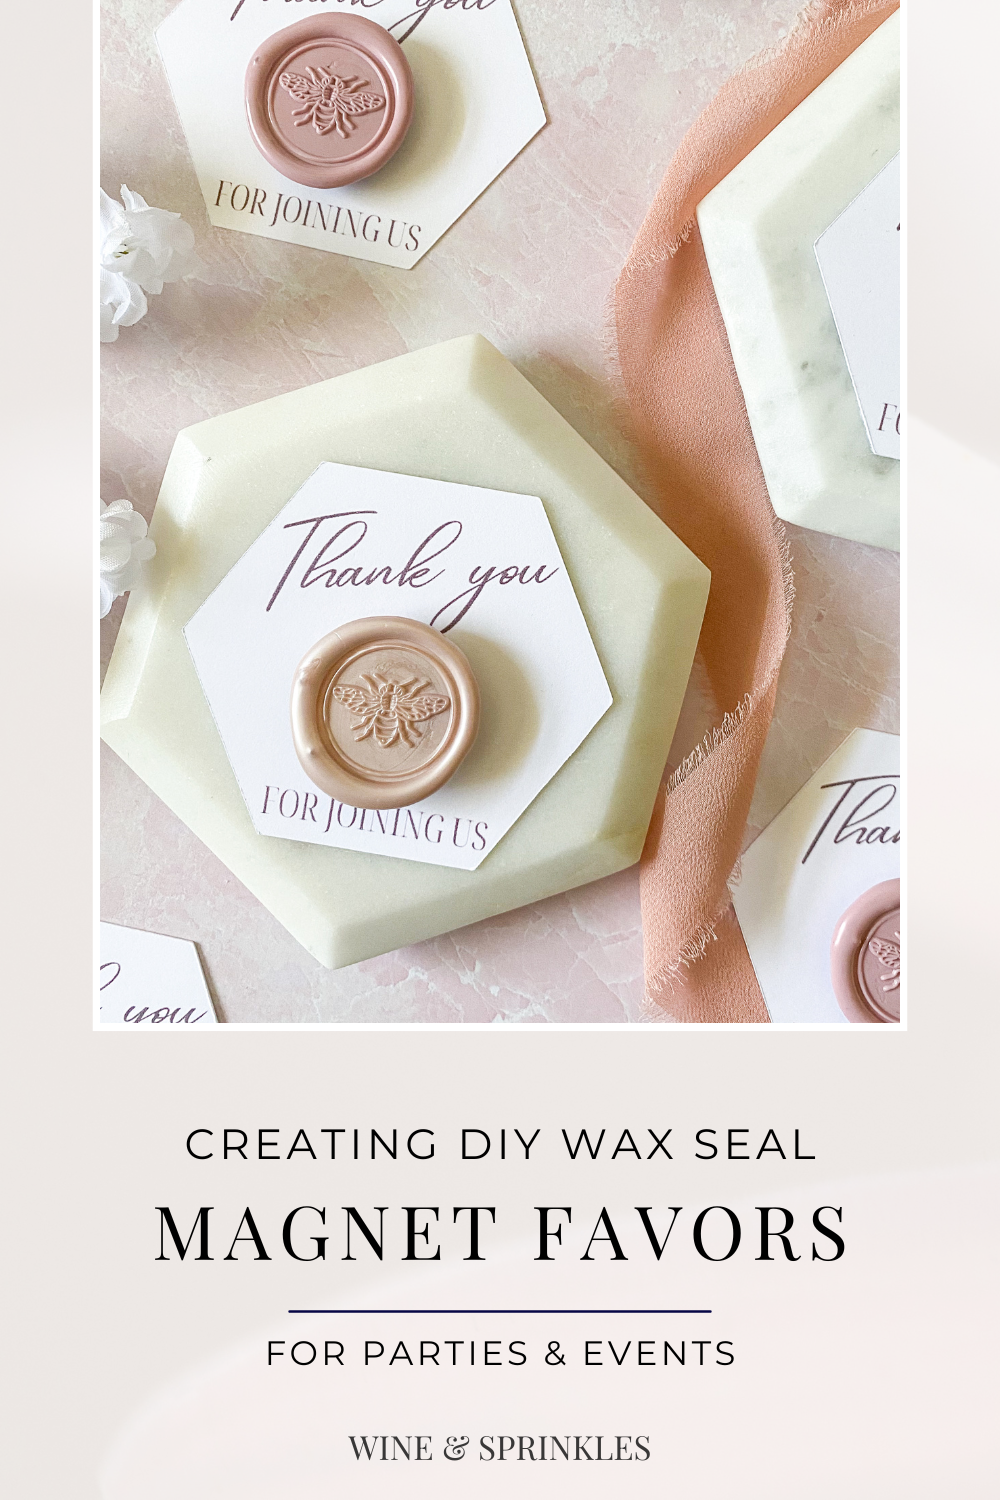
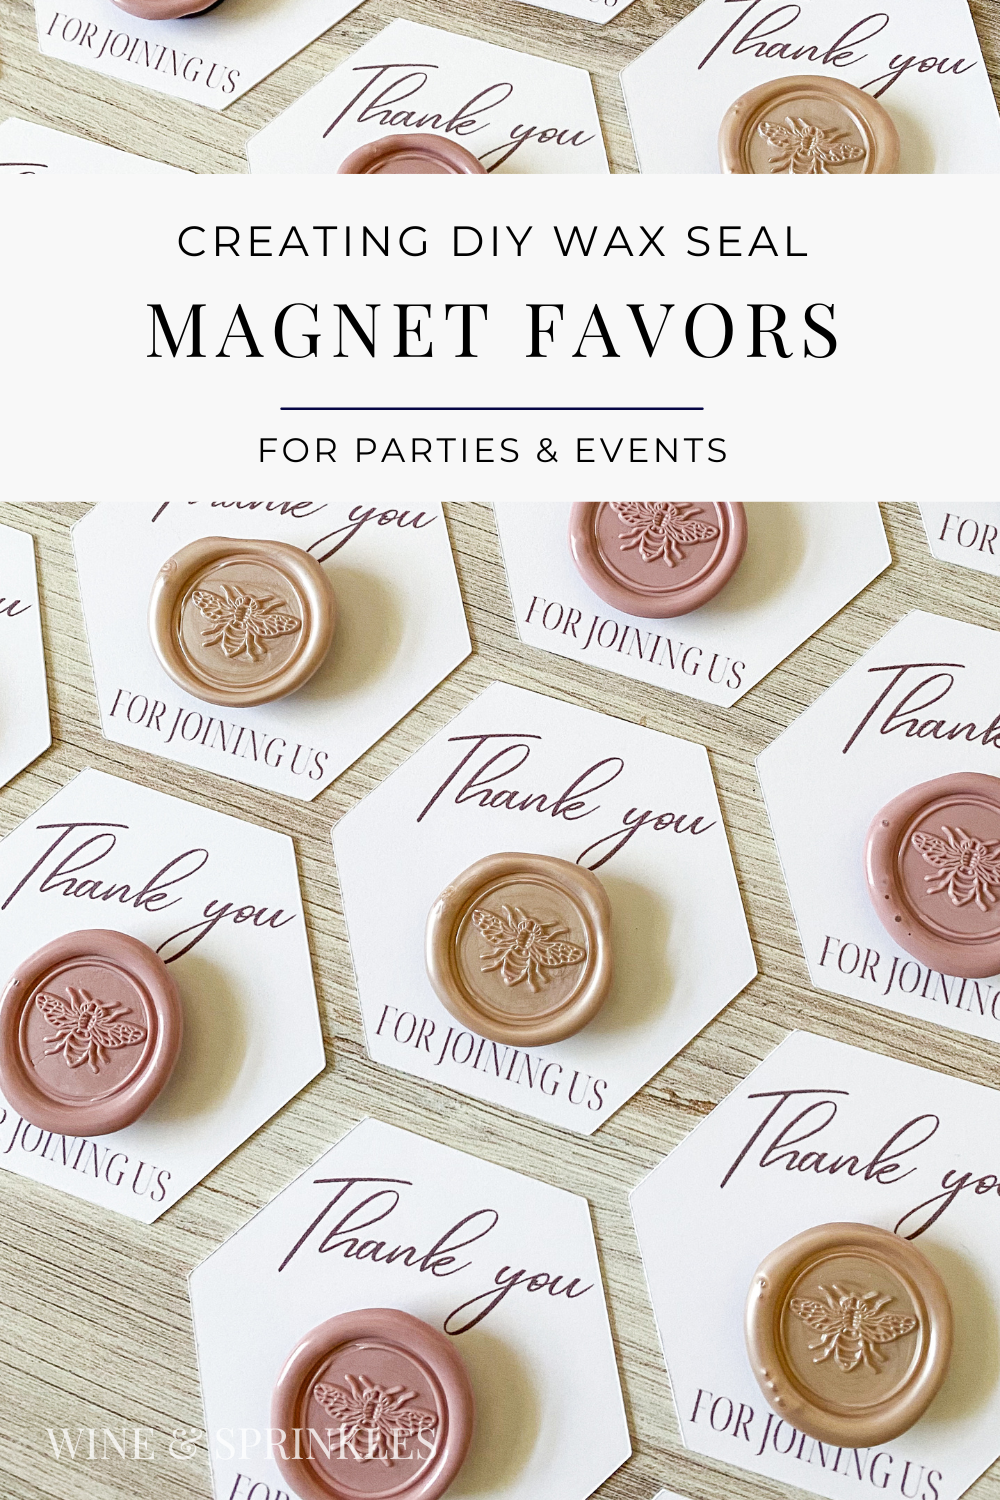
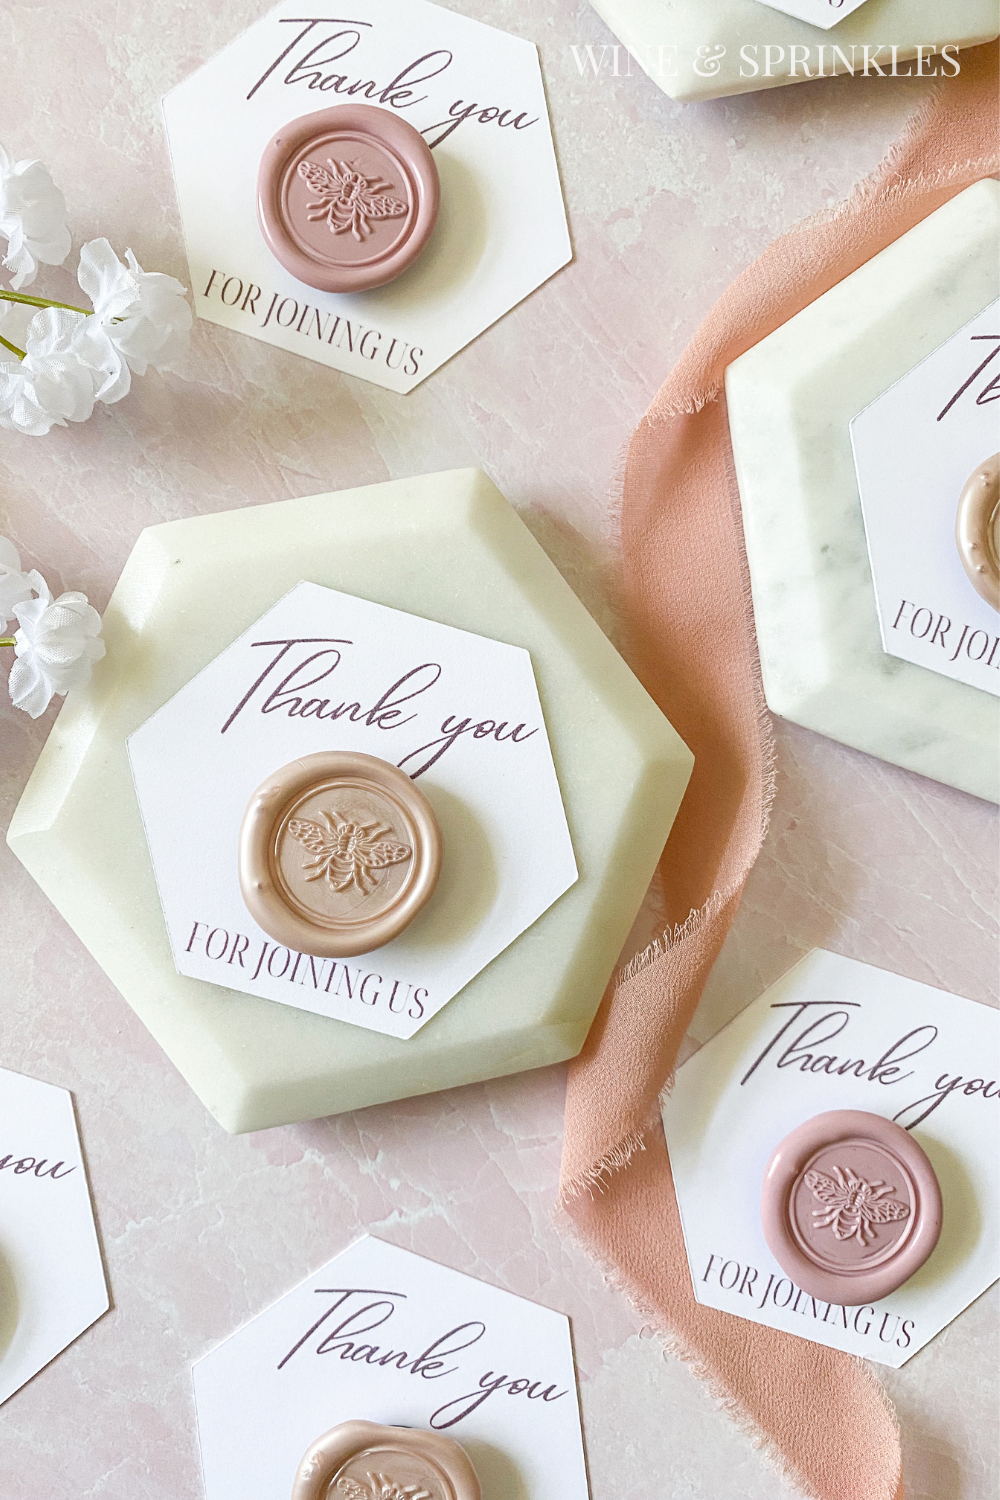
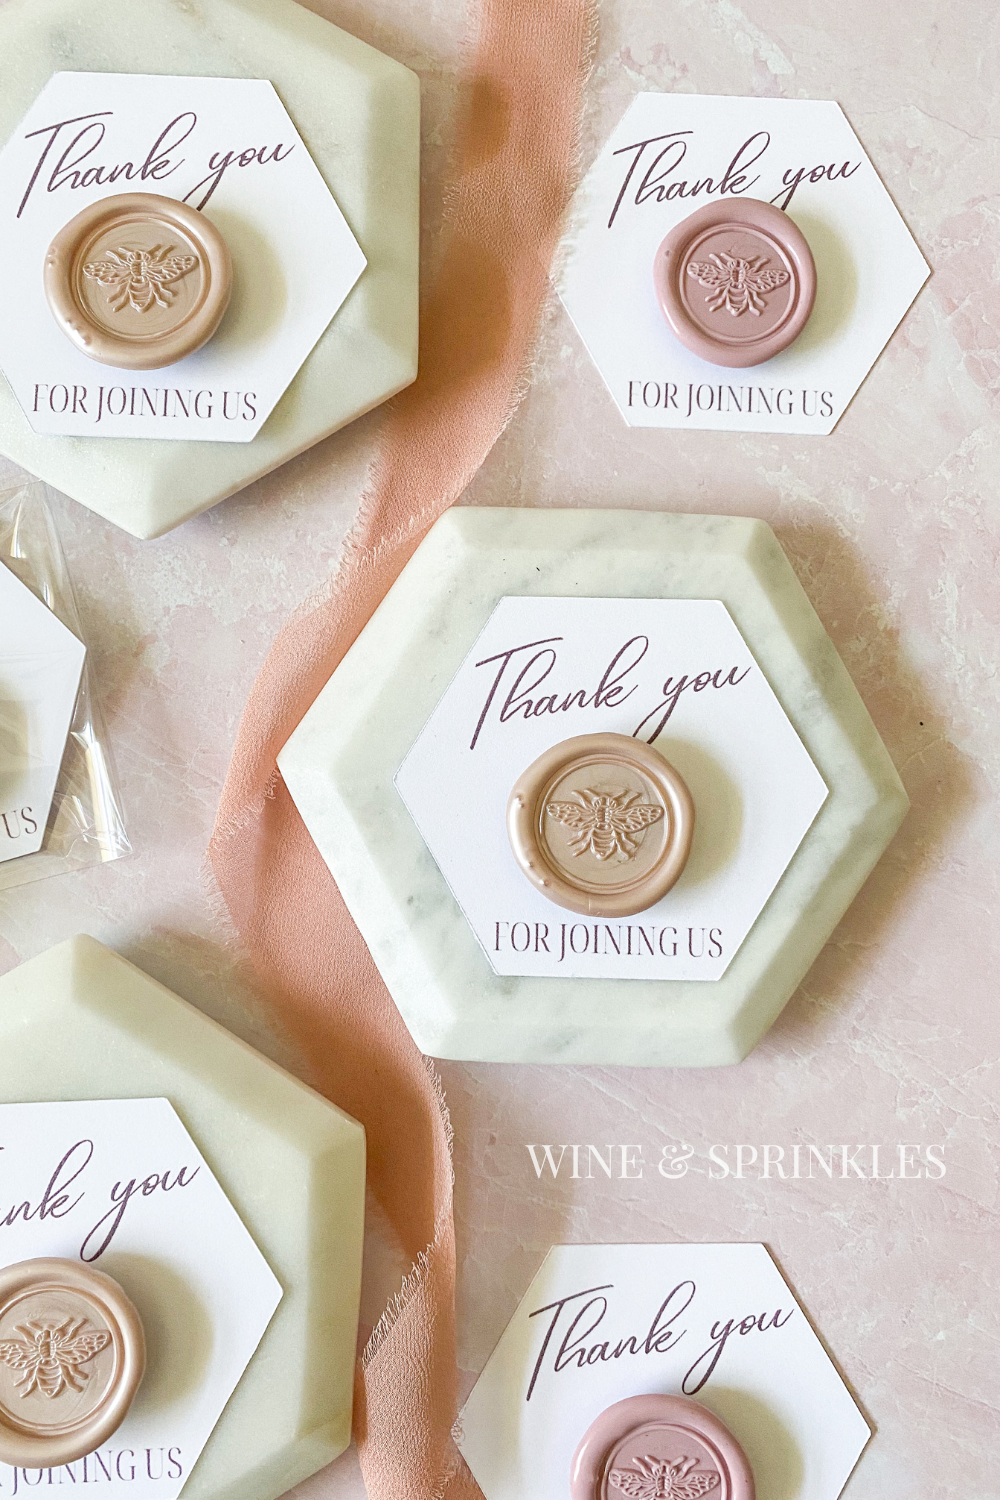
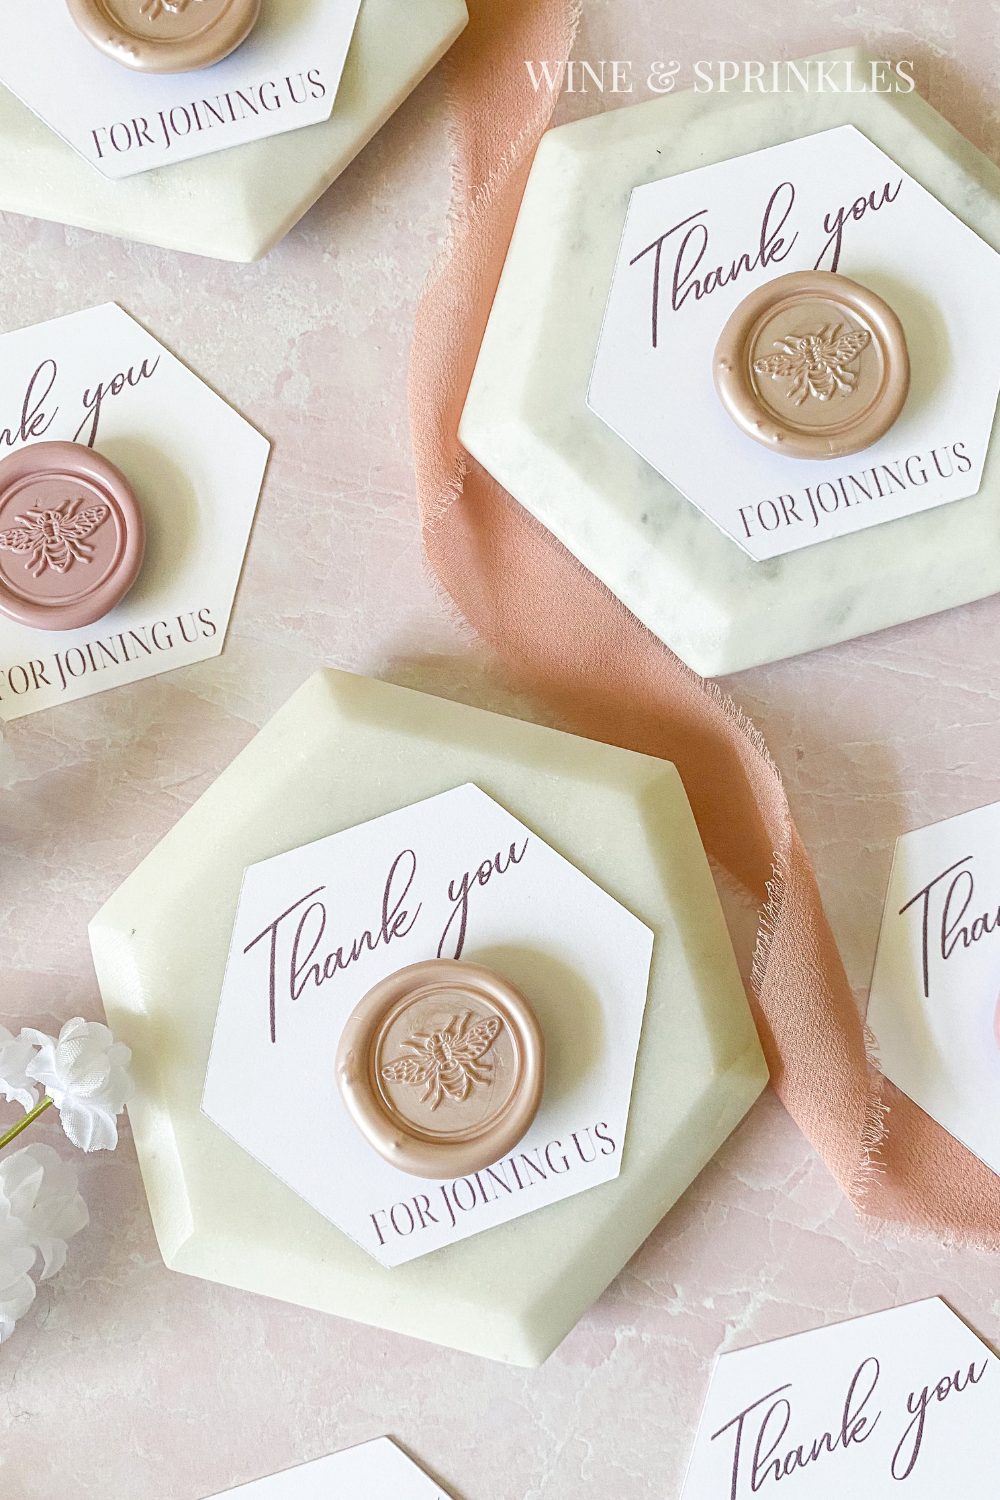
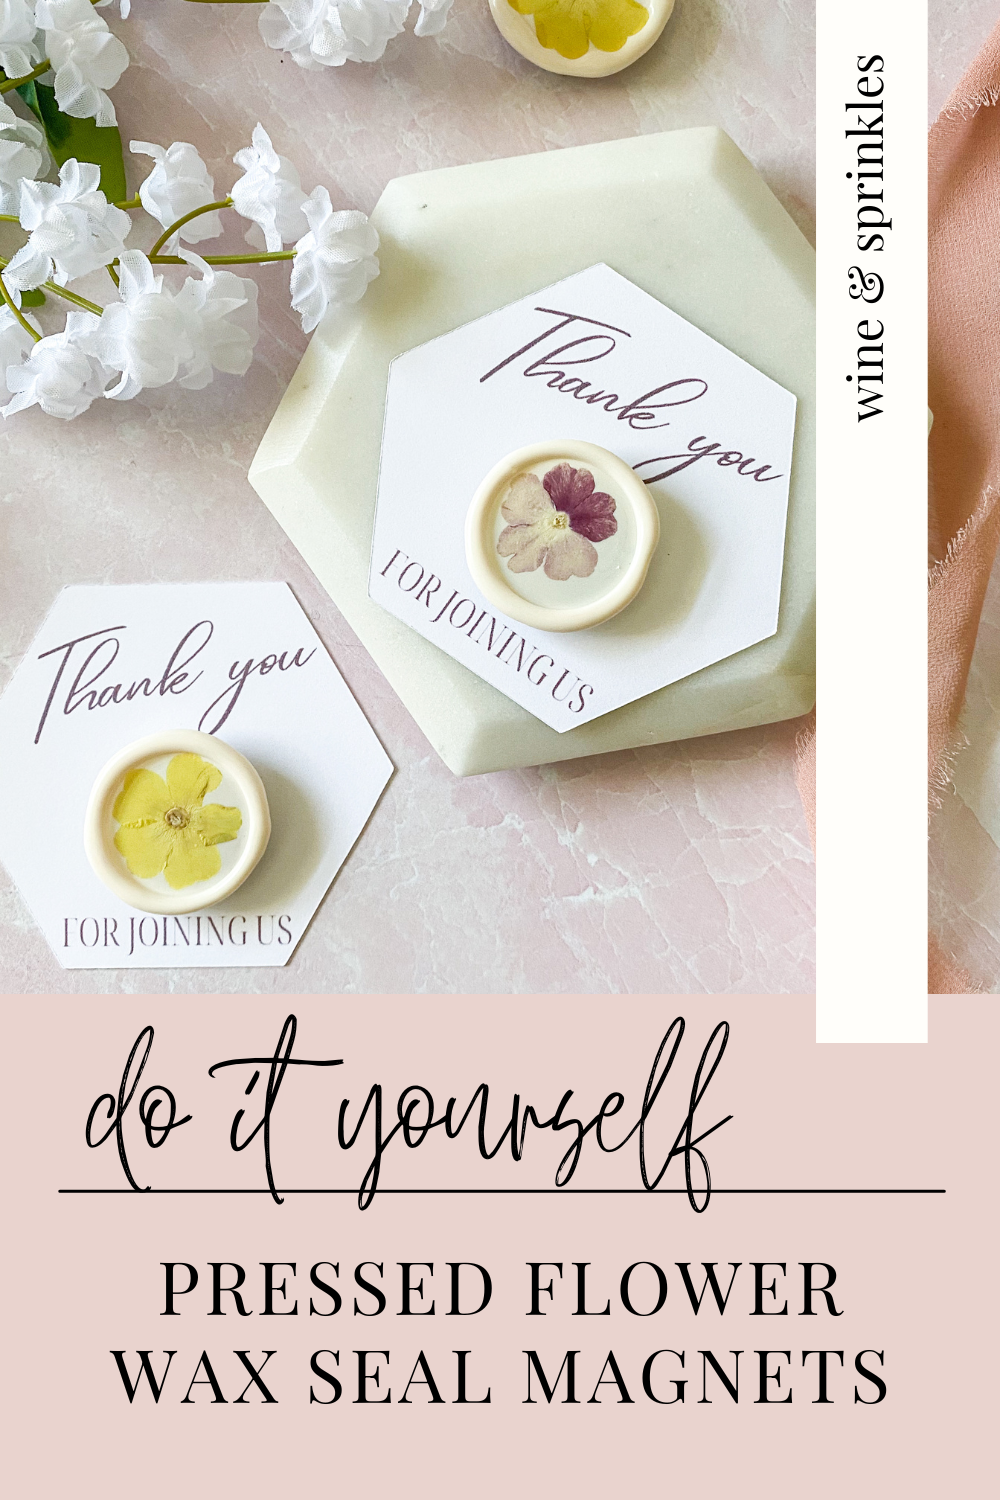
I love magnets as an inexpensive and useful party favor, but even more for how many creative options I’ve found in the past. From wooden magnets to photos to wine corks or bottle caps, there’s so many creative ways to design them and make them unique to your own event! When I was experimenting with ways to use sealing wax in my party projects for my Vintage Victorian Cocktail Party, as soon as I thought of making these Wax Seal Magnet Favors, I knew that they were going to be my favorite form of magnet yet!
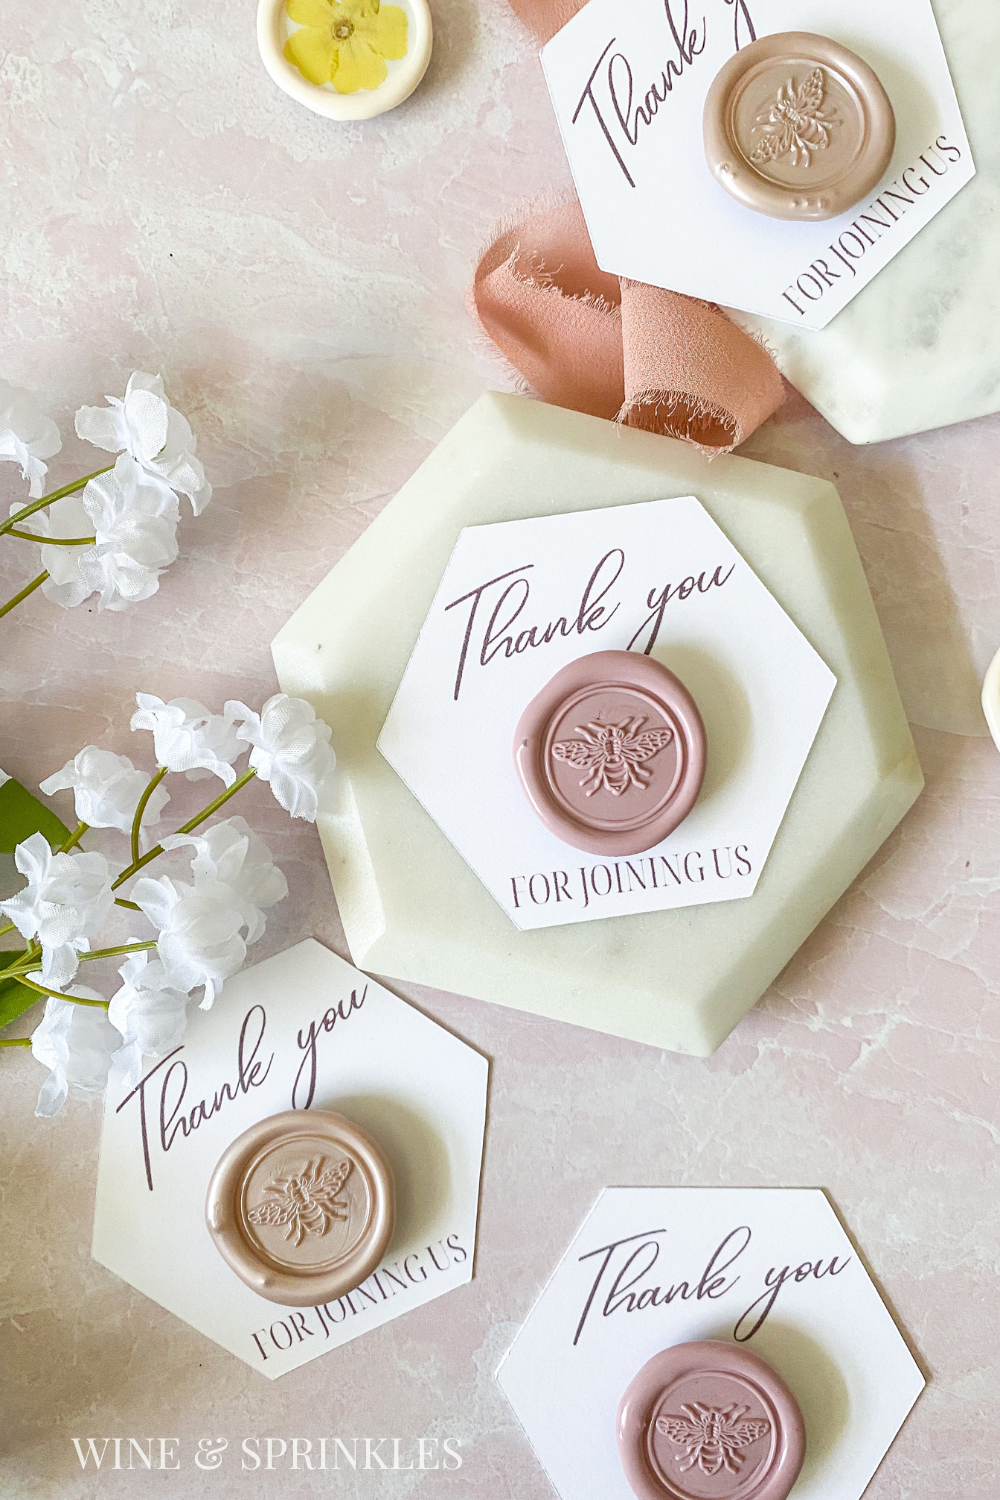
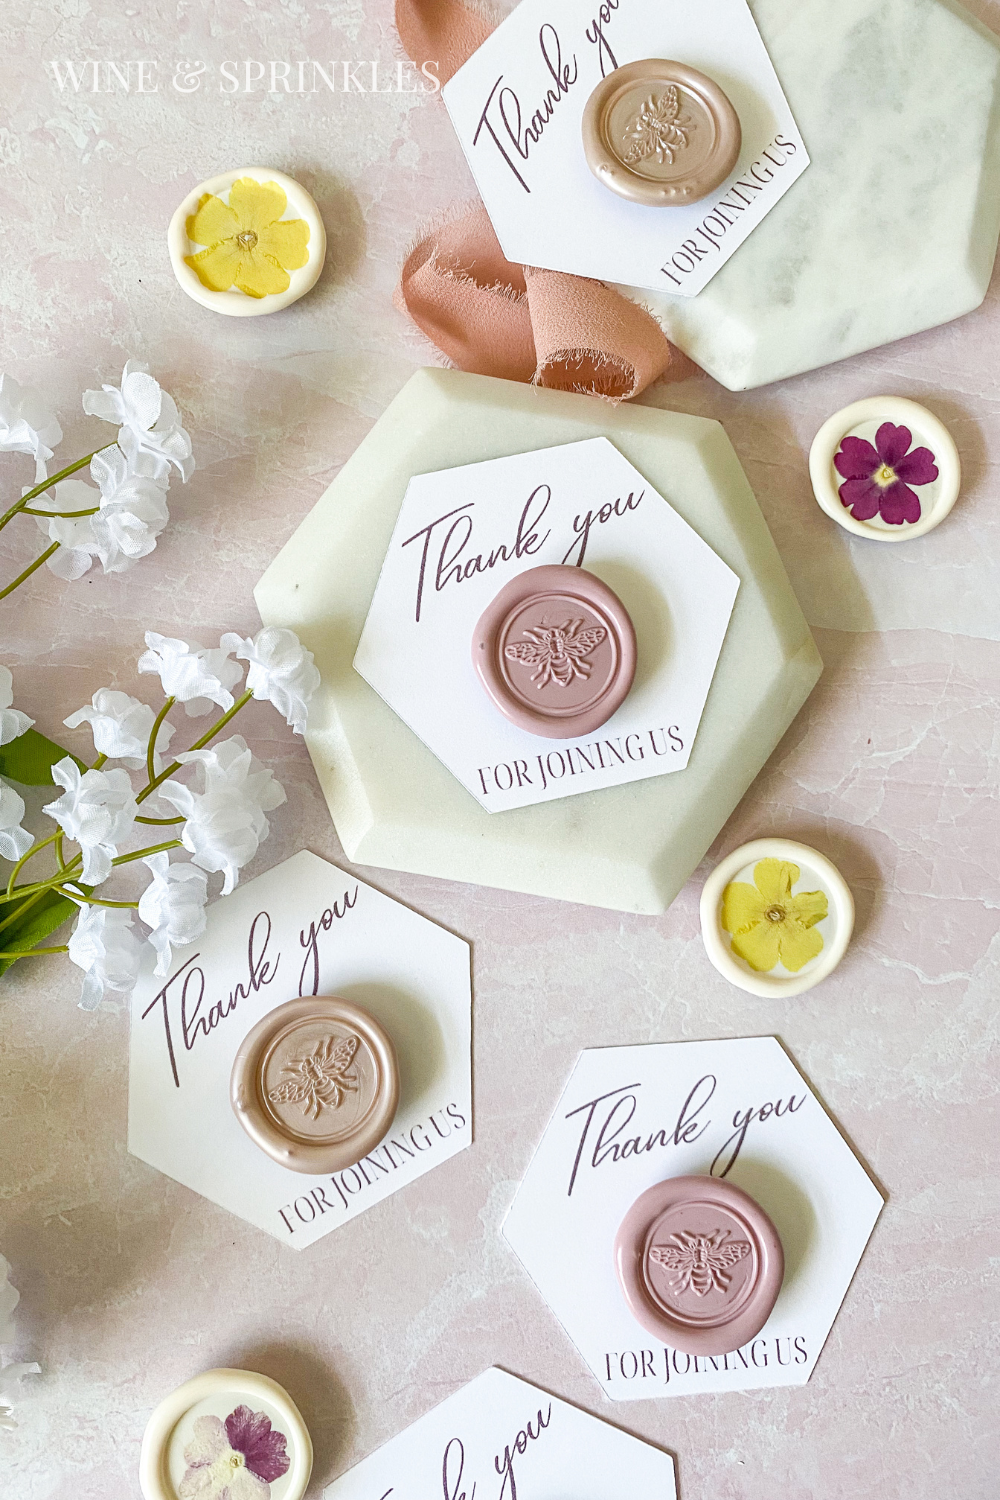
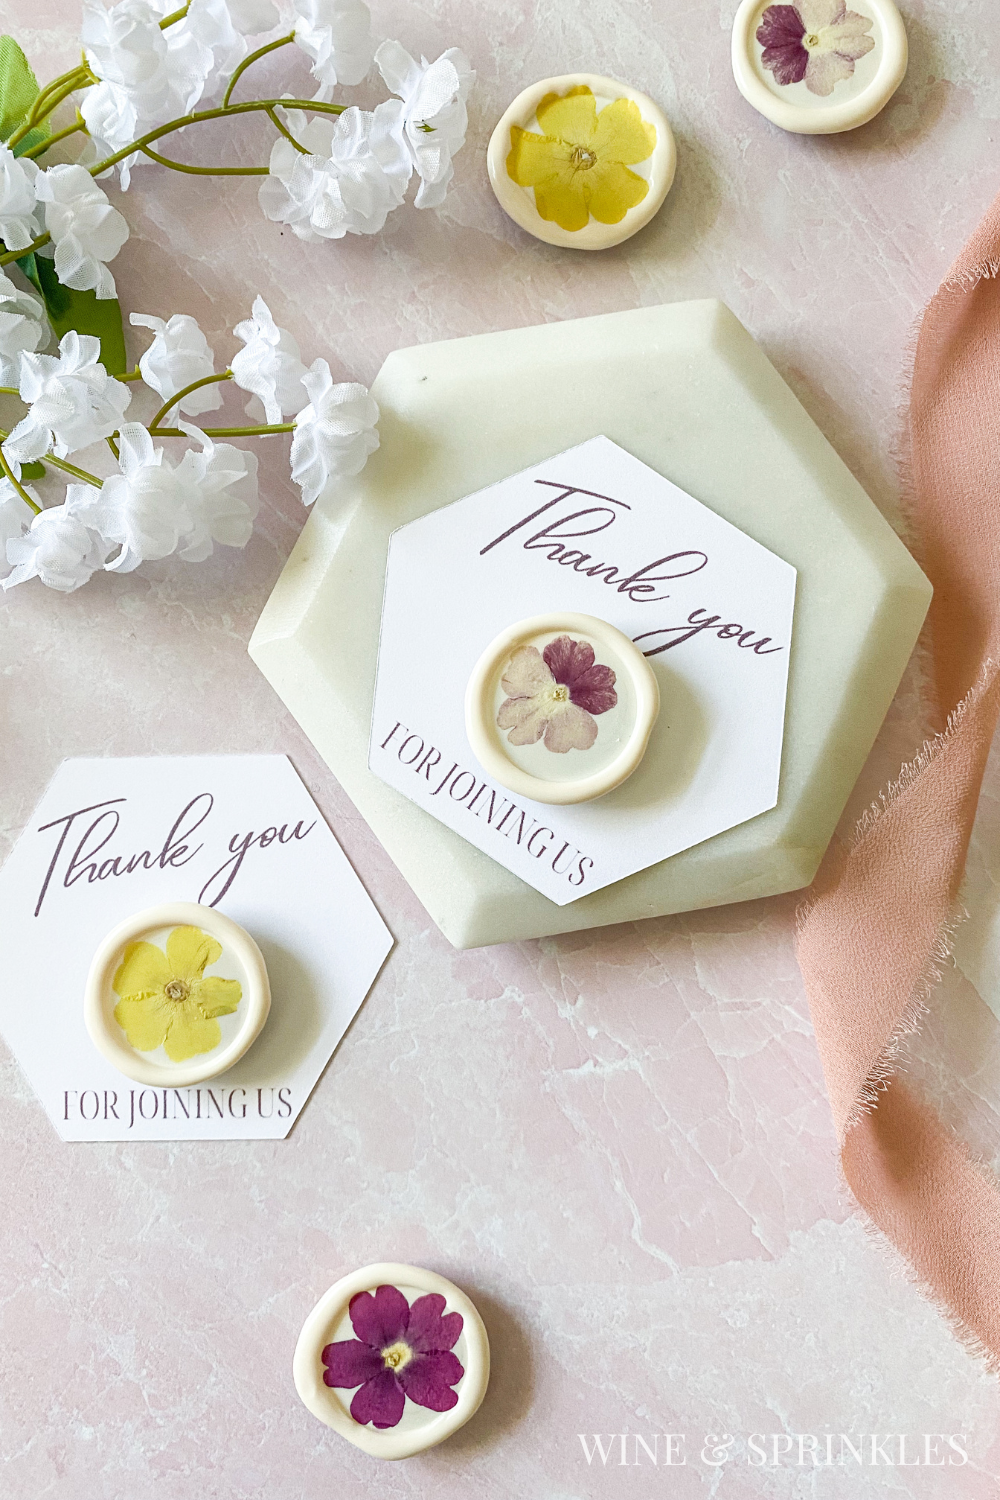
When I went down a rabbit hole of crafting any and all Wax Seal Projects I could think of, I actually thought of these magnets as a way to display some of my favorite Pressed Flower Seals in a way that they wouldn’t just be discarded with stationery, and when the idea struck I knew my party guests needed them too! While they got magnets made from my first sets of Simple Self Adhesive Seals, I loved the champagne and dusty rose honeybee seals as the magnets to give away for a Bridgerton style Vintage Victorian Cocktail Party. In fact, I loved these little beauties so much I made a whole set for my fridge to keep along with giving them away as favors!
For the wax I used to make these as well as my other Wax Seal Projects, there’s no shop I love more for the color palettes and quality sealing wax than my affiliate partner, Artisaire! A Canadian based shop specializing in all things wax seals, after I tried their sealing wax and stamps there was no going back! I absolutely love their waxes and stamps, but if you aren’t ready to dive into making your own, I love that you can buy premade seals in dozens of designs and even more colors; it makes this project even easier! You can read more about all the wonderful supplies I have received or purchased myself as well as the projects I’ve created with them here in my Artisaire Wax Stamps and Seals Review.


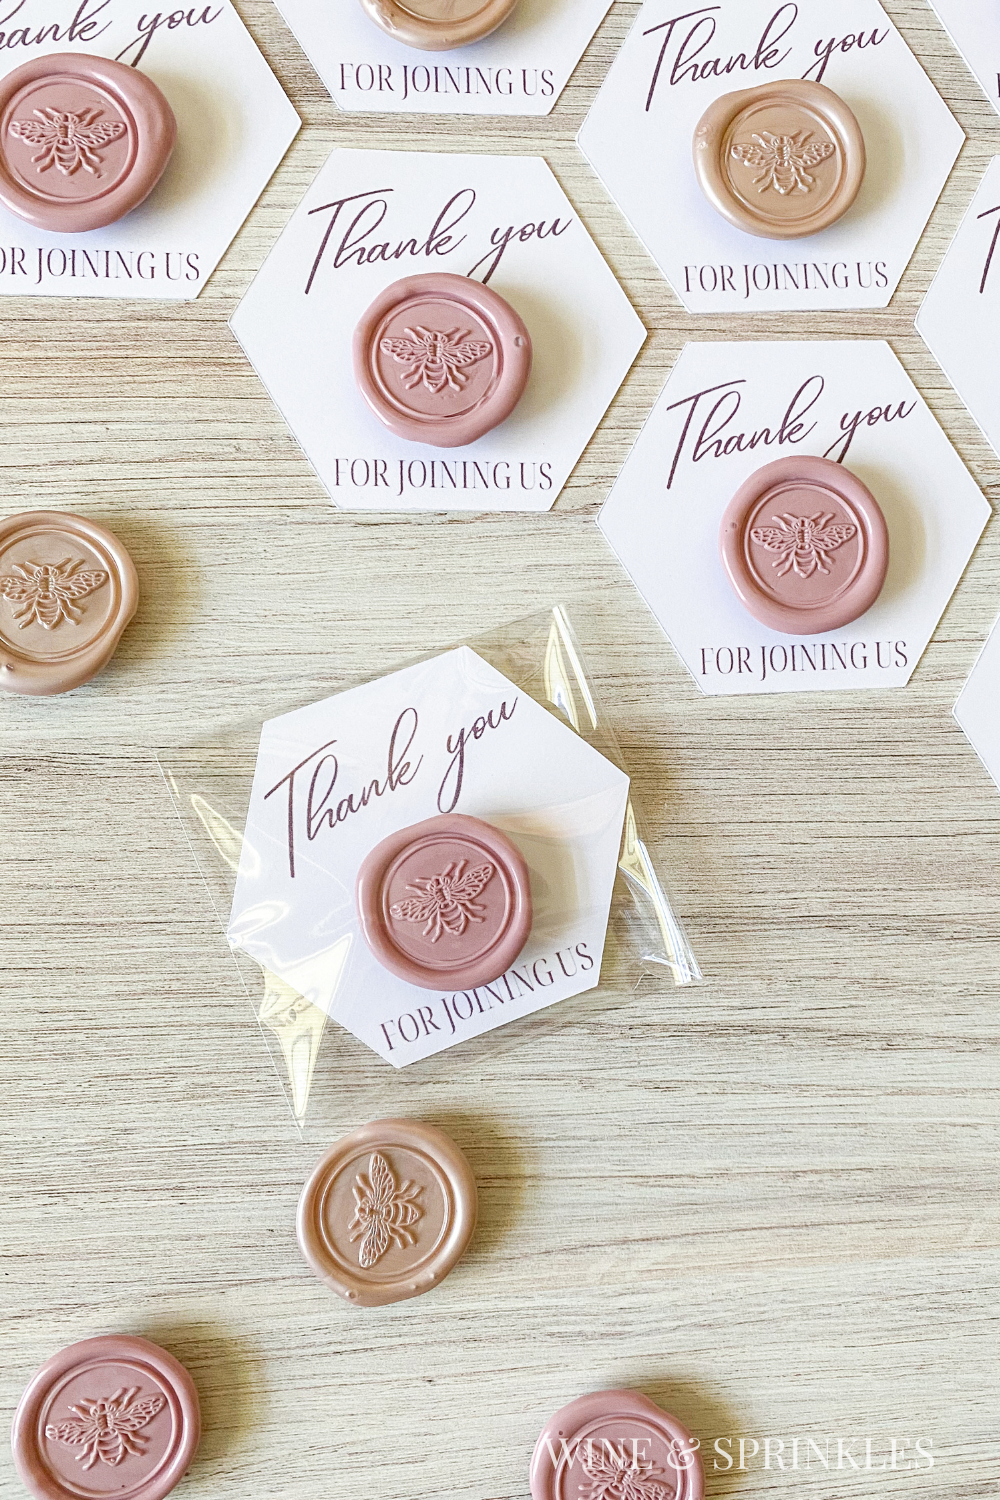
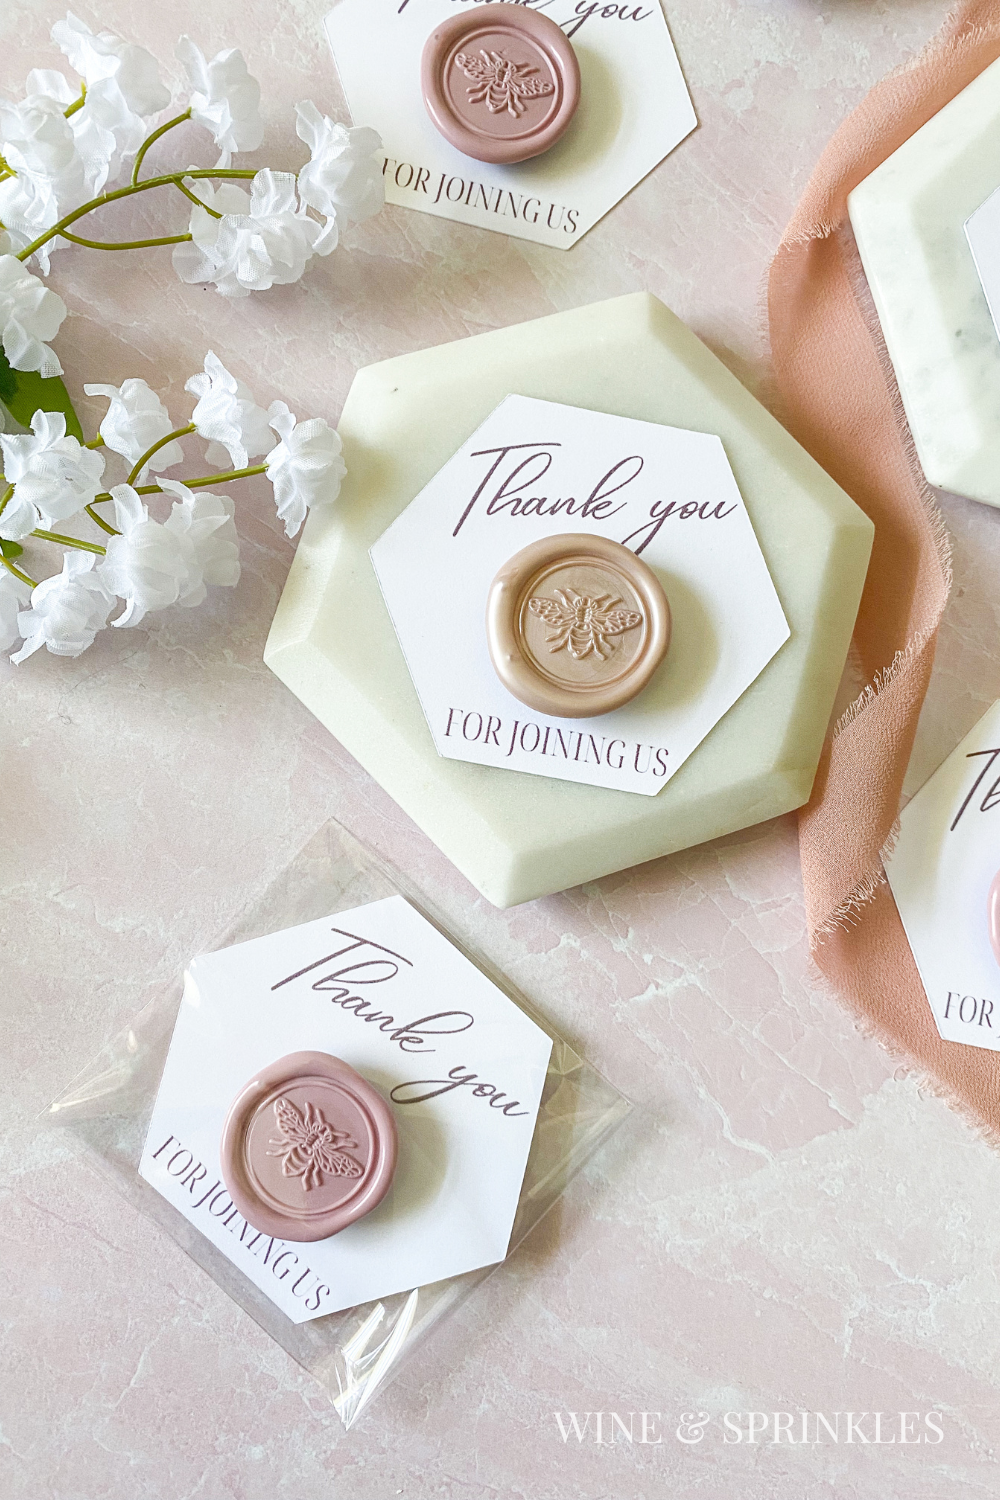
For displaying and packaging the magnets, I wanted a cute card that could not only show them off, but also keep all the magnets apart once they were attached to their seals so they weren’t hard to store until I could give them away. It was the perfect time to expand on the Hexagon Favor Tags and create some custom cards and to share them with all of you! I finished each card and magnet combo with my favorite Self Sealing Favor Bags and it was perfect for protecting the seals, keeping the magnets apart, and showing off each favor.
Whether you just make some for your friends or your own fridge, these bee-utiful favors are sure to impress your guests and are an easy way to start working with wax seals too! Below you can learn more about what I used and how I made my magnets, and I hope it inspires you to make a set all your own!

SUPPLIES
FAVOR SUPPLIES
Wax Seals: the first and most fun part of this favor is the wax seals you choose to turn into magnets! I made mine from the Simple Honeybee Seals I created in a mix of champagne and dusty rose wax, a perfect choice for my Vintage Victorian Party’s take home favor boxes. You can create your own wax seals, like I did, for your favors; but for an equally beautiful, more time efficient, and more affordable option is to buy premade wax seals instead! Artisaire, my online wax supplier and affiliate partner, offers a variety of these seals in a rainbow of colors and dozens of designs, making it easy to pick your favorite for this project!
Self Adhesive Round Magnets: the second and most necessary part of this favor is the way you’re sticking it to your fridge, the magnets! These magnets were the perfect size for my seals, being just slightly smaller so that the seal completely covered the magnet, with the strong adhesive keeping the two together securely. My magnets came with adhesive circles that I used, but if you buy pre-made seals they will come with an adhesive circle on them already so you won’t use the included ones.
FAVOR PACKAGING & LABEL SUPPLIES:
Removable Glue Dots: for sticking your magnets to your favor cards, which I also include as supplies in the tutorial where I show you how to make favor cards. You only need one for each card, so if you’ve made your favor cards with dots beforehand you don’t need more here!
Favor Cards: for sticking your magnets to for giving to your guests! I made these myself and the hexagon shape was perfect for my bee inspired seals! You can get the file and learn how to make these yourself from my post on how to make Hexagon Favor Tags and Cards Here!
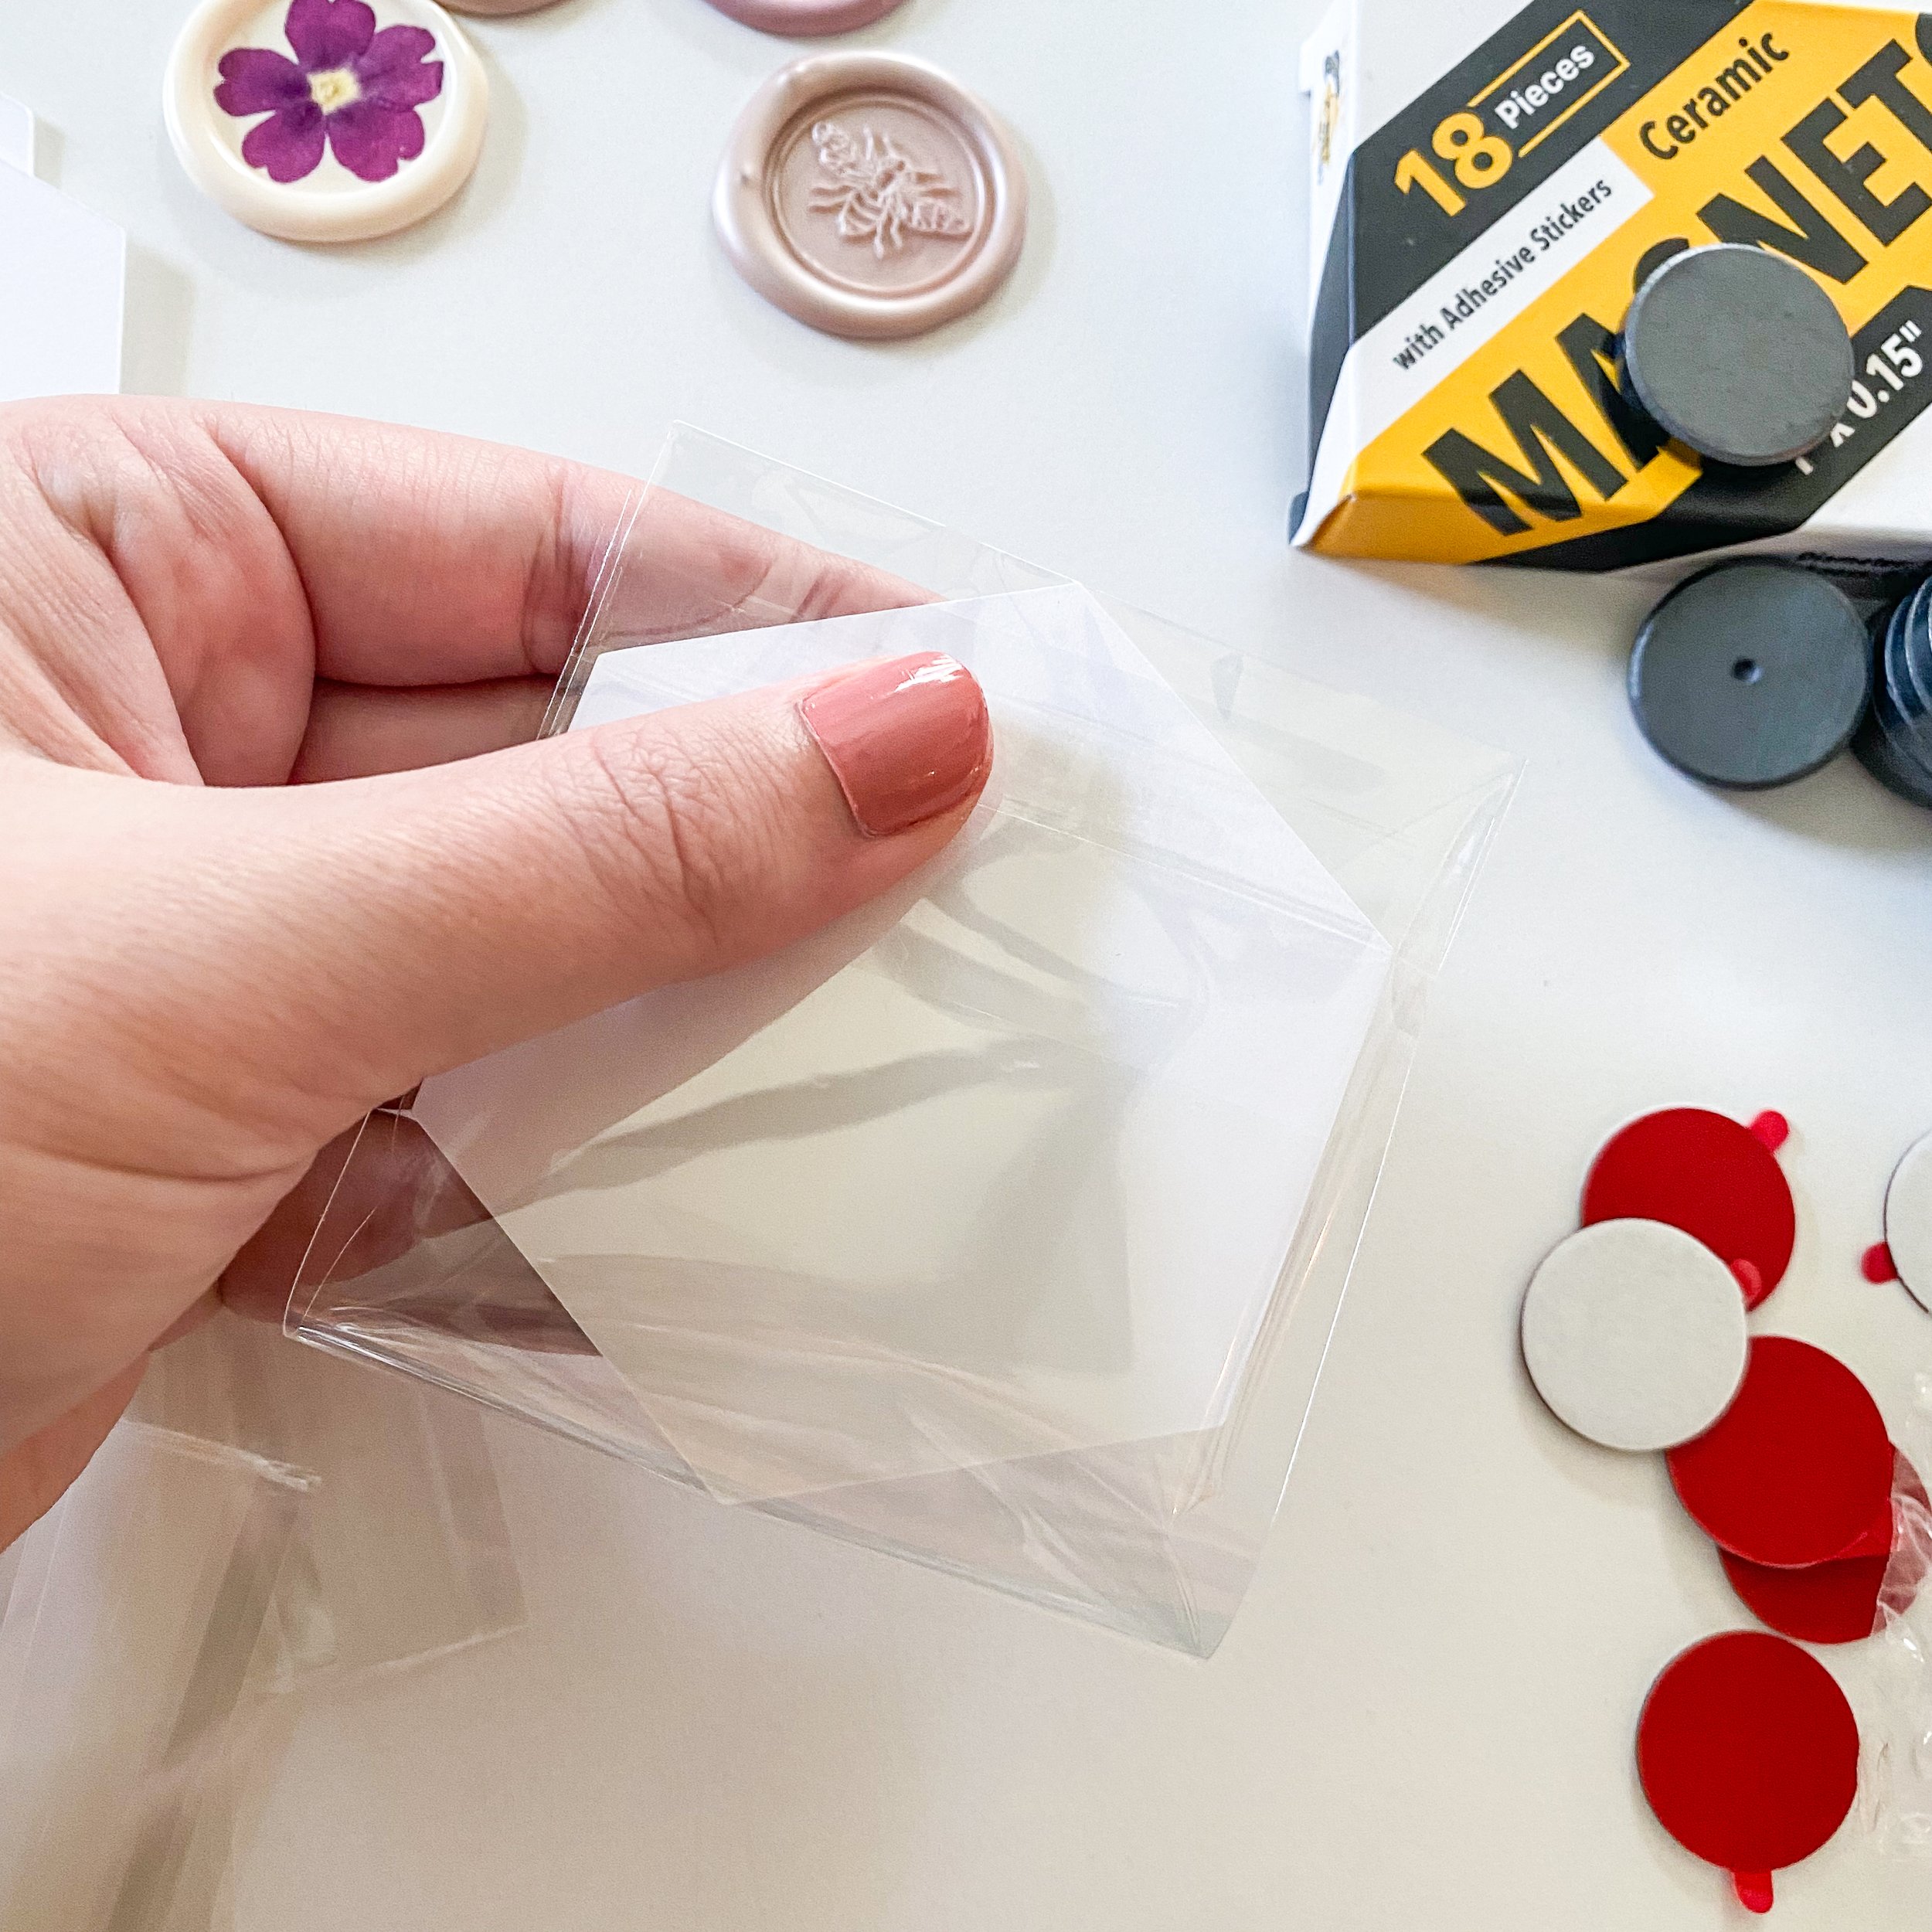
Self Sealing Cellophane Bags (optional): While it's optional to slide the assembled favors into bags, I love how perfectly the cards fit into my favorite self sealing size along with how professional they look all packed up! I’ve used these bags for all sorts of favors, from magnets like these to Christmas cookies and they always look beautiful and are so easy to seal.
SUPPLIES LIST:
[for 24 favors]
FAVOR SUPPLIES
Wax Seals x 24
Self Adhesive Round Magnets x 24
FAVOR PACKAGING & LABEL SUPPLIES
Favor Cards x 24
Removable Glue Dots x 24
Self Sealing Cellophane Bags x 24

DIRECTIONS
STEP 1: CREATE WAX SEAL MAGNETS

Take your magnet and make sure both sides are clean, then remove the side of the adhesive backing provided and press firmly to the magnet, leaving the side with the tab on the backing on the adhesive circle for easier removal.
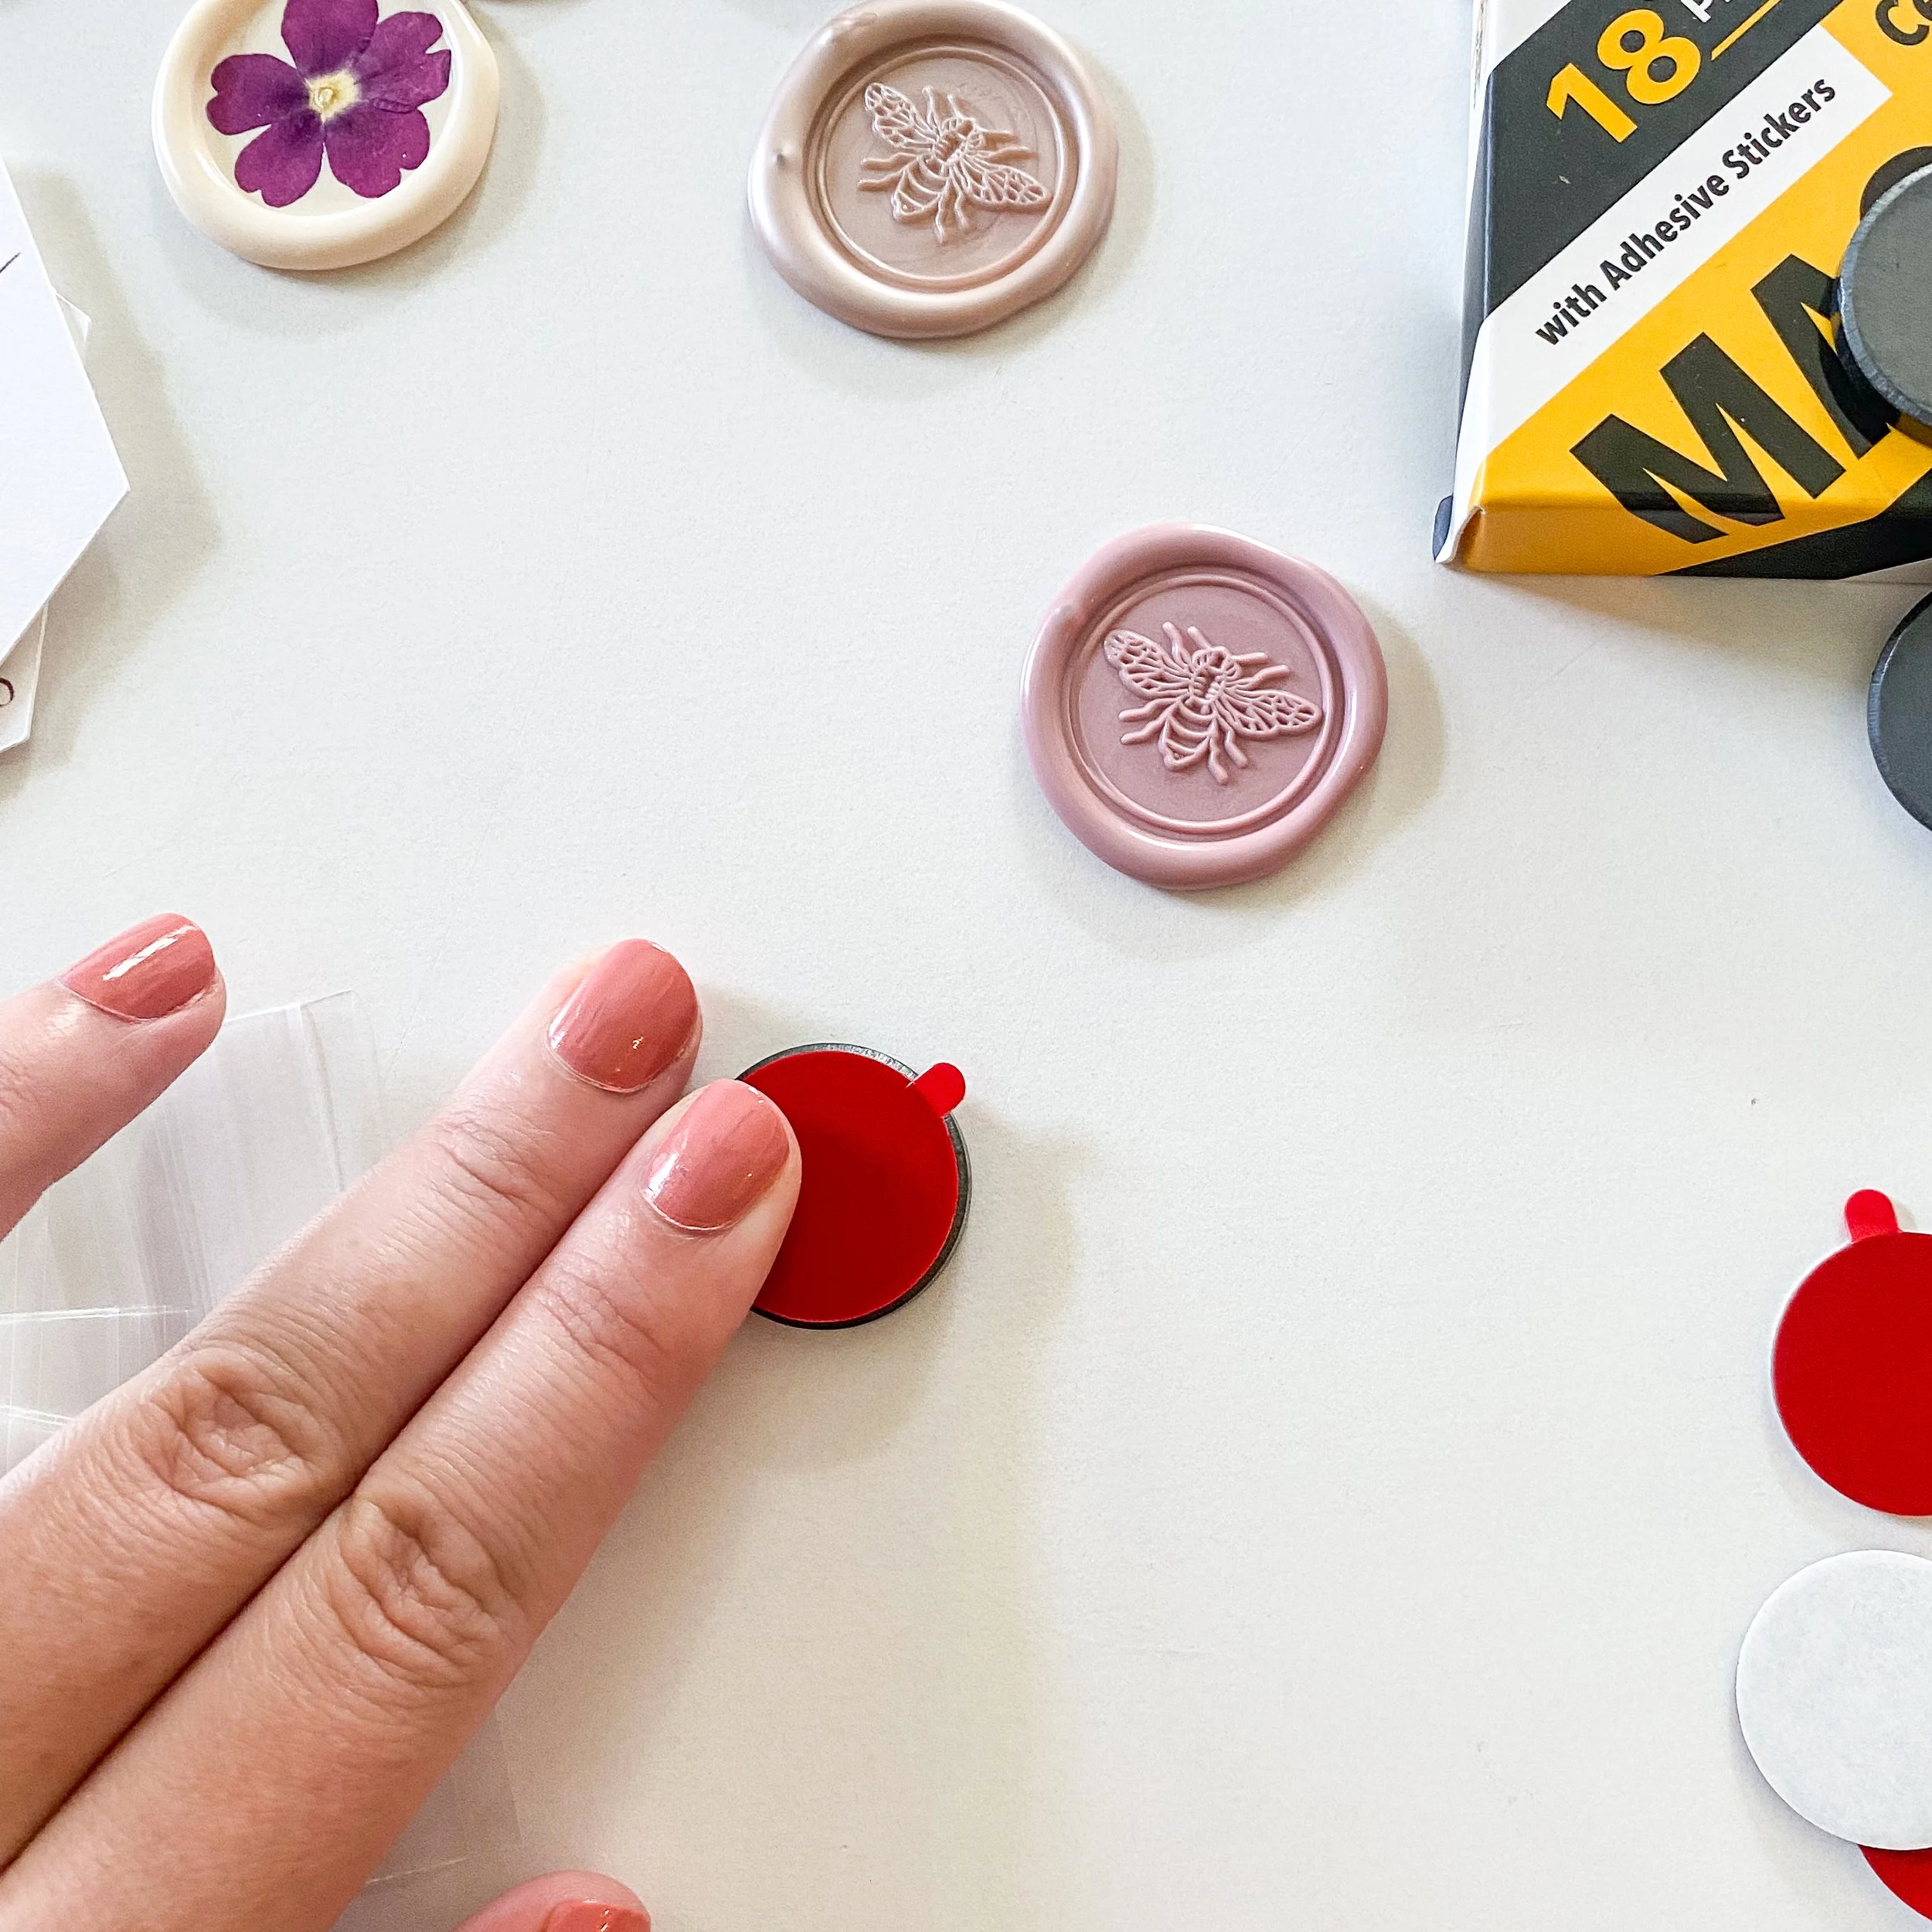


Once secure, remove the tabbed backing side of the adhesive circle then center it along the back of the wax seal and press the seal into the backing, holding for 5-10 seconds to secure it. Repeat with all the magnets you are creating.

STEP 2: PACKAGE YOUR FAVORS

Using the favor cards from the Cardstock Hexagon Favor Tags & Cards, start by placing a removable glue dot in the center of the back of the magnet, rubbing it through the clear backing to warm the adhesive and make the removal easier. If you made the cards first from the favor card tutorial, your glue dot will be on the card already, either works!


Remove the clear backing on the glue dot, then center the magnet over the circle on the card, pressing down to stick the magnet to the favor card.

You can give your favors with just the card, but if you want them packaged in dapper little cellophane bags, slide the cards into the cellophane bags, with the front of the card facing away from the top with the adhesive strip. Remove the backing on the adhesive strip, then fold behind the card and seal, so that the glue strip is on the backside of the card and the favor shows through the clear cellophane on top.


These magnet favors are so elegant and so easy to make, that they’re the perfect simple but unique favor for your guests to keep on their fridge for years to come! So pick out your own favorite wax seal and create your own custom magnets for your friends, family, and yourself!

SEE OUR RELATED POSTS HERE:


OUR PINS FOR THIS POST:

OUR MOST RECENT BLOG POSTS:


Calling all Aires, Pisces, and every sign in between! I think astrology is super fun, which any of my guests who attended my Zodiac Summer’s Eve Party can attest, and I love to make fun zodiac themed gifts for my favorite friends that love it too! For those who don’t have the time or astrological inspiration to make their gifts, this guide is for you!