This post contains affiliate links, meaning that if you click on a link I will recieve a small comission. This costs you nothing extra and I only promote products I use and love! You can read our full disclosure here

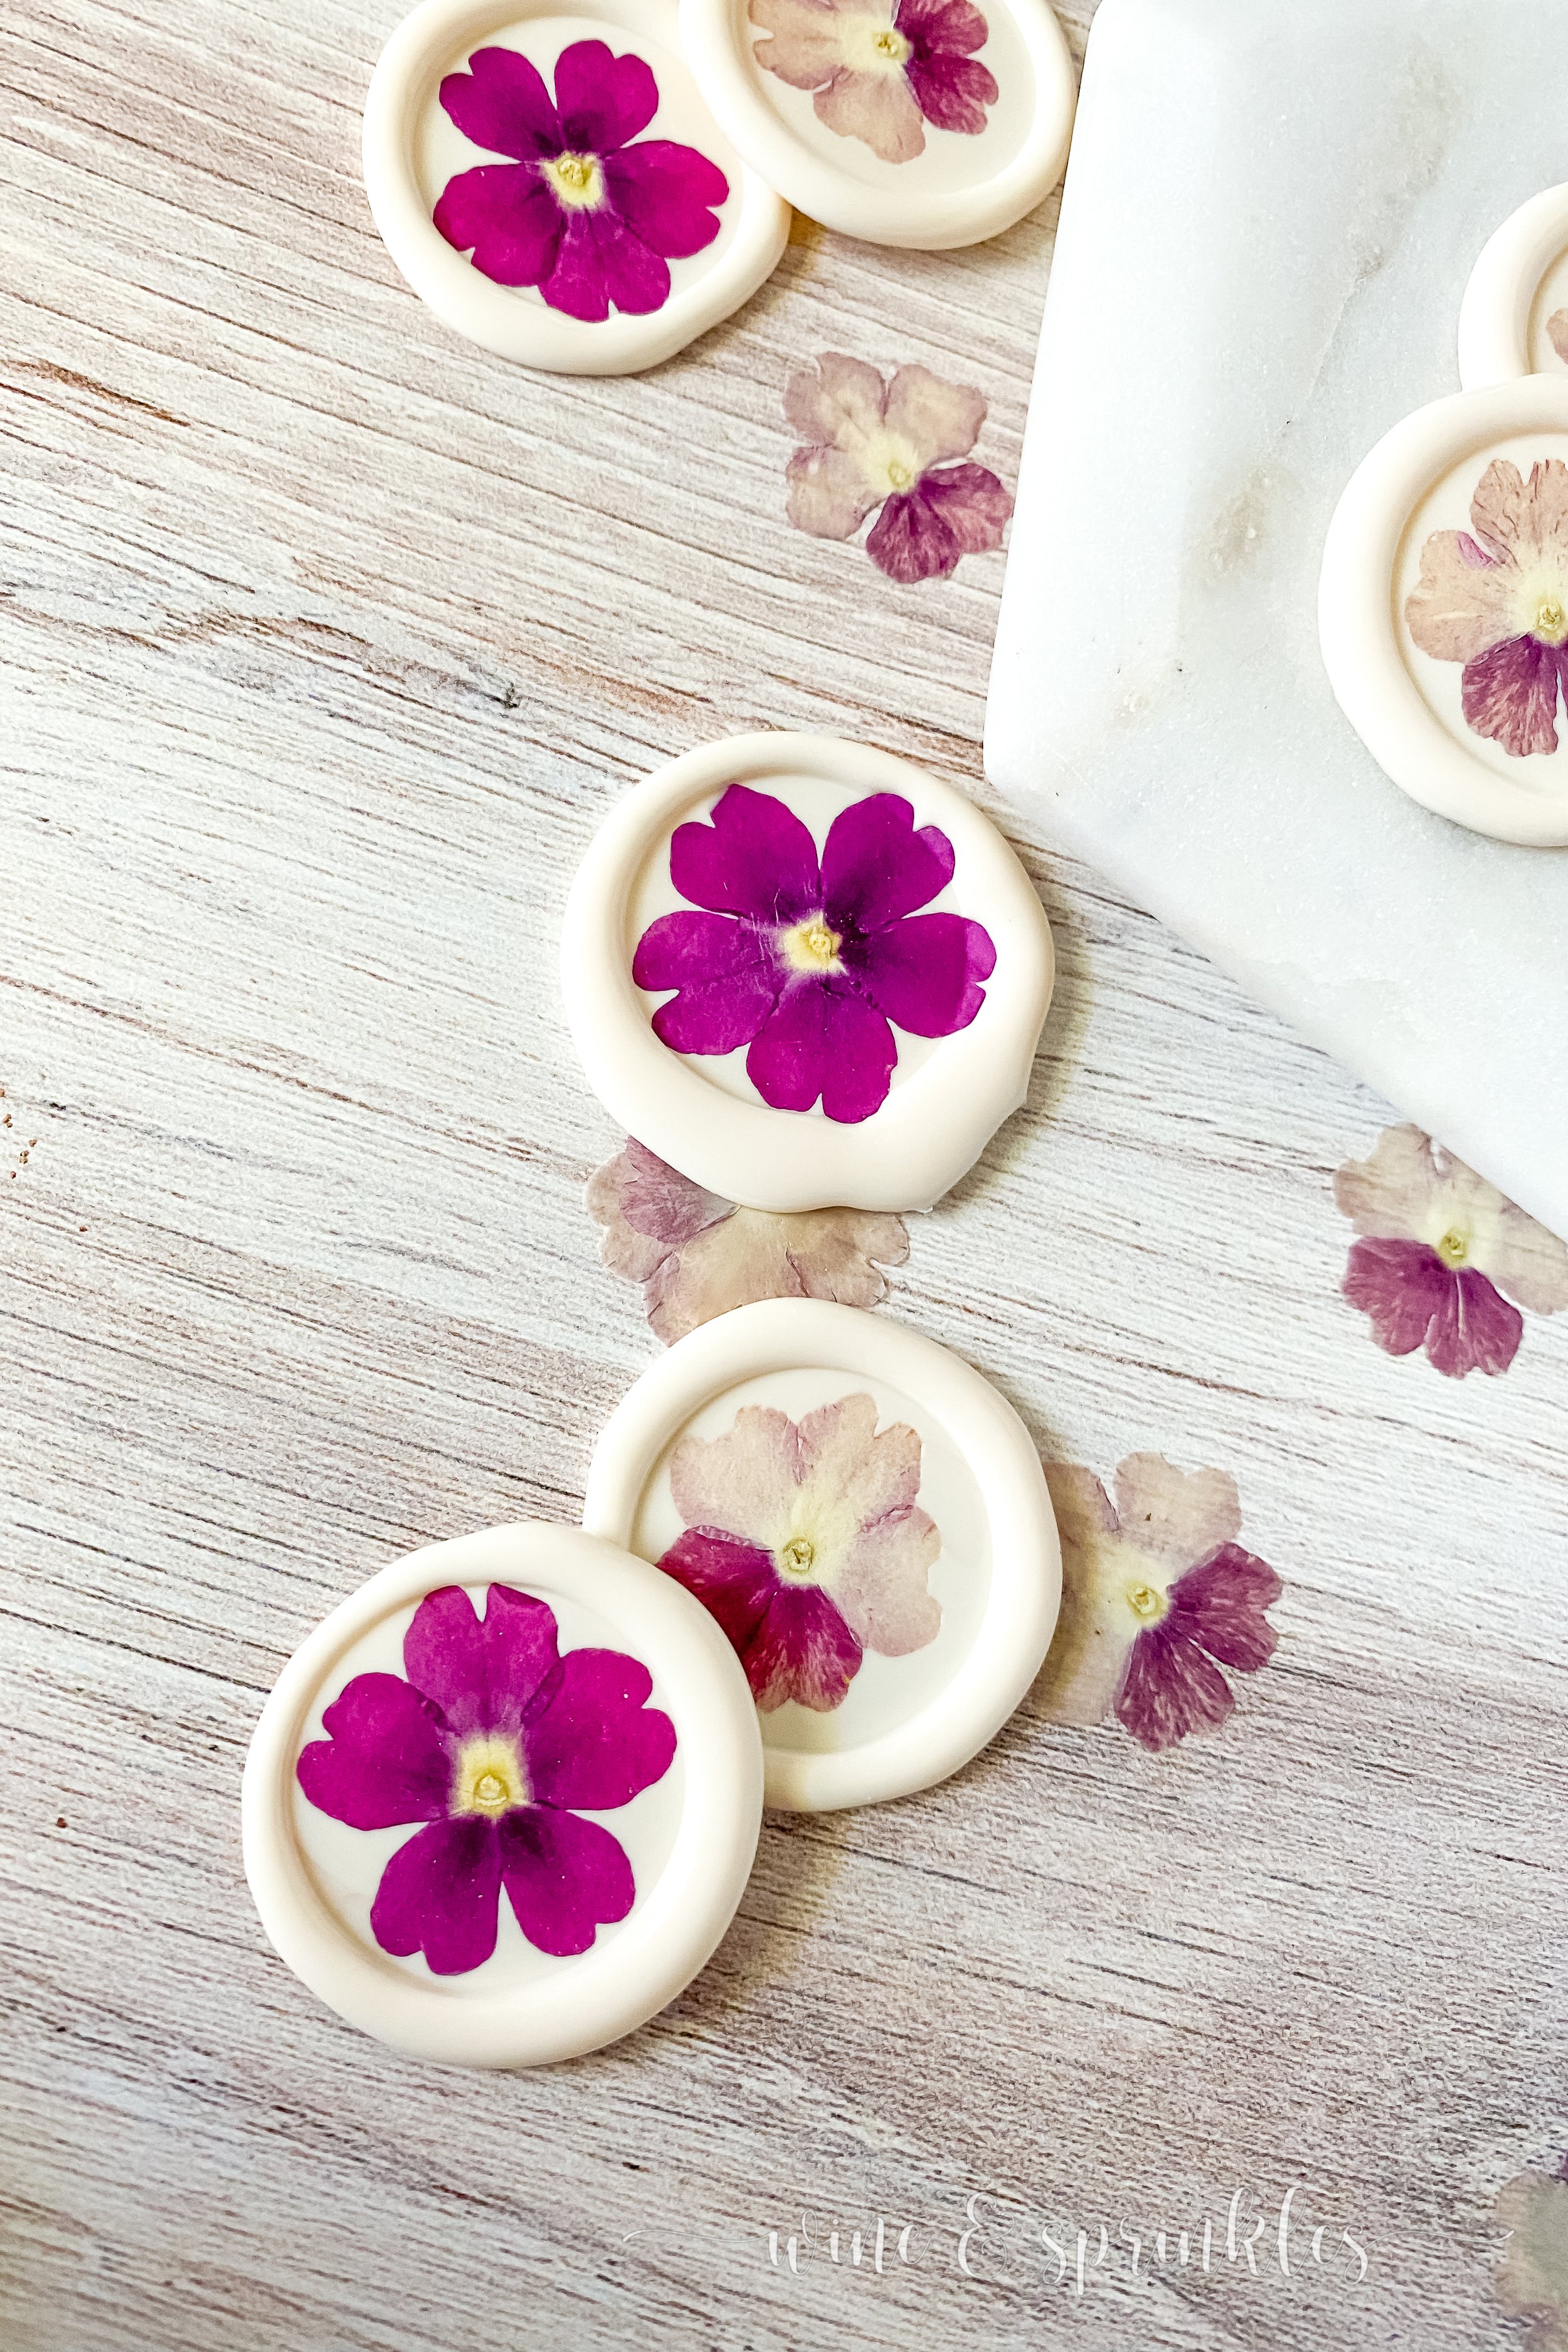
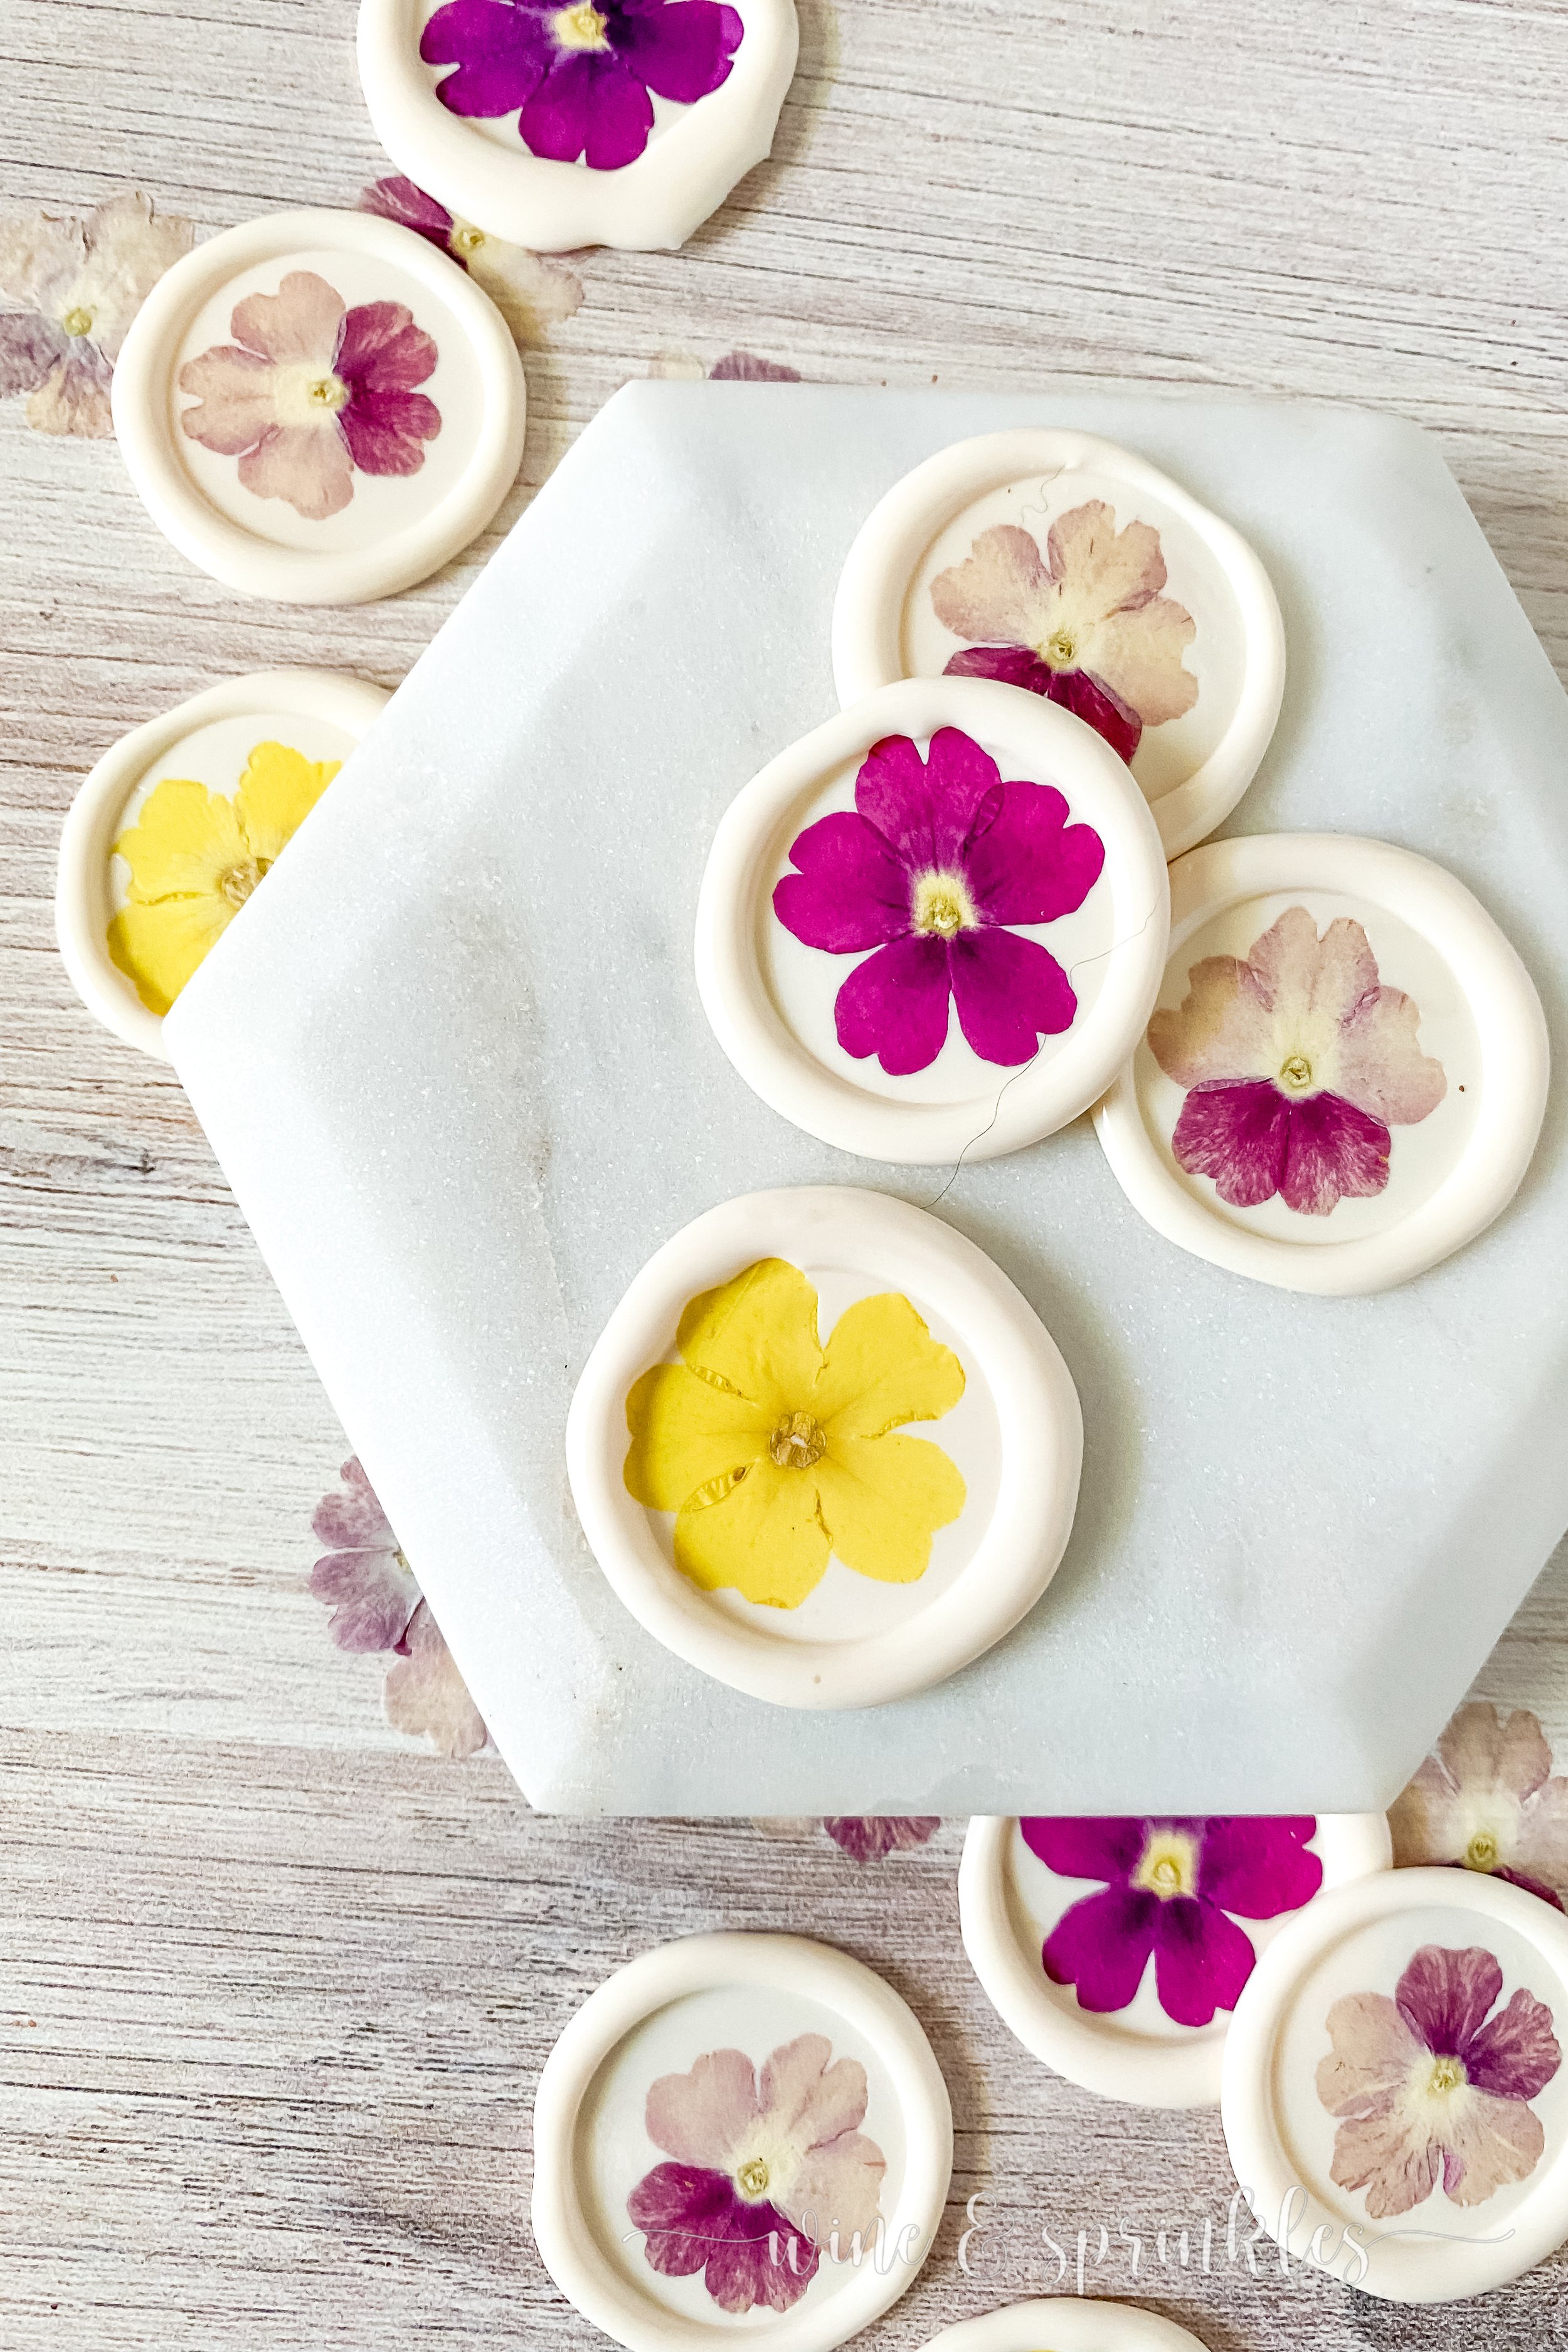
I love flowers in all forms and especially in making pretty petite details to adorn my crafting projects. So as I started my journey in wax seal making, I had to try to add a little floral flair to some stationary details too! So I gathered some of the smallest flowers in my collection and these Pressed Flower Self Adhesive Seals were born!
I’ve had this assortment of pressed flowers for a while now, using them to make Pressed Flower Resin Necklaces as well as Tie Clips and Cufflinks for gifts for my Goddess of Spring 30th Birthday; and was only too happy to find another use for them in making these beautiful wax stamps for some floral inspired stationary for my next event!
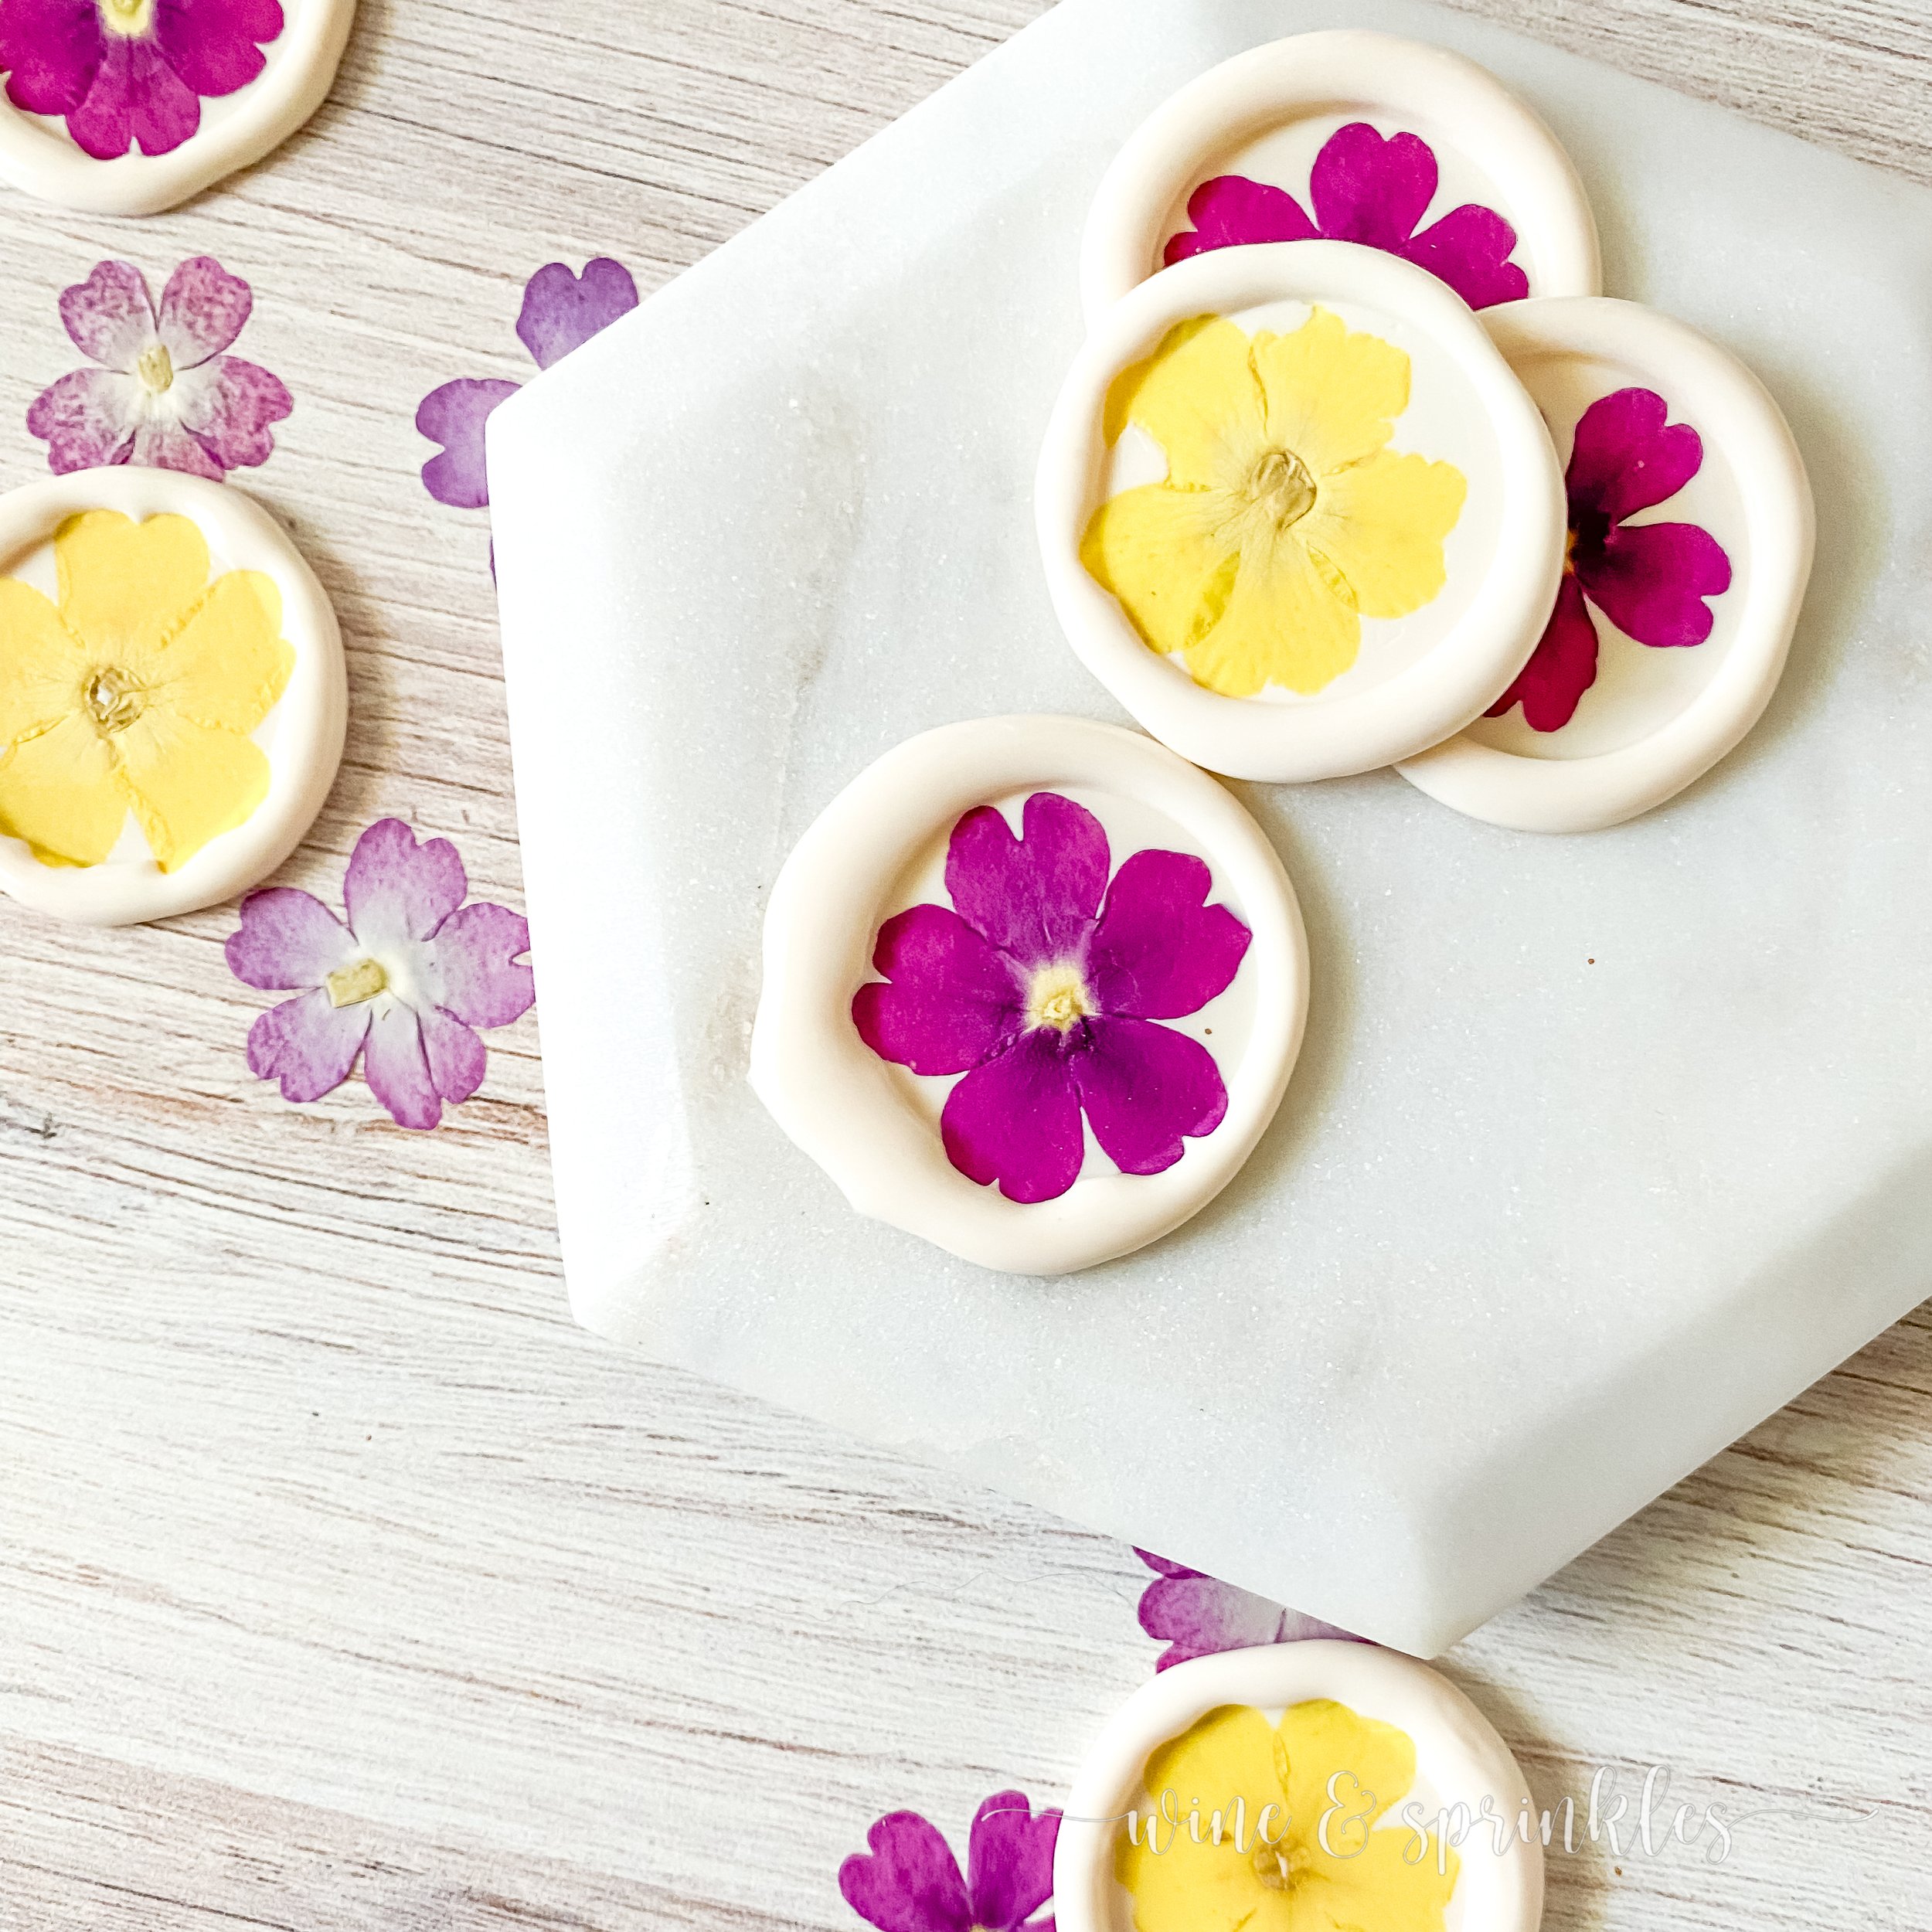

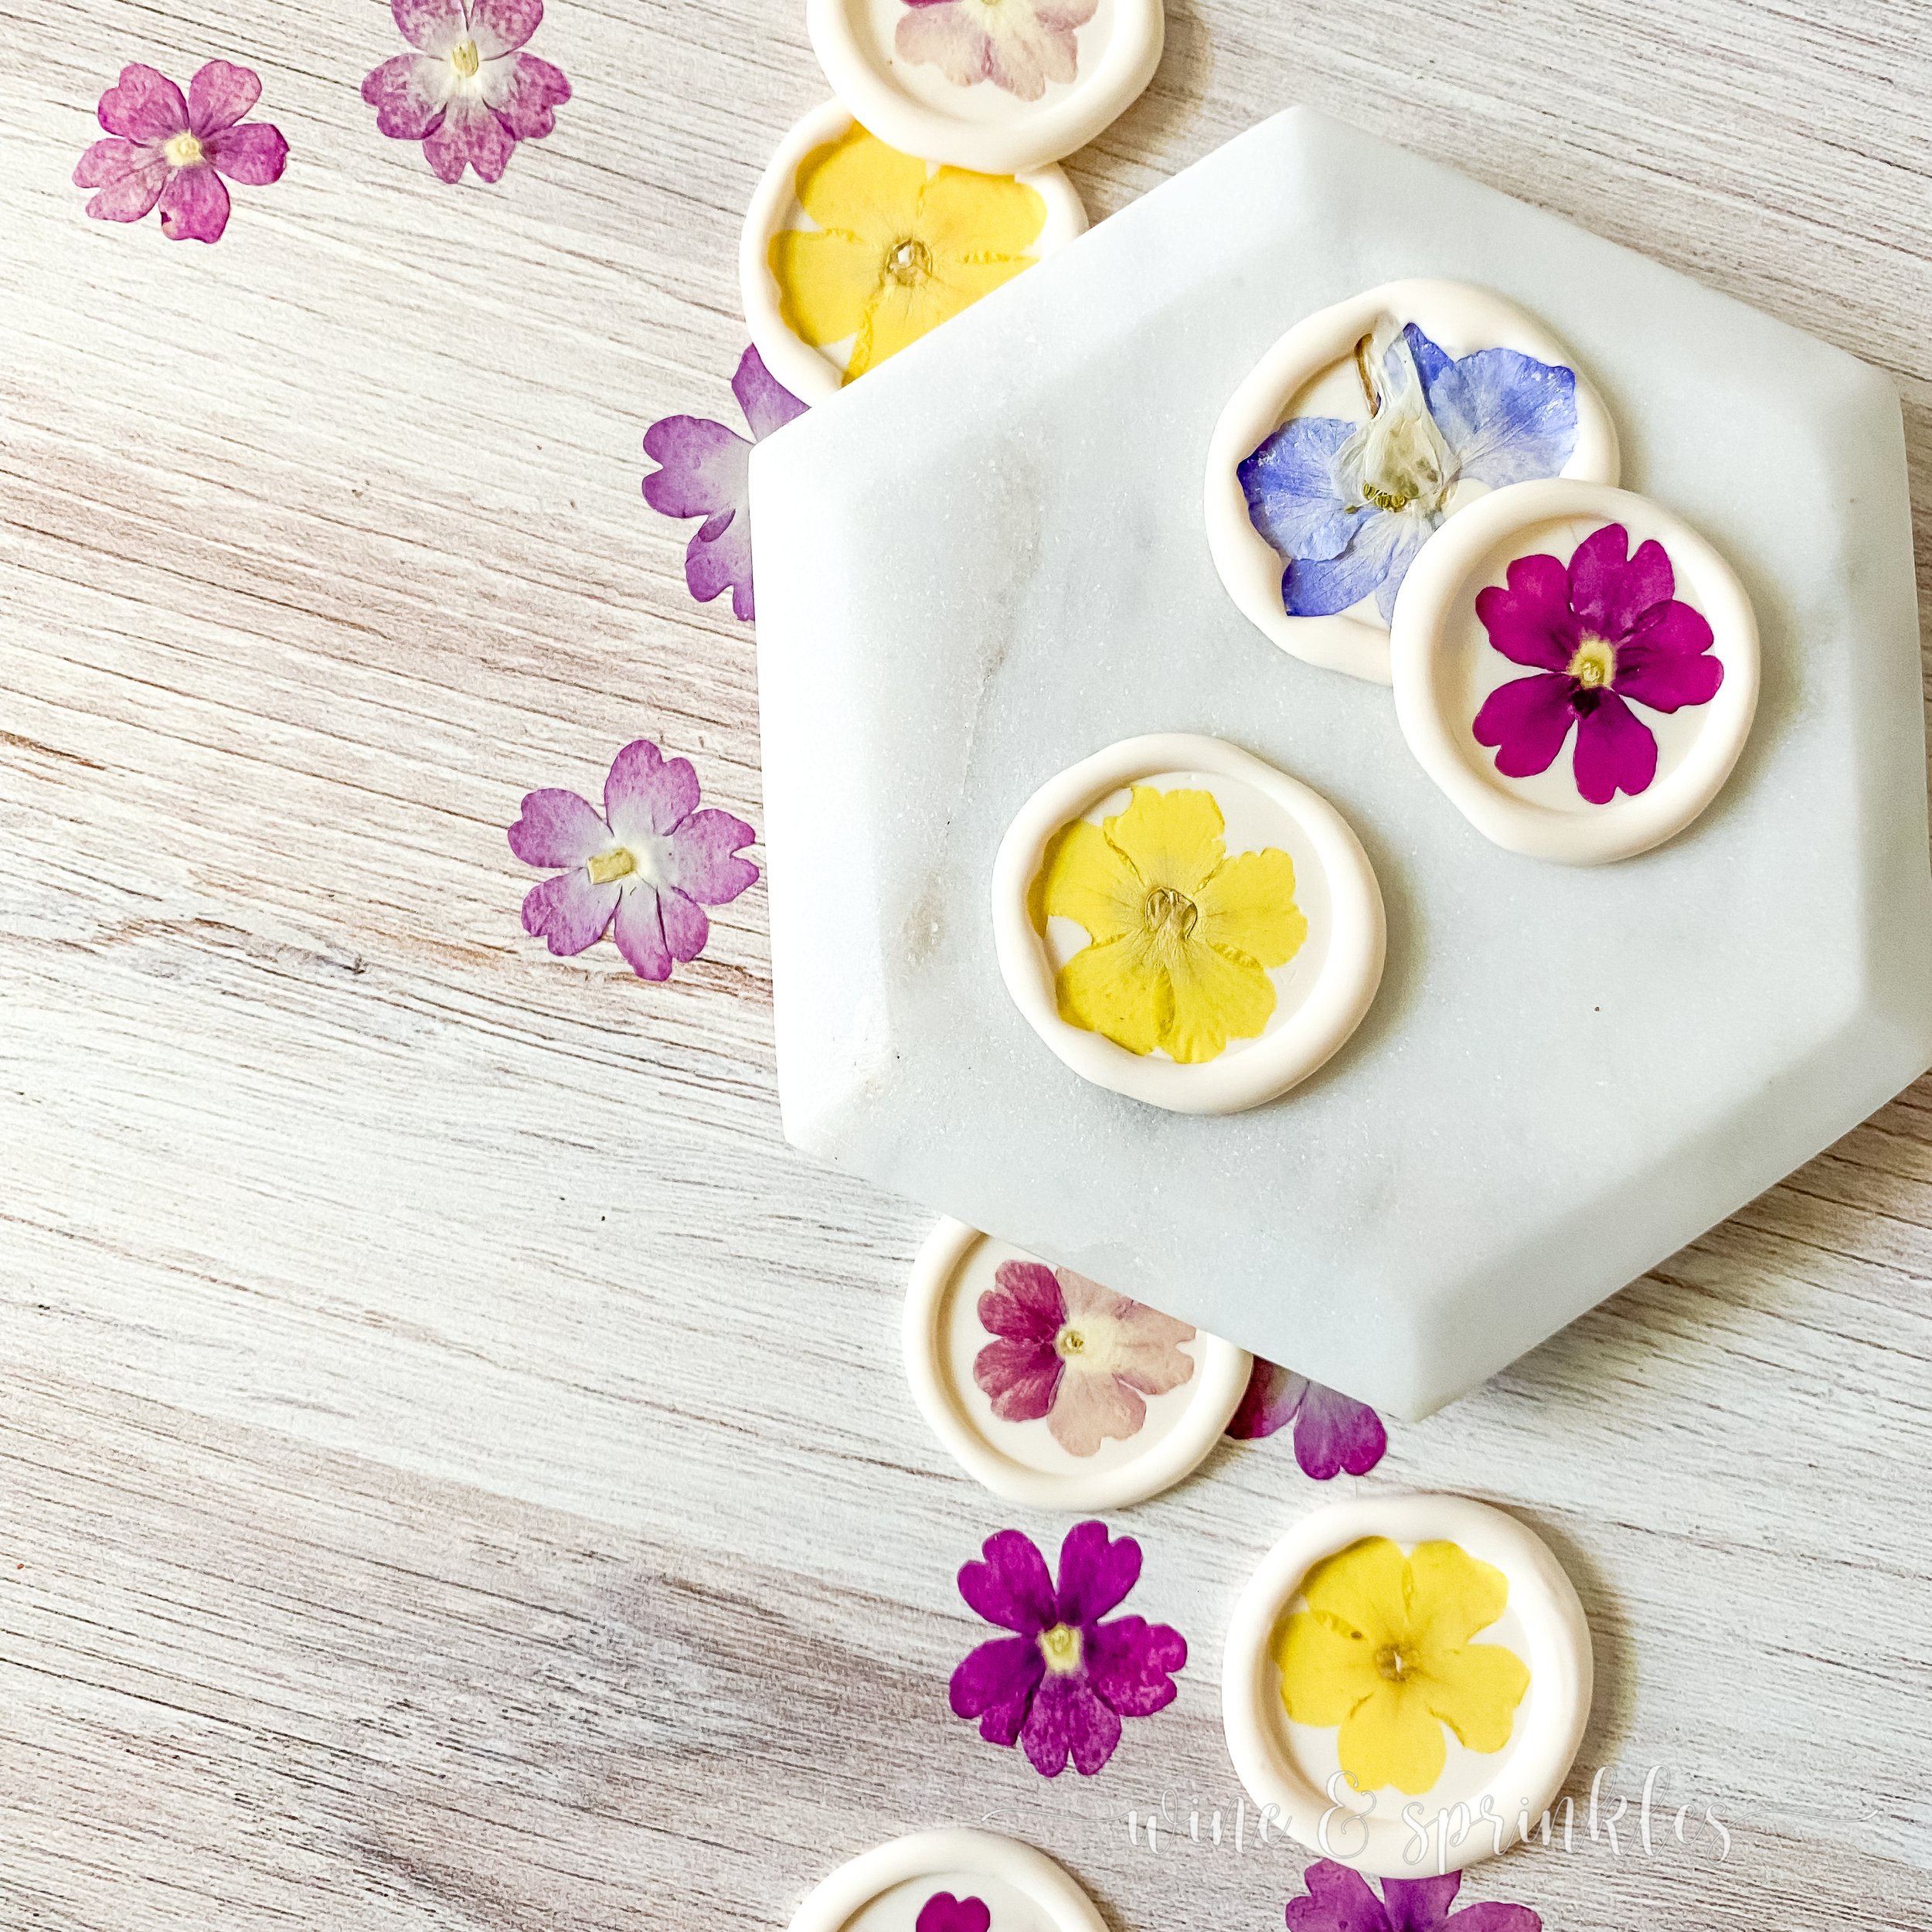
Similarly to one of the stamps I used for my Glitter Metallic Flake Seals, a simple blank stamp was perfect for pressing each stamp to show off the flowers without dealing with a stamp impression to crumple them, and I found I loved them all that way! Regardless of the stamps I choose, Artisaire is always my go to for my sealing wax not only for their gorgeous modern color palettes, but for how easily and beautifully their wax melts for my seal projects! I wanted these pretty pressed petals and all their beautiful colors to be shown off, and the warm white Buttercream Sealing Wax was the perfect choice! To learn more about the different kinds of wax seals you can create yourself and all the products of theirs I have used so far, check out my review of Artisaire here!
You’ll be seeing these and my other Wax Seal Projects in all sorts of different styles of stationary for my future parties, and they are so simple and beautiful I highly recommend them as an easy beginner wax seal project for some beautiful blooming seals of your own!

SUPPLIES
WAX STAMP & SEALING SUPPLIES
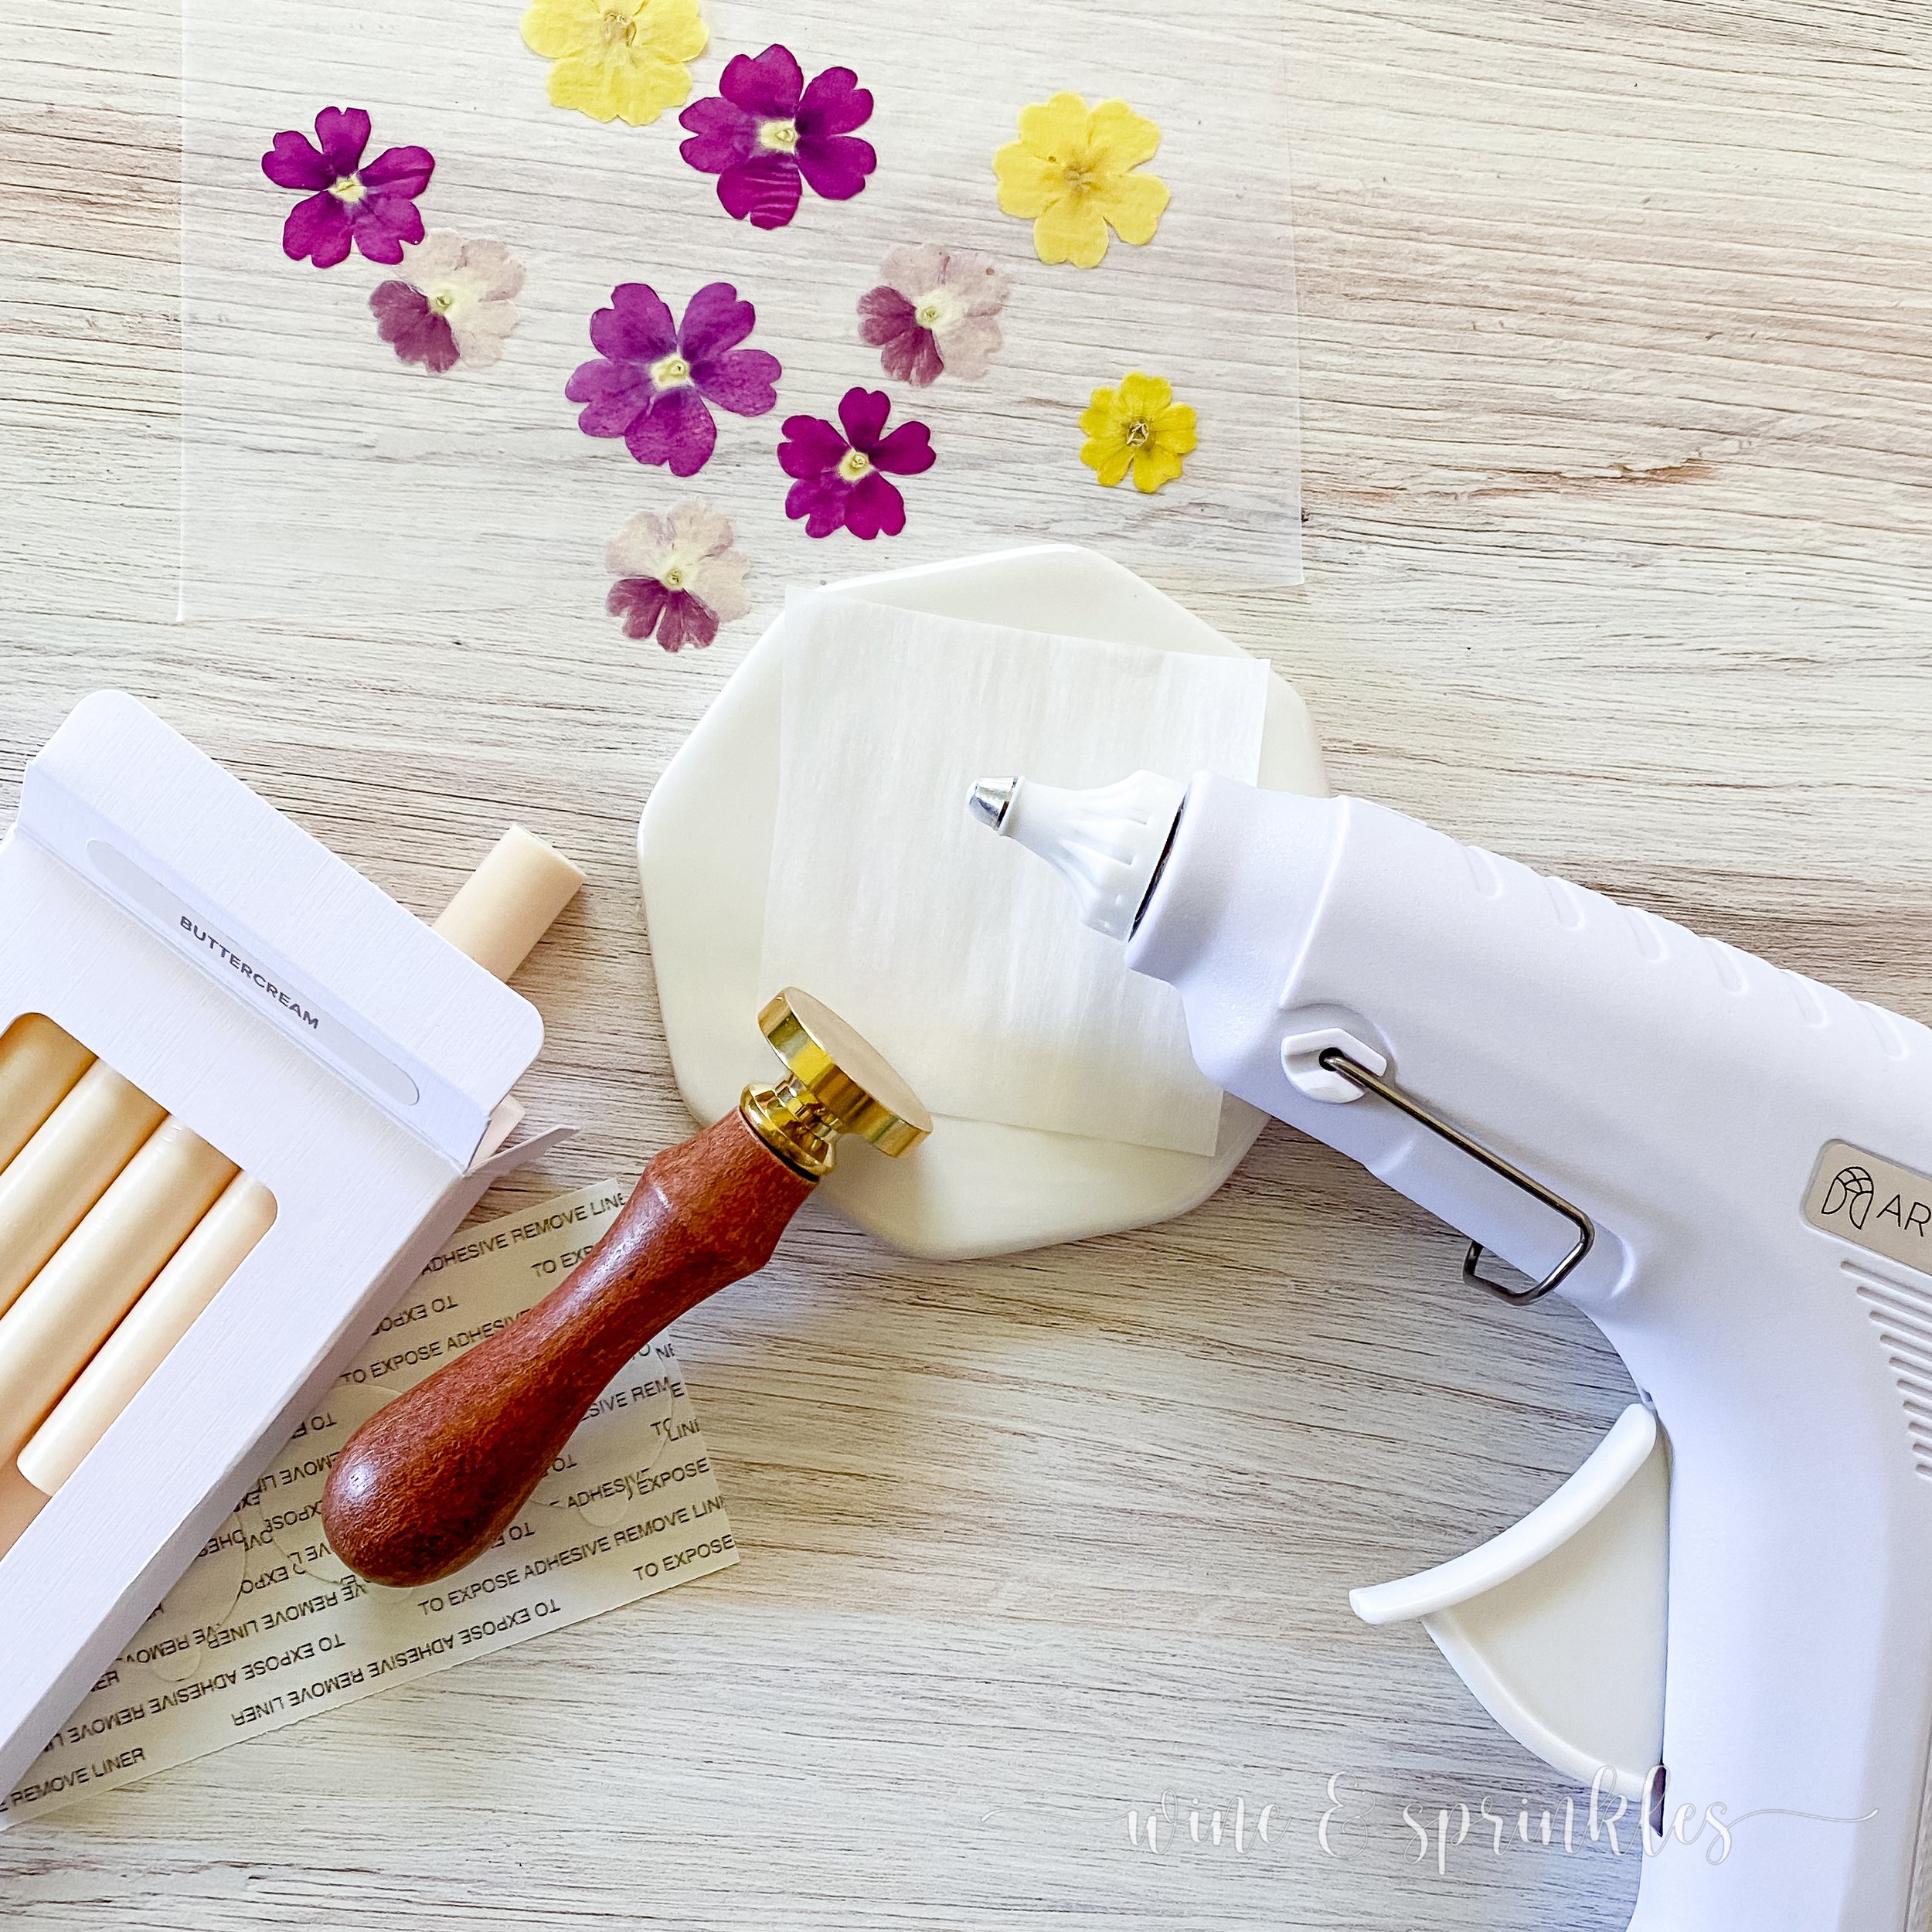
Blank Wax Stamp & Handle: While my other Wax Stamp Projects are all about beautiful stamp designs, for these floral seals I went with only a blank round stamp and the result was exactly what I wanted! My petite blooms were perfectly pressed into smooth seals, with no other adornment needed!
Sealing Wax Sticks: wax sealing sticks are so easy to use and make such consistent, beautiful stamps, they are my method in making most of my Wax Stamp Projects. For these seals, I wanted a light background so the flowers weren’t competing for attention with the wax, so this warm white Buttercream hue was the perfect choice!
Pressed Flowers: the star of these seals are their beautiful pressed flowers! While you can certainly press your own, I love the little Etsy Shop, My Love Meadow, for procuring my pretty petals! They have a beautiful assortment of dried pressed flowers that rotate based on availability. The most important thing to note is that the flowers you pick are smaller than the size of your seal, in my case 1”.
TOOLS & OTHER SUPPLIES
Low Temperature Glue Gun: For melting your wax seal sticks and dispensing the wax, a low temperature glue gun is a must. I got mine from Artisaire and I absolutely love it, firstly because it does a great job of uniformly melting the wax but also because it doesn’t drip hot wax everywhere when it's idle between stampings, which is more than I can say for my glue guns and glue sticks I’ve use in other projects!
Ceramic Wax Melting Pad: these nifty little pads create a flat workspace that cools down quickly for you to dispense your hot wax onto to create your seals.
Parchment Paper: for putting on your melting pad so that you can easily remove your cooled seals.
Double Sided Self Adhesive Backings: for adhering to the back of your cooled wax seals so you can stick them to stationary, gift tags, or anything you like!
SUPPLIES LIST:
[for 40 wax seals]
WAX STAMP & SEALING SUPPLIES
Wax Stamp & Handle x 1
Sealing Wax Sticks x 6
Pressed Flowers x 40
TOOLS & OTHER SUPPLIES
Low Temperature Glue Gun x 1
Ceramic Wax Melting Pad
Parchment Paper
Double Sided Self Adhesive Backings x 40
DIRECTIONS
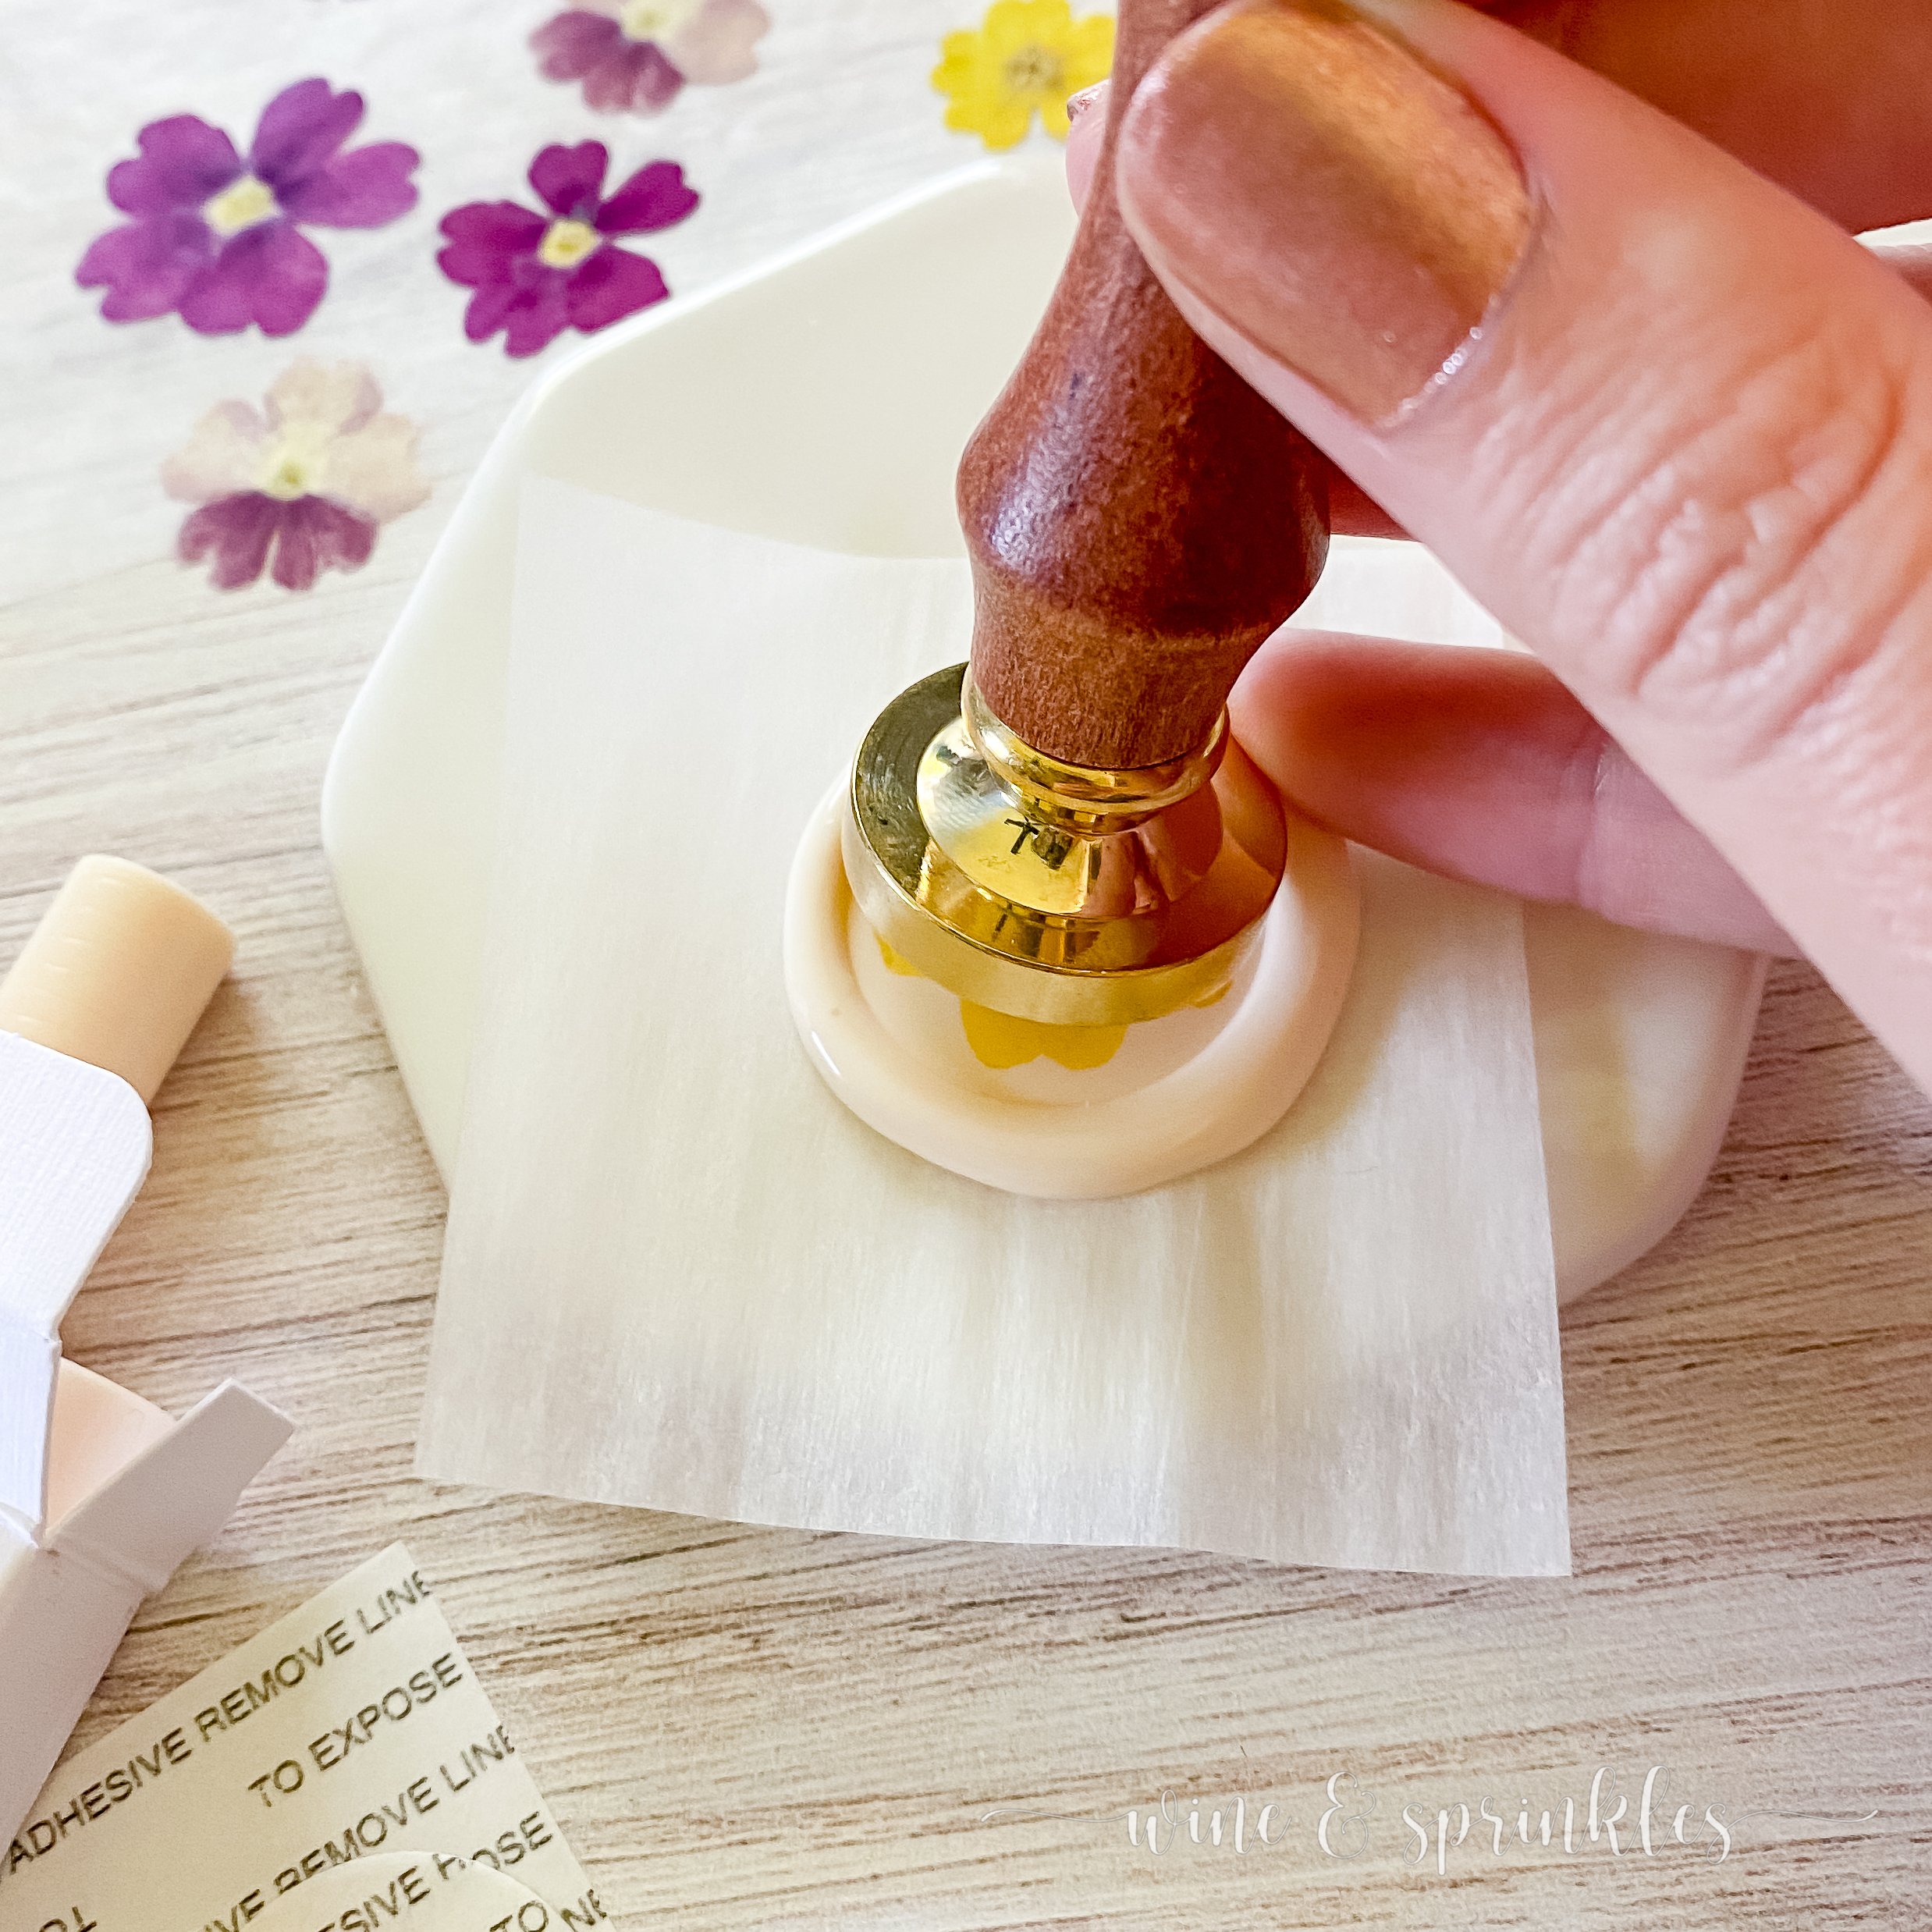
1. Plug in and heat up your wax stick in your low temperature glue gun for 7-10 minutes. While your gun is heating up, cut your parchment paper into small squares to place on your ceramic cooling pad and pick out the wax stamps you want to use. Place a piece of parchment paper on your cooling pad, then you’re ready to start making seals.


2. Dispense hot liquid wax onto the parchment paper on your cooling pad, creating a circular puddle of hot wax. I used about 2 ½ triggerfuls of the glue gun I had, which gave exactly the seals I wanted. Top your hot wax puddle with the pressed flower of your choice, centering it in the middle of the wax.


3. Press your stamp firmly and evenly into the wax, cover as much of the flower as possible. Leave for 15-30 seconds until wax is set, then carefully peel the stamp off of the seal, leaving the pressed flower flattened into the wax.


4. Peel the wax seal off of the parchment paper, then turn over and stick an adhesive circle to the back, leaving one side of the sticker on its backing so that they can be used to peel and stick later. Repeat this process for as many wax seals as you need and you are done!


These seals are so pretty and easy to make, you can easily create them in any color scheme or floral style you love to perfectly personalize them for your own projects. I can’t wait to include them in all sorts of springtime floral stationary and pretty paperie projects; but I’m sure I’ll be saving my extras for floral touches to my future mother’s day cards and any other unique projects I can think of!
SEE OUR RELATED POSTS HERE:
OUR PINS FOR THIS POST:

OUR MOST RECENT BLOG POSTS:


