This post contains affiliate links, meaning that if you click on a link I will recieve a small comission. This costs you nothing extra and I only promote products I use and love! You can read our full disclosure here
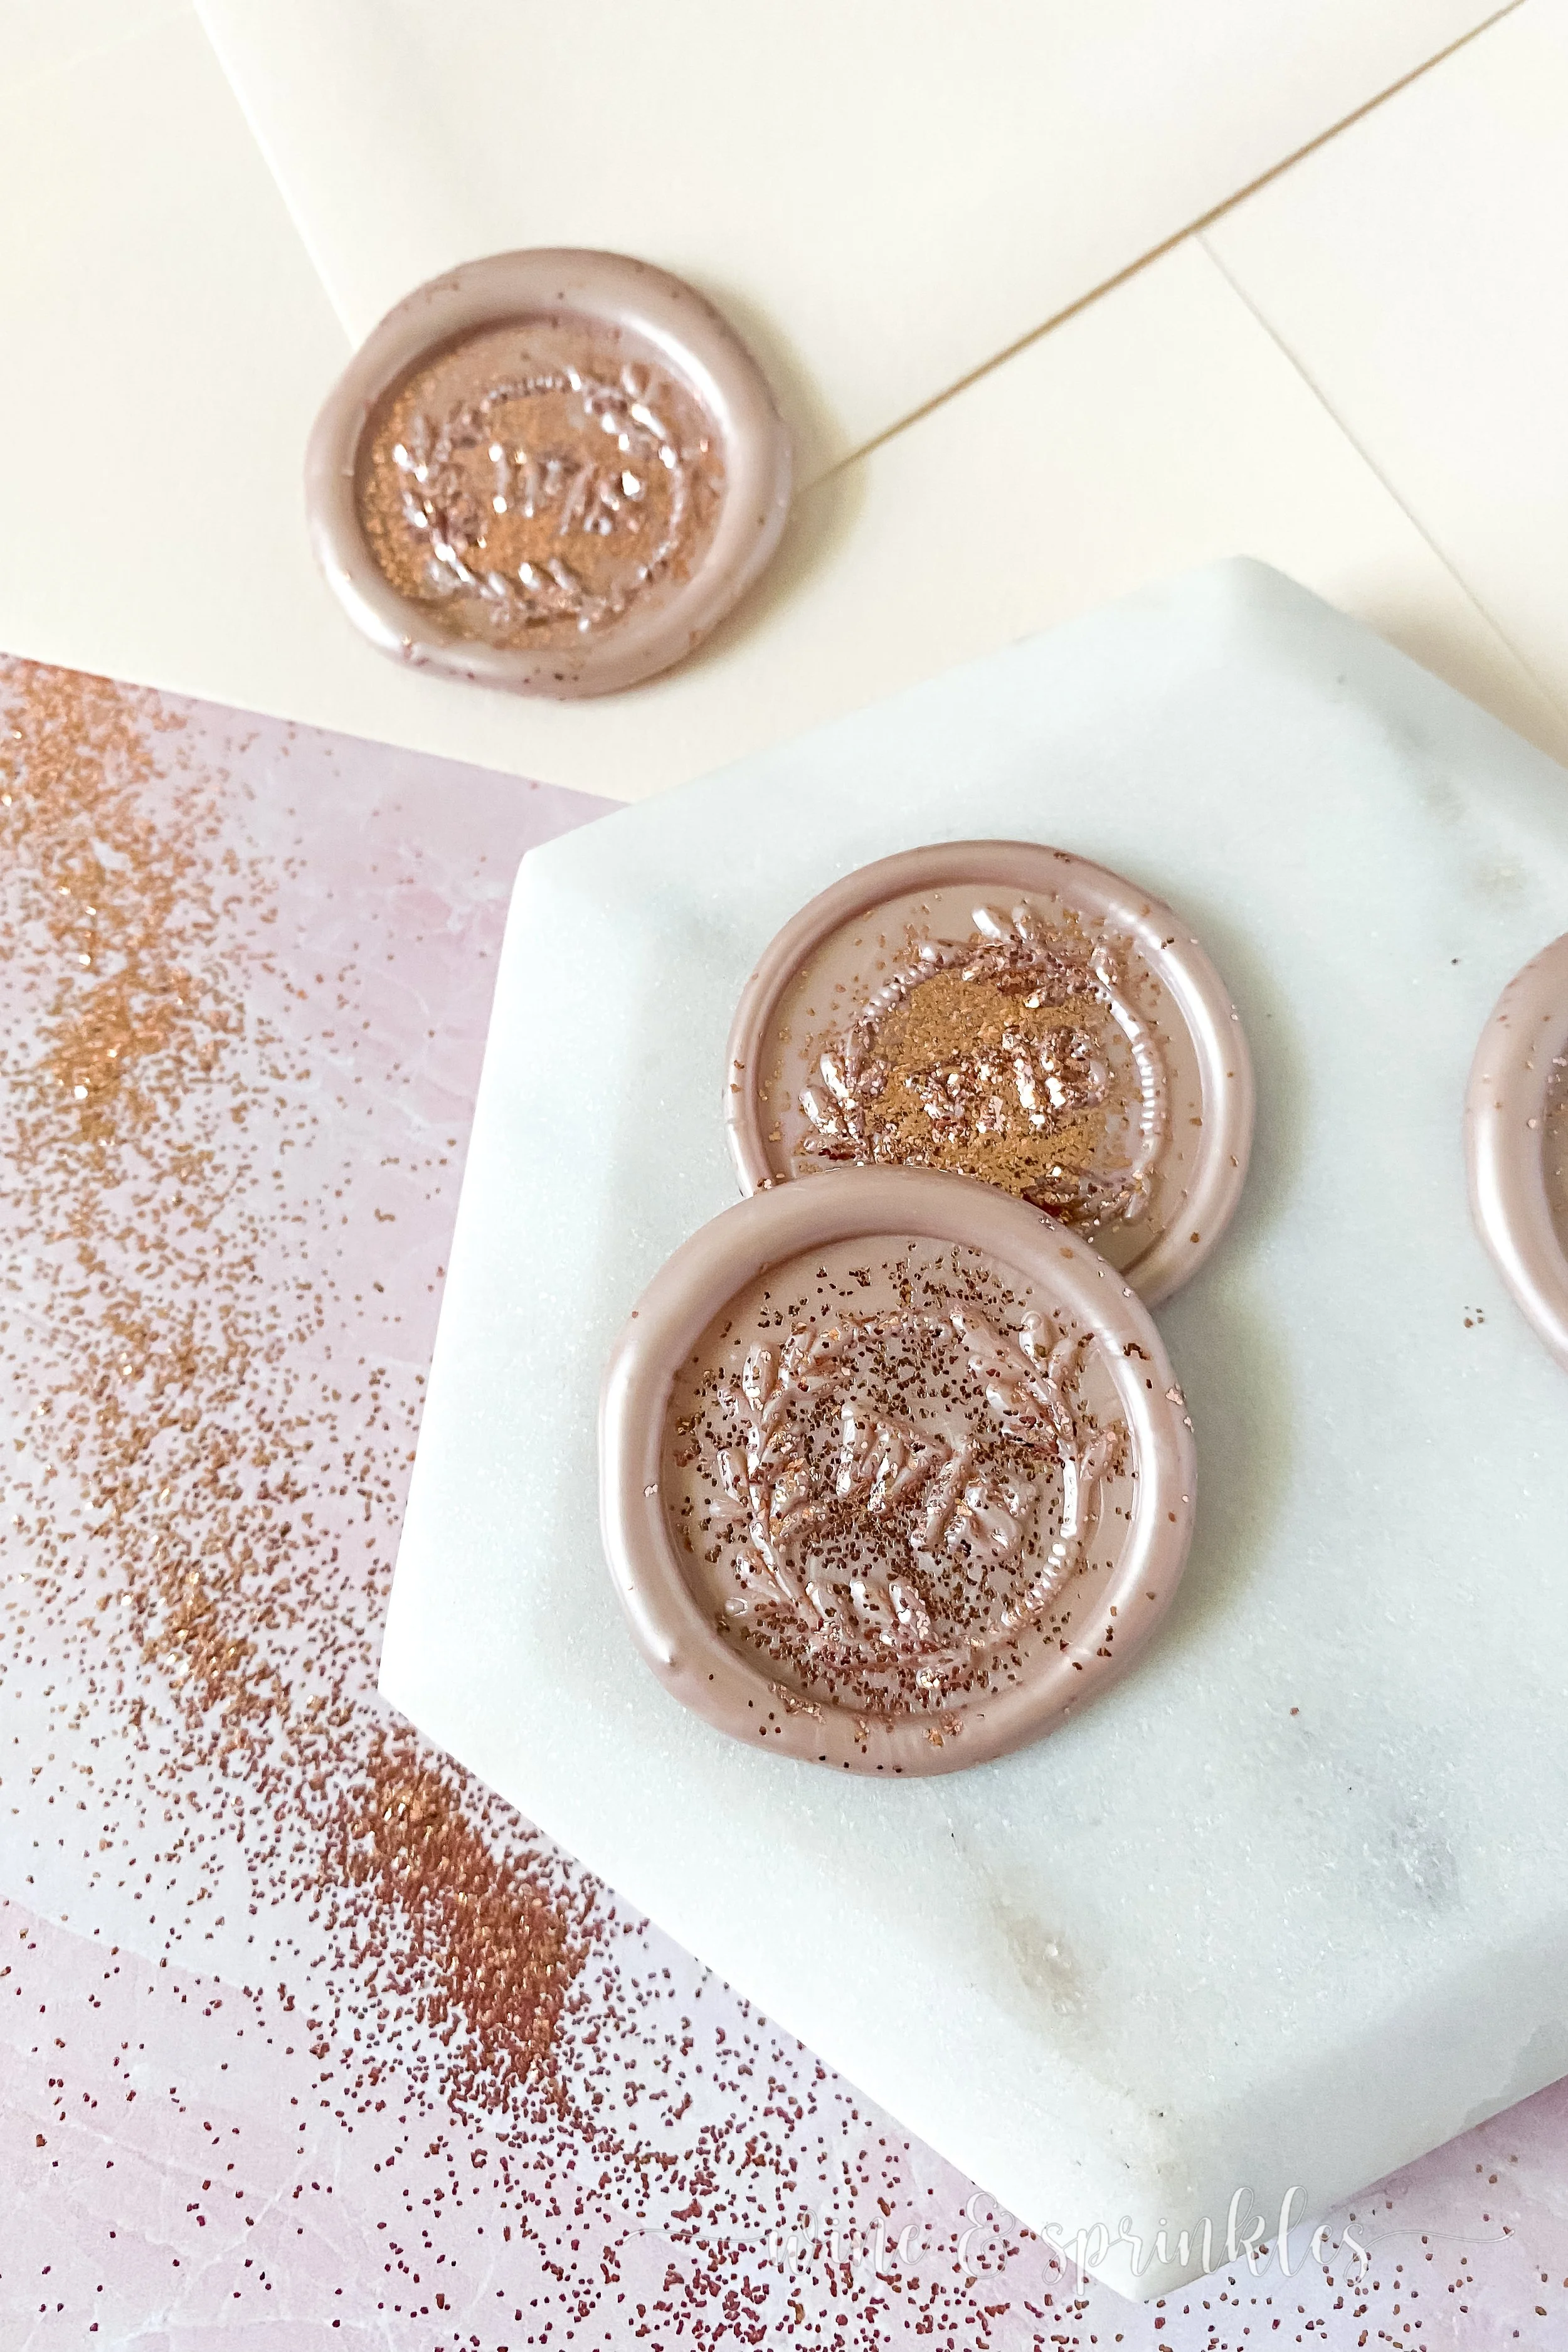
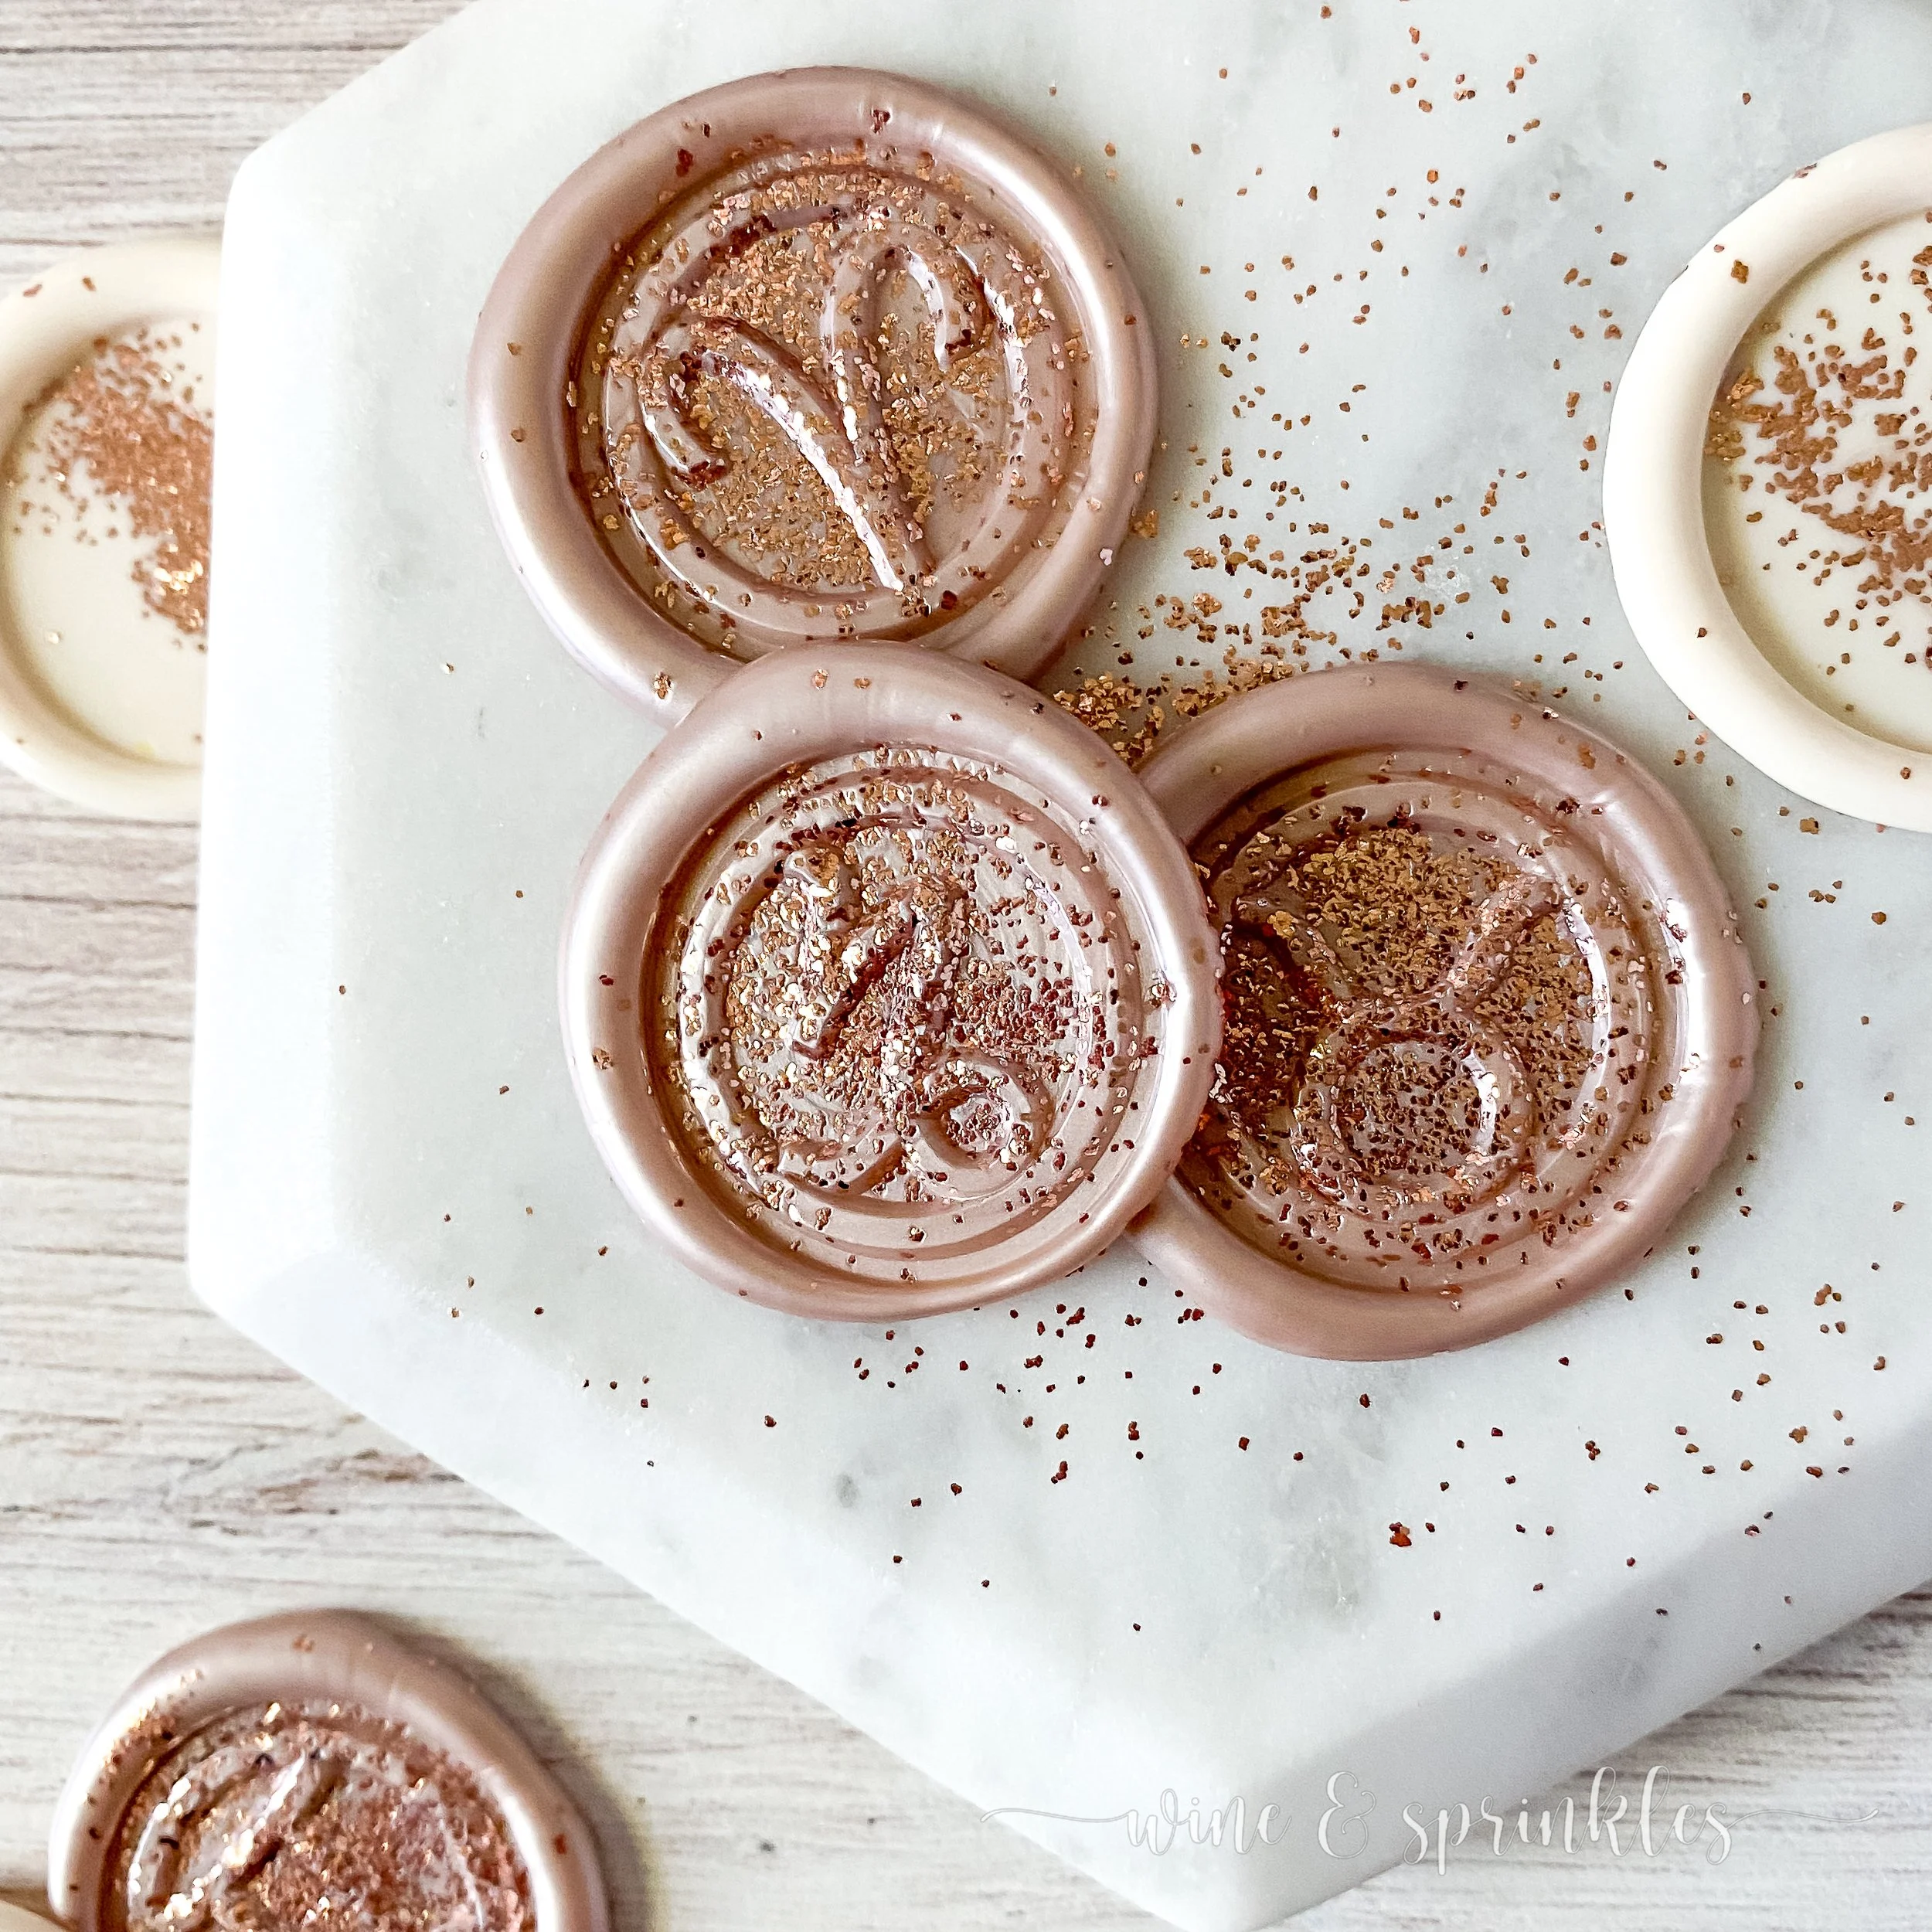
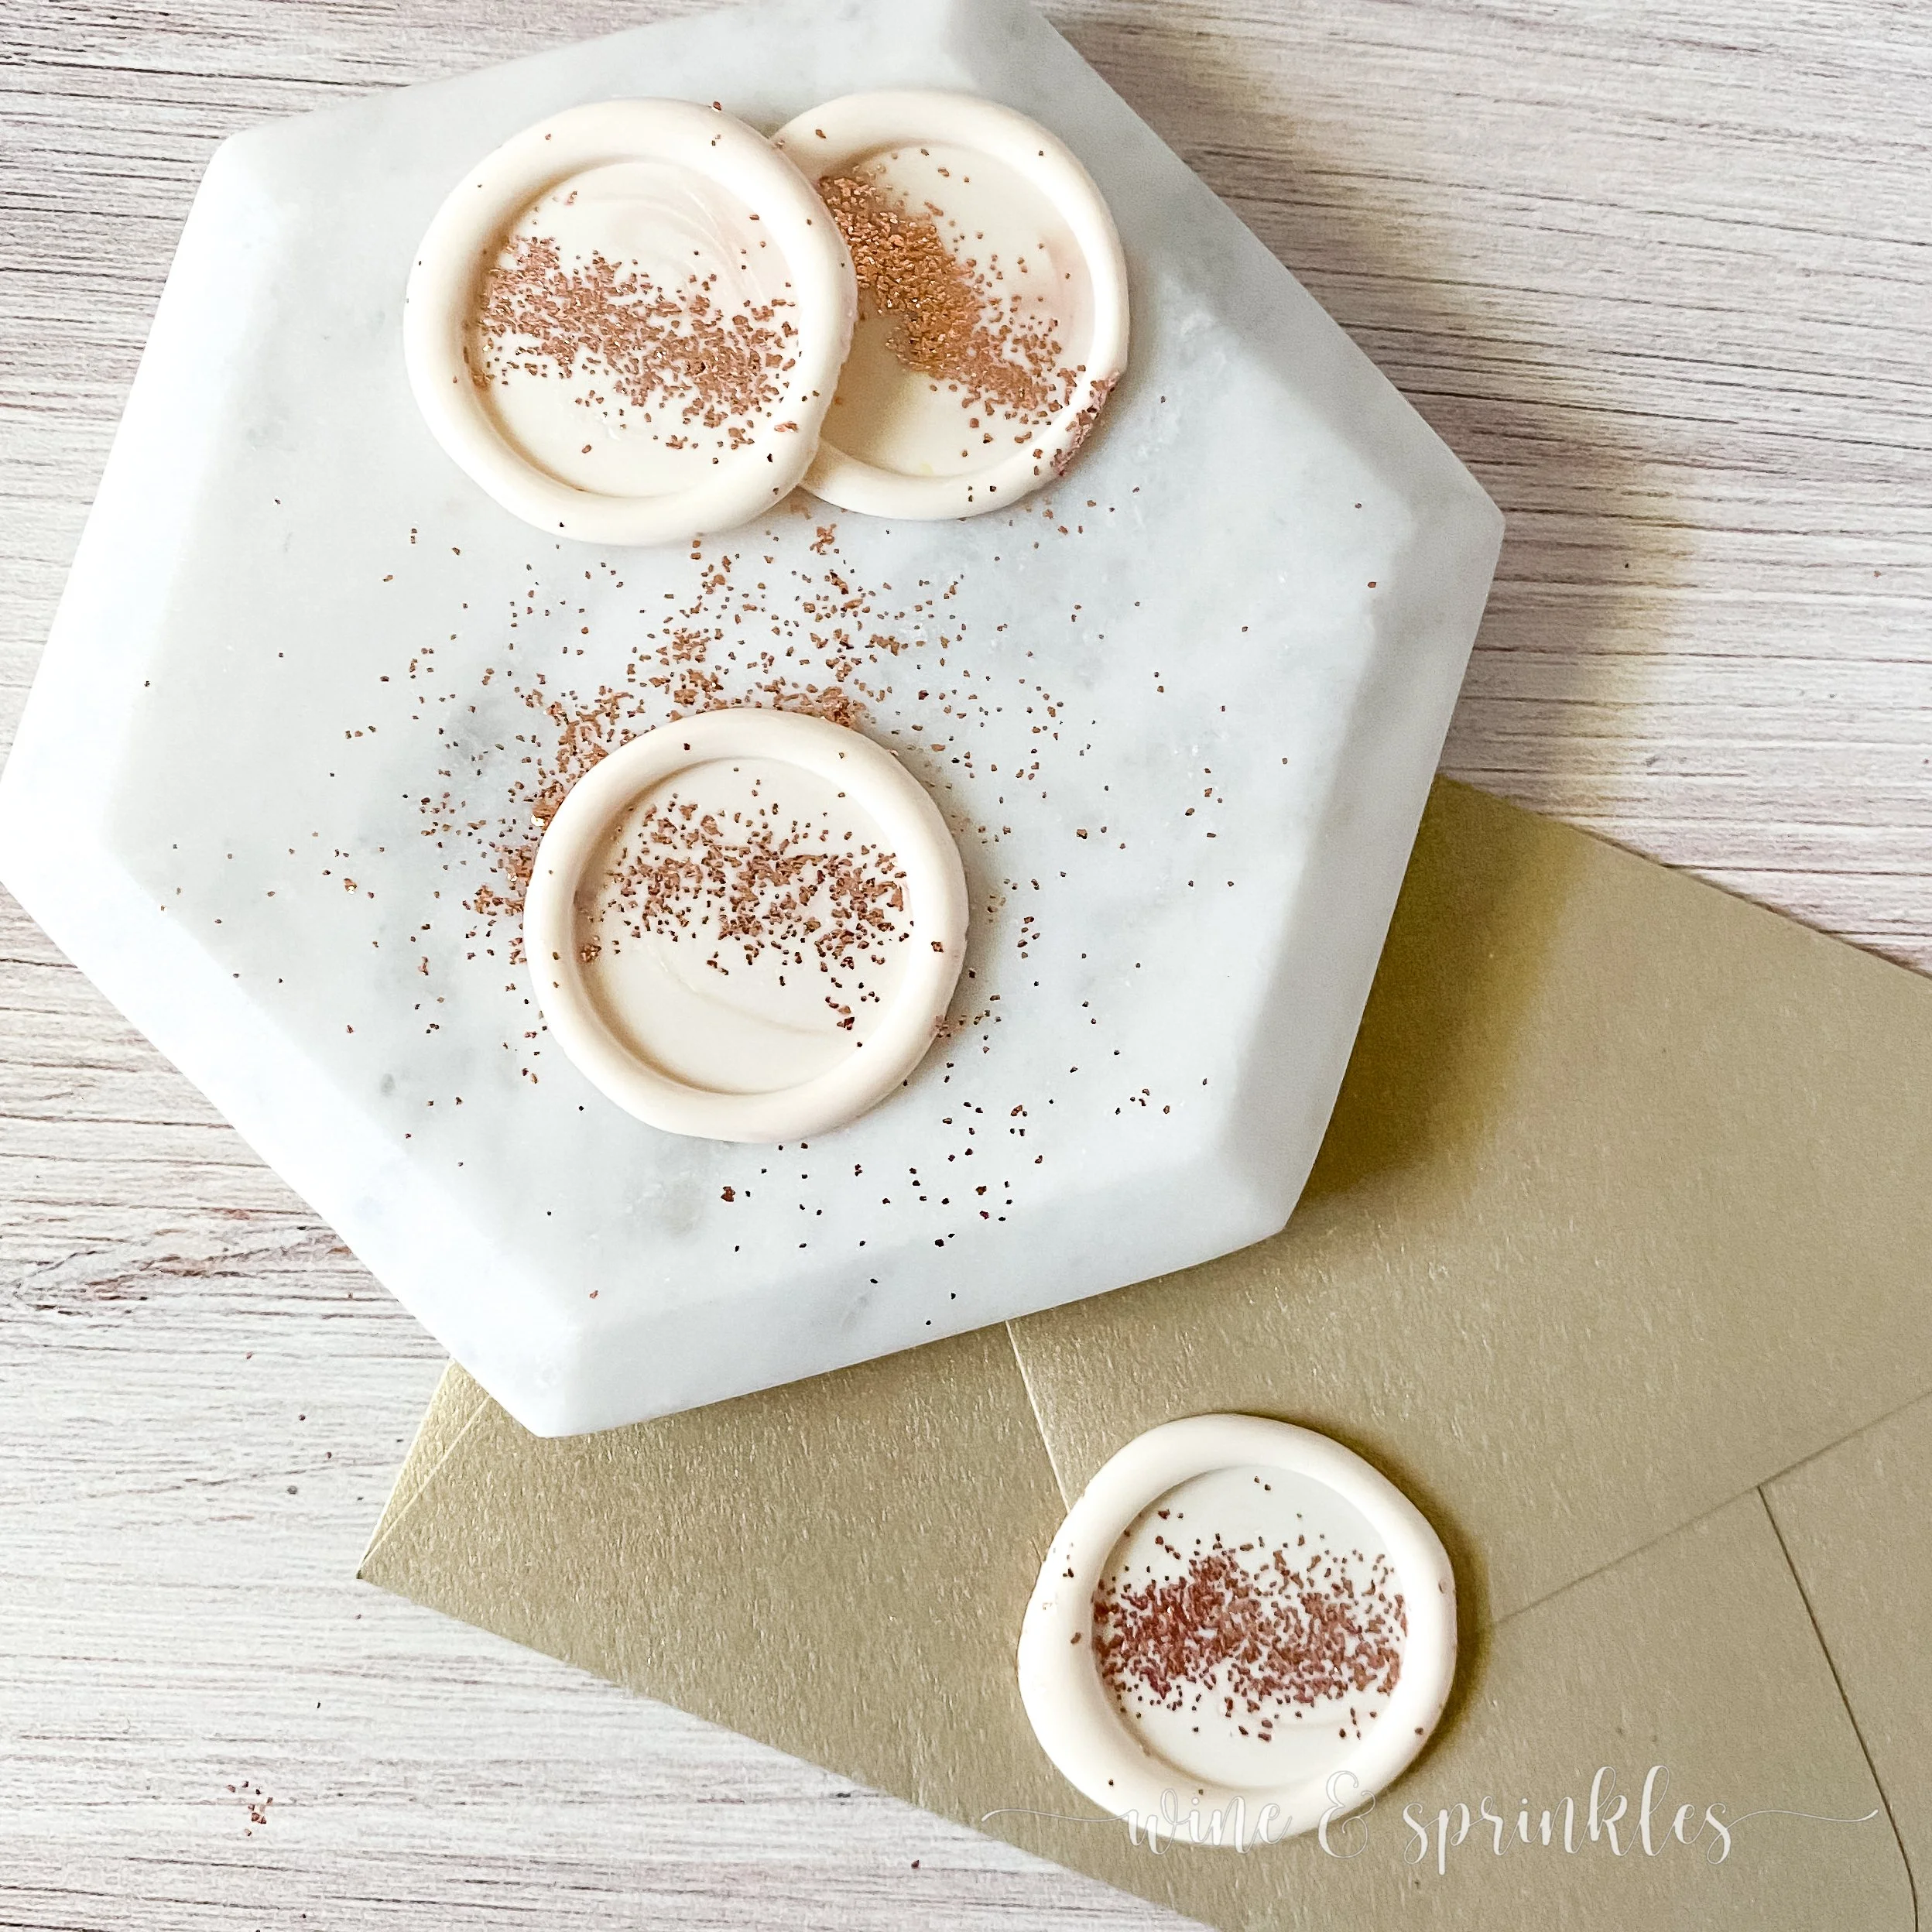
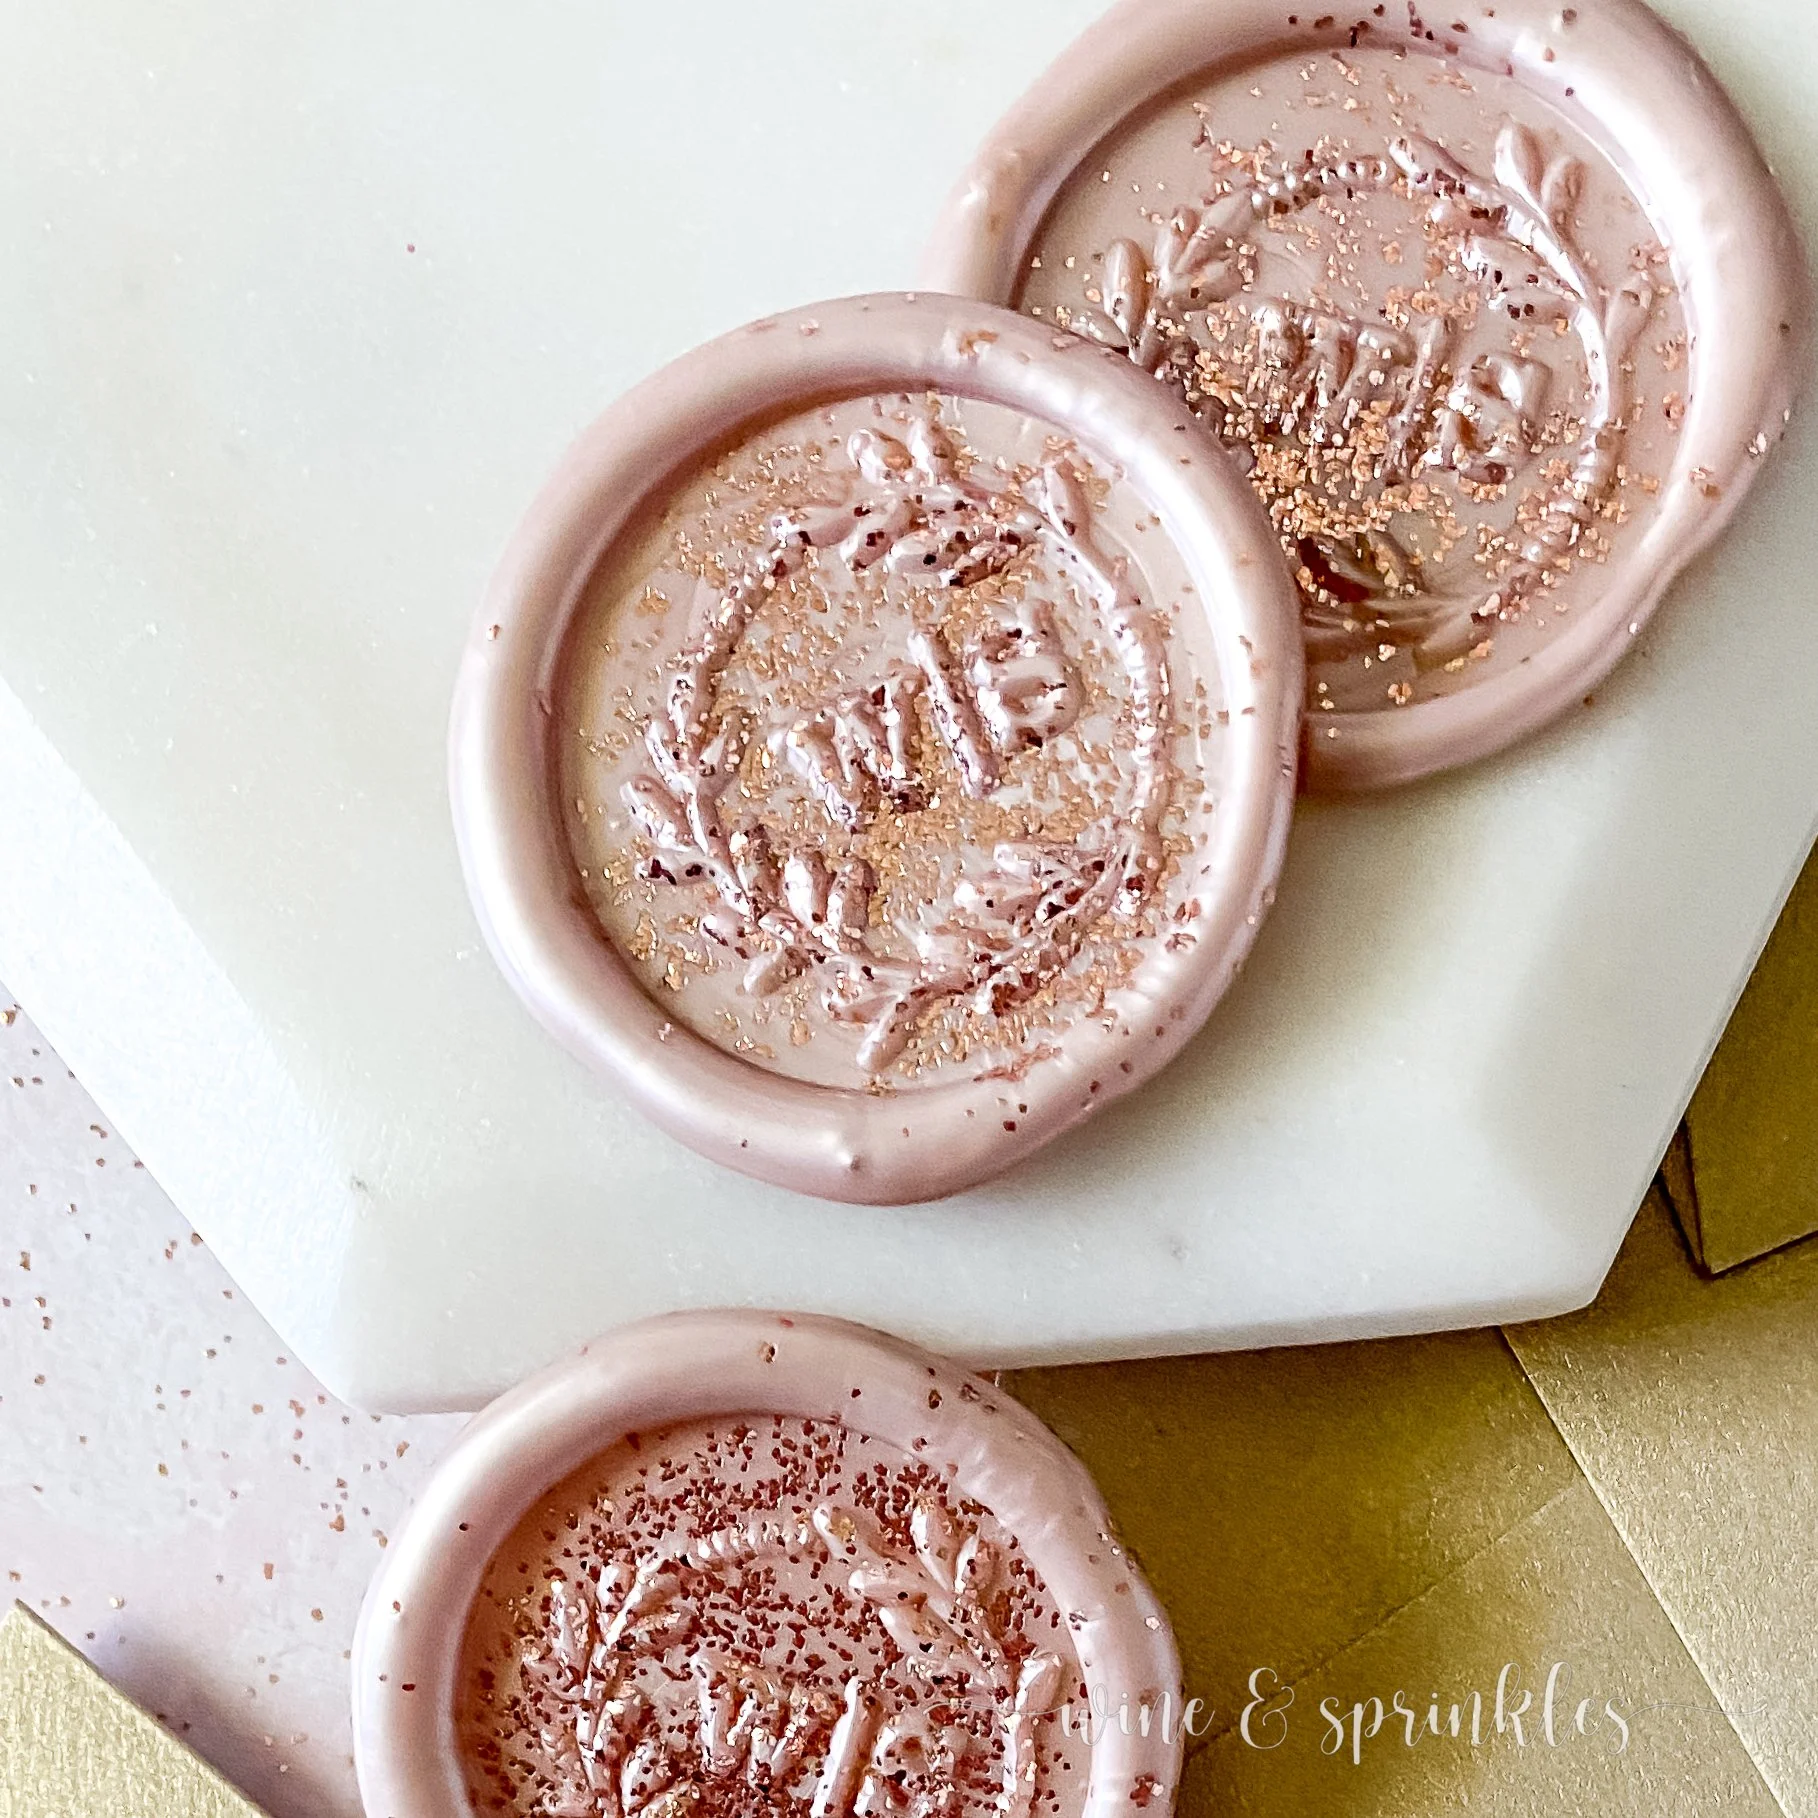
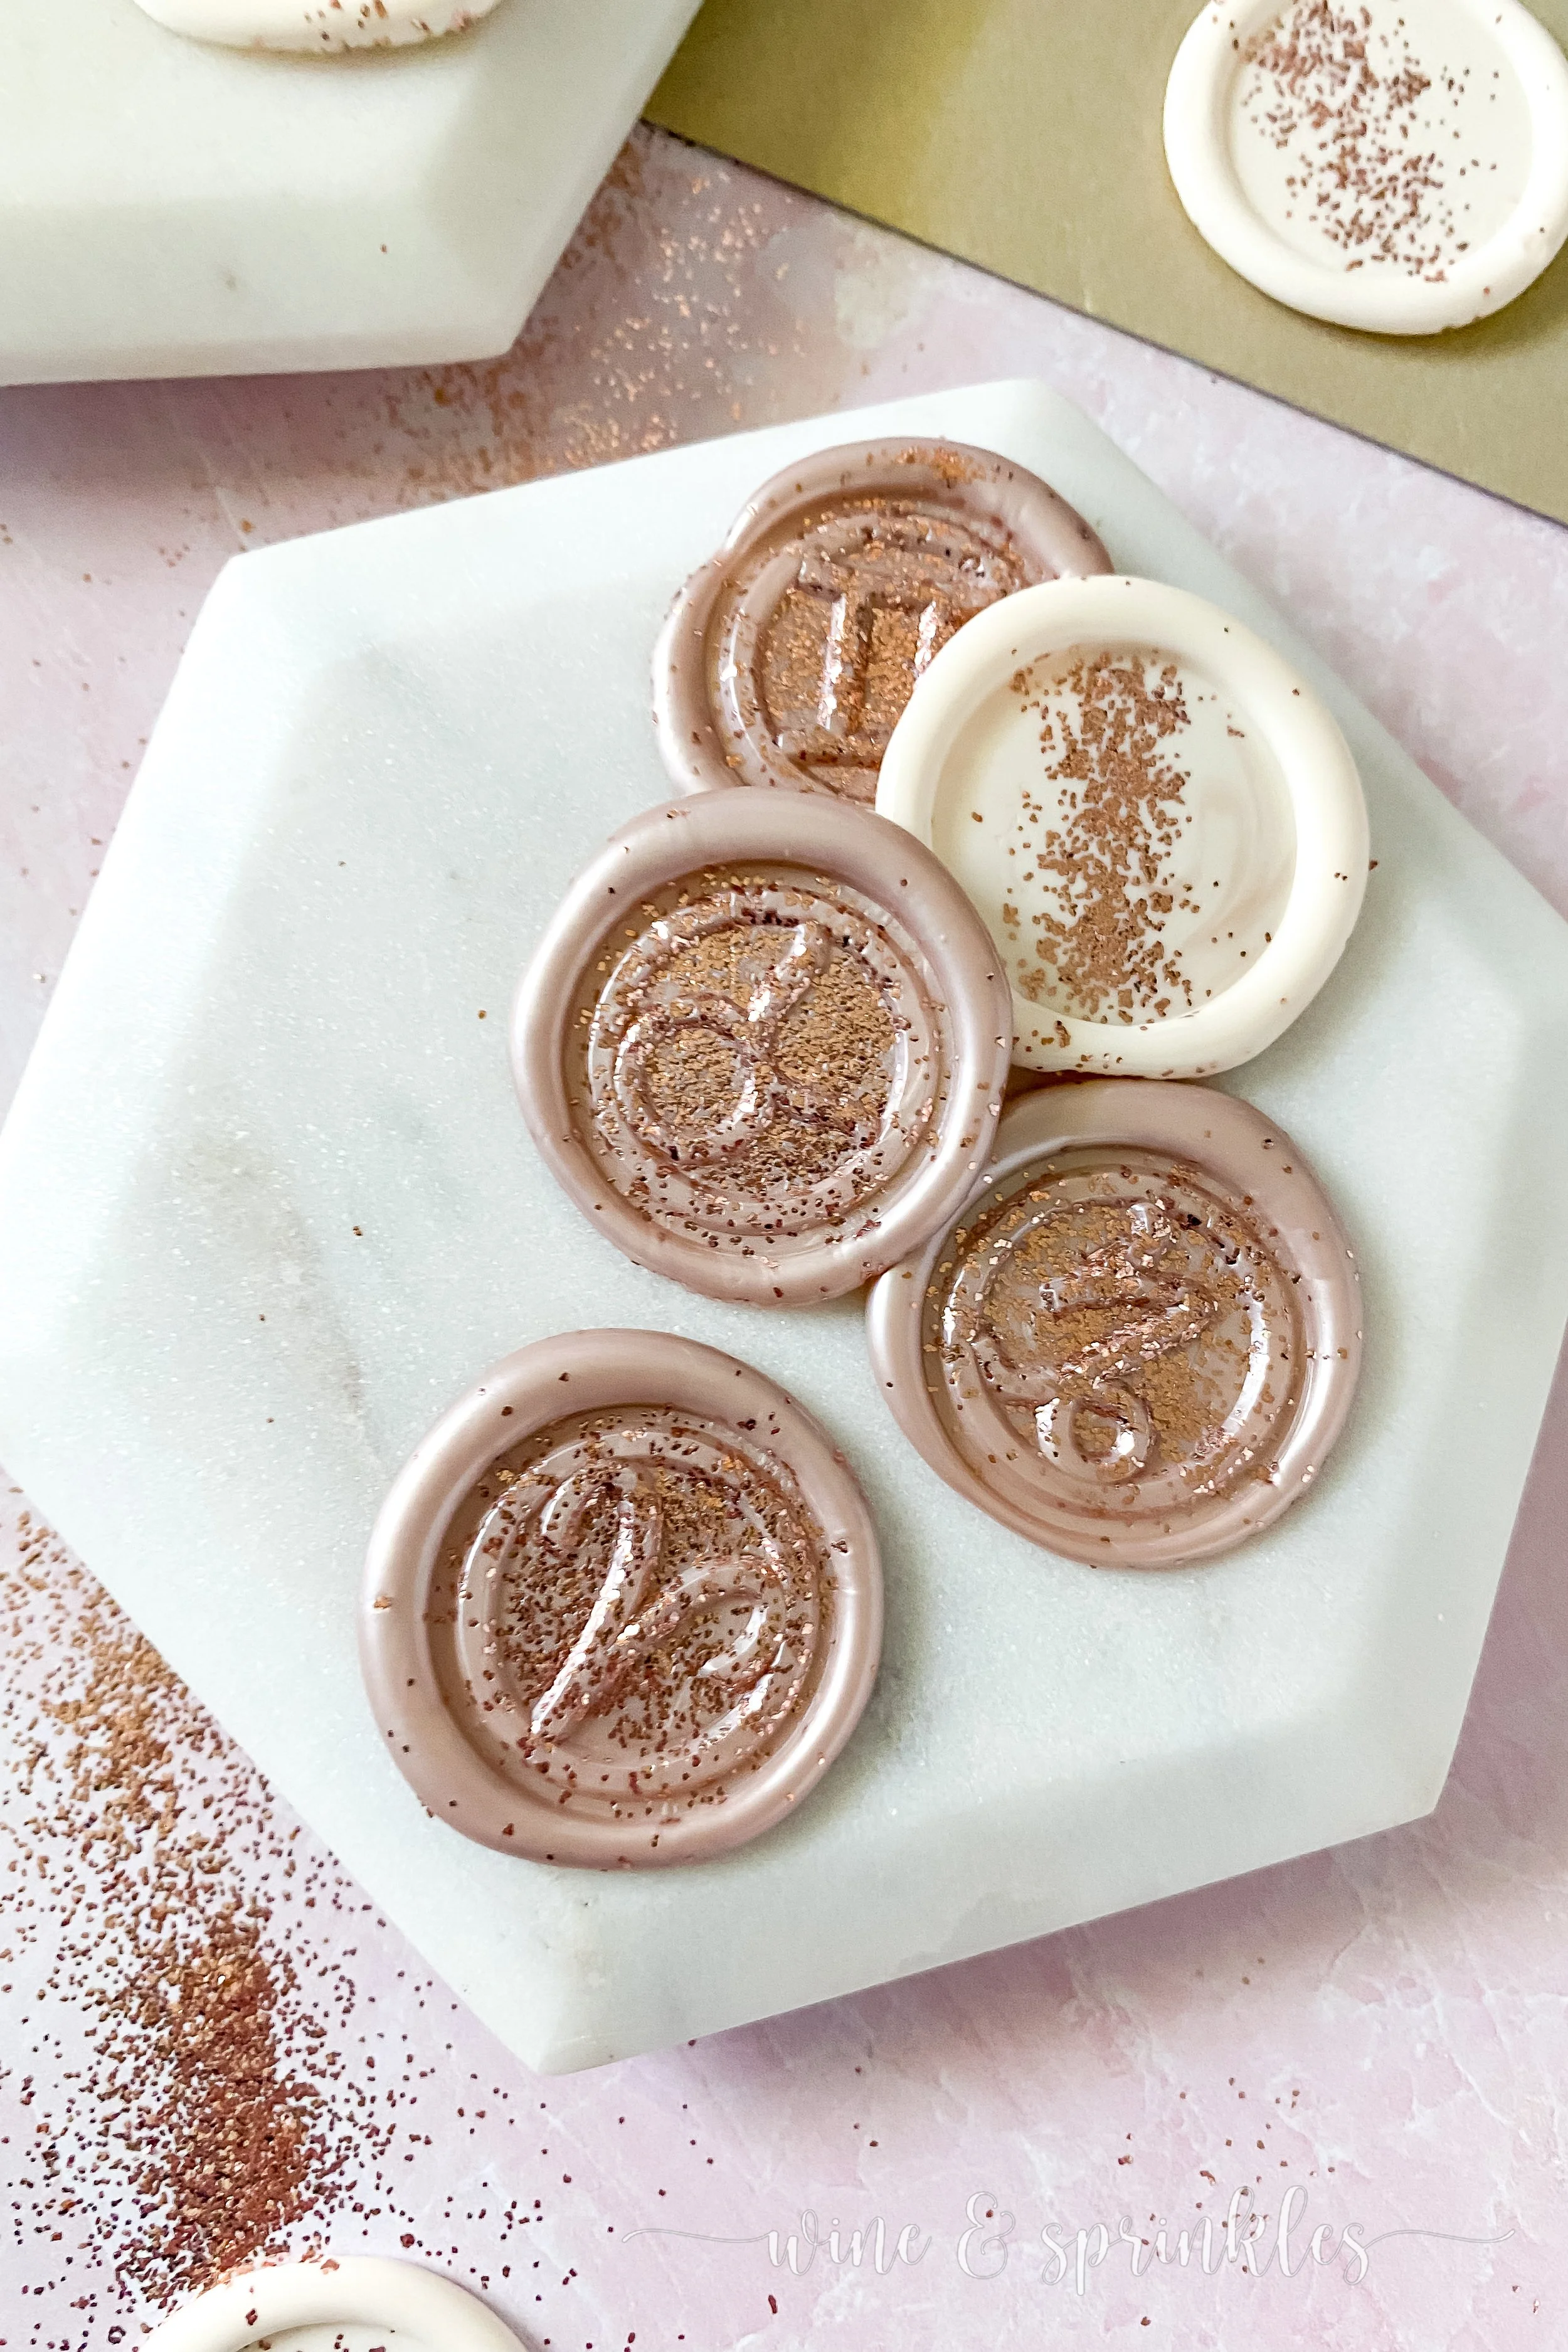
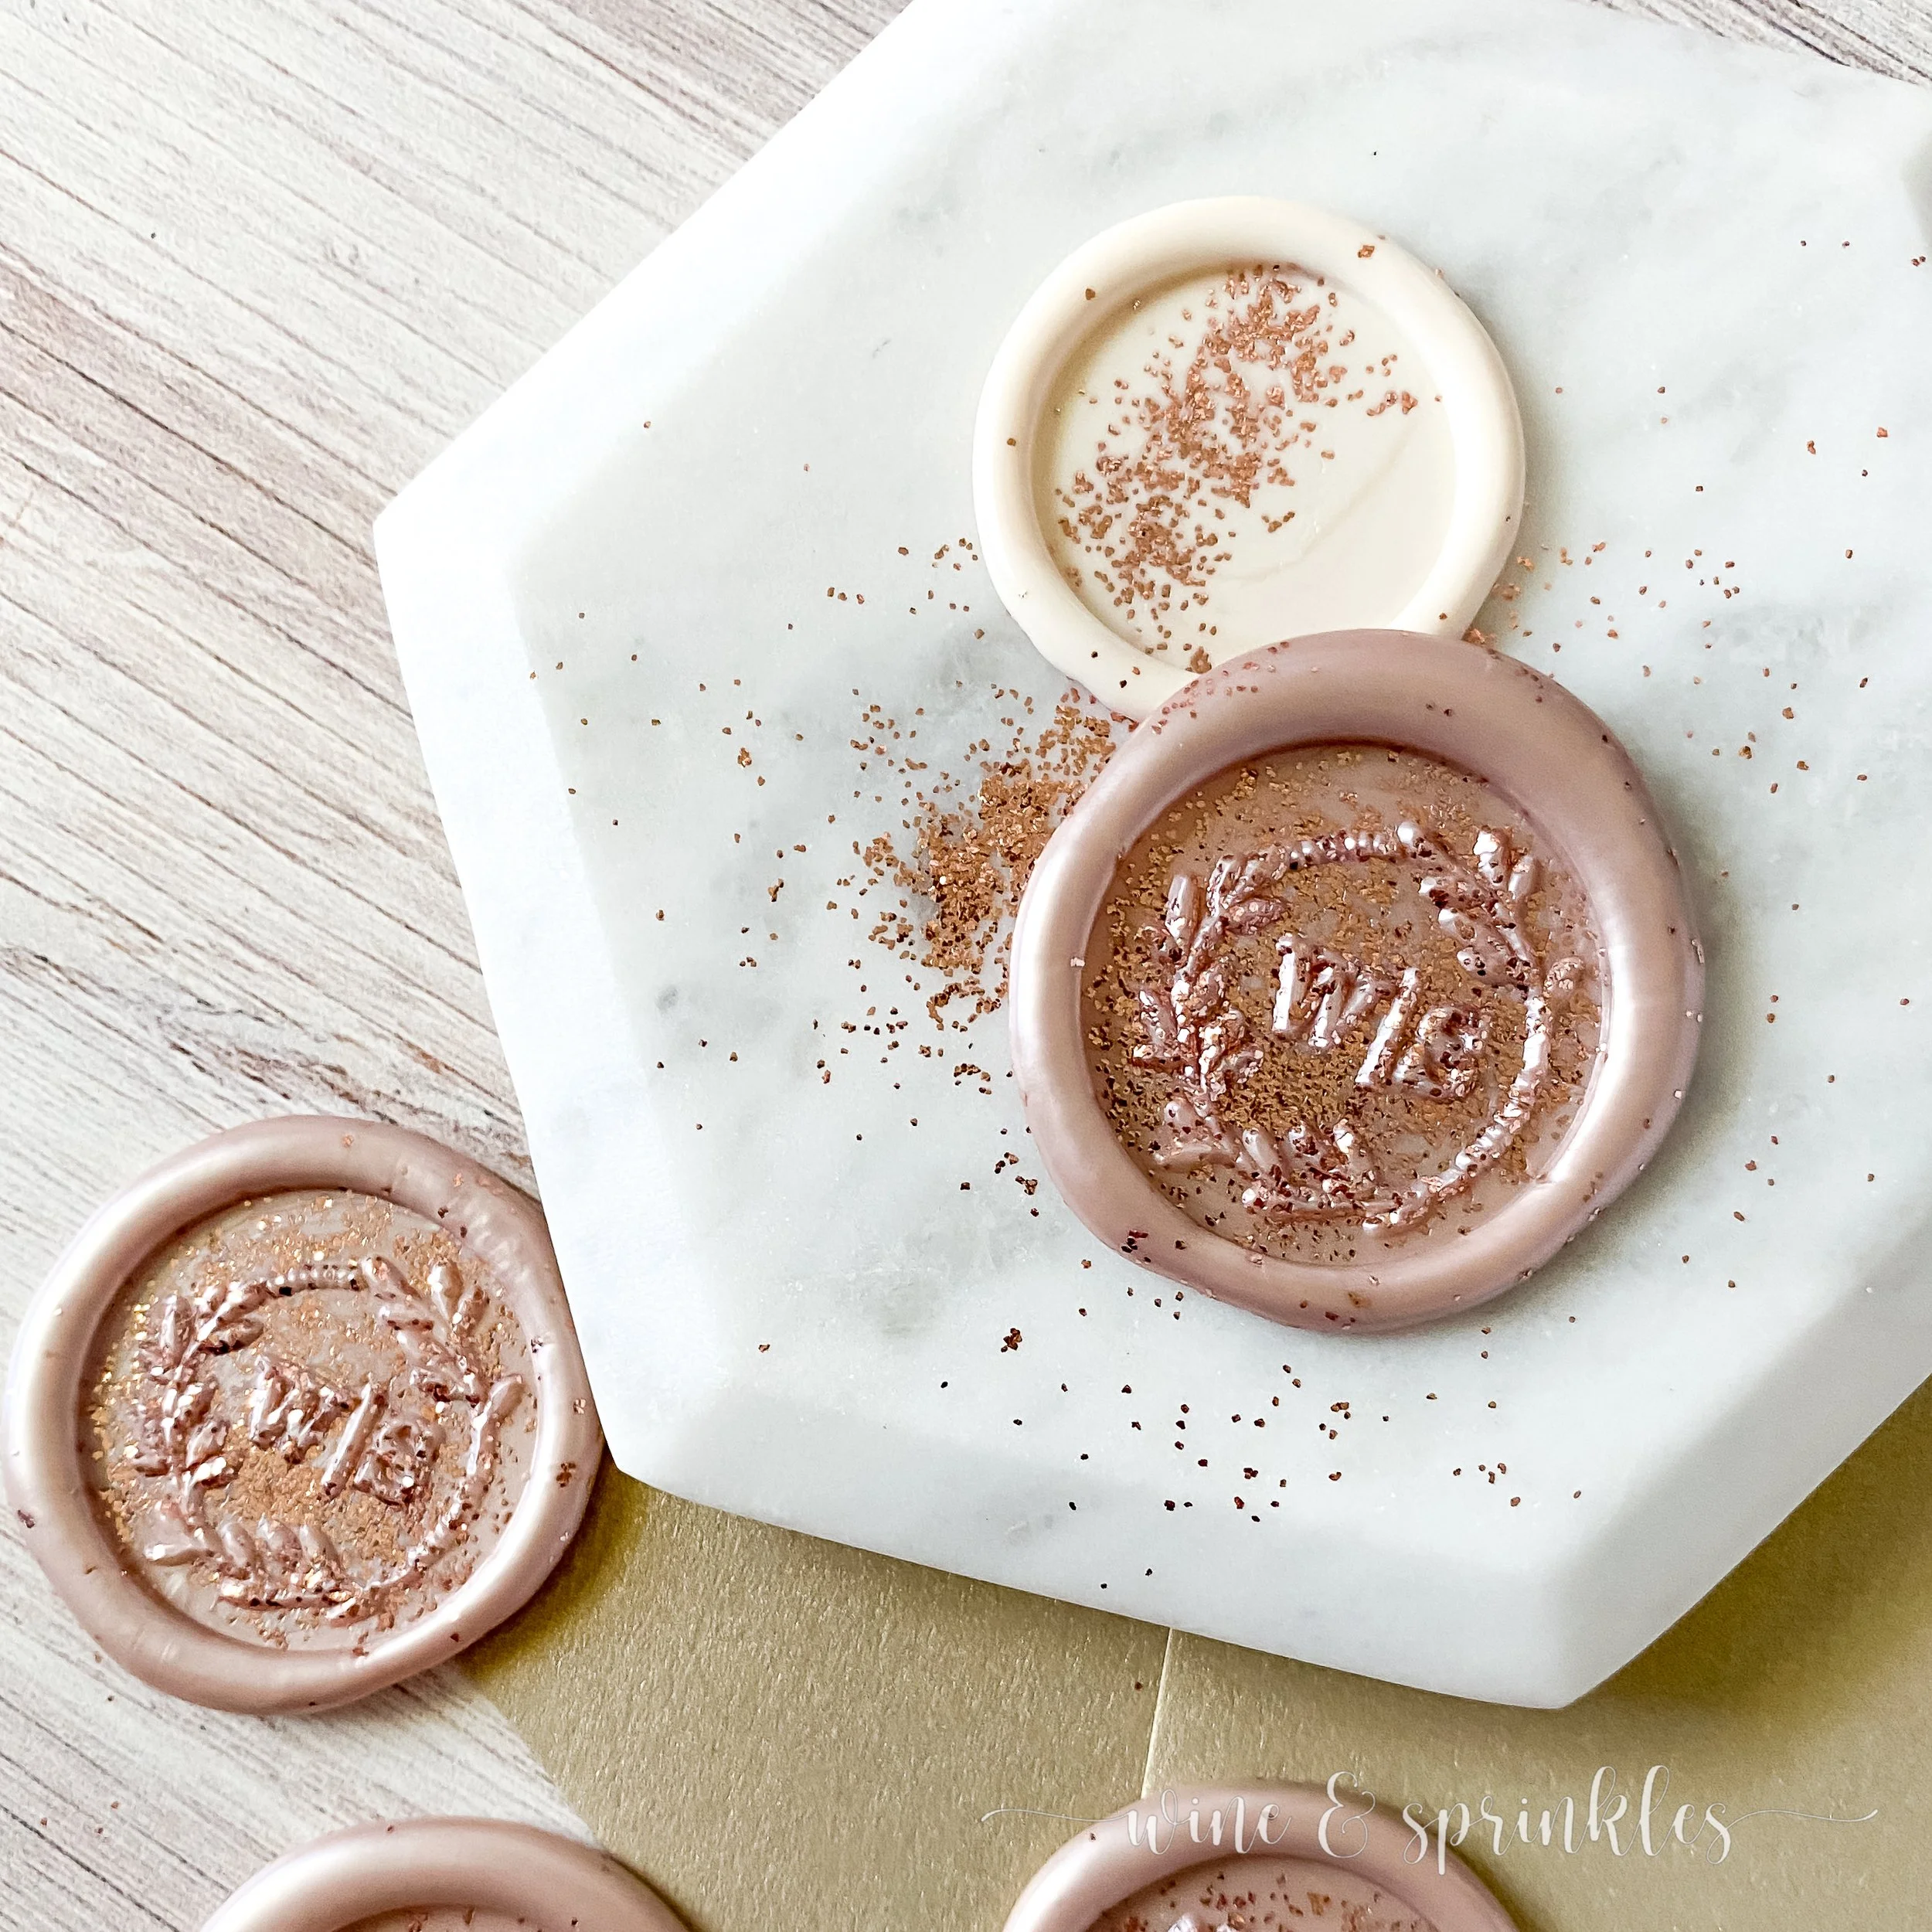
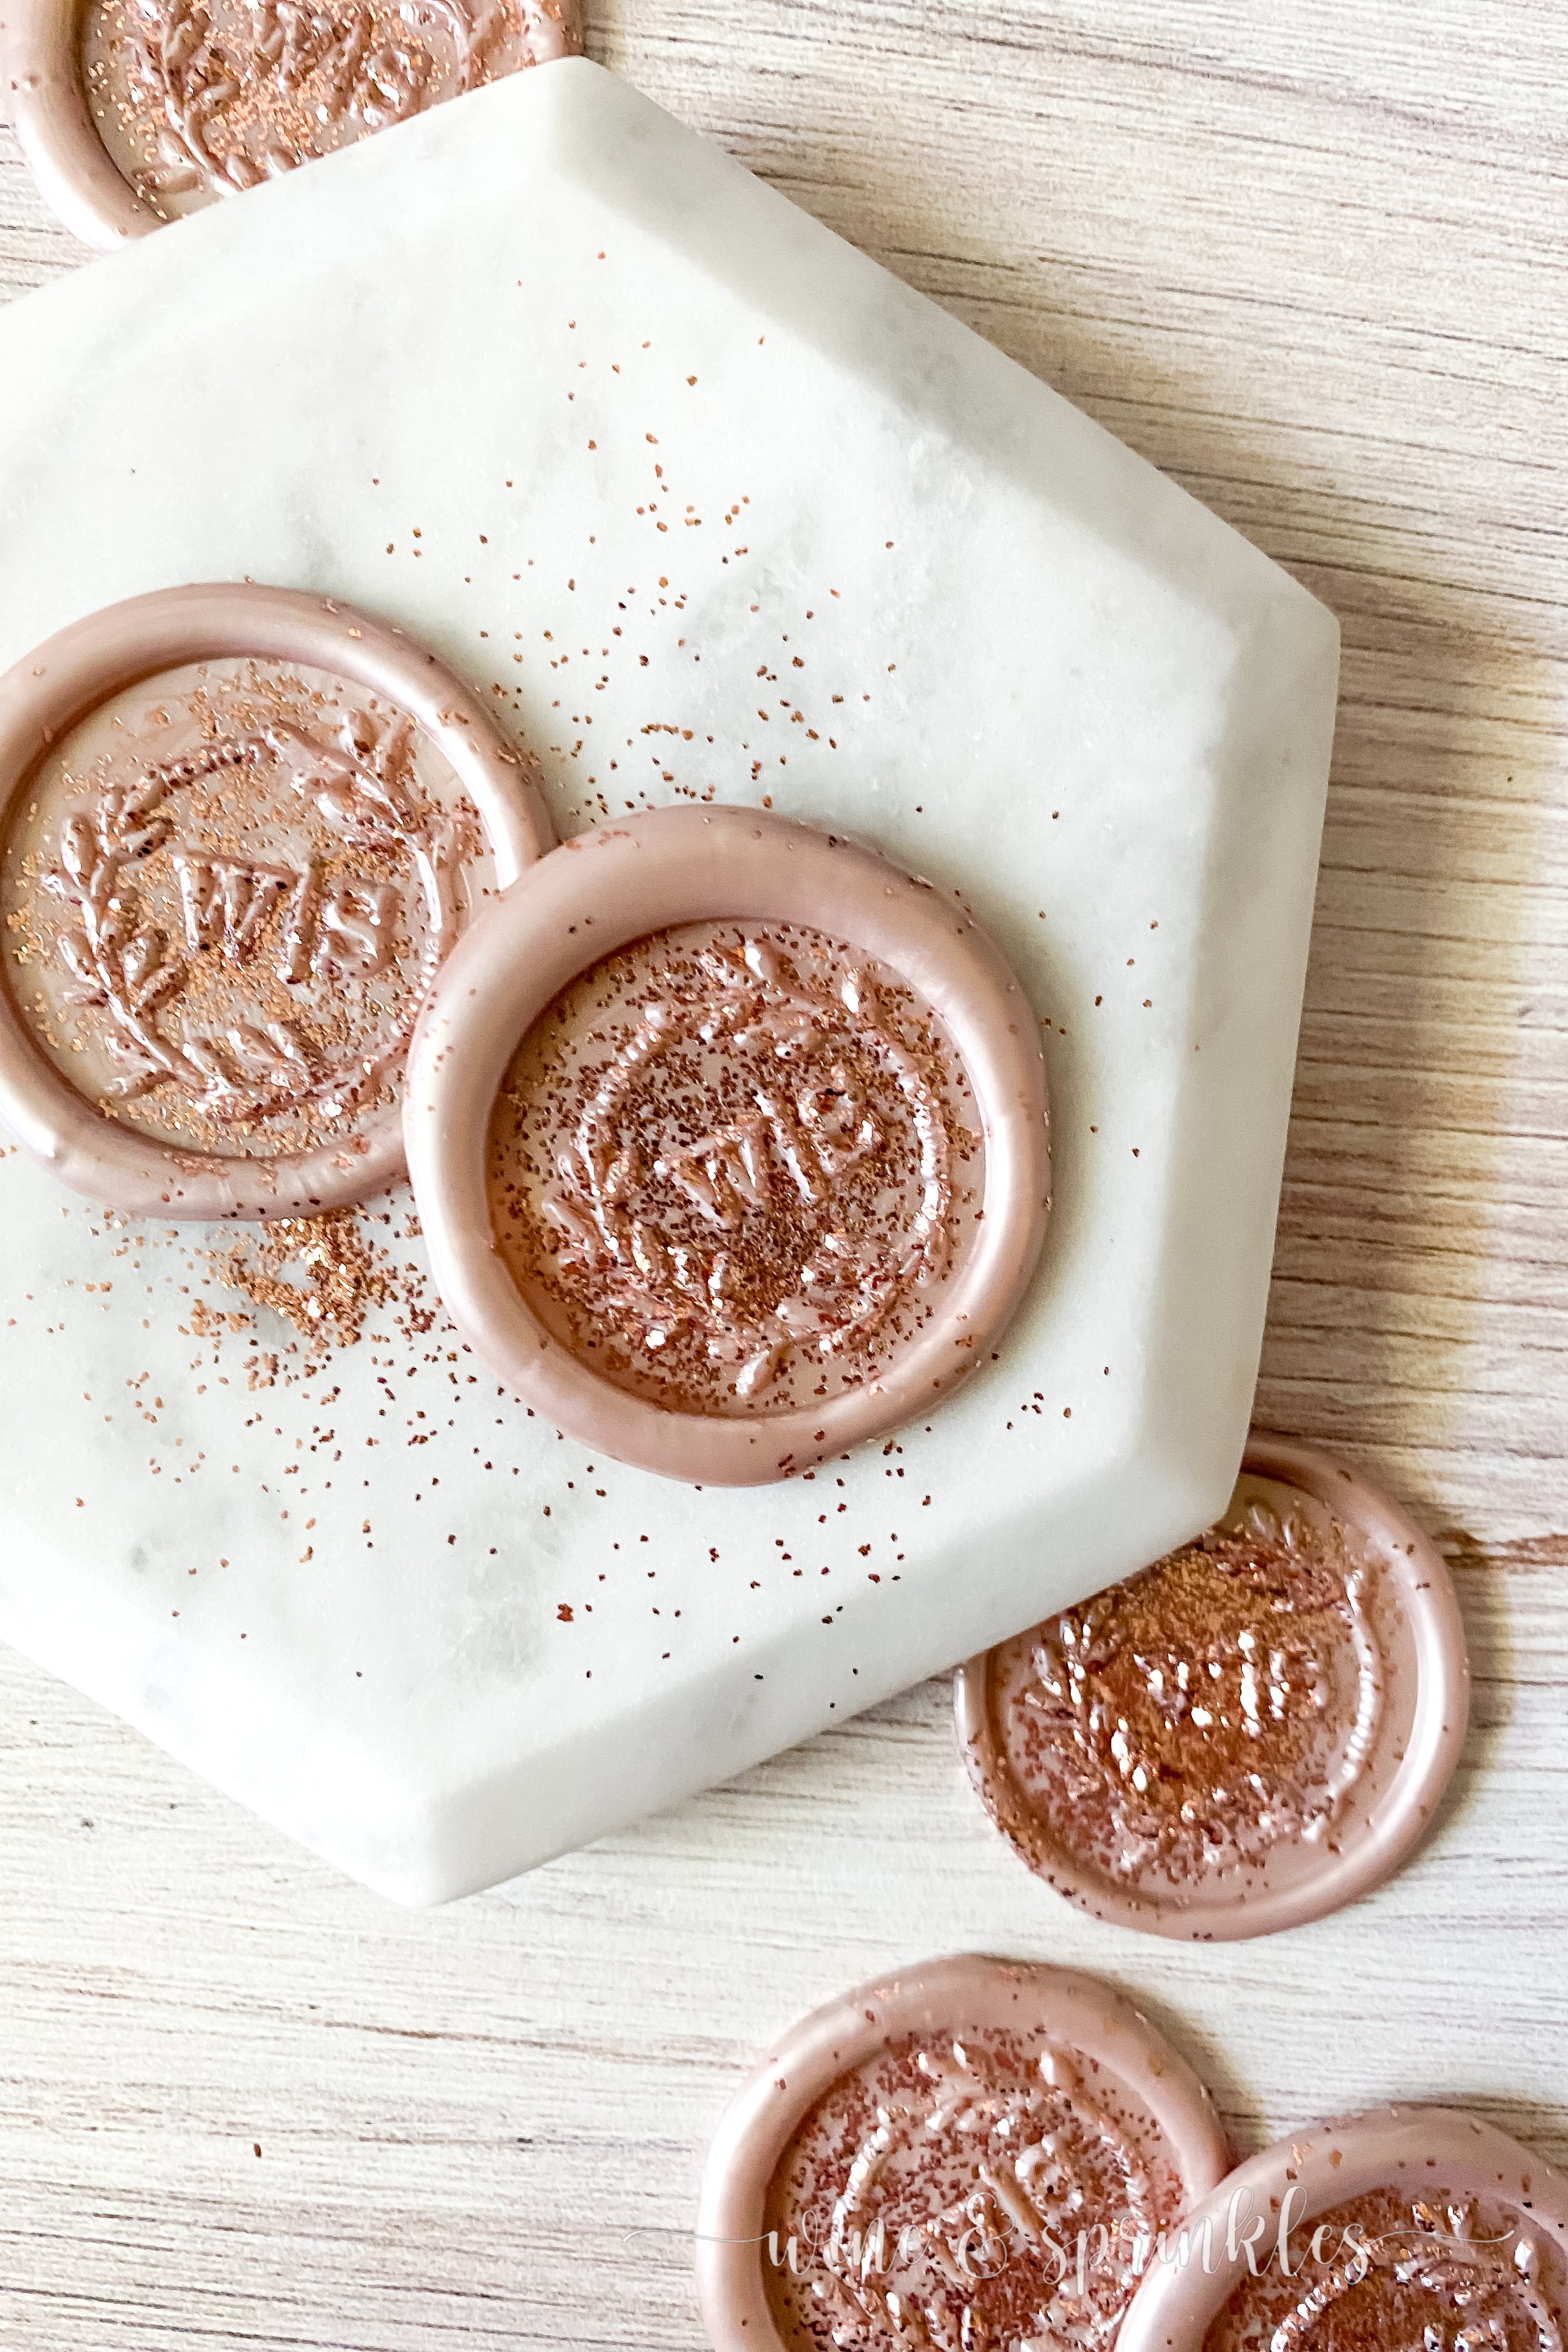
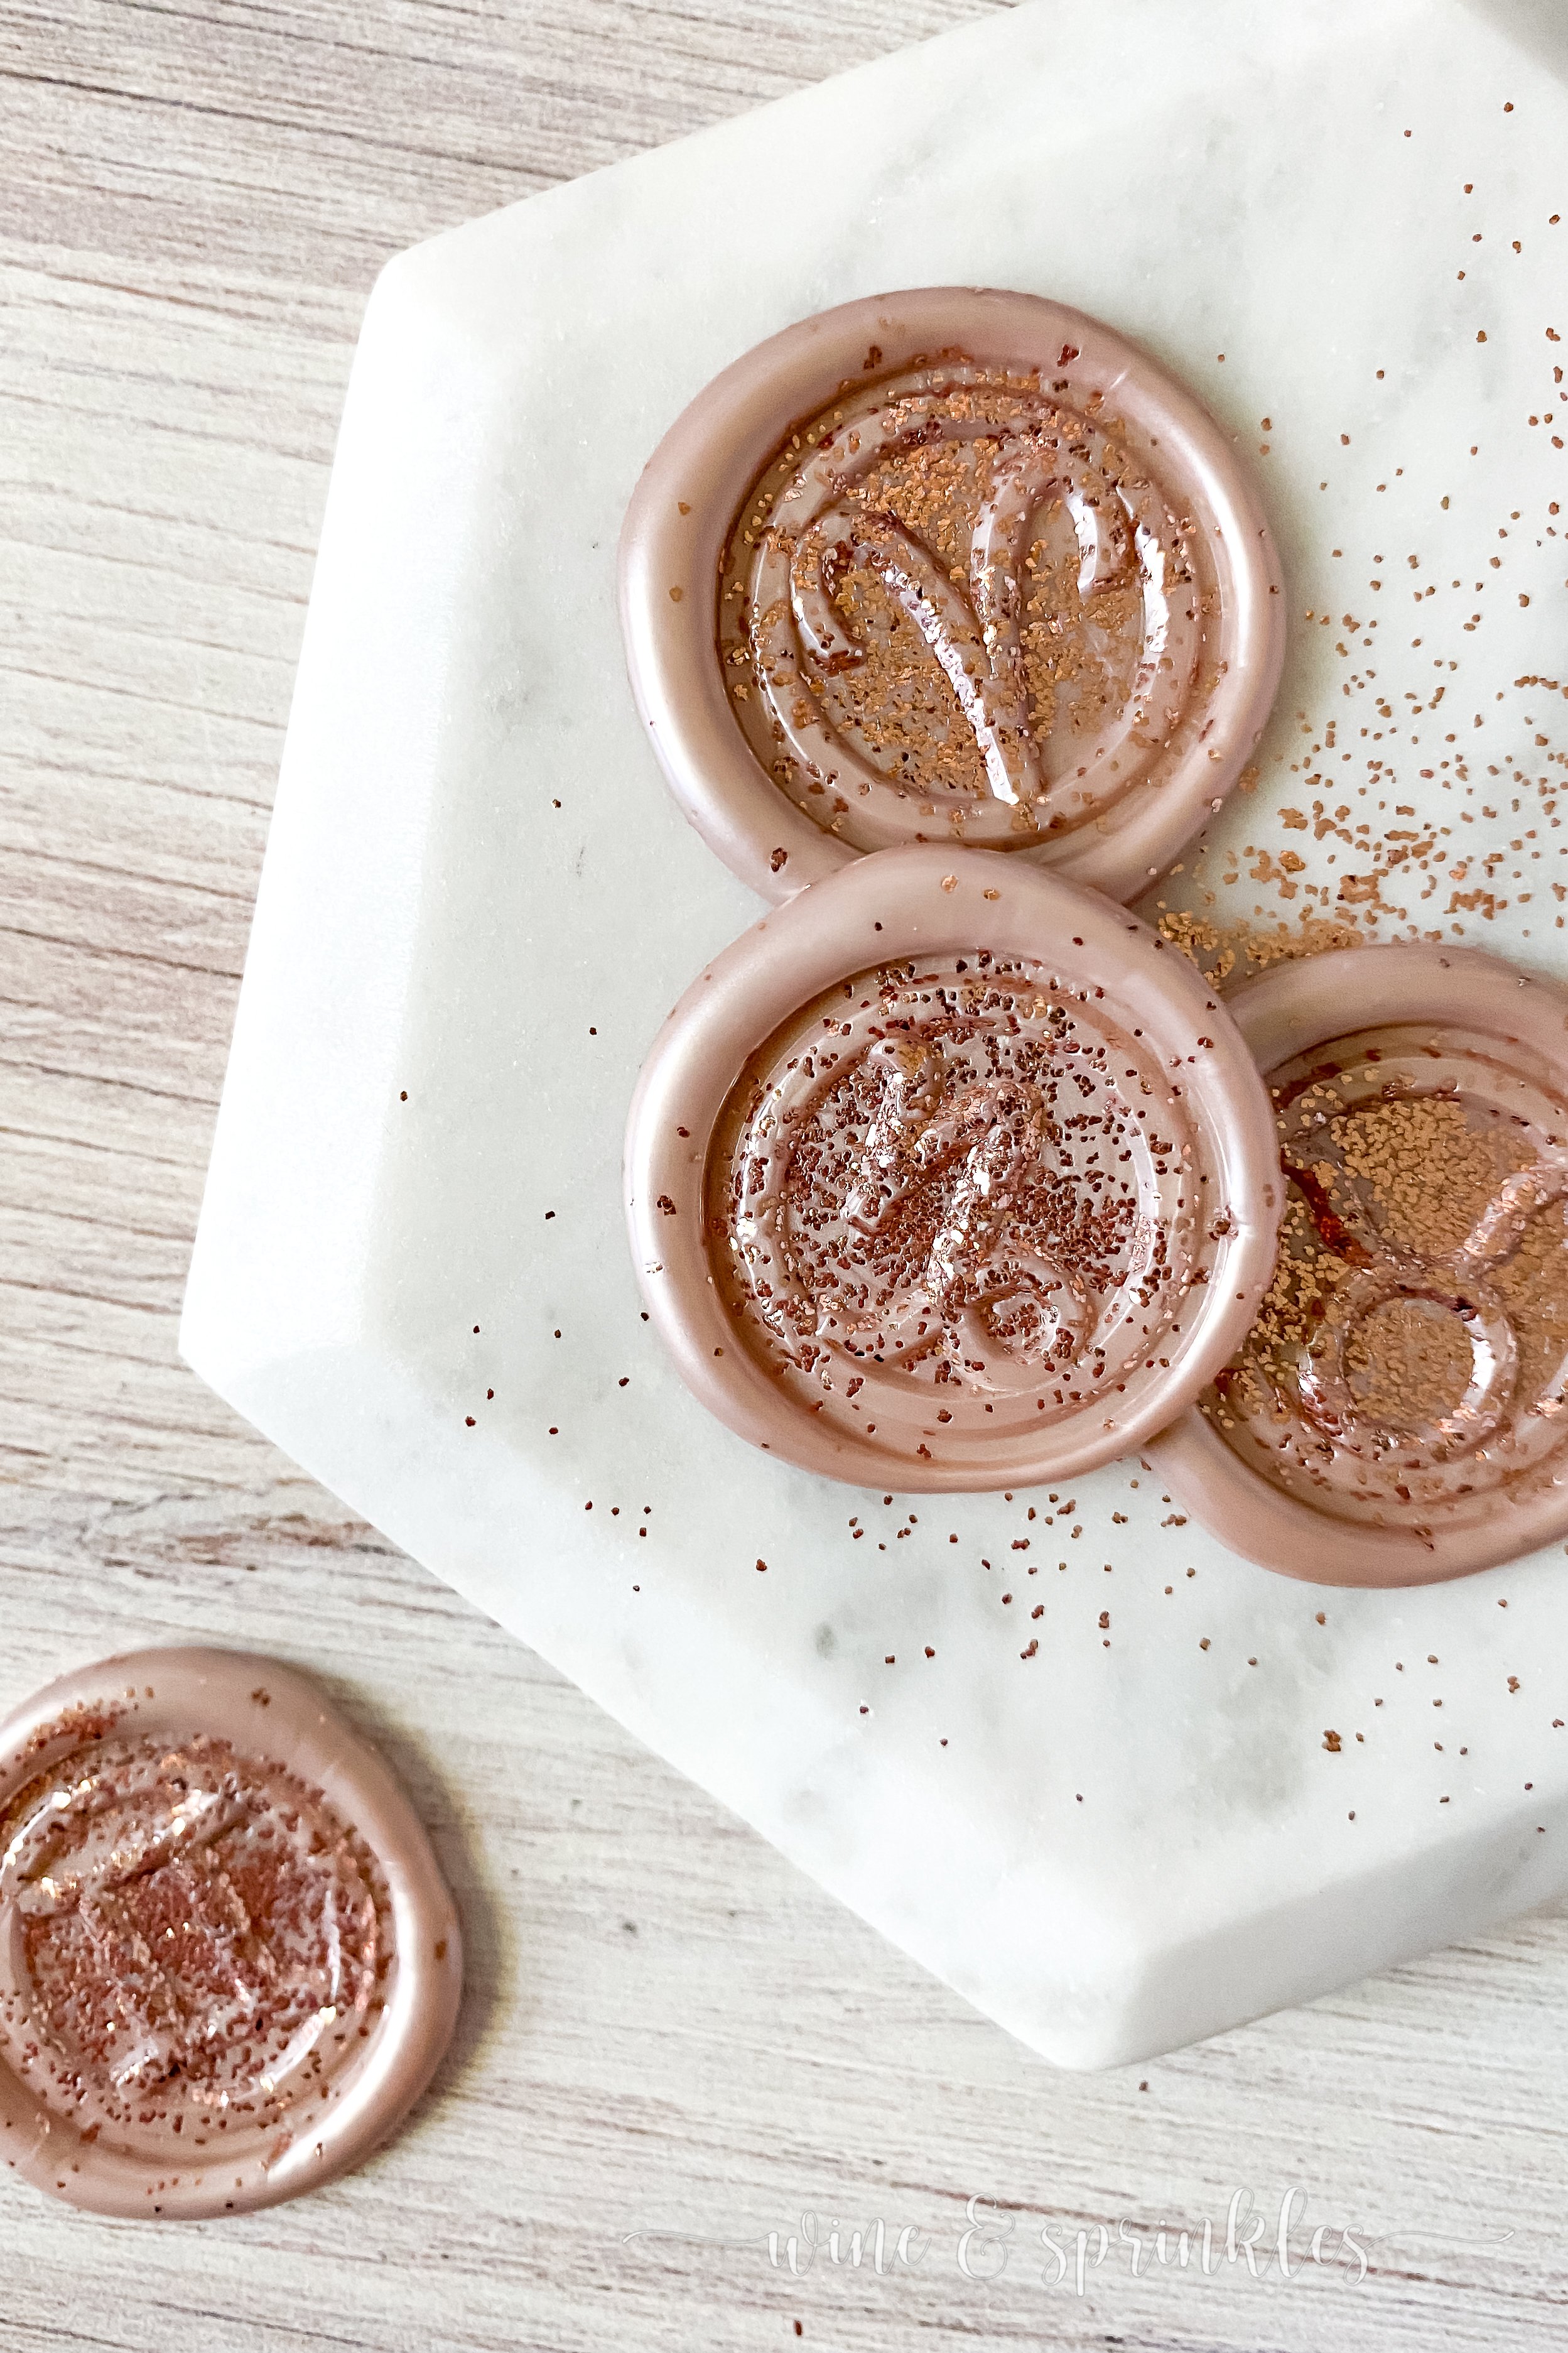
For that extra bit of glitz and glam, nothing adds sparkle like a glittery design detail! So as I learned about the basics of wax seal making as I created my Simple Self Adhesive Wax Seals and my Marbled Self Adhesive Wax Seals, I started experimenting with other details to add to my seals to give them some extra pizazz, starting with some metallic flake rose gold glitter. I gathered a bunch of my favorite bold and blank wax stamps, started sprinkling glitter everywhere, and from my fun a variety of metallic flake covered Glitter Self Adhesive Wax Seals were created for my future holiday and birthday stationary projects!
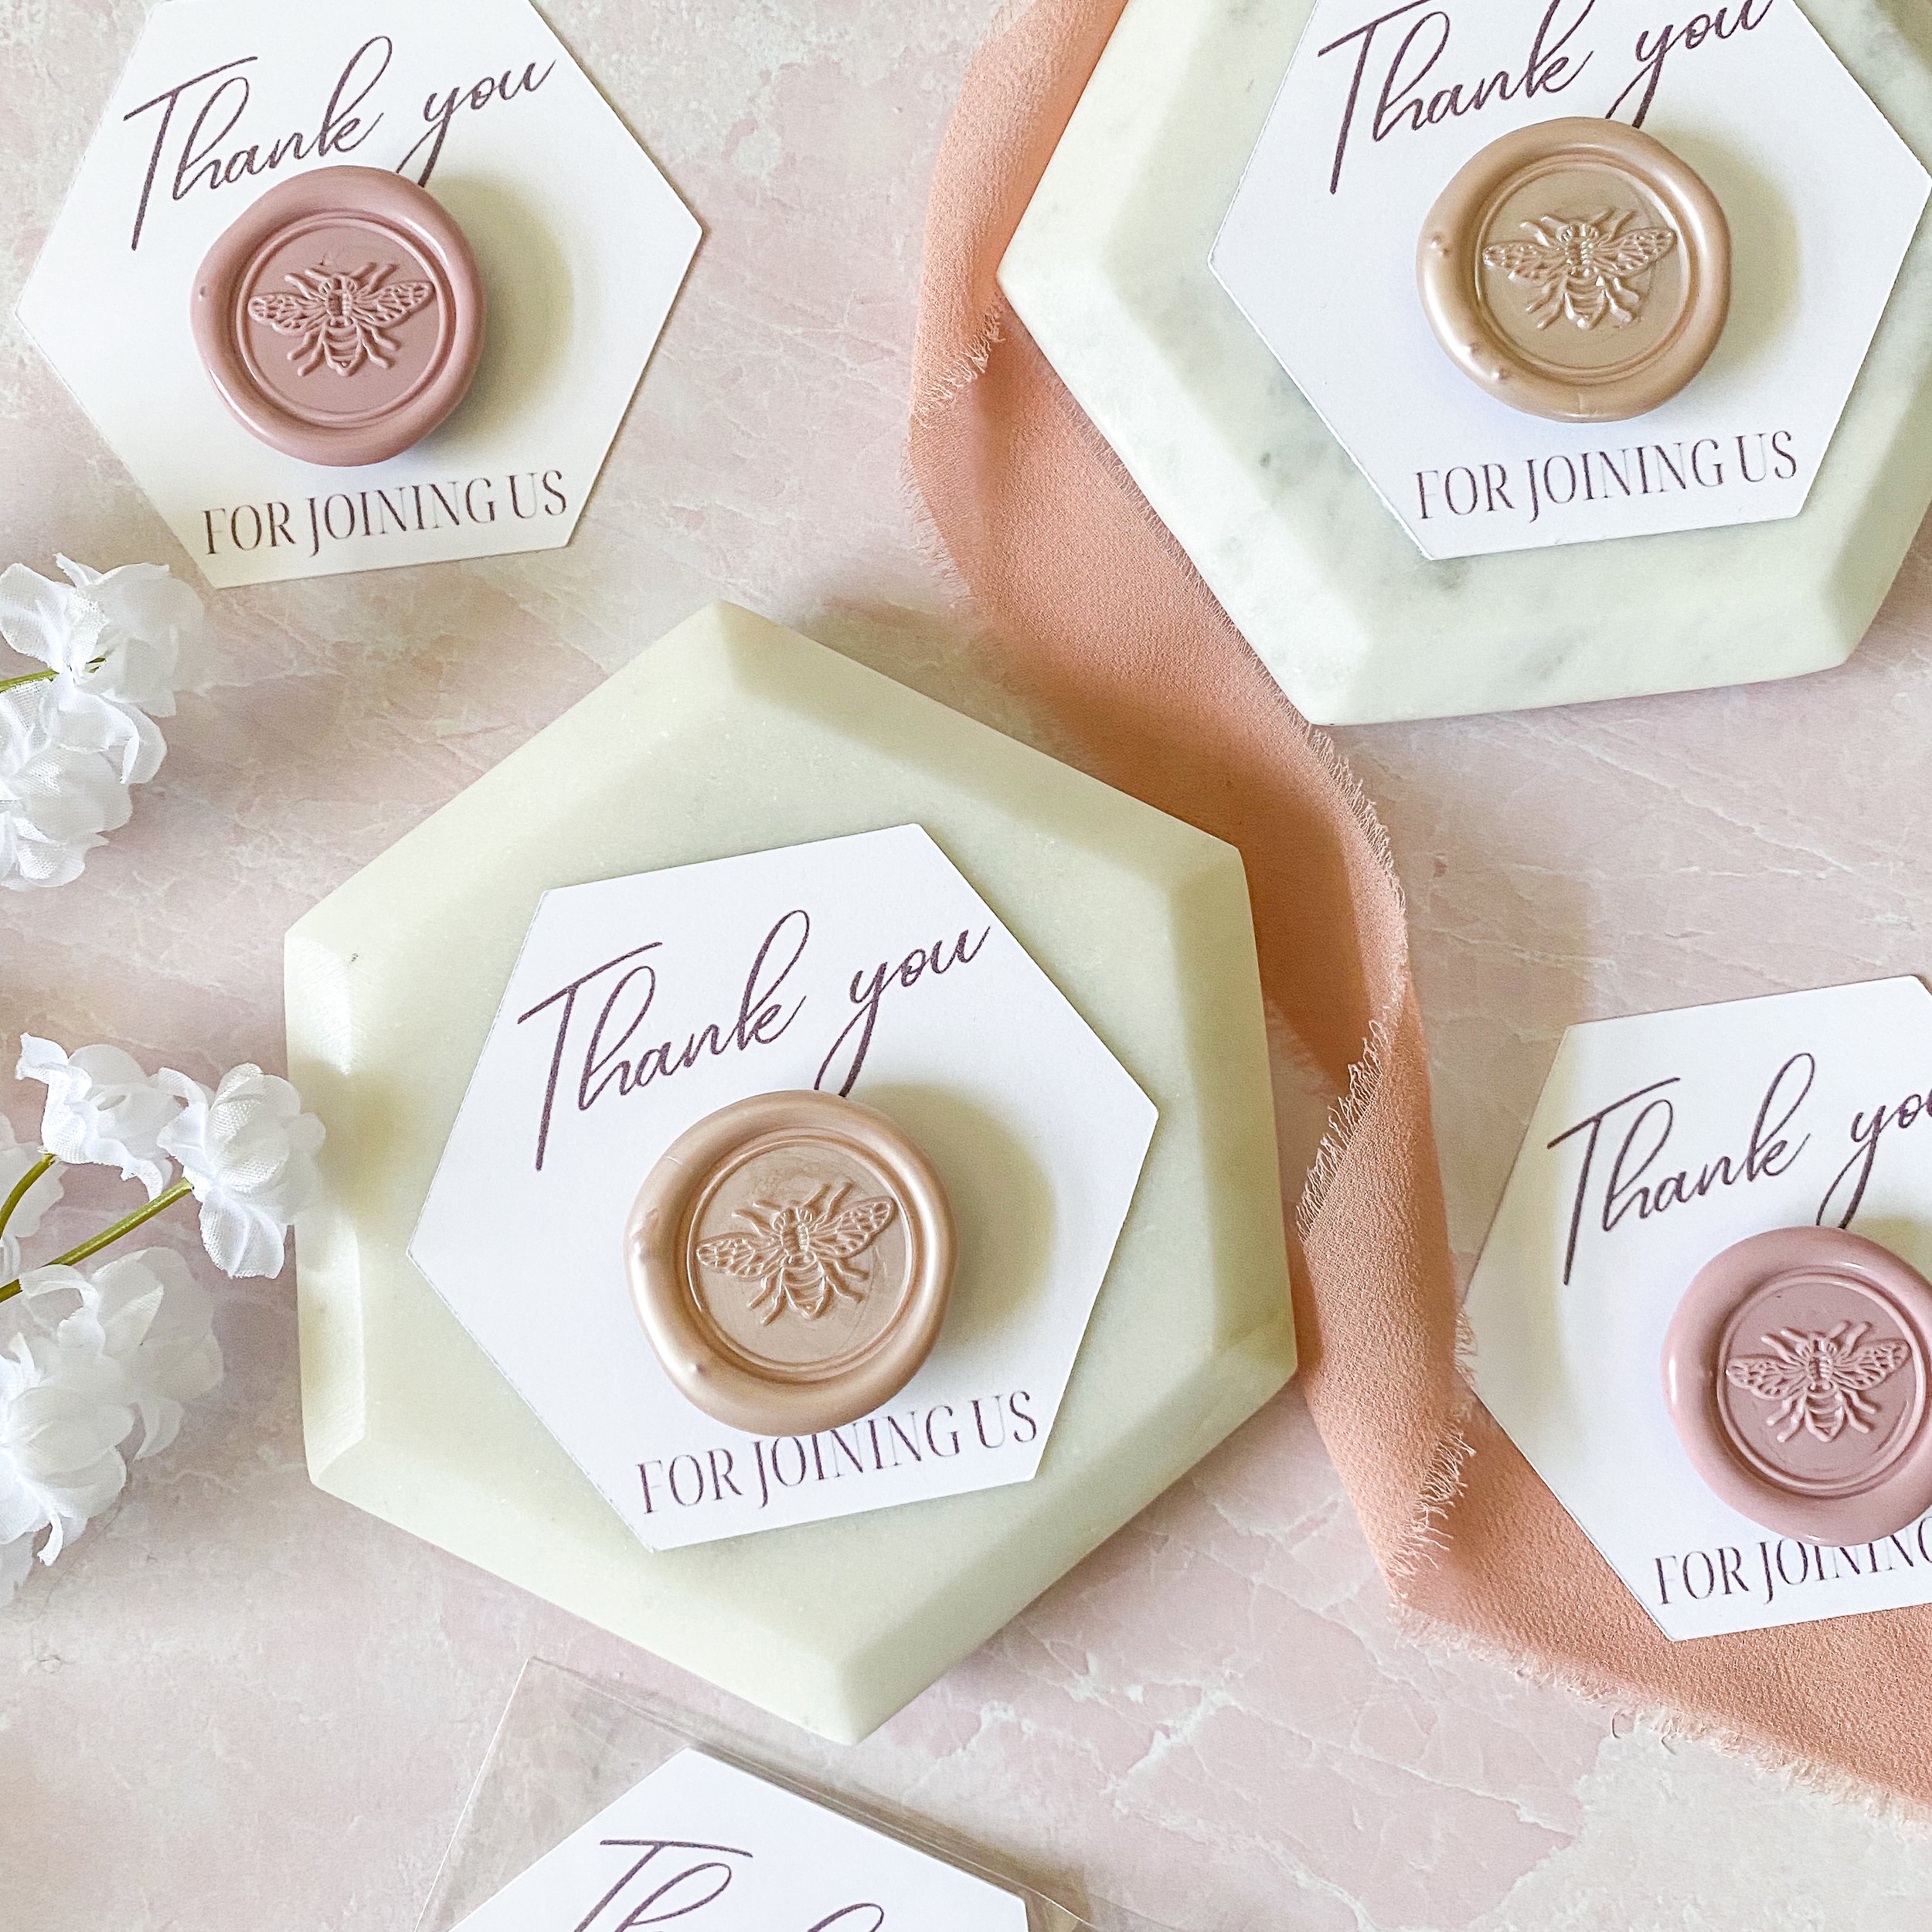
Like my other Wax Seal Projects, I used the wonderful sealing wax from my favorite supplier of wax stamp supplies as well as one of my affiliate partners, Artisaire!
Artisaire specializes in sealing wax beads, sticks, stamps, and all the accessories needed to make beautiful wax seals for your stationary; and now that I’ve found their waxes I’m never looking back! I absolutely love the modern color palettes for their waxes as well as their variety of metallic colored wax options, which is perfect for a glittered up project like this one! Though I made a couple blank stamps with the Buttercream Sealing Wax, most of my seals were made with the beautiful light Champagne Sealing Sticks. To learn more about Artisaire’s beautiful waxes and stamps along with the different styles of wax sealing methods I’ve tried, check out my review of Artisaire and the products here!
When I first started making glittered seals, I wasn’t pressing my seals hard enough and it showed; mainly in impressions that you couldn’t make out! The other big thing I noticed is that you want bolder impressions on your stamps for this project, my more delicate stamp designs didn’t turn out as legible but my bold stamps complimented the glittered surface perfectly.
These seals will certainly be making reappearances in some of our holiday projects coming up this year, and in the meantime give your own stationary projects some sparkle with some glittery wax seals of your own!
SUPPLIES
WAX STAMP & SEALING SUPPLIES
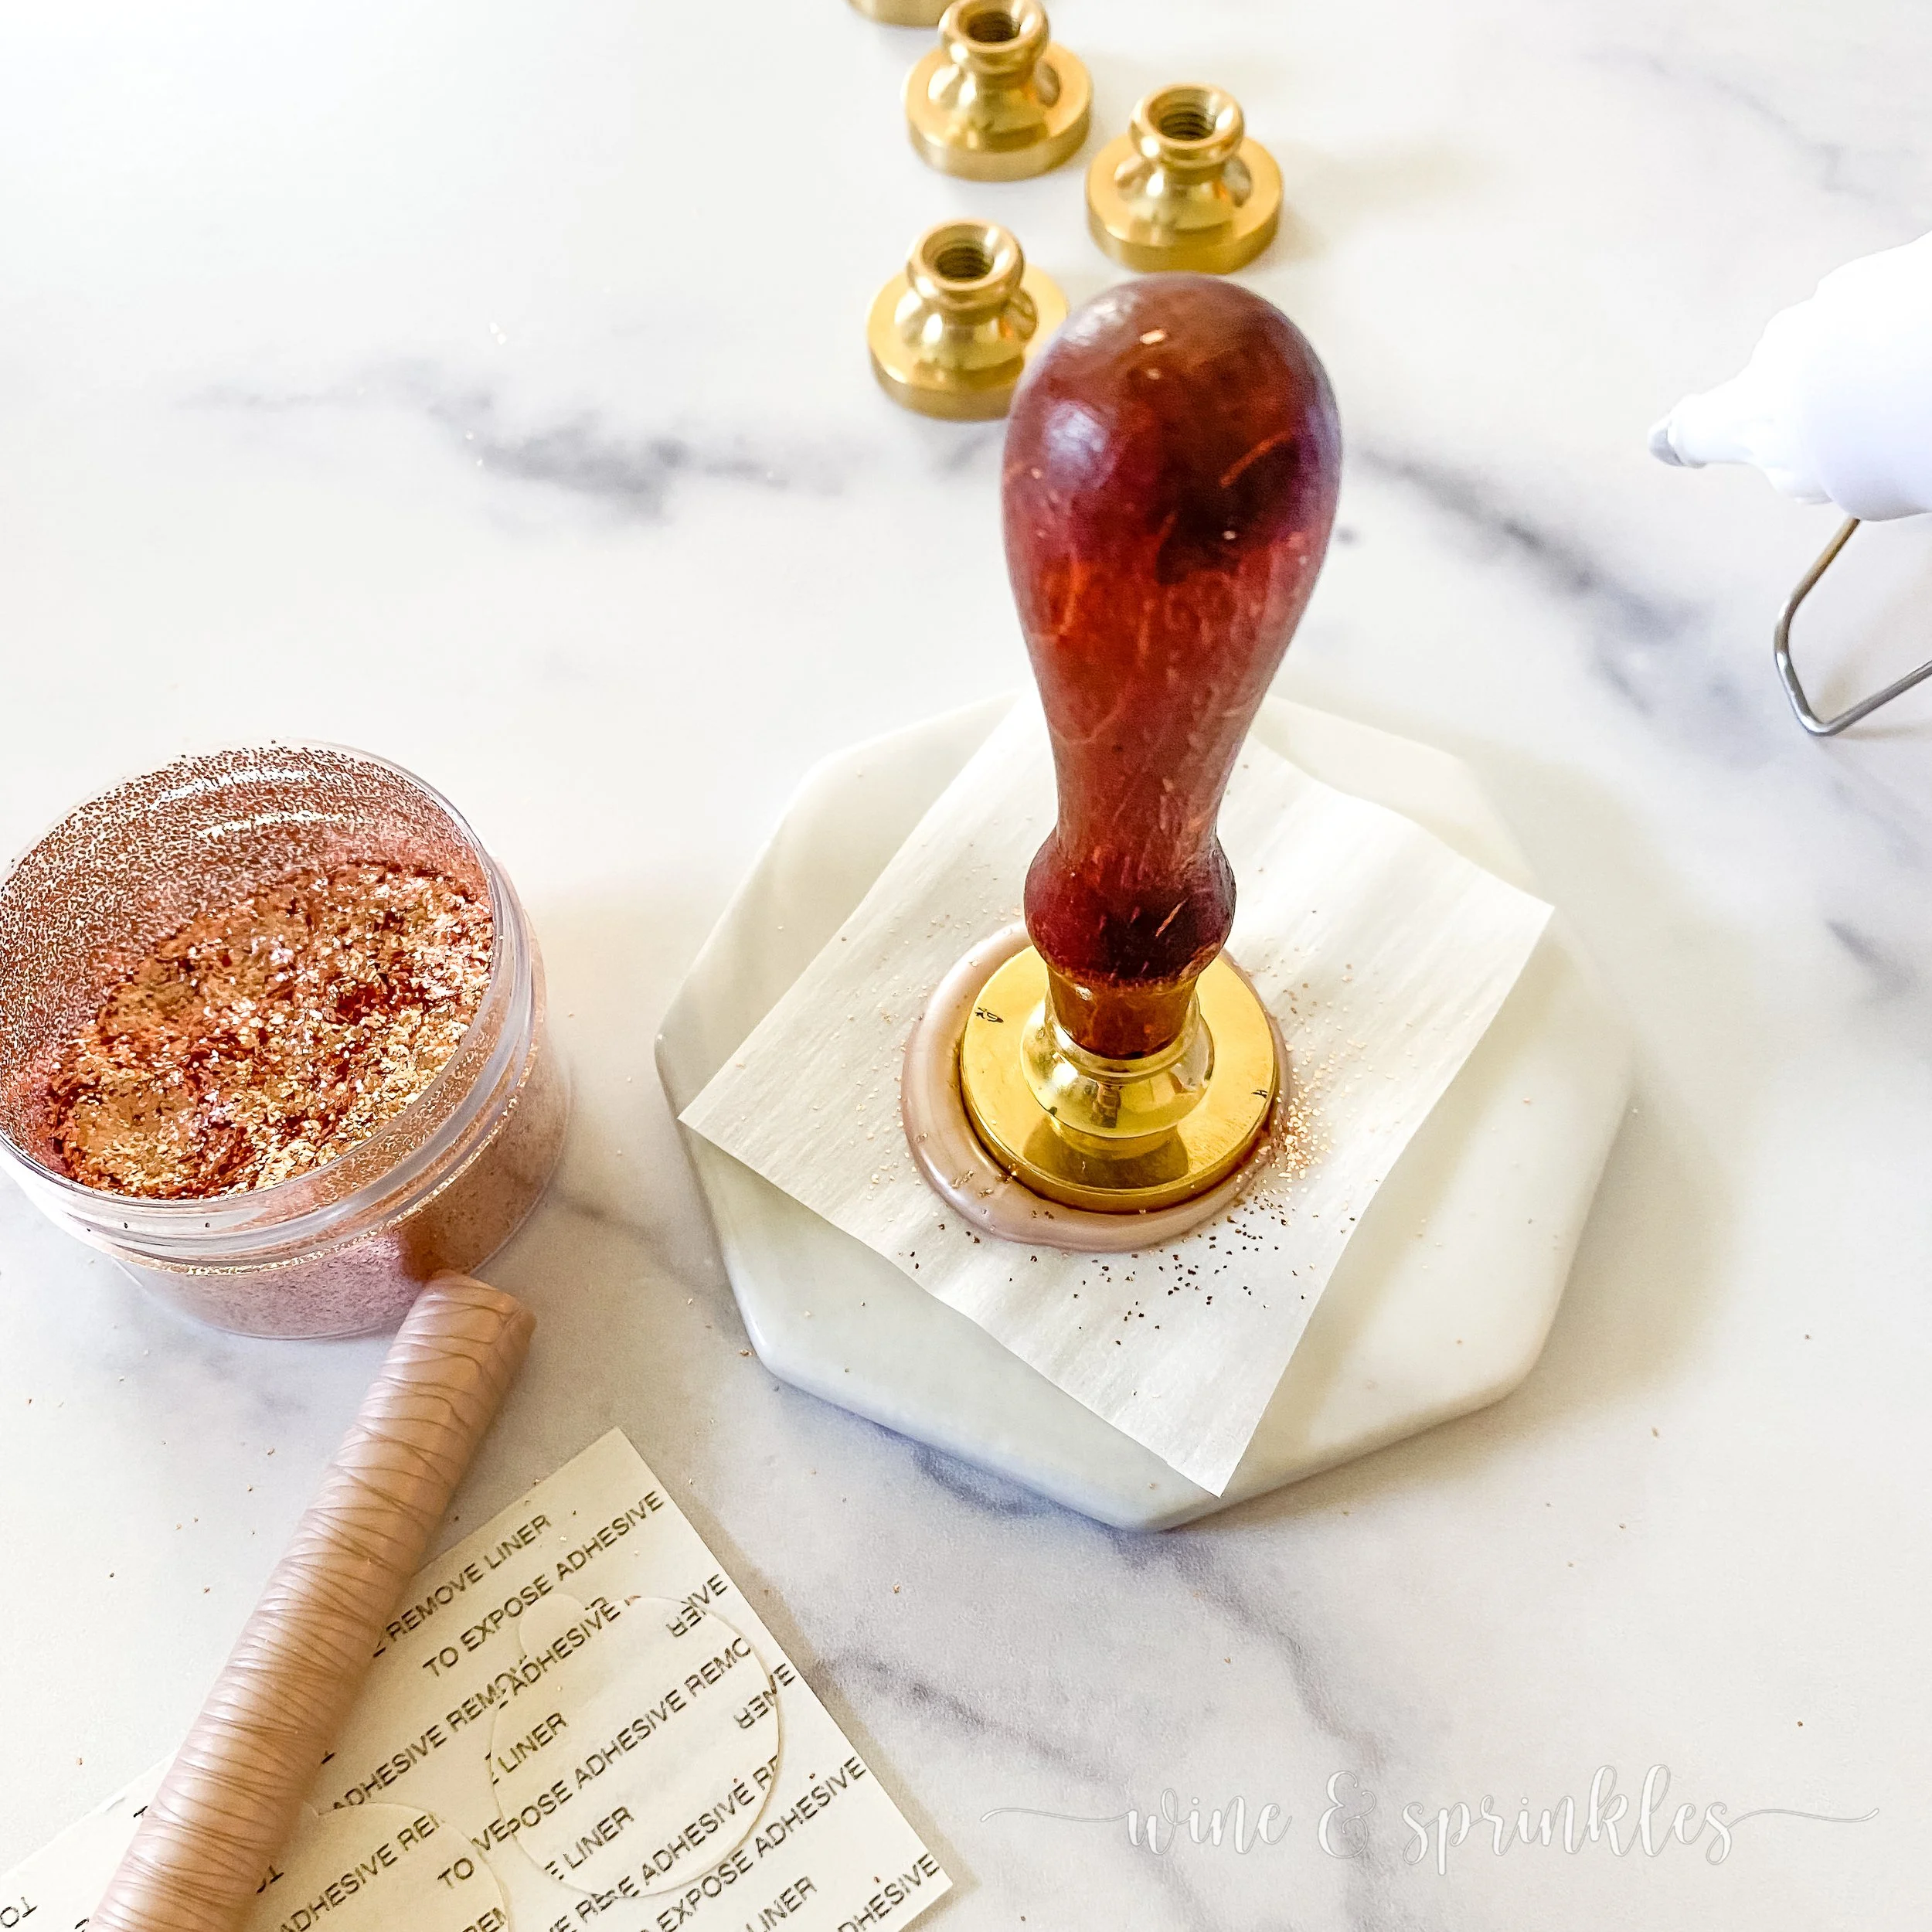
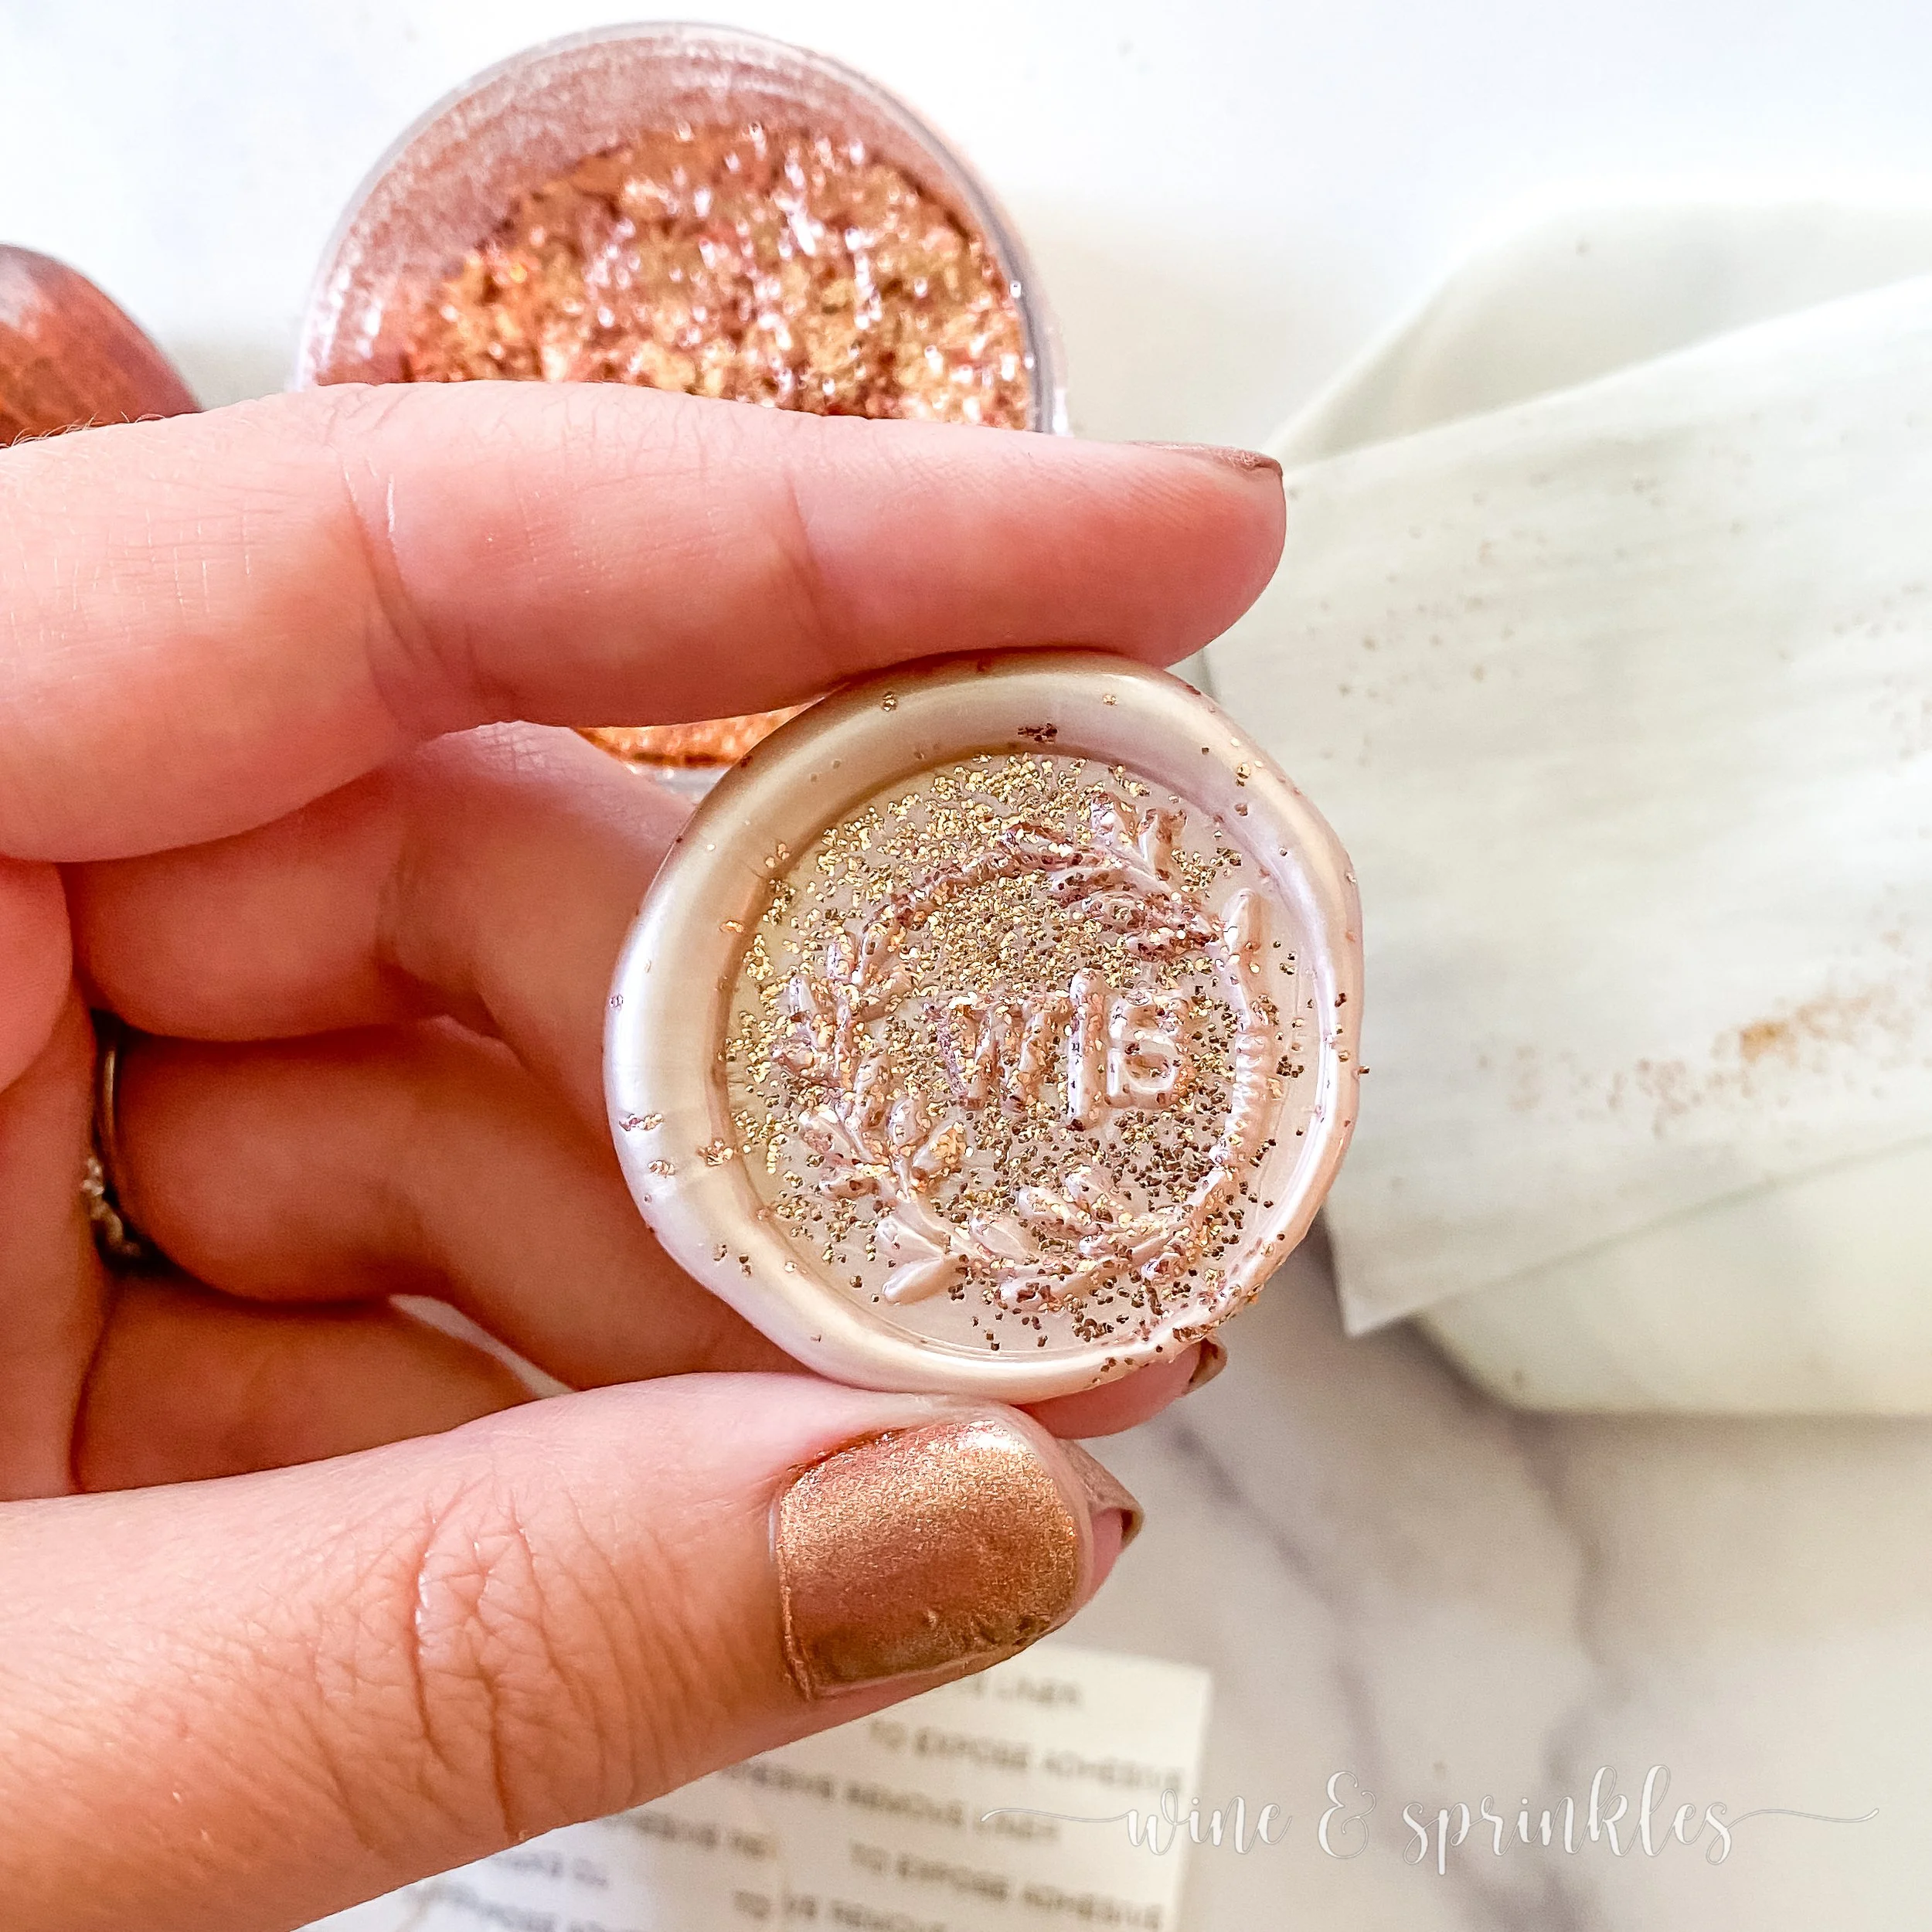
Wax Stamp & Handle: For this project, I needed to use stamps with thicker designs so that the metallic flake wouldn’t mess up the impression, so I went with a Eucalyptus Monogram Stamp I purchased on Etsy, along with trying a Blank Round Stamp and my Zodiac Sign Stamp Set from when I made my Wax Stamped Personalized Gift Bags for my Zodiac Summer’s Eve Party. The result was a glitter constellation feel for the Zodiacs, beautiful modern glam for the blanks, and a beautiful glitter background to show off my pretty monogram!
Sealing Wax Sticks: I love using wax sealing sticks for my wax seal projects; they are so easy to use and make such consistent, beautiful stamps, that this will be my method for as many stamp projects as I can! Like some of my Simple Self Adhesive Wax Stamps, I used the beautiful Champagne Sealing Sticks for the majority of these seals, with a few of each made in Buttercream with my blank stamp for some future holiday stationary!
Metallic Flake Glitter: For glittery metallic flake seals, you of course need a glam glitter to accent your sealing wax! I loved the selection available at Advanced Metallics and couldn’t say no to these beautiful rose gold copper flakes! They have many different sizes and shades to choose from and I can’t wait to invest in more colors and flake sizes soon, but I’m glad that I chose the finest metal flake for this project. While my supplies list says these seals require 40 grams, that is just the smallest size my flake was sold in, there was still plenty left for other projects!
TOOLS & OTHER SUPPLIES
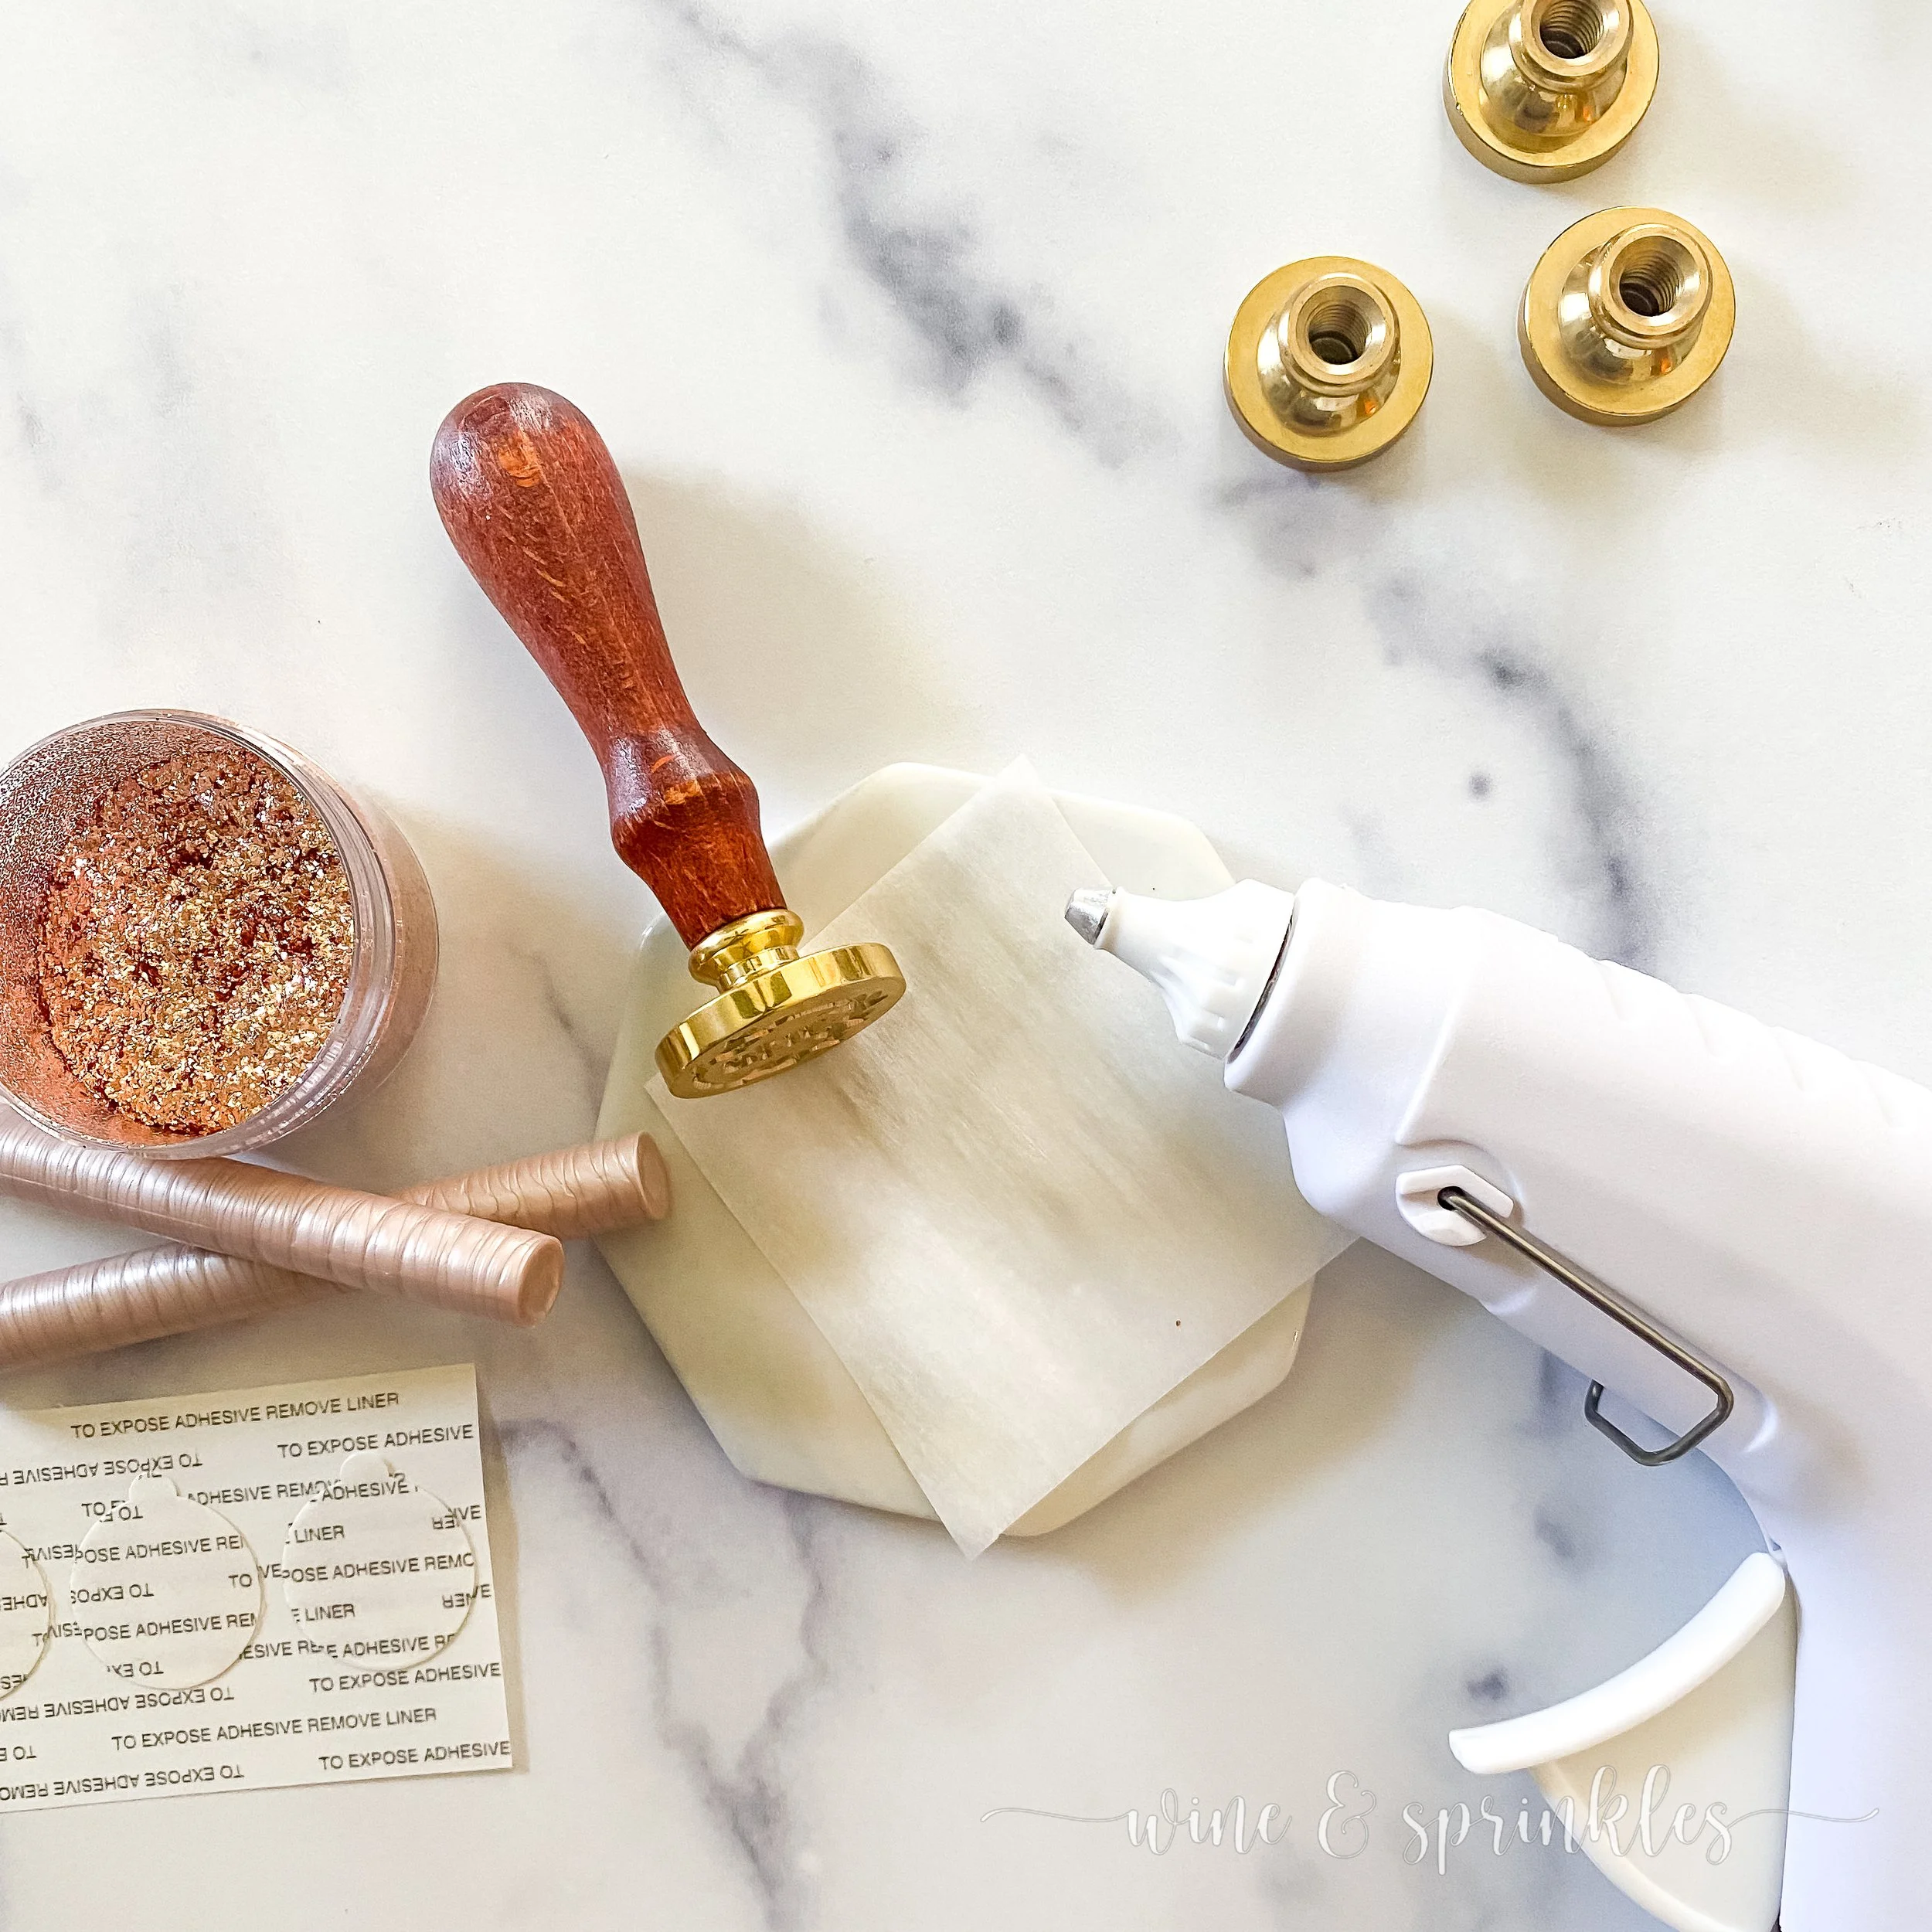
Low Temperature Glue Gun: For melting your wax seal sticks and dispensing the wax, a low temperature glue gun is a must. I got mine from Artisaire and I absolutely love it, firstly because it does a great job of uniformly melting the wax but also because it doesn’t drip hot wax everywhere when it's idle between stampings.
Ceramic Wax Melting Pad: for a flat quick cooling workspace for you to dispense your hot wax onto to create your seals.
Parchment Paper: for putting between your melting pad and your hot wax so that you can easily remove your cooled seals.
Double Sided Self Adhesive Backings: for sticking to the back of your cooled seals so you can easily stick them to your stationary, gift tags, or anything you like!
SUPPLIES LIST:
[for 40 wax seals]
WAX STAMP & SEALING SUPPLIES
Wax Stamp & Handle x 1
Sealing Wax Sticks x 1
Metallic Flake Glitter x 40 grams
TOOLS & OTHER SUPPLIES
Low Temperature Glue Gun x 1
Double Sided Self Adhesive Backings x 40
DIRECTIONS
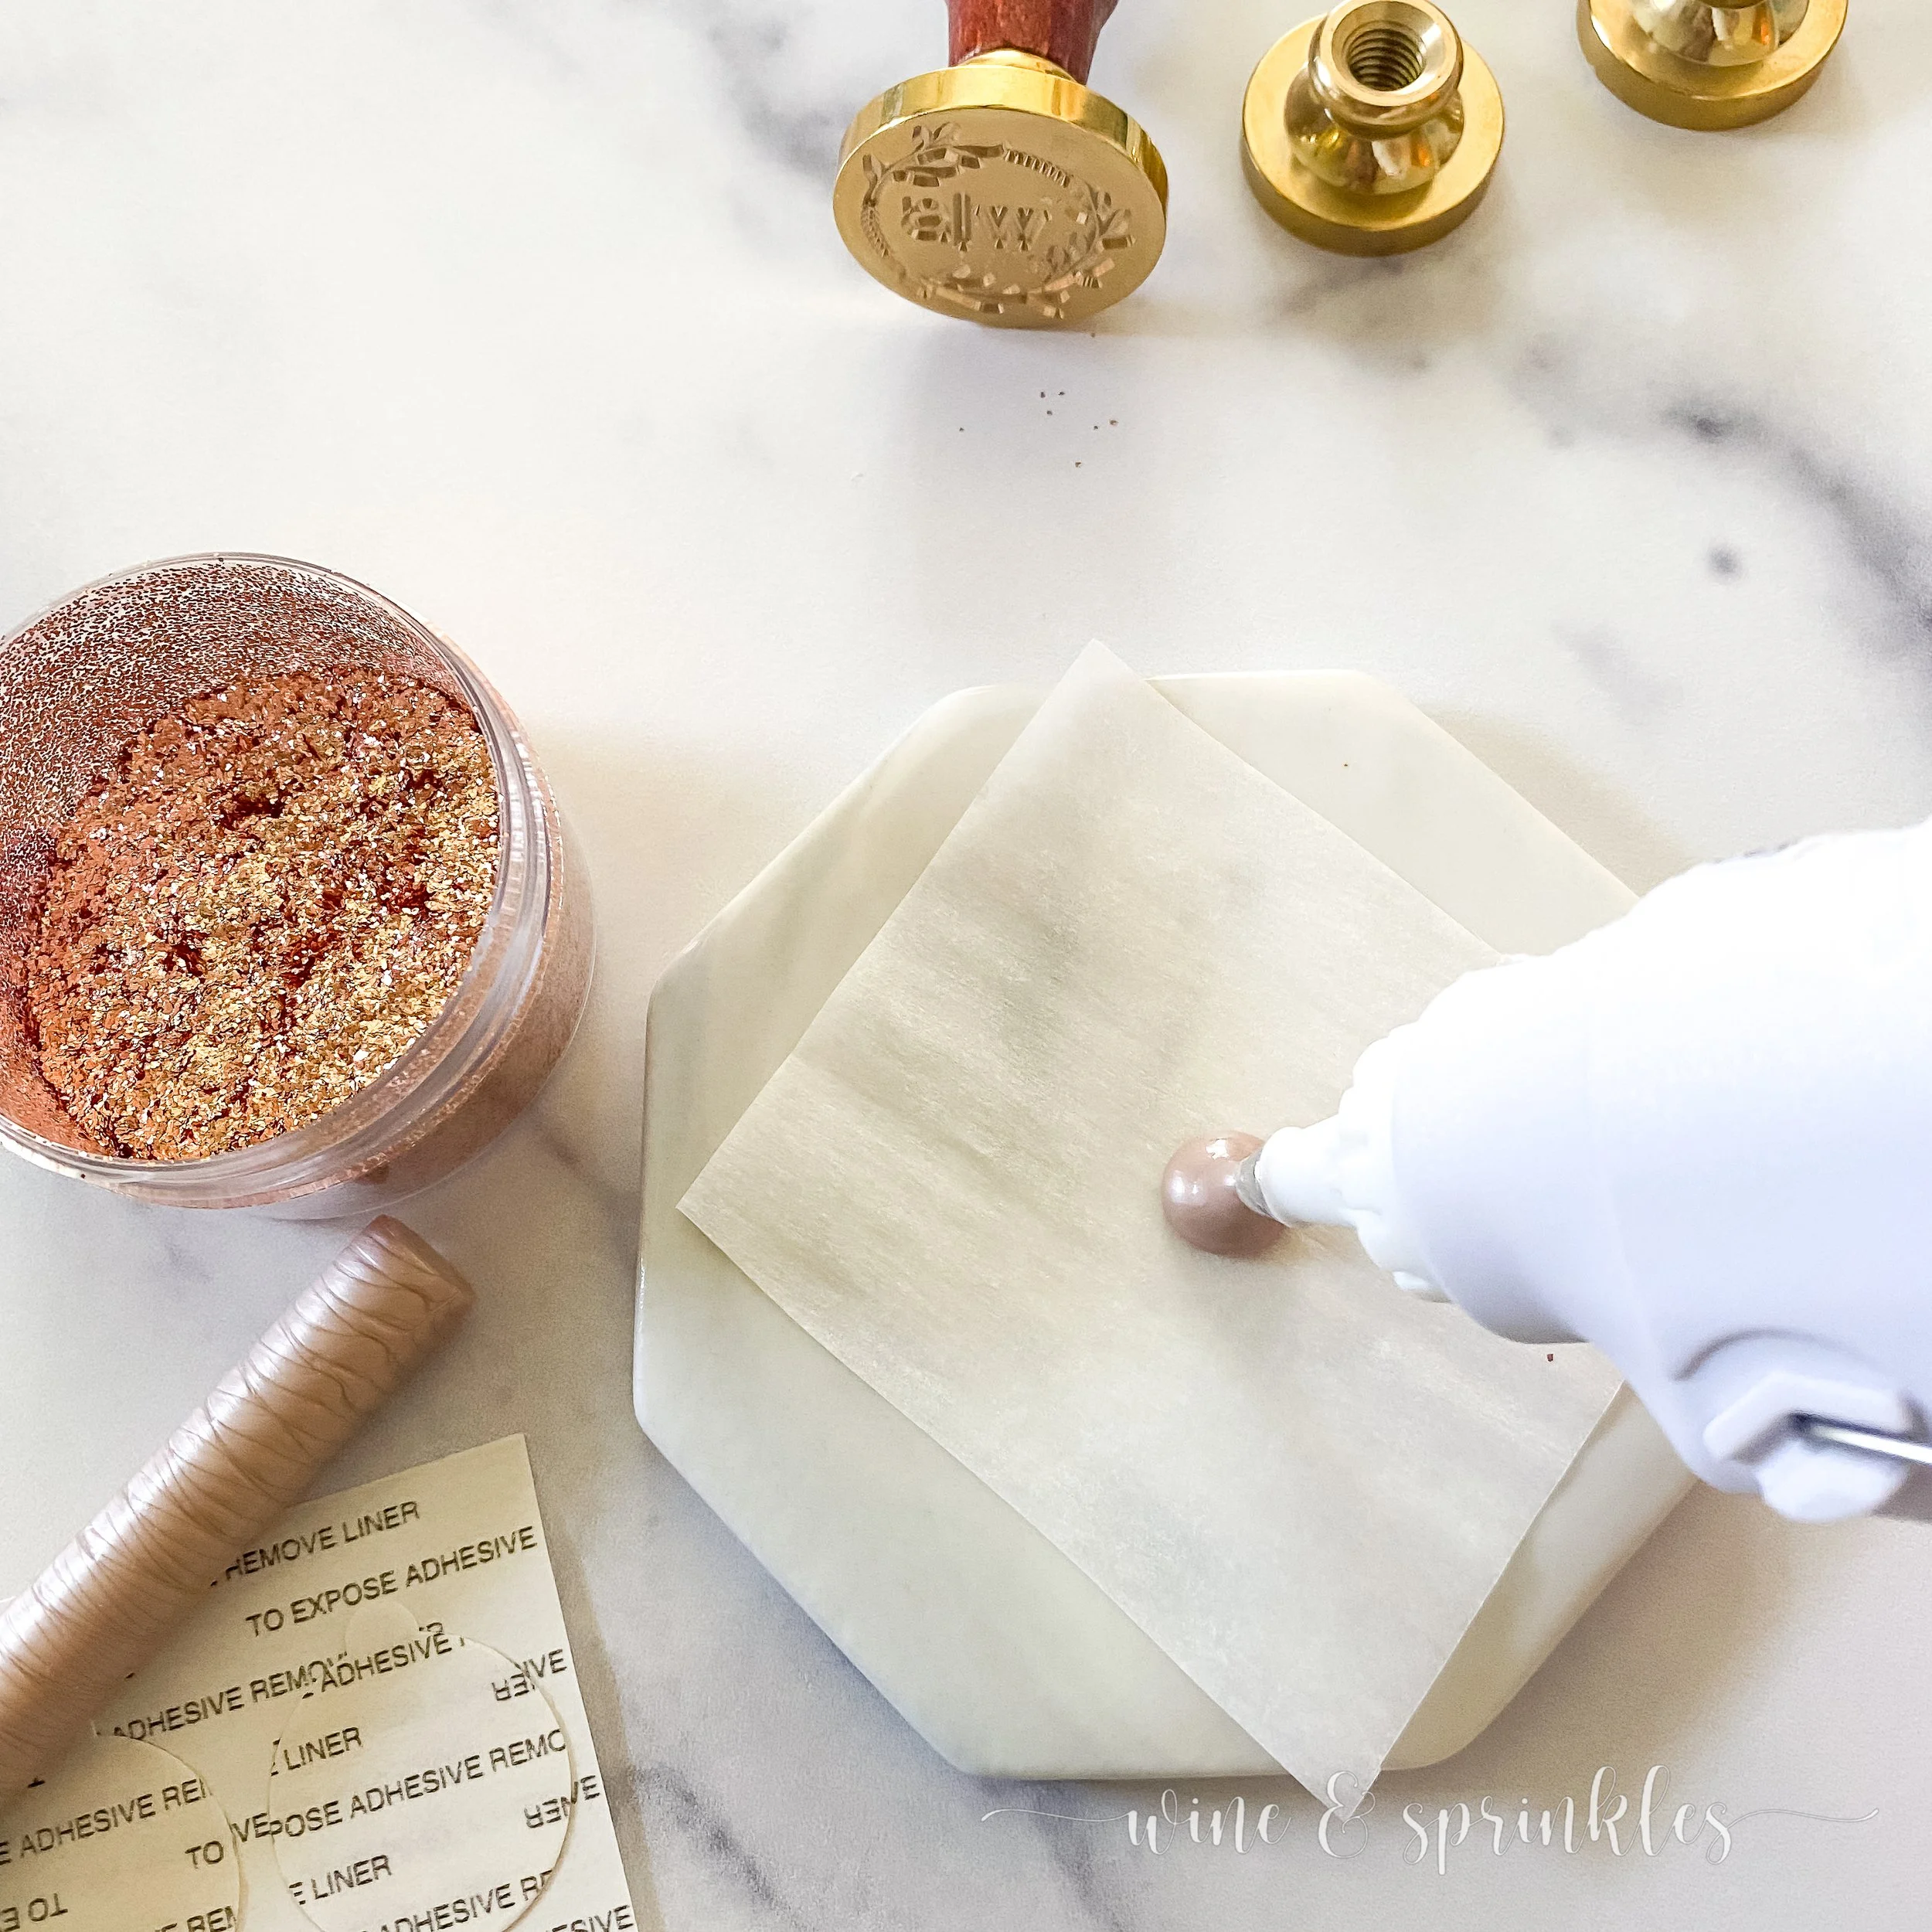
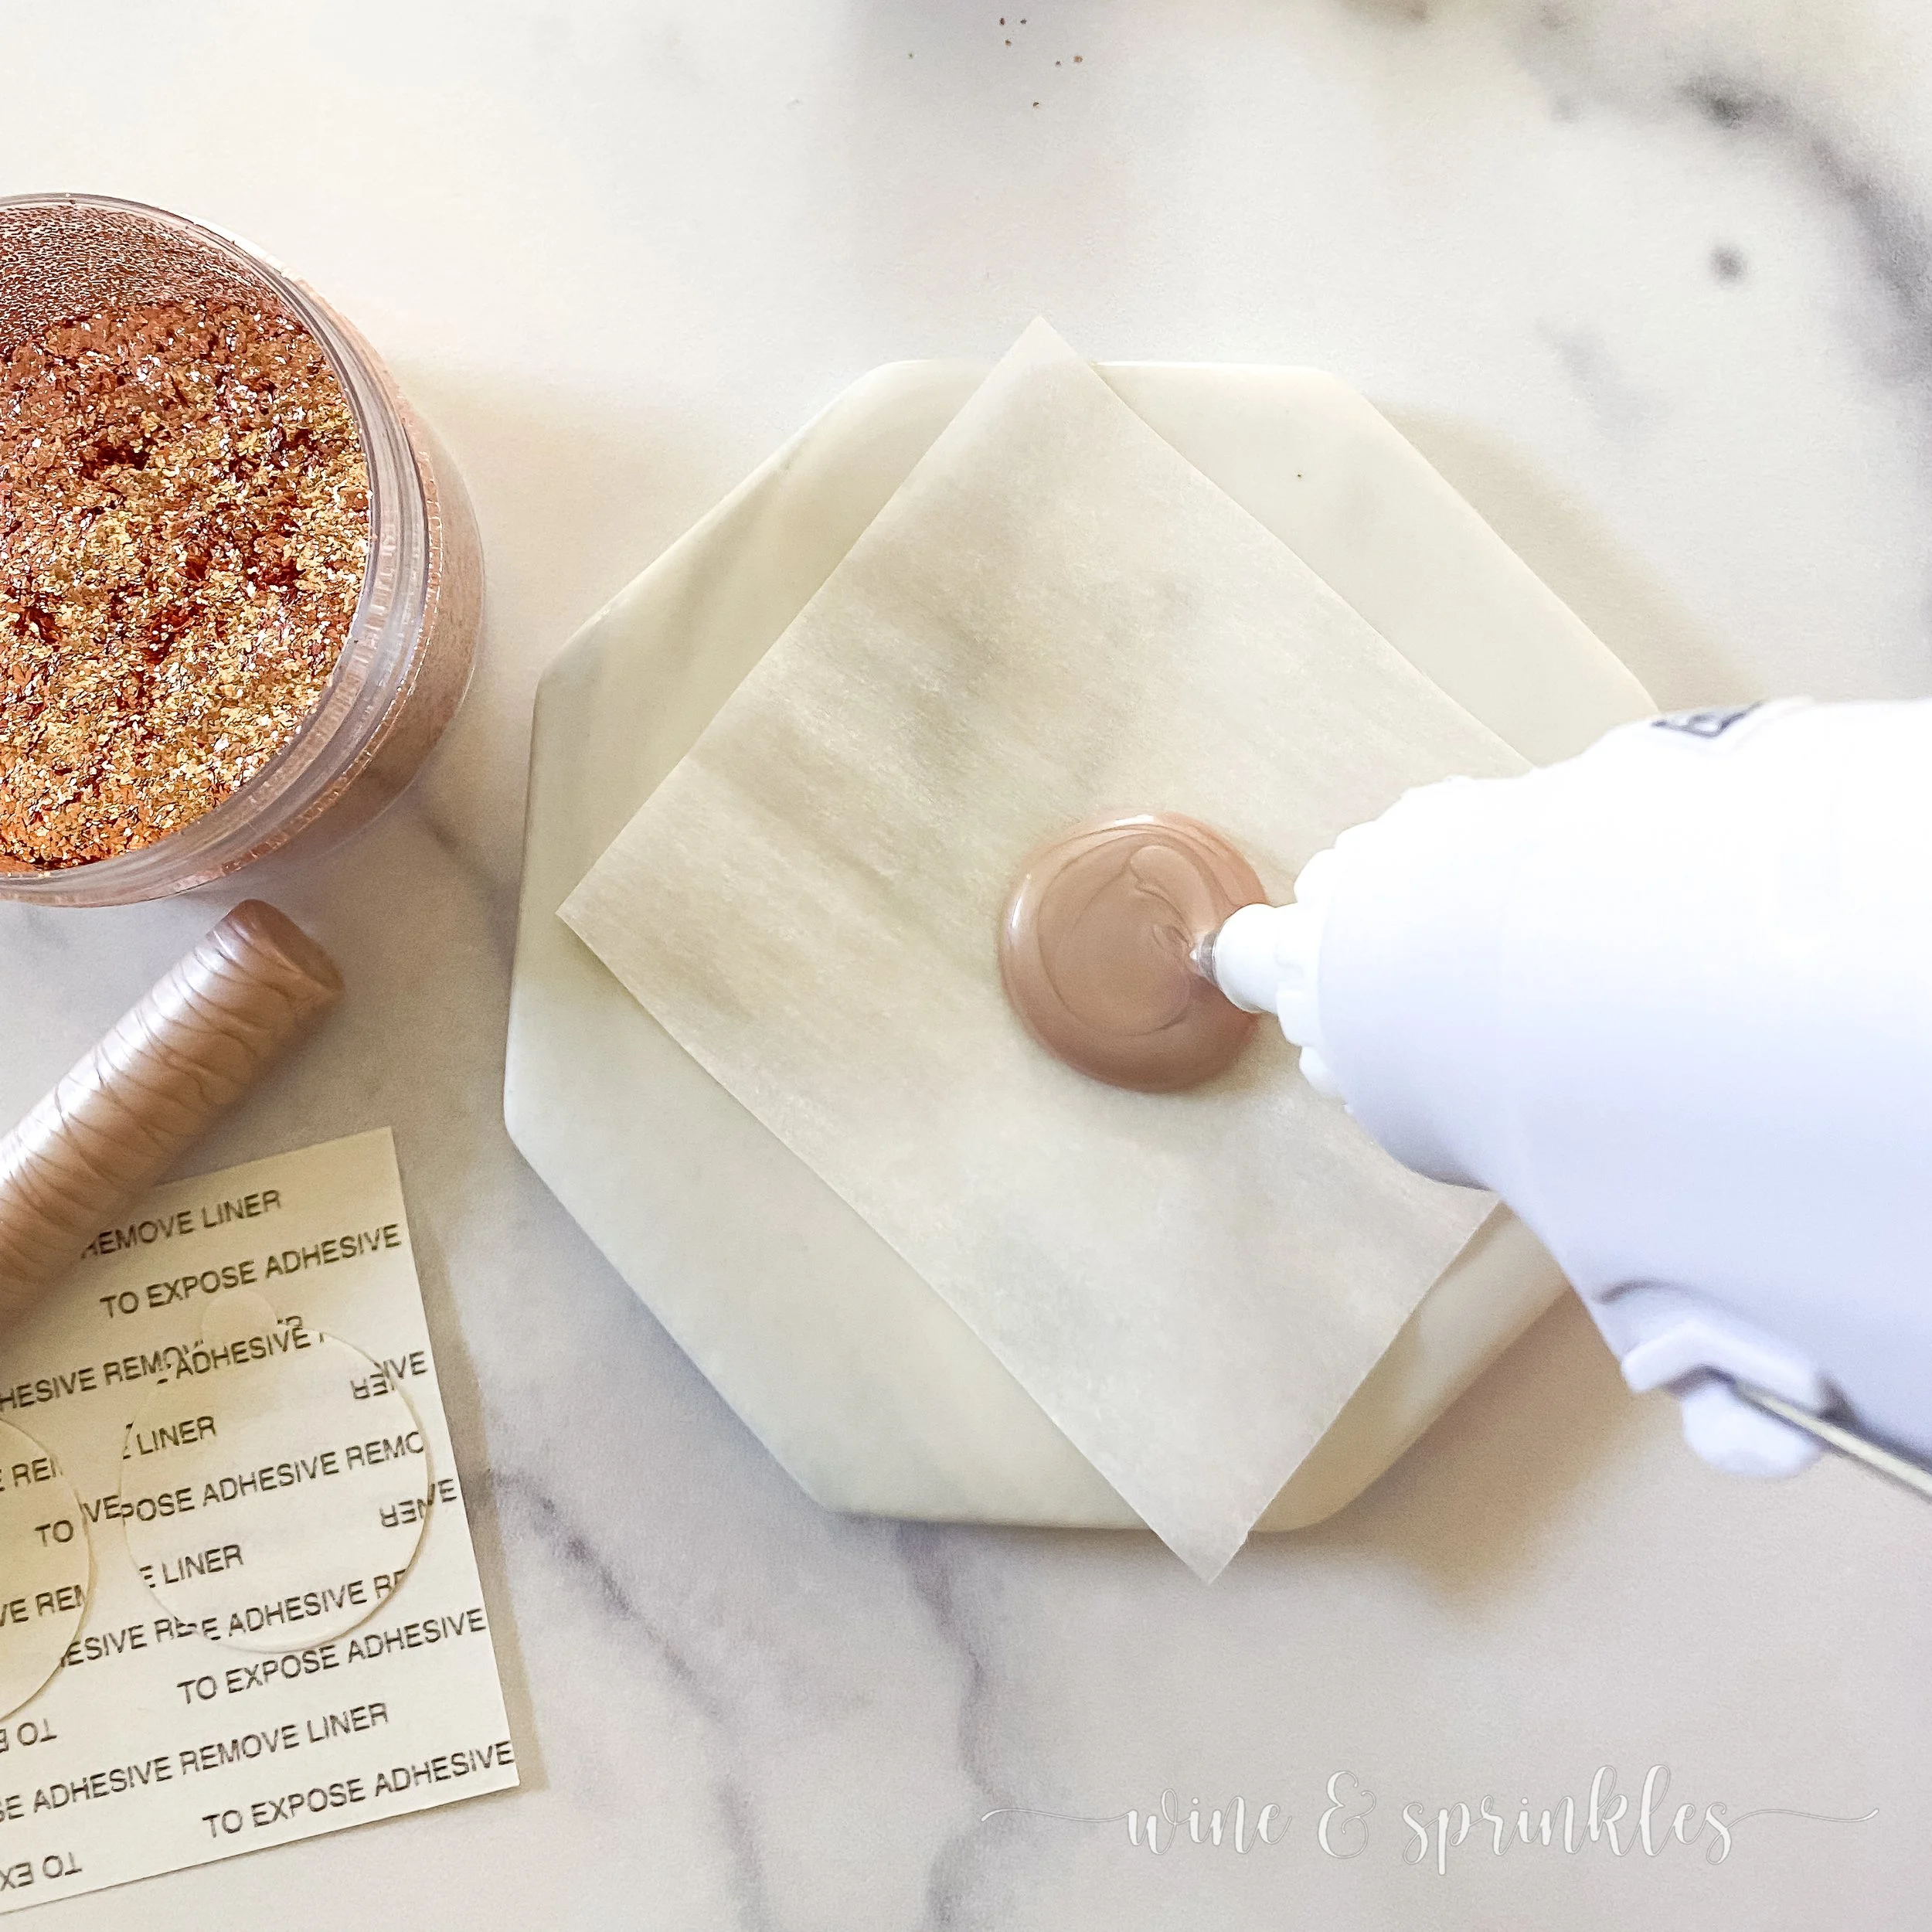
1. Plug in and heat up your wax stick in your low temperature glue gun for 7-10 minutes. While your gun is heating up, cut your parchment paper into small squares to place on your ceramic cooling pad and pick out the wax stamps you want to use. Place a piece of parchment paper on your cooling pad, then you’re ready to start making seals.
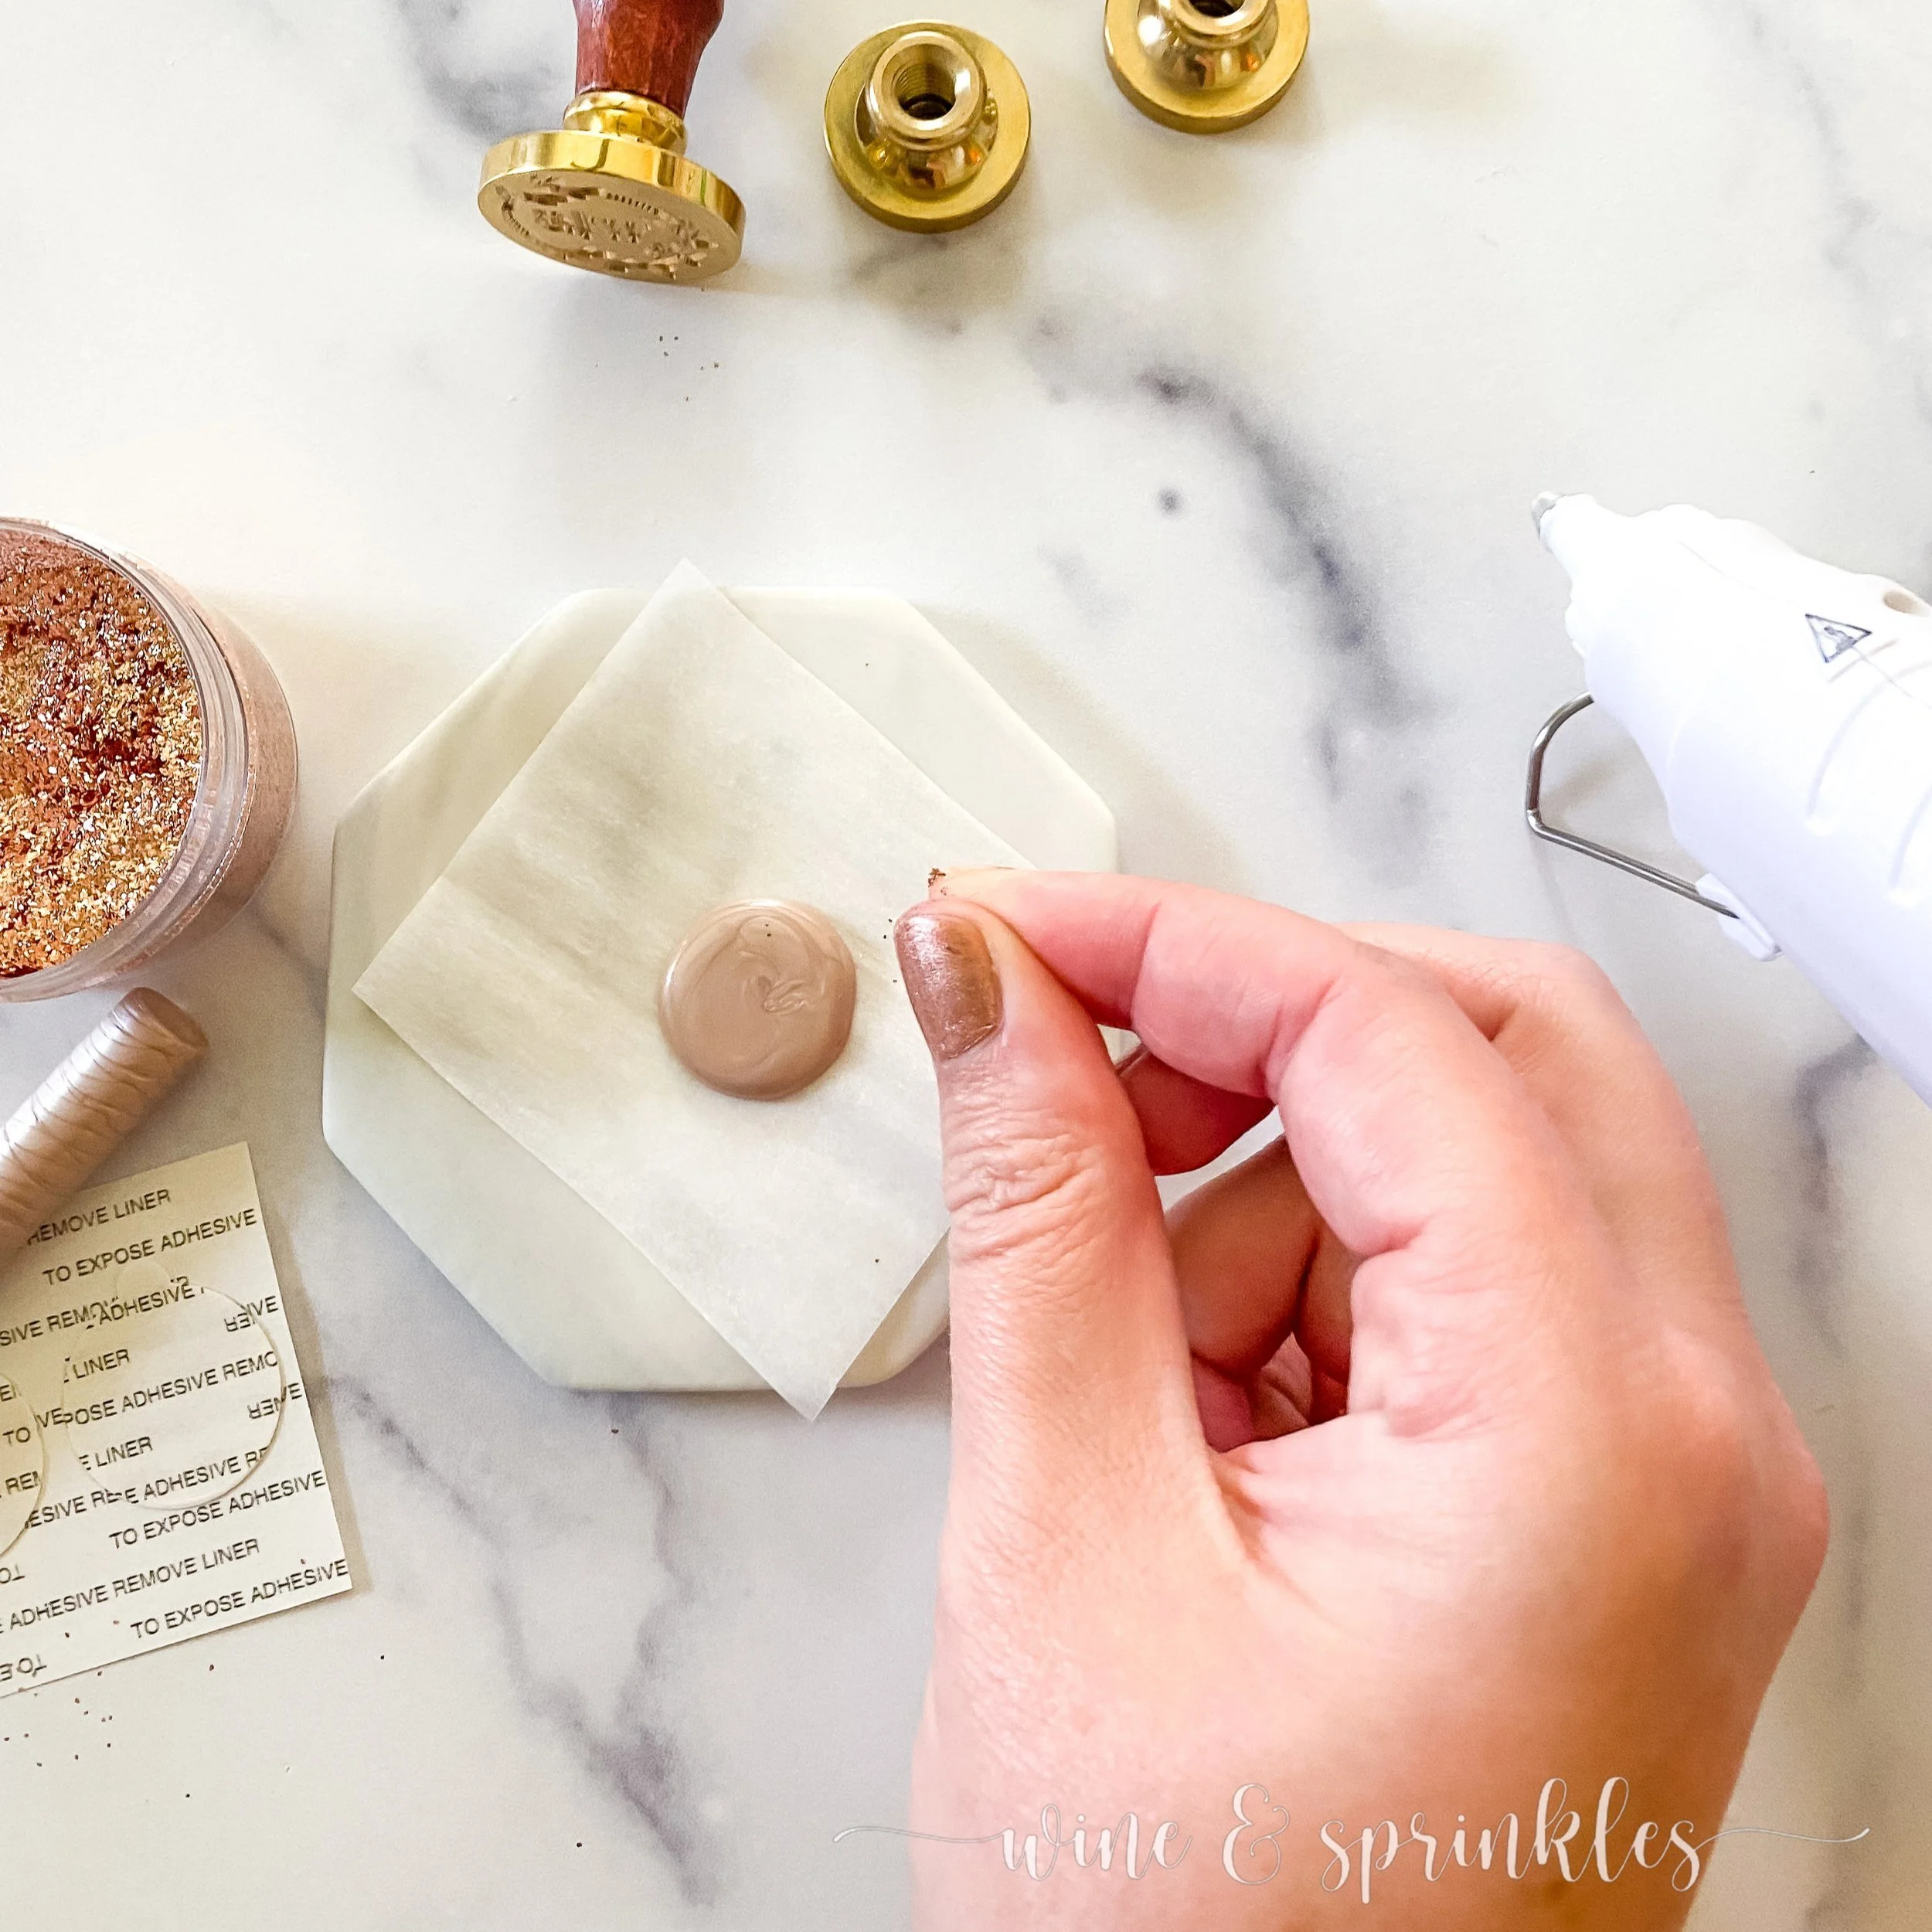
2. Dispense hot liquid wax onto the parchment paper on your cooling pad, creating a circular puddle of hot wax. I used about 1 ½ - 2 triggerfuls of the glue gun I had, which gave exactly the seals I wanted for my larger eucalyptus seal, with 1 - 1 ½ triggerfuls for my smaller seals. Sprinkle your metallic flake glitter diagonally over the wax, swirling gently with a toothpick to incorporate it slightly into the seal.
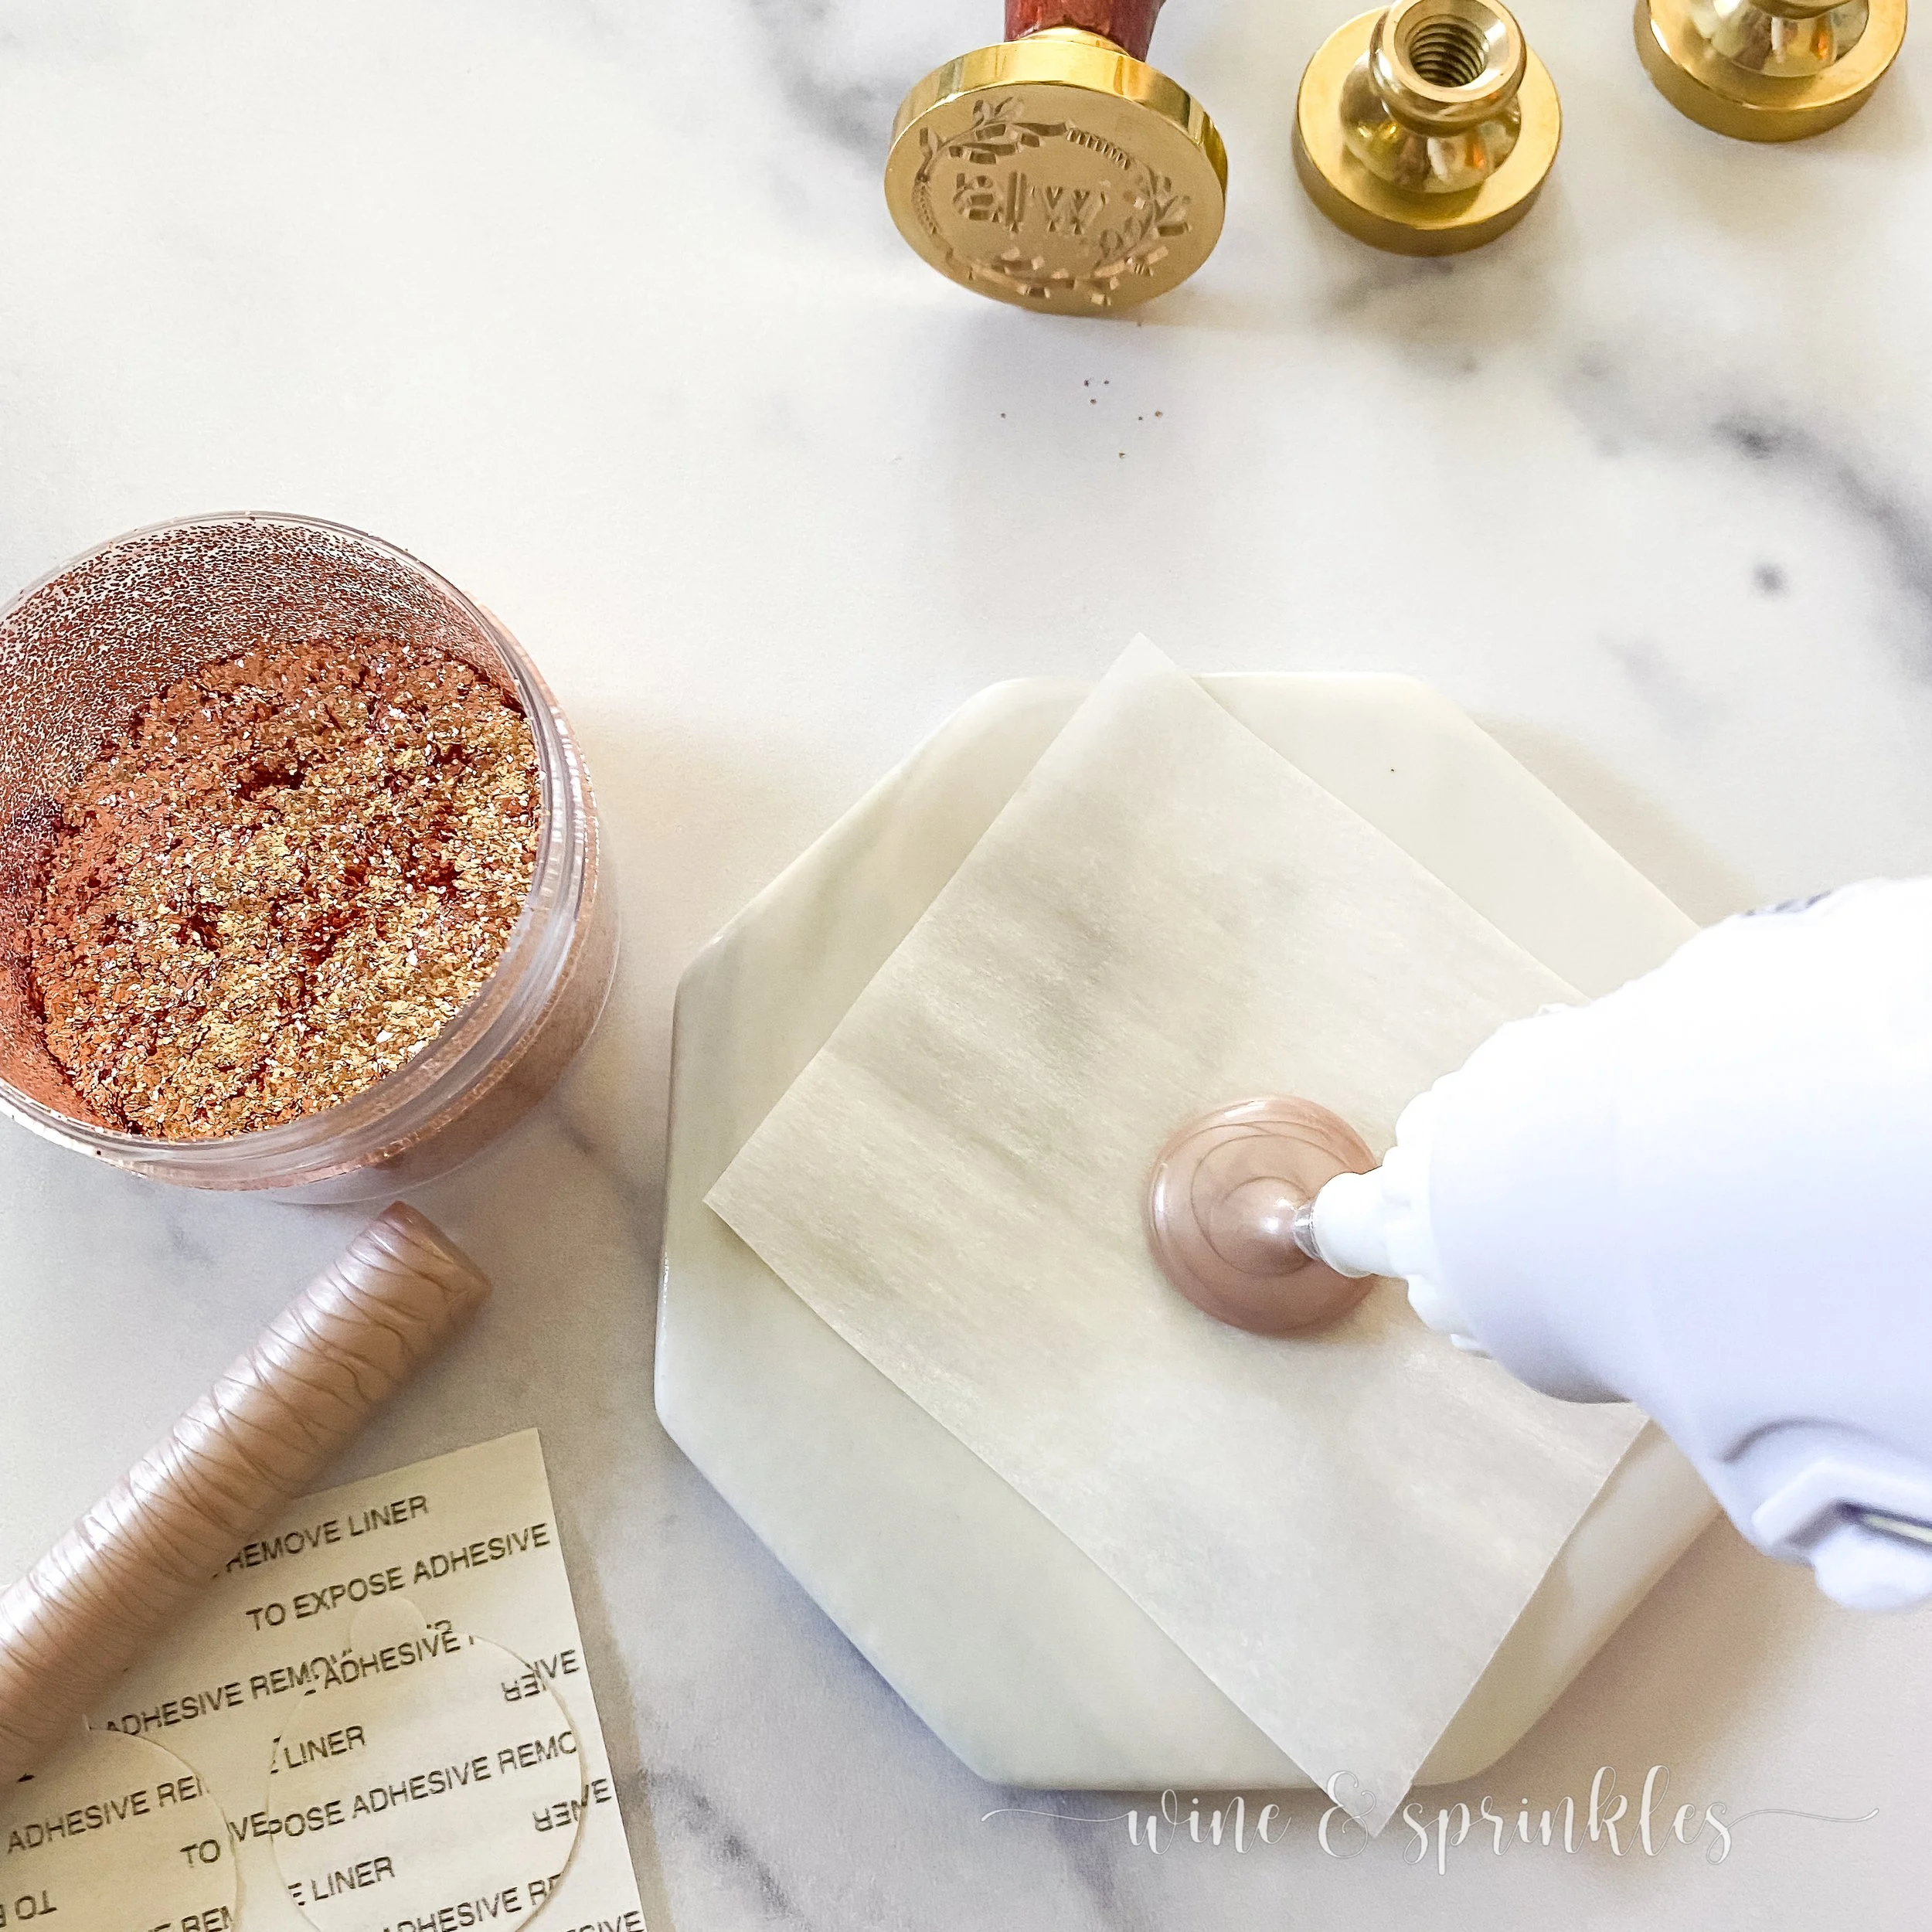

3. Sprinkle your metallic flake glitter over the wax to your choosing; I choose diagonally for my blank stamps and an all over dusting for my stamps with designs. Press your stamp firmly and evenly into the center of the wax puddle.
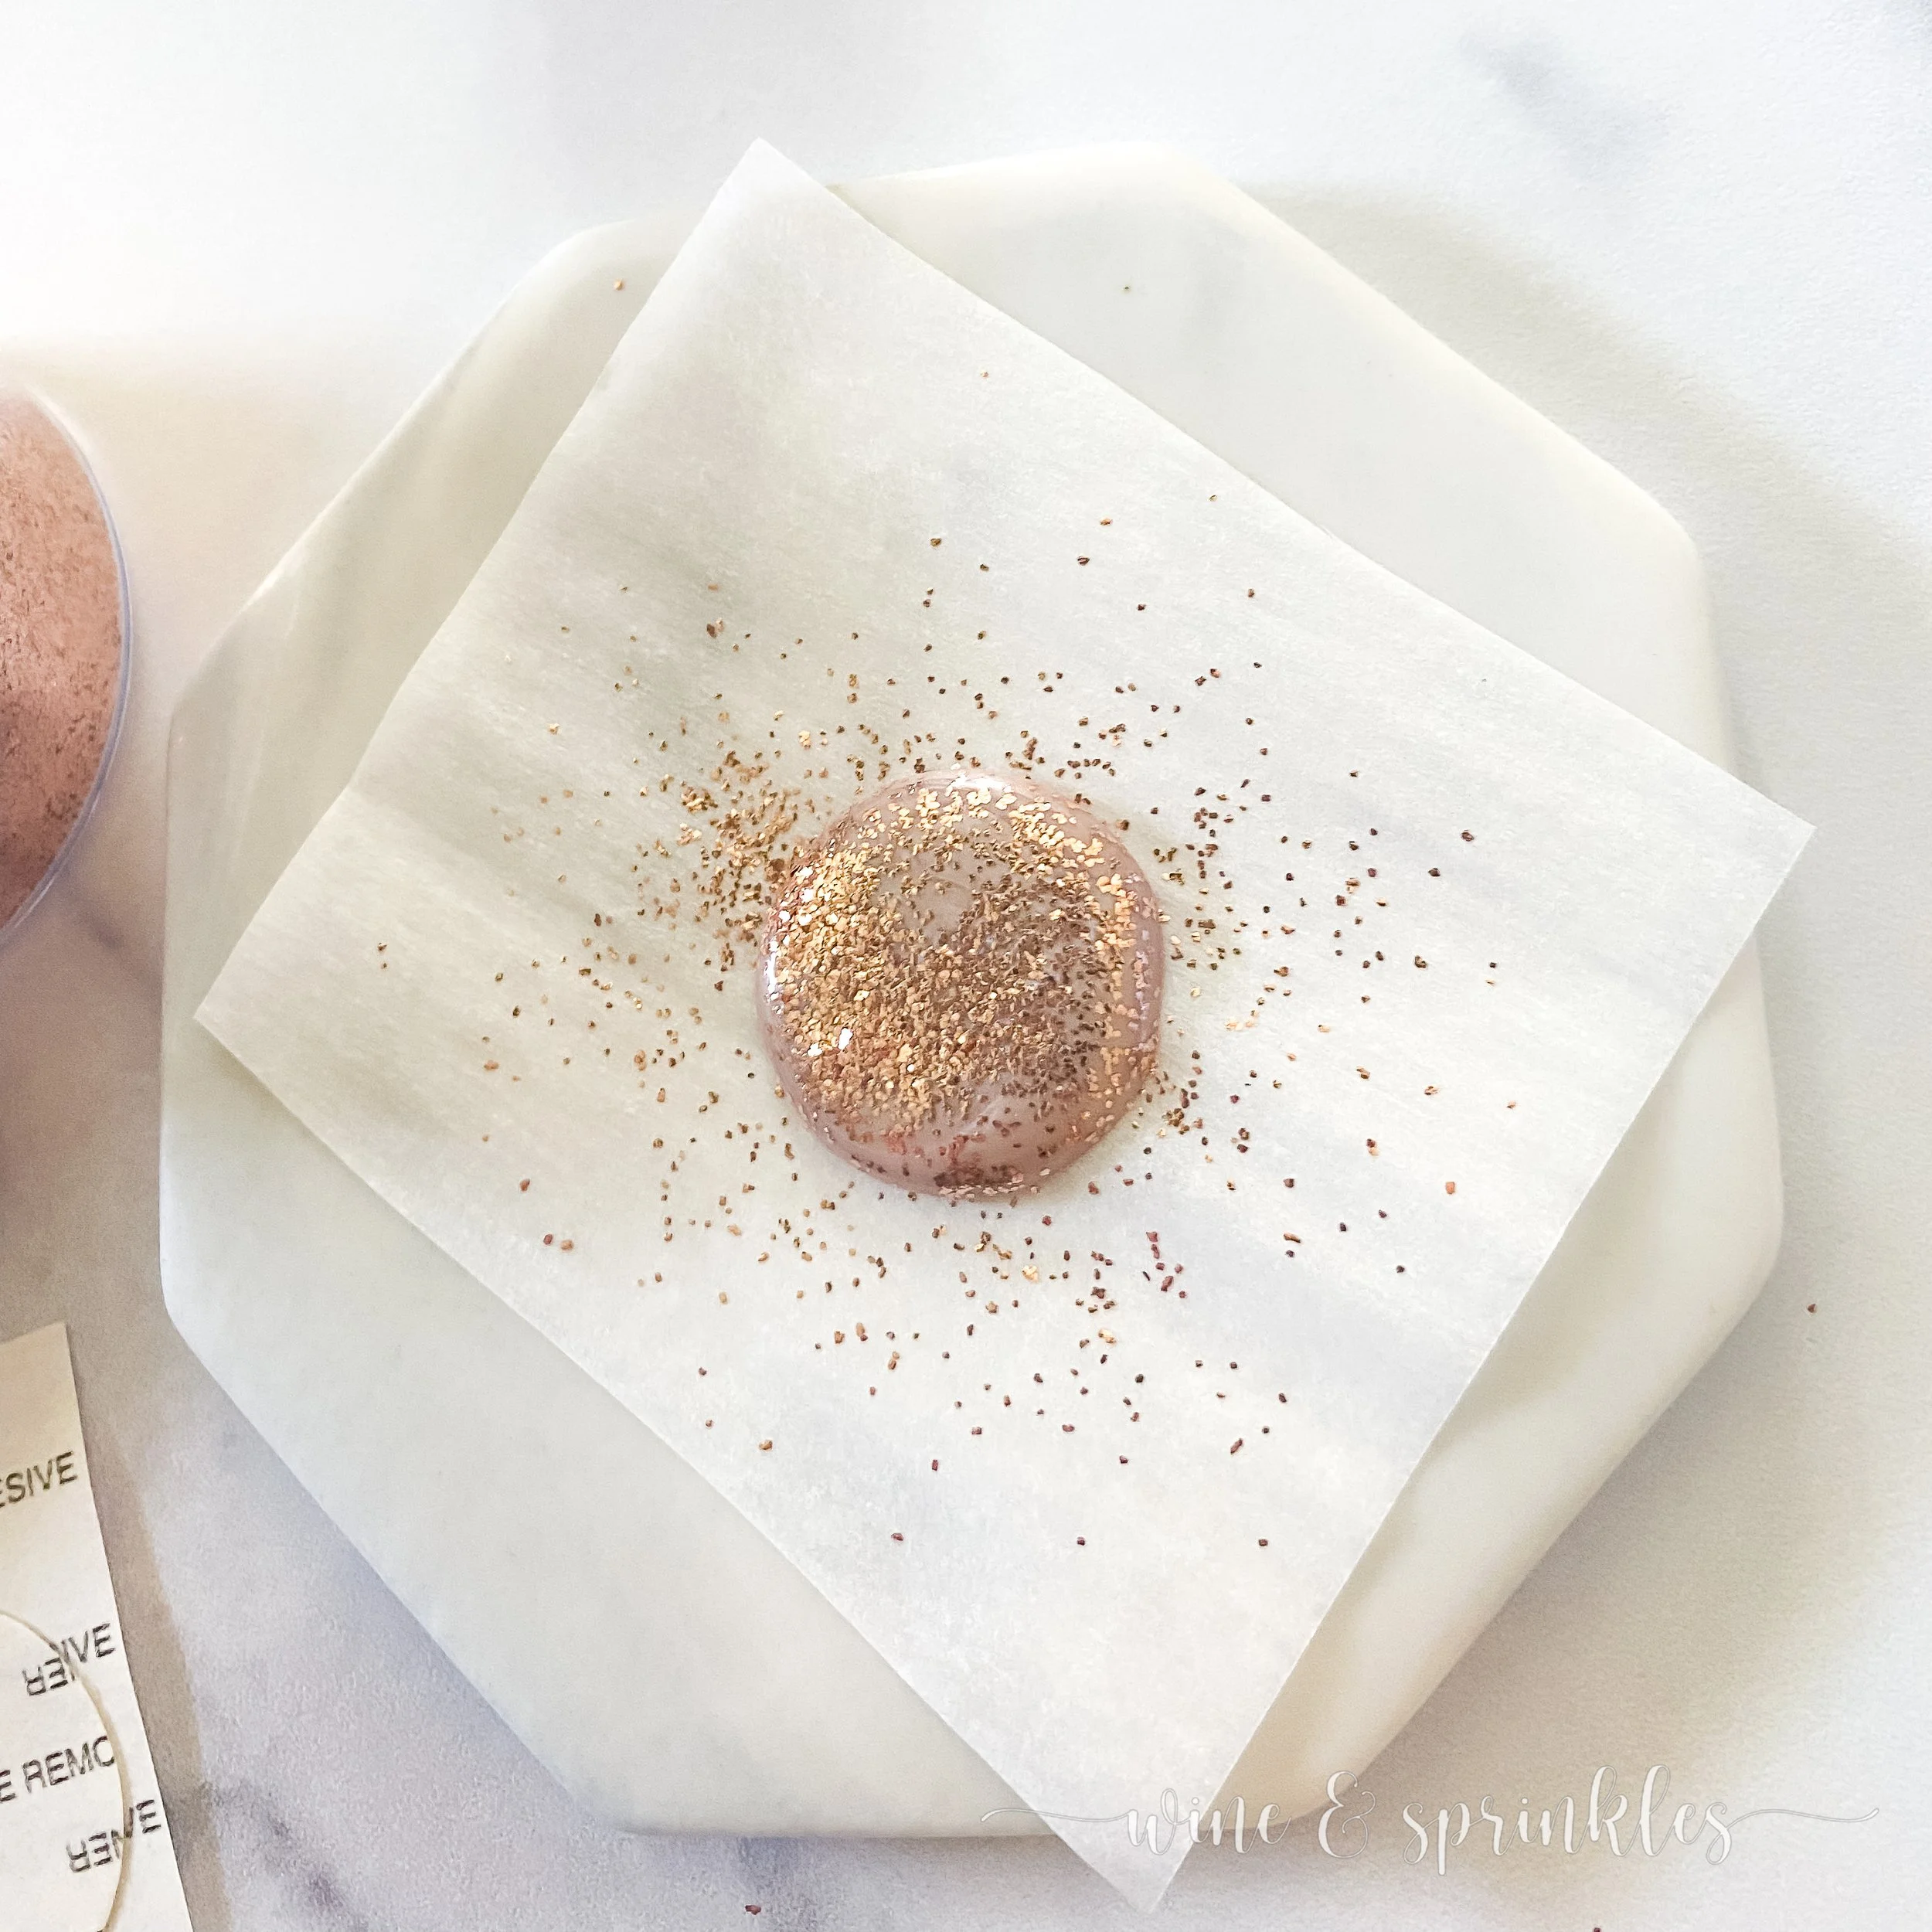
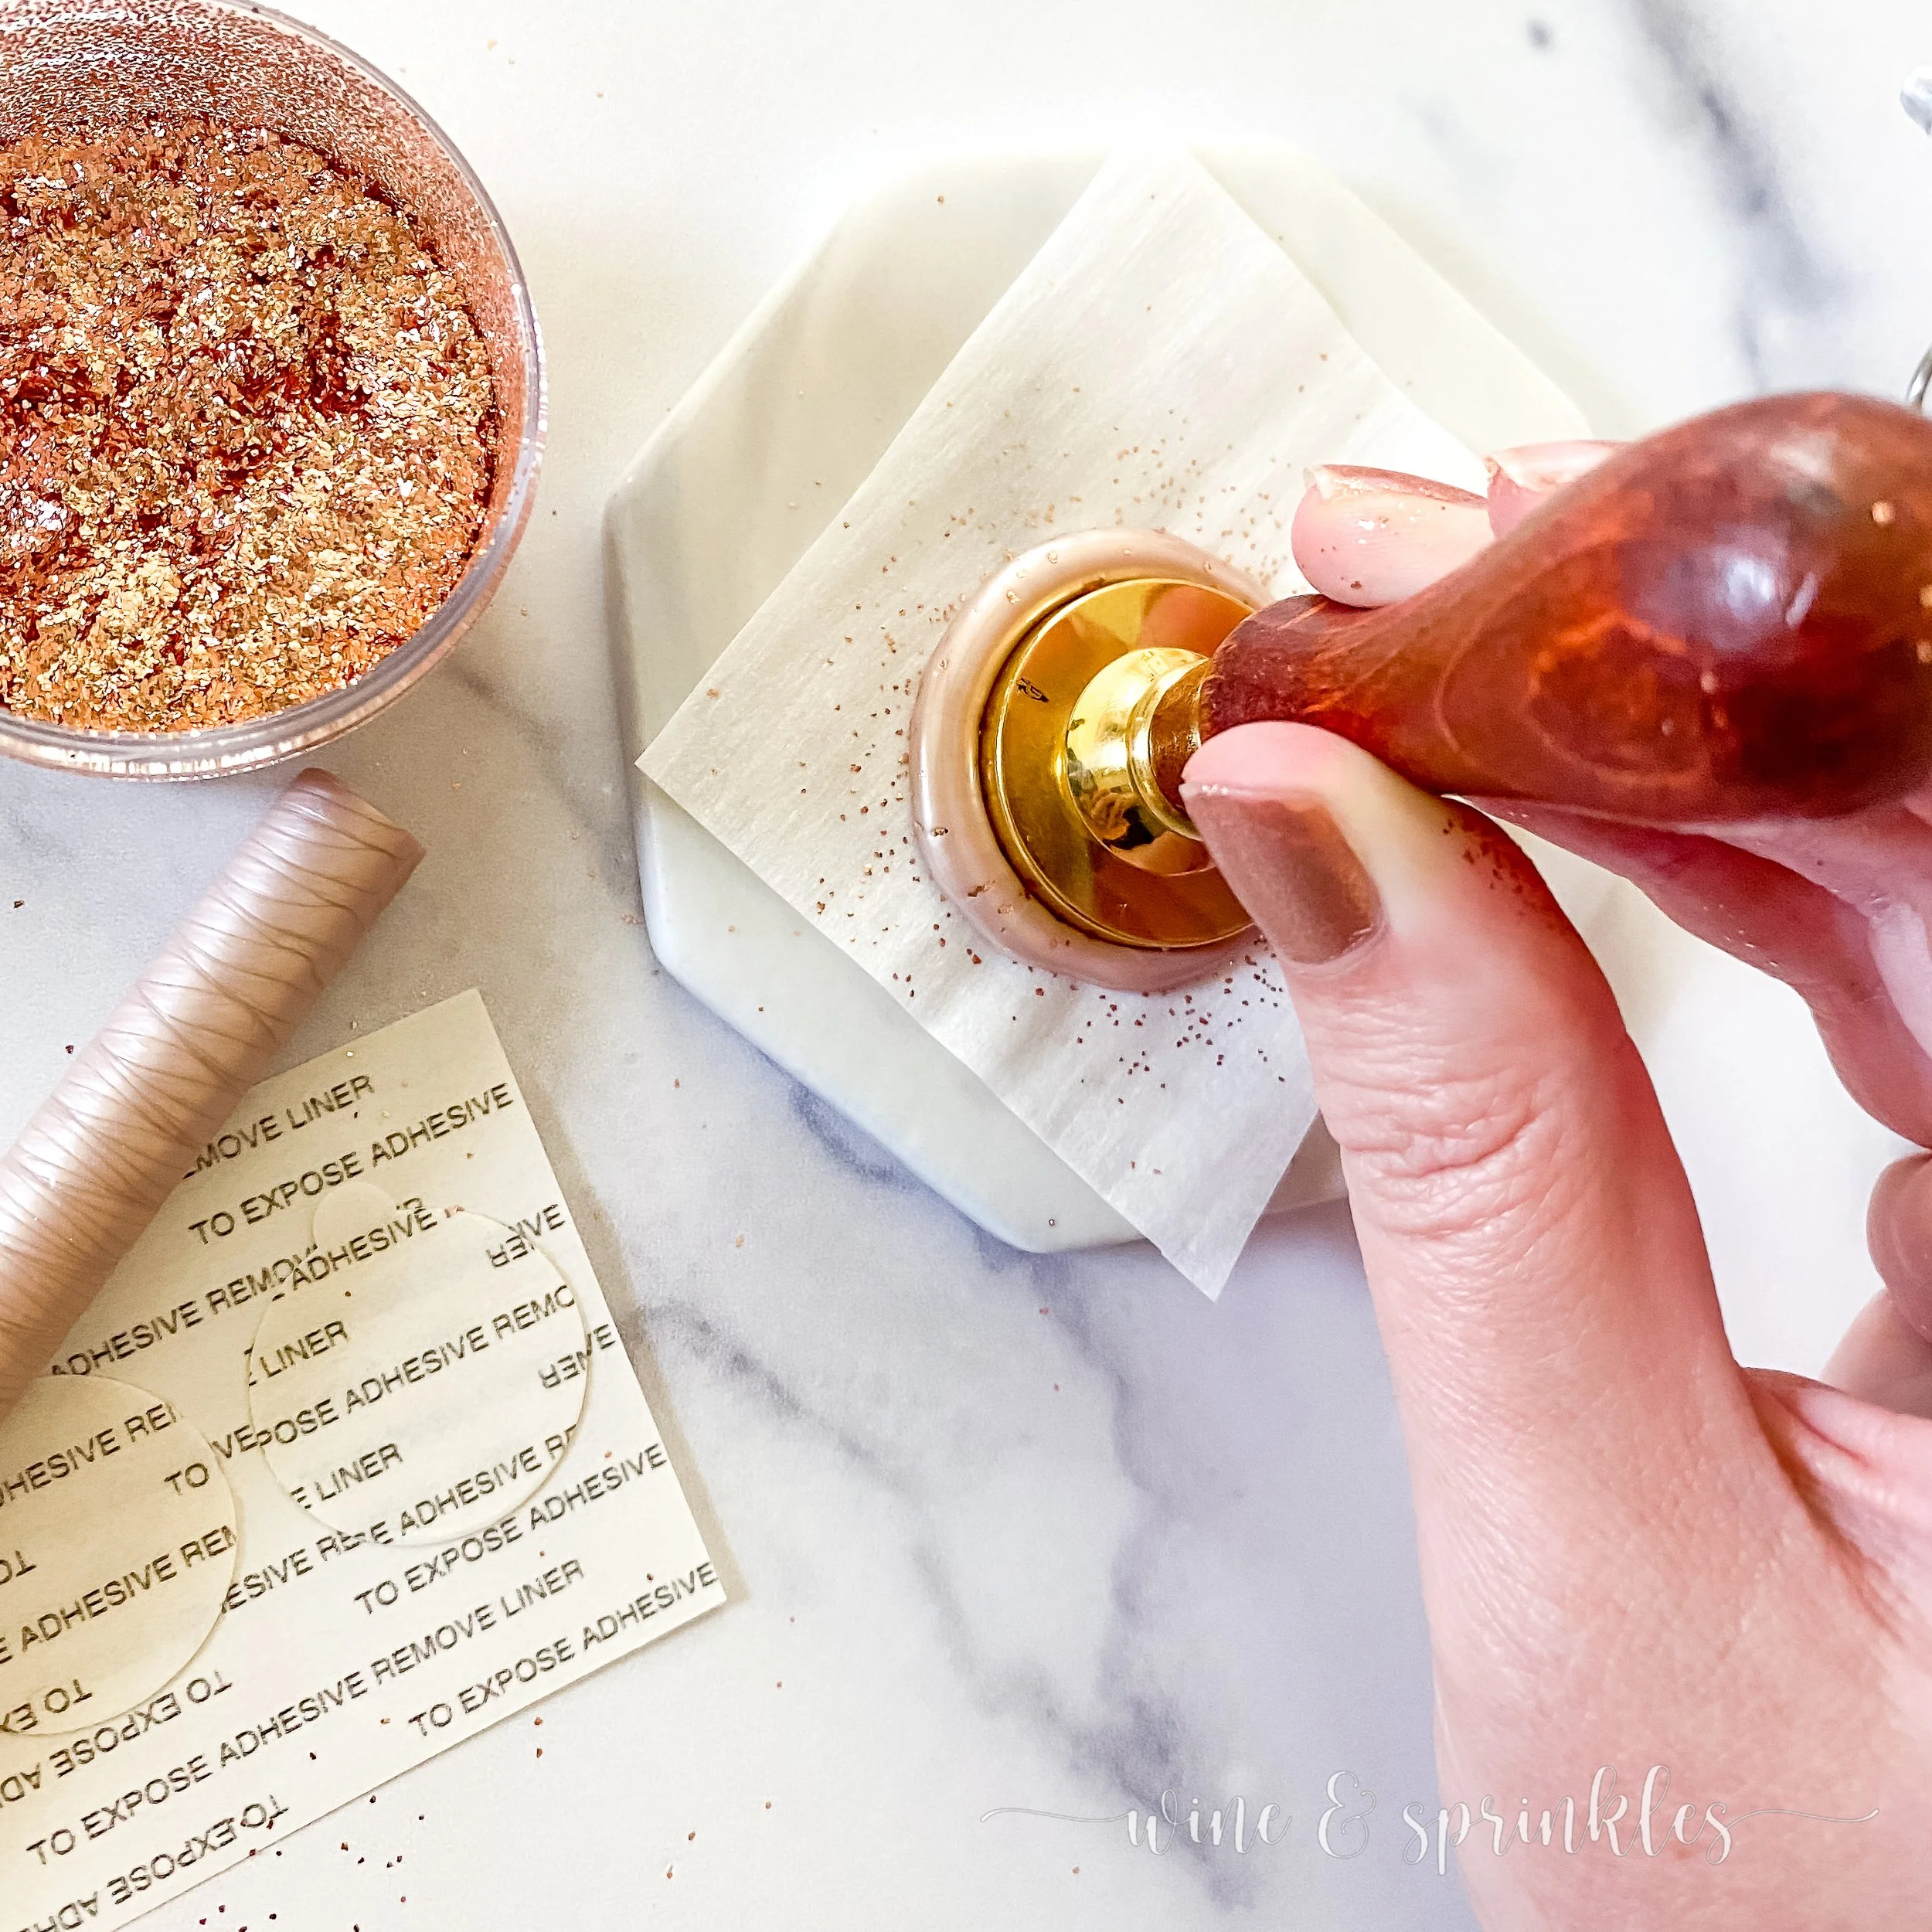
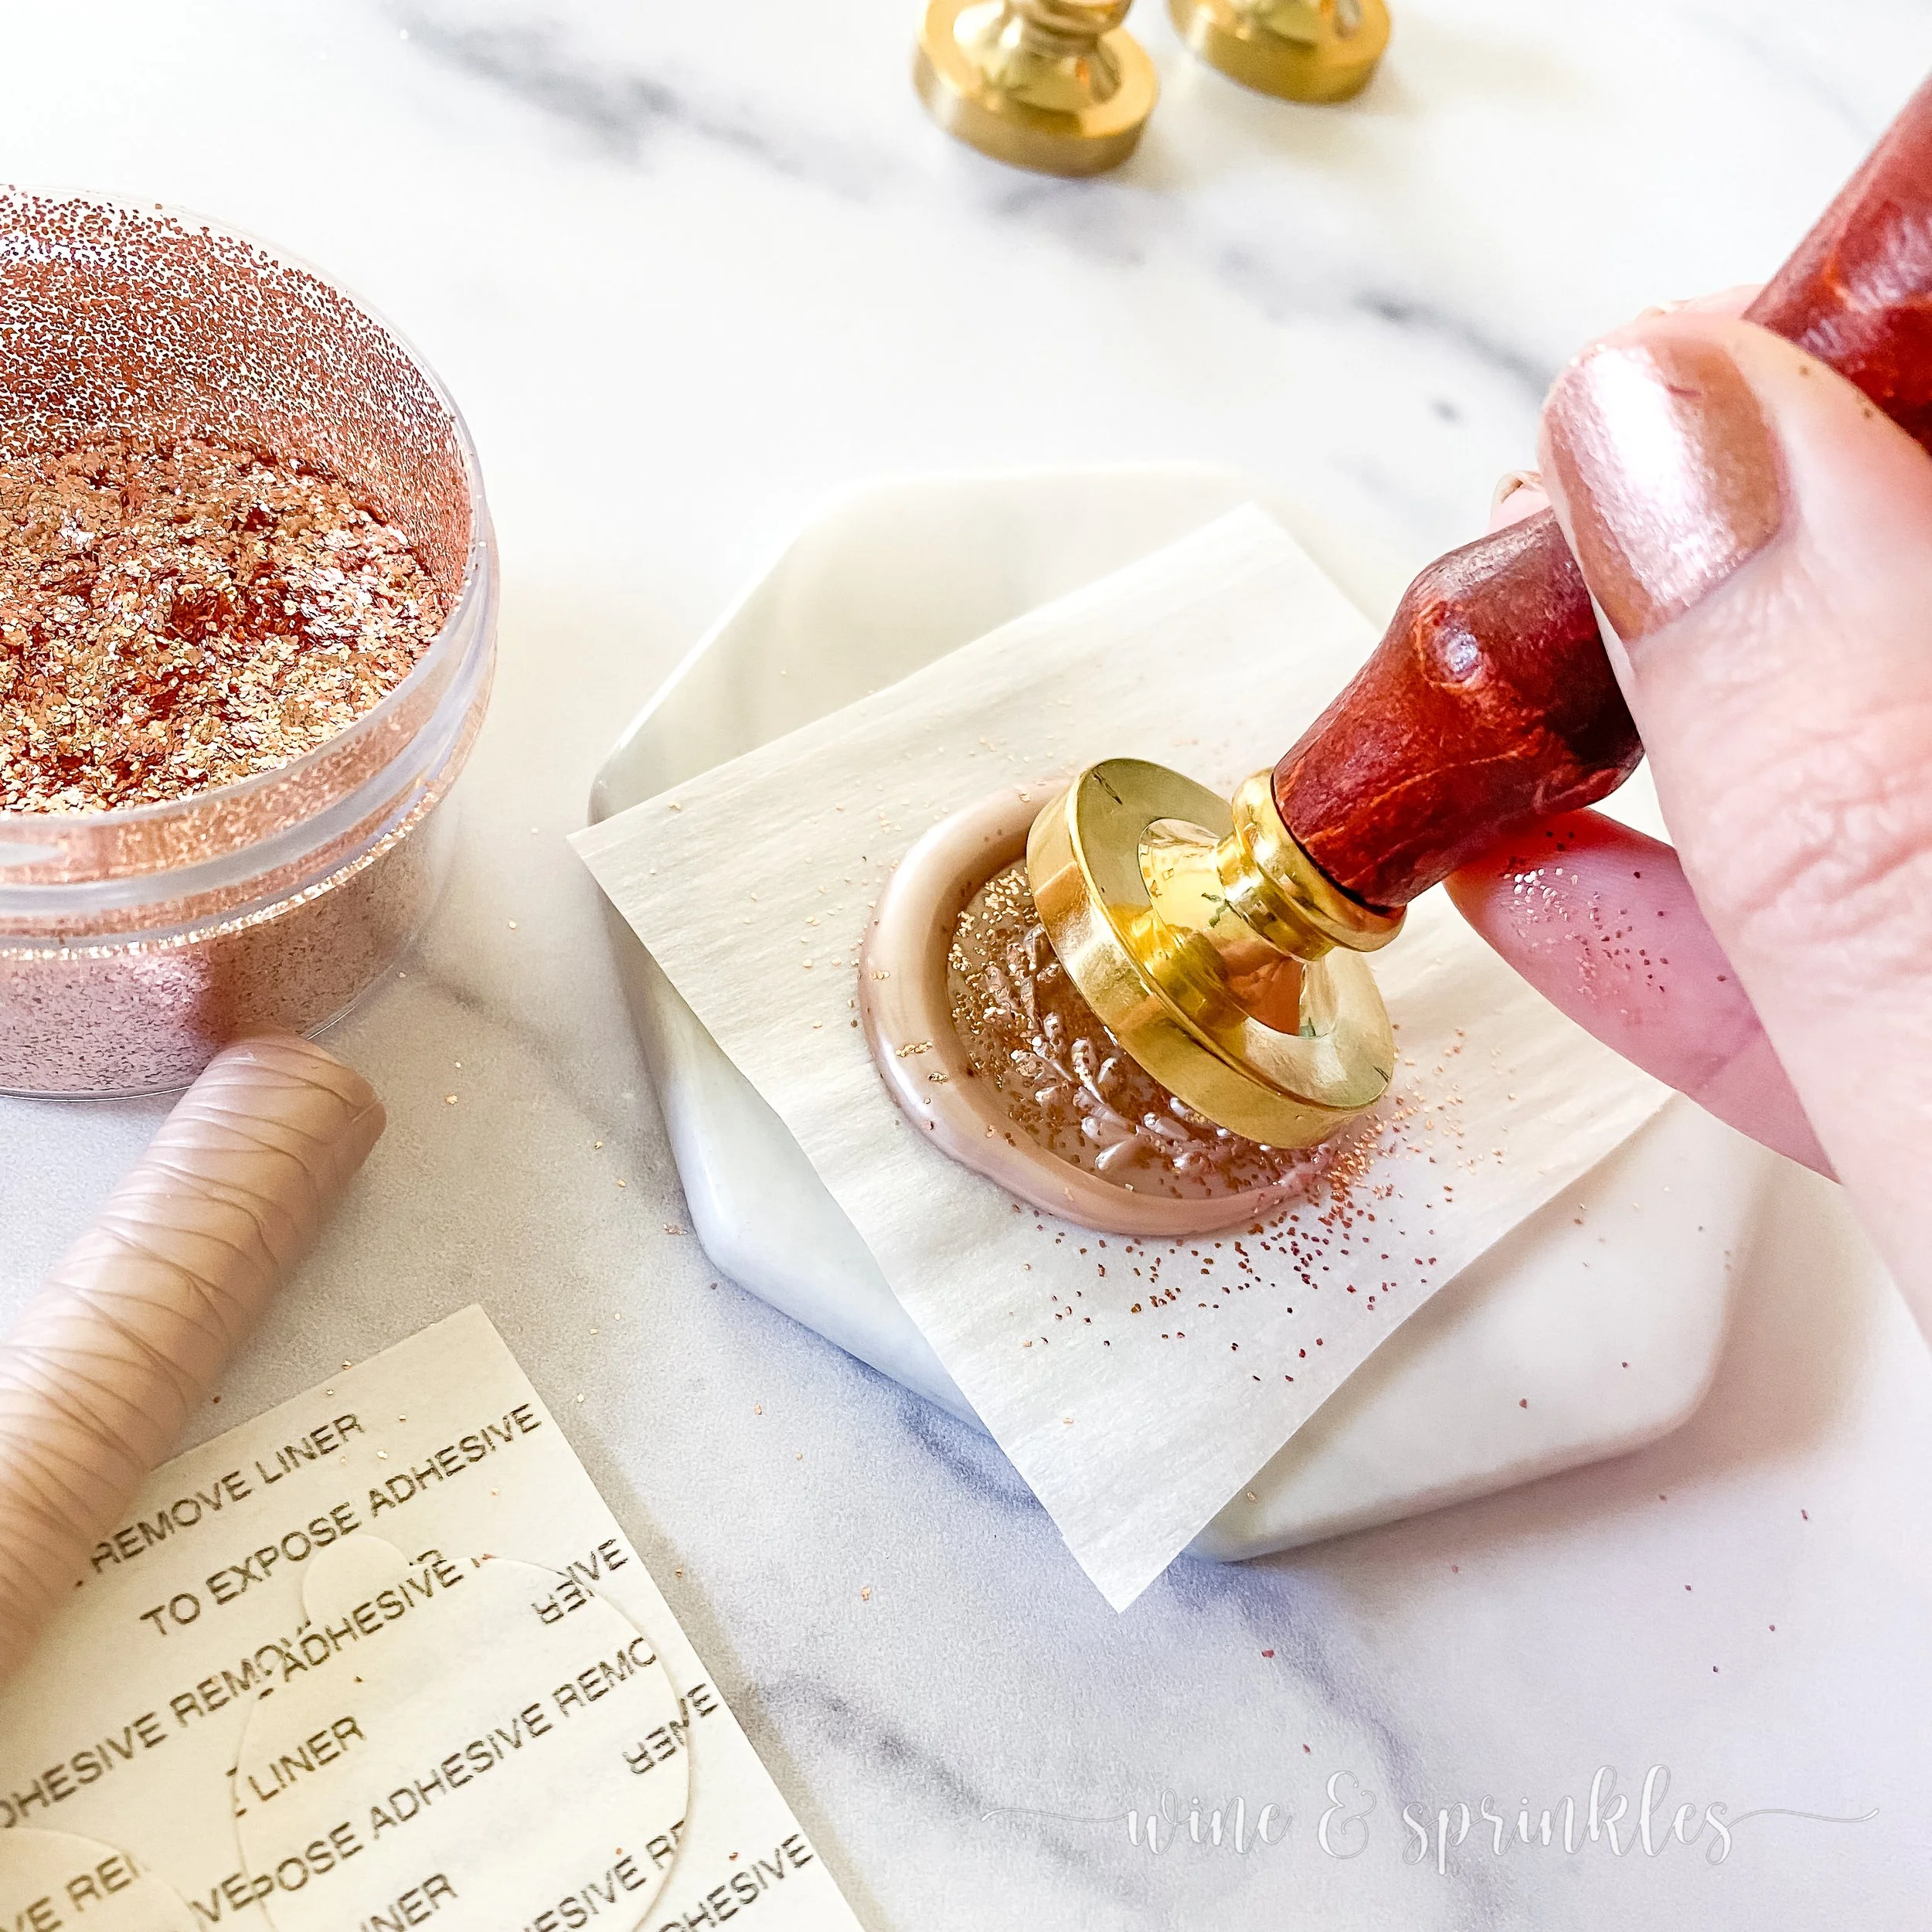
4. Leave for 30 seconds until wax is set, then carefully peel the stamp off of the seal, leaving the glittered impression in the wax. The more firmly I pressed the wax, the better the impression showed clearly through the glitter.

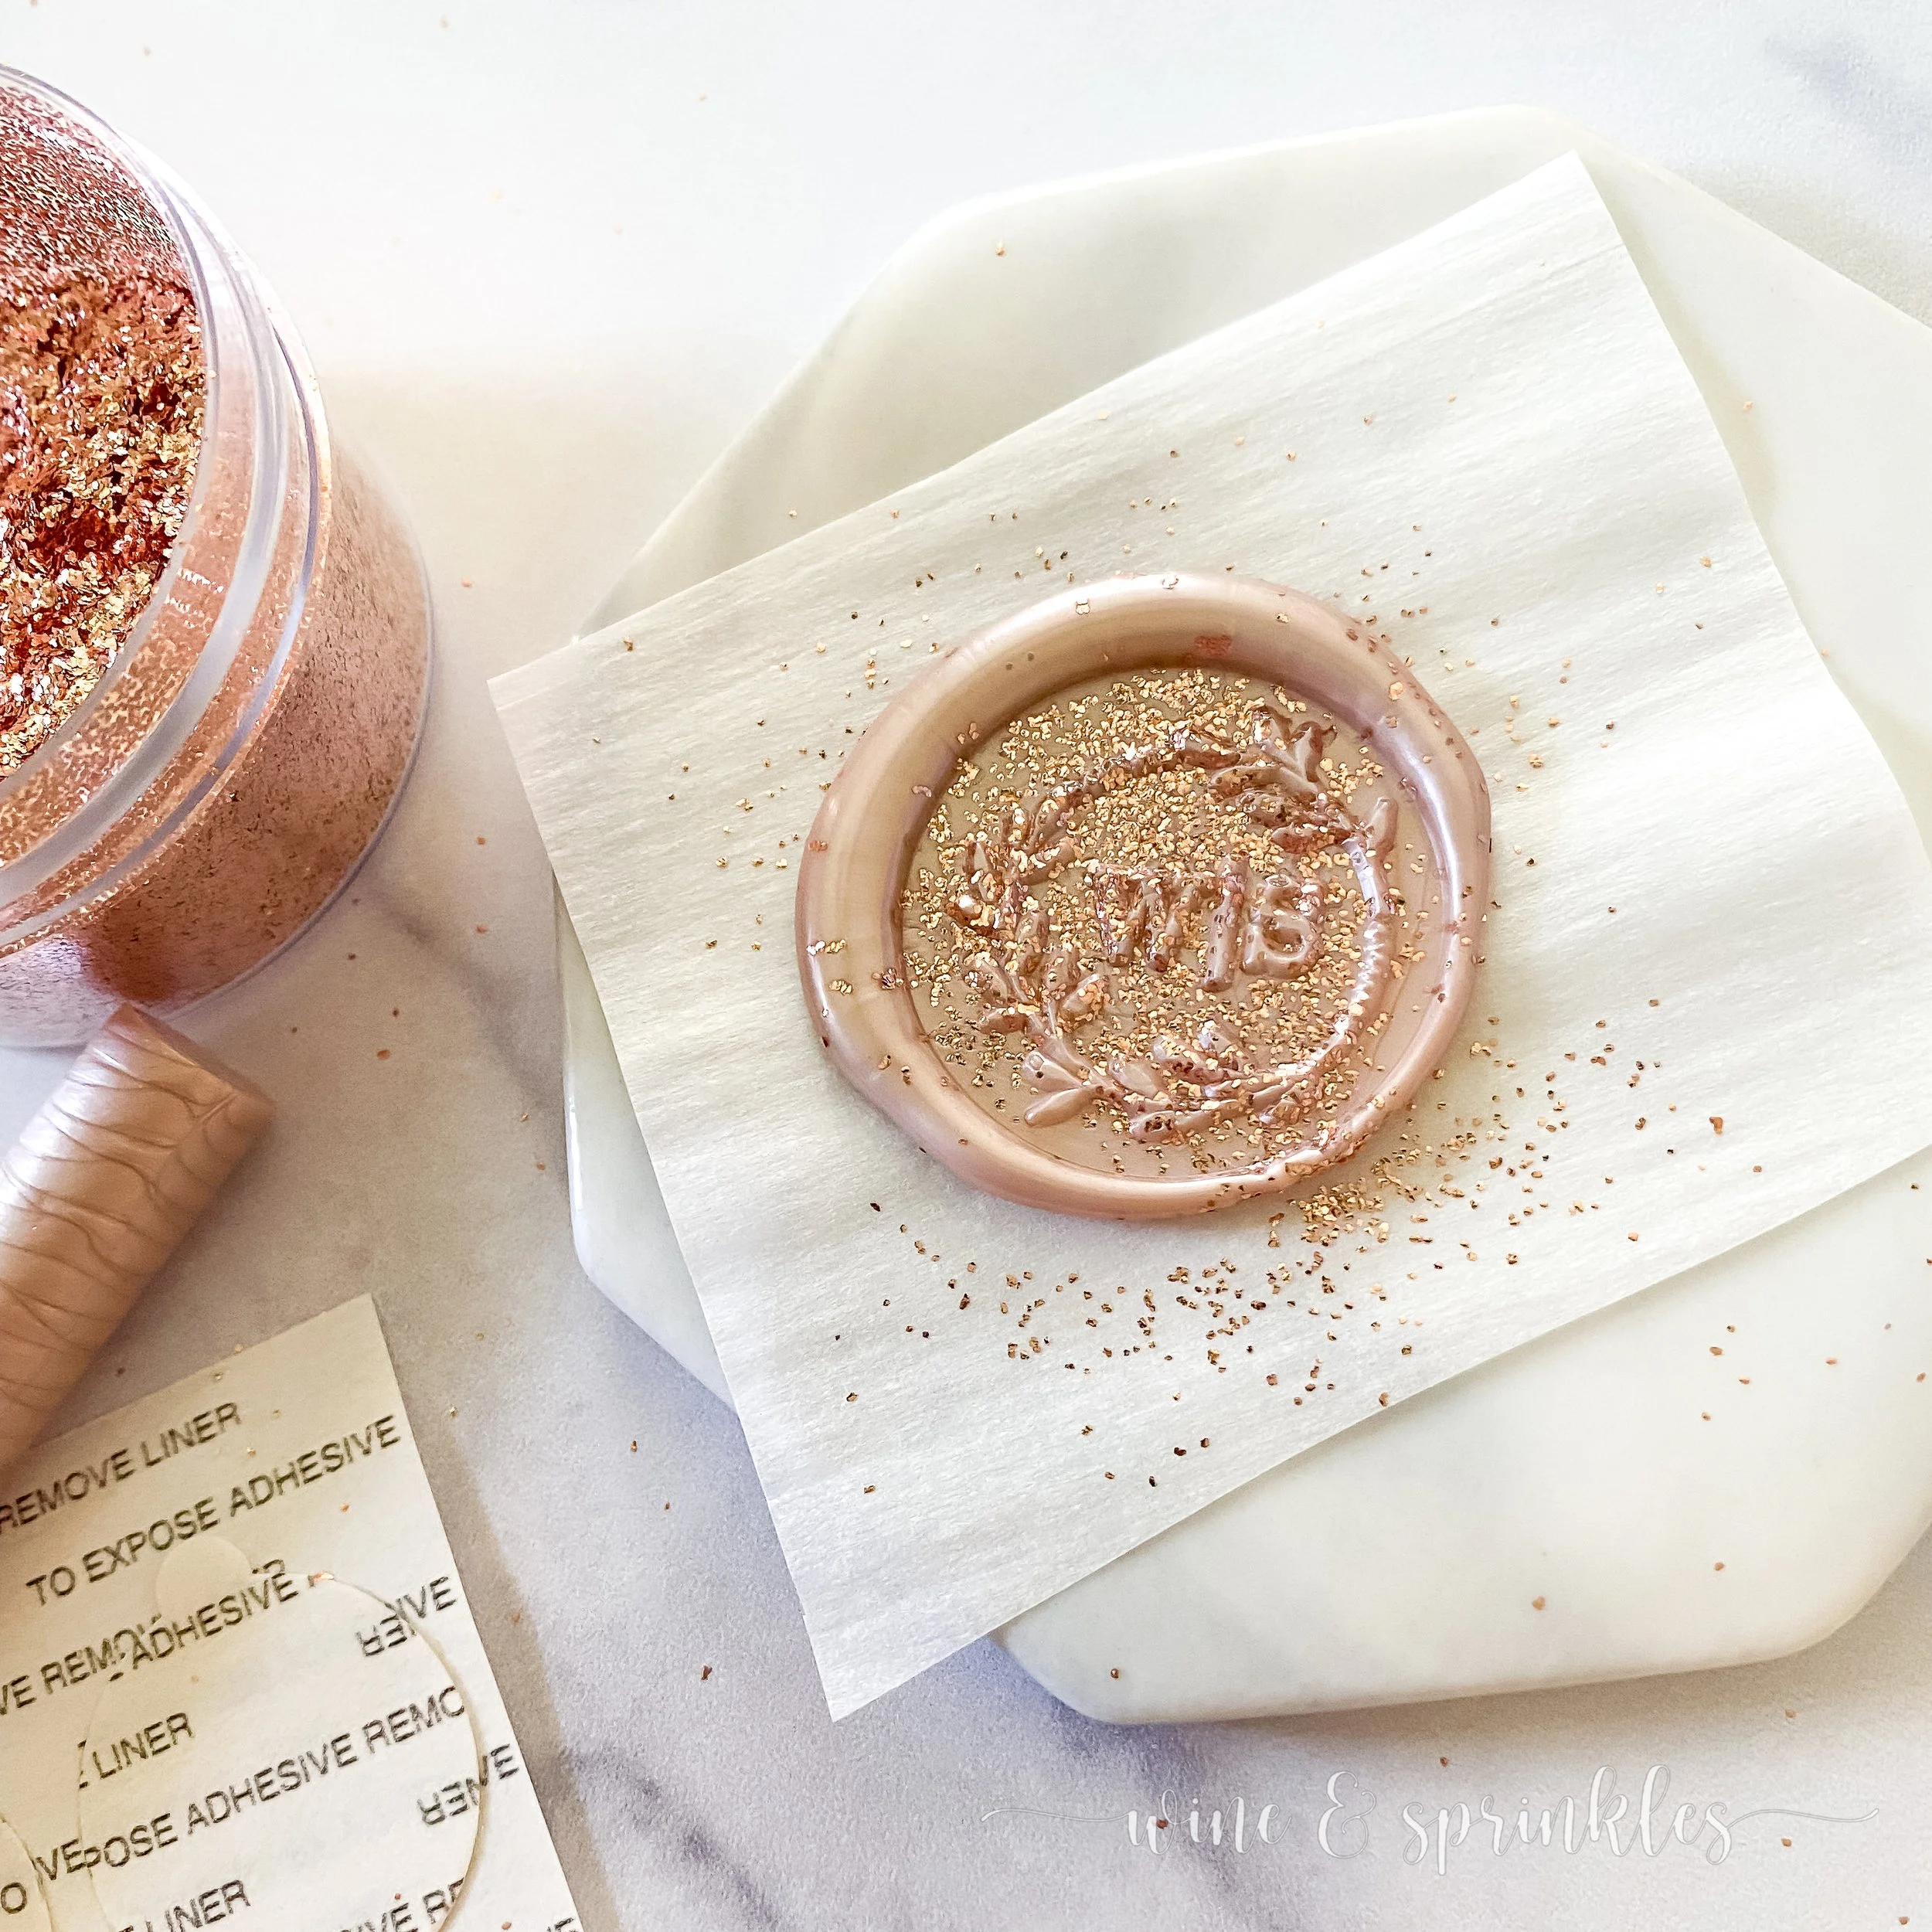
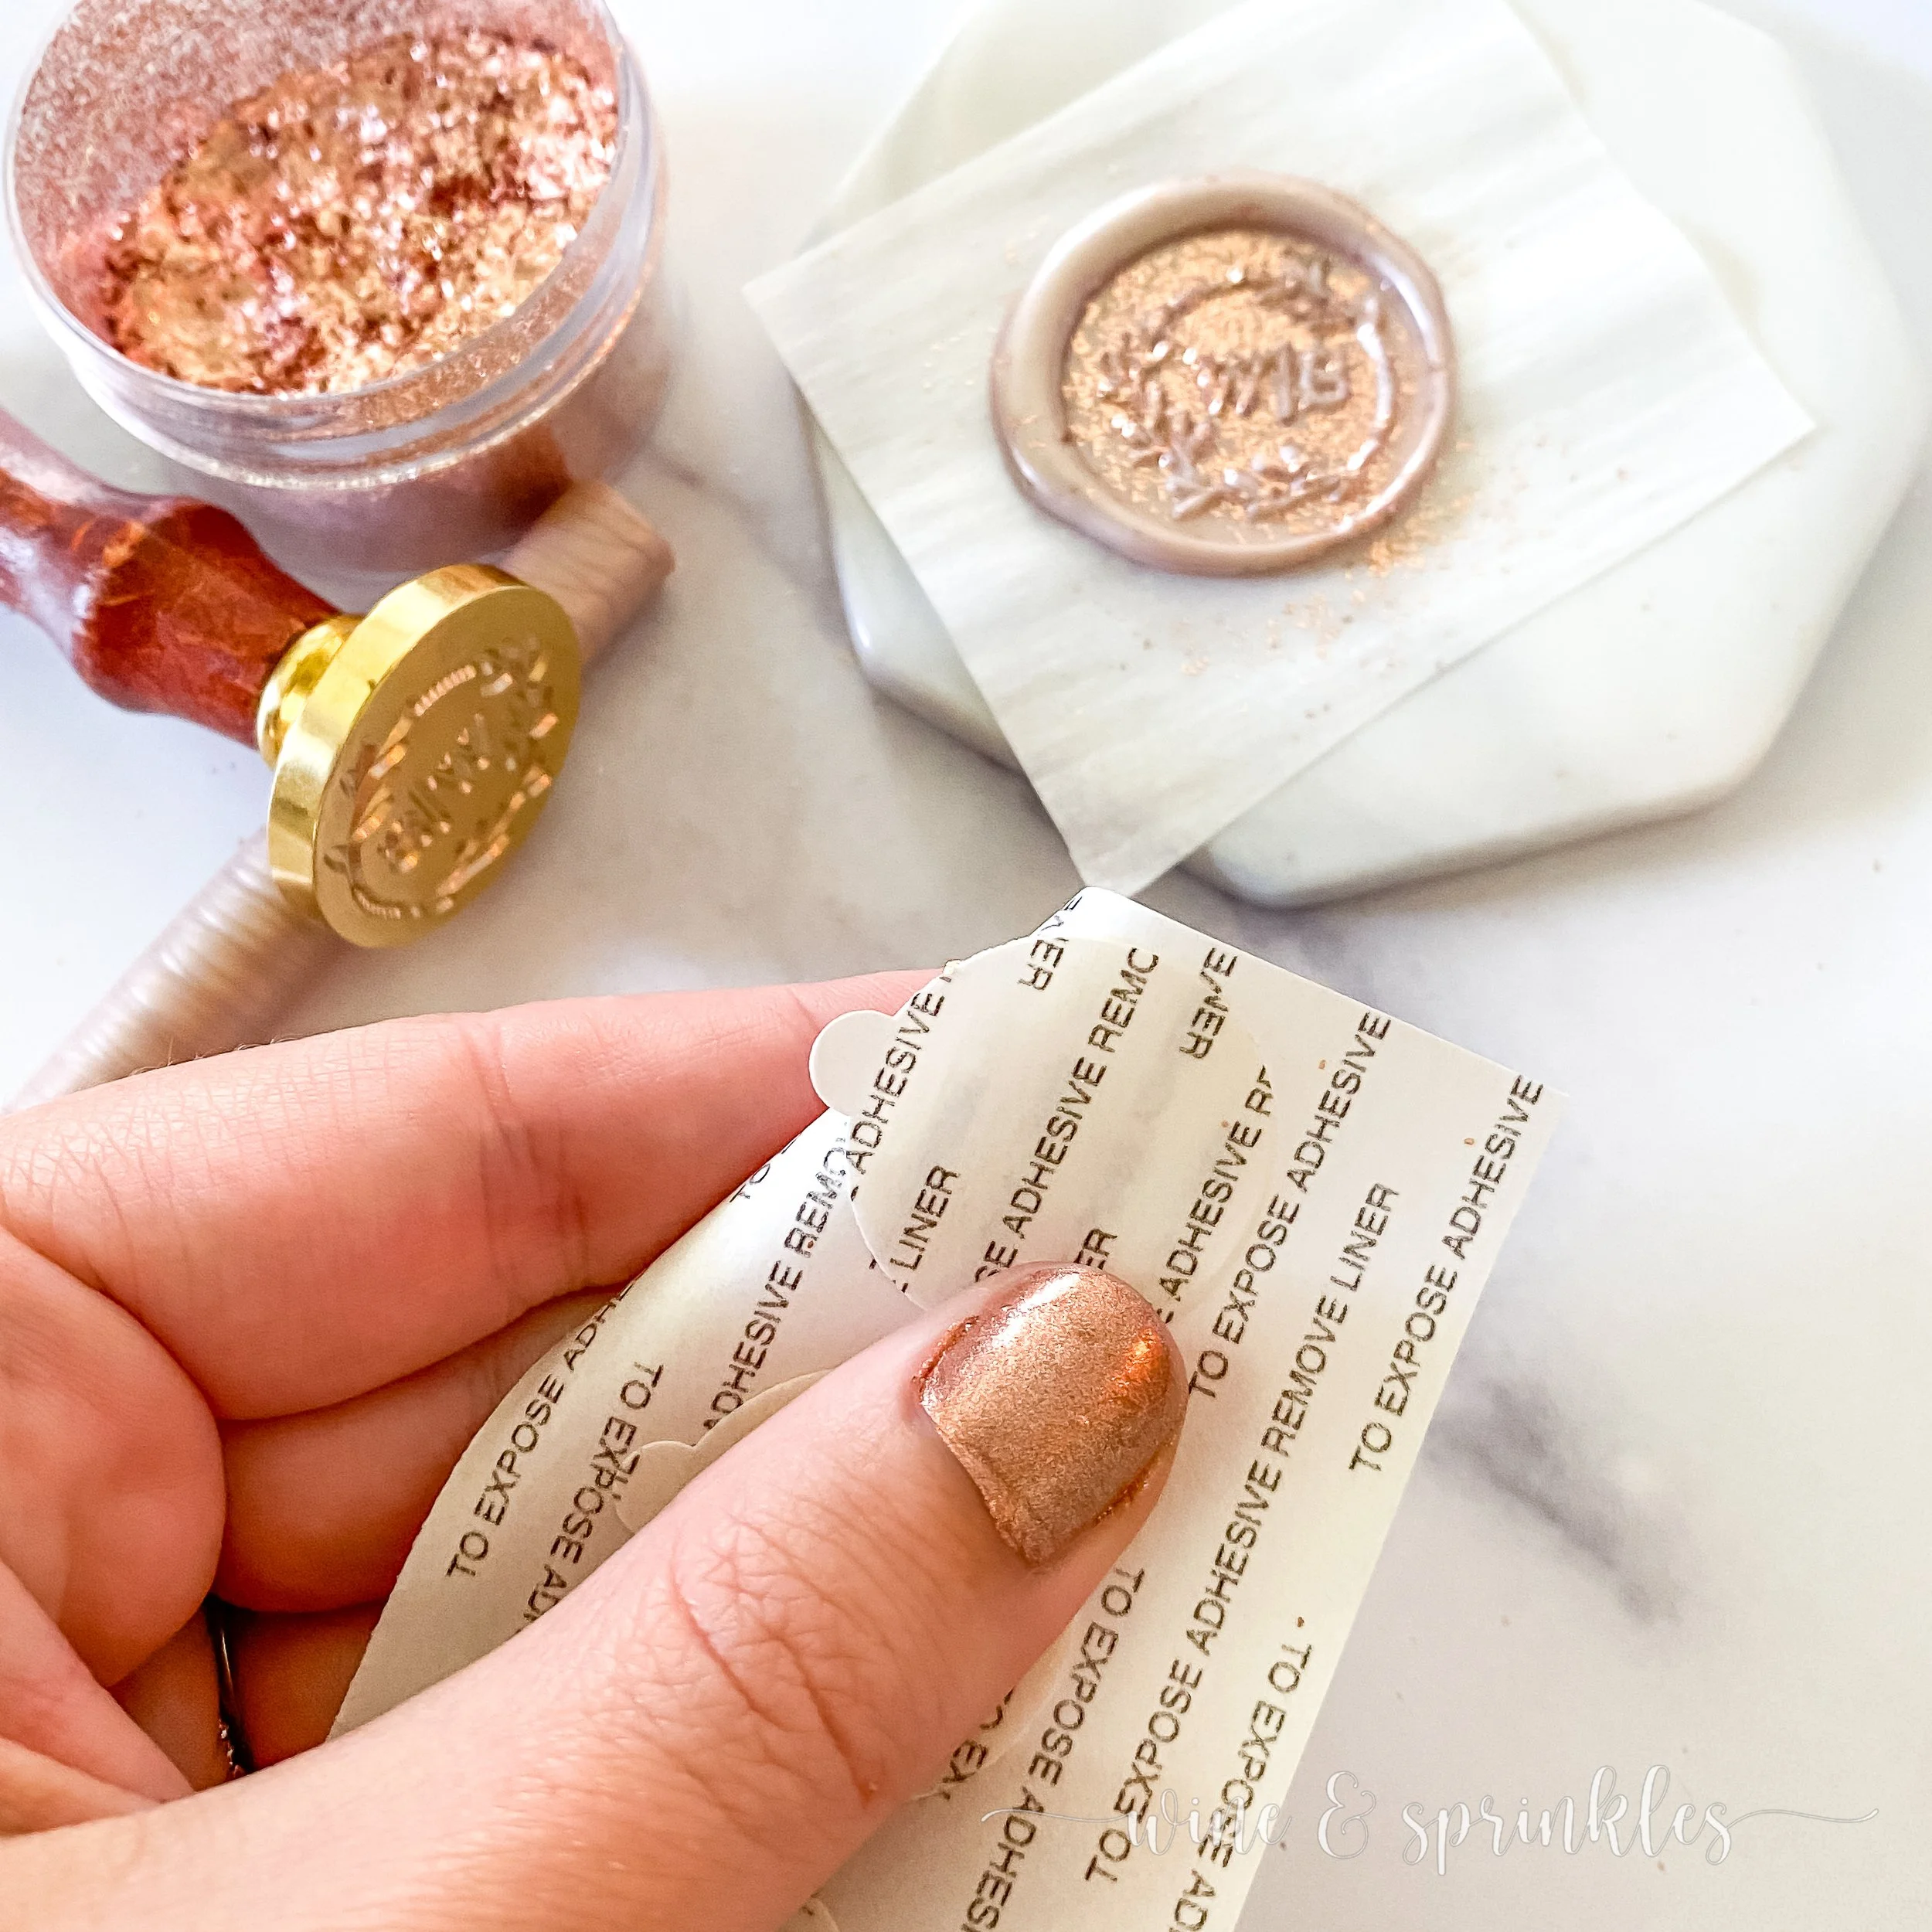
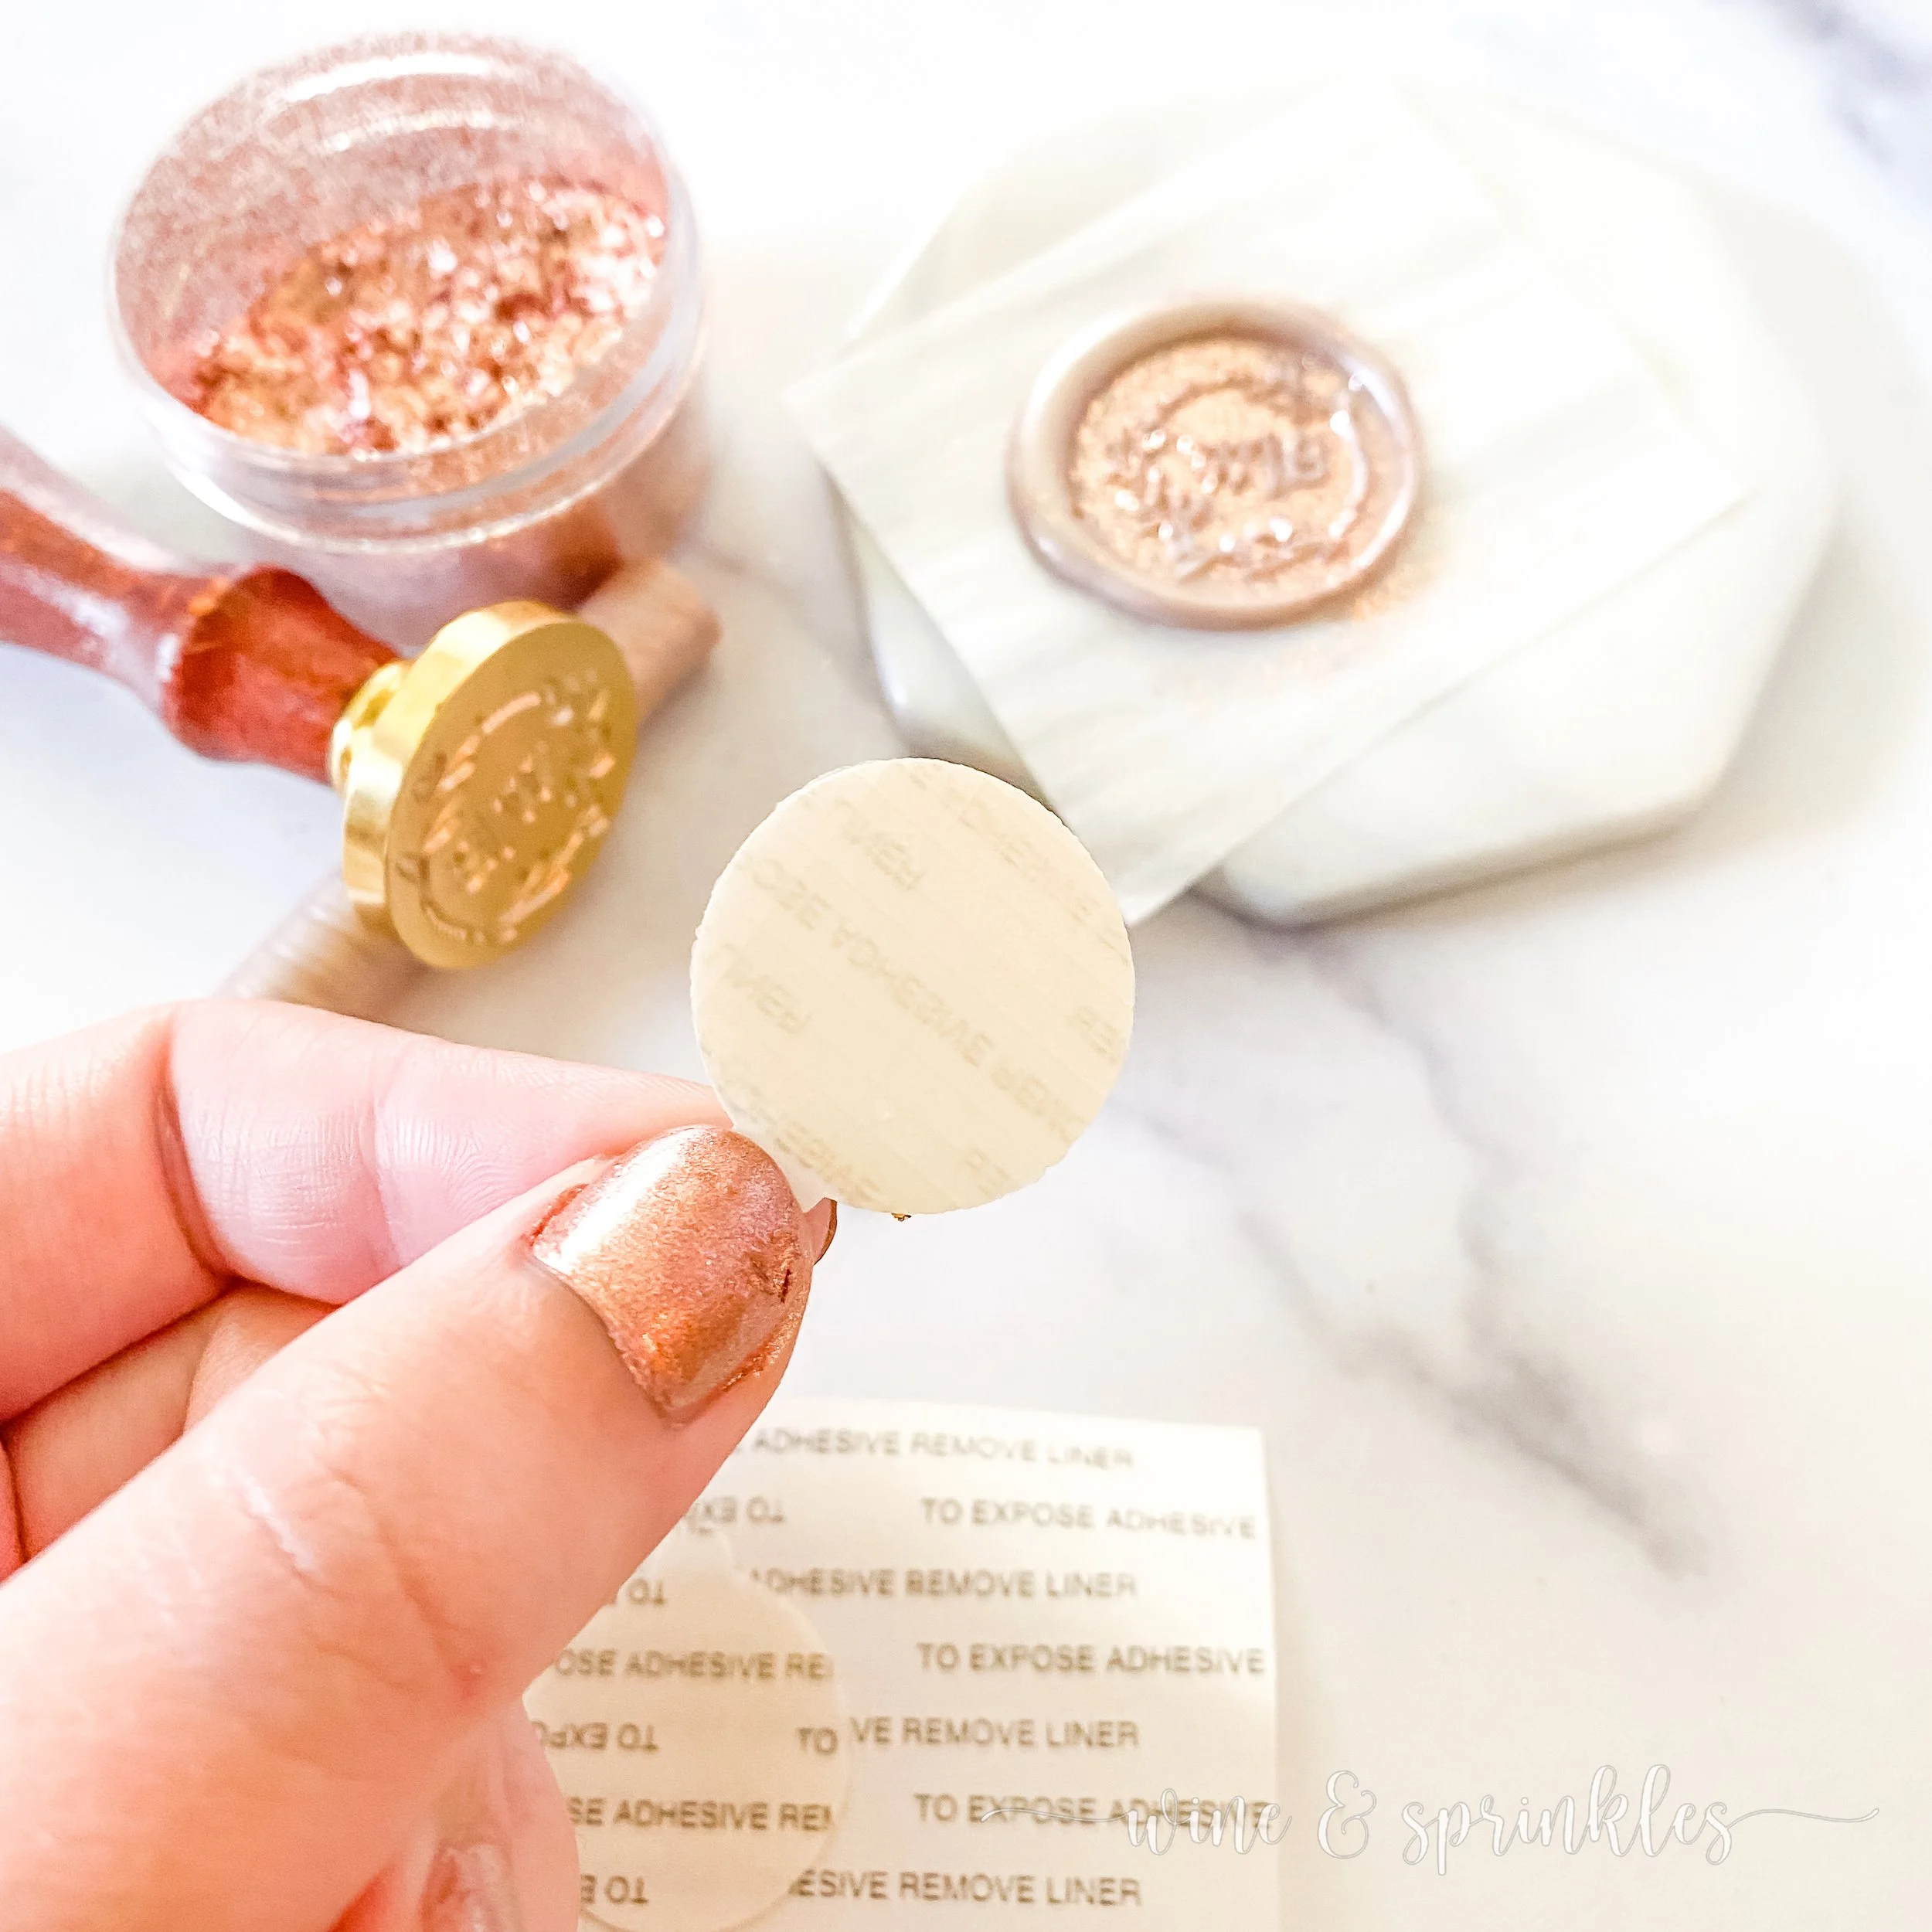
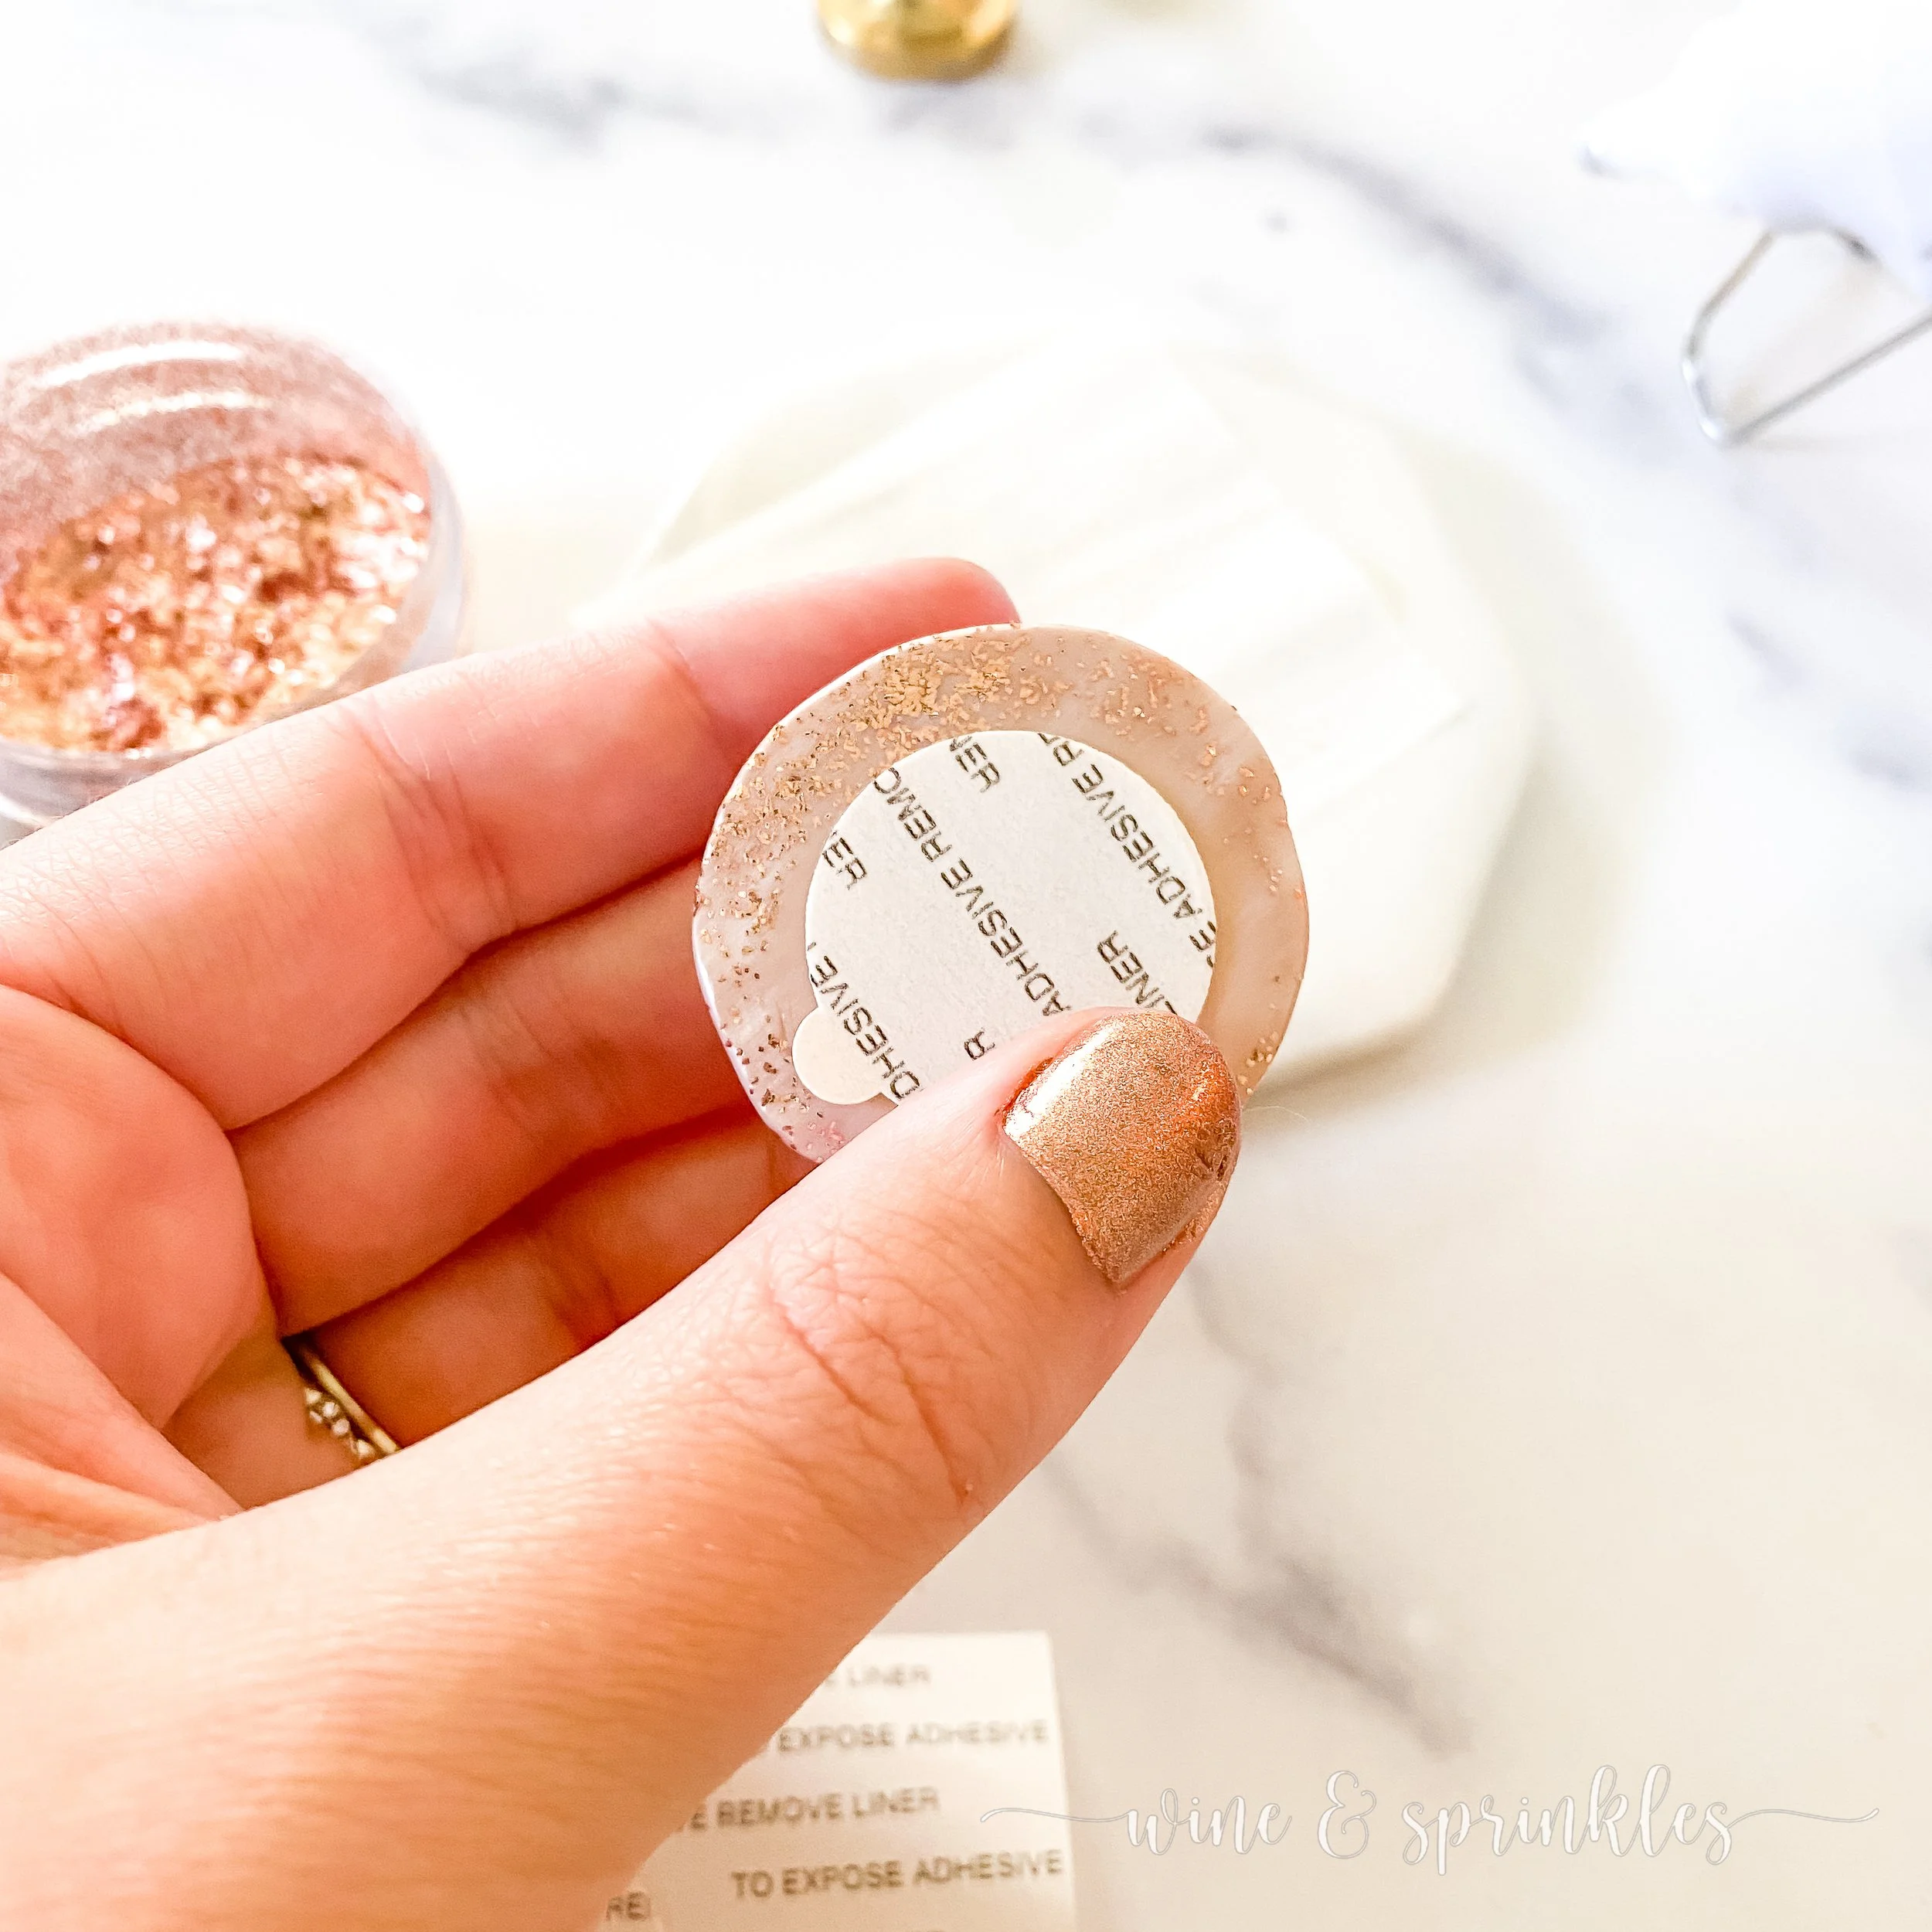
5. Peel the wax seal off of the parchment paper and tap any excess glitter off. Finally, turn over and attach an adhesive circle to the back, leaving one side of the sticker on its backing so that they can be used to peel and stick later. Repeat this process for as many wax seals as you need and you are done!
TIPS & TRICKS
- Use stamps with bolder impression so that the glitter doesn’t overpower them.
-Changing wax stick colors: Heat gun with current wax for 5 minutes, then pull the excess stick out of the glue gun. Then, let the gun sit another 10 minutes to let melted wax reach the bottom. Press the new colored wax stick into the gun, pressing out as much of the old color as possible, then let the new color heat for 10 minutes. There will be a couple marbled seals in between, which I stamp and save for future cards and stationary!
-For making many stamps at a time, use an ice pack to cool your stamp between impressions, wiping any condensation & glitter off it for easy removal.
SEE OUR RELATED POSTS HERE:


OUR PINS FOR THIS POST:

OUR MOST RECENT BLOG POSTS:


