This post contains affiliate links, meaning that if you click on a link I will recieve a small comission. This costs you nothing extra and I only promote products I use and love! You can read our full disclosure here
As you read this post, you’ll notice a lot of bolded words, some that highlight pink and link to other posts and products, and others that don’t do anything. That’s because I am still writing and working on the posts those words go to! As these posts get published, I’ll be updating this post until all the projects are complete! Subscribe to my Newsletter or Follow me on Facebook to keep updated on when I post new content!

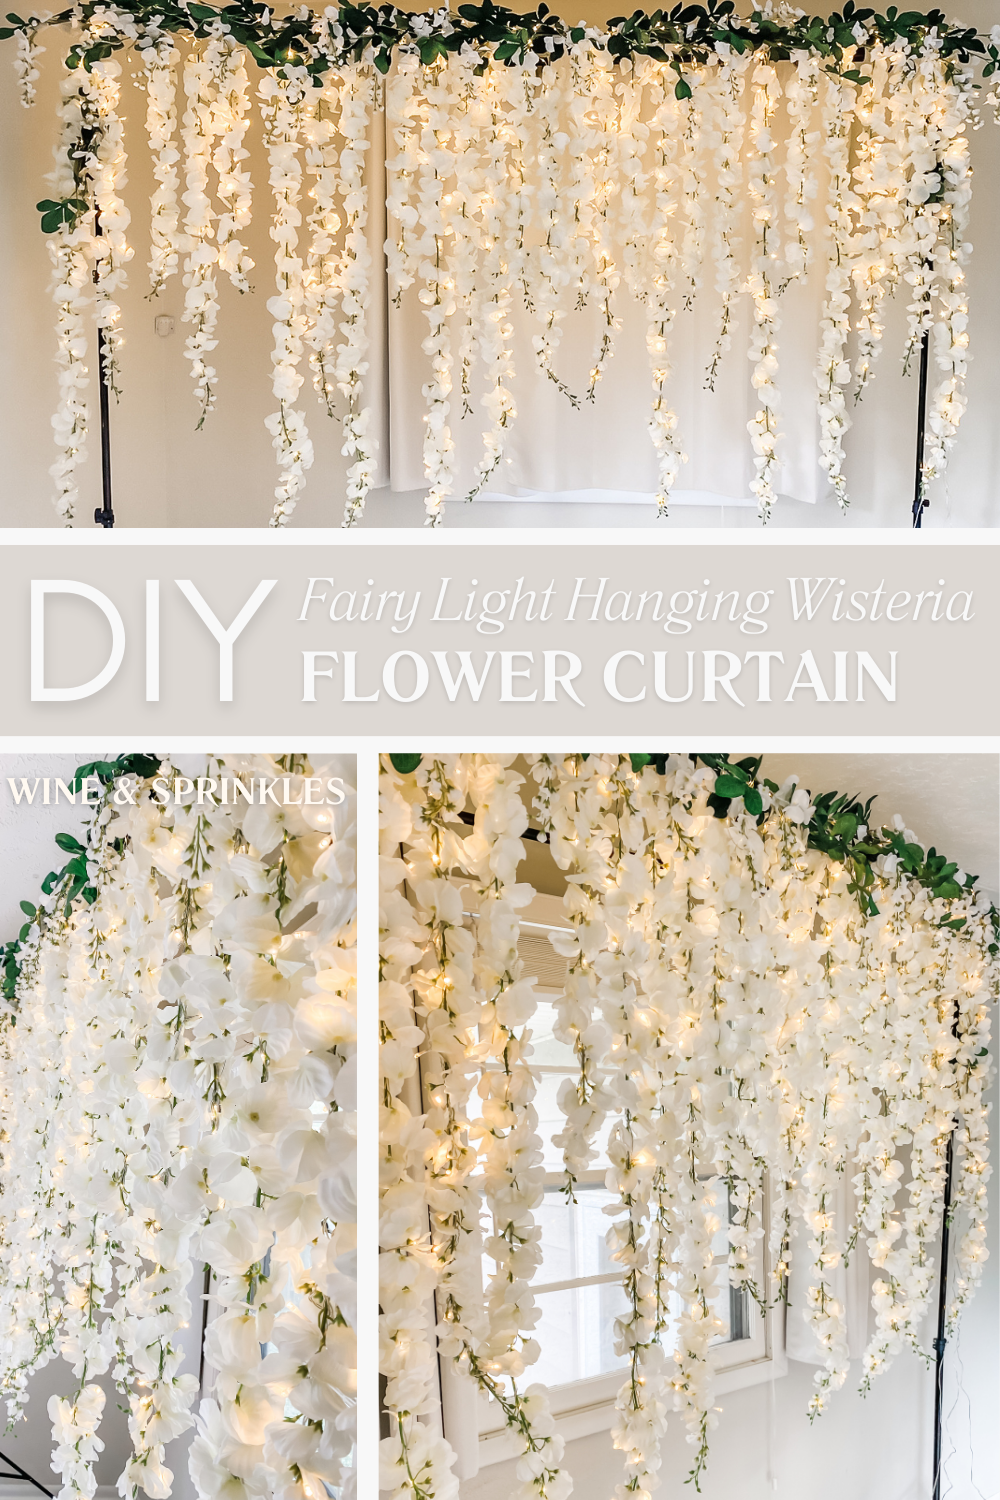
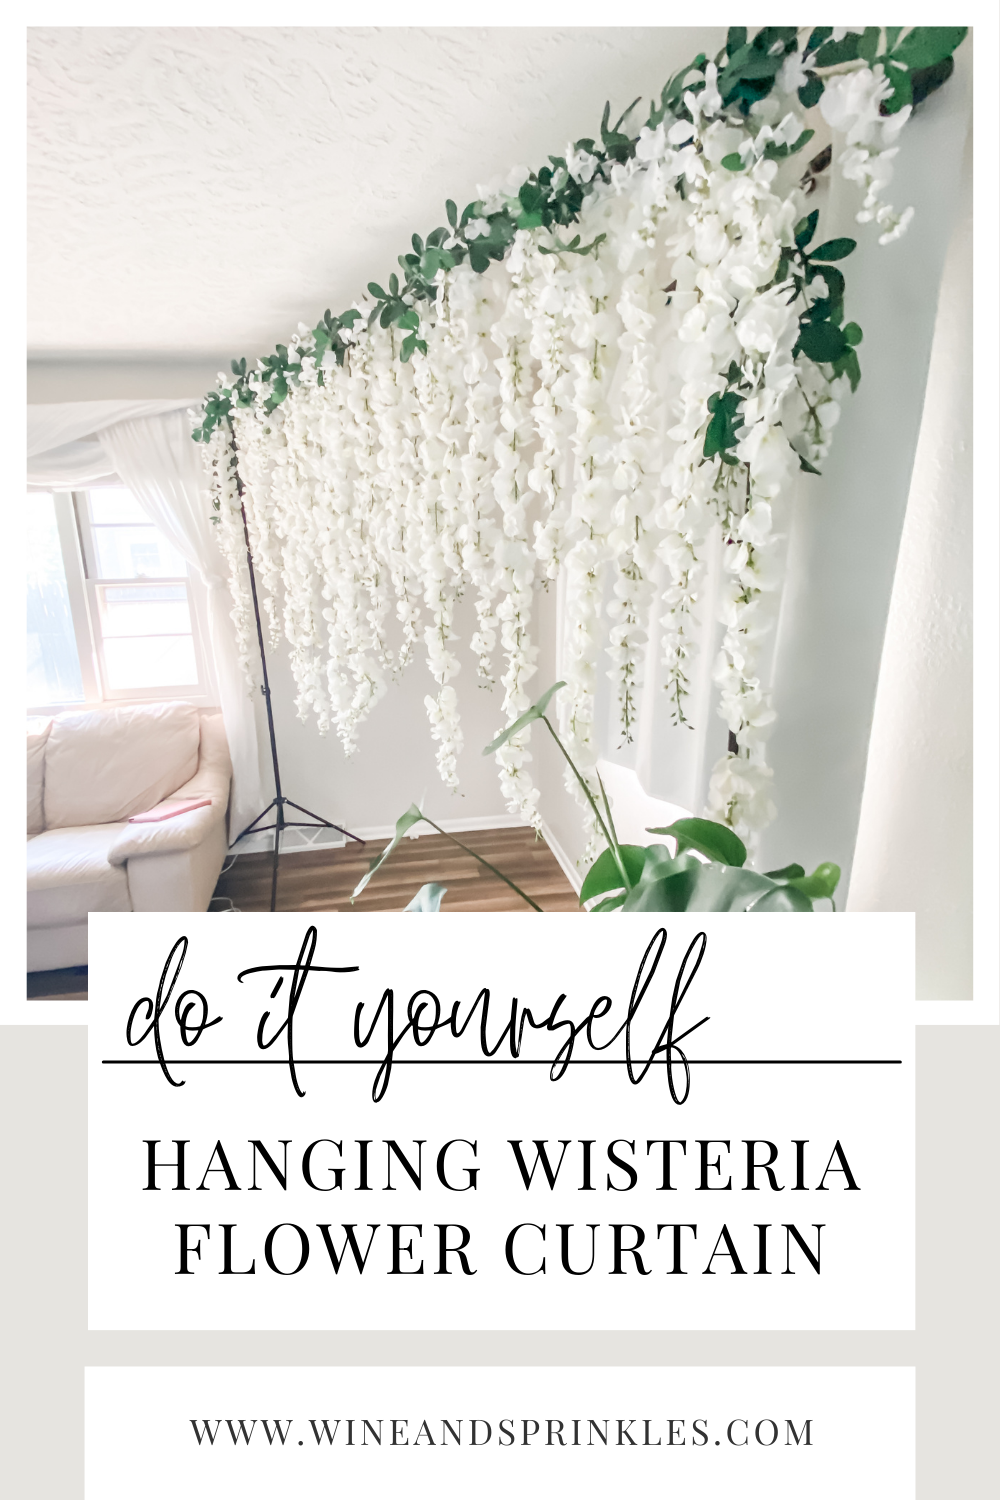
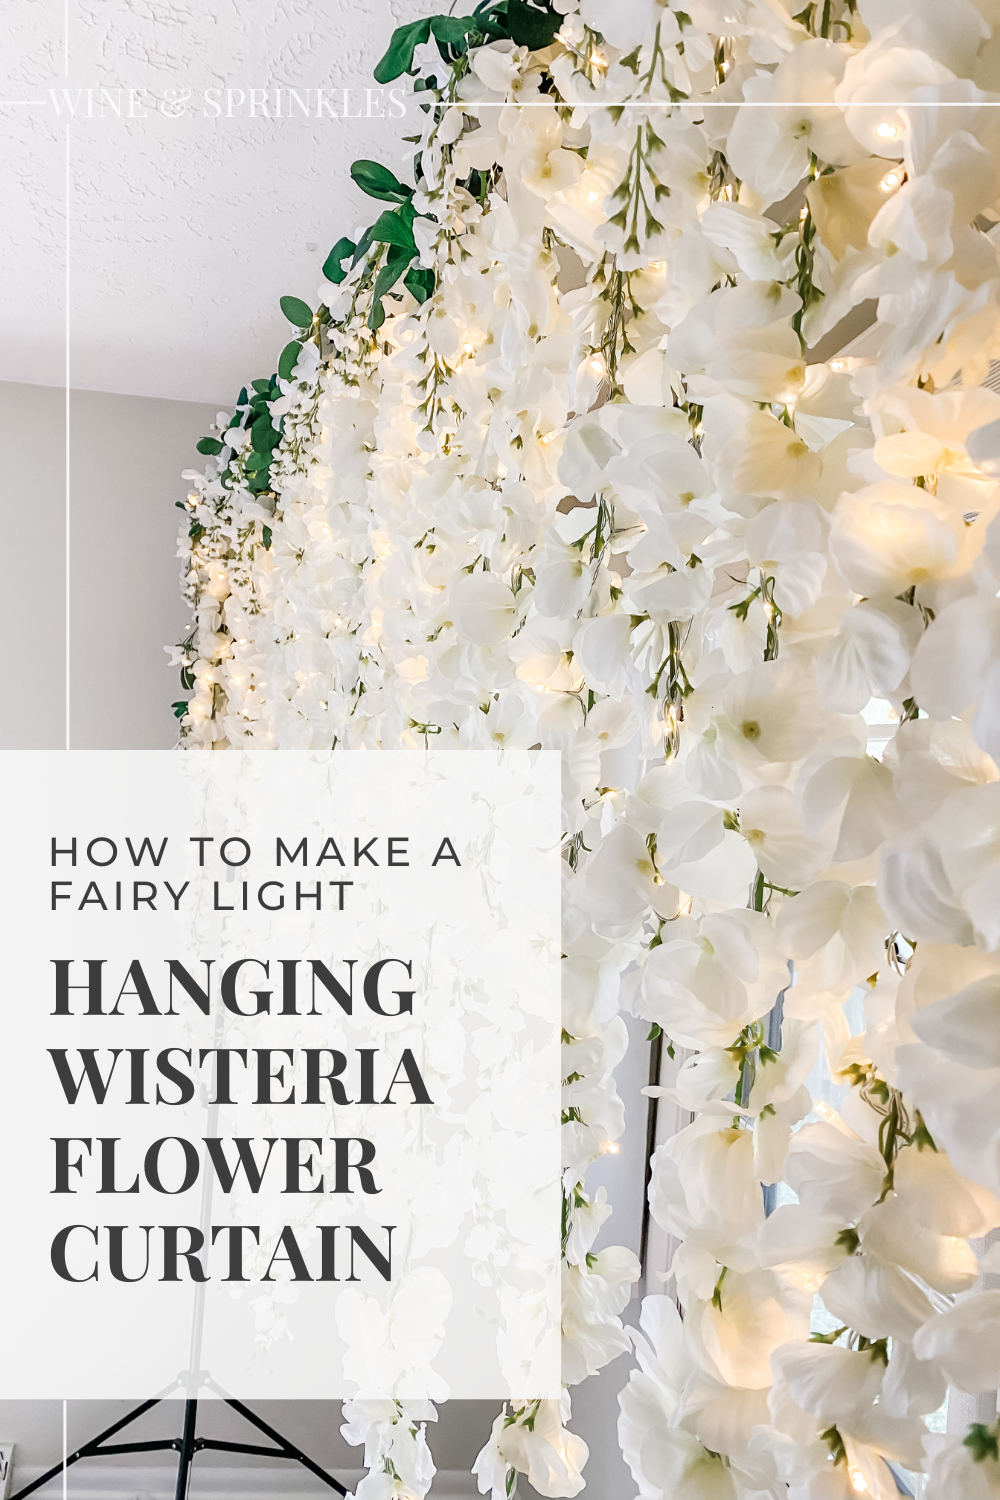
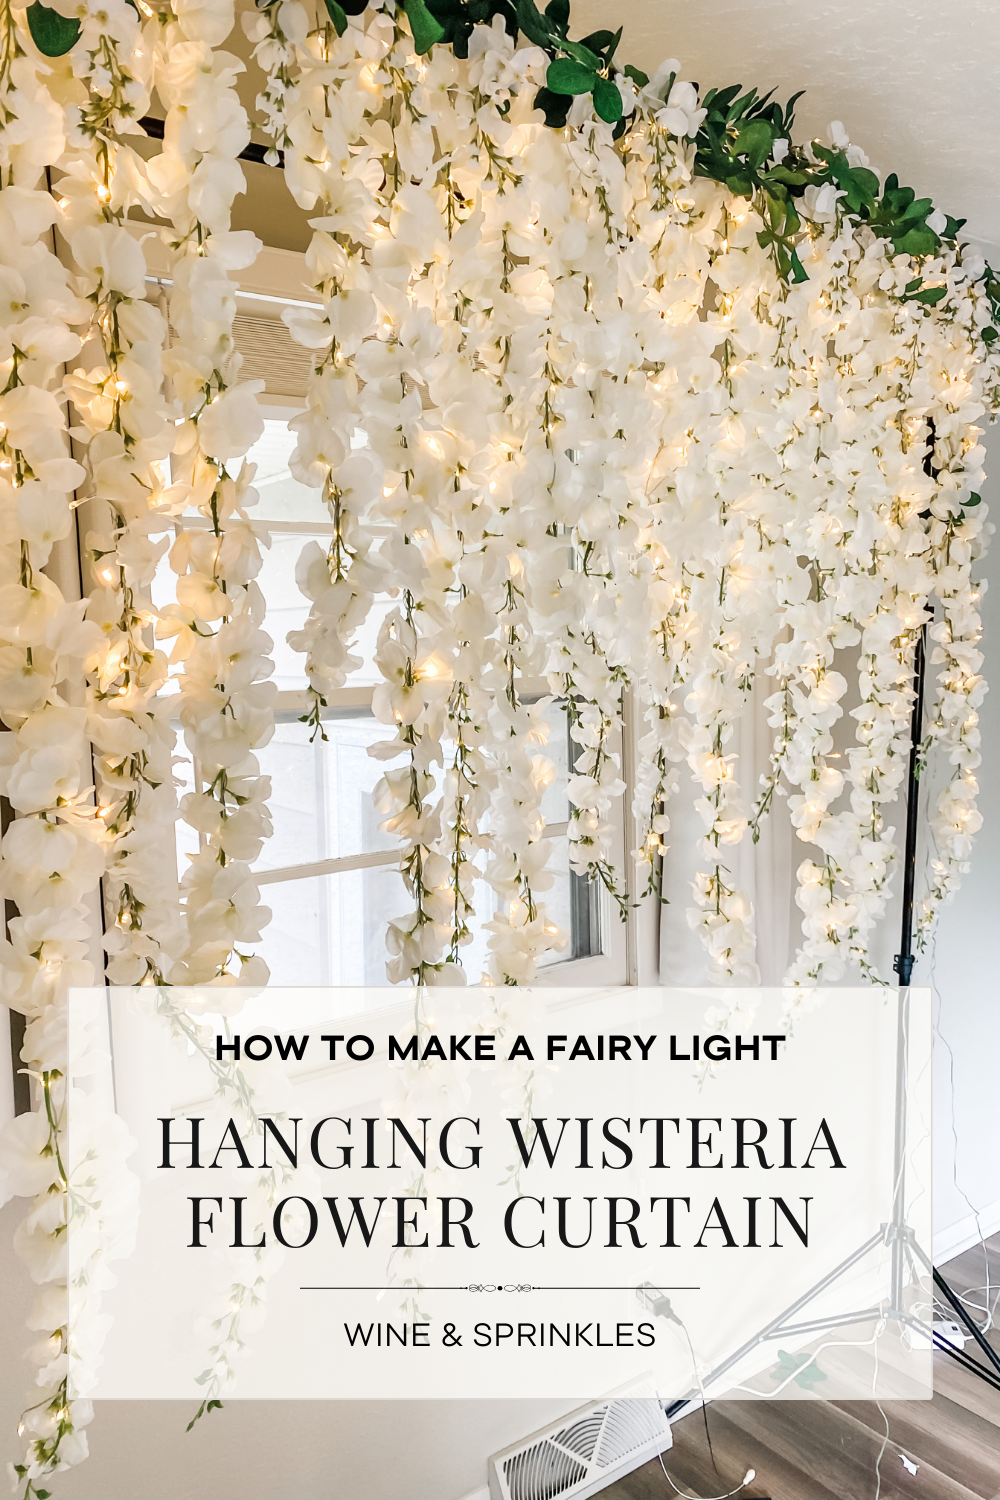
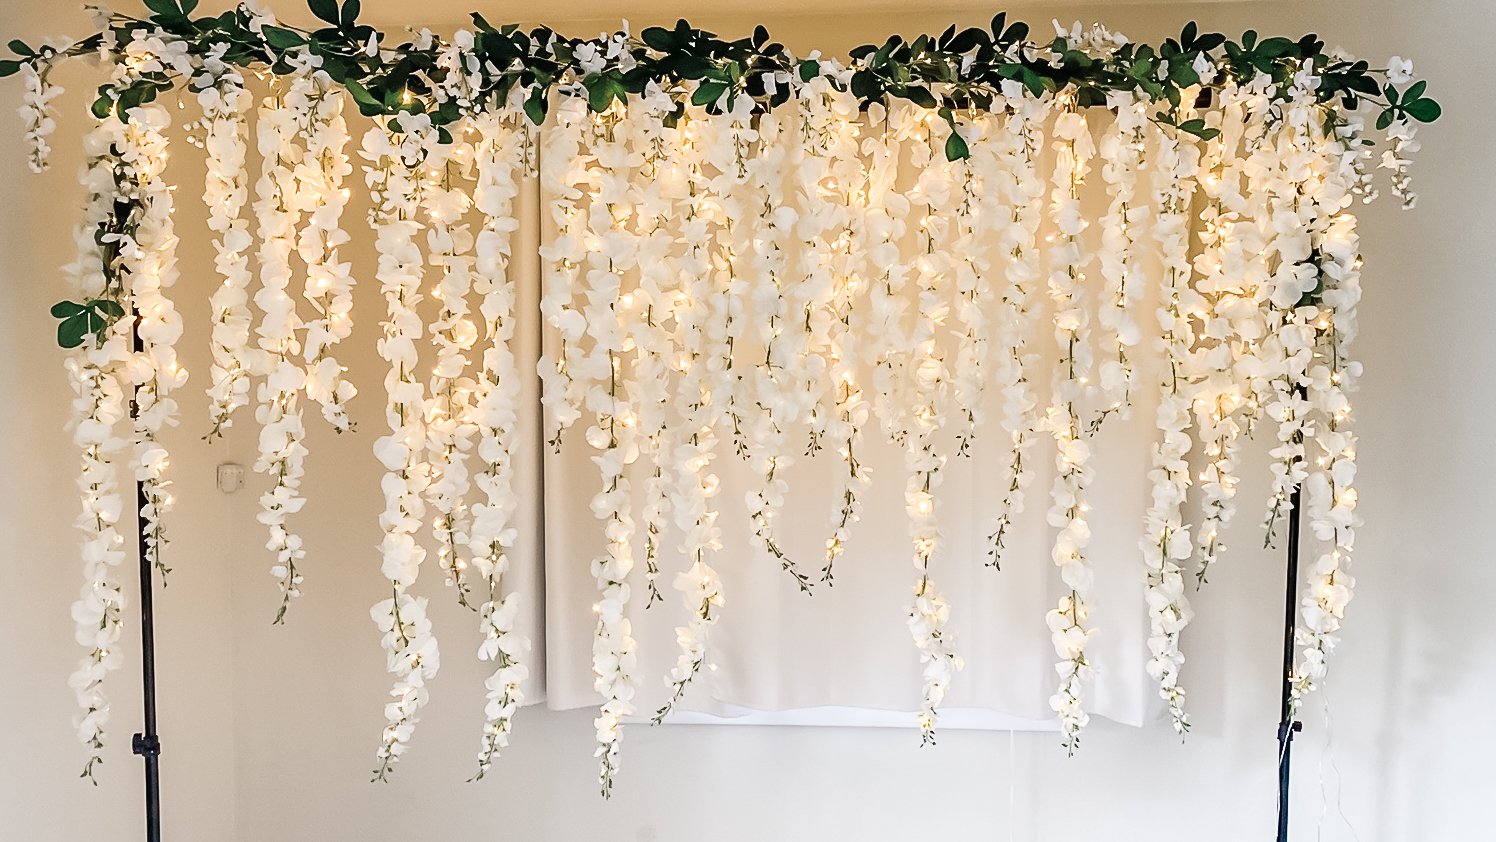
For her outdoor fairy garden inspired wedding, my bestie hosted a beautiful hanging wisteria altar pergola to exchange her vow, and ever since I saw it I instantly fell in love with the idea of creating a curtain of my own for using as a beautiful photo backdrop! So when my favorite silk flower provider featured some gorgeous wisteria garlands and stems, I knew it was the perfect time to craft my own Fairy Light Flower Curtain to feature at my Vintage Victorian Cocktail Party!
This creative curtain is really two parts, a fairy light curtain twined into silk wisteria garlands and some leaf and bloom wisteria stems for securing along the top of the curtain and rods once it's up. Both of these styles of beautiful blooms I bought from my favorite floral affiliate partner, Afloral! Specializing in silk flowers that are ethically sourced, they are my go to for starting new centerpiece and bloom based projects, especially because their flowers are so nice that I can use them again and again! I keep all my various stems in airtight tubs in my party closet to continually create new arrangements and garlands with them, then take those arrangements apart to use the stems again in new centerpieces as inspiration strikes! You can see all my Silk and Wooden Flower Projects Here to see what other kinds of projects I’ve made with Afloral’s products and you’re sure to continue seeing them as I keep on finding new arrangements I love!

When I first started making this backdrop curtain, I had all these ideas of taking it apart to use the Wisteria garland for other pieces but then, upon trying to detangle one strand of lights from flowers, I realized that this beauty would be better suited to stay as a curtain that could be taken out for future events instead! In the end, I kept the greenery and flower stems separate to use for this backdrop and other centerpieces while the garlands became a permanent fairy light feature. I left a few fairy light curtain strands loose to arrange in the top floral and give it some lights too, but this was way more manageable than taking the whole thing apart each time.
Instead of spending hours untangling lights and hurting my precious blooms in the process, I further secured them to the fairy light curtain with zip ties and now she's gracing all sorts of parties for both myself and my friends! Like my Paper Circle Photo Backdrop, this reusable decor piece does take some time and was a bit of a labor of love to make, but for such a lovely addition to my party supply closet the time it took to create it was well worth it!
While you’re sure to see it coming out for many floral themed parties in the future, it’s also a perfect floral backdrop for wedding ceremonies, bridal showers, or even fancy tea parties! See the supplies I used and how I made this curtain below, and mine will happily grace my office walls until its next party appearance.

SUPPLIES
SILK FLOWERS
When I originally made this beautiful floral curtain, like all my silk flower projects I found my blooms from my favorite silk flower affiliate partner, Afloral! You can read my review of their products I’ve tried and used so far here, but as they buy batches of blooms then sell them out, my exact choices may not always be available! At these times, I find the best substitute I can from Amazon to share with you, but if they come back in stock you will see them here again because I absolutely adore them and love that they are ethically sourced!
Silk Wisteria Garlands: for creating the flower curtain part of your backdrop, I went with white silk wisteria, but specifically without any greenery so I could weave them into the lights and line the top of the curtain with greenery later if I so chose. I loved these hanging wisteria garlands for coming in three lengths so I could alternate them for a more natural look and their plastic rings on the tops made it easy to attach them to my curtain as I built it. For the ones I’ve linked (because Afloral is all out), you can trim them to multiple lengths easily to get the same effect!
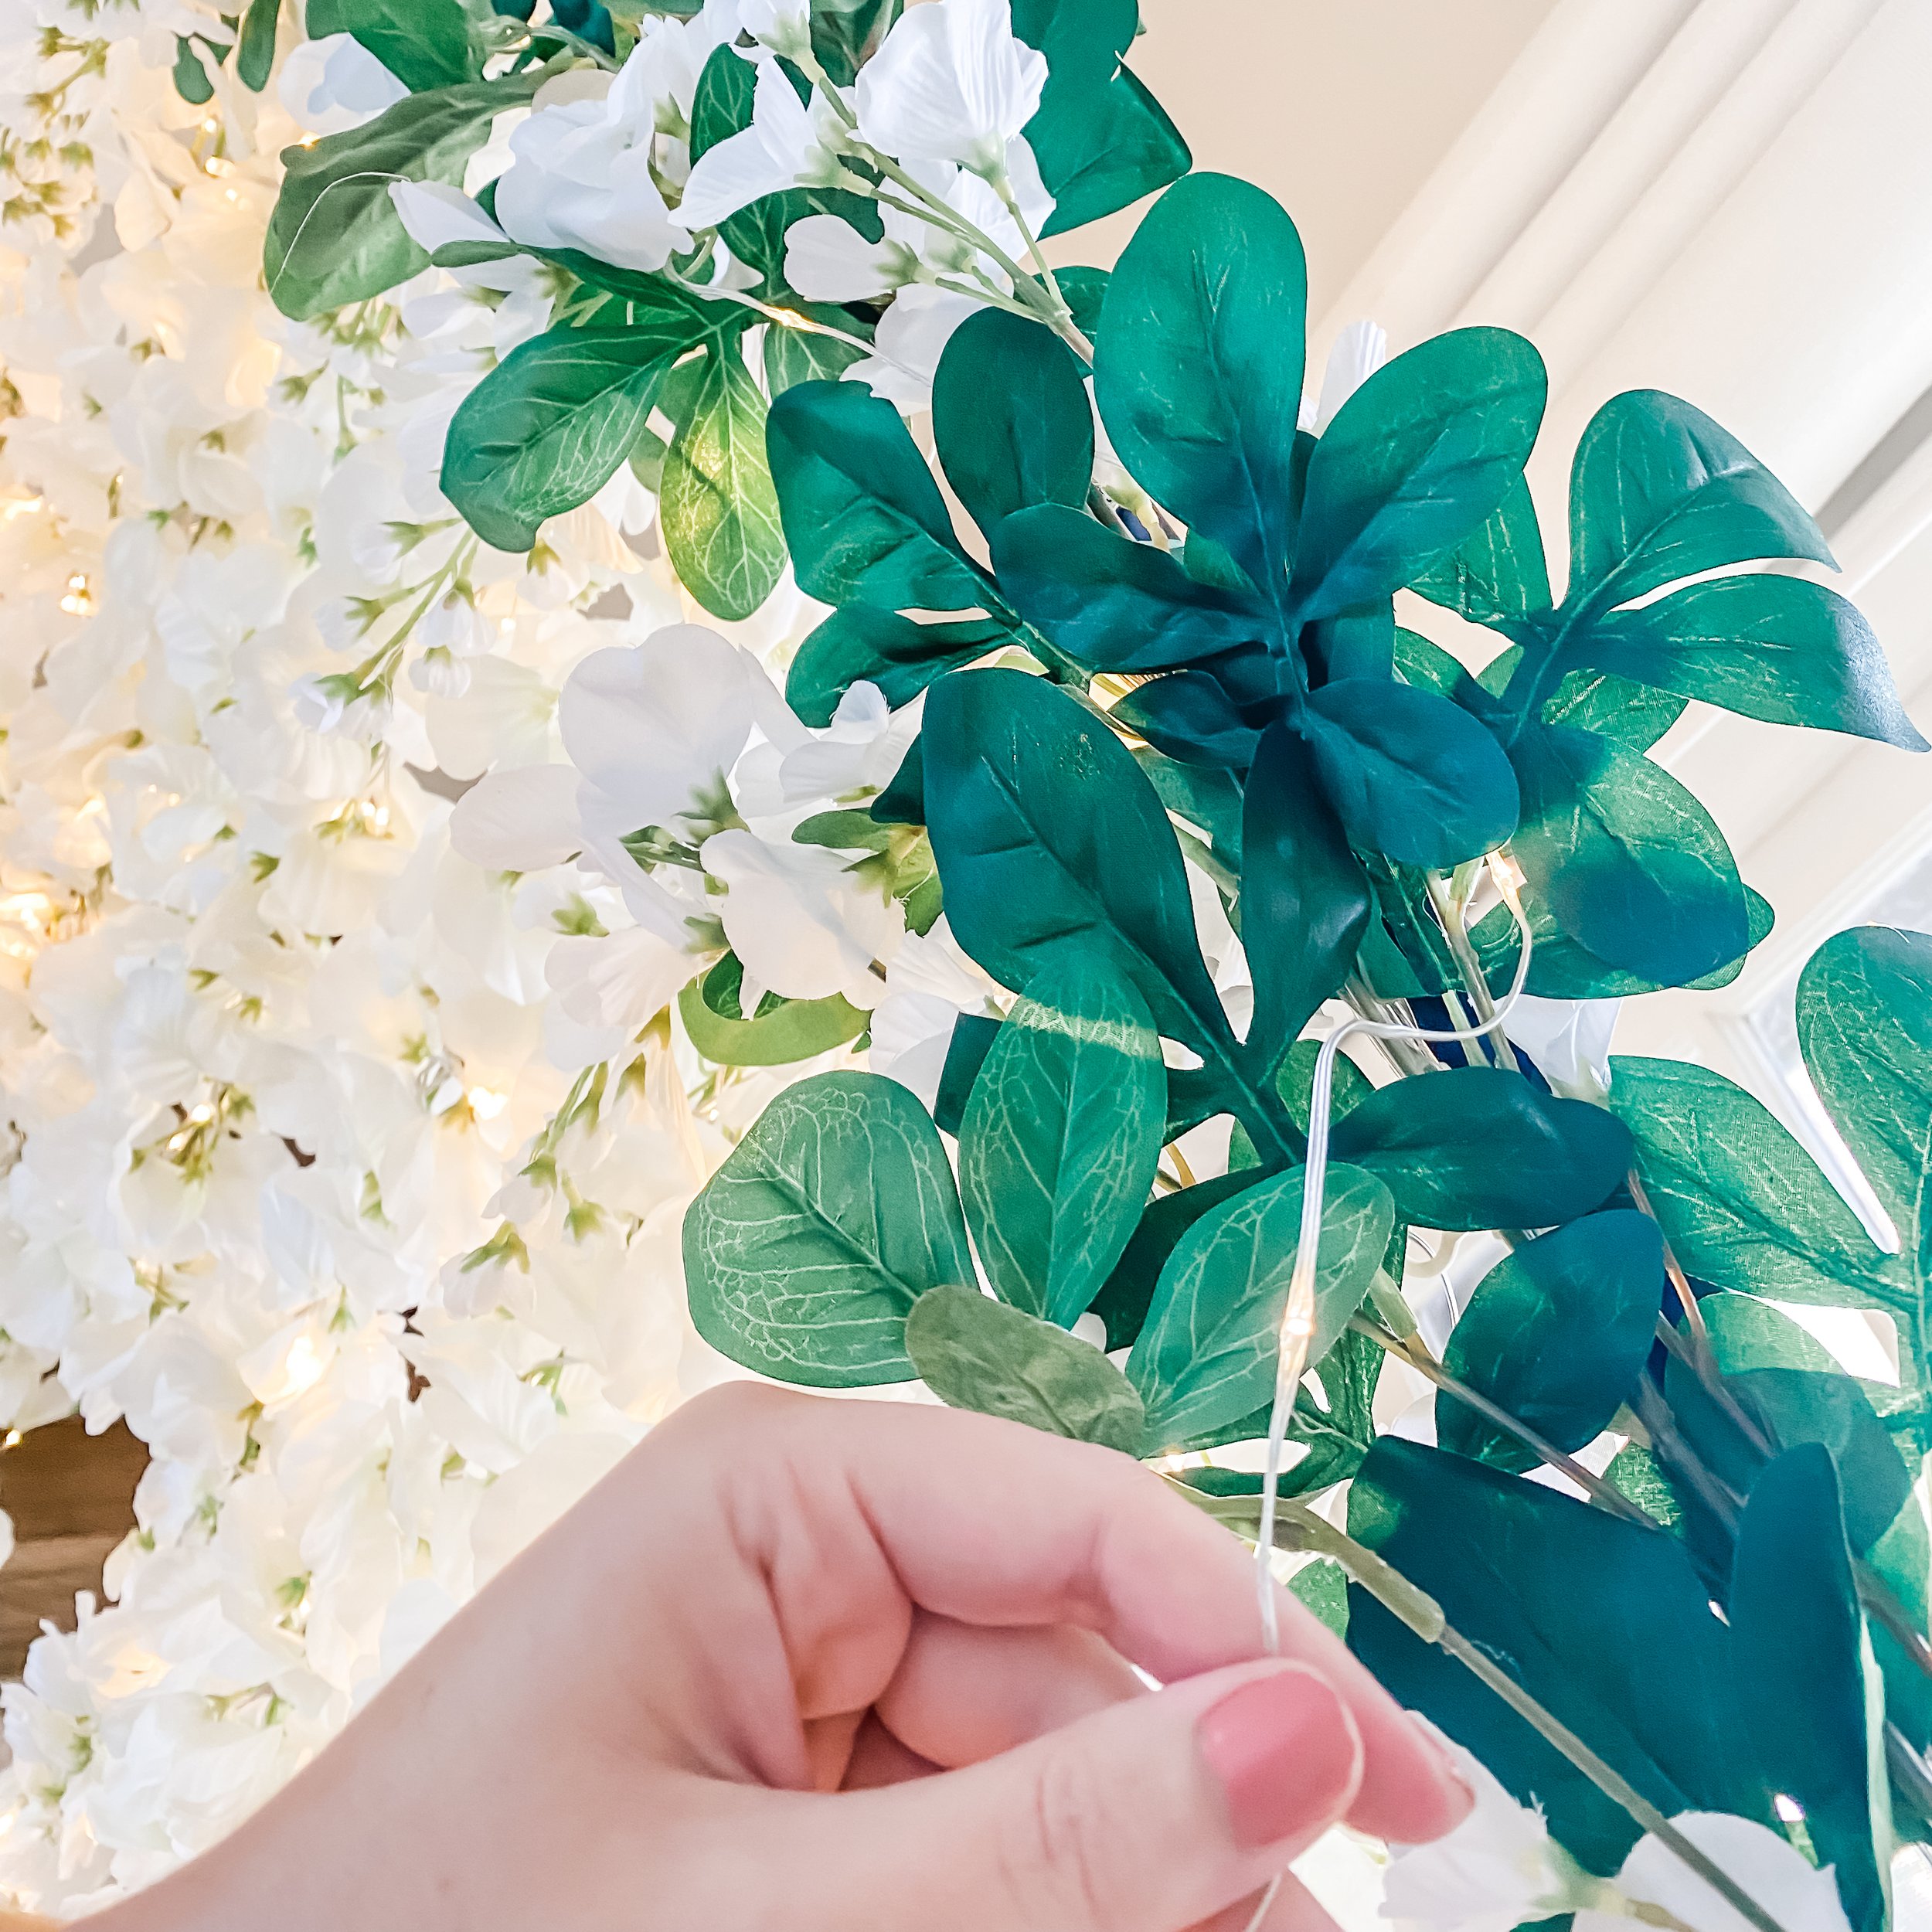
Silk Wisteria Stems: for arranging along the top of my curtain to cover wires and any floral tape and zip ties used to secure the curtain. I cut up a silk wisteria bush into multiple stems to create this curtain which worked out just delightfully! They were perfect for finishing the top of the curtain and it's nice to keep them separate so I can use them for other Silk Flower Arrangement Projects in the future!
TOOLS & OTHER SUPPLIES
Fairy Light Curtains: to create the base of your flower curtain and to weave into your Wisteria garlands. I used two different fairy light curtains I already had from previous parties, but the one I linked have the same strand numbers and will be my next set to purchase because they also have the power to change colors too!
Photo Backdrop Stand: for building and displaying your flower curtain, though once mine was fully secured after my Vintage Victorian Cocktail Party, I’ve just been hanging my flower curtain on the curtain rods in the house!
Clear Zip ties: to secure your wisteria garlands to your curtain after setup, so you can take it off as one big curtain
Floral Tape: for securing your garlands to your fairy light curtains and the loose wisteria branches to the top of your backdrop stand.
Wire Cutters or Zip Tie Trimmer: for cutting off your zip tie tails
SUPPLIES LIST:
[for 1 flower curtain]
SILK FLOWERS
Silk Wisteria Garlands x 21
Silk Wisteria Stems x 8
TOOLS & OTHER SUPPLIES
Fairy Light Curtains x 2
Photo Backdrop Stand
Clear Zip Ties
Floral Tape
Wire Cutters or Zip Tie Trimmer

DIRECTIONS
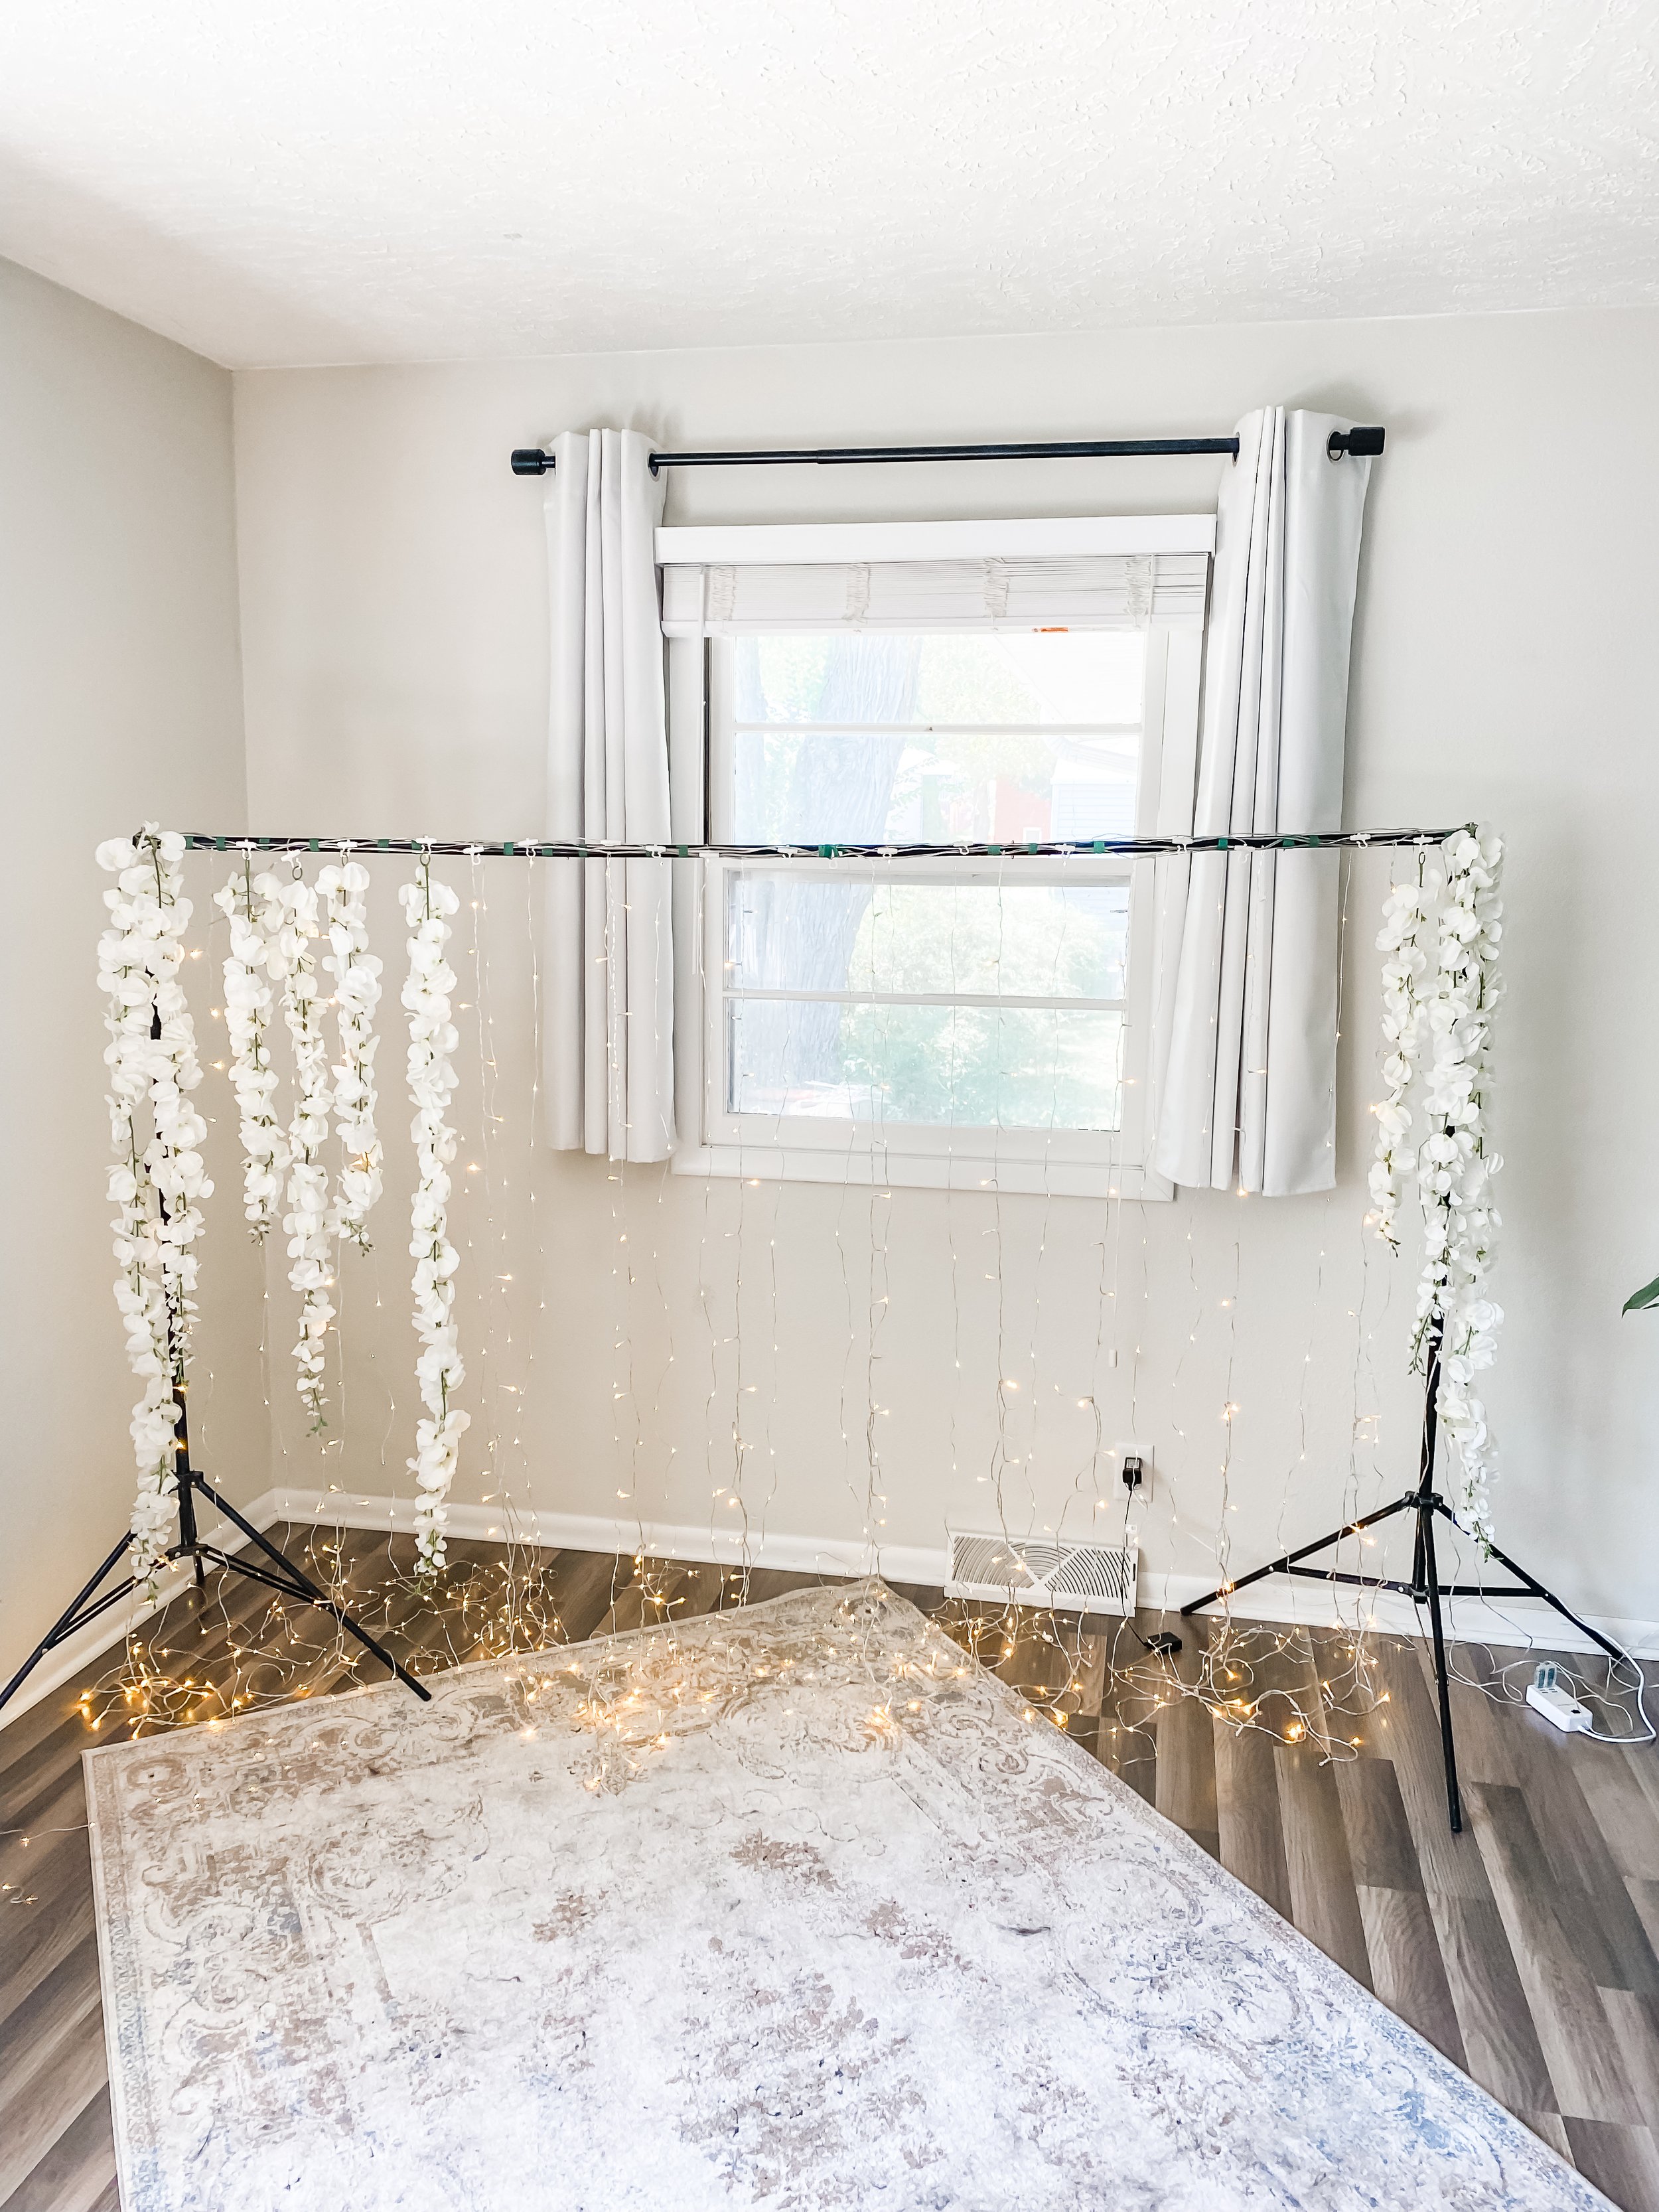
1. Assemble your backdrop frame according to your manufacturer's instructions, raising it to about half height so that you can work on it more easily before raising it to its final position. Untangle and string your fairy lights along the top frame, securing the lines with masking or floral tape, hanging the curtain lines in between each other so that each set has its light strands between the other curtain’s strands.


2. Starting on the outside of the backdrop, start by hanging two of your longer strands of wisteria on each side of the frame to start the covering of the backdrop legs. Starting on the outside corners of your frame, start arranging the hanging wisteria strands along the top edge of your photo booth, focusing your longer strands along the outside and shorter along the inside, while still keeping a mix of lengths along the curtain.
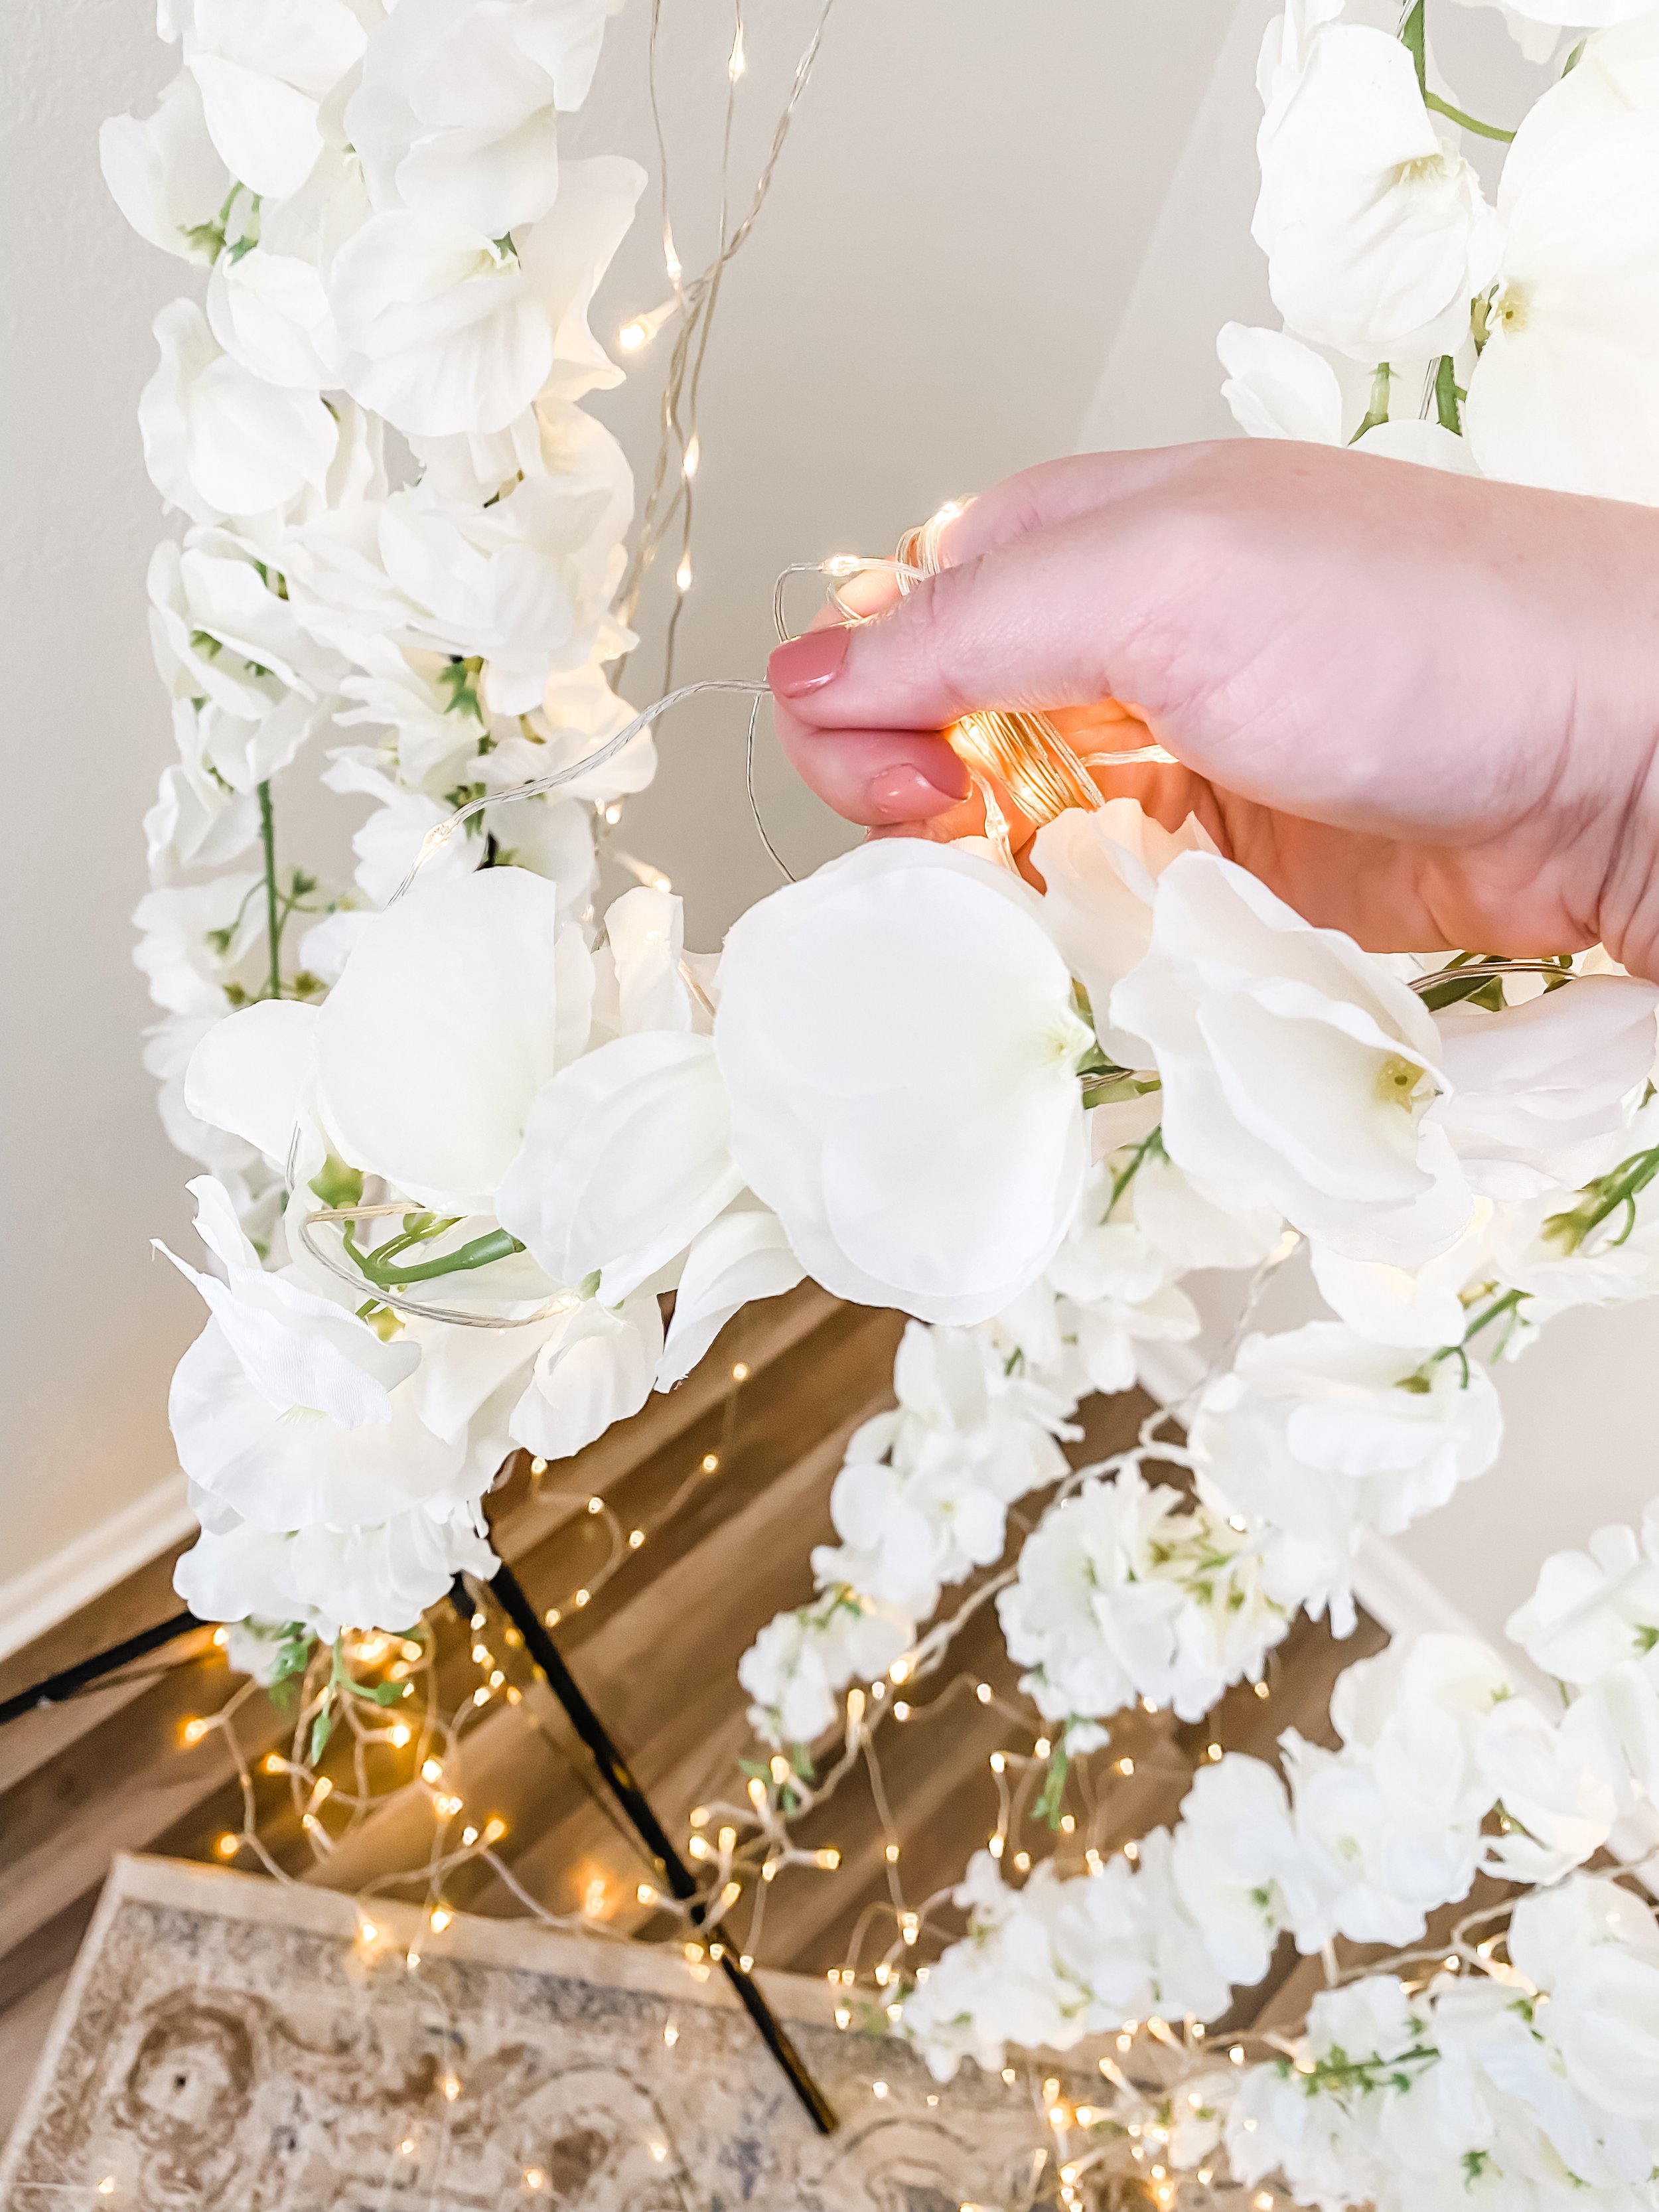
If your lights had hooks like mine did, you can hang the flowers directly on the hooks to start. If your fairy lights dont have hooks, use clear zip ties to loop through the base of the hanging wisteria and secure along the top line of the fairy light curtains. I used the hooks first so I could rearrange my flowers until I got the look I wanted, then once I finished wrapping lights I secured them with zip ties, either method works!
As all of my strands were between three different lengths I started by hanging on the hooks and where I found empty areas I would secure the top bits of my flowers along the top of the frame and fairy light curtains.This made for flowers in a lot of different length while filling in patchy areas, while also adding some blossoms to the top of the photo booth before filling it in with the greenery and flower stems at the end.


3. Once the strands of flowers are secured along the frame top, start wrapping the fairy lights into them, doubling back up the strands as you reach the bottom of the flowers and wrapping them back up each strand so that they are embedded in the flowers but don’t hang loosely without them. Repeat this with at least one light strand per branch, leaving the extras hanging to wrap into the foliage that will be added to the frame. If you haven’t zip tied your flower strands to your curtain, now's the time to do it and make sure they are all secured, so that when you take it down they all come down as one big curtain.


4. If your wisteria greenery comes as a bush like mine did, cut it into individual stems with a couple strands of flowers each. Mine turned into eight which was more than enough for my backdrop. Starting on the outside of the top of the frame and working inward, floral tape the wisteria greenery stems along the top of the photo booth, overlapping your new flowers to cover your already taped stems until the top of the frame is completely covered. If you have extras, tape them down the sides of the photo booth poles to give more coverage.

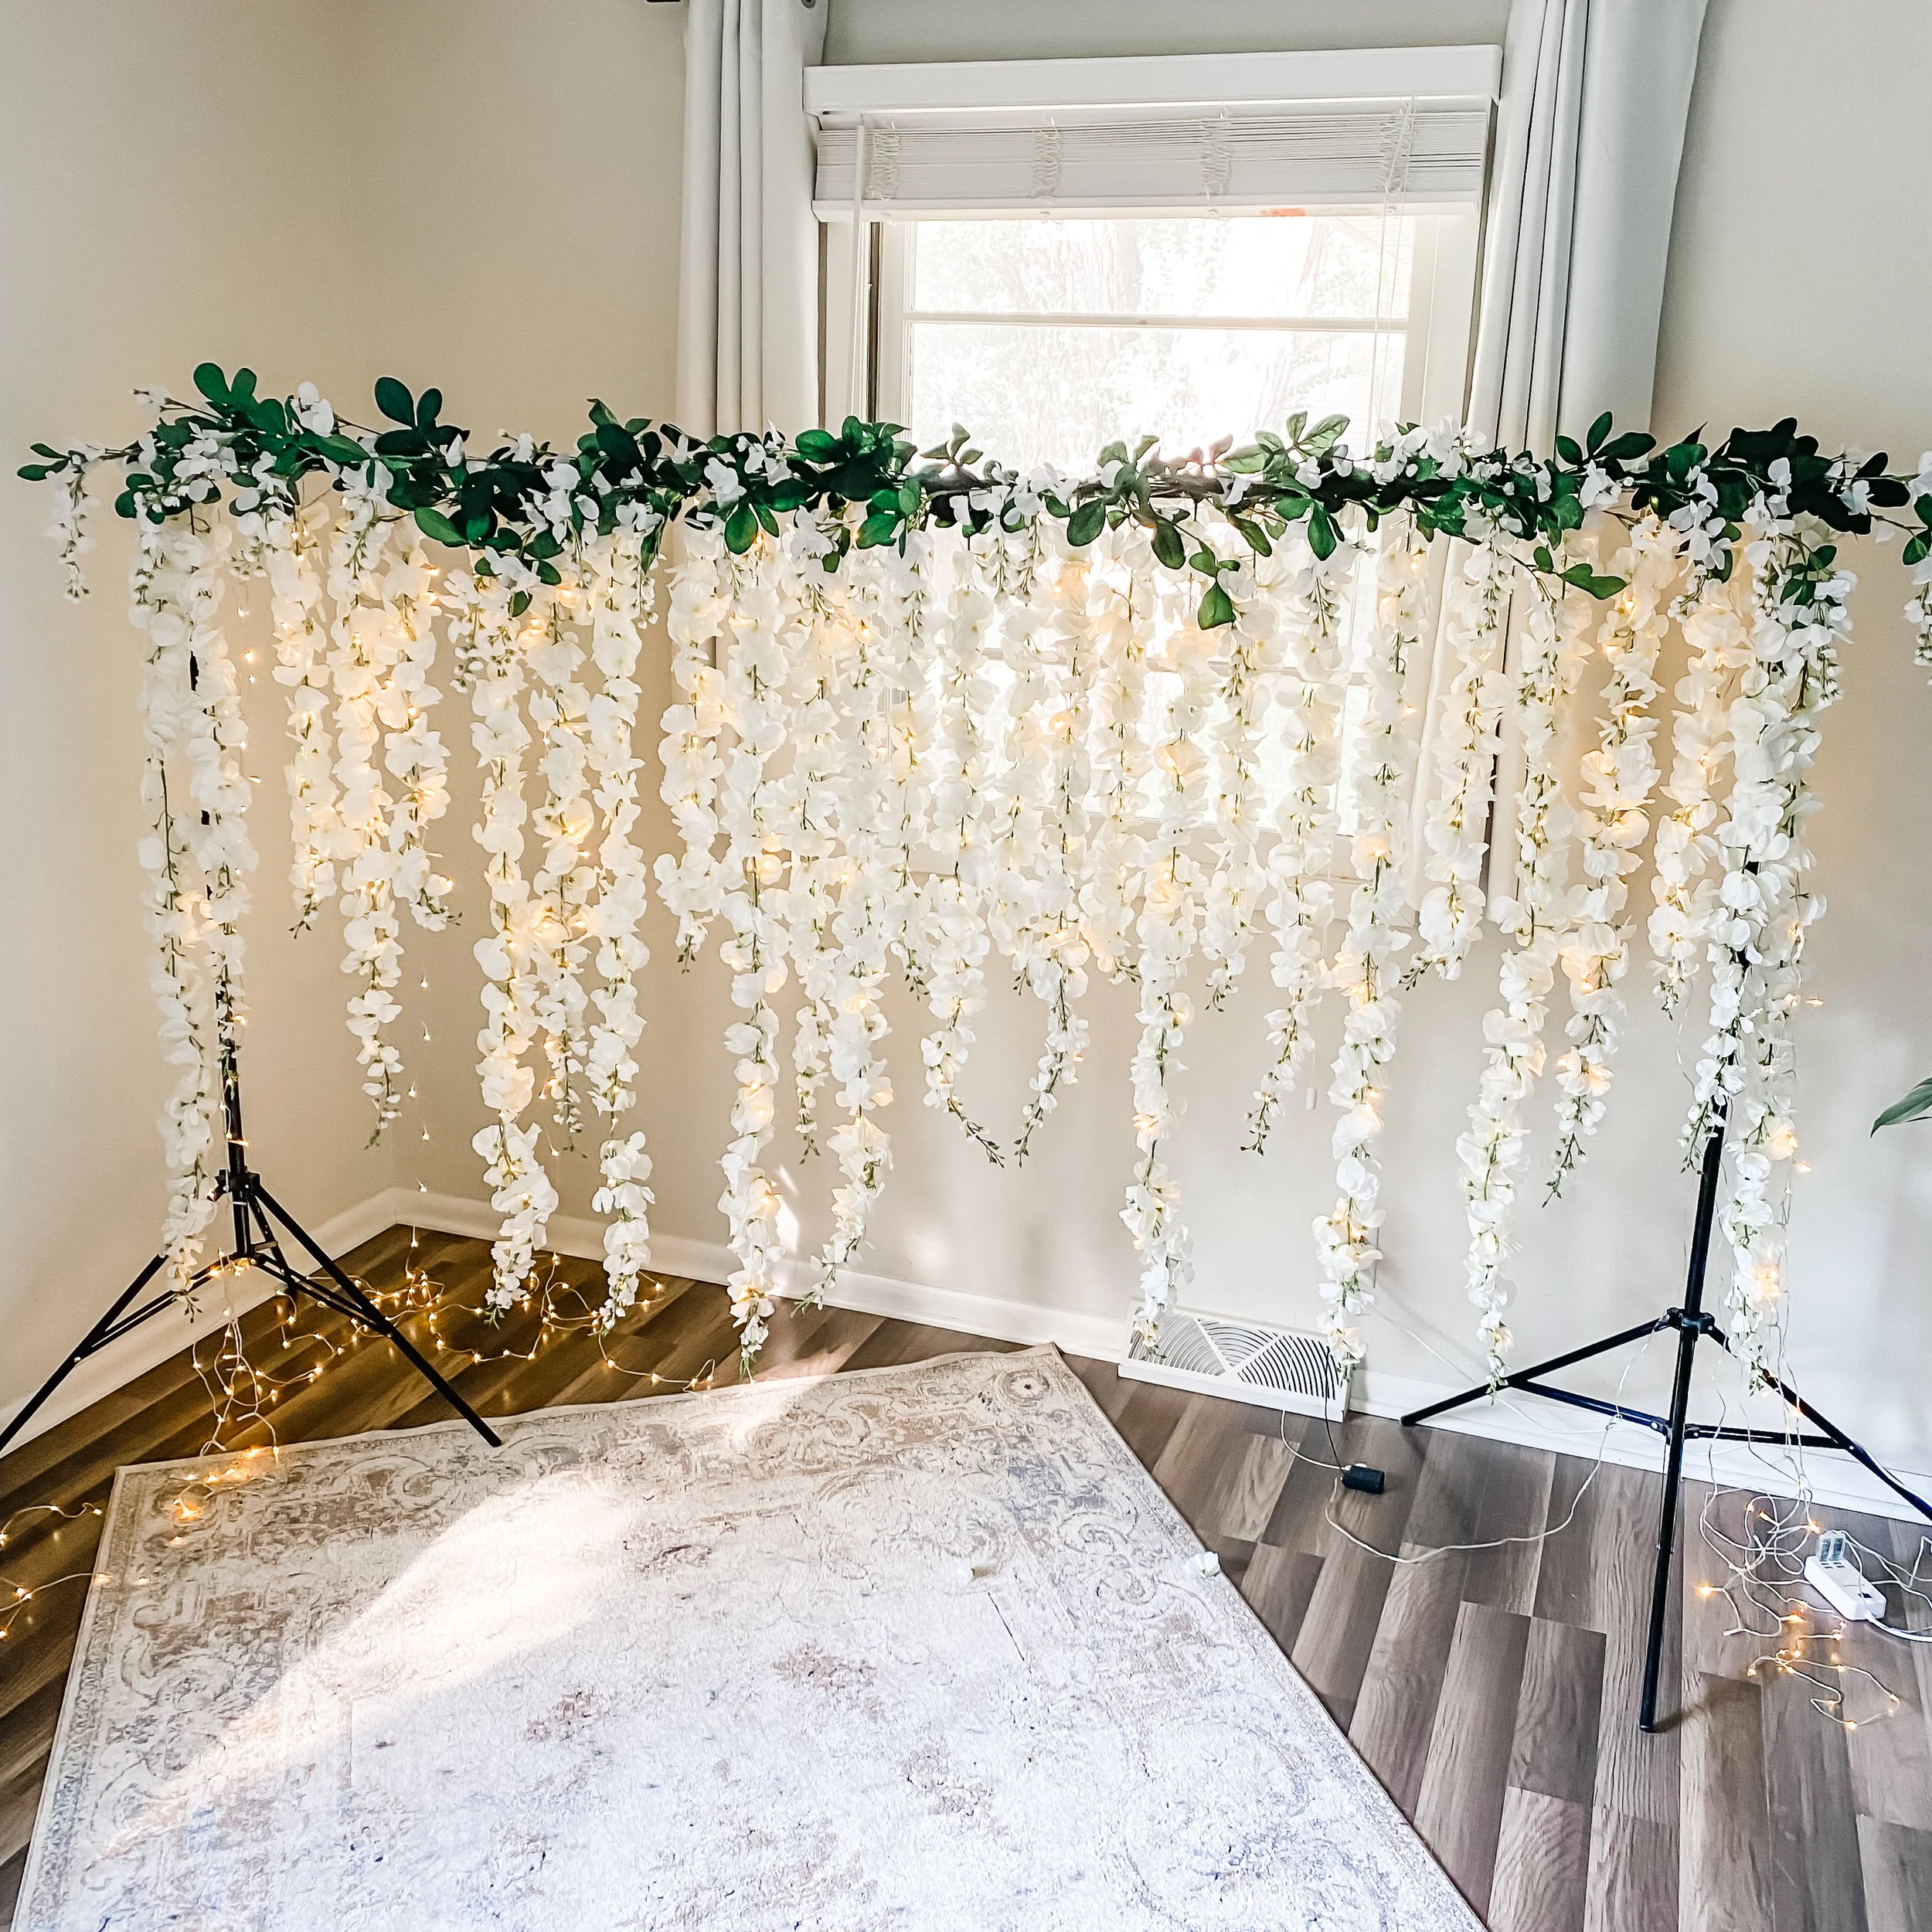
5. Once all your wisteria is taped to the frame, finish your backdrop by wrapping the extra lights you left loose around these newly added flowers along the top and sides of your backdrop frame, then raise it to its full height and it’s ready to impress your guests!
When you disassemble this beauty, just unwrap the few free strands of fairy lights from the greenery, then untape the stems first followed by the flower curtain. My curtain lives in an airtight tub with my greenery stems living with my other loose silk flowers, and both come out of storage easily for any floral party I plan. Keep a lookout for my next summer party featuring my favorite flower curtain and create your own for your future unique events!

SEE OUR RELATED POSTS HERE:


OUR MOST RECENT BLOG POSTS:


OUR PINS FOR THIS POST: