This post contains affiliate links, meaning that if you click on a link I will recieve a small comission. This costs you nothing extra and I only promote products I use and love! You can read our full disclosure here
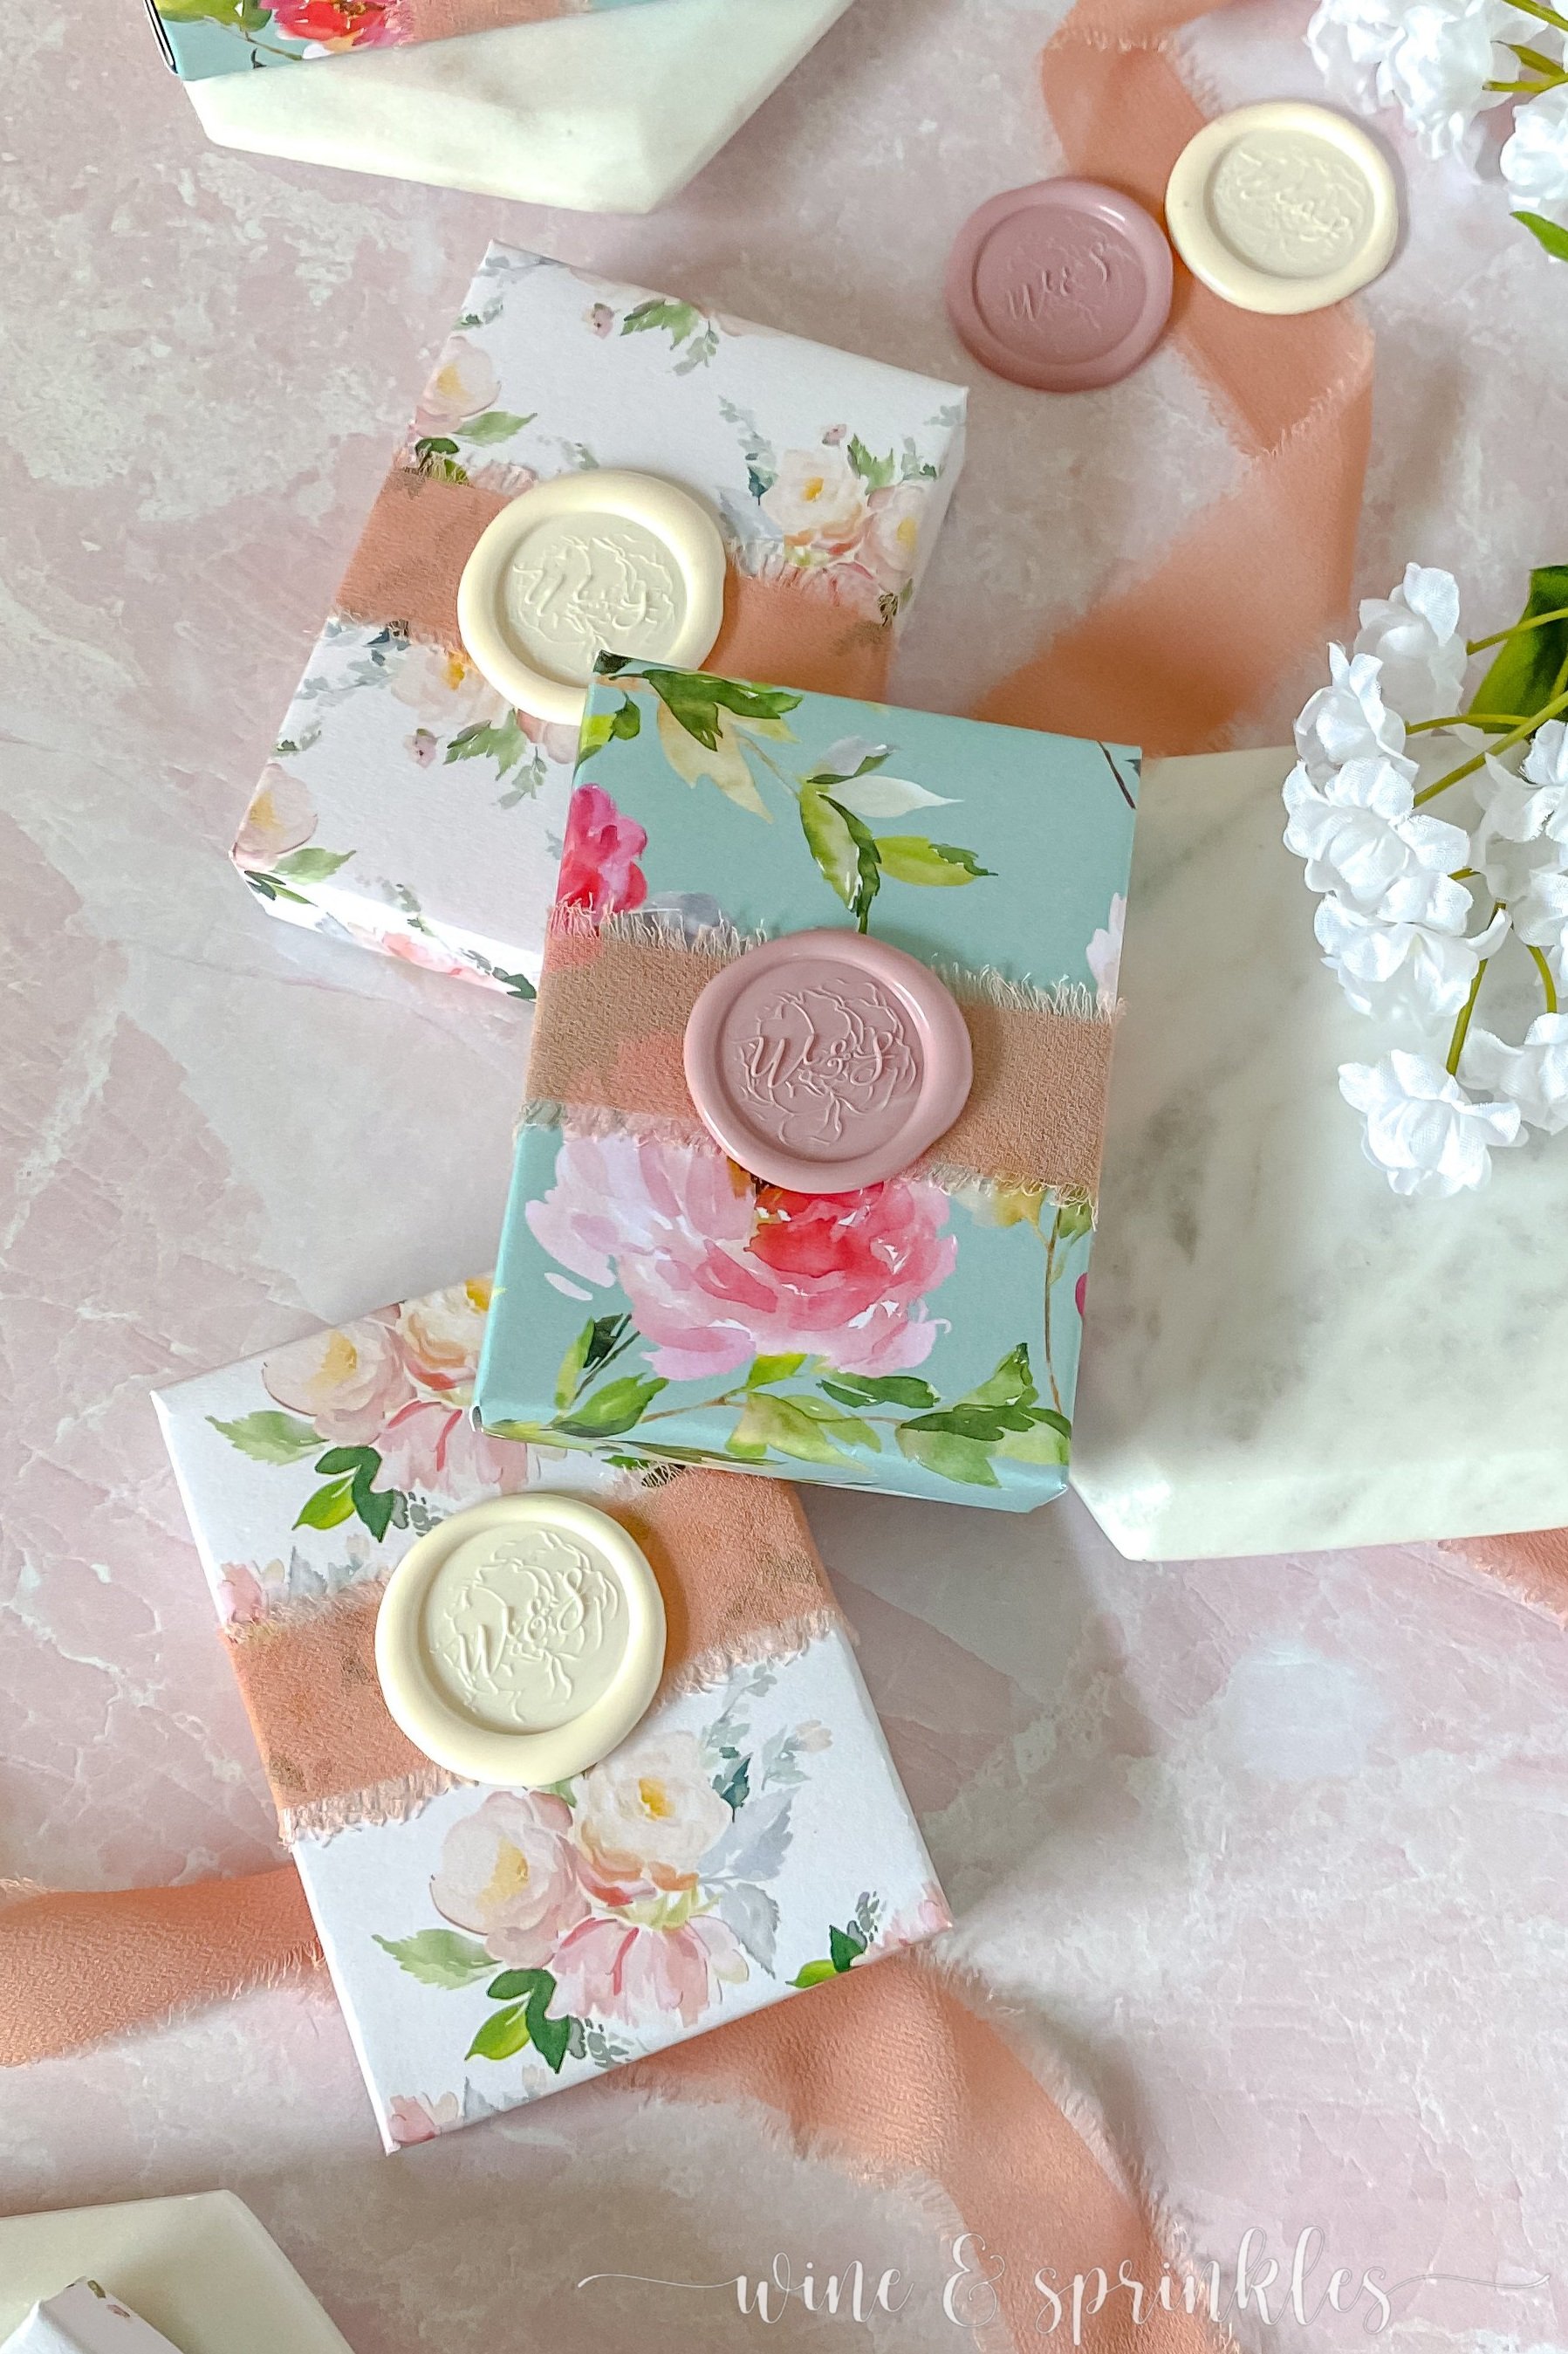
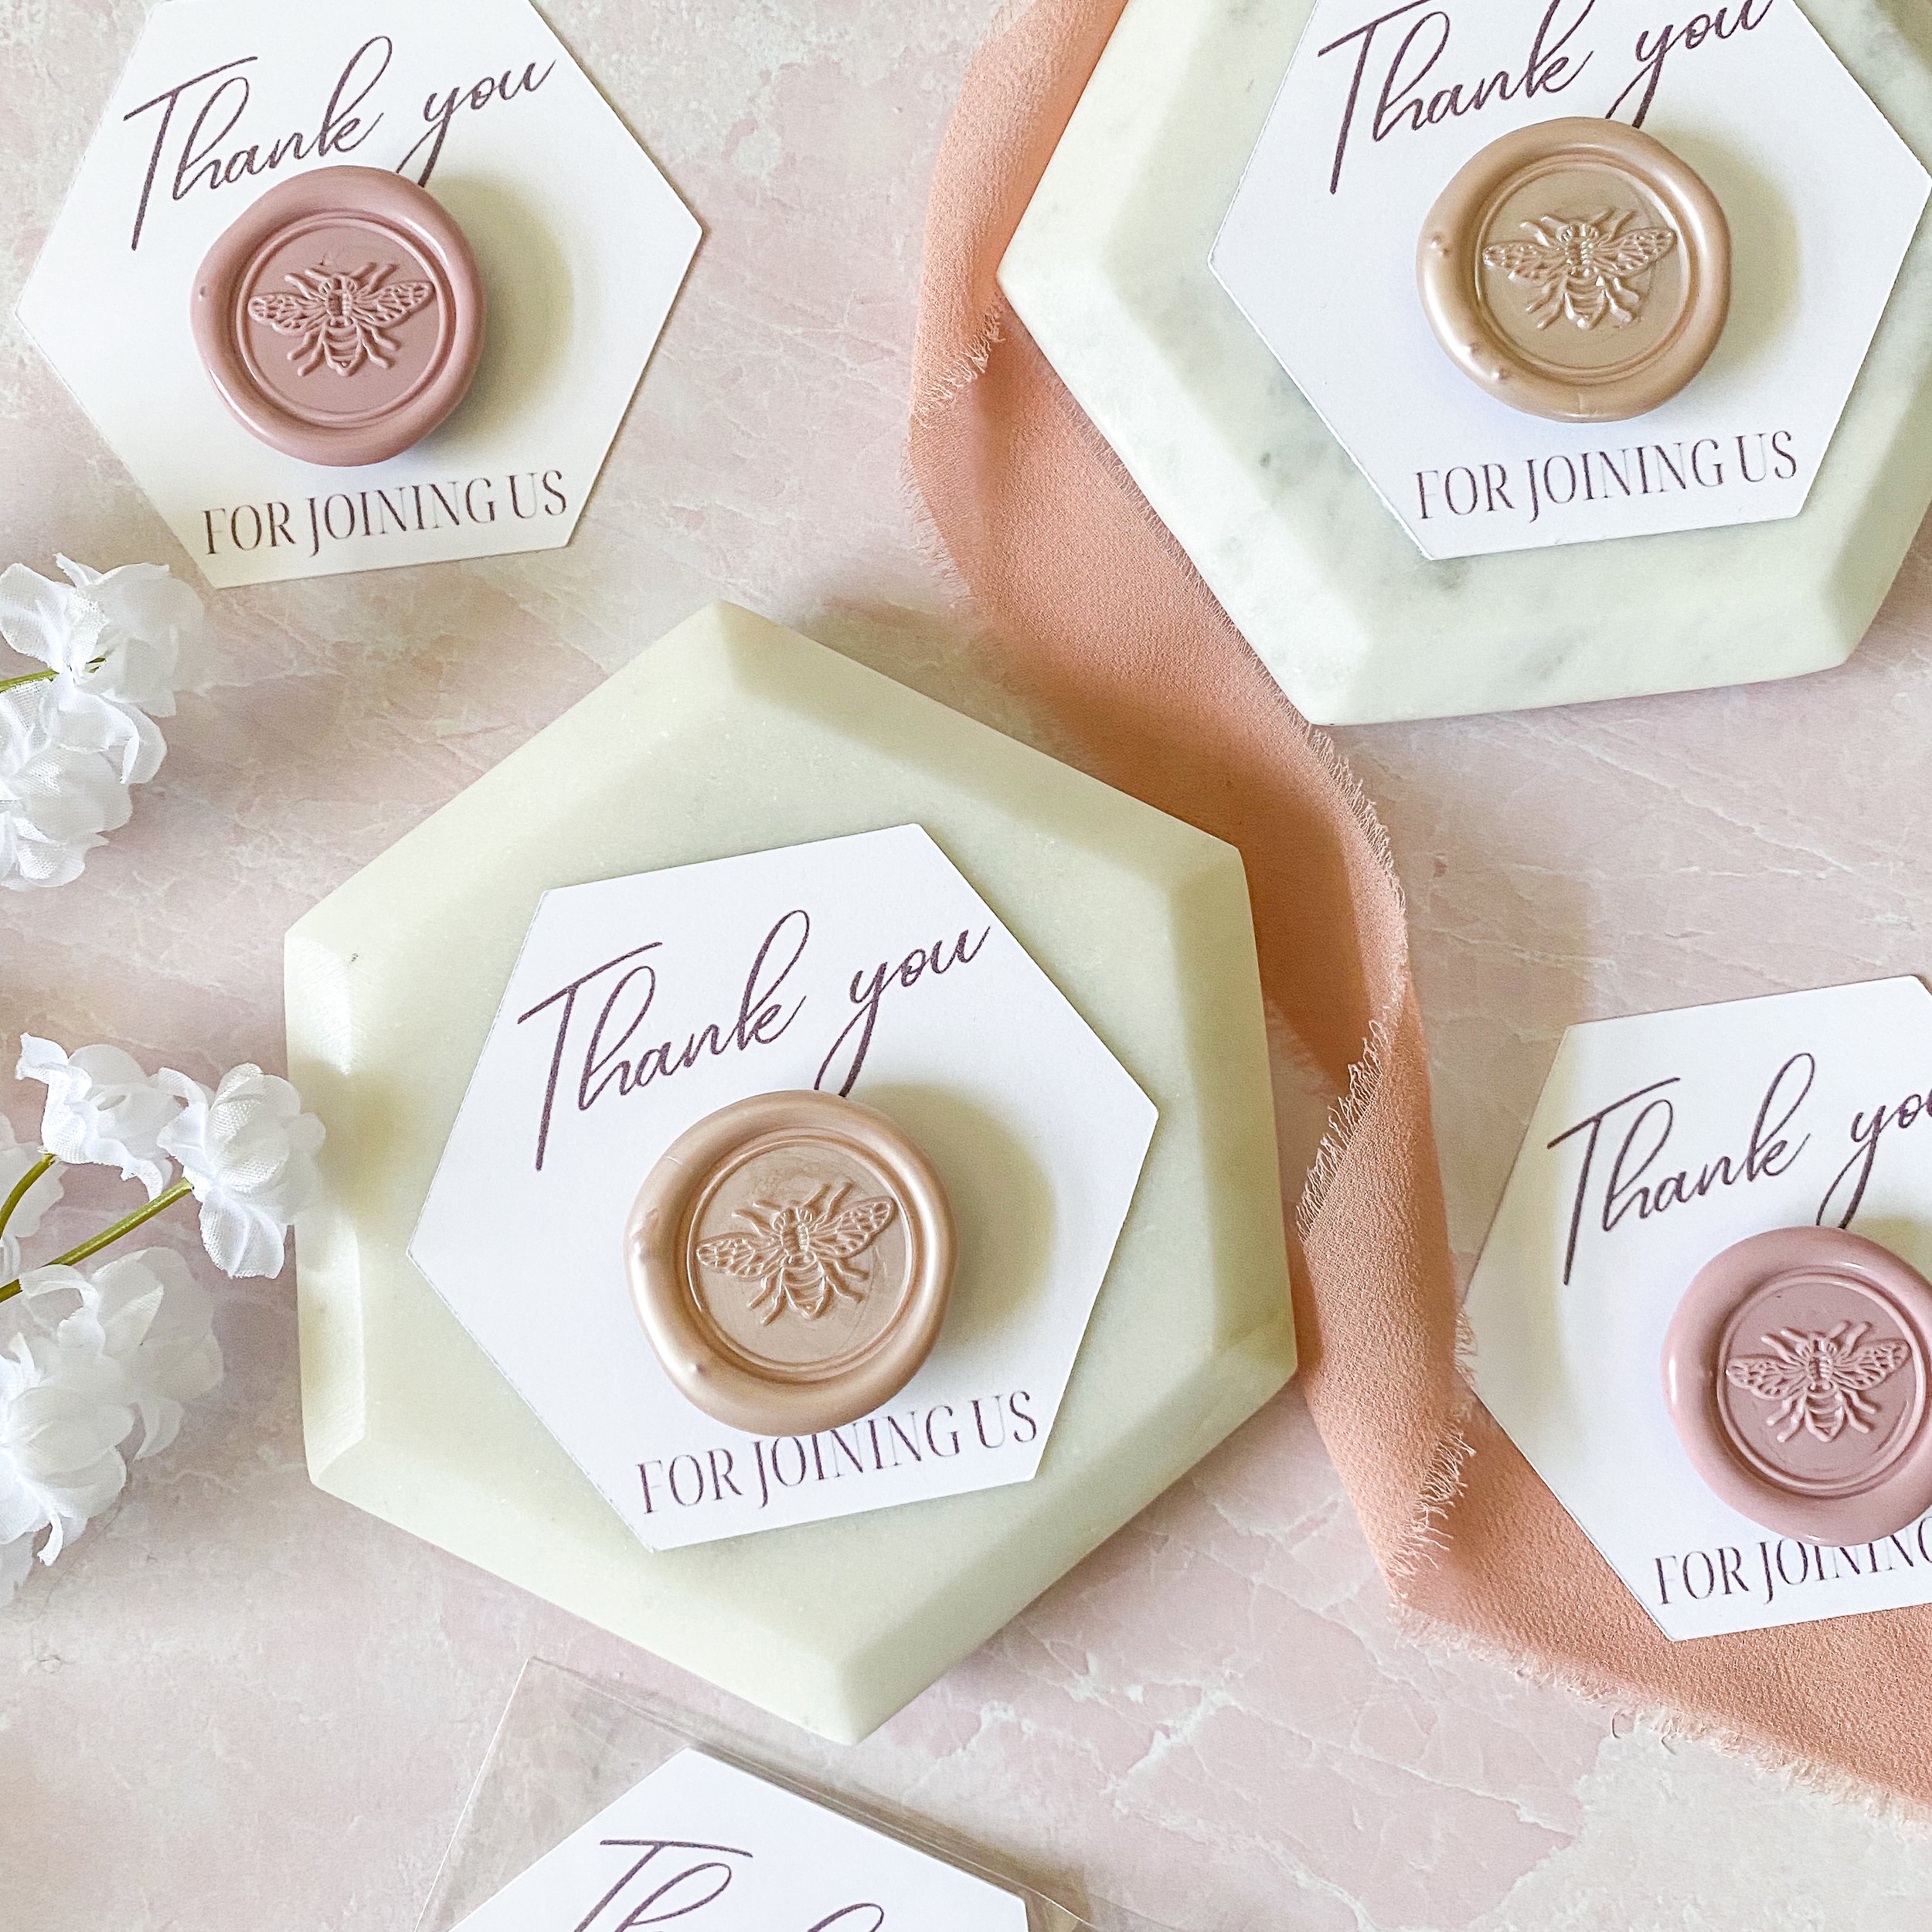
While I was creating all sorts of mismatched floral stationery and details for my latest party, I just had to share one of my favorites before the festivities started, featuring some of my own favorite things; florals and beautiful wax stamps! With my next party full of fun and games, my first project featuring all the wax seals I’ve made so far are kicking off with these Personalized Wax Stamp Floral Patterned Playing Cards.
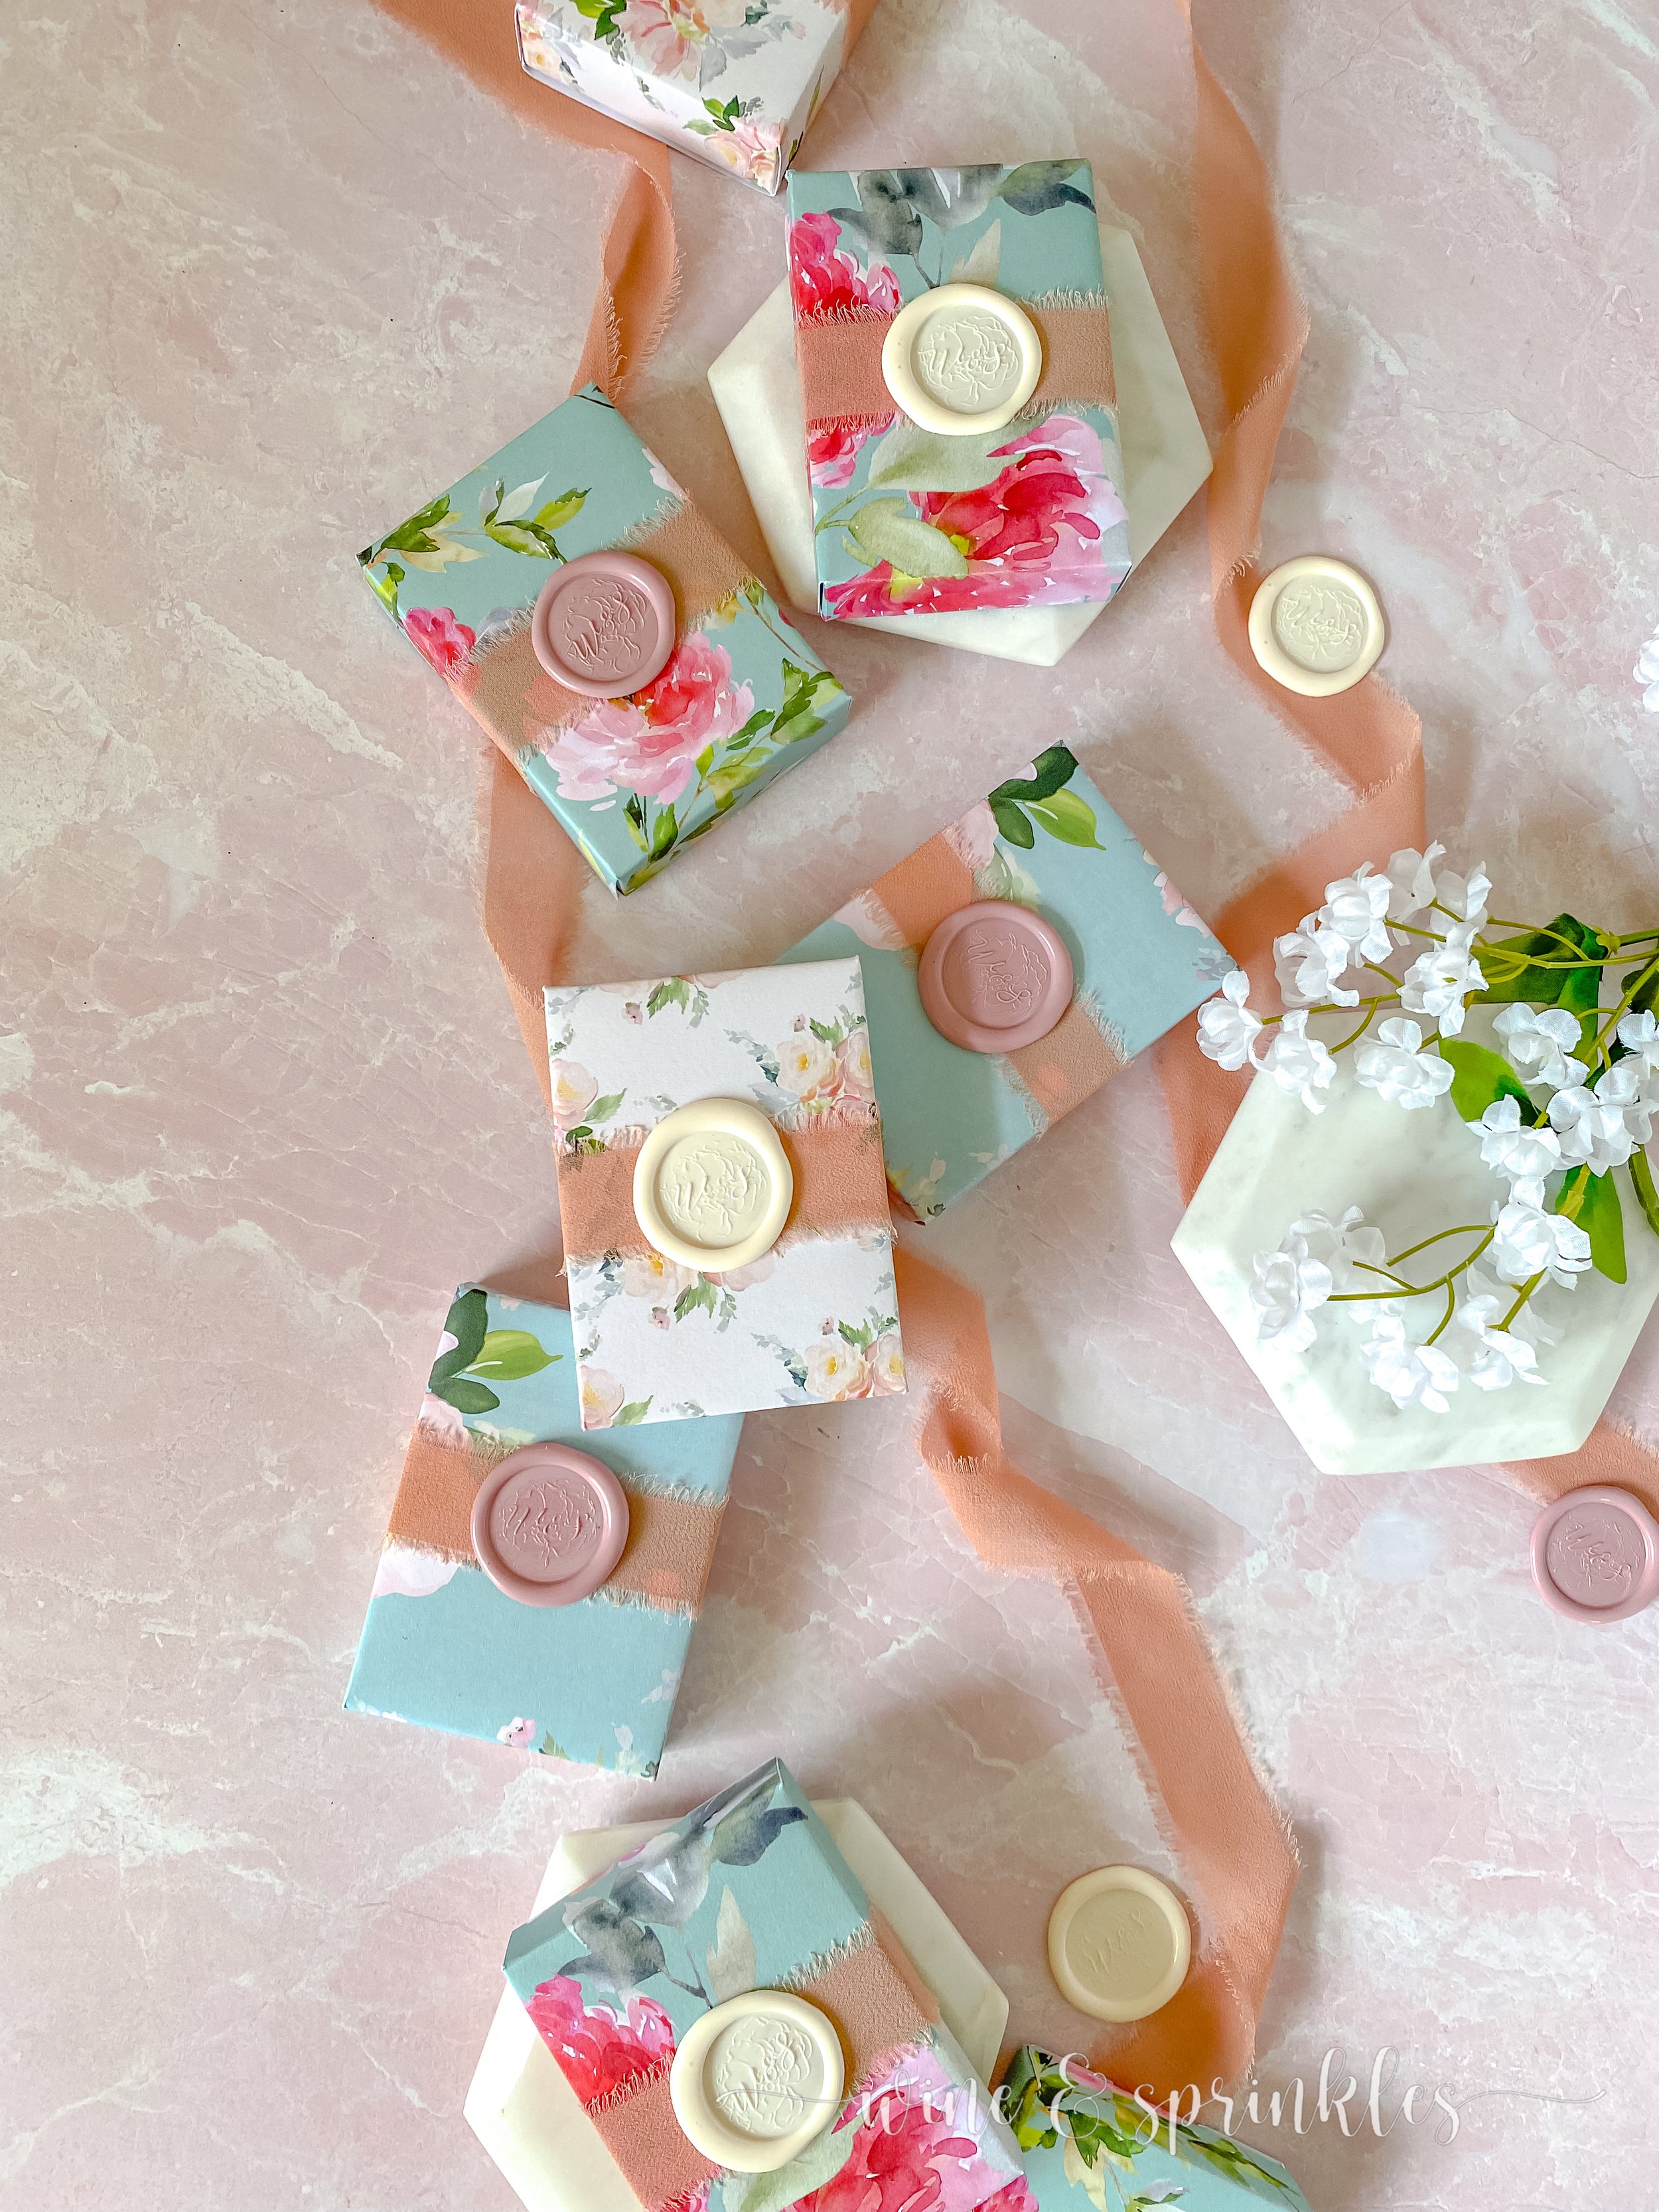
I’ve always wanted to make my own playing card boxes, back from when I was originally planning our wedding ages ago, so my latest event featuring a card room for those cribbage and non musical folks, this was the perfect chance to spend the time designing a card box that could be easily glued around and existing deck, featuring the florals for my party and some beautiful wax stamps I made for them from one of my favorite affiliate partners, Artisaire!

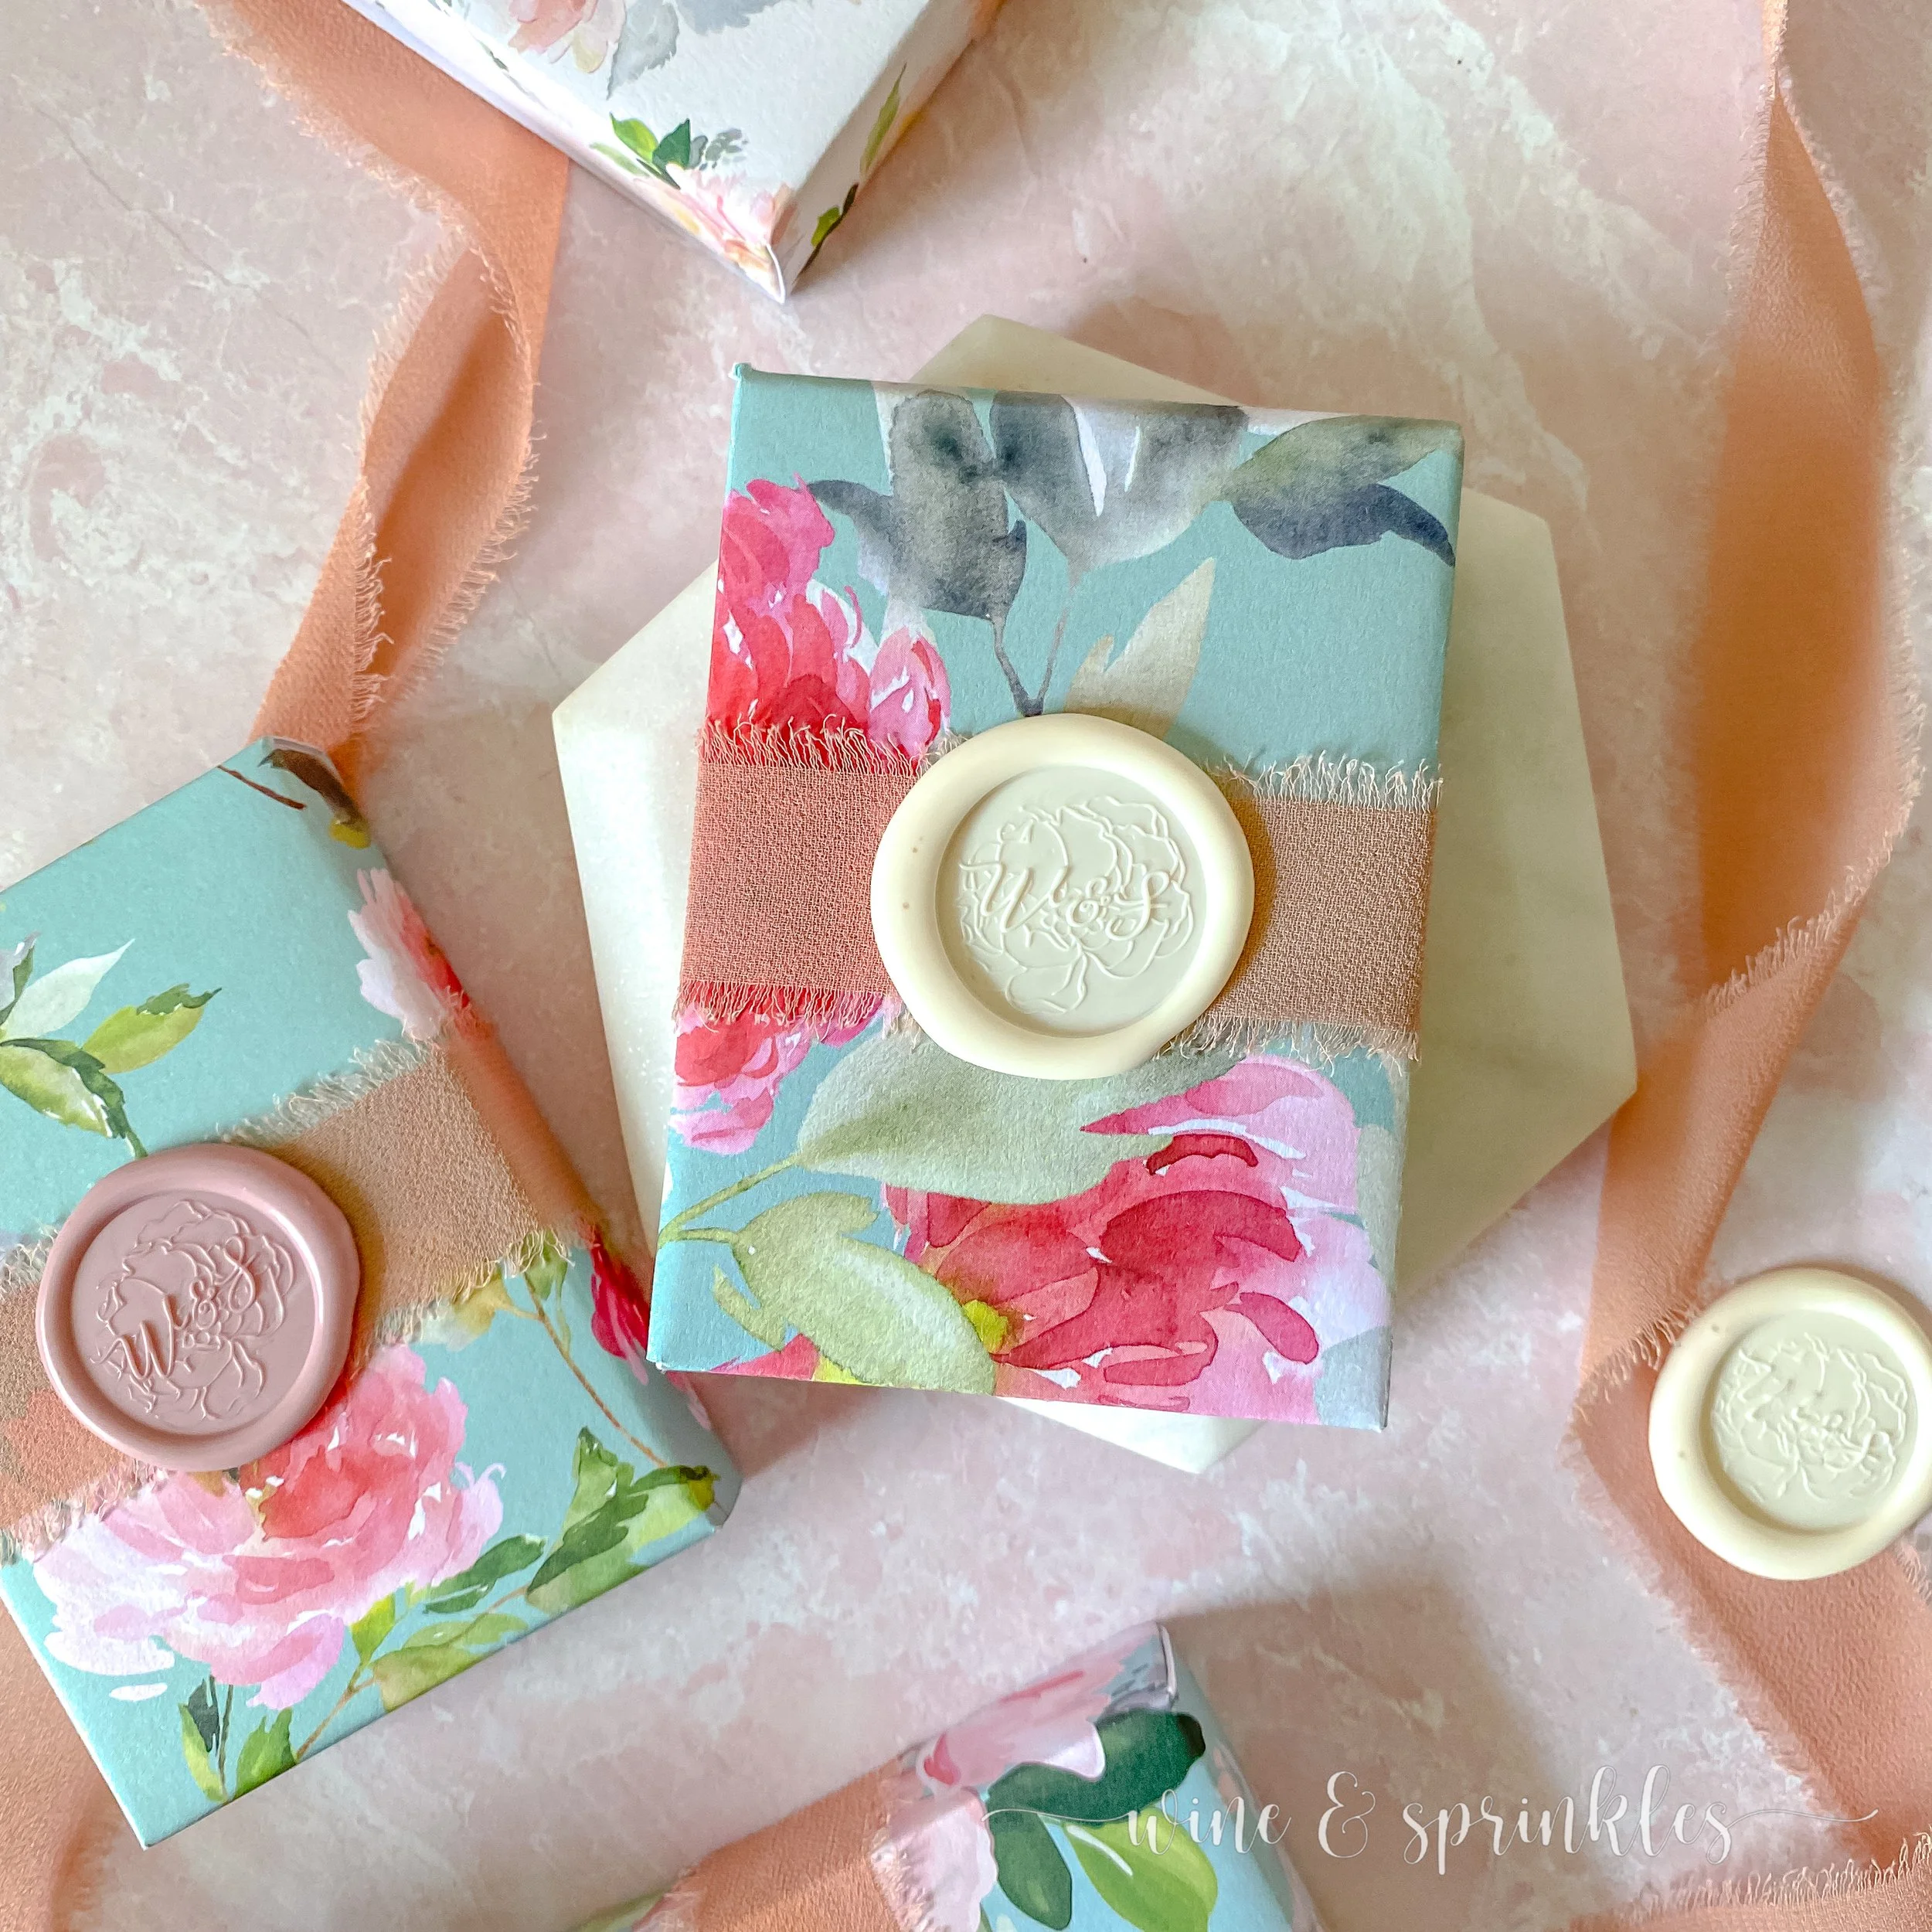
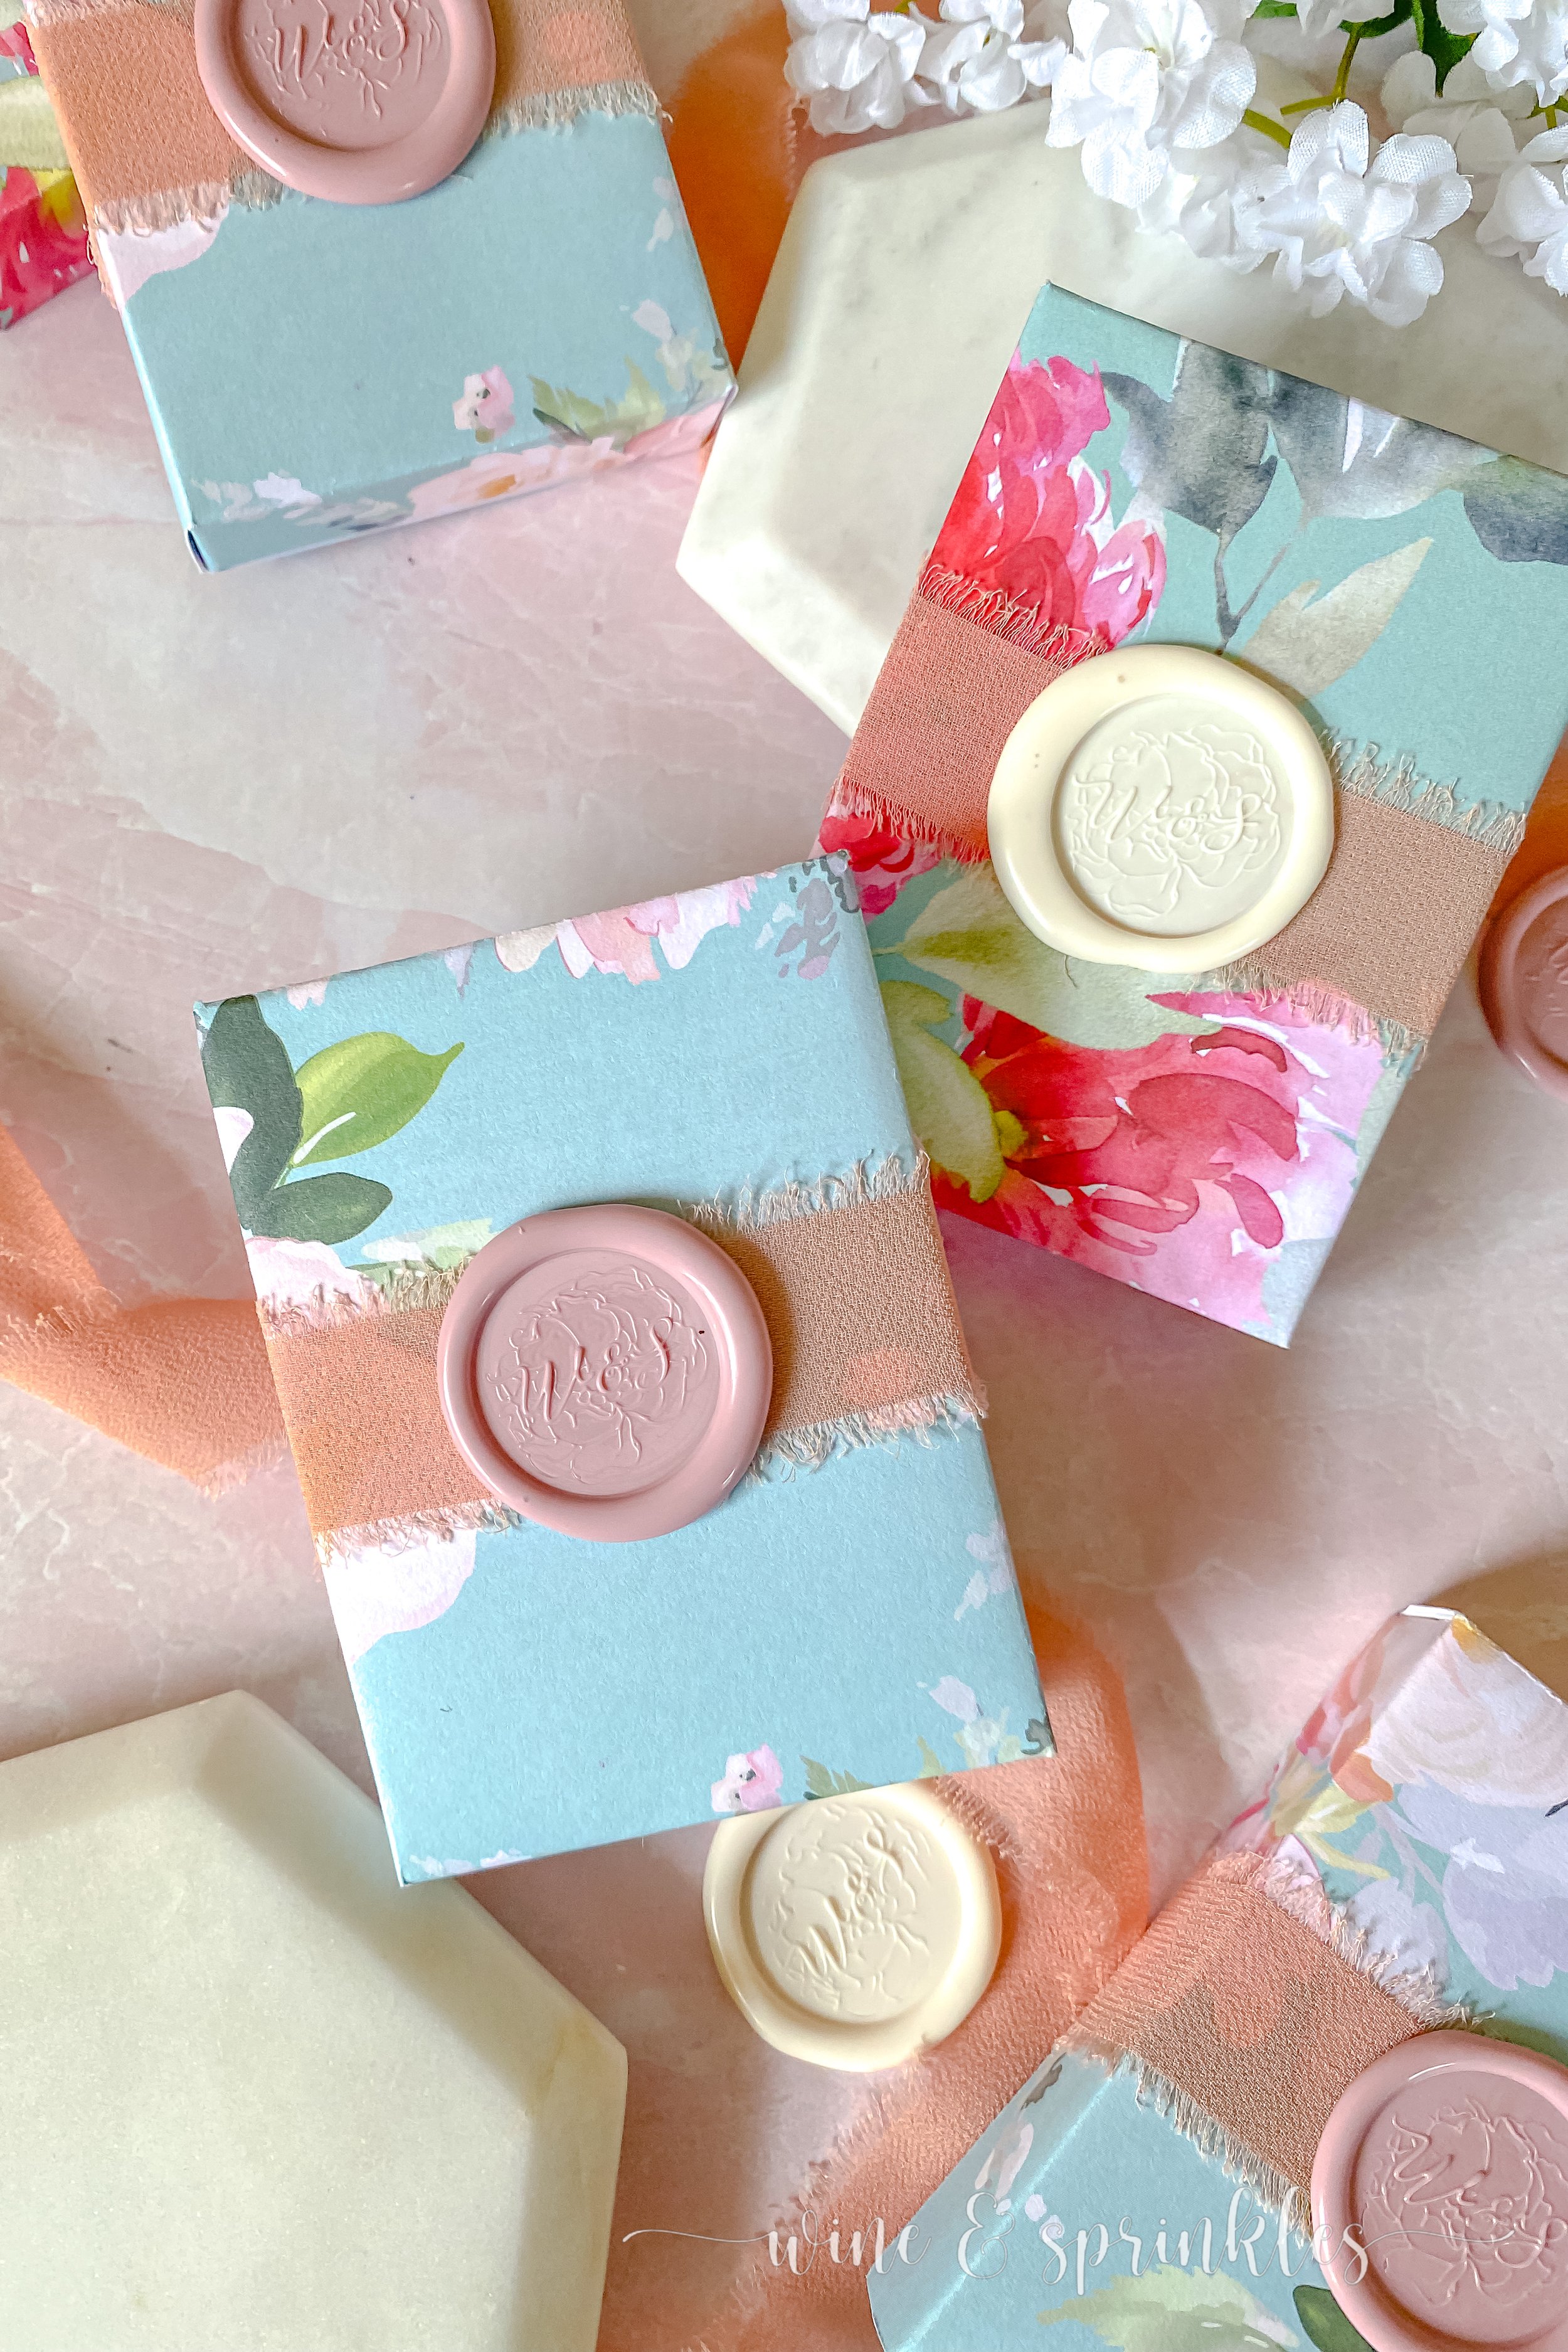
Artisaire is a Canadian based company that specializes in all things wax seals and stamps, from premade self adhesive stamps you can buy directly to all the supplies you need for creating your own! I’ve been in love with their Sealing Wax Sticks since I first tried them, and those Simple Self Adhesive Wax Seals I made get their first feature here on these beautiful decks! The Dusty Rose and Buttercream Sealing Wax Sticks were the perfect choice to accent the rose gold ribbon for each box along with the blush and blue floral papers I used for making the paper covers for each deck.
The Pascala Monogrammed Stamp was the pop of petals I adored for my wax seals on these papers, and I made good use of it by theming many of my details around this gorgeous design! To find your own perfect stamp for your party projects, check out all the beautiful designs Artisaire offers here, and to learn more about their products as well as the different methods of making wax seals, see my review on all the fabulous products I’ve bought or received from them so far!
Now I can’t say my card box covers are perfect, there is a little trimming involved to make them fit the top flap of the deck, as well as an indent in the front to make the cards easier to get out, which I didn’t figure out myself until I was already in the middle of crafting and wanted the boxes to open more easily. These cuts are still so easy compared to what your Cricut Craft Cutter has to accomplish, while one day I may include them in the cut file for now a quick trim completes these card boxes like a charm. I can’t wait to show off these cute card boxes at my next party, as well as craft some for favors in the future!

SUPPLIES
WAX STAMPS & CARD BOX SUPPLIES
Playing Card Decks: For custom playing card boxes, of course the first thing you need are standard boxes of playing cards to cover! I went with this twelve pack of playing card decks so I could make several different patterns to display at my card tables and these are the decks my own box covers are designed around.
Self Adhesive Wax Seals: for the finishing touch and to hide the seam where the chiffon ribbon meets,I used the beautiful Simple Self Adhesive Wax Seals I made with the Pascala Monogrammed Wax Stamp I received from Artisaire. If you don’t have time or all the supplies to make your own; however, I strongly encourage you to look at all the different Self Adhesive Wax Seals Artisaire offers, so you can affordably buy any number of seals you like in a variety of colors to suit whatever card boxes you design!
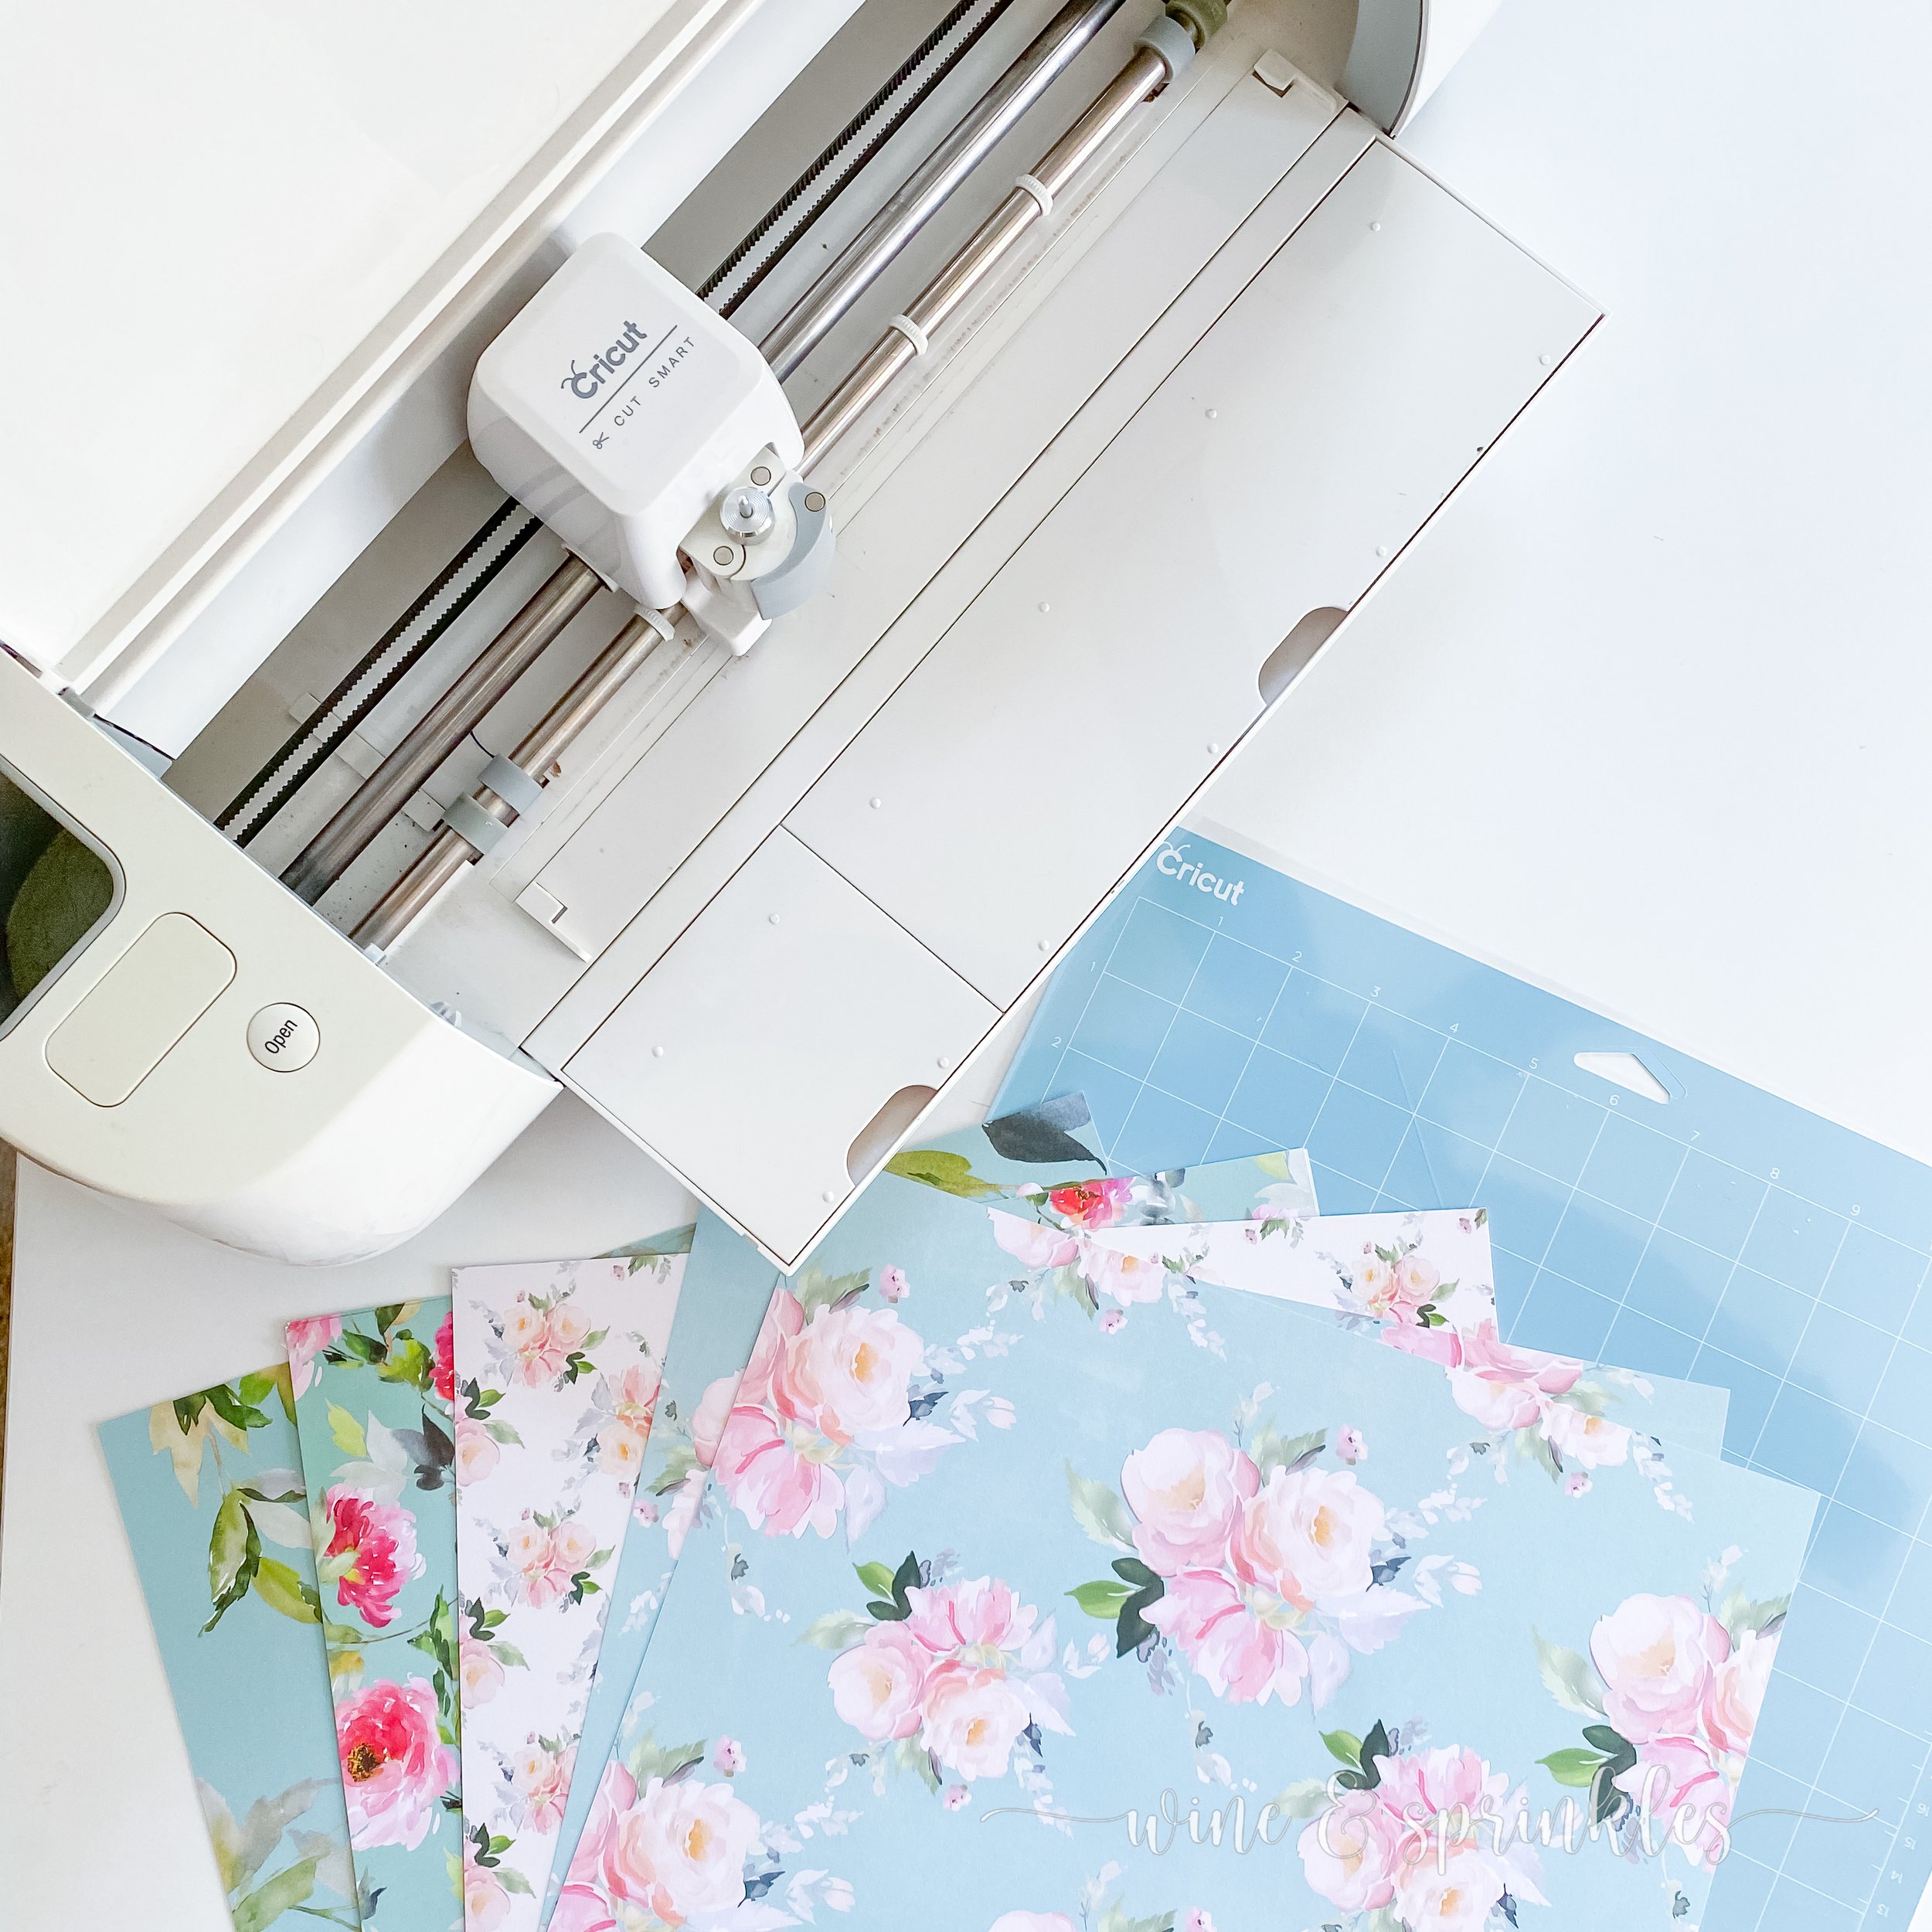
Scrapbook Paper: for creating the playing card covers, scrapbook paper is the perfect choice! It's thin enough to easily be cut and folded around the existing card boxes, and the patterns are endless! For this set, I wanted to do mismatched florals so I found a floral multipack set like the one I’ve linked, but you can find so many floral scrapbook patterns you can print from Etsy, I would recommend finding your perfect pattern there, especially if you want your papers to match!
Chiffon Ribbon: I love the distressed frayed chiffon ribbon for adding a little texture and softness to these decks, and the rose gold color went perfect with the blush and blue vibes of my papers. You’ll need about 7 inches of ribbon for each box you want to make.
TOOLS & OTHER SUPPLIES
Craft Cutter: talking about the product
Light Grip Adhesive Mat: I recommend using a light grip mat for this as well as most all paper projects for my craft cutter, it securely holds your paper without ripping it to pieces when you try to remove it from the mat.
Permanent Paper Adhesive: I found these little permanent adhesive roller tools online, which while usually used for scrapbooking were perfect for lining different edges of the playing card boxes and the various paper tabs on the covers, so each box stayed together and looked gorgeous!
Double Sided Tape: for securing the ribbon around the card box
Craft Scissors: for trimming the top flap of your card box cover after assembly.
Cuticle Scissors: I found little curved cuticle scissors were perfect for getting the little front semicircle indent out of the card boxes while keeping a nice clean cutting line, though small sewing scissors would also work.
The Card Box Design File: to upload to your Cricut and cut out your card box covers!
SUPPLIES LIST:
[for 12 card boxes]
WAX STAMPS & CARD BOX SUPPLIES
Playing Card Decks x 12
Self Adhesive Wax Seals x 12
Scrapbook Paper x 6
Chiffon Ribbon x 7 ½ ft
TOOLS & OTHER SUPPLIES
Craft Cutter
Light Grip Adhesive Mat x 1
Permanent Paper Adhesive x 1
Double Sided Tape x 1
DIRECTIONS
STEP 1: IMPORT & RESIZE YOUR FILES
1. Download the playing card jacket design file; then upload it into the Cricut Design Software as a cut image, which it should automatically prefer. Press upload in the lower right corner of the screen, then add it to your project by selecting your newly imported file and click Add to Canvas, then it will show up on your workspace in the software screen.


2. Once your file is imported, lock the dimensions by pressing the padlock on the upper toolbar, then change the size so that its dimensions are 7” x 6.5”. Once resized, copy and paste the cut file so you have two card jackets, then select “Make” in the upper right side of the screen to set up the cut.


STEP 2: CUT YOUR PLAYING CARD COVERS

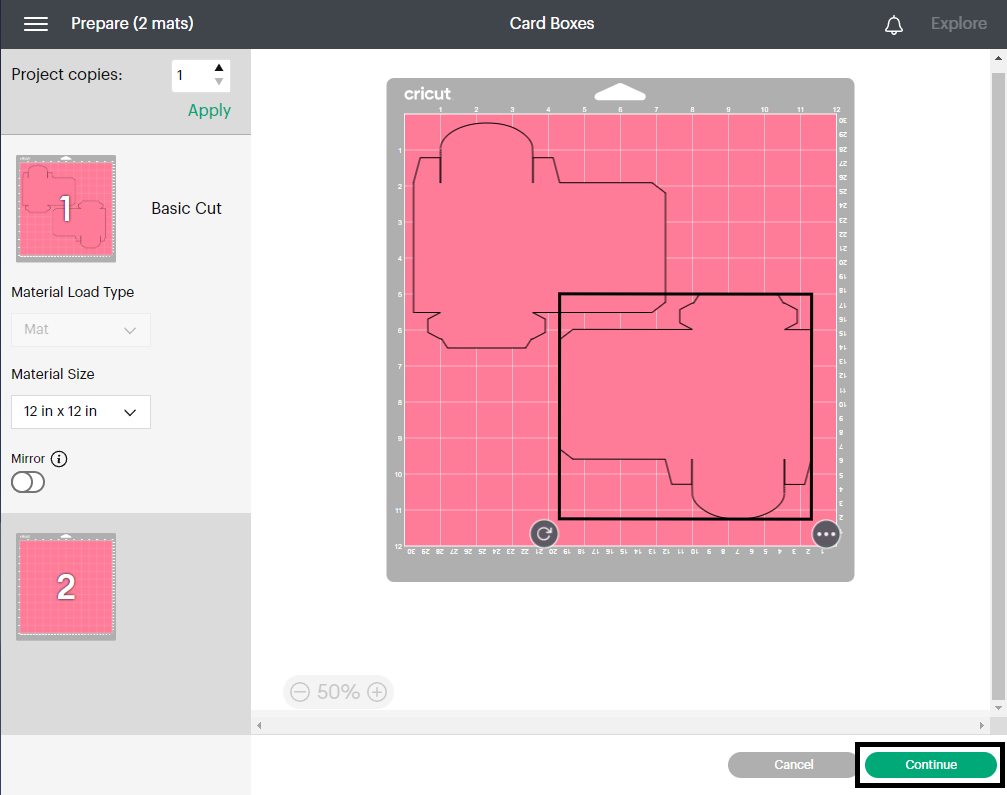
3. Check your files on the mat set up screen and make sure the material size is 12 in x 12 in. and that the liner and invitation mat appear properly sized in the mat setup picture. You’ll notice that your two cut files appear on different mats, but two can be cut from a single sheet using the following method:
Select the second sheet and the playing card cover, then clock the circle with dots on the upper left of the shape, and select “Move Object.” Select mat 1 and once both cut files are on the same sheet, rotate the recently moved file 180 degrees so it appears upside down, then position it in the lower right corner of the mat so that the two shapes have no overlap, then press Continue.


4. Load the patterned paper, design face up, along the upper left hand side of your cutting mat as shown in the picture on the screen. If your adhesive mat is low on stickiness, I like to secure the top and bottom of my cardstock with washi tape to provide extra security while cutting them out, but this is optional! Set the Material to Light Cardstock +, then press the loading button on your craft cutter to load the mat into the machine. Press the “Go” Button to start the scanning and cutting process, and when the cutter is complete the loading button will blink to indicate to unload the mat.


5. Remove your mat and freshly cut card jackets, disposing of the extra paper. Then, load your next piece of patterned paper onto the mat and repeat the cutting process until you have cut out all the card jackets you need for your project!

STEP 3: ASSEMBLE YOUR CARD BOXES

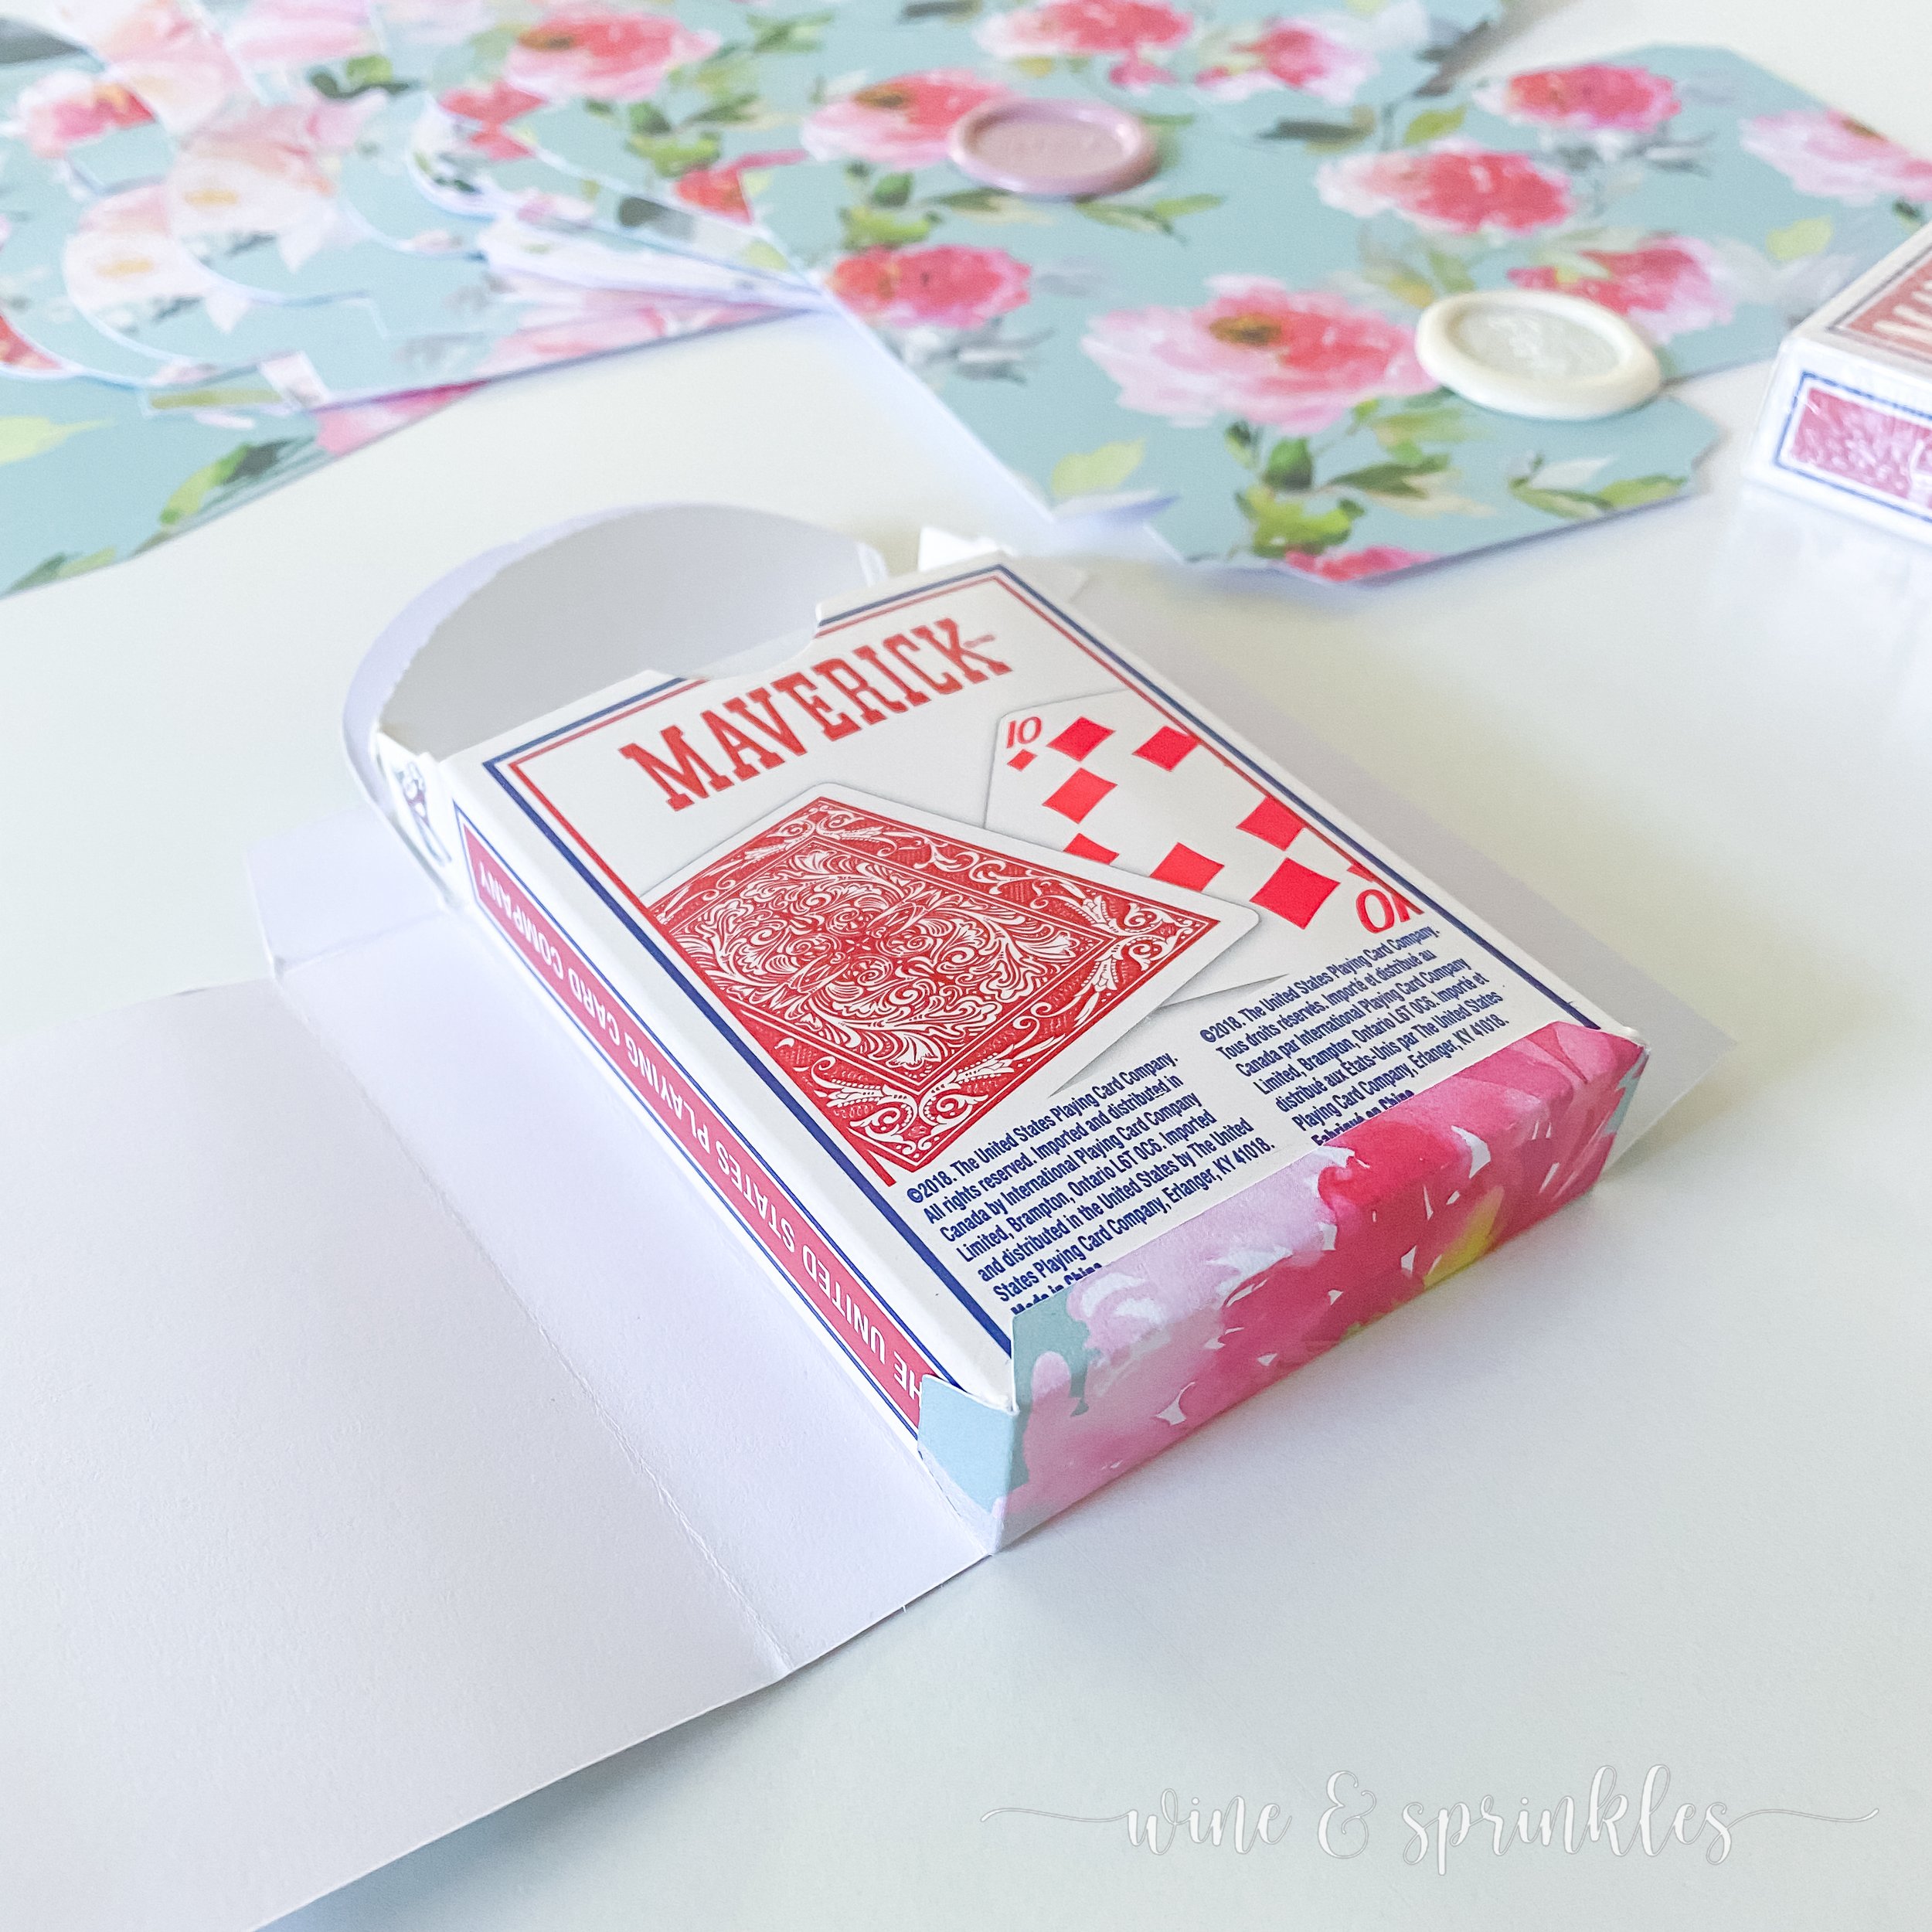
6. Fold the jacket around a deck of playing cards, using the edges of the deck to find where the jacket naturally folds around the cards. Your jacket will look like the one in this picture, where the folds coordinate with your box.


7. Run lines of adhesive along the bottom tabs of the jacket, along with one line down the right side of the card deck of the jacket. Place the deck of cards, top opened, into the prefolded jacket, securing the bottom tabs along the bottom edge of the card deck as shown. Fold the main body of the deck over from left to right, securing the tab along the adhesive line on the right side.


8. Run lines of adhesive to cover the right side of the card box, then fold over the right rectangular tab to cover the first fold and secure the paper flush with the lines of the box, creating the card box body.


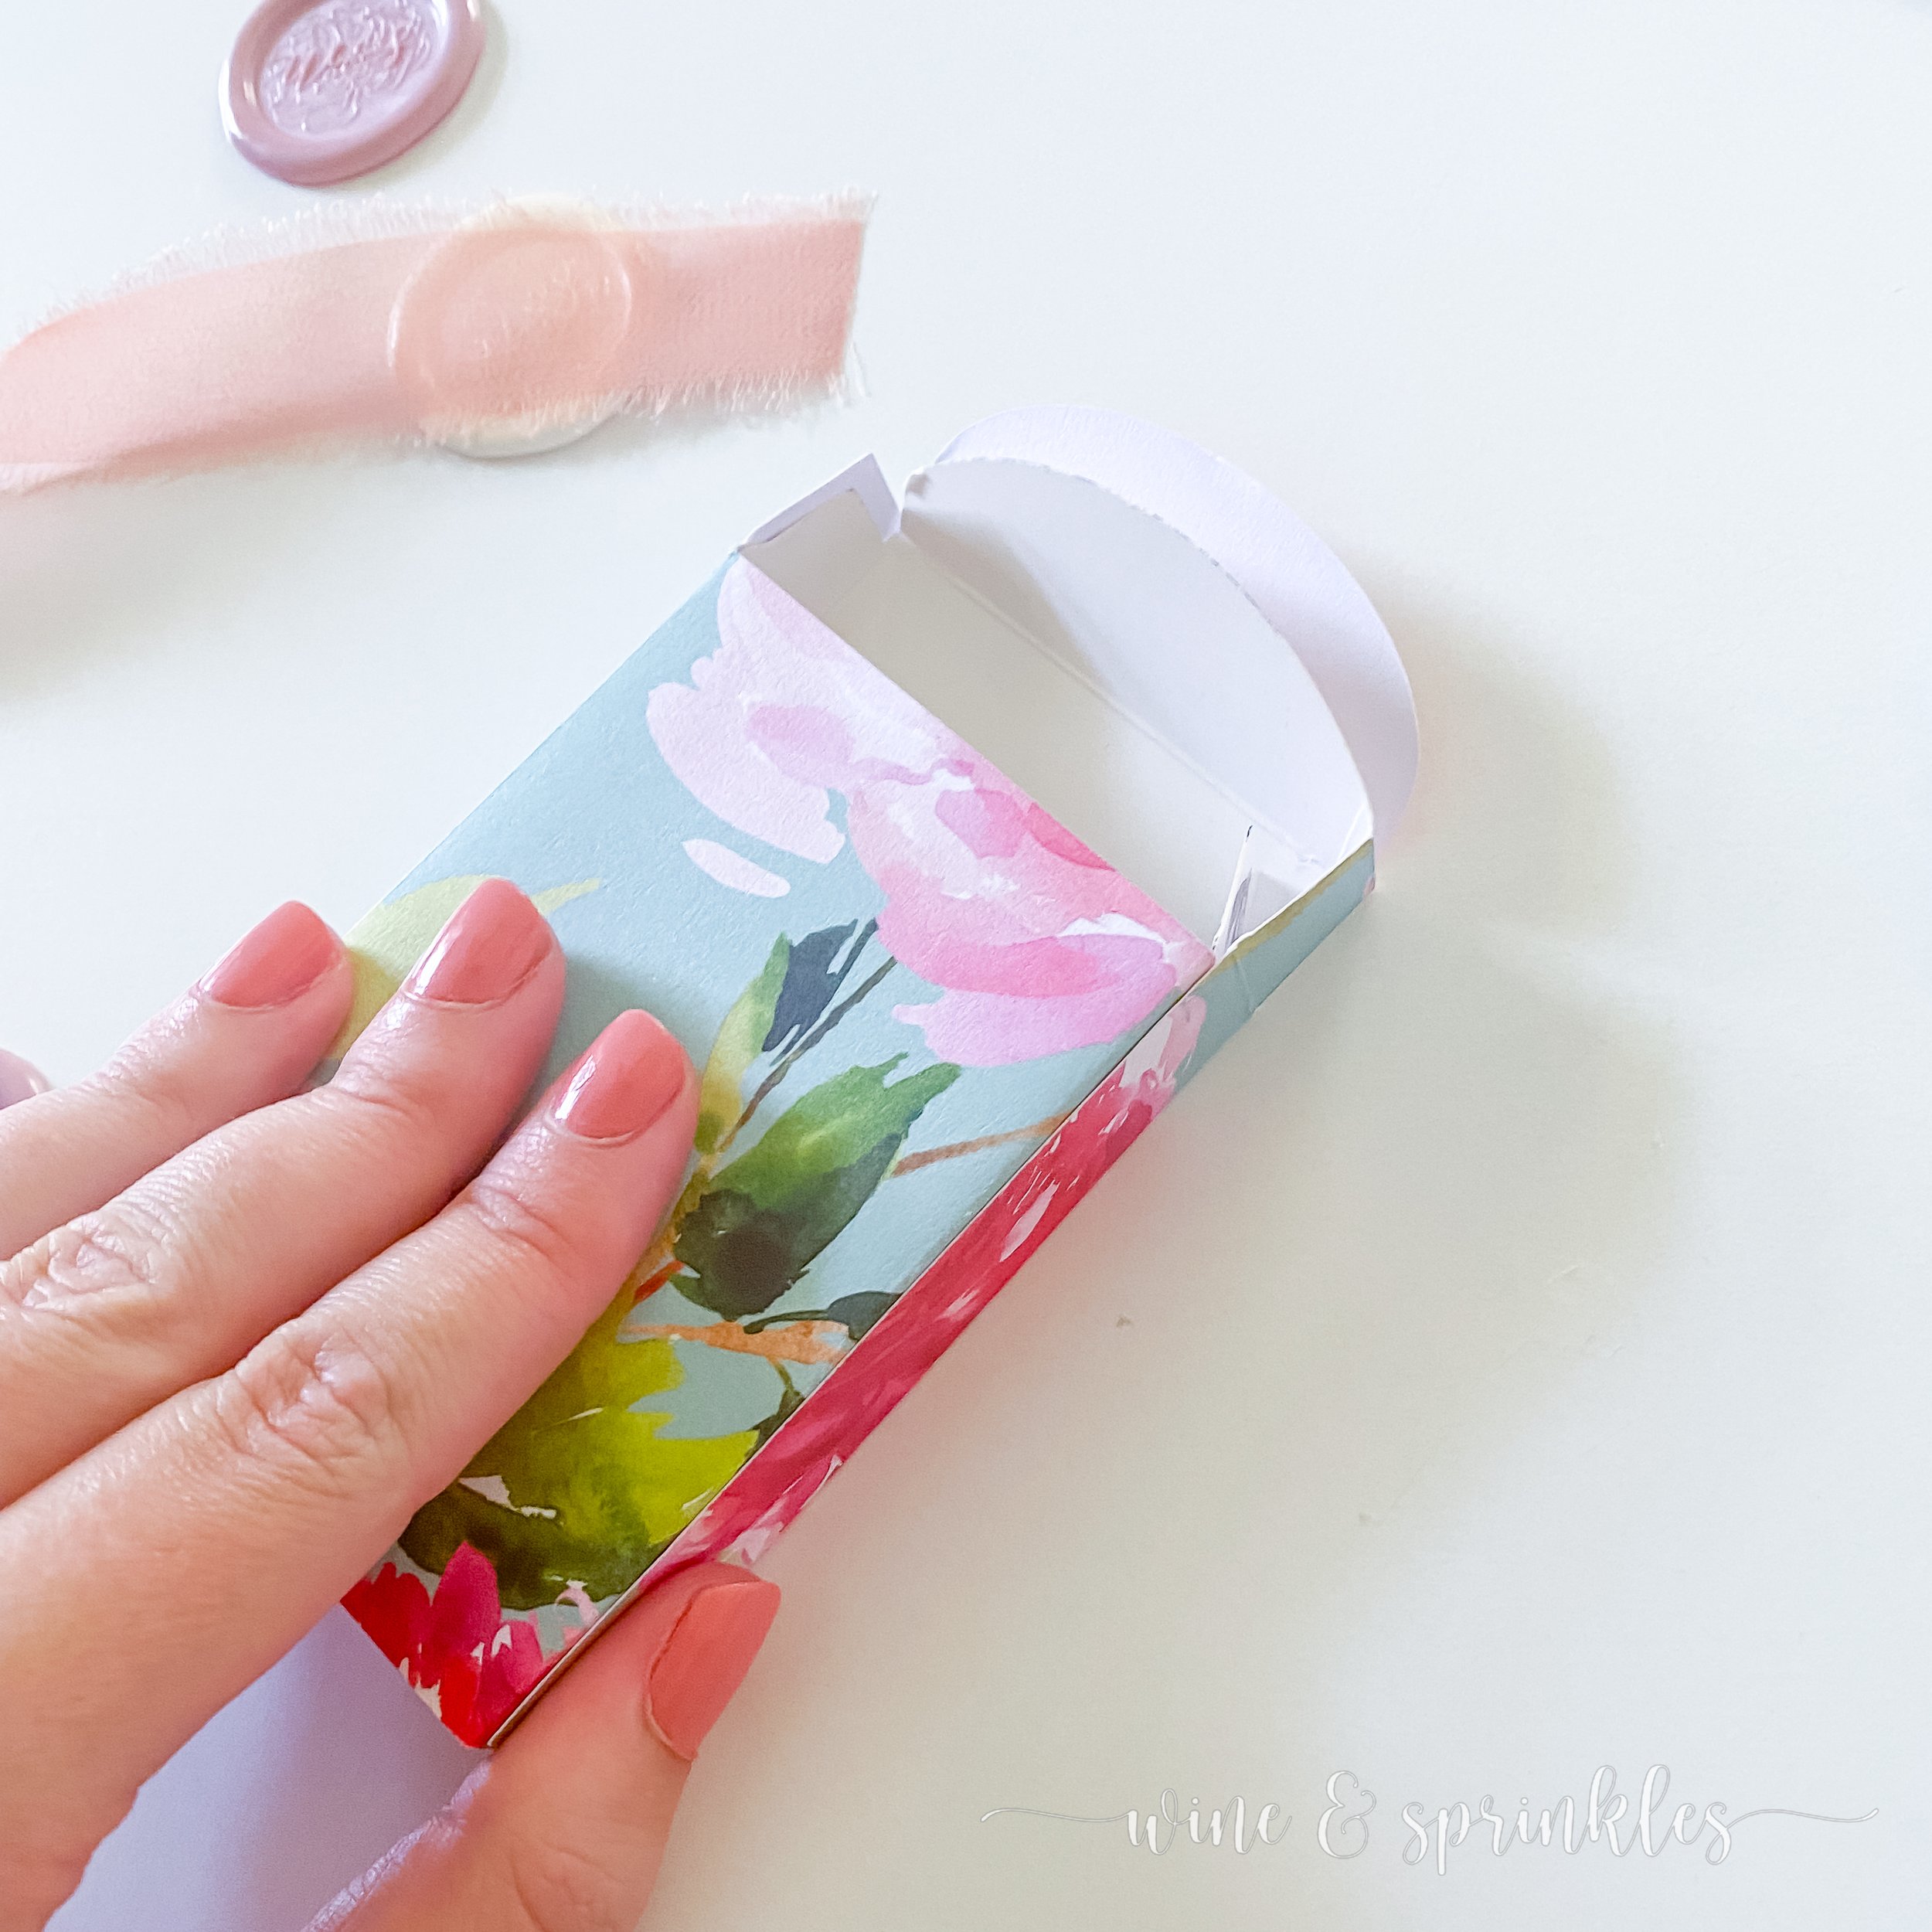


9. Next, cover the outside of the top flaps of your box with adhesive, pressing the patterned paper tabs against them to make smooth flaps that fold down, with the patterned paper tabs overlapping the sides of the original tabs. Repeat this process with the top of the card box, covering the entire top with adhesive lines and pressing the top into the patterned paper behind it to secure it to the card box.


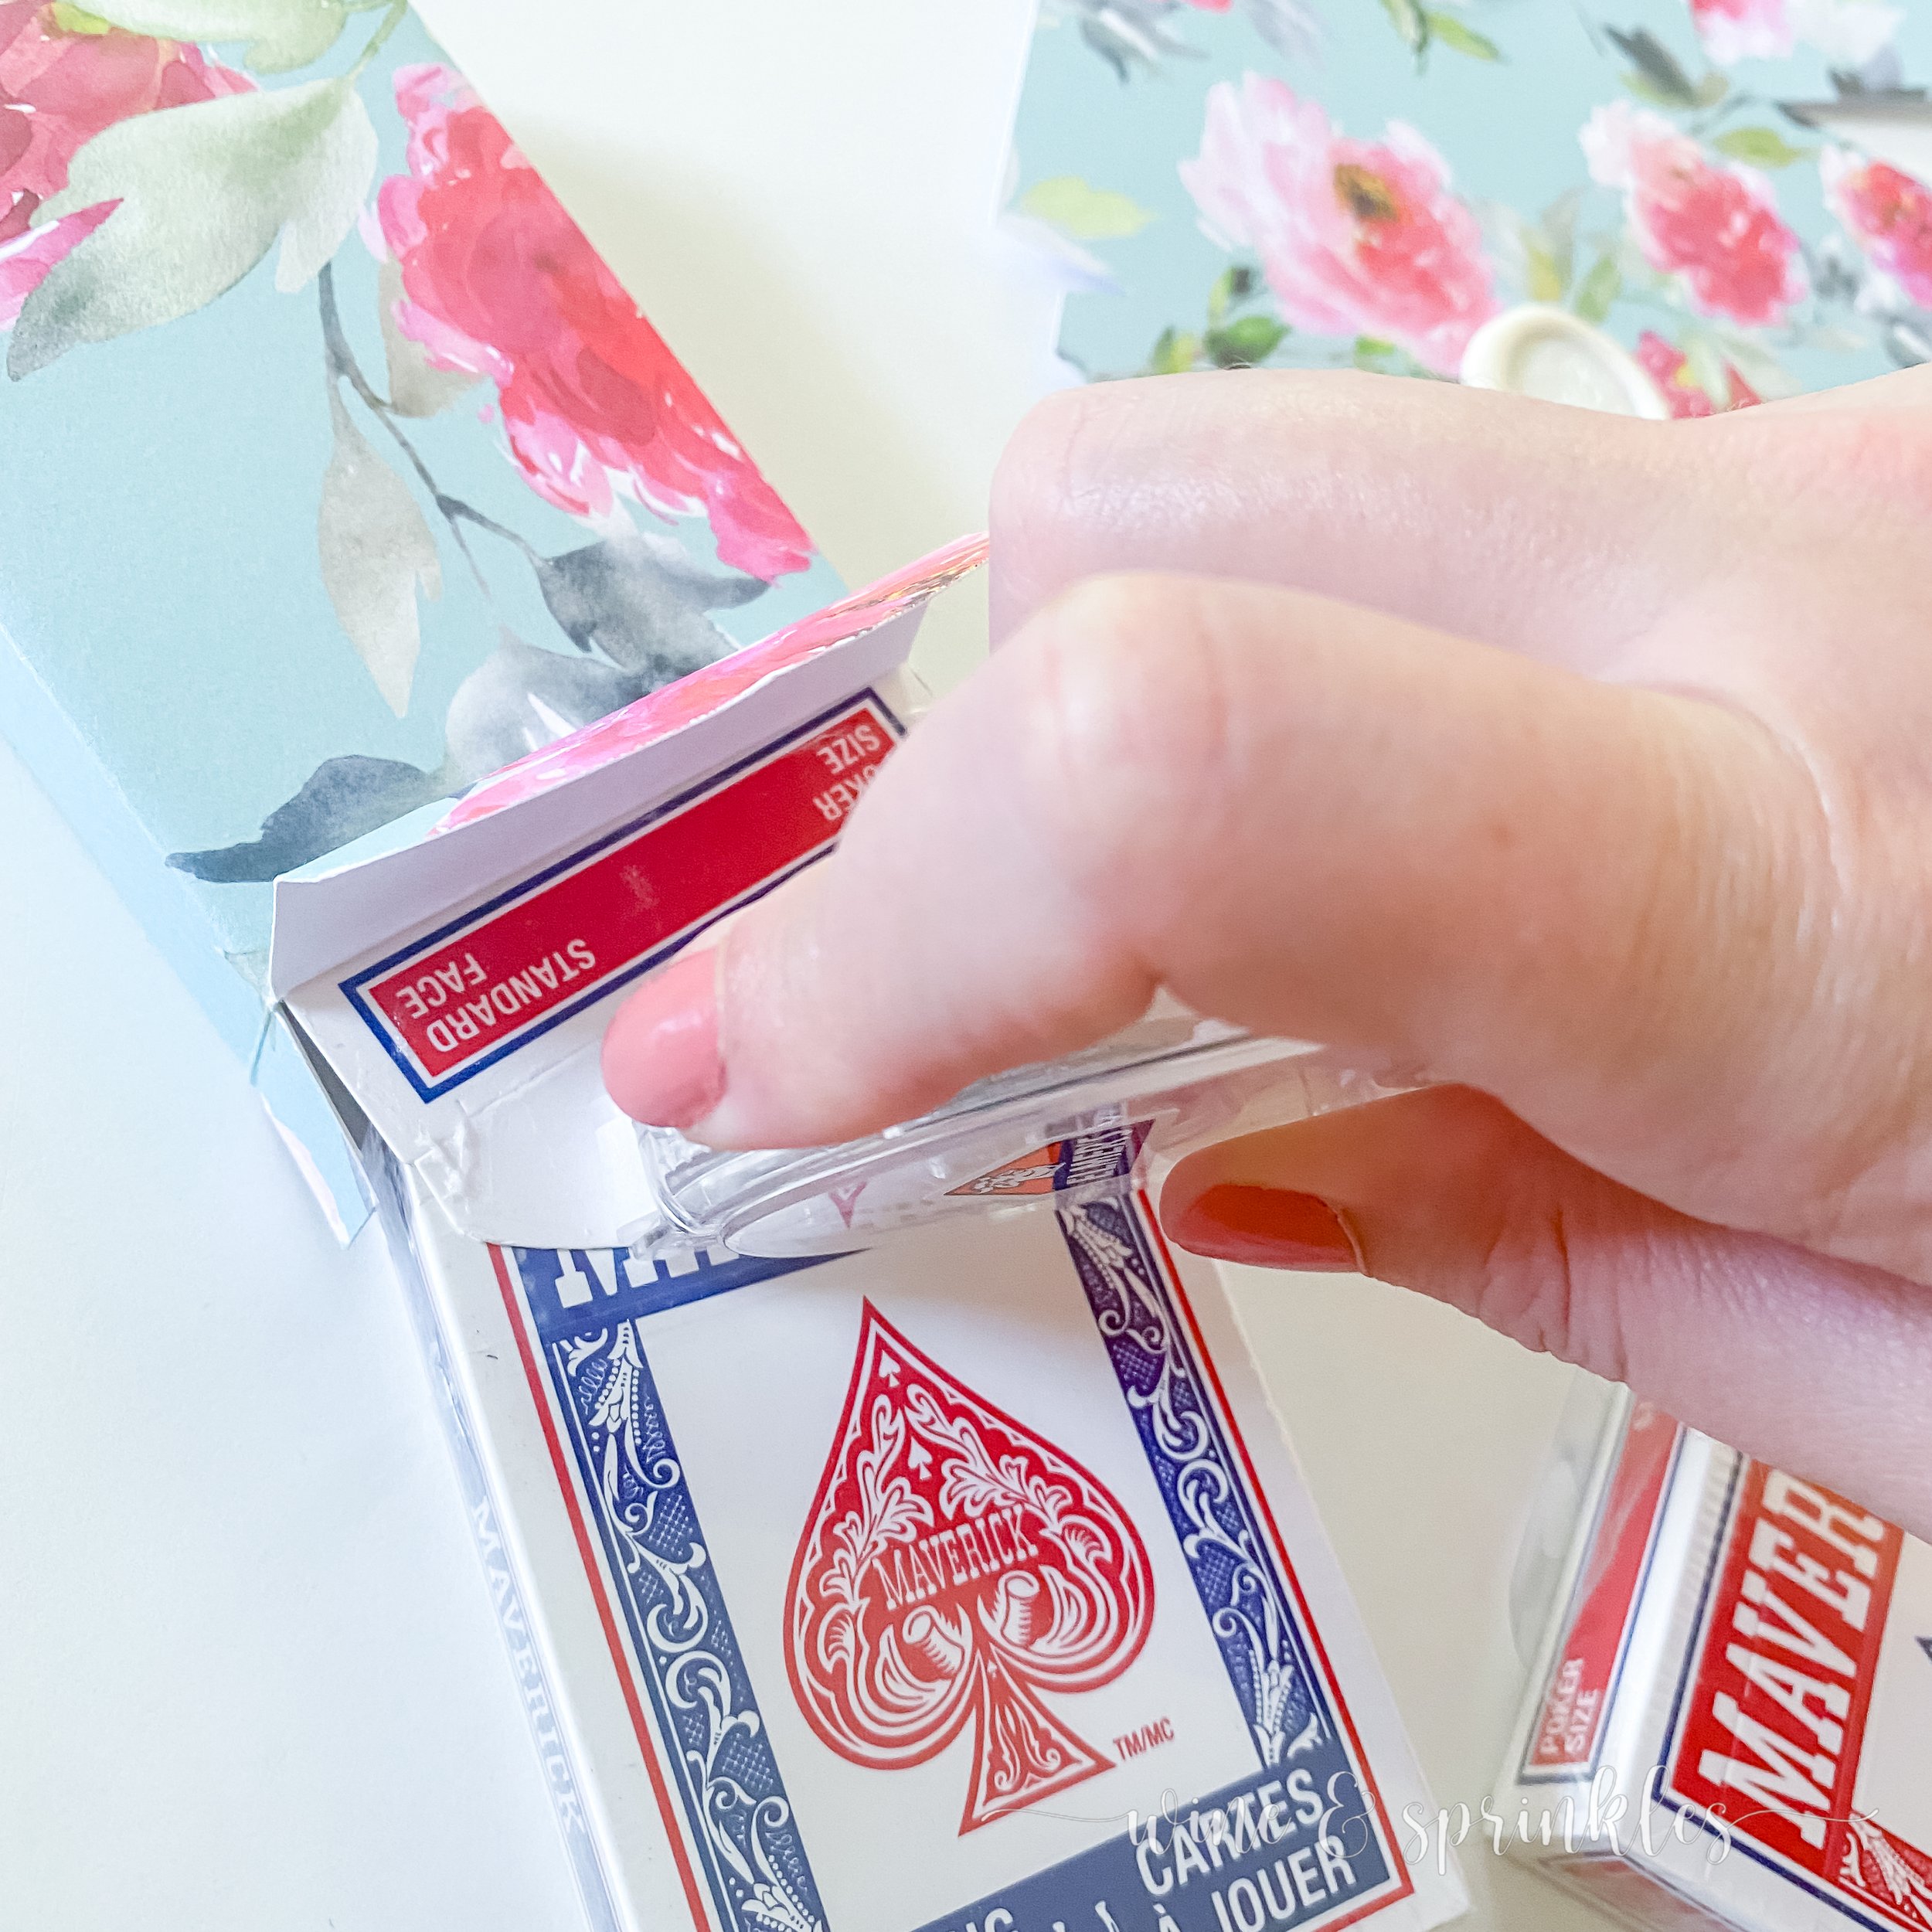
10. Trim the top of the card box so that the patterned paper is flush with the edge of the original card box, then remove the playing cards and set aside. Using small cuticle scissors, trim along the indent on the front of the card box. Remove a semicircle of paper and make the cutting flush with the original box, then replace your cards. This will make your box much easier to open and remove the playing cards from!


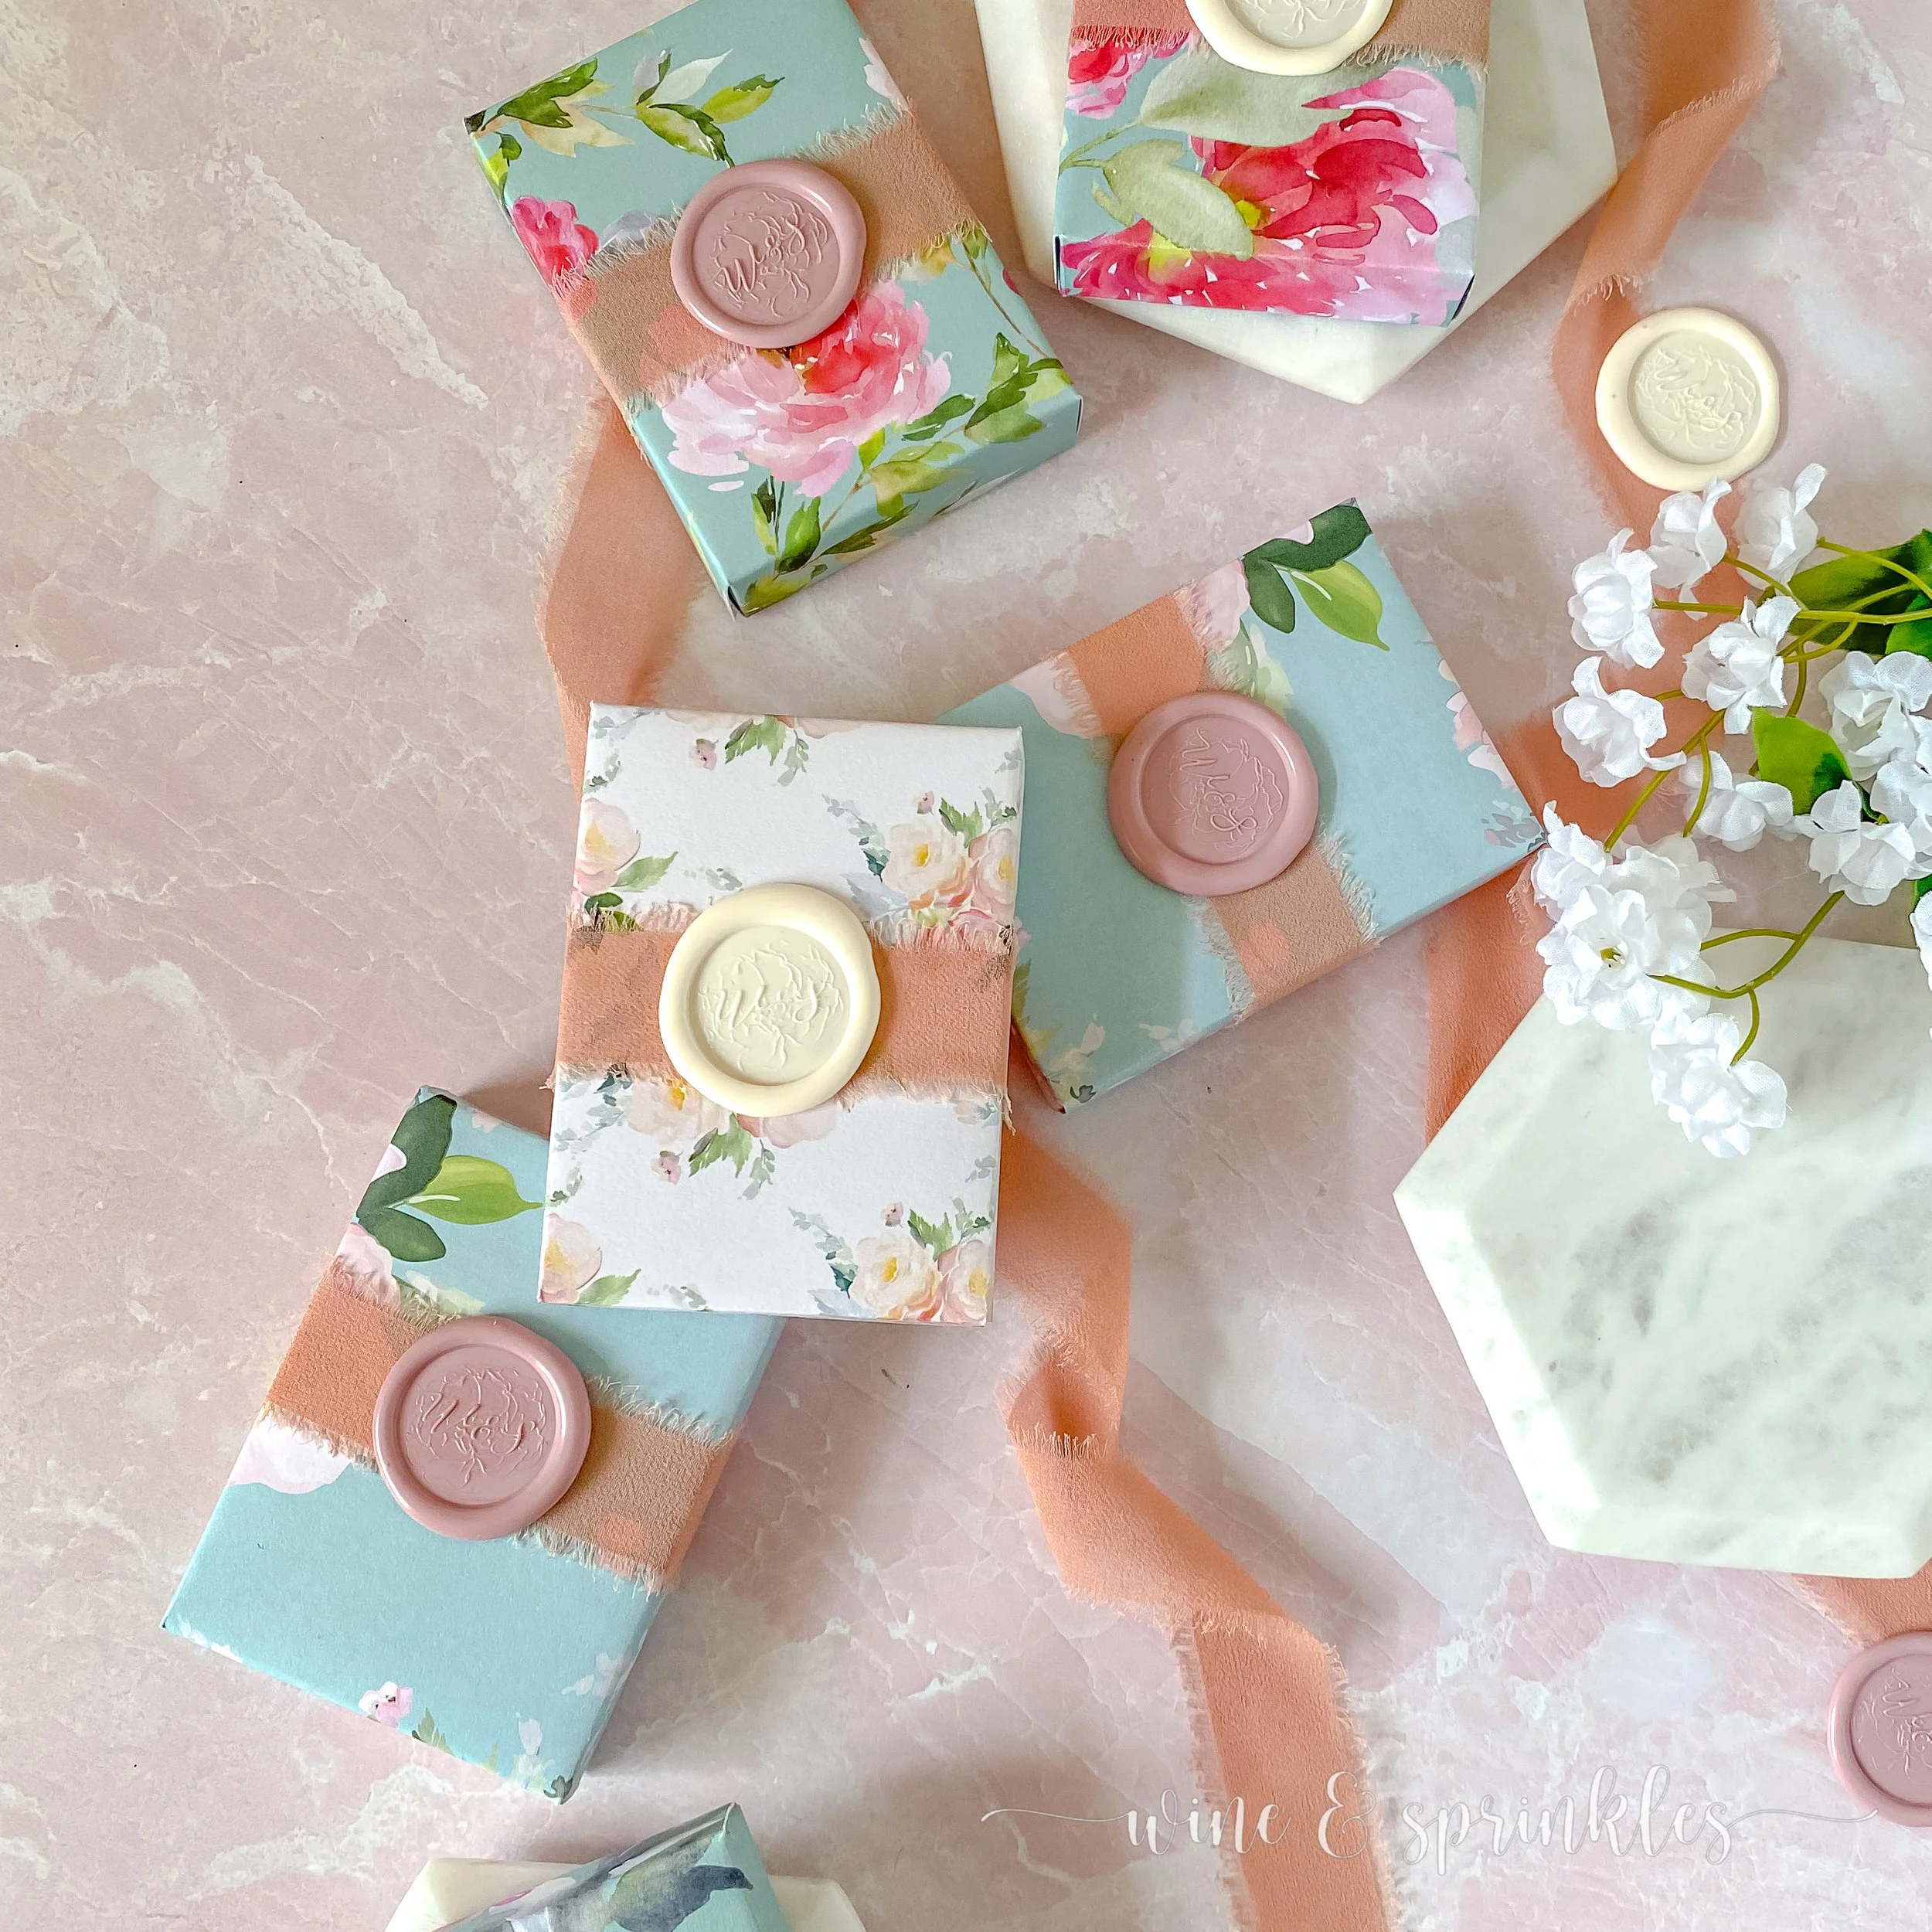
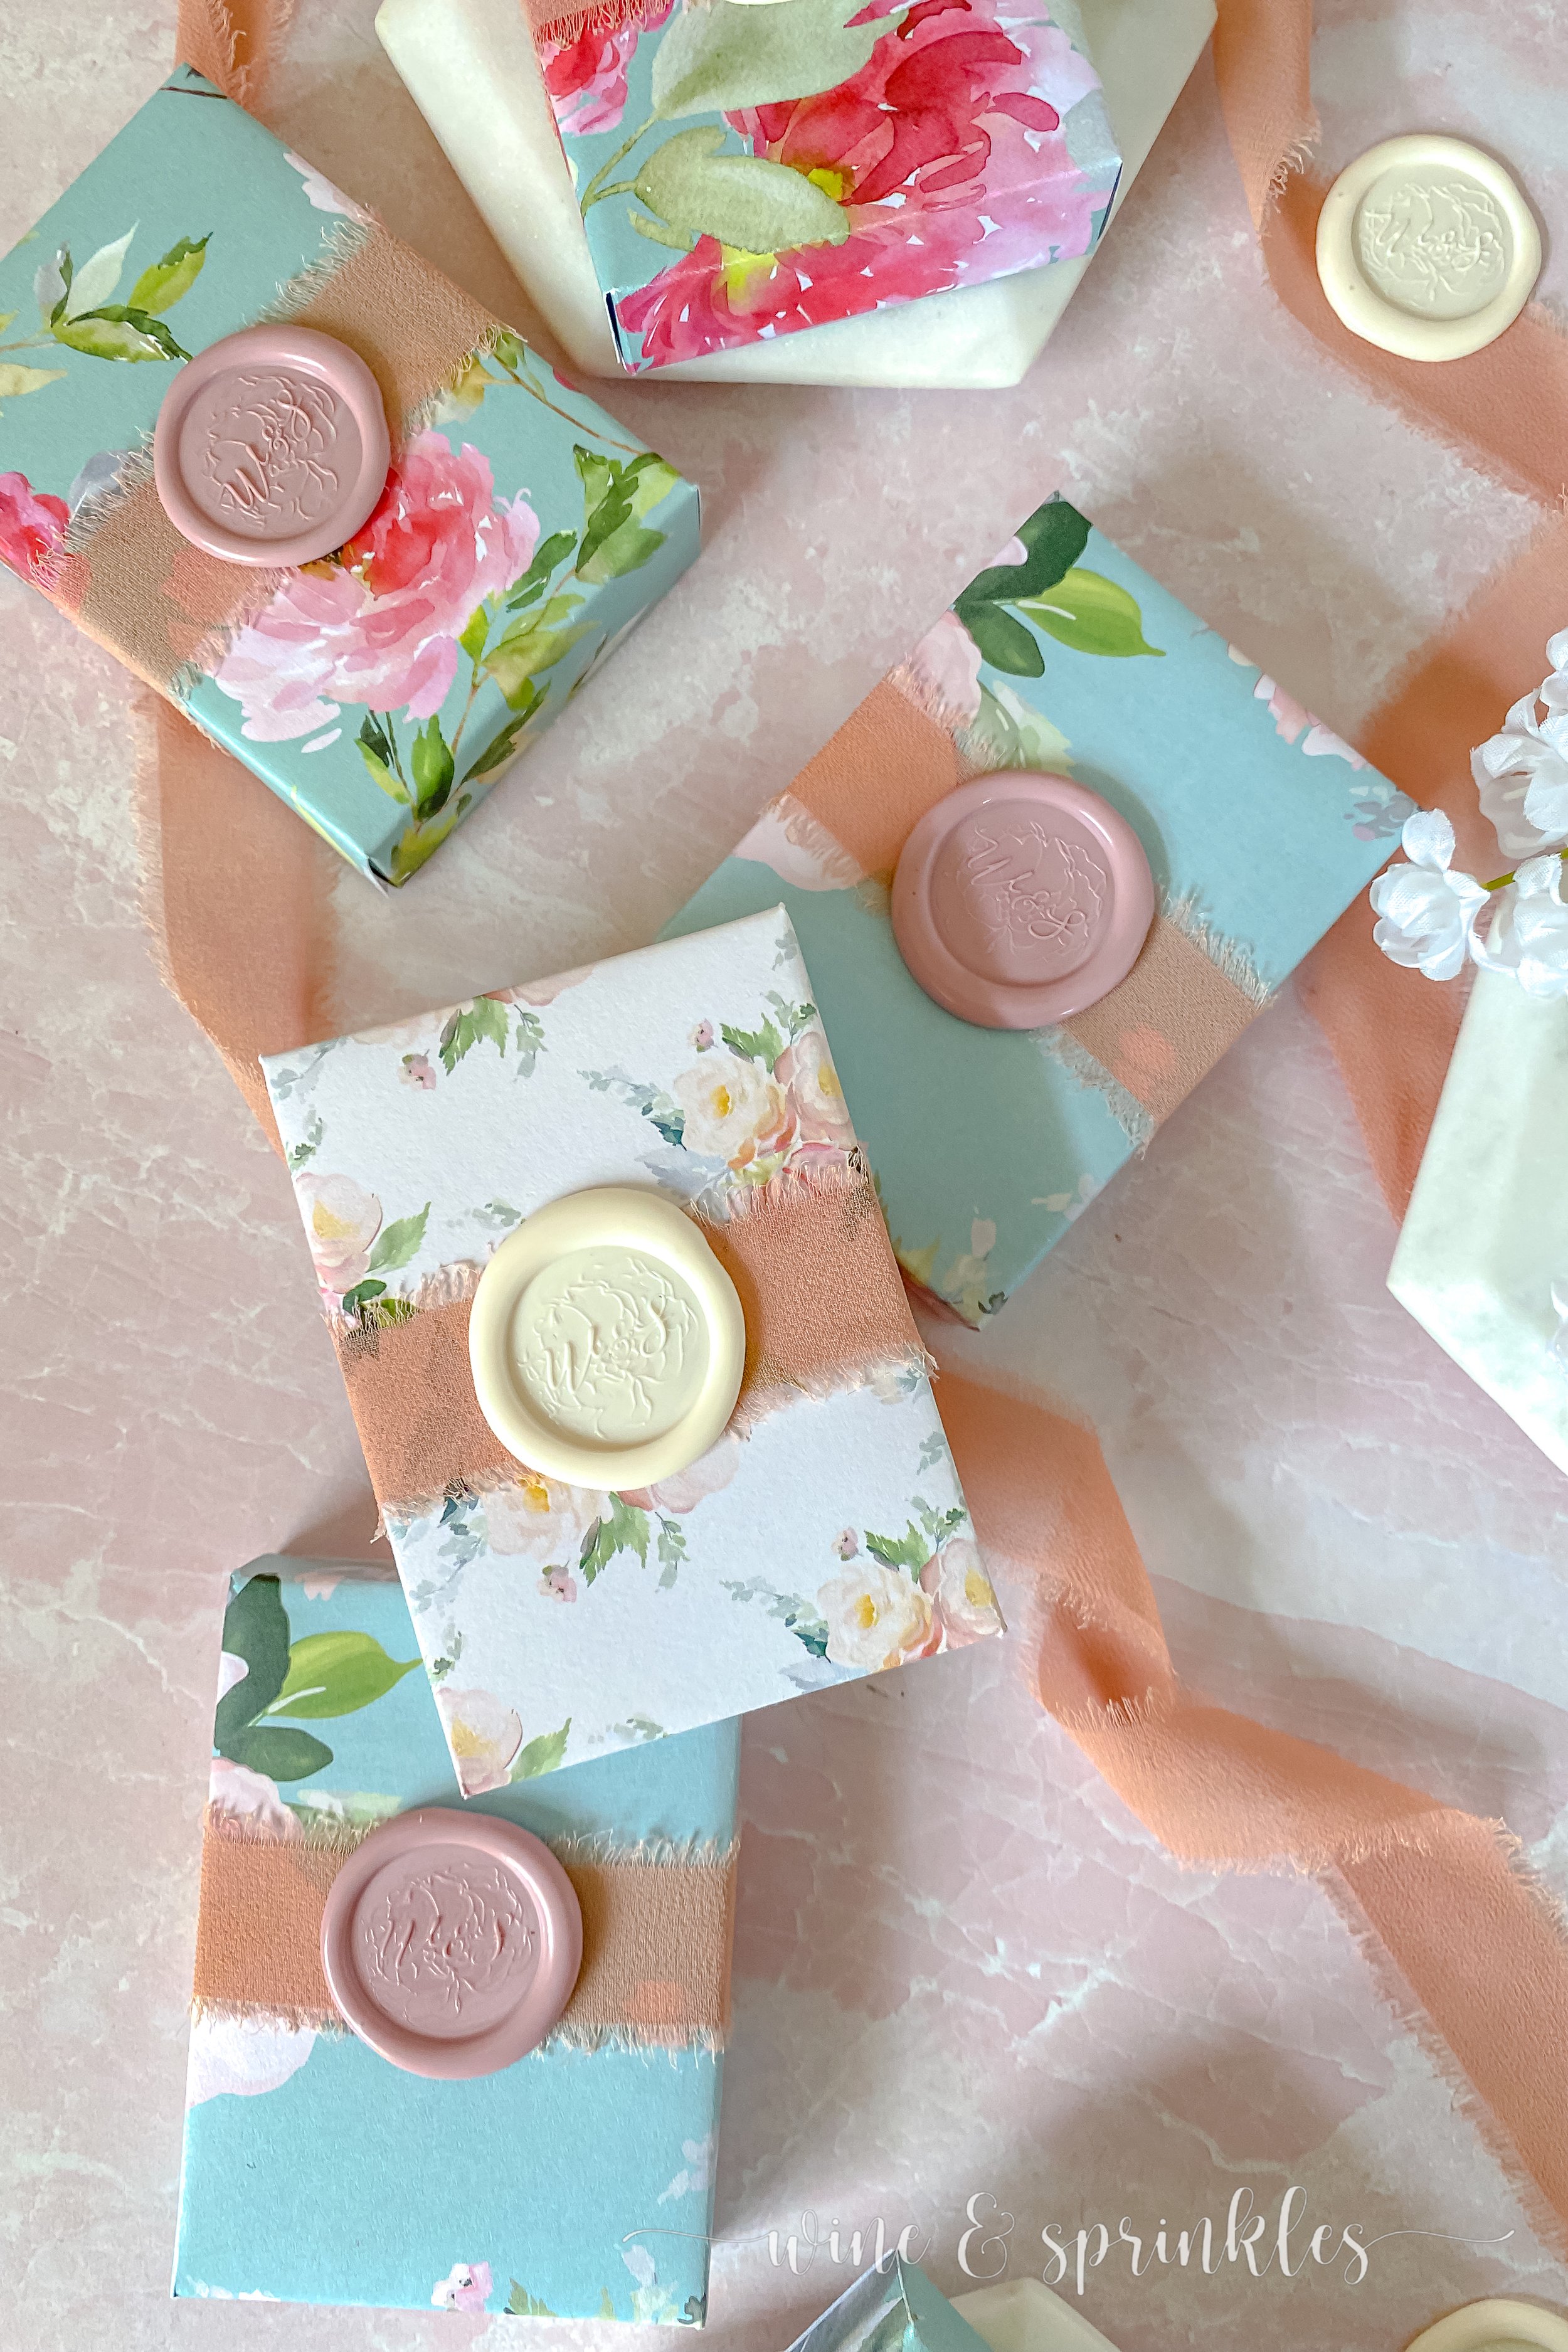
11. Finally, finish your box with ribbon and a wax seal. Start by wrapping your ribbon around the card box, cutting it so that the ends of the ribbon meet but don’t overlap. Using double sided tape, secure the ribbon around the deck with the ends of the ribbon in the middle of the deck.


Remove the adhesive backing from your wax seal, then place it over the ribbon in the middle where the ends meet, then your custom deck of cards is complete!
These fashionable floral card boxes are perfect for unforgettable favors or as unique party details like mine will be! Pick you own favorite patterned paper and wax seal to craft some cards all your own!
SEE OUR RELATED POSTS HERE:


OUR PINS FOR THIS POST:
OUR MOST RECENT BLOG POSTS:


Calling all Aires, Pisces, and every sign in between! I think astrology is super fun, which any of my guests who attended my Zodiac Summer’s Eve Party can attest, and I love to make fun zodiac themed gifts for my favorite friends that love it too! For those who don’t have the time or astrological inspiration to make their gifts, this guide is for you!