This post contains affiliate links, meaning that if you click on a link I will recieve a small comission. This costs you nothing extra and I only promote products I use and love! You can read our full disclosure here

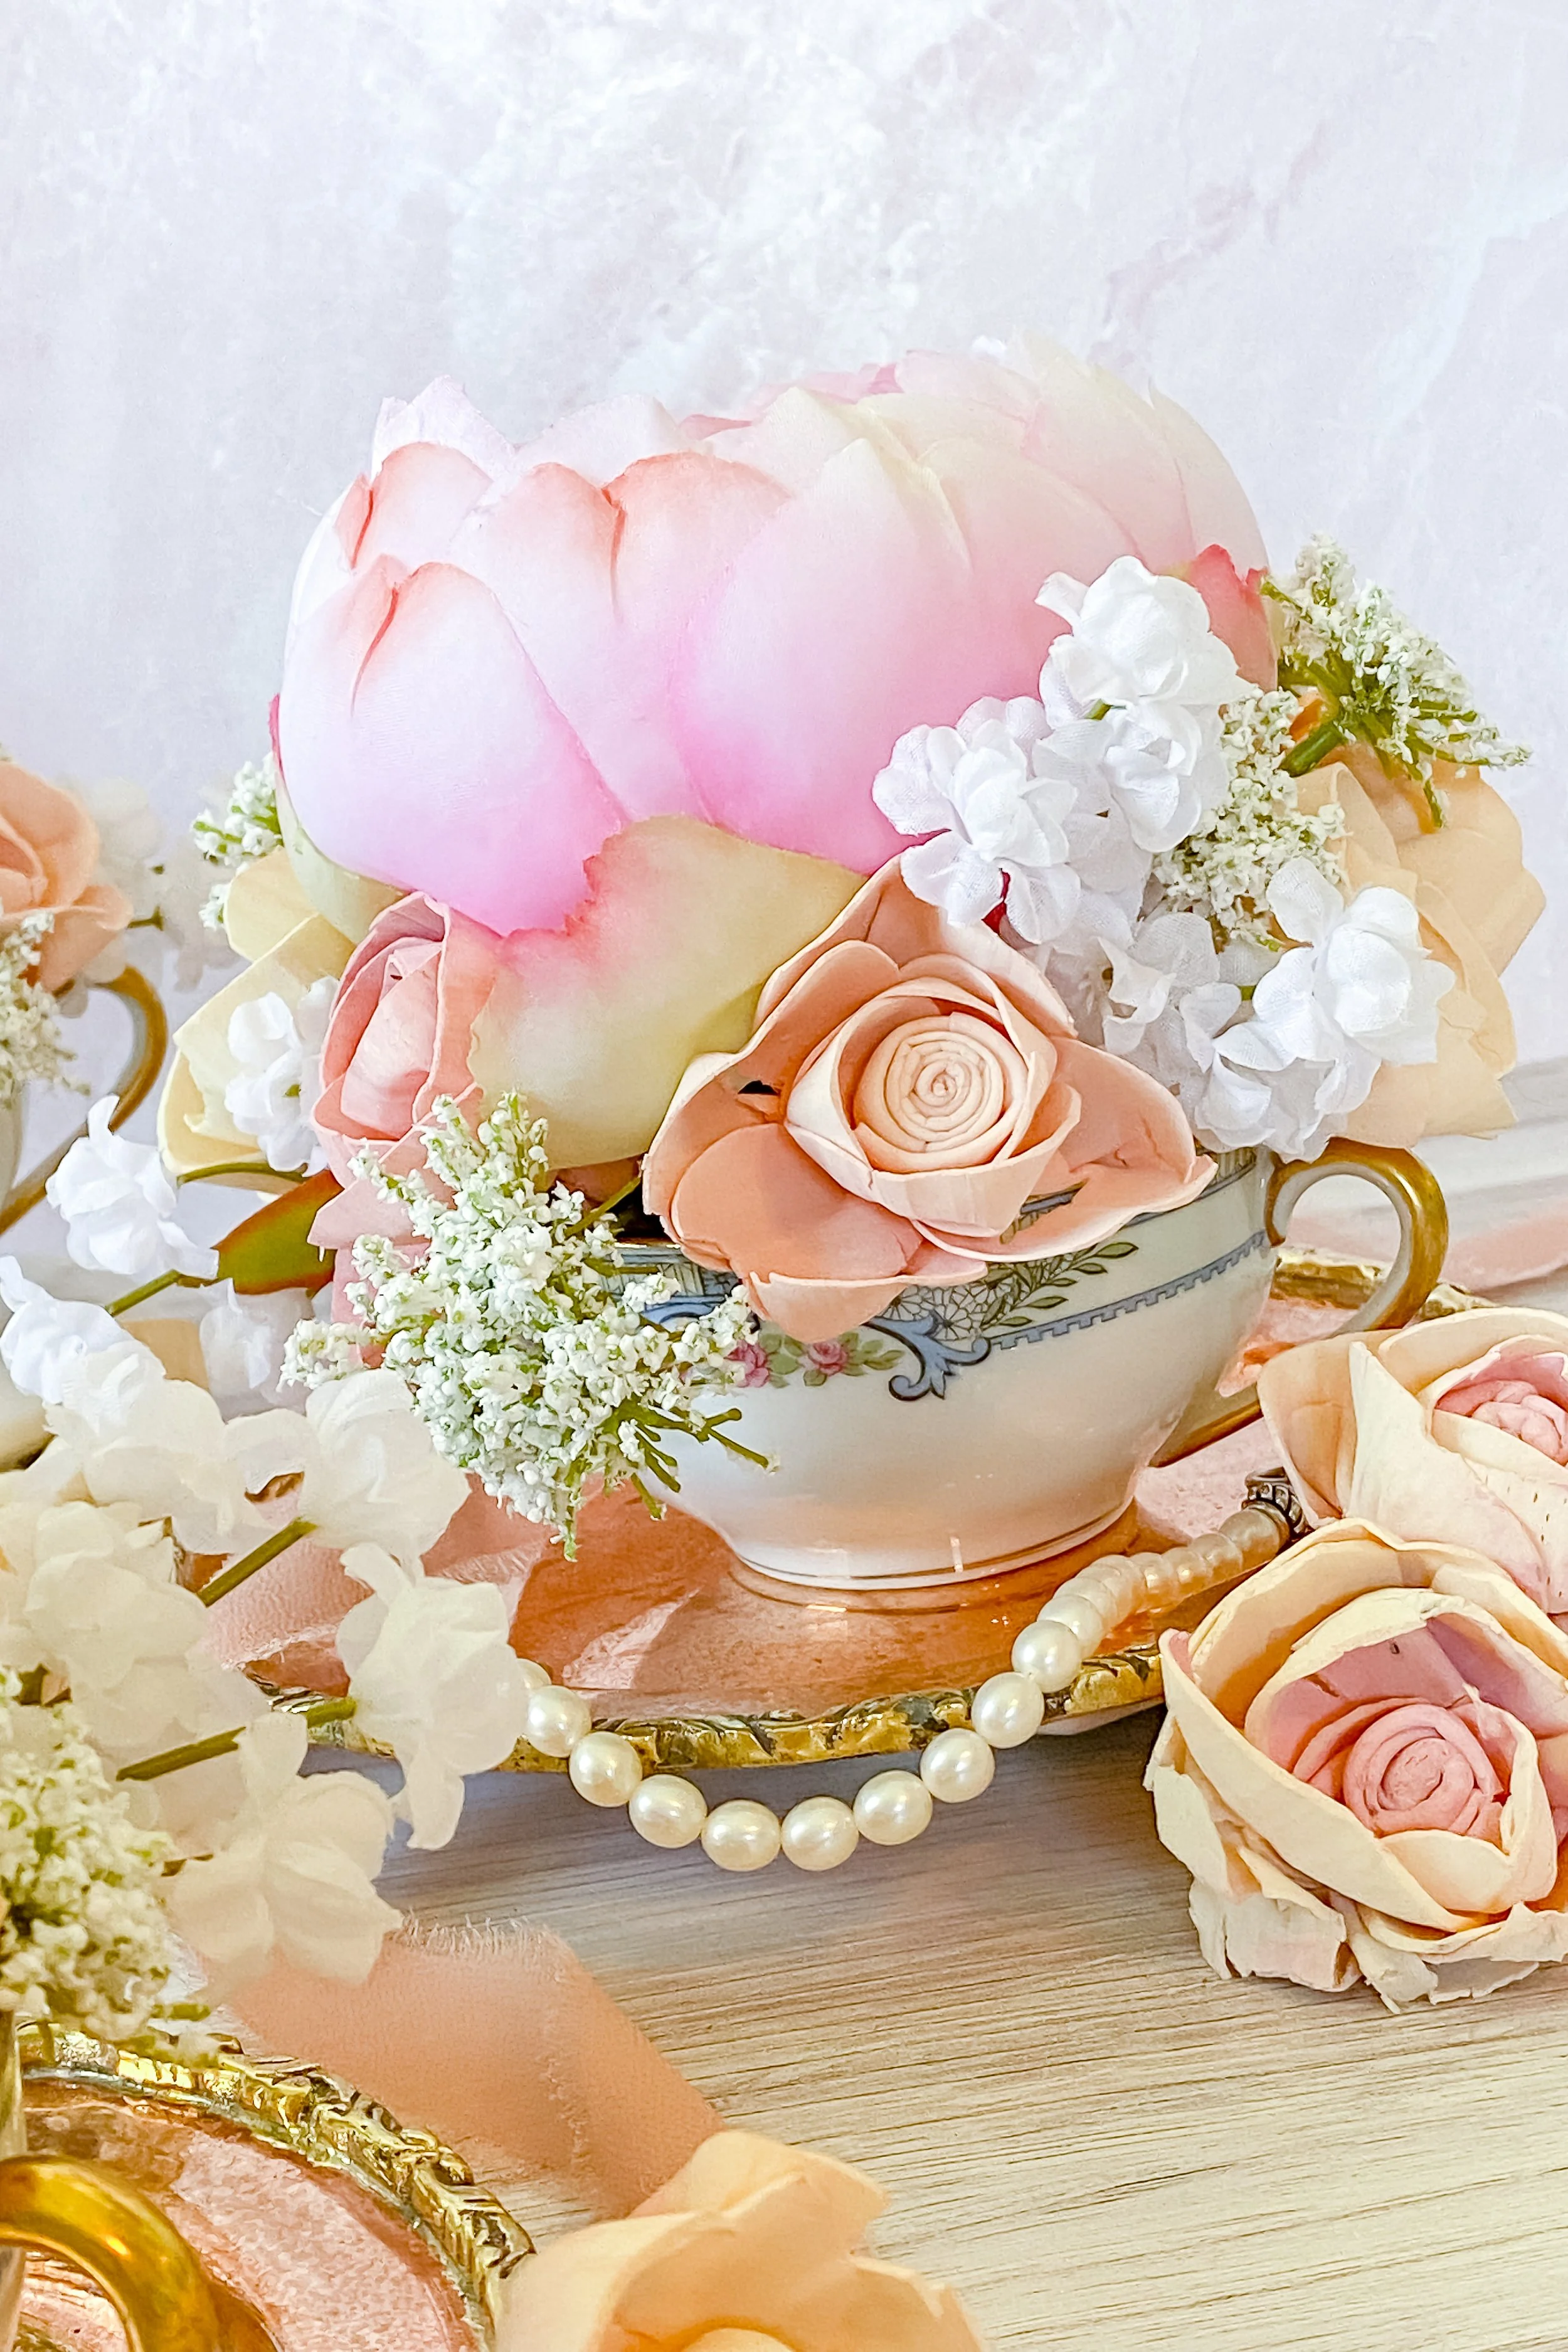
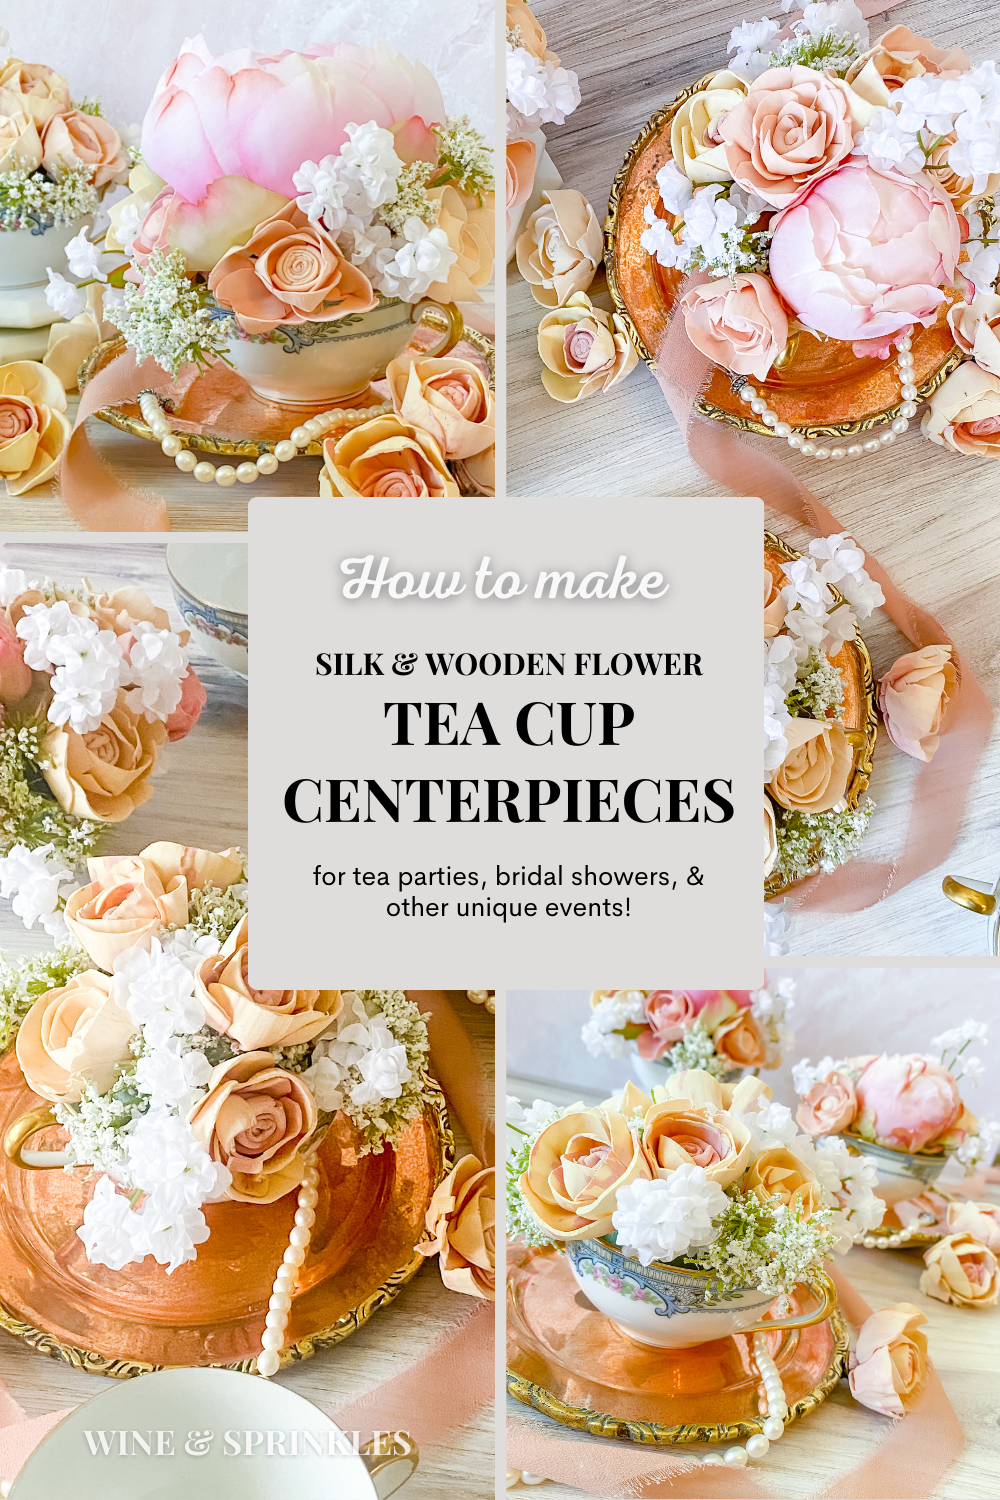
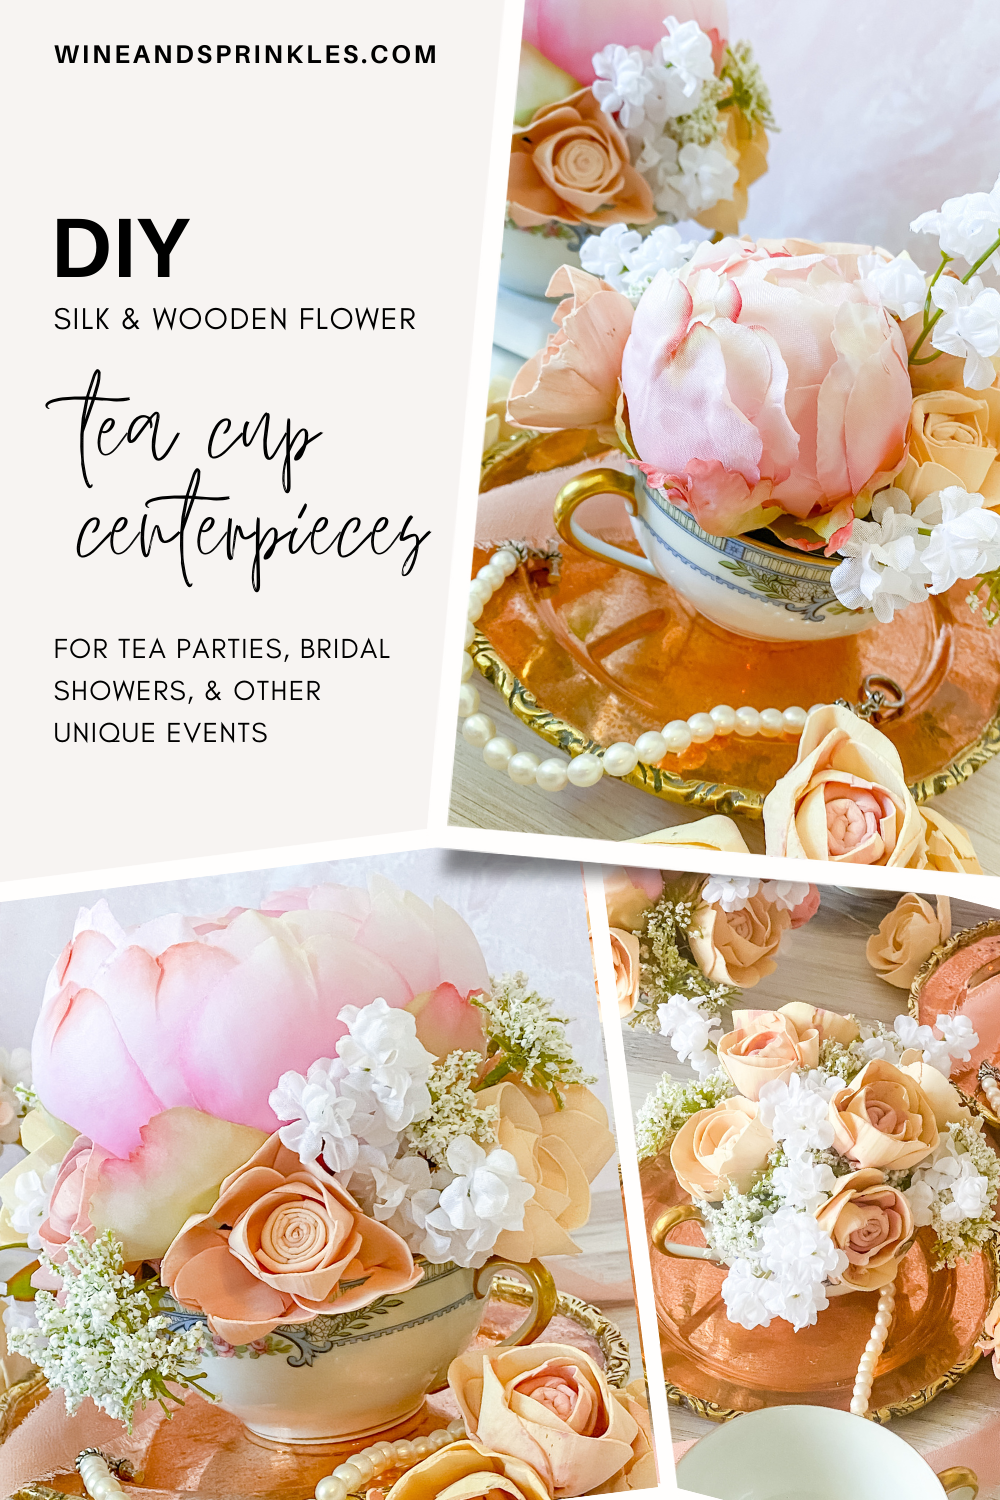
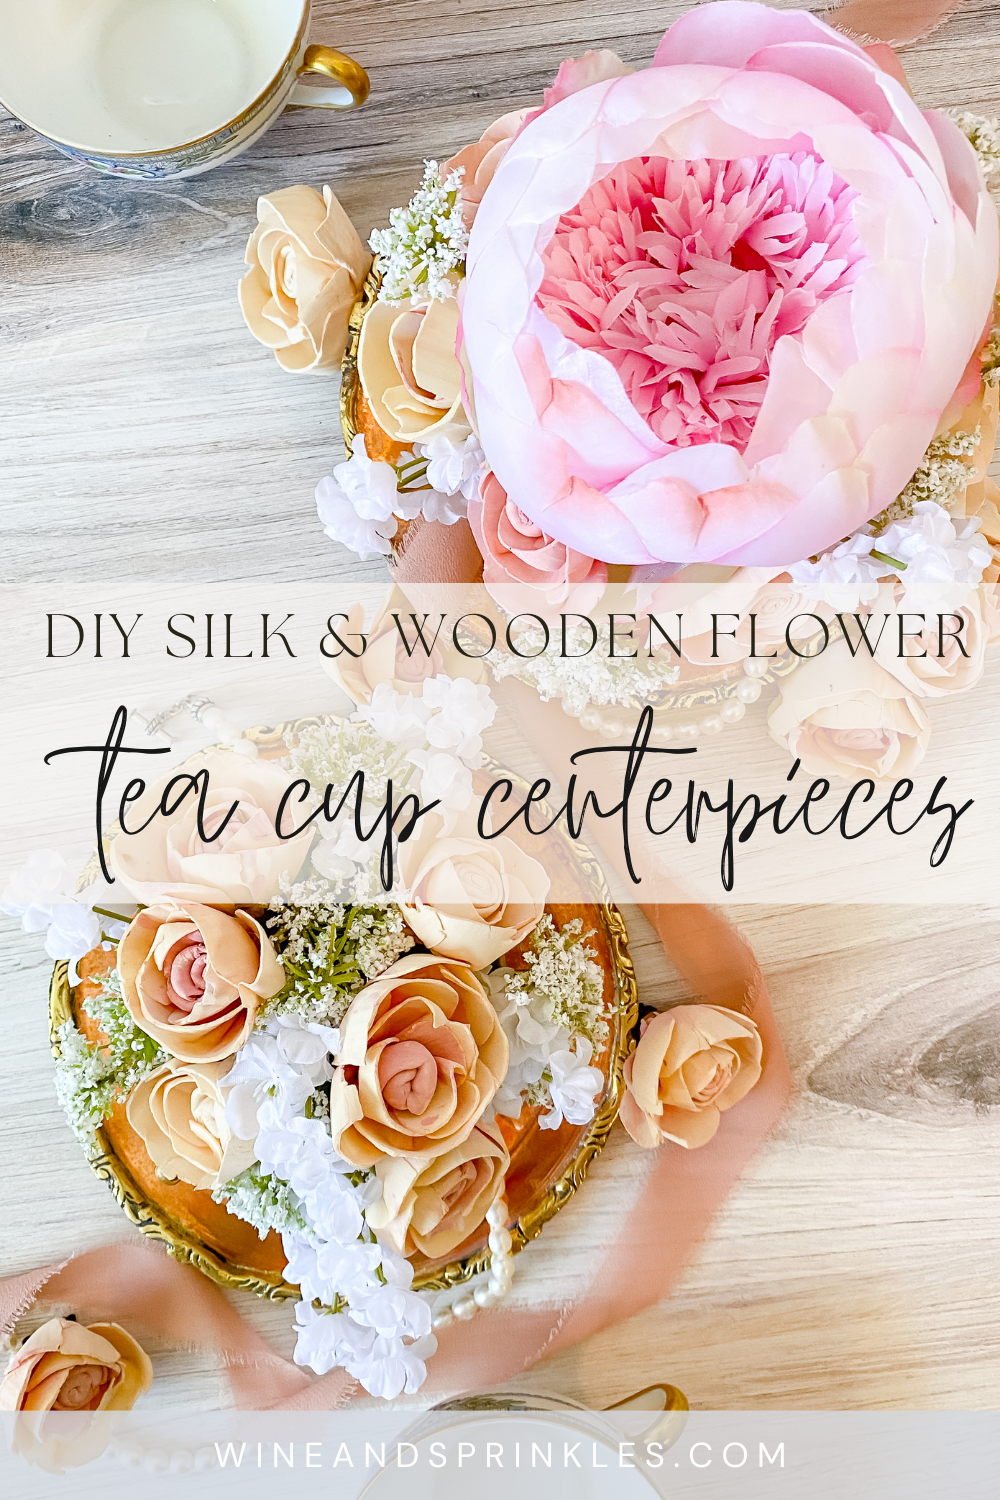
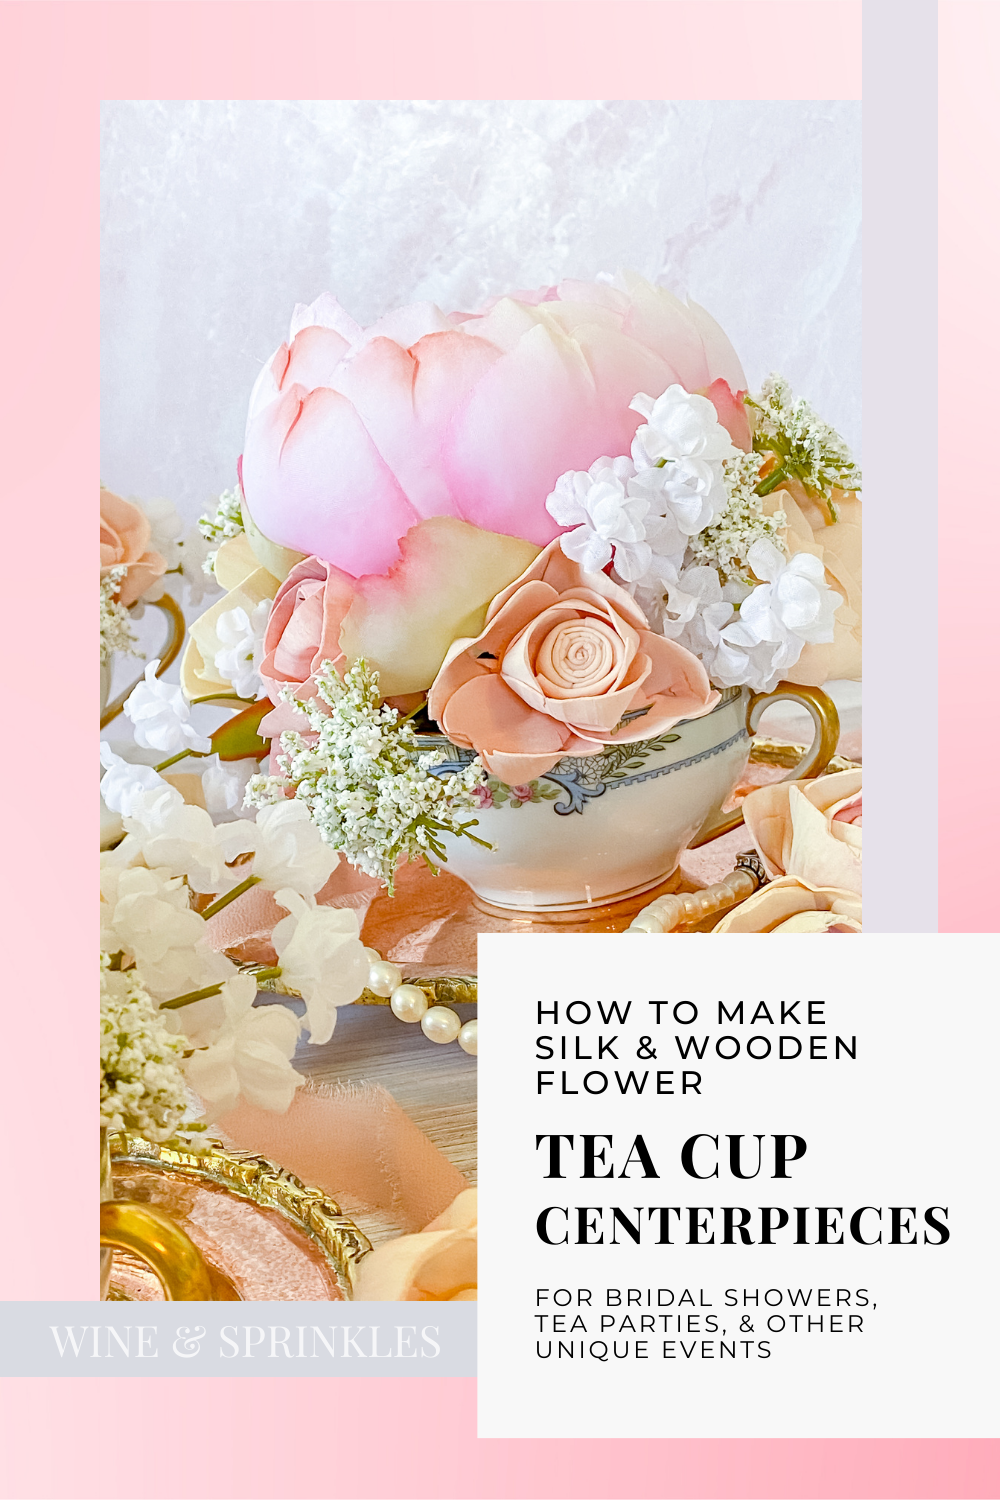
Anybody care for a spot of tea? While tea is usually my winter warmer of choice, with the start of my collection of tea cups I wanted to see what other uses I could put them to in the warmer months while still having them for serving future tea parties and brunches. Enter these Teacup Mini Centerpieces, a perfect petite floral addition to my myriad of party decorations! These cute little cups are a perfect mini centerpiece to add pops of floral to any bridal shower, baby shower, or in my case my Victorian themed Cocktail Party; really any event where tea ties in. I also love them as a way to use bits and pieces of my various silk and wooden flower supplies that would just be wasted otherwise, now they are adorable little floral arrangements that I can put in my tea cups anytime!
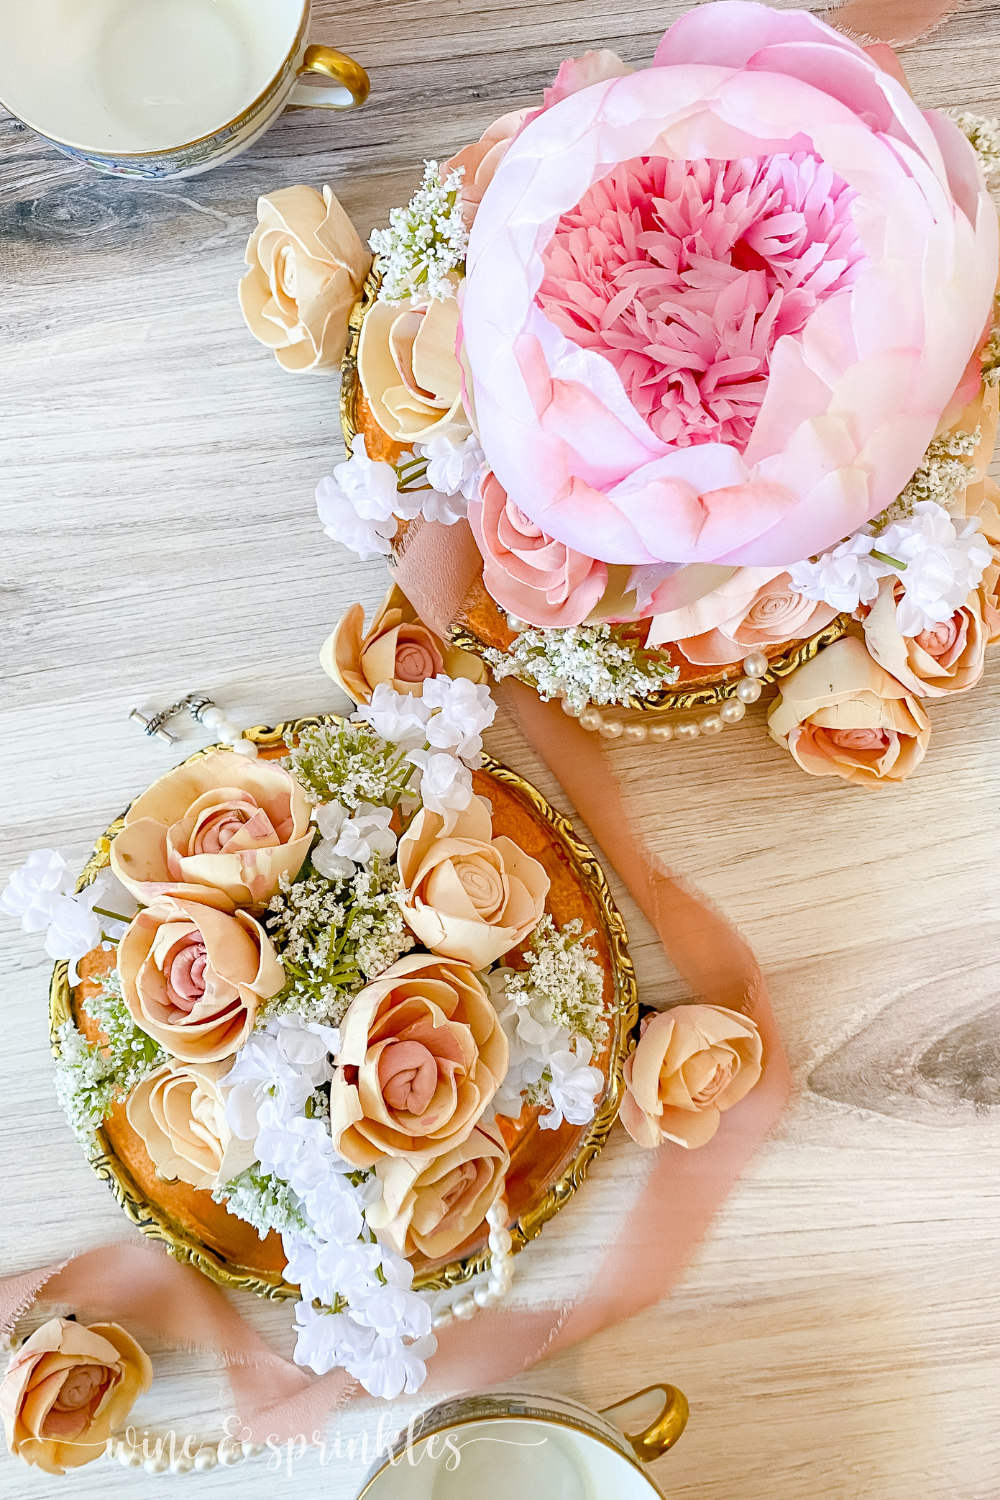
For these centerpieces, I wanted a mix of different styles of floral elements together, so it was the perfect time to use bits and pieces of my favorite flowers from my two fake floral favorites, Afloral and SOLA Wood Flowers! Afloral specializes in ethically sourced silk flowers, and ever since I first bought supplies for my Silk Flower Eucalyptus Garlands I‘ve been in love with their beautiful and realistic blooms! I used their perfect pink peonies and buds as the main flower in most of my centerpieces, but all of them made use of my bits of baby's breath and queen anne’s lace. And those gorgeous pink and cream blooms? Those are all thanks to the wooden flowers by SOLA Wood Flowers, who I first worked with to create these Ombre Dyed Wooden Flowers, created with sustainably farmed sholapith plants that I’ve been incorporating into my centerpieces and accessories since! I used some of the ombre flowers as well as the extras I had dyed in solid pinks and creams, and I must say that they fit with my color scheme perfectly and I love the texture combo of the silks and wood! You can see all the different Silk and Wooden Flower Projects I’ve made here with these and other blooms in my arsenal; after all, the best part of realistic and high quality flowers is that I use them again and again to create new beautiful pieces!


While I made these arrangements in these cups, I secured them in floral foam cylinders so that they can stay stored safely in a little airtight tub to try them in other vases and containers for future spring soirees! You’re sure to see them in some form at my future parties, so grab some of your own favorite floral bits and follow the guide below to make a set for your own parties and future fun floral events!
SUPPLIES
CENTERPIECE SUPPLIES
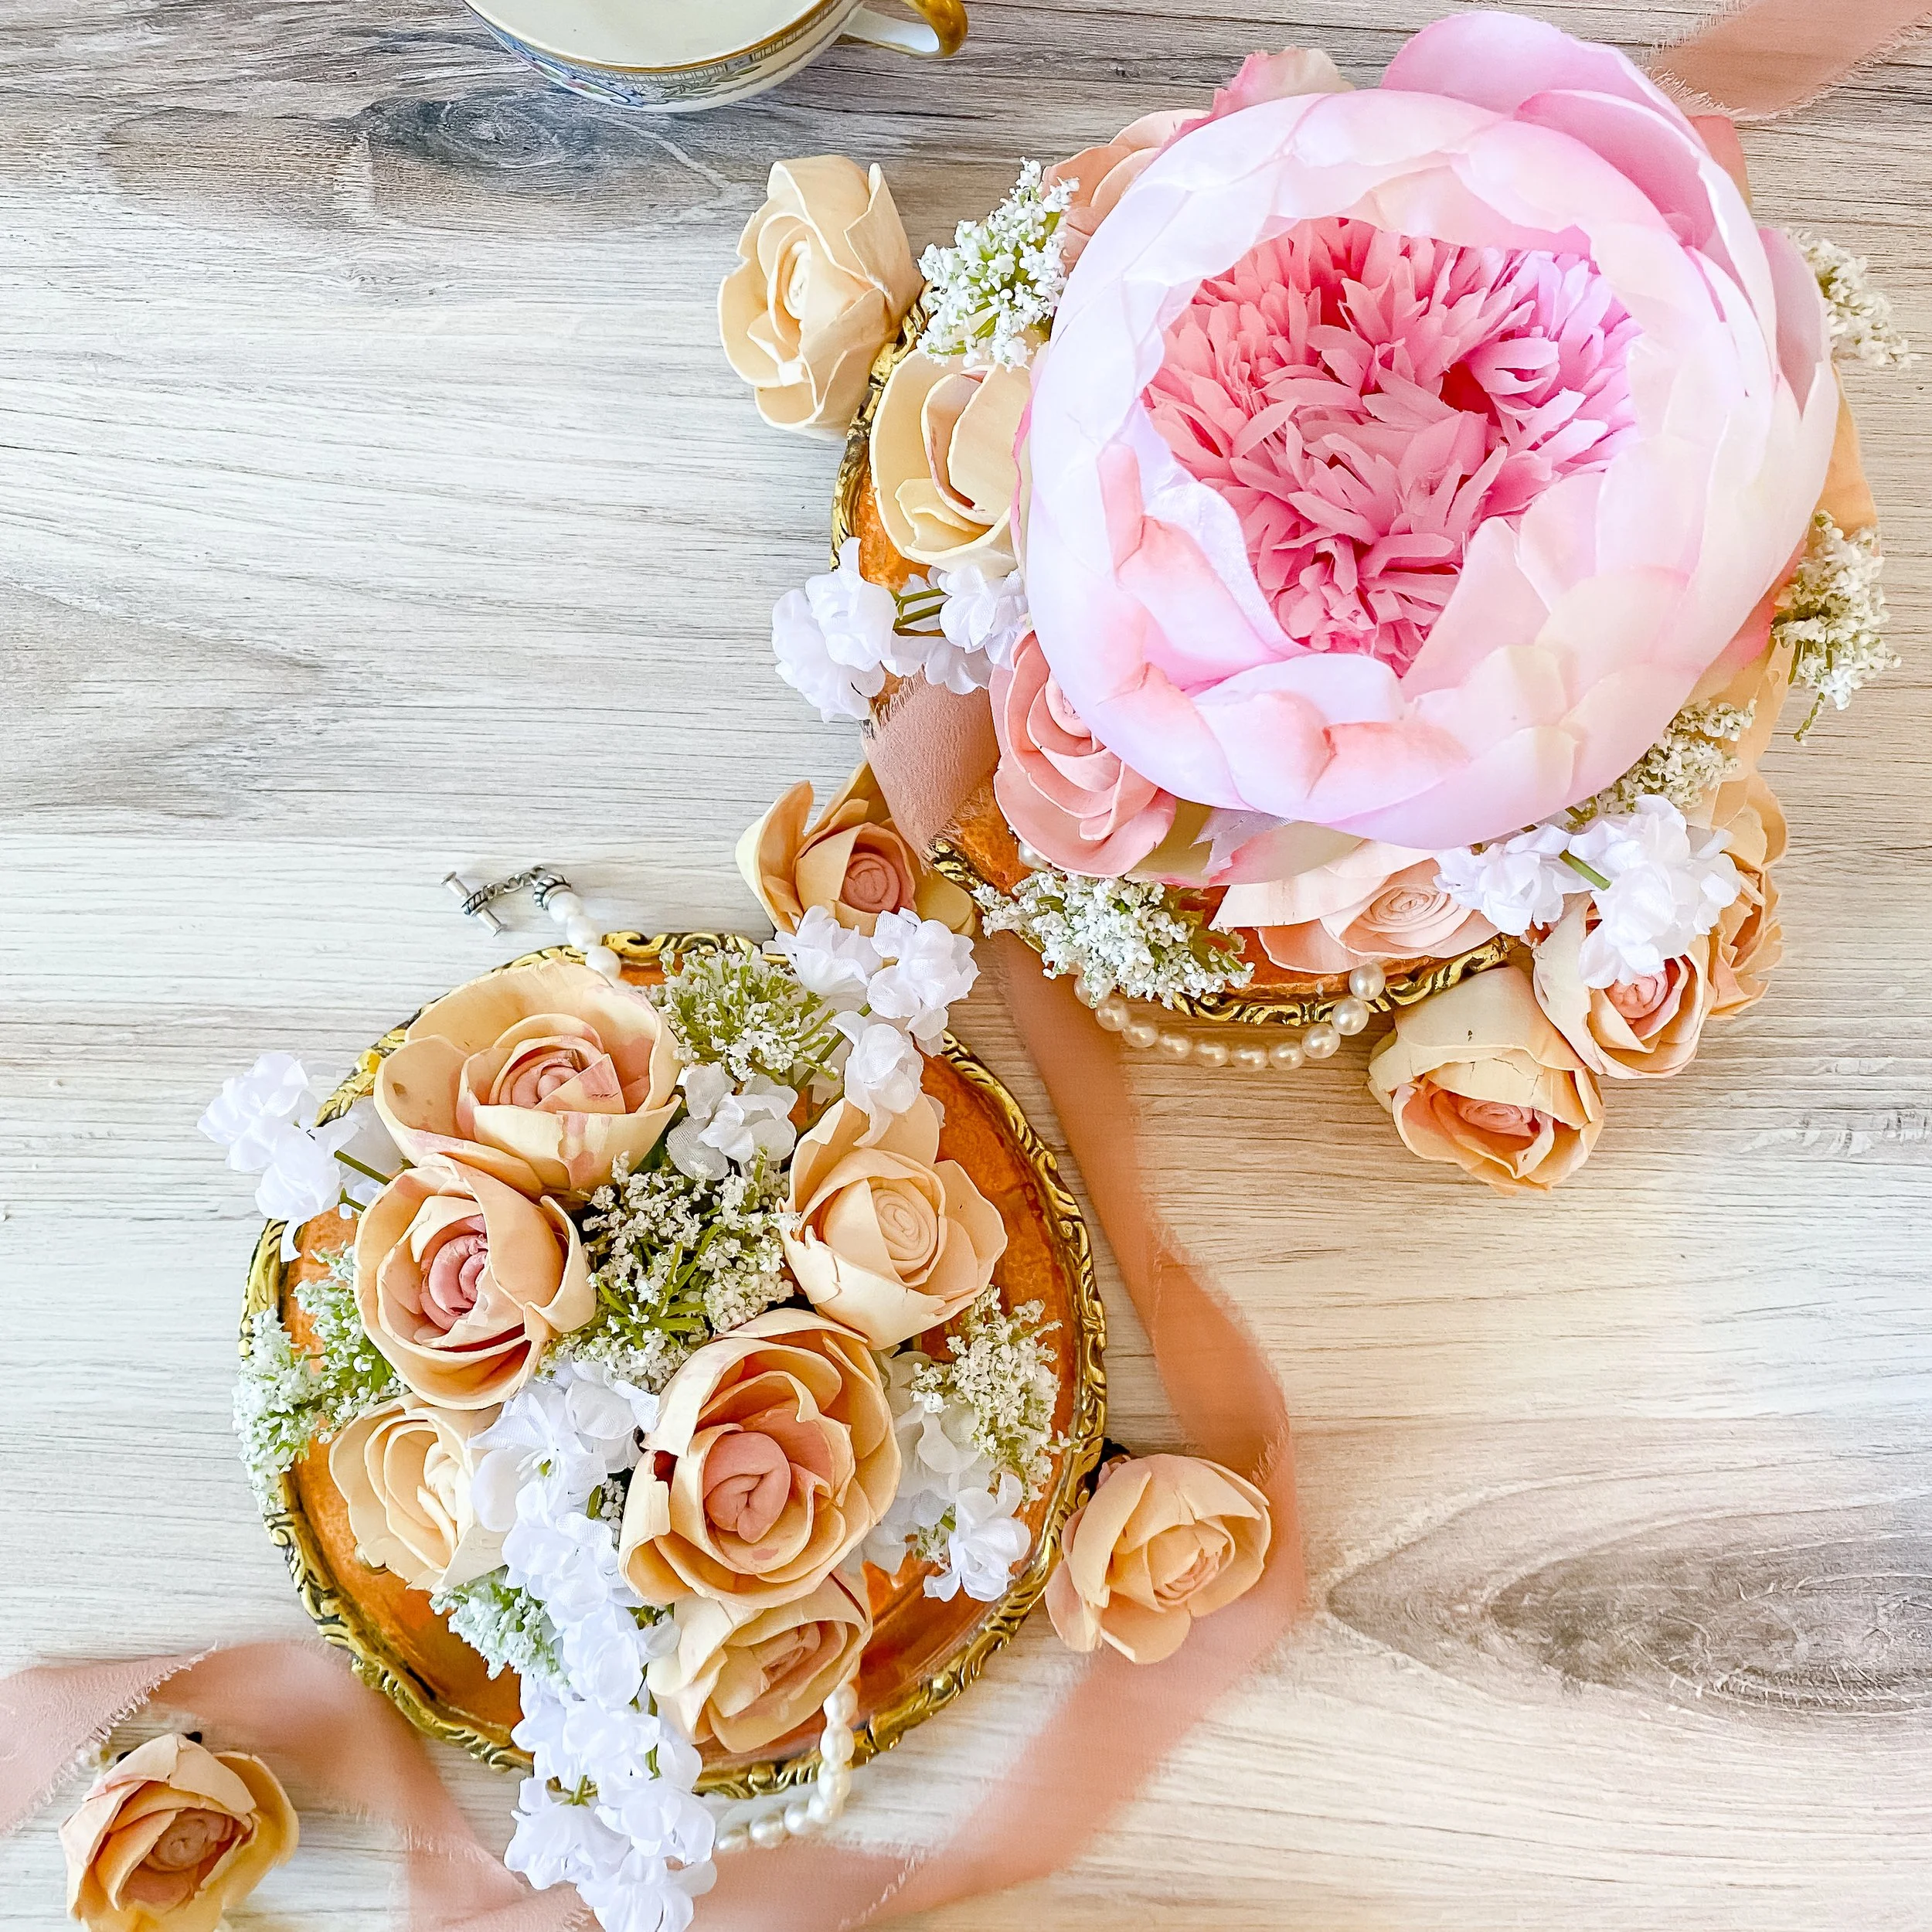
Tea Cups: the base of these centerpieces is one of my favorite items to collect and use in decor in general, vintage tea cups! These beauties were given to me for Christmas from one of my best friends, but you can find tea cups of your own from vintage shops or online. I’ve linked my favorite tea cup shop from Etsy above to find your own favorites to start your own tea cup collection! For this project, I used five teacups to make three different styles of mini centerpieces, featuring either a fully blooming peony, peony bud, or only wooden and filler flowers, so the amount of flowers I used below is for this combination!
Floral Foam: for securing all the flowers, I found these nice little cylindrical floral foam bases that I only needed to cut in half to be a perfect fit, though you can get other options to cut to size. My floral foal was 2.5” wide, but these are the closest I found online!
MAIN FLOWERS
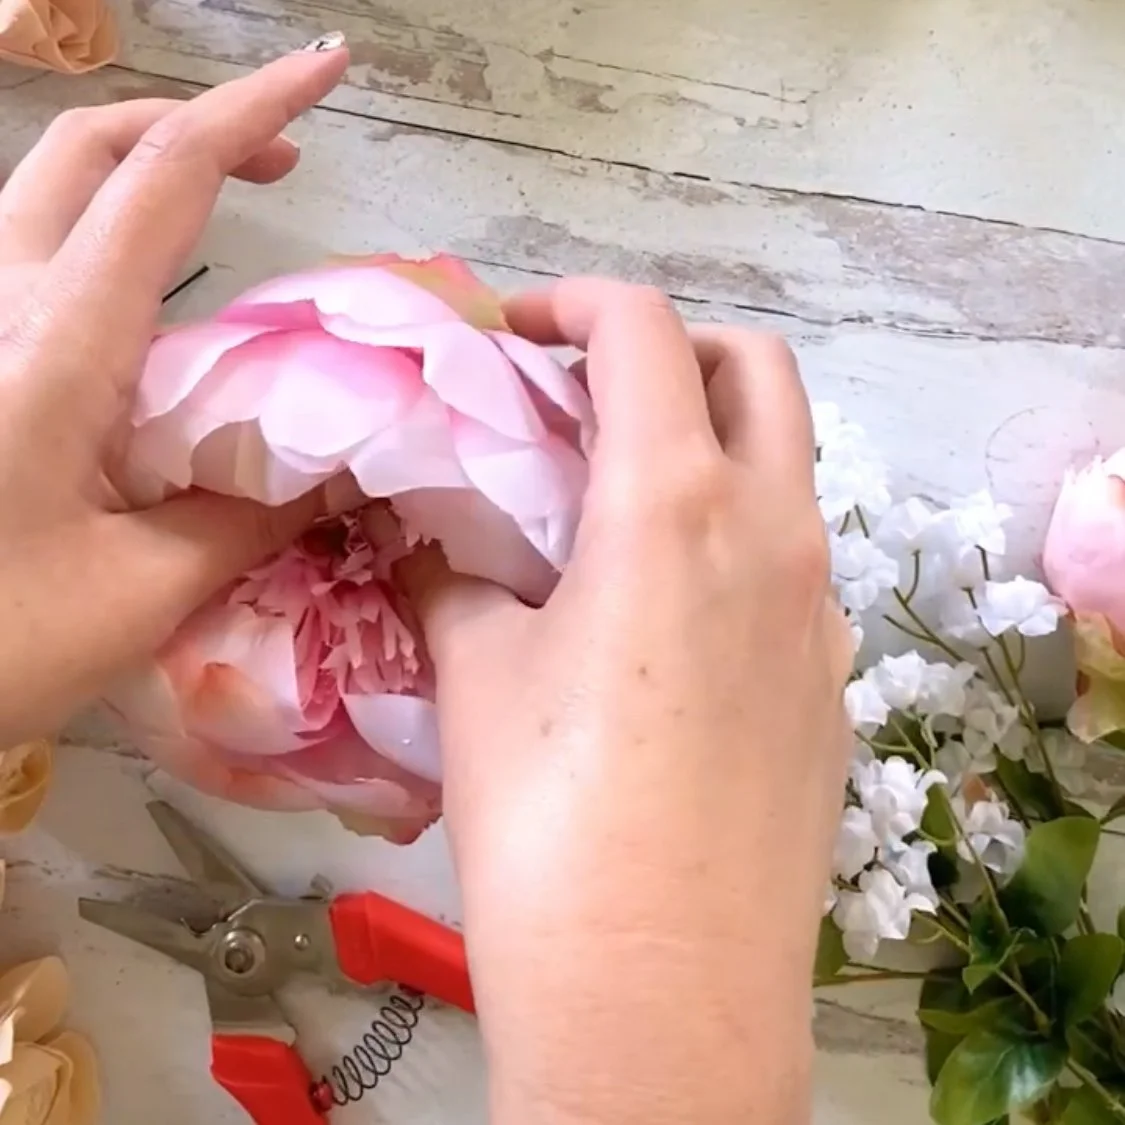
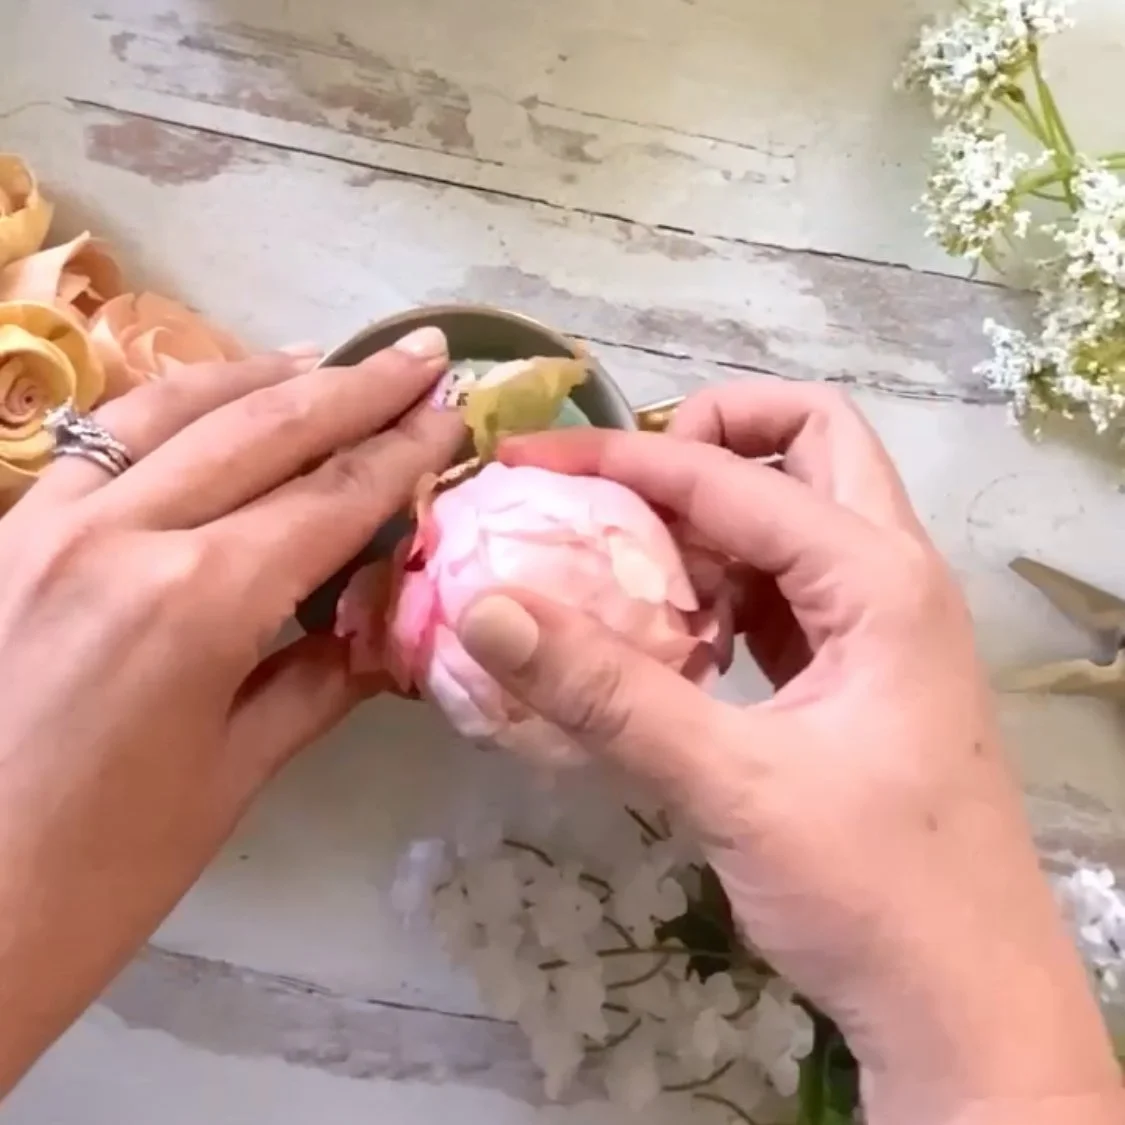
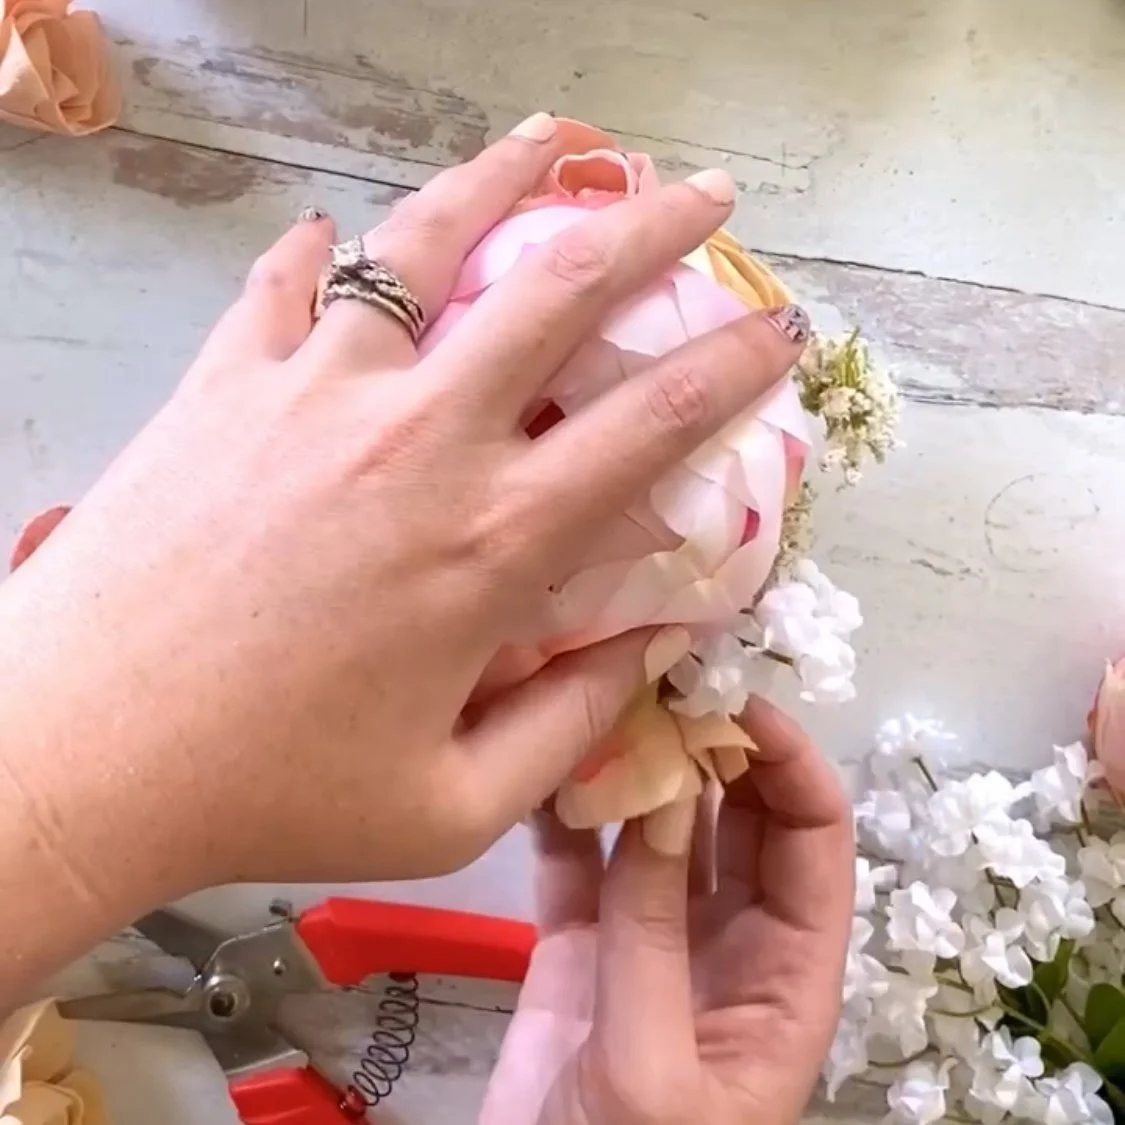
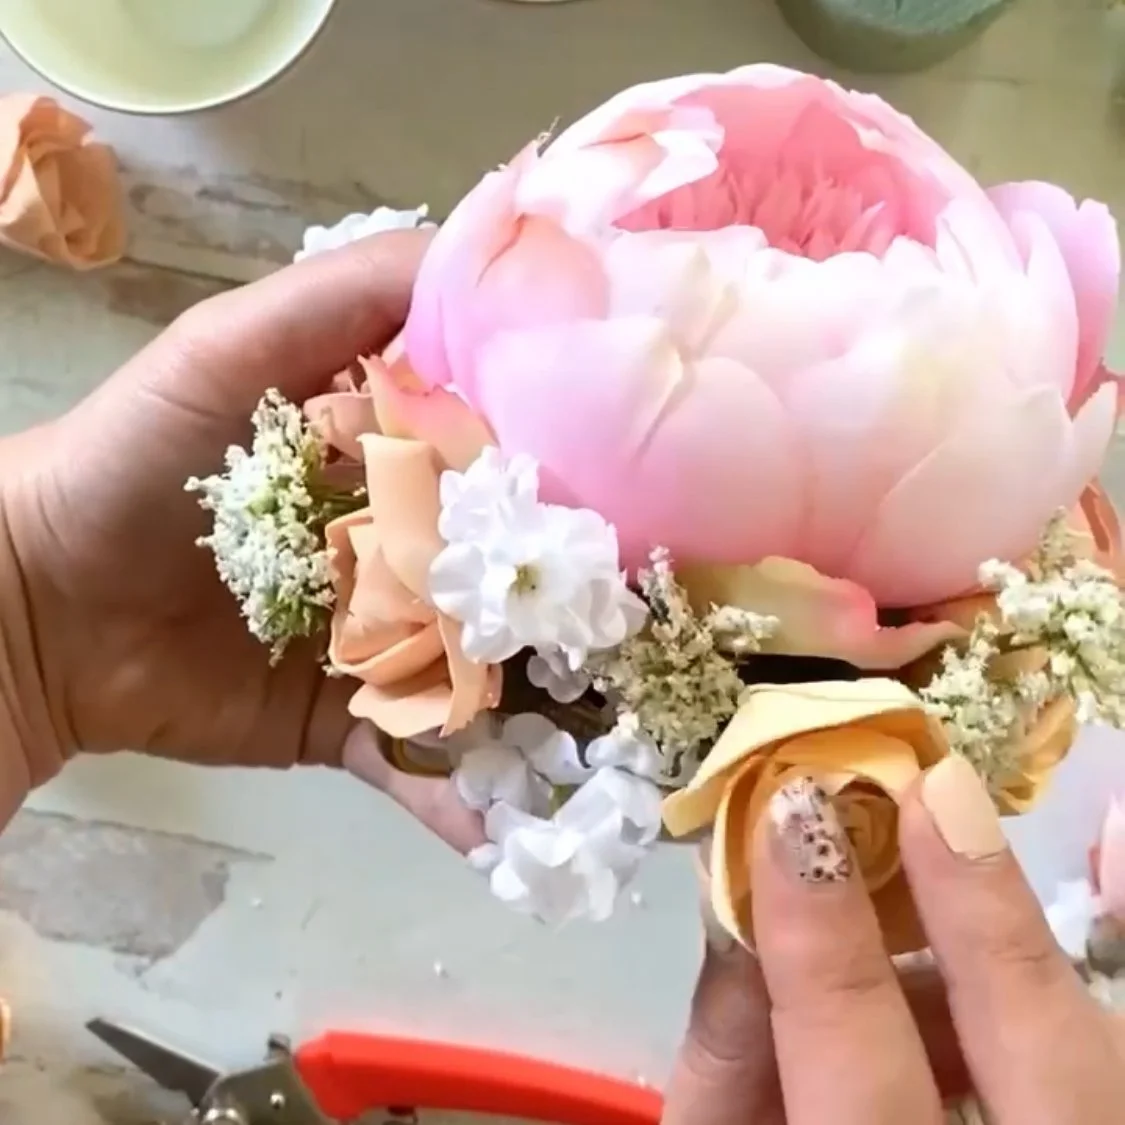
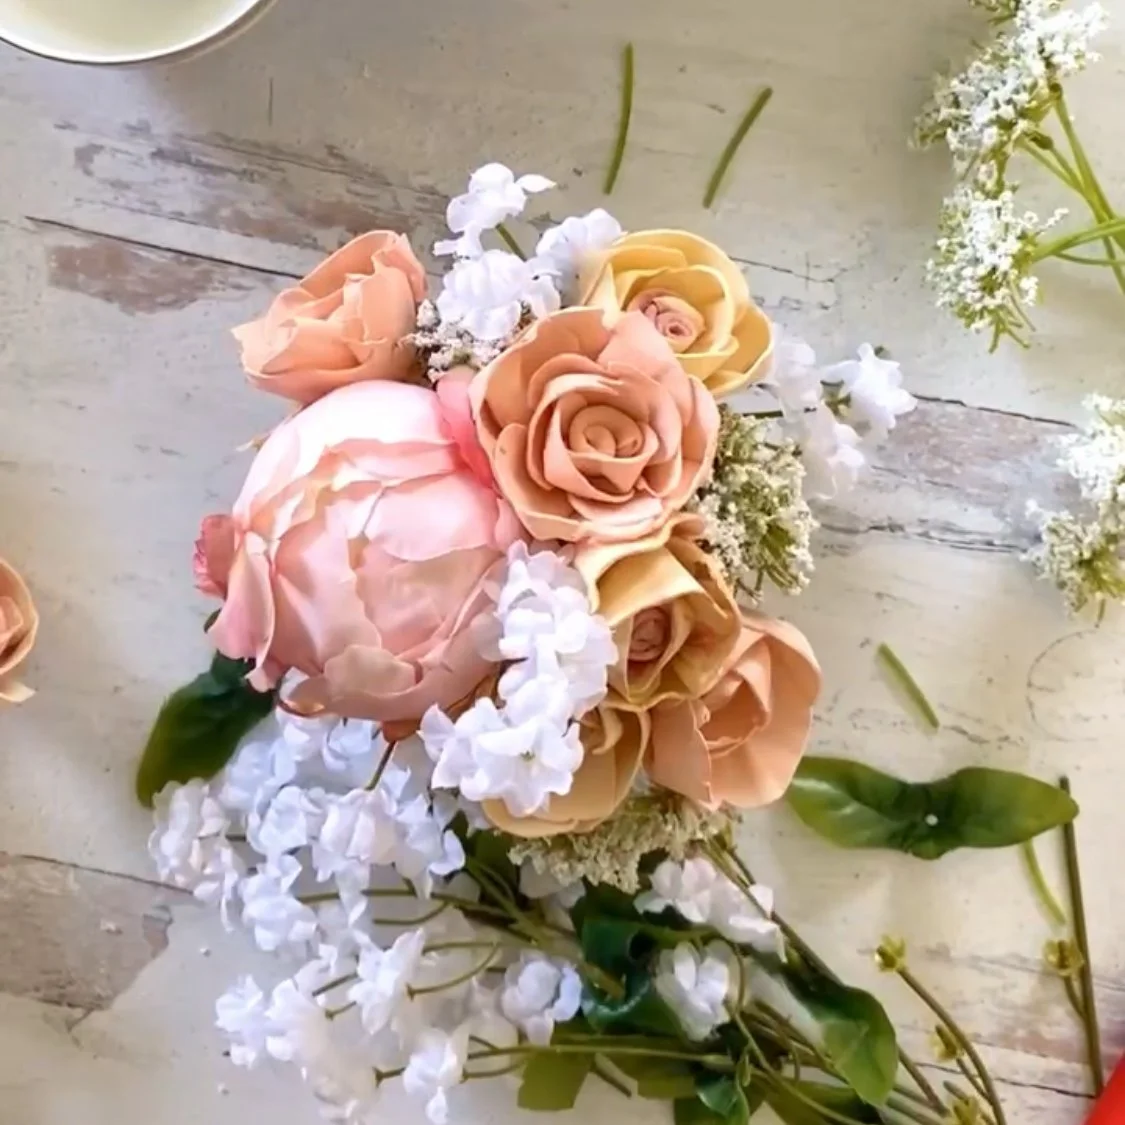
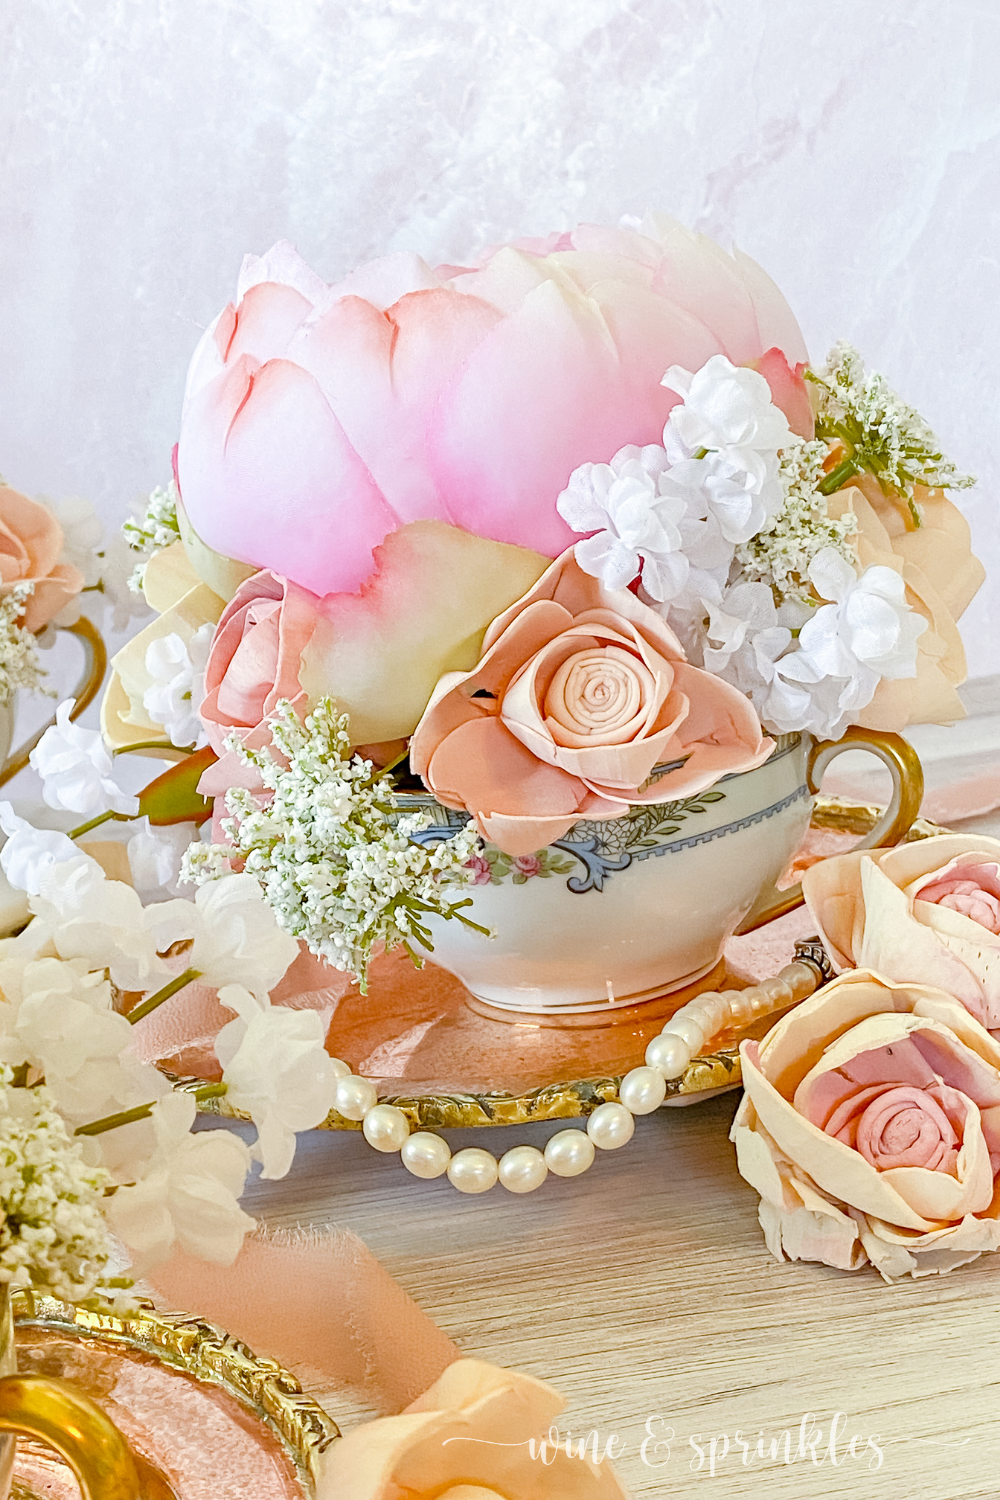
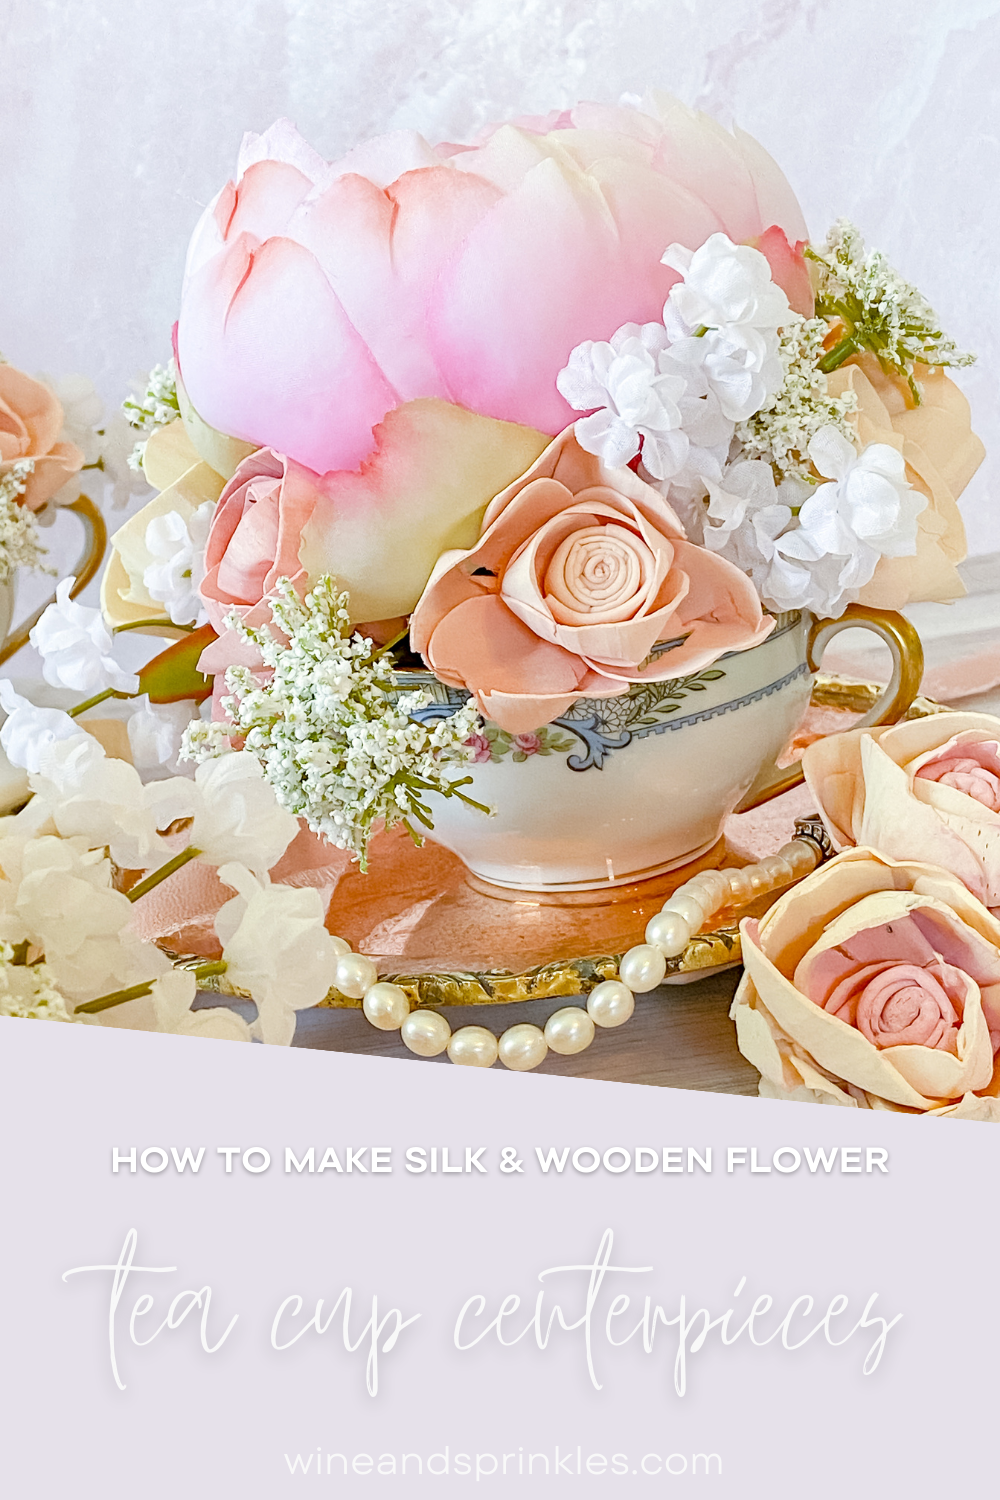
Peony & Peony Buds: Like many of my Silk Flower Garlands and Centerpieces of the past, these centerpieces feature peonies as one of the showcase flowers, in fact they are the peonies I’m reusing from my past posts! I used one peony and two buds to three of my teacups, with these light blushy pink blooms perfectly accenting the creams, pinks and white of the other flowers in the teacups.
Dyed Wooden Flowers: The other main flower in these arrangements is another favorite from my past projects, some of my pink, cream, and Ombre Dyed Wooden Flowers that were leftover from my Wooden Flower Wine Bottle Centerpieces and Wooden Flower Accessory Clips. I was curious to see how these flowers looked mixed with silk blooms, and I have to say that I absolutely love how they turned out! Each of my teacups used 6-8 wooden flowers regardless of if they had peonies or not, with the extra white filler flowers filling in empty space for the wooden flower only tea cups.
SUPPORT FLOWERS
Babies Breath: I used the end bits and pieces of my babies breath and other white leftover filler flowers in these teacups, but any white filler flowers that are good at filling in extra space will work perfectly! I used 3-4 clusters of several blooms, using them to fill in space around the wooden flowers and cover where the floral foam was visible.
Queen’s Anne Lace: while not always available, I love Queen Anne’s Lace as a filler flower. And with lots of little clusters already cut up from my Silk Flower Eucalyptus Garlands of last year and begging to be used, they were perfectly appreciated as my second white filler flower in these arrangements! Each teacup used between 5-7 clusters of trimming flowers, but I mainly just filled in until I couldn't see the floral foam any more! These stems were less rigid than my others and were therefore much harder to secure into the foam, so be patient with these ones as you arrange them.
TOOLS & OTHER SUPPLIES
Knife: for cutting floral foam to size. My foam was already in nice little cylinders so it was just a simple trim to the height of my teacup, but depending on the foam you get will depend on how much you have to cut it.
Floral Shears & Wire Cutters: for trimming stems on the silk and wooden flowers
Floral Wire: for making stems for your wooden flowers. The amount you will need depends on if you precut the wire to shorter lengths for this project, which you should! I had these flowers left over from when I used them to make Wooden Flower Wine Bottle Centerpieces, so I had to trim mine down from long stems to short.
Glue Gun & Glue Sticks: for gluing wire stems into your dyed wooden flowers
SUPPLIES LIST:
[for 5 teacup centerpieces]
CENTERPIECE SUPPLIES
Tea Cups x 5
Floral Foam x 3
MAIN FLOWERS
Dyed Wooden Flowers x 32-35
Peony x 1
Peony Buds x 2
SUPPORT FLOWERS
Babies Breath x 3-4
Queen’s Anne Lace x 1-2
TOOLS & OTHER SUPPLIES
Knife
Floral Shears & Wire Cutters
Floral Wire
Glue Gun & Glue Sticks
DIRECTIONS

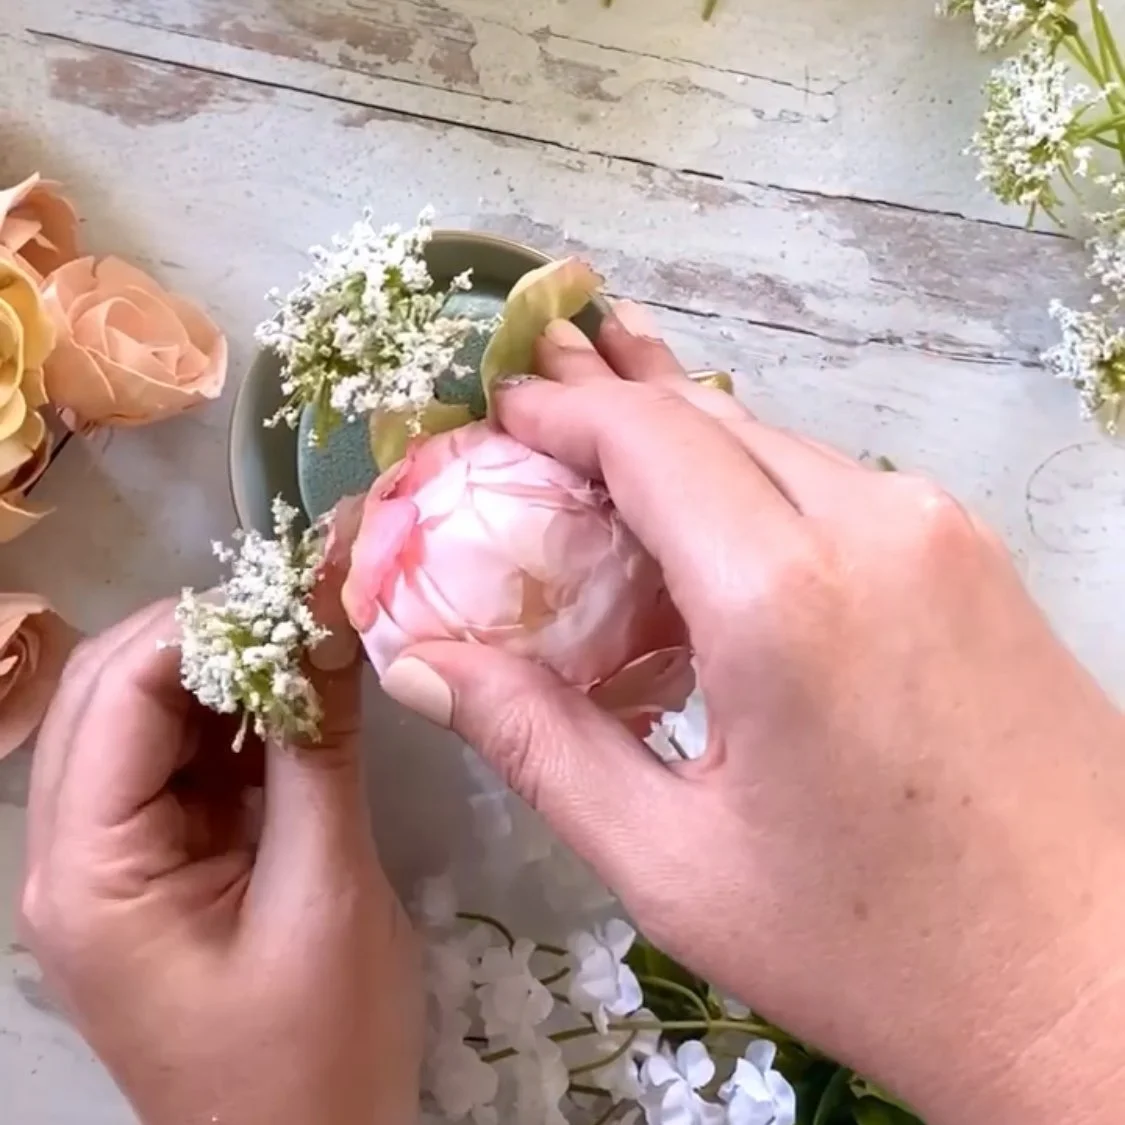
1. First, it’s time to get all the various flowers ready for arranging. Hot glue wooden flowers onto floral wire, then trim each stem to be 1” long. You can use small pre-cut pieces of floral wire instead, but since these were leftovers from my Wooden Flower Wine Bottle Centerpiece, mine were trimmed after they were glued. Likewise, trim all the silk flowers you are using so their stems are also 1-1 ½“ long. The shorter your stems are the better, especially for your silk filler flowers without wire!

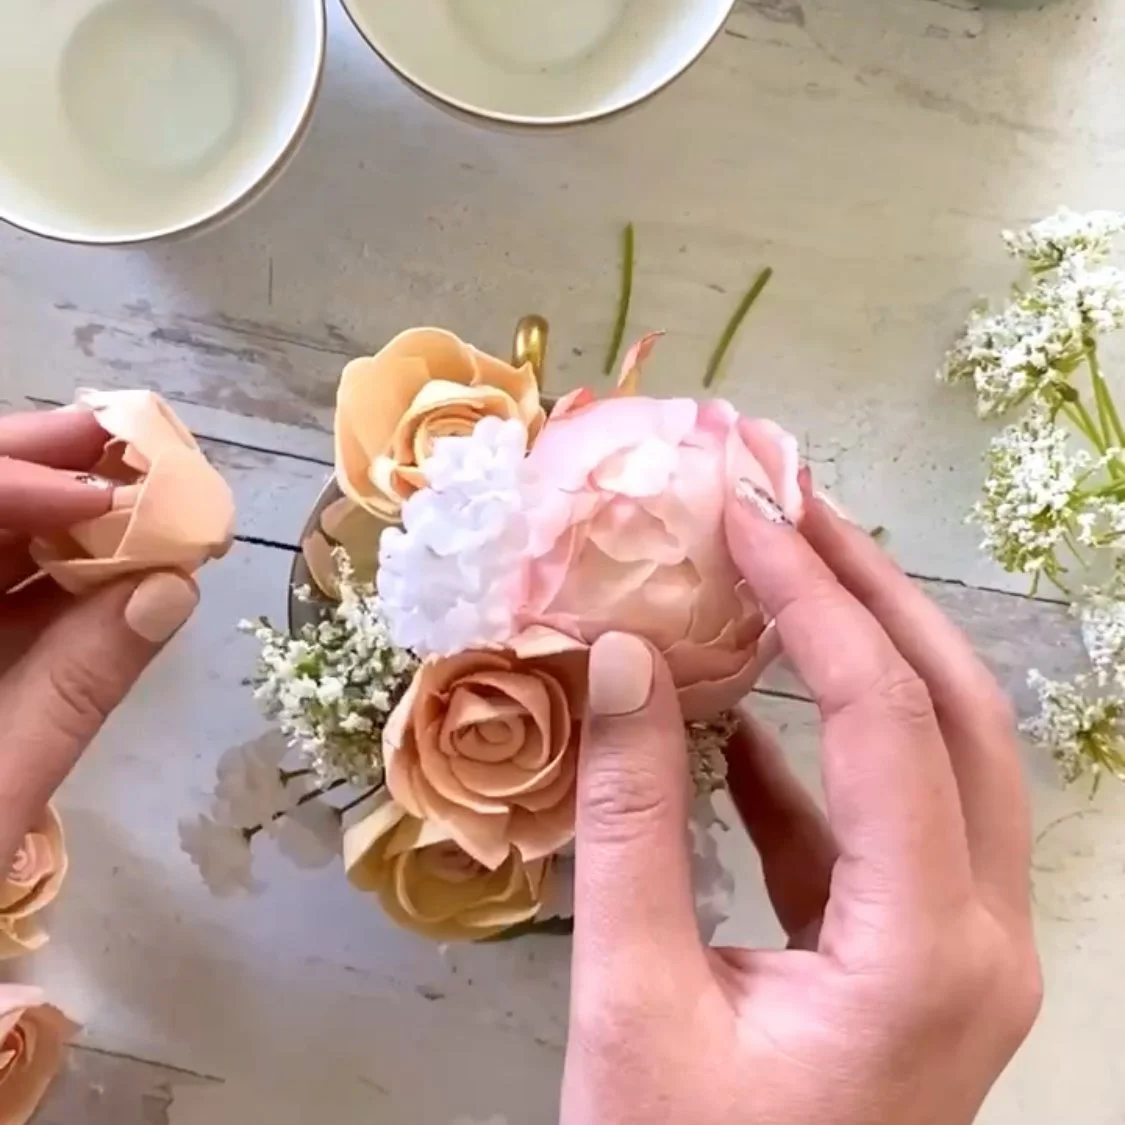
2. Next, cut your dry floral foam to fit and place it inside your teacup. Starting with your largest flower, stick each shortened stem bloom into the floral foam to secure it. You will notice I made three kinds of teacups, ones with blooming peonies, ones with peony buds, and ones with just wooden and filler flowers. Here I’m talking about the ones with peonies and their buds, because I found it easiest to secure the wooden flowers last where my filler flowers needed extra care to stick them securely into the foam.
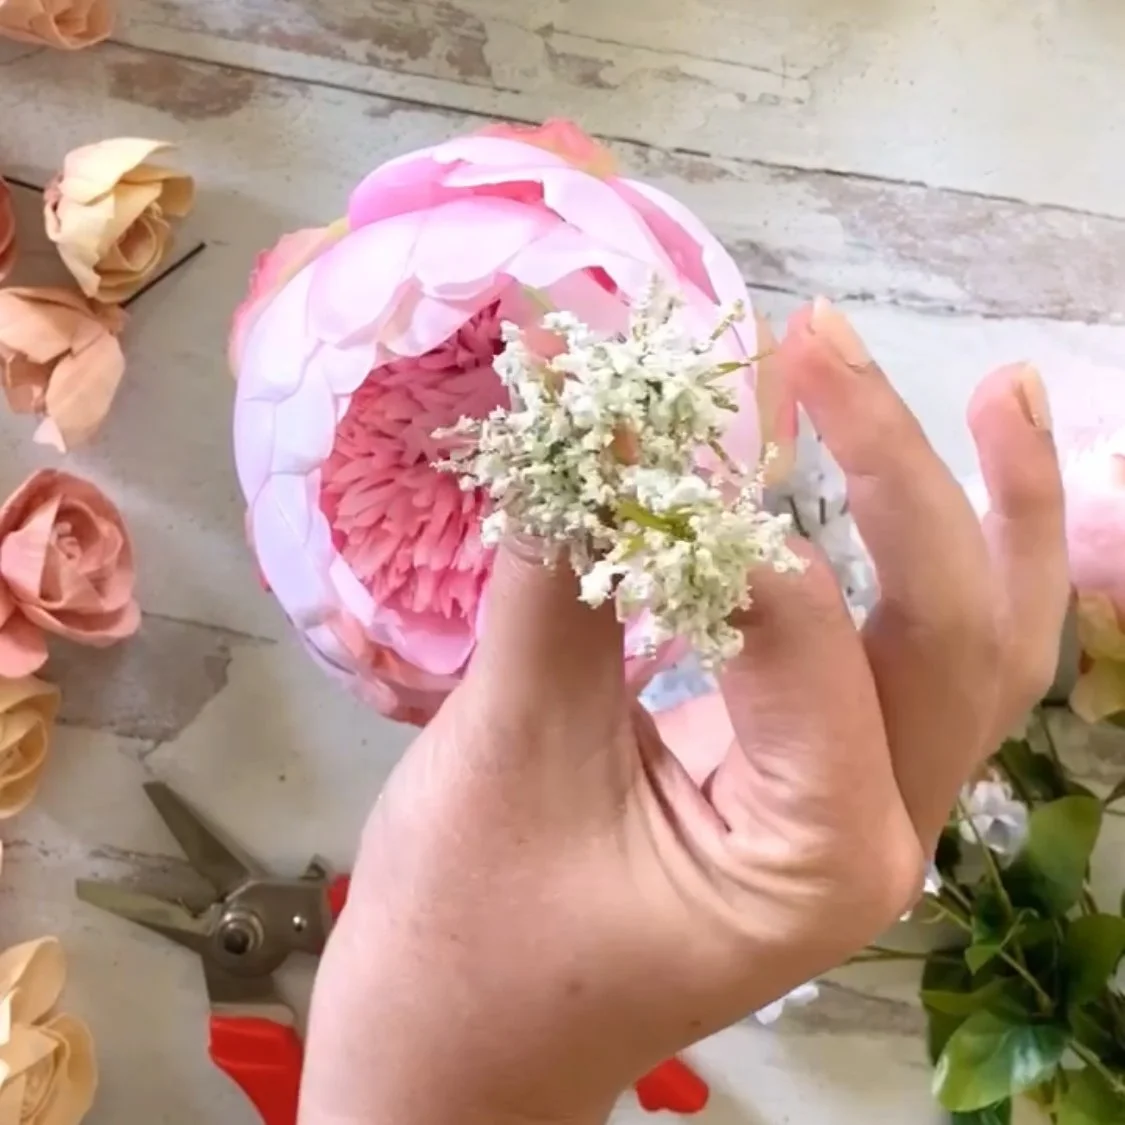

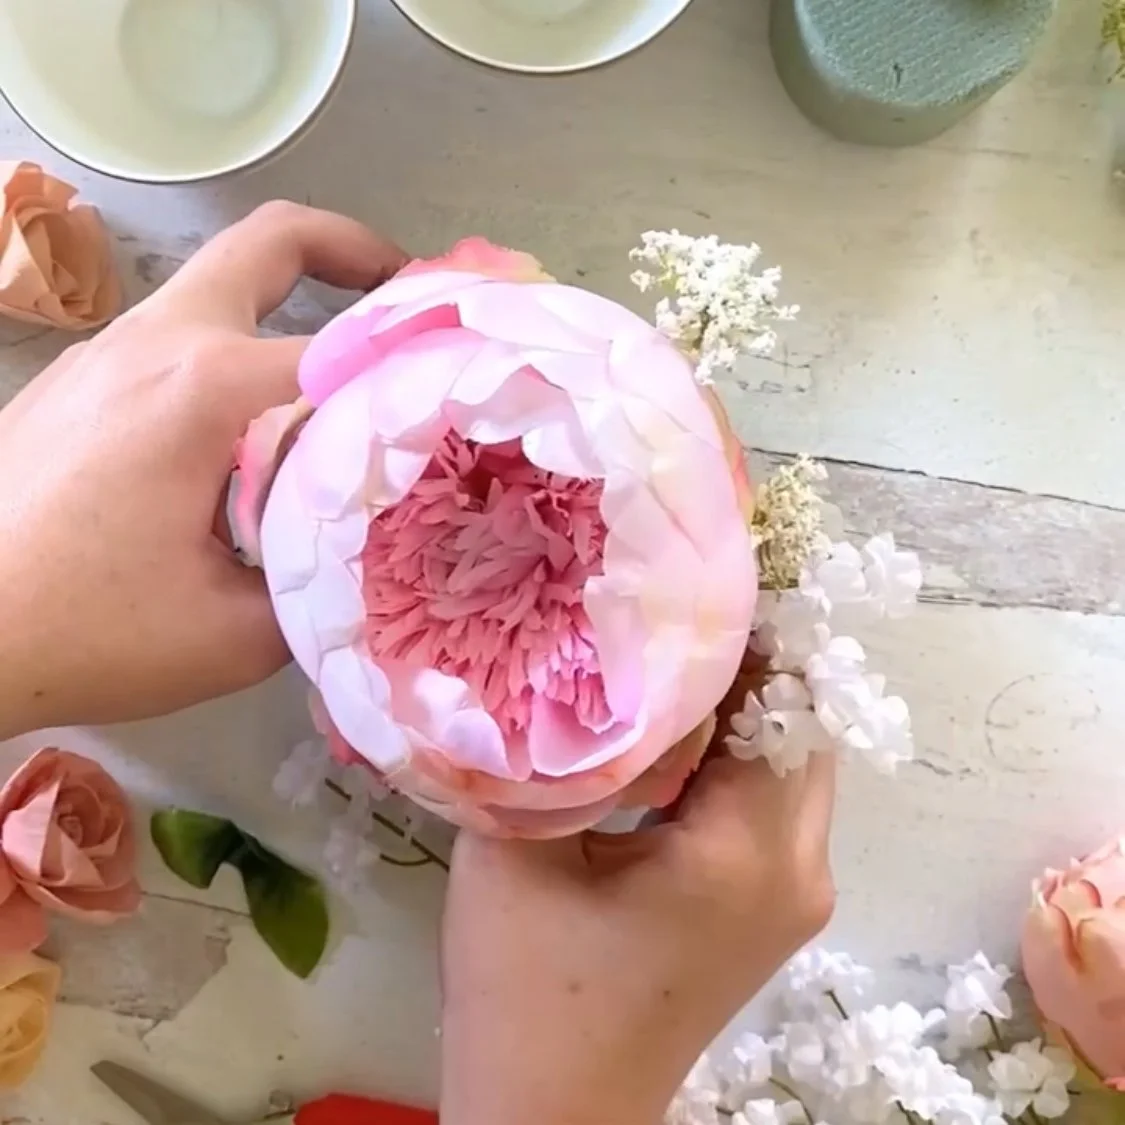
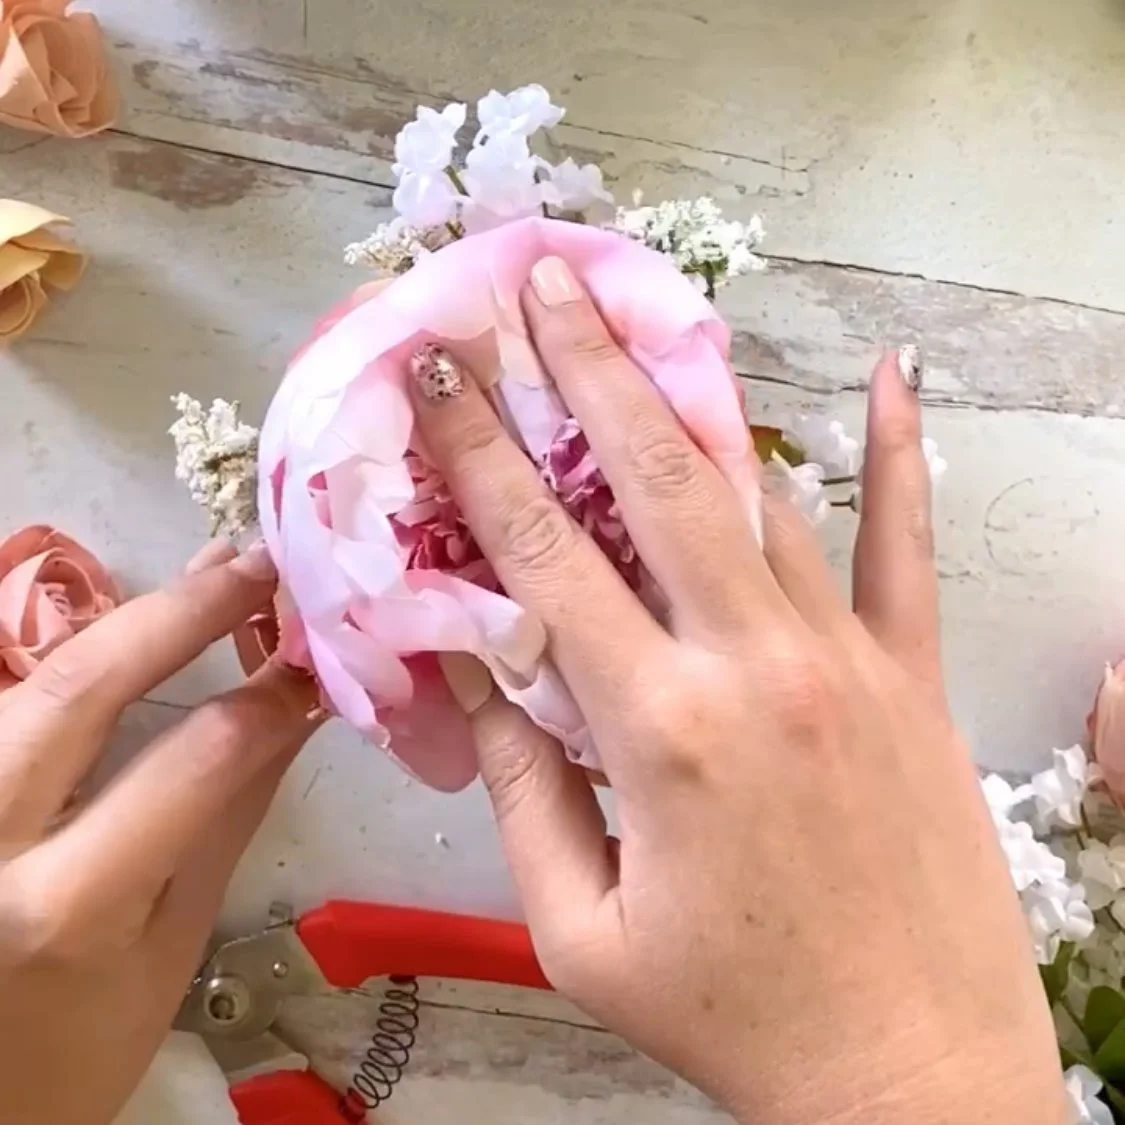
3. Once your centerpiece flower is secured, fill in around it and cover all the floral foam from sight with your filler flowers, in my case babies breath and Queen Anne’s Lace. Once these flowers are placed, finish your teacups with wooden flowers nestled into the filler flowers and to fill in any open patches in your arrangements. I found it easiest to start with peonies, put in my baby's breath and Queen Anne’s lace, then finish by inserting my wooden flowers around where I thought things looked patchy. For my cups without peonies, I divided all the leftover silk flowers clumps between the two cups to put in first, then just like the other finished them with the wooden flowers, their sturdiness made the silks naturally nestle around them and they were much easier to stick in without being as delicate as the plastic stems.

And just like that you have adorable vintage tea cup centerpieces to grace your next party, wedding, or high tea! These little beauties did an excellent job for my party and now are continuing to be beautiful arrangements that are displayed in my china cabinet in the spring and stored safely for the rest of the seasons, keep your eye out for them at my future tea parties!
SEE OUR RELATED POSTS HERE:


OUR MOST RECENT BLOG POSTS:


OUR PINS FOR THIS POST:

Calling all Aires, Pisces, and every sign in between! I think astrology is super fun, which any of my guests who attended my Zodiac Summer’s Eve Party can attest, and I love to make fun zodiac themed gifts for my favorite friends that love it too! For those who don’t have the time or astrological inspiration to make their gifts, this guide is for you!