Monogram Canvas Tote Bags

This post contains affiliate links, meaning that if you click on a link I will recieve a small comission. This costs you nothing extra and I only promote products I use and love! You can read our full disclosure here

DIY Monogram Bridal Canvas Tote Bags #diywedding #cricutprojects #monogram

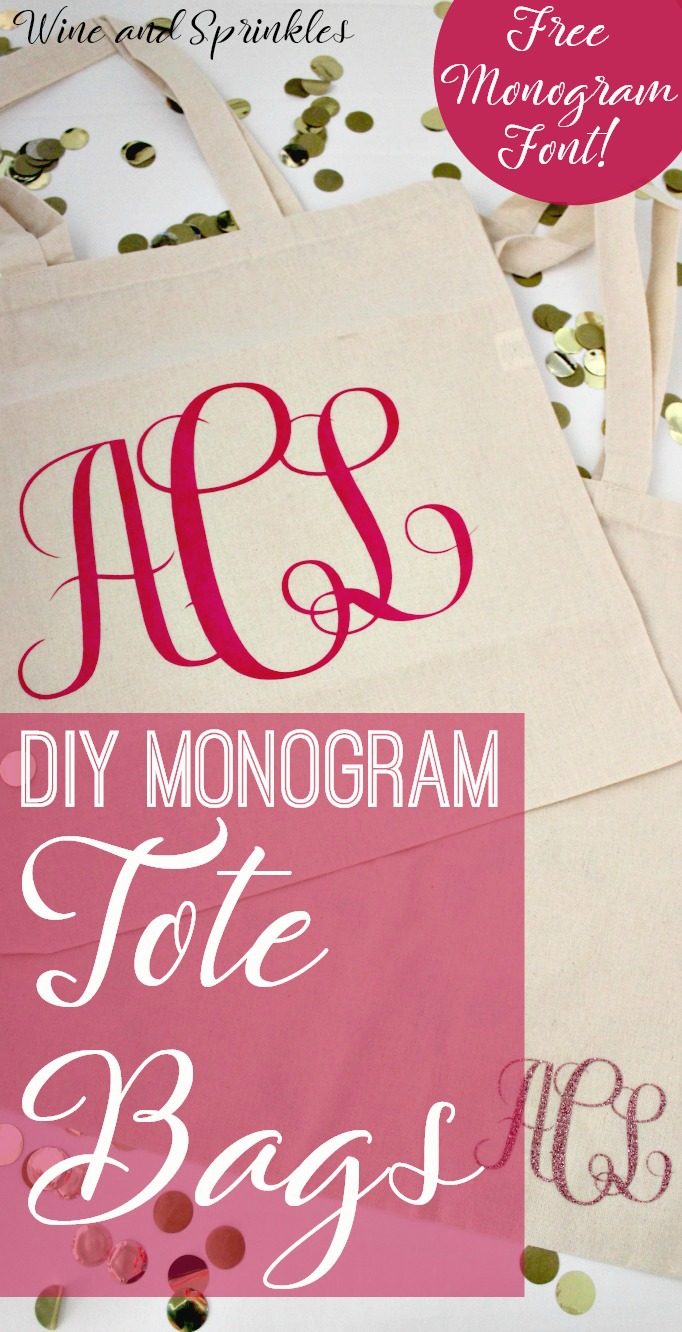
If there is one thing I adore on Etsy its all the monogrammed swag you can buy for yourself and your maids for your wedding! I love monogrammed items, but have always been nervous to try it myself because I assumed it would be difficult. Luckily, that was not the case! :)

DIY Monogram Bridal Canvas Tote Bags #diywedding #cricutprojects #monogram

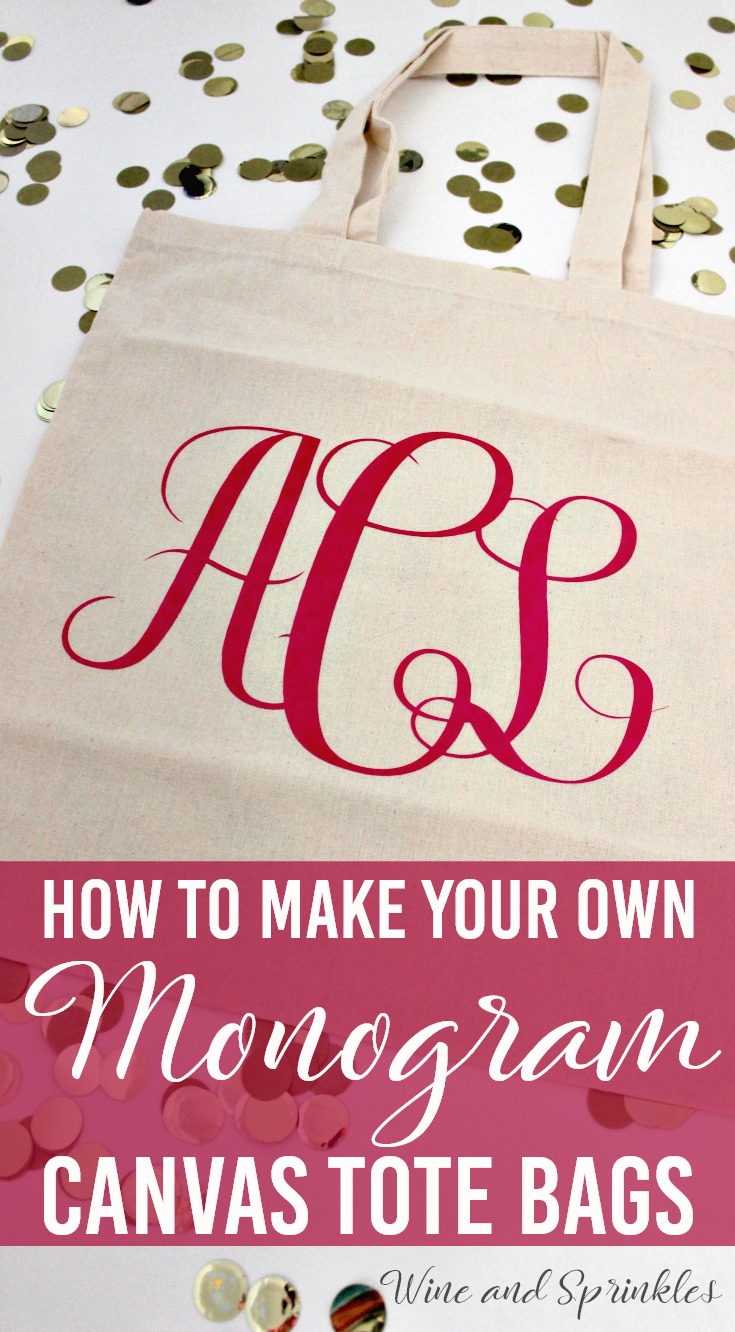
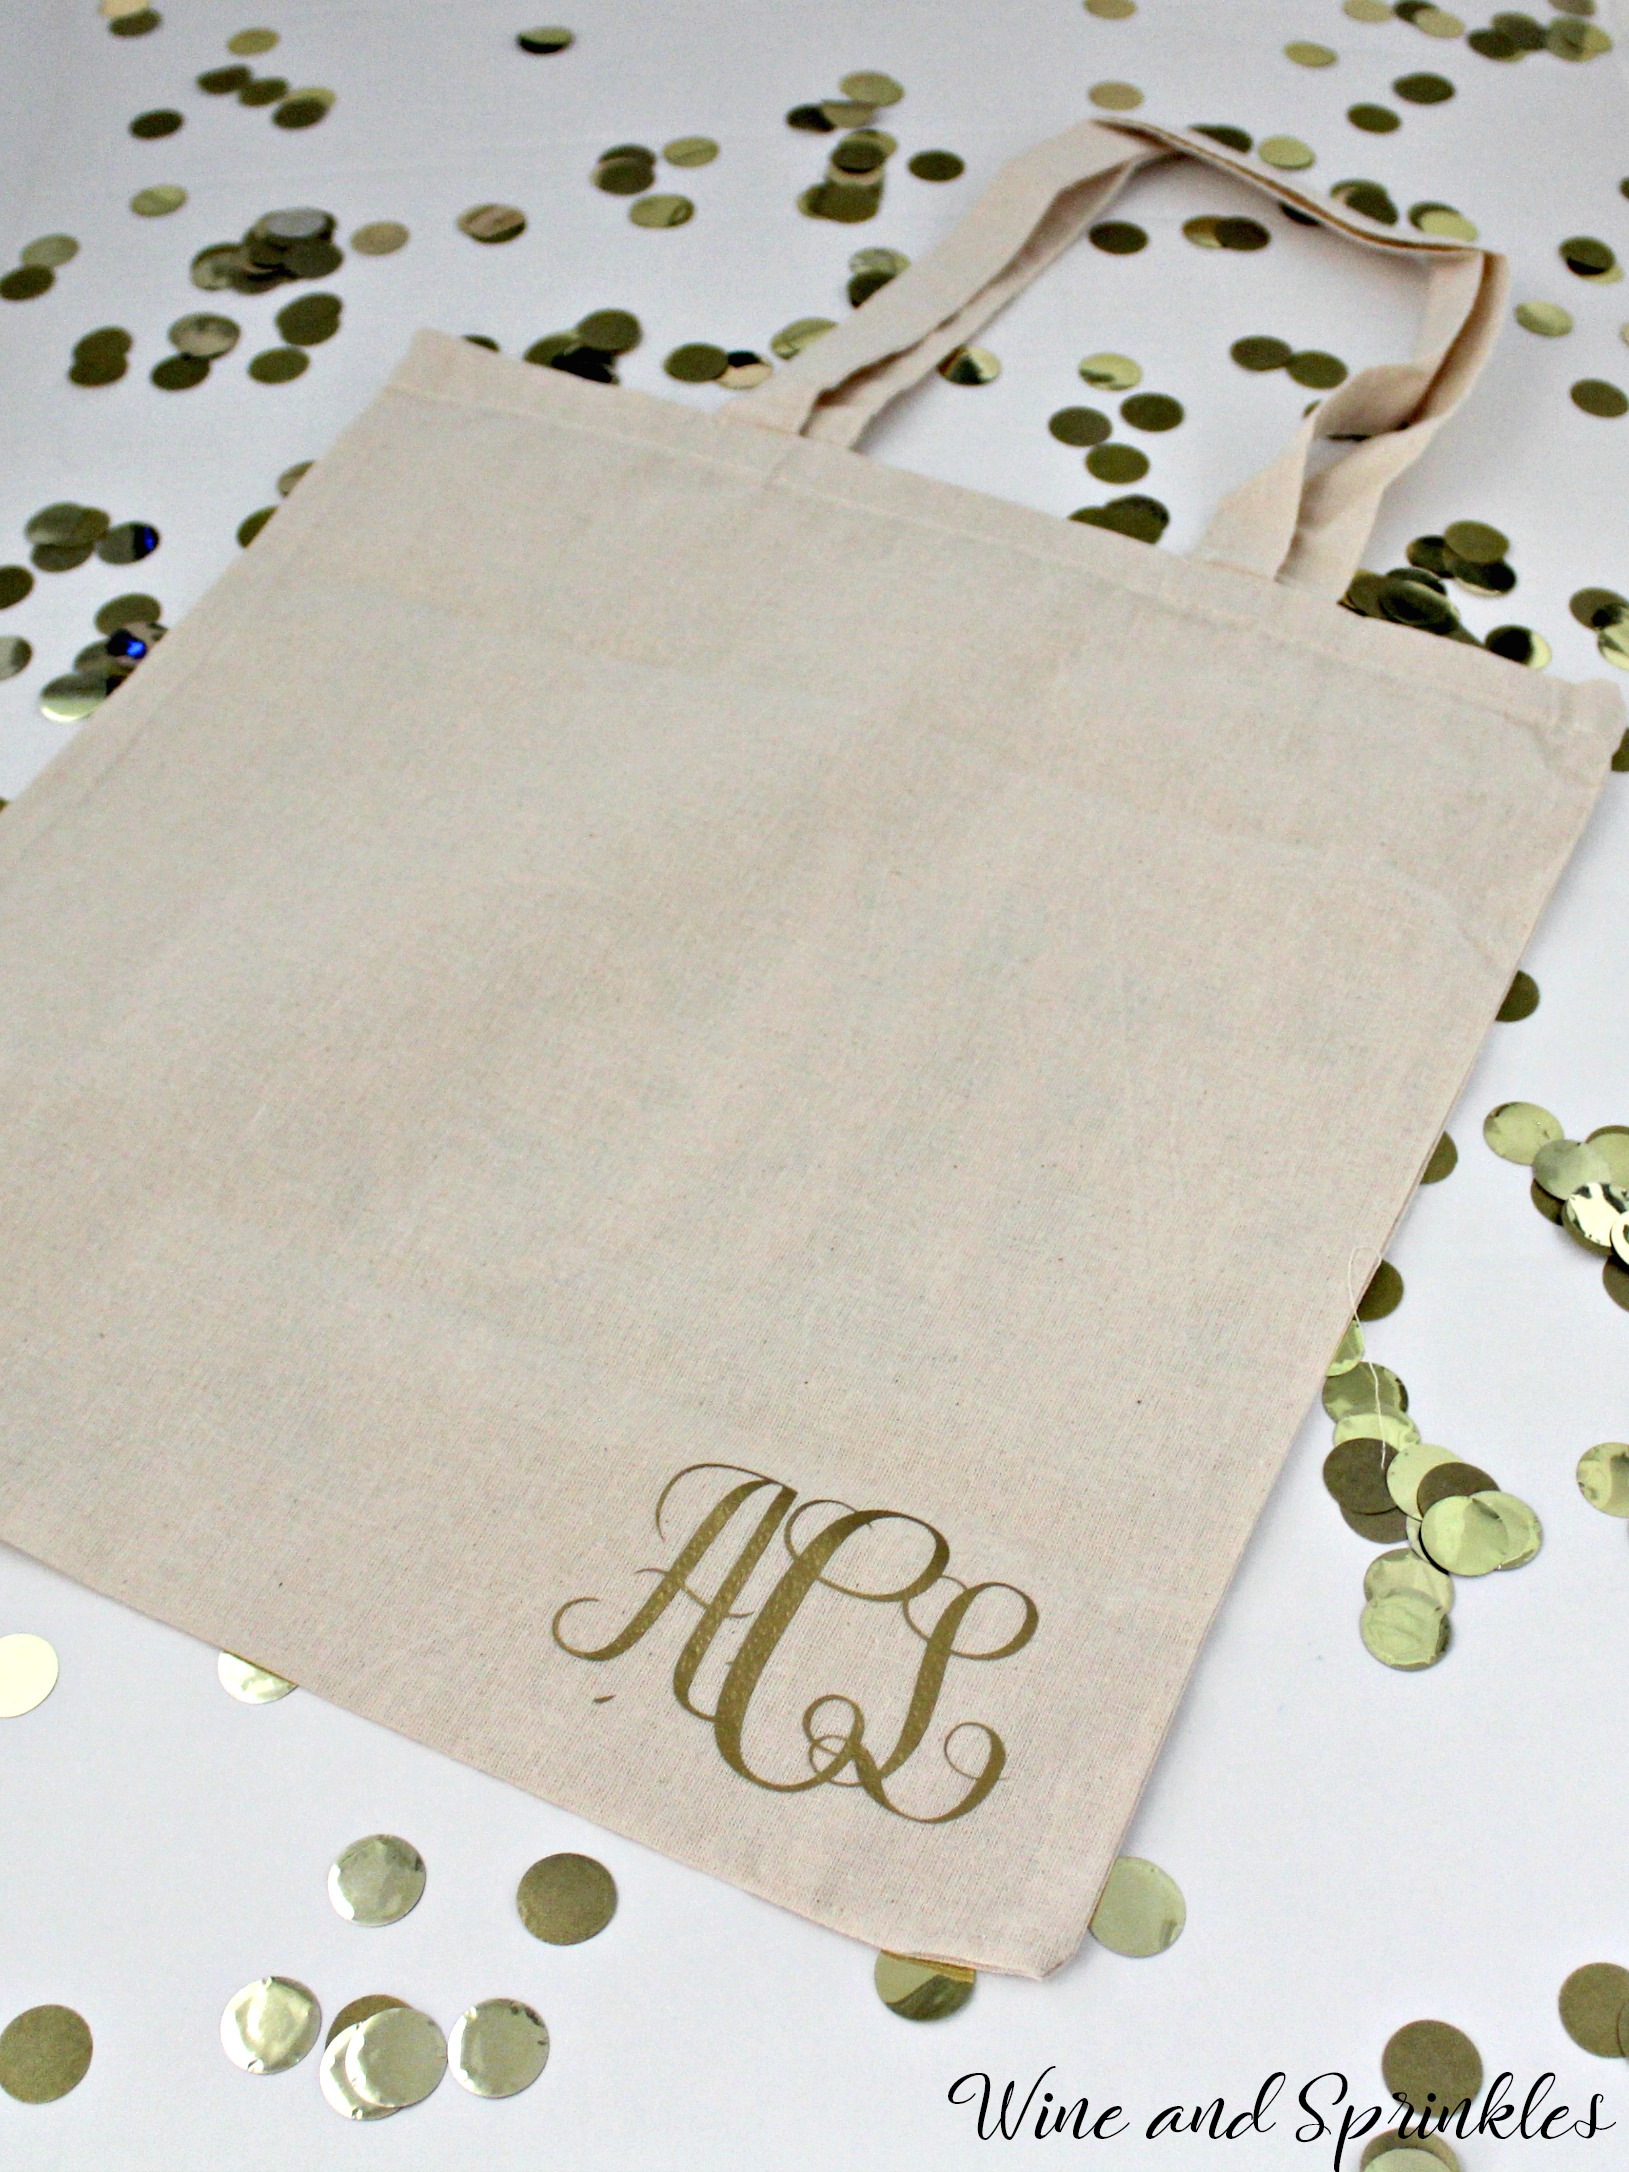
I ended up finding a free monogram font (that I reference below) and it took all of 15 minutes of playing around with the software for my Cricut to easily make oodles of monograms, so I started with tote bags! Tote bags, especially canvas ones like these, are great for your wedding party for a beach or destination wedding where your maids will want a beach bag to throw their things in. :)

DIY Monogram Bridal Canvas Tote Bags #diywedding #cricutprojects #monogram

In this tutorial, I’ll go step by step to show you how to make monograms in your Cricut software for tote bags of your own or whatever else you want to monogram! :)

Supplies:
Blank Tote Bags
Easyweed Heat Transfer Vinyl or Glitter Heat Transfer Vinyl
Craft Cutter and Tool set
Adhesive Mat
Iron and Ironing Mat

Designing Your Monogram:

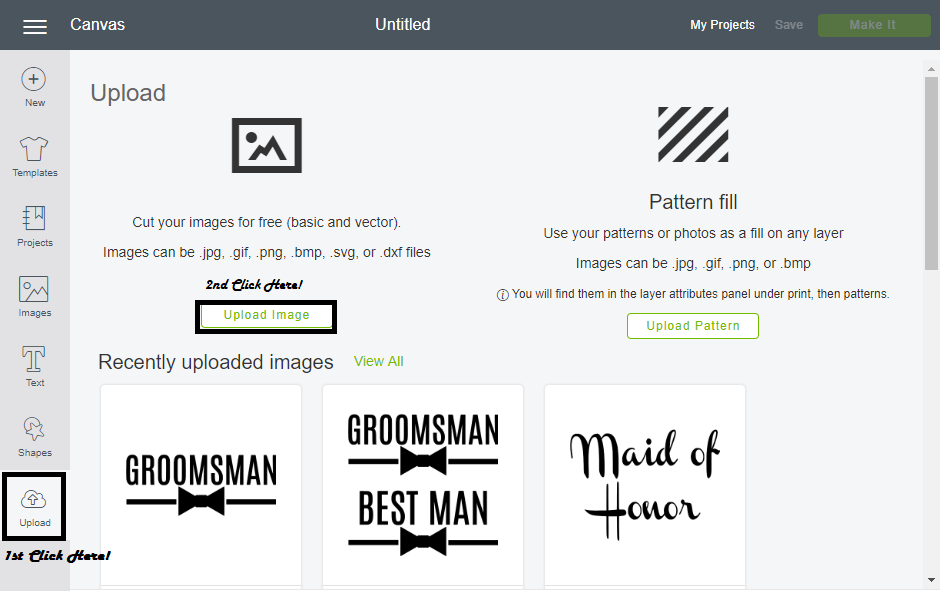
1. First, if you don't already own a Monogram style font, download one. The font I used is called Free Monogram Font from DaFont.com and it worked perfectly for what I wanted, and as the name implies its totally free!

2. Now, open a new project in your Cricut design software and create a text box. Select the Monogram font from your font choices and use it to type the initials for your monogram.

DIY Monogram Bridal Canvas Tote Bags #diywedding #cricutprojects #monogram

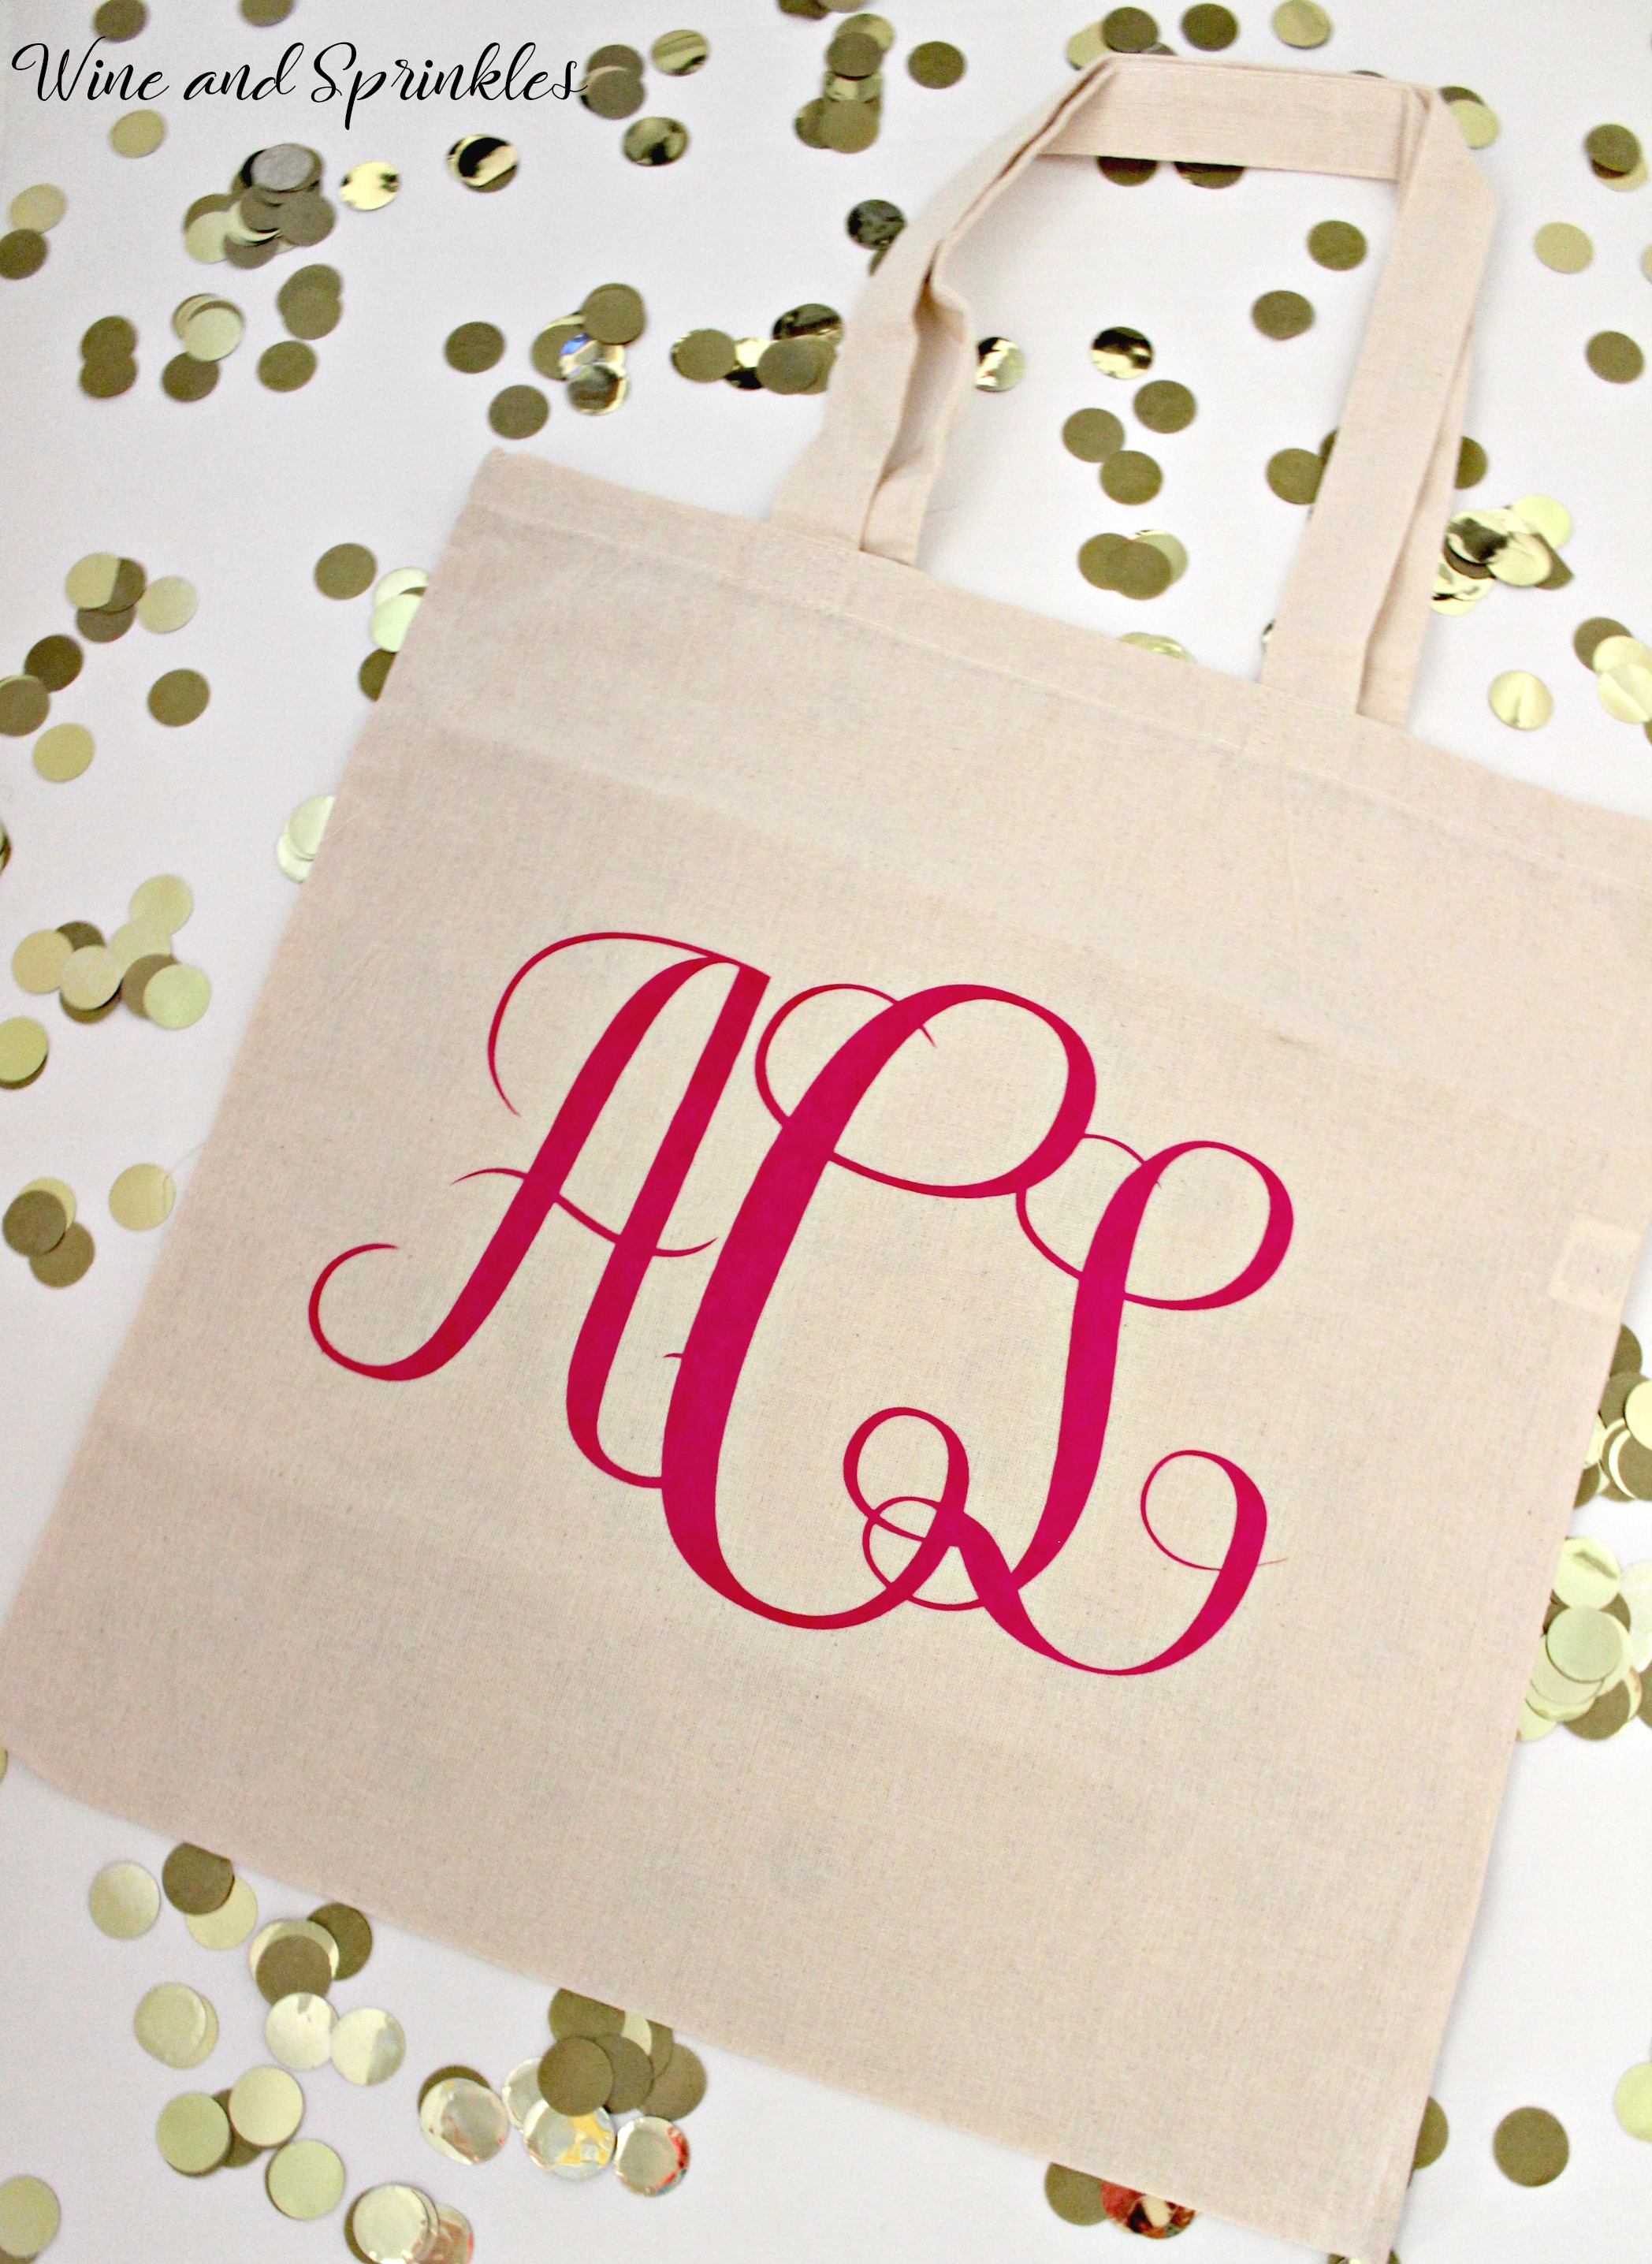
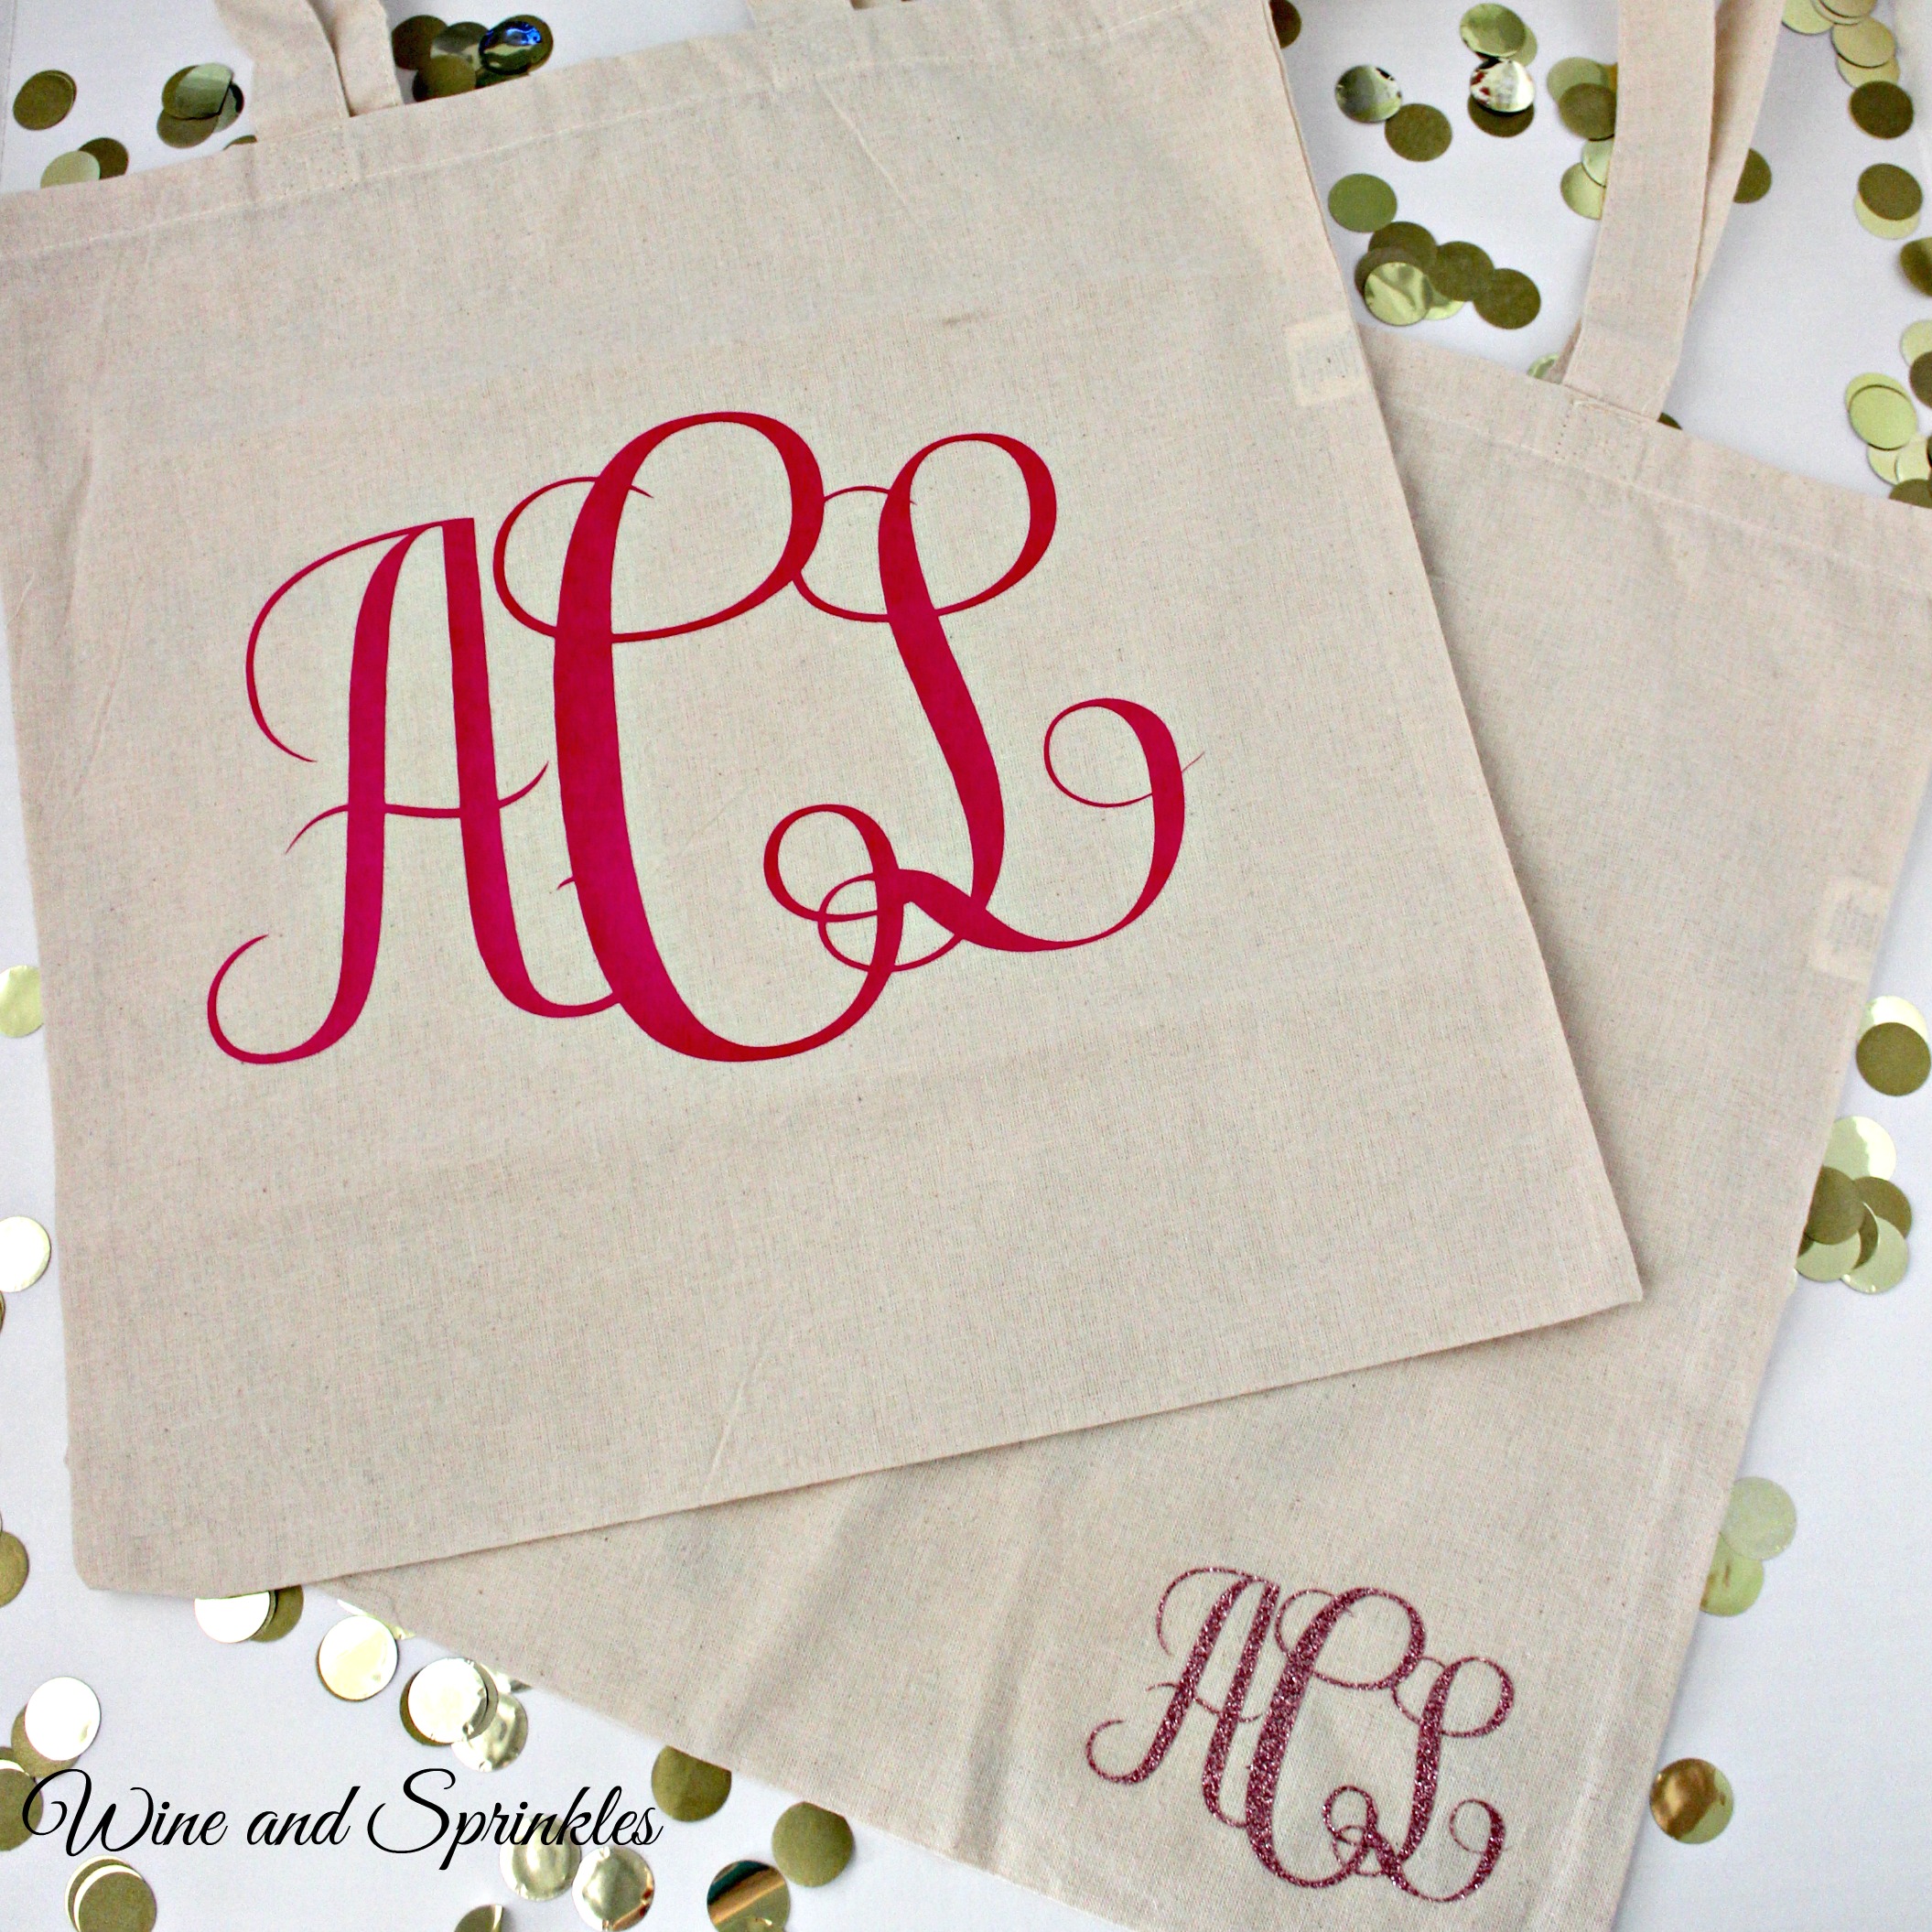
3. If you are using the font I mentioned, for smaller side letters you use lower case letters and for the center letter you use uppercase letters. For example, my initials on the monogram shown are typed in as "aCl" .

DIY Monogram Bridal Canvas Tote Bags #diywedding #cricutprojects #monogram

4. Next, overlap your letters by changing the letter spacing of your font. I chose -2 for the spacing of my letters but it is better to mess with it a little bit to find out what looks best to you.

DIY Monogram Bridal Canvas Tote Bags #diywedding #cricutprojects #monogram

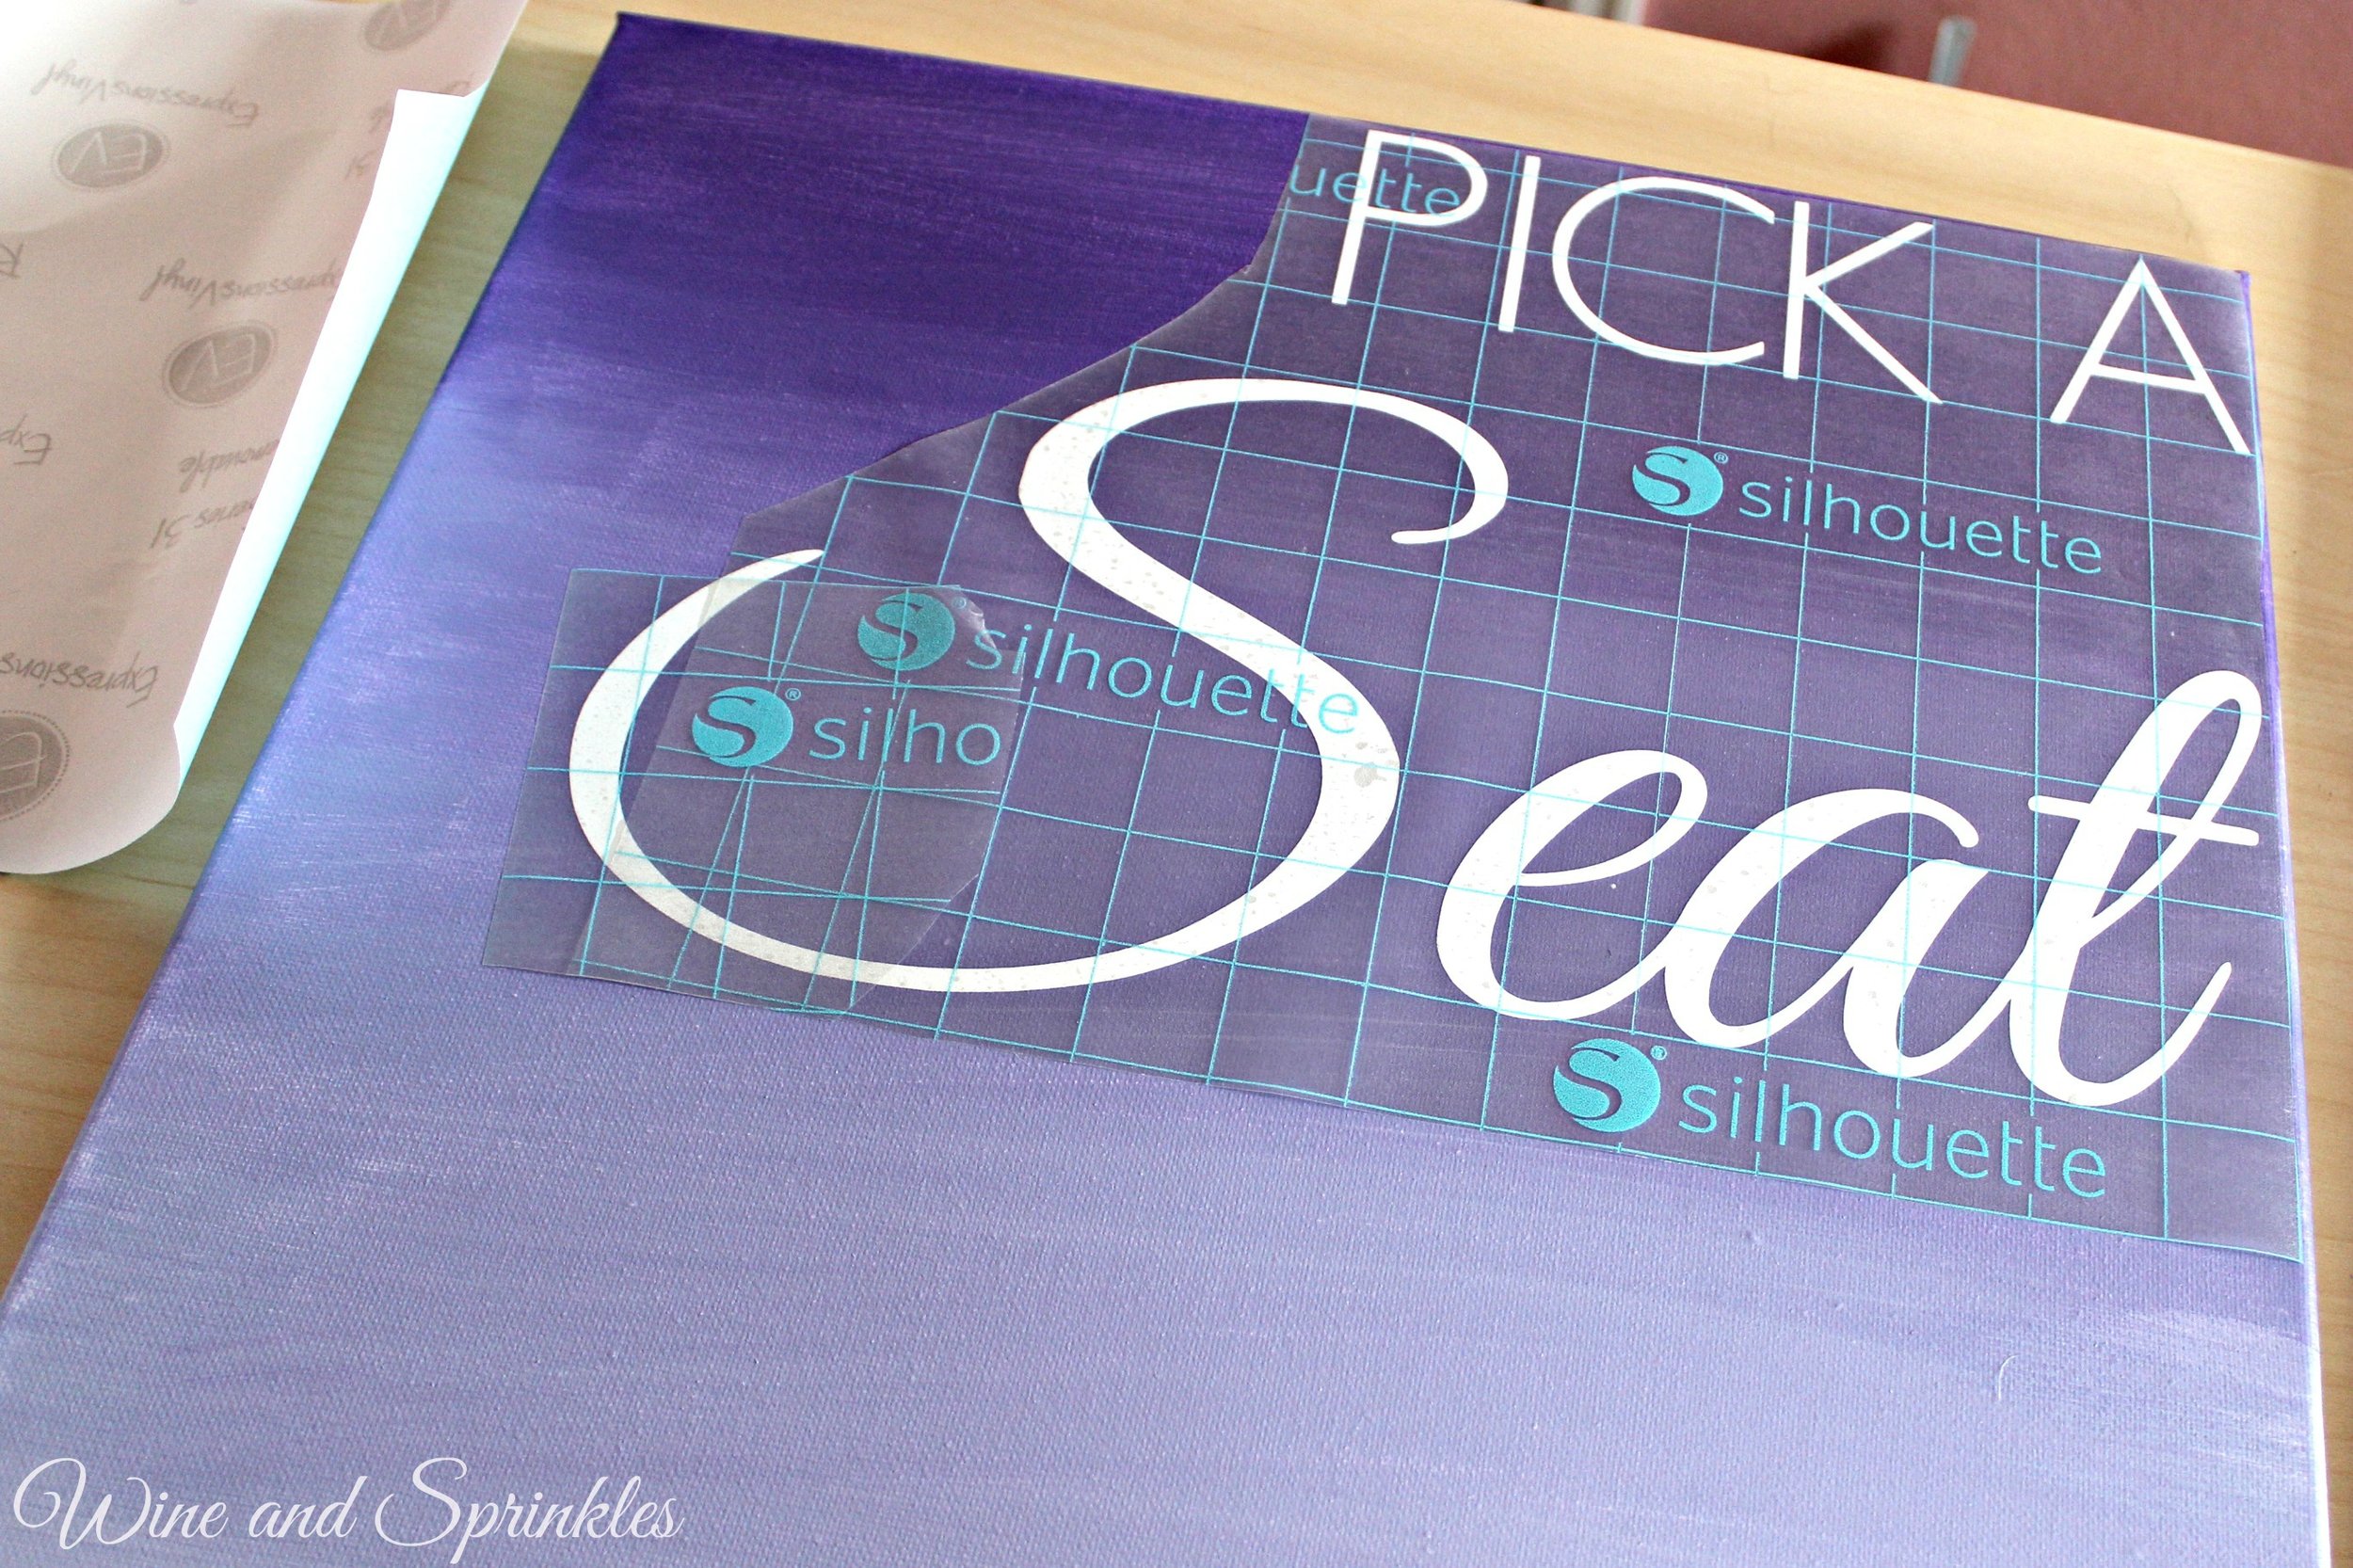
5. Once all your letters are spaced to your satisfaction, select the "Weld" tool to combine your letters into a single set of cutting curves. 

DIY Monogram Bridal Canvas Tote Bags #diywedding #cricutprojects #monogram

6. Now,  you can size your monogram to whatever size you like best. For the small monograms, I made them 3" wide and for the large monograms, I made them 10.5" wide.

DIY Monogram Bridal Canvas Tote Bags #diywedding #cricutprojects #monogram

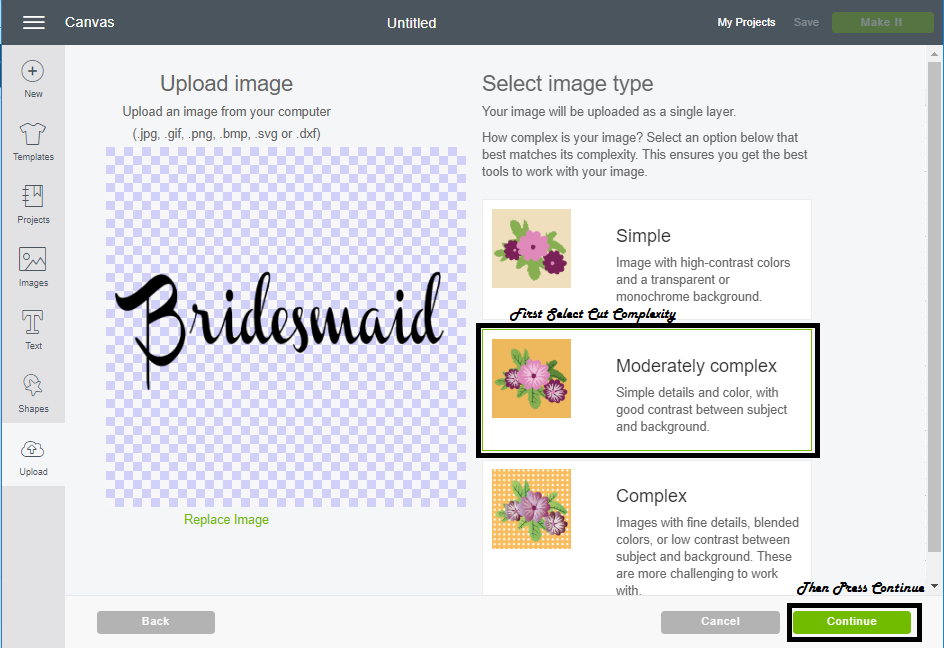
7. Finally, cut the monograms on your choice of vinyl. I used the Iron On+ setting for Glitter HTV and the Standard Iron On Setting for regular Easyweed Vinyl. Make sure that you select the "Mirror" Function and load your Iron On material Shiny side down so that your design cuts correctly! :)

DIY Monogram Bridal Canvas Tote Bags #diywedding #cricutprojects #monogram

Transferring your Design

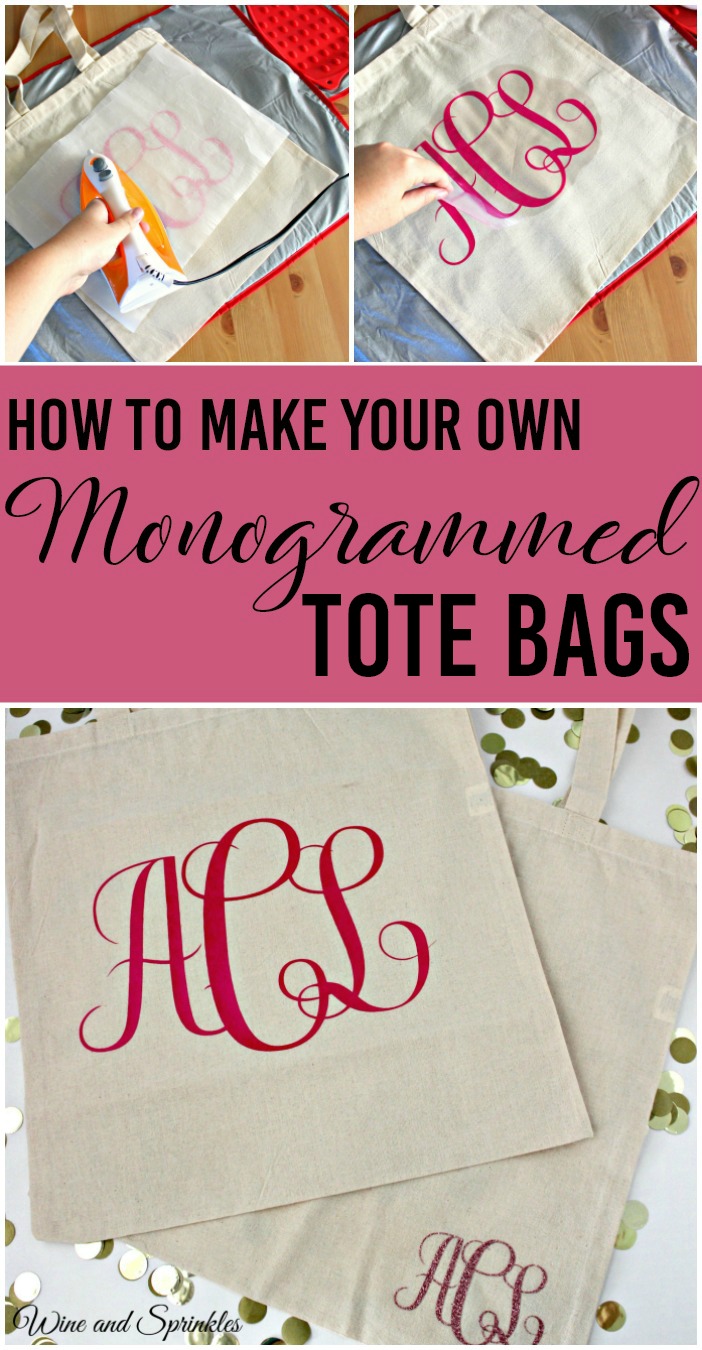
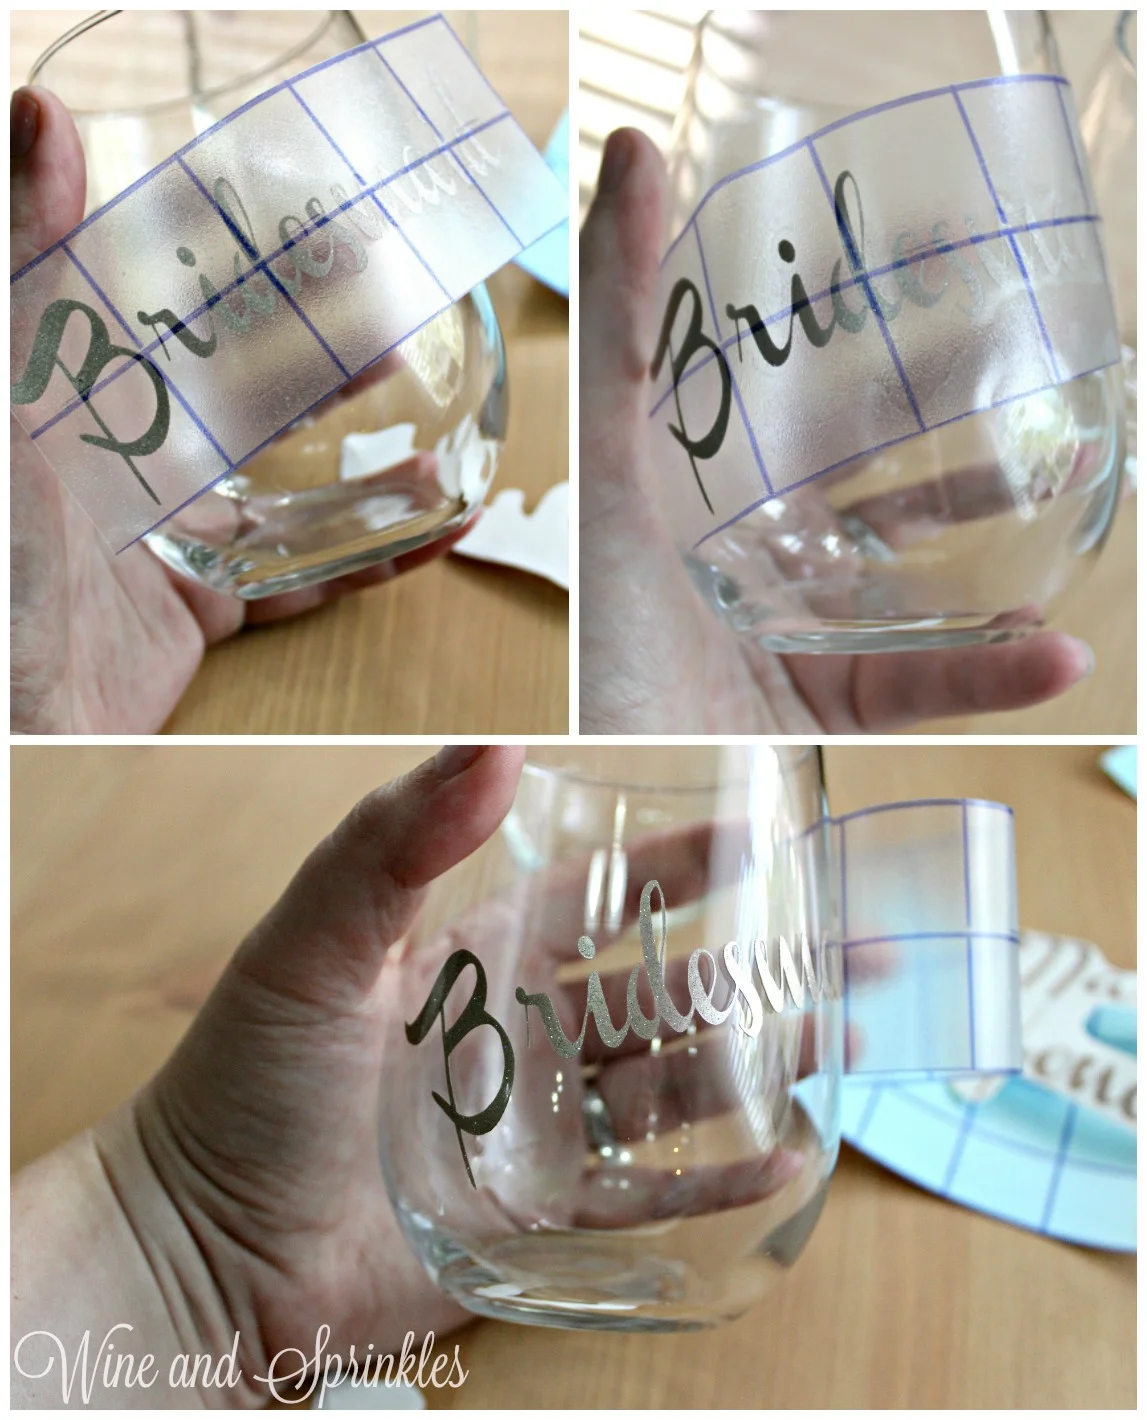
8. Once your design is cut, weed away the extra material, leaving only your monogram.

DIY Monogram Bridal Canvas Tote Bags #diywedding #cricutprojects #monogram

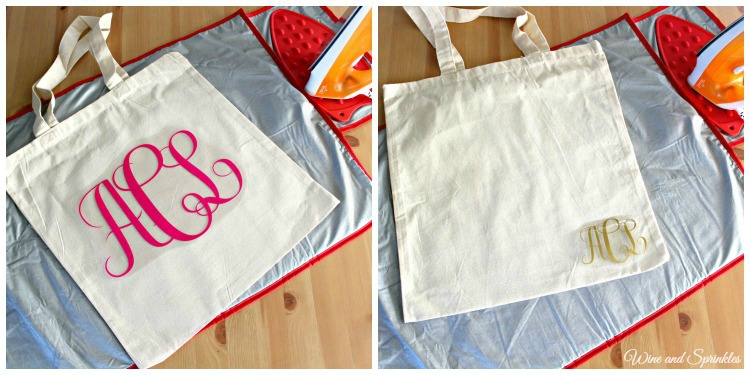
9. Iron your Tote Bag to remove any creases, then arrange the Monogram where you want to transfer it on your tote. For large monograms I put it in the middle and for smaller monograms I preferred the lower right corner. Arrange the design shiny side up, then cover with parchment paper. Make sure to keep the parchment paper between the design and the iron.

DIY Monogram Bridal Canvas Tote Bags #diywedding #cricutprojects #monogram

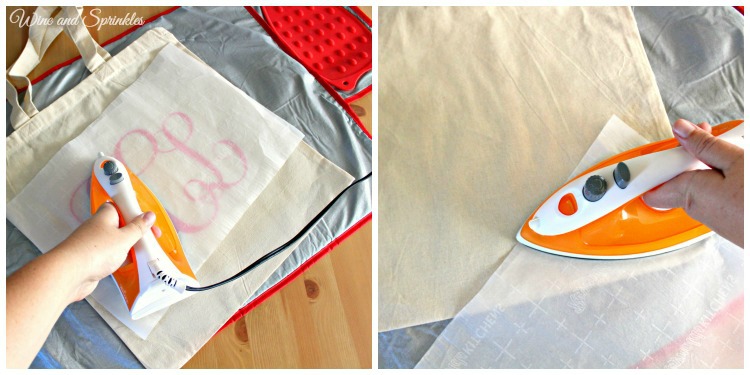
10. Set your Iron to the second Highest setting and press the the iron down firmly on the design, not ironing but rather using it as a small heat press. I worked from the upper left to lower right on the design, pressing the iron on each part of the design for at least 30 seconds, then overlapping the last position as you move the iron across the design.

DIY Monogram Bridal Canvas Tote Bags #diywedding #cricutprojects #monogram

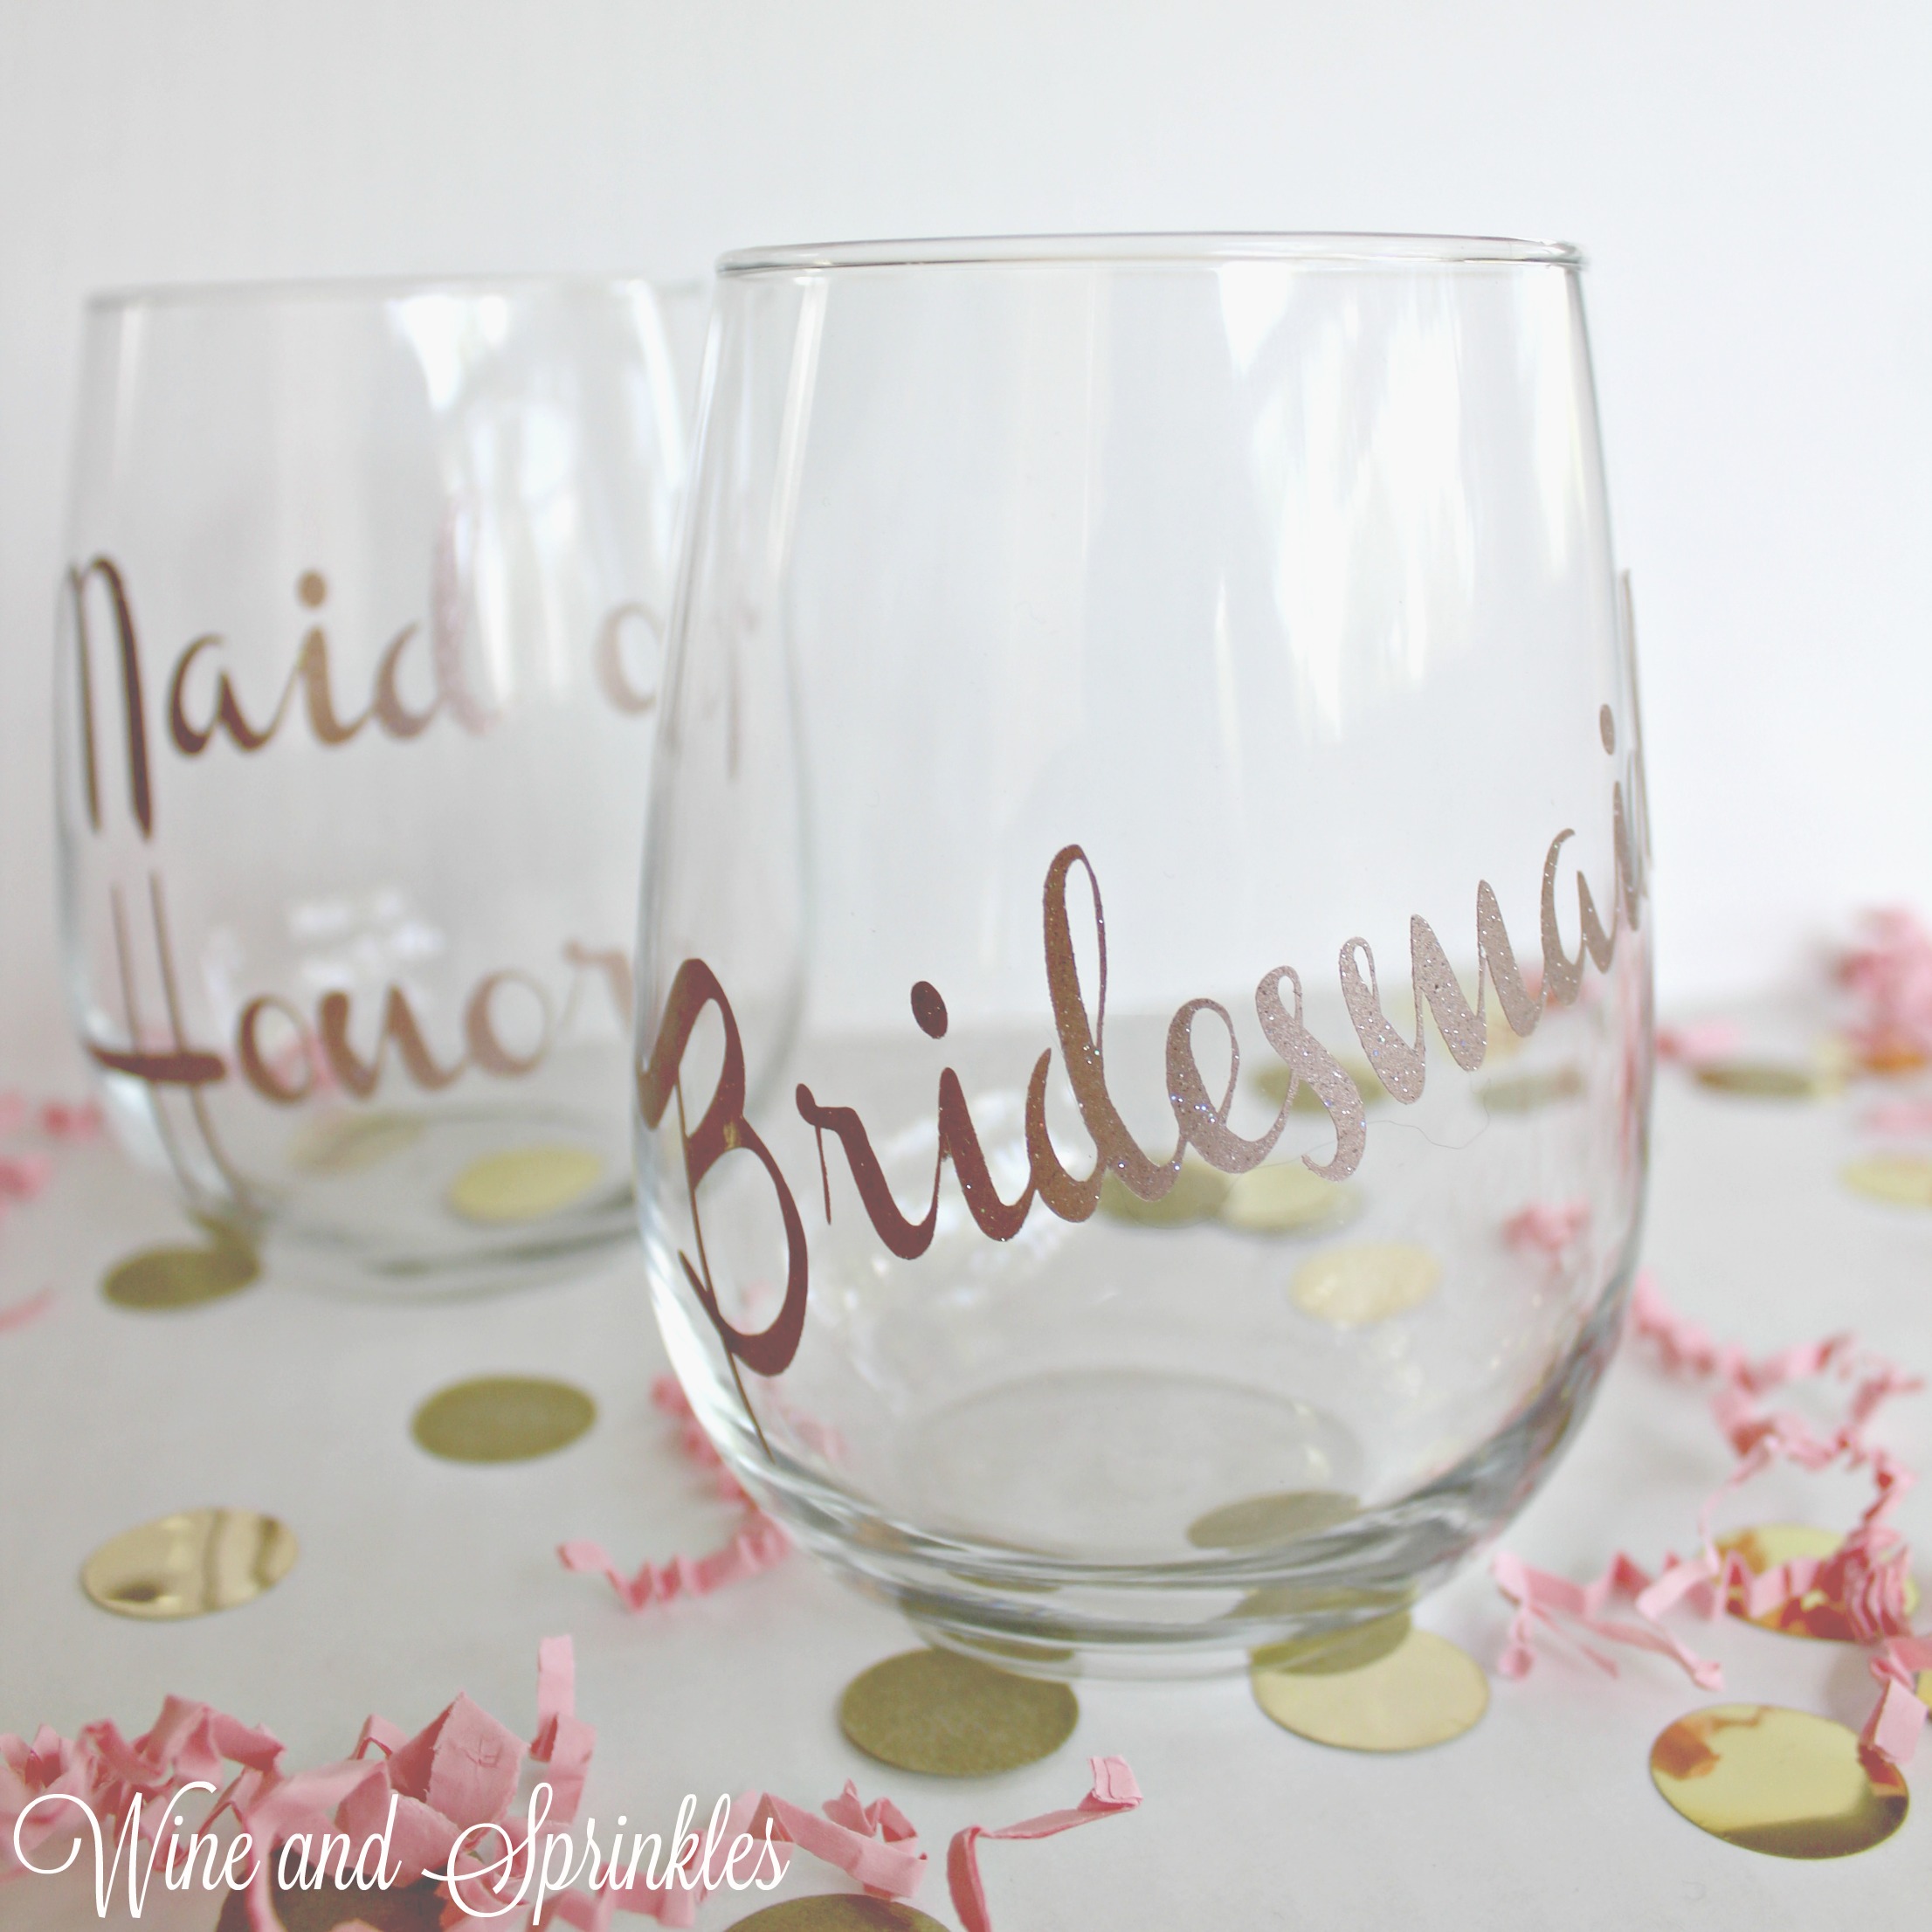
11. Remove the backing from the design, leaving the Monogram on the Tote Bag. Repeat with all the remaining Totes.

DIY Monogram Bridal Canvas Tote Bags #diywedding #cricutprojects #monogram

I was very pleasantly surprised with how easy these were to make and now have several other monogram projects in the wings to show bunches of different monogrammed projects! :) What are your favorite monogrammed items?

DIY Monogram Bridal Canvas Tote Bags #diywedding #cricutprojects #monogram

Wreath Wine Bottle Table Numbers

This post contains affiliate links, meaning that if you click on a link I will recieve a small comission. This costs you nothing extra and I only promote products I use and love! You can read our full disclosure here

DIY Wreath Wine Bottle Table Numbers #diywedding #cricutprojects #tablenumbers #winebottlecrafts

Wine bottle centerpieces are always a cost effective choice for the wine loving bride with bottles to spare, so I decided to spruce up the table numbers for such a centerpiece with some vinyl decals. They can be put on the bottles beforehand to designate your wedding tables and are a super easy project for your Cricut, literally load, cut, weed and stick.

DIY Wreath Wine Bottle Table Numbers #diywedding #cricutprojects #tablenumbers #winebottlecrafts

While I’ve made Wine Bottle Table numbers before, I couldn’t help thinking of some other design ideas over the last several months and so I decided to return to them and make a couple options so that you can better personalize your wine bottle centerpieces depending on your style. This first set is a fairly simply script set surrounded by a simple vine and leaf “wreath,” perfect for most wedding with natural elements.

DIY Wreath Wine Bottle Table Numbers #diywedding #cricutprojects #tablenumbers #winebottlecrafts

You will notice in the cut file downloads that there are both full sheets for groups of the table numbers and individual table numbers. Both types of files will be the same size of table number when cut so you can use either interchangeably. It is worth noting that, since the circling vine is thin, sometimes weeding these designs require a little care and extra attention. I did not have to redo any, but in case you have a problem, you can easily upload the single table number file to replace any table number casualties.

Supplies:
Empty Wine Bottles
Permanent Adhesive Vinyl
Transfer Tape
Craft Cutter and Tool Set
Adhesive Mat
Table Number Design Cut Files

1. First, soak your wine bottles in hot, soapy water to remove the labels and adhesive. I found it easiest to soak them for about 5 minutes, remove what l could, then once the label was completely removed clean up the last bits of adhesive with steel wool. :)

2. After downloading the cut files, import them into the Cricut Software. After creating a new project, select Upload Image. Select the file you wish to upload and it will automatically take you to the final upload screen, where you can name the file the select Save.  

3. Cut the design(s) in your choice of permanent adhesive vinyl with the Vinyl Setting on your Cricut. The SVG Files are sized so that they will automatically cut to the size you see in the photos, but if you want to change the size you can do so to fit the wine bottles the way you like.

DIY Wreath Wine Bottle Table Numbers #diywedding #cricutprojects #tablenumbers #winebottlecrafts

4. Once the designs are cut, weed away the extra vinyl and cut a piece of transfer taper to 4" x 4.5". Cut away any excess backing and smooth transfer tape over the design, aligning it so that “Table” is aligned to the transfer tape grid 2” from the top of the transfer tape (4 blocks down if you are using the Cricut 1/2” transfer tape), as shown below. Using the smoother tool, smooth the tape to the vinyl, removing any air bubbles. The transfer tape should overlap the backing of the design, so that you can stick the tape to an object with the backing still on the design.

DIY Wreath Wine Bottle Table Numbers #diywedding #cricutprojects #tablenumbers #winebottlecrafts

5. Now, transfer the design to your bottle. If you are comfortable centering the designs you can remove the tape from the backing and directly place the design on the wine bottle. If not, arrange the design to the bottle before removing the backing, sticking it with the overlapping transfer tape.  I aligned mine without the backing by lining up the bottom of the transfer tape with the bottom of the bottle without much trouble, as shown in the photos below. Smooth design onto the bottle, removing any air bubbles.

DIY Wreath Wine Bottle Table Numbers #diywedding #cricutprojects #tablenumbers #winebottlecrafts

6. Remove the transfer tape to leave the design on the wine bottle, then repeat the process for all your additional table numbers.

DIY Wreath Wine Bottle Table Numbers #diywedding #cricutprojects #tablenumbers #winebottlecrafts

This is a project that is super easy to do months in advance and the bottles can be easily stored together and set up the day of your wedding. :) Pick your favorite bottles to make into table numbers then simply gather other bottles and candles around them for a pretty and cheap centerpiece!

DIY Wreath Wine Bottle Table Numbers #diywedding #cricutprojects #tablenumbers #winebottlecrafts

Soon to be Drunk Bachelorette Flasks

This post contains affiliate links, meaning that if you click on a link I will recieve a small comission. This costs you nothing extra and I only promote products I use and love! You can read our full disclosure here

Free Cut Files! - DIY Soon to be Drunk Bachelorette Party Flasks #diybachelorette #bachelorette #cricutprojects

I love designing flasks for bachelorette parties, they are the perfect accessory for any group out on the town! Since I already had flasks from my previous projects, I decided to keep designing for them! :)

Free Cut Files! - DIY Soon to be Drunk Bachelorette Party Flasks #diybachelorette #bachelorette #cricutprojects

These flasks are a simple, cute design for any bar crawl or bachelorette party where booze is to be ingested (so pretty much all of them). Be careful when you are weeding the “Drunk” and “Mrs” middle bits, sometime they are a bit tricky.

Free Cut Files! - DIY Soon to be Drunk Bachelorette Party Flasks #diybachelorette #bachelorette #cricutprojects

1. After downloading the cut files, import them into the Cricut Software. After creating a new project, select Upload Image. Select the file you wish to upload and it will automatically take you to the final upload screen, where you can name the file the select Save. 

2. Cut the design(s) in your choice of permanent adhesive vinyl with the Vinyl Setting on your Cricut. The SVG Files are sized so that they will automatically cut to the size you see in the photos, but if you want to change the size you can do so.

Free Cut Files! - DIY Soon to be Drunk Bachelorette Party Flasks #diybachelorette #bachelorette #cricutprojects

3. Once the designs are cut, weed away the extra vinyl and cut a piece of transfer taper to 4" x 5". Cut away any excess backing from the vinyl design and smooth transfer tape over the design, aligning it to the “Soon” on each decal as shown below. Using the smoother tool, smooth the tape to the vinyl, removing any air bubbles.

Free Cut Files! - DIY Soon to be Drunk Bachelorette Party Flasks #diybachelorette #bachelorette #cricutprojects

4. Now, transfer the design to your flask. I arranged mine by the bottom of the transfer tape following the bottom of the flask with the design centered by placing the opening of the flask between the two “O’s” of the “Soon.”

Free Cut Files! - DIY Soon to be Drunk Bachelorette Party Flasks #diybachelorette #bachelorette #cricutprojects

5. Once your design is placed to your satisfaction, smooth the design onto the flask, once again using the smoother to remove any air bubbles.

Free Cut Files! - DIY Soon to be Drunk Bachelorette Party Flasks #diybachelorette #bachelorette #cricutprojects

6. Remove the transfer tape to leave the design on the flask, then repeat the process for all the additional flasks.

Free Cut Files! - DIY Soon to be Drunk Bachelorette Party Flasks #diybachelorette #bachelorette #cricutprojects

Just like the other flasks I’ve made, these were super simple and came out great! :) There will be plenty of future flasks, so check them out here!

Free Cut Files! - DIY Soon to be Drunk Bachelorette Party Flasks #diybachelorette #bachelorette #cricutprojects


DIY Bride Tribe Iron On Tank Tops

This post contains affiliate links, meaning that if you click on a link I will recieve a small comission. This costs you nothing extra and I only promote products I use and love! You can read our full disclosure here

DIY Iron on Bride Tribe Tank Tops #diywedding #cricutprojects #htv

These are the first bridal party tank tops I’ve designed and I love how then turned out! :) They can be easily given as bridesmaid invitations, bachelorette tank tops or even getting ready tank tops! I adore this design and it would work equally well on tote bags or tshirts.

DIY Iron on Bride Tribe Tank Tops #diywedding #cricutprojects #htv

While I’ve worked a good amount with adhesive vinyl, this was the first time I worked with HTV, and I was very nervous! Luckily there wasn’t much to be worried about. :) Other than making sure the design gets mirrored (which you do before cutting) the only other question was how to best “iron it on.” As it turns out, the best way is to use your iron as a mini heat press, pressing it to part of the design, then lifting it and pressing the next piece, until the design has all been heat pressed.

DIY Iron on Bride Tribe Tank Tops #diywedding #cricutprojects #htv

1. After downloading the cut files, import them into the Cricut Software. After creating a new project, select Upload Image. Select the file you wish to upload and it will automatically take you to the final upload screen, where you can name the file the select Save. The SVG Files are sized so that they will automatically cut to the size you see in the photos, but if you want to change the size you can do so to fit the tank tops the way you like.

2. After selecting “Make It” Make sure to select the Mirror Mode on the cutting screen. Cut the design(s) in your choice of heat transfer vinyl (I used Gold Confetti Glitter HTV) with the Iron On (for Easyweed Vinyl) or Iron On+ (for Glitter Vinyl) Setting on your Cricut, with the shiny side of the material down.

3. Weed the additional material off of the backing material so that, looking down with the shiny side up, you can see your design with the correct orientation.

DIY Iron on Bride Tribe Tank Tops #diywedding #cricutprojects #htv


4. Iron your tank top to remove any creases, then center the design over the top half of the tank top. Arrange the design shiny side up, then cover with parchment paper. Make sure to keep the parchment paper between the design and the iron.

DIY Iron on Bride Tribe Tank Tops #diywedding #cricutprojects #htv

5. Set your Iron to the second Highest setting and press the the iron down firmly on the design, not ironing but rather using it as a small heat press. I worked from the upper left to lower right on the design, pressing the iron on each part of the design for at least 30 seconds, then overlapping the last position as you move the iron across the design.

DIY Iron on Bride Tribe Tank Tops #diywedding #cricutprojects #htv

6. Remove the backing from the design, leaving the design on the tank top. Repeat with all the remaining tank tops.

DIY Iron on Bride Tribe Tank Tops #diywedding #cricutprojects #htv


DIY Heart Bridesmaid Flasks

This post contains affiliate links, meaning that if you click on a link I will recieve a small comission. This costs you nothing extra and I only promote products I use and love! You can read our full disclosure here

How to DIY your own Bridesmaid Wedding Flasks with Free Cut Files! #cricut #diywedding #flasks #bridesmaid

With all the fun I had making the Groomsman Mustache Flasks, I couldn't leave the Bridesmaids out of the shinanigans! These Heart flasks are a simple and understated way to invite your bridesmaids to your wedding party or to use as a bachelorette favor or wedding gift! And of course I included one for the Bride so that all the wedding ladies can celebrate together!

How to DIY your own Bridesmaid Wedding Flasks with Free Cut Files! #cricut #diywedding #flasks #bridesmaid

The only difficult part of this project is to make sure some of the smaller pieces of vinyl don't get removed while weeding the letters from the heart (like the middle of the "e's" and "d's") so take your time on weeding the design and cut a couple extras if you are nervous! :)

How to DIY your own Bridesmaid Wedding Flasks with Free Cut Files! #cricut #diywedding #flasks #bridesmaid

1. After downloading the cut files, import them into the Cricut Software. After creating a new project, select Upload Image. Select the file you wish to upload and it will automatically take you to the final upload screen, where you can name the file the select Save.  

2. Cut the design(s) in your choice of permanent adhesive vinyl with the Vinyl Setting on your Cricut. The SVG Files are sized so that they will automatically cut to the size you see in the photos, but if you want to change the size you can do so to fit the flask the way you like.

How to DIY your own Bridesmaid Wedding Flasks with Free Cut Files! #cricut #diywedding #flasks #bridesmaid

3. Once the designs are cut, weed away the extra vinyl and cut a piece of transfer taper to 4" x 3.5". I recommend using a transfer tape with 1/2" gridlines such as the Cricut brand tape as it makes it much easier to precisely transfer to the flasks. Cut away any excess backing and smooth transfer tape over the design, aligning it so that the  middle on the long side of your transfer tape is centered along the middle of the heart, with the bottom of the heart at the bottom of the transfer tape, as shown below. Using the smoother tool, smooth the tape to the vinyl, removing any air bubbles. The transfer tape should overlap the backing of the design, so that you can stick the tape to an object with the backing still on the design.

How to DIY your own Bridesmaid Wedding Flasks with Free Cut Files! #cricut #diywedding #flasks #bridesmaid

4. Now, transfer the design to your flask. If you are comfortable centering the designs you can remove the tape from the backing and directly place the design on the flask. If not, arrange the design to be centered on the flask before removing the backing, sticking it with the overlapping transfer tape.  I aligned mine such that the middle of each heart was centered on the top cap of the flask and the top of the transfer tape ran along the top edge of the flask, as shown in the photos below.

How to DIY your own Bridesmaid Wedding Flasks with Free Cut Files! #cricut #diywedding #flasks #bridesmaid

5. Once your design is placed to your satisfaction, carefully peel the tape off the backing, transferring the vinyl to the transfer tape while not unsticking it from the flask. Remove the backing then smooth the design onto the flask, once again using the smoother to remove any air bubbles.

How to DIY your own Bridesmaid Wedding Flasks with Free Cut Files! #cricut #diywedding #flasks #bridesmaid

6. Remove the transfer taper to leave the design on the flask, then repeat the process for all the additional flasks.

How to DIY your own Bridesmaid Wedding Flasks with Free Cut Files! #cricut #diywedding #flasks #bridesmaid


DIY Groomsman Mustache Flasks

This post contains affiliate links, meaning that if you click on a link I will recieve a small comission. This costs you nothing extra and I only promote products I use and love! You can read our full disclosure here

DIY Groomsman Mustache Flasks #groomsman #diywedding #flasks #cricut

Whether they are used as Groomsman Proposals, Bachleor Party Favors, or even Groomsman Gifts, giving flasks to Groomsmen is always a fun gift for them to recieve! I remembered a set I saw once on Pinterest that were a collection of mustaches and was determined to make a set for myself!

DIY Groomsman Mustache Flasks #groomsman #diywedding #flasks #cricut

I absolutely love the way they turned out and all the different styles of mustaches that I designed! Below you can find the cut files for all the different flasks as well a one for the Groom so he isn't left out of the fun! :) Each file can be uploaded individually so you can either have all your groomsmen flasks match with the same 'stache or pick which one you think fits each of your boys best!

DIY Groomsman Mustache Flasks #groomsman #diywedding #flasks #cricut

1. After downloading the cut files, import them into the Cricut Software. After creating a new project, select Upload Image. Select the file you wish to upload and it will automatically take you to the final upload screen, where you can name the file the select Save. 

DIY Groomsman Mustache Flasks #groomsman #diywedding #flasks #cricut

2. Cut the design(s) in your choice of permanent adhesive vinyl with the Vinyl Setting on your Cricut. The SVG Files are sized so that they will automatically cut to the size you see in the photos, but if you want to change the size you can do so to fit the flask the way you like.

DIY Groomsman Mustache Flasks #groomsman #diywedding #flasks #cricut

3. Once the designs are cut, weed away the extra vinyl and cut a piece of transfer tape to 4" x 5". I recommend using a transfer tape with 1/2" gridlines such as the Cricut brand tape as it makes it much easier to precisely transfer to the flasks. Cut away any excess backing and smooth transfer tape over the design, aligning it along the bottom of the Groomsman text, with one row of the 1/2" blocks below it. I also tried to align mine with one of the vertical lines centering in the middle of the mustache, but it is more important to get the text straight. :) Using the smoother tool, smooth the tape to the vinyl, removing any air bubbles. The transfer tape should overlap the backing of the design, so that you can stick the tape to an object with the backing still on the design.

DIY Groomsman Mustache Flasks #groomsman #diywedding #flasks #cricut

4. Now, transfer the design to your flask. If you are comfortable centering the designs you can remove the tape from the backing and directly place the design on the flask. If not, arrange the design to be centered on the flask before removing the backing, sticking it with the overlapping transfer tape. I aligned mine such that the middle of each mustache was centered on the top cap of the flask and the top of the transfer tape ran along the top edge of teh flask, as shown in the photos below.

DIY Groomsman Mustache Flasks #groomsman #diywedding #flasks #cricut

5. Once your design is placed to your satisfaction, carefully peel the tape off the backing, transferring the vinyl to the transfer tape while not unsticking it from the flask. Remove the backing then smooth the design onto the flask, once again using the smoother to remove any air bubbles.

DIY Groomsman Mustache Flasks #groomsman #diywedding #flasks #cricut

6. Remove the transfer taper to leave the design on the flask, then repeat the process for all the additional flasks.

DIY Groomsman Mustache Flasks #groomsman #diywedding #flasks #cricut

Once they are all completed, they can be easily wrapped back up in their original boxes or paired with a card or your Groomsmen's spirit of choice! :)

DIY Groomsman Mustache Flasks #groomsman #diywedding #flasks #cricut
DIY Groomsman Mustache Flasks with free cut files #groomsman #diywedding #flasks #cricut


Fun and Unique Save the Dates for a Beach Wedding

Fun and Unique Save the Dates for a Beach Wedding

If there is a kind of wedding that is most necessary for sending a save the date, it would have to be a destination wedding. Guests need time to make their vacation plans and get time off and it never hurts to build some excitement for your wedding day. I also adore that with destination weddings, there are so many fun options for save the dates! From the more traditional save the dates to luggage tags, here are some of my favorite, unique ways to invite your guests to your wedding!

Read More

DIY Groomsman Humidors

This post contains affiliate links, meaning that if you click on a link I will recieve a small comission. This costs you nothing extra and I only promote products I use and love! You can read our full disclosure here

DIY Groomsman Humidor #groomsman #bestman #groomsmangifts

I absolutely love the idea of giving humidors as Groomsman Gifts or even as Groomsman Proposals if you have the budget for it! When I was getting married, I ended up hand etching all of my boys' humidors with their names and a mountain range, but vinyl is a far quicker way to create a beautiful gift for all your groom's best guys for your wedding day.

DIY Groomsman Humidor #groomsman #bestman #groomsmangifts

For these groomsman and best man humidors, I went with a simple bow tie design to leave plenty of space for viewing cigars, but if you want to have extra personalization on your humidors, you can add it on the bottom (the font I used is called Antonio).

DIY Groomsman Humidor #groomsman #bestman #groomsmangifts

Supplies:
Glass Top Humidors
Permanent Adhesive Vinyl
Craft Cutter and Tool Set
Adhesive Mat
Transfer Tape
Groomsman Cut File
Best Man Cut File

1. Download the Groomsman and Best Man Cut Files by clicking the links above, which will open the file into a new tab. right click on the picture and select "Save Picture as".  

2. Import the files into the Cricut software. You can do this by going to the software; and, after making a new project, click the "Upload Button." Then Select Upload Image

DIY Groomsman Humidor #groomsman #bestman #groomsmangifts

3. Click "Browse" and select the file you want to cut from your saved files. Once the file is selected, a new screen will appear to choose cut complexity. I generally find the best results on the "Moderately Complex" Setting. Click your setting of choice then click "Continue."

DIY Groomsman Humidor #groomsman #bestman #groomsmangifts

4. You will now be on the "Select and Erase Screen." In this case, there is nothing to erase so just press continue to go to the final screen. Here you can choose whether is is a "Print to cut" file or regular "Cut" File. Select the Cut file, then press "Save."

DIY Groomsman Humidor #groomsman #bestman #groomsmangifts

5. Back on the Upload Screen, Repeat Steps 1 - 4 on the "Best Man" image. Once both images have been uploaded, select them from the main "Upload Screen" and click "Insert Images."

DIY Groomsman Humidor #groomsman #bestman #groomsmangifts

6. Both the "Groomsman" and "Best Man" Decals should be on your Project Screen. Size both decals to be 6.25" wide to have them be a similar size to the humidors pictured. Then copy and paste additional decals as needed from these resized ones. Press "Make It" to go to the Cut Screen.

DIY Groomsman Humidor #groomsman #bestman #groomsmangifts

7. On the Prepare Screen, confirm that your designs are arranged as you would like them on the cutting mat, then press "Continue." You can move any object by dragging and dropping it on the mat. Finally, load your vinyl of choice, select "Vinyl" on your machine, load your craft cutter, then press the Cricut "C" button on the cutter when it blinks.

DIY Groomsman Humidor #groomsman #bestman #groomsmangifts

8. Cut out your files on the adhesive vinyl of your choice and weed the extra vinyl from the design.

DIY Groomsman Humidor #groomsman #bestman #groomsmangifts

9. Press transfer tape along the design, aligning the text with the grid lines of the transfer tape. Use a smoother tool to release any air bubbles and the get the vinyl to stick to the tape.

DIY Groomsman Humidor #groomsman #bestman #groomsmangifts

10. If you aren't comfortable eyeballing the placement of your design, take an extra piece of transfer tape and adhere it to the inside of the humidor glass, starting at the top edge of the lid. Now, all the grid lines will be parallel to the window frame of the humidor,.

11. Slowly remove the tape from the vinyl design, making sure that the design transfers from the vinyl backing to the tape.

DIY Groomsman Humidor #groomsman #bestman #groomsmangifts

12.  From the middle of the glass, smooth the design with a smoother to remove any air bubbles. Once design has been pressed onto the glass, slowly remove the transfer tape, confirming that the design transfers from the tape to the glass. Repeat with all your remaining humidors.

DIY Groomsman Humidor #groomsman #bestman #groomsmangifts

13. Remove the transfer tape from the inside of the humidor, then repeat the process for the rest of your humidors! :)

DIY Groomsman Humidor #groomsman #bestman #groomsmangifts
Pinterest 1.jpg

20 Groomsman Gifts under $25

In keeping with our theme of Bridesmaid Proposals, Bridesmaids Gifts, and Groomsman Proposals, I thought it was fitting that the next roundup n our list was affordable Groomsman Gifts! I was trying to originally keep it under $20, but unfortunately I wasn't finding a whole lot I liked. By bumping up the budget $5, there were so many more amazing and unique options! Whether your groomsman are into beer, cigars, or games there are so many personal and thoughtful options to pick from below to give your boys a great gift they will love!

Read More

DIY Bridesmaid Wine Glasses

This post contains affiliate links, meaning that if you click on a link I will recieve a small comission. This costs you nothing extra and I only promote products I use and love! You can read our full disclosure here

DIY Bridesmaid Wine Glasses #bridesmaid #bridesmaidproposal #bridesmaidgift

One of my favorite things to make for bridal parties are themed glasses, whether for DIY Nights, Bachelorette Parties, Bridal Showers, or Getting ready on the big day! I will be posting on how to make your own personalized glasses in a bit, but these are more generic and can be easily used for all wedding events by your girls. 

I cut out mine using a Champagne Glitter Vinyl, but there are many options to choose from if it's not quite right for wedding party. Also worth noting, when I designed the cut files I kept the text black on a blank canvas, so on my computer then tend to be on a black background and can't be seen very well, you can right click to either copy the file or save it and it should be black text with a clear background. :)

Supplies:
Stemless Wine Glasses
Permanent Adhesive Vinyl
Craft Cutter and Tool Set
Adhesive Mat
Transfer Tape
Bridesmaid Cut File
Maid of Honor Cut File

1. Download the Bridesmaid and Maid of Honor Cut File by clicking the links above, which will open the file into a new tab. right click on the picture and select "Save Picture as".  

2. Import the files into the Cricut software. You can do this by going to the software; and, after making a new project, click the "Upload Button." Then Select Upload Image

DIY Bridesmaid Wine Glasses #bridesmaid #bridesmaidproposal #bridesmaidgift

3. Click "Browse" and select the file you want to cut from your saved files. Once the file is selected, a new screen will appear to choose cut complexity. I generally find the best results on the "Moderately Complex" Setting. Click your setting of choice then click "Continue."

DIY Bridesmaid Wine Glasses #bridesmaid #bridesmaidproposal #bridesmaidgift

4. You will now be on the "Select and Erase Screen." In this case, there is nothing to erase so just press continue to go to the final screen. Here you can choose whether is is a "Print to cut" file or regular "Cut" File. Select the Cut file, then press "Save."

DIY Bridesmaid Wine Glasses #bridesmaid #bridesmaidproposal #bridesmaidgift

5. Back on the Upload Screen, Repeat Steps 1 - 4 on the "Maid of Honor" image. Once both images have been uploaded, select them from the main "Upload Screen" and click "Insert Images."

DIY Bridesmaid Wine Glasses #bridesmaid #bridesmaidproposal #bridesmaidgift

6. Both the "Bridesmaid" and "Maid of Honor" Decals should be on your Project Screen. Size your "Bridesmaid" Image to 4.5" wide and the "Maid of Honor" image to 3" tall to have them be a similar size to the glasses pictured. Then copy and paste additional decals as needed from these resizes ones. Press Continue to go to the Cut Screen.

DIY Bridesmaid Wine Glasses #bridesmaid #bridesmaidproposal #bridesmaidgift

7. On the Prepare Screen, confirm that your designs are arranged as you would like them on the cutting mat, then press "Continue." You can move any object by dragging and dropping it on the mat. Finally, load your vinyl of choice, select "Vinyl" on your machine, load your craft cutter, then press the Cricut "C" button on the cutter when it blinks.

DIY Bridesmaid Wine Glasses #bridesmaid #bridesmaidproposal #bridesmaidgift

8. Cut out your files on the adhesive vinyl of your choice and weed the extra vinyl from the design.

DIY Bridesmaid Wine Glasses #bridesmaid #bridesmaidproposal

9. Press transfer tape along the design, aligning the text with the grid lines of the transfer tape. Use a smoother tool to release any air bubbles and the get the vinyl to stick to the tape.

DIY Bridesmaid Wine Glasses #bridesmaid #bridesmaidproposal

10. Slowly remove the tape from the vinyl design, making sure that the design transfers from the vinyl backing to the tape.

DIY Bridesmaid Wine Glasses #bridesmaid #bridesmaidproposal

11. Angle your text such that it leaves about an inch around the top of the glass and stick the middle of the design on the wine glass. From the middle of the glass, smooth the design along the curve of the glass from the middle to the edges. The transfer tape won't perfectly lay on the glass due to its curved surface, but the text can be smoothed on without much fuss.

DIY Bridesmaid Wine Glasses #bridesmaid #bridesmaidproposal

12. Once design has been pressed onto the glass, slowly remove the transfer tape, confirming that the design transfers from the tape to the glass. Repeat with all your remaining glasses.

DIY Bridesmaid Wine Glasses #bridesmaid #bridesmaidproposal
DIY Bridesmaid Wine Glasses #bridesmaid #bridesmaidproposal #bridesmaidgift

Christmas Wine Bottle Labels

This post contains affiliate links, meaning that if you click on a link I will recieve a small comission. This costs you nothing extra and I only promote products I use and love! You can read our full disclosure here

PInterest Title.jpg

Tis the Season for Christmas Themed Wine Bottles! I had fun dressing up these bottles to take to a Christmas Party, but you could also use them for inexpensive gifts for friends! (Depending on the wine of course).

Neato Wine Bottle Labels
Christmas Wine Printable
Wine of Choice (Of course I would recommend a white given the text :) )

Supplies with text.jpg

1.     Download the Printable and Print your labels.

2.     Soak off the Label from your wine bottles with hot soapy water. Scrub any remaining residue off with a sponge and dry the outside of the bottles.

3.     Place the square label where the old label used to be and you are done!

completed bottles with text.jpg

I love the idea of giving one of these for a white elephant, mystery white wine! Never hurts to dress up cheap wine in a pretty label. :)

Halloween Witch Canvas

This post contains affiliate links, meaning that if you click on a link I will recieve a small comission. This costs you nothing extra and I only promote products I use and love! You can read our full disclosure here

Title Picture.jpg

After how much fun I had making the Ombre Wedding Canvases I decided to make a whole slew of them for the upcoming holidays! First, I designed a fun spooky canvas for the Halloween Season.

I didn’t want to ombre this one but instead tried to make the background a black and purple squiggles as a nice offset to the black decals and lettering.

Supplies:
11 x 14 Canvas
Black and Purple Paint
Paint Brush
Paint Bowls
Craft Cutter and Tool Set
Adhesive Mat
Black Vinyl
Lettering and Decal Cut File

Purple Paint Collage.jpg

1.     Mix your black and purple paint with a tablespoon or two of water, just enough to give it a watercolor consistency. Paint the purple on first in wavy squiggles along the canvas until the canvas is mostly covered in paint.

Black Paint Collage.jpg

2.     Wash out the brush and fill in some of the lighter purple spots with squiggly line of black. Be careful to not over paint with the black, if you do too much, you end up with just a black canvas.

3.     Upload the cut file into the Cricut Design software. Size the file to be 11.5” tall. Cut out in black vinyl.

Supplies 1.jpg

4.     Cut the vinyl design in half so that the text and bottom canvas decal are on two separate pieces. Weed the excess vinyl from the designs, leaving only the text and bottom decal. Lay transfer paper over the designs and smooth out, removing all the air bubbles. Lift the text design and arrange on the center top of the canvas. Smooth the design onto the canvas and remove the transfer paper, leaving the text on the canvas.

Text transfer collage.jpg

5.     Repeat with the cauldron and pumpkins decal, arranging it along the bottom of the canvas.

Finished DIY.jpg

I also ended up making this on a smaller canvas than the wedding signs, mainly because I want to hang it on my door! An added benefit is that you don’t need a special long mat to cut it and can just use the standard mat. Happy Halloween!

Harry Potter Wine Labels

This post contains affiliate links, meaning that if you click on a link I will recieve a small comission. This costs you nothing extra and I only promote products I use and love! You can read our full disclosure here

Pinterest 1.jpg

Harry Potter Wine Labels? What could be more fun for our Harry Potter Bachelorette Bash! When I was designing these, I had so much fun coming up with the names that I made one for four different types of wine! And just like the Bridesmaid Proposal Wine Bottles, these are as easy as peel, stick and done!

Instagram.jpg

Supplies:

Neato Wine Bottle Labels
Harry Potter Wine Printable
Wine of Choice (Labels are for Pinot Grigio, Chardonnay, Merlot and Cabernet Sauvignon)
 

Supplies.jpg

1.     Download the Printable and Print your labels. I have made them specifically for Chardonnay, Pinot Grigio, Cabernet Sauvignon, and Merlot because those are my favorites! (Yes, four favorite types of wine is totally acceptable)

2.     Soak off the Label from your wine bottles with hot soapy water. Scrub any remaining residue off with a sponge and dry the outside of the bottles.

Peeling Label.jpg

3.     Place the square label where the old label used to be and you are done!

placing label.jpg
finished bottle.jpg

This is a wonderful way to add some Halloween and Harry Potter fun to your wine and it really only costs as much as the wine and a set of labels. Want to design your own labels? The company that created these label sheets has an online design studio so you can always come up with a design all your own!

finished bottles with text.jpg

Harry Potter Martini Mixer Labels

This post contains affiliate links, meaning that if you click on a link I will recieve a small comission. This costs you nothing extra and I only promote products I use and love! You can read our full disclosure here

Pinterest 1.jpg

Happy Halloweentime everyone! To keep with the spooky spirit, its time for some Halloween style tutorials! First up are some labels and decorations I made for my friend's bachelorette party, which as luck would have it, was Harry Potter themed!

Since I was bringing martini mixers, wine and paper signs, I wanted them all designed for such a fun theme, so my question became, what wizard would sell martini mixers? Why Gilderoy Lockhart of course! Why?

#1 - He is beloved by ladies, ladies love martini mixers
#2- Lockhart would totally sell a mixer as a potion to his adoring fans

In true Lockhart fashion, each mixer is themed on one of his bestselling books, and for legalities they do in fact state that they “contain no magical properties” (Not that anyone who knows Gilderoy would assume they work). I ended up buying a set of martini mixers from Amazon which are what I designed my stickers to and it was perfect for having a selection of martini mixers for the bachelorette party.

Finished Potions 3.jpg
finished potion.jpg
supplies.jpg

1.     Print out Labels on Sticker Paper. Cut out with Scissors.

peeling labels with text.jpg

2.     Peel off the existing Martini Mixers and replace with the new Lockhart Labels. The original flavors are also on the new labels so I found it easiest to take off the old label and replace it one bottle at a time so that I didn’t get mixed up and put the wrong label on the wrong bottle.

placing labels.jpg

And it’s as easy as that! I love being able to add little touches to themes like this with bottle labels, cheap and super cute! What Harry Potter Themed drinks would you make?

finished potions 2.jpg

Ombre Watercolor Wedding Signs

This post contains affiliate links, meaning that if you click on a link I will recieve a small comission. This costs you nothing extra and I only promote products I use and love! You can read our full disclosure here

DIY Ombre Wedding Signs #diywedding #ombre

These wedding signs may be my favorite thing I’ve made in September for my two brides, and funnily enough they were the thing that was made “in a hurry.” I had finished the other crafts, gotten all my candle holders and decorations together, and my friend/bride asked if I had any ideas for a “Pick a Seat, not a Side” signs.

I considered staining wood and using vinyl for lettering since it was an outdoor wedding, but I only had 3 days before the wedding and wasn’t about to get that done in time. Then I saw my pile of blank canvases (come now we all have one, those darn Michaels sales!) and saw a great opportunity to use them!

I used removable vinyl for the lettering and would highly recommend you doing so if you don’t plan to keep these forever. They held up just fine outside and even when it rained, but the vinyl being removable made it much easier to move the lettering if you don’t position it just right the first time.

When we had first started thinking about her wedding, there were so many ombre details we saw on Pinterest that we loved so I figured, why not ombre these signs? I absolutely love how they came out and, other than making sure my letters were all looking nice, easy to make and only took a couple hours! And by a couple hours, that was half an hour of doing things and a couple hours of letting paint dry.

Supplies:
Craft Cutter and Tool Set
Adhesive Mat
Transfer Paper
White Adhesive Vinyl
Purple, Lavender, and White Paint
16” x 20” Canvases
Paint Brush
Bowls for Paint
Pick a Seat Cut File
Not a Side Cut File
You’re Loved by both Cut File
The Groom and Bride Cut File

DIY Ombre Wedding Signs #diywedding #ombre

1.     First, mix your different colors of paint. I used a mix of white, lavender, and violet to make 4 different shades. Add a couple tablespoons of water to each bowl to thin the paint, making it only slightly thicker than water so that it acts more like a watercolor.

DIY Ombre Wedding Signs #diywedding #ombre

2.     Starting from light to dark, paint ¼ of the canvas light purple. Take the next darkest shade and paint the second quarter of the canvas. Wash the brush and using the lighter shade, brush across the canvas between the two color stripes to blend the colors. Continue in this fashion until the canvases are both painted. Let dry.

DIY Ombre Wedding Signs #diywedding #ombre

3.     Do a second coat on each canvas the same way as you painted the first one, making sure to wash your brush between colors. Once completed, wash out brush and from dark to light, brush horizontally across the canvas to smooth any paint lines. Let Dry.

DIY Ombre Wedding Signs #diywedding #ombre

4.     Using the Provided cut files, cut the "you're loved.." file to 5 inches tall and the other files to 11.5 inches tall (I made mine 16 inches wide and that made it a lot harder to keep them on the canvas and cut them). I’d recommend the 12” x 24” mat on these to fit them to the larger canvases.

DIY Ombre Wedding Signs #diywedding #ombre

5.     Weed the designs and cover with transfer paper. I prefer grid line transfer paper to help keep all your letters level.

DIY Ombre Wedding Signs #diywedding #ombre

6.     Transfer the designs onto your dry canvases. Press out any air bubbles and remove transfer paper, leaving the design behind.

DIY Ombre Wedding Signs #diywedding #ombre

These could easily be made in different colors to fit most wedding themes and were a fun twist on the traditional signs. Better yet, I already had everything to make them so they were free! :) Would you make these signs for your wedding?

DIY Ombre Wedding Signs #diywedding #ombre