This post contains affiliate links, meaning that if you click on a link I will recieve a small comission. This costs you nothing extra and I only promote products I use and love! You can read our full disclosure here
As you read this post, you’ll notice a lot of bolded words, some that highlight pink and link to other posts and products, and others that don’t do anything. That’s because I am still writing and working on the posts those words go to! As these posts get published, I’ll be updating this post until all the projects are complete! Subscribe to my Newsletter or Follow me on Facebook to keep updated on when I post new content!

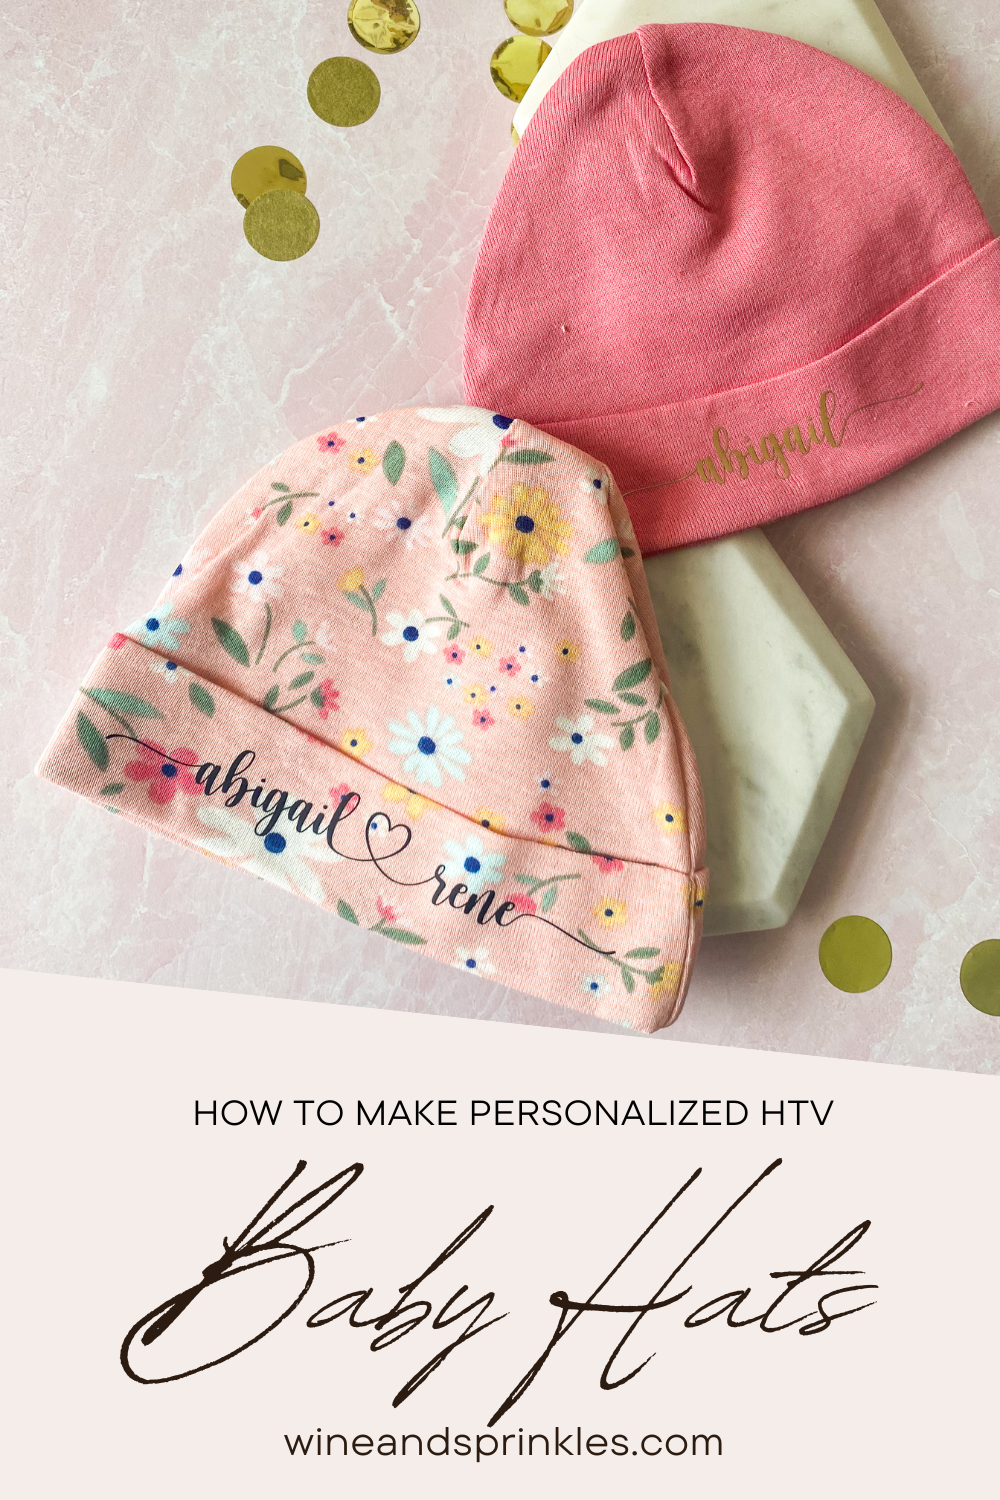
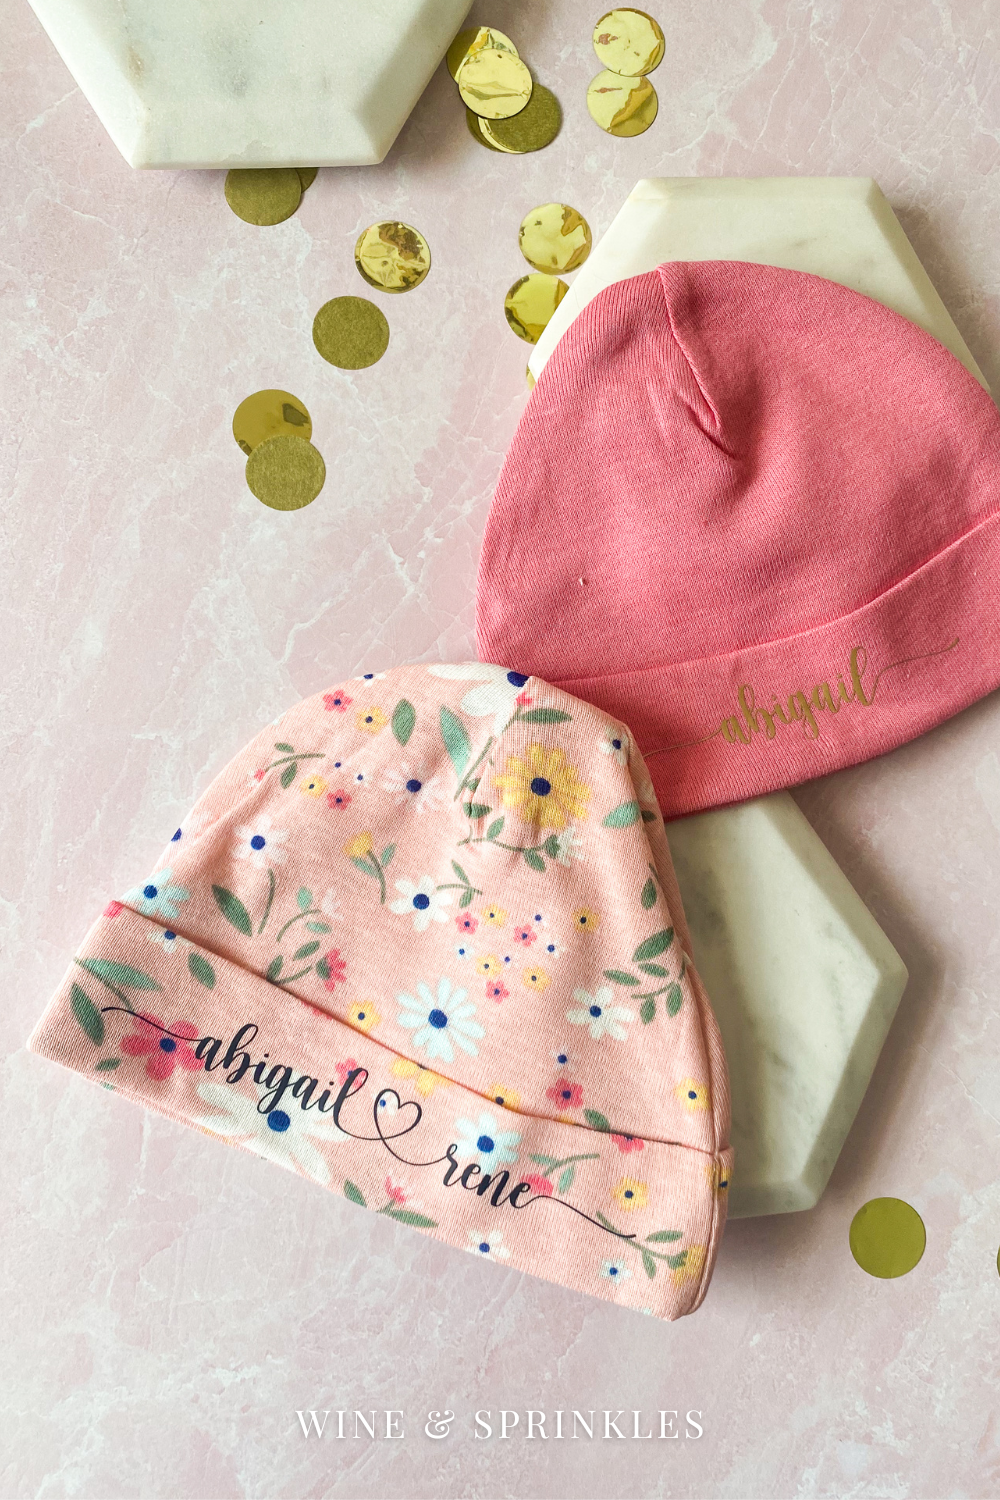
One of my favorite pictures I see of newborns are ones of them in adorable personalized hats for their hospital pictures, so when I was crafting a clothesline of baby wardrobe items I knew there was one thing that I had to include! For those that need some cute little customized caps too, I’ve shown you how for these Personalized Baby Hats!
These hats were the finishing touch for my Clothesline Laundry Basket Baby Gift, which included these as well as a slew of Holiday Seasonal Bibs, Sassy Baby Socks, and an assortment of different DIY Baby Onesies from my collection of decals from projects past, but this is the first time I’m showing you, on a baby hat at least, how to do personalized text!
These sweet and simple decals are all about manipulating text in Cricut’s Design Software, but it’s actually a pretty straightforward process which I show you how to do below! For my hat’s lettering, I used a font called Hello Honey, which you can download the basic version for personal use on a project like this, but if you want the fun swirly hearts and letter tails, buy the full version which was about $15 when I bought it and I love using it for everything! That being said, you can find your own curly font to make it truly your own, this tutorial should help you personalize regardless of font!


After personalizing two of the hats, I wanted to make my third something unique but easy, so I took some extra decals I made from my Animal Paw Print Onesie Design and put them on this cute cub eared hat to go with a Baby Bear Onesie, and it's hard to pick if I love it more on a hat or a onesie! So don’t forget, there’s lots of creative things to do with these decals, think of fun new ways to use them too!

For cutting these and all my different baby clothing decals, I used the newest additions to my craft supply family, my Cricut Maker and Heat Press! A Cricut Explore was my first ever craft cutter and after having it for years and adored it, I finally upgraded to a new Maker and got a Heat Press to boot, and I’m so thankful using an iron is the way of my past! I loved this heat press for making short work of all my Baby Projects, I simply prepped all the decals then transferred them, assembly line style! It also did so much better at being able to press things evenly and well the first time, and I’m sure that the Cricut Heat Guide helped me a lot with that, you just put it the material you are using and transferring to, and it tells you how to press it! This and my new Maker came with Material Bundles so I was happy to use up some long skinny bits of HTV on this project, since I’m trying to see just how much I can make out of all the supplies!
You can see the supplies I used and the process for designing, cutting, and pressing these decals below, and after you learn how to personalize one thing it's so easy to keep on cutting for all sorts of crafts!
SUPPLIES
HTV BLANKS & MATERIALS
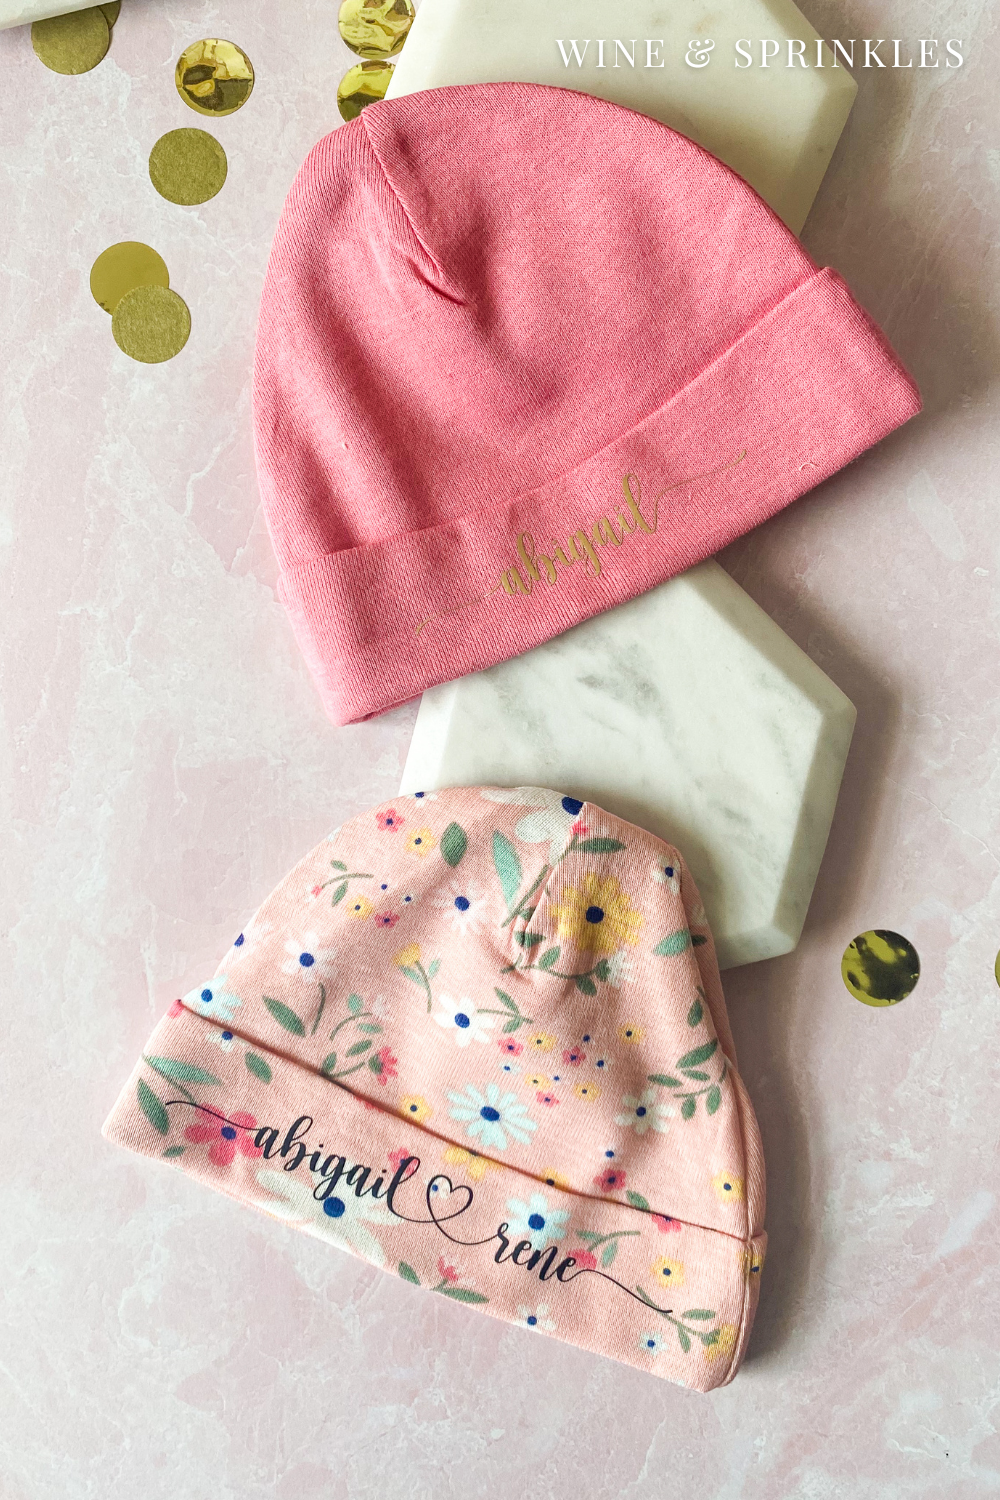
Baby Hats: I like using hats with the little fold up brim for displaying my decals and found this cute little 3 pack while I was out shopping, loving it for both the floral patterned hat and the one with ears that I could make a fun paw print hat using decals from my Pawprint Onesie Design, since I felt like two name hats was just the right amount. Any newborn hat set made from cotton will work for this, so I’ve linked my favorite pack from Amazon but really your options are endless!
Heat Transfer Vinyl (HTV): for creating your decals, I used a combination of HTV from the Everyday Iron On Classics Sampler Pack as well as the Everyday Iron On White HTV for these as well as all my baby projects for my Clothesline Basket Baby Gift. Like my Baby Socks this was a great project to use spare bits of material while creating delicate and beautiful decals!
TOOLS & OTHER SUPPLIES
Cricut Heat Press: for transferring your decals to your baby hats, you’ll need either a heat press or an iron, but I have to say I’ve been adoring my new heat press and highly recommend it! I love that the Cricut Heat Guide makes it easy to always know what temperature and time to heat press my projects, and for when I was mass making these as well as all Baby Onesies and Socks for my Clothesline Basket Baby Gift, it made my assembly line of HTV projects an easy feat. I was a little worried about these delicate decals staying in place and transferring well, but just like all my other projects my heat press did perfectly!
Cricut Craft Cutter: for cutting out HTV decals, there’s no better tool than my Cricut craft cutter! I used my new Maker for these projects and just like all of the craft cutters I’ve purchased from them, it did a great job at cutting beautifully and accurately. My favorite part of the Maker though is that it can specify in the design software the unique HTV you are using, from glitter to holographic, so getting cuts right the first time is a breeze and you aren’t stuck recutting things and wasting material!
Standard Grip Mat: to secure your material for cutting, I prefer the standard grip mat for my HTV projects. It keeps everything in place for cutting and easy weeding, but is easy to remove the decal from afterwards.
Heat Press Mat: for protecting the surface you are using to heat press your decals on.
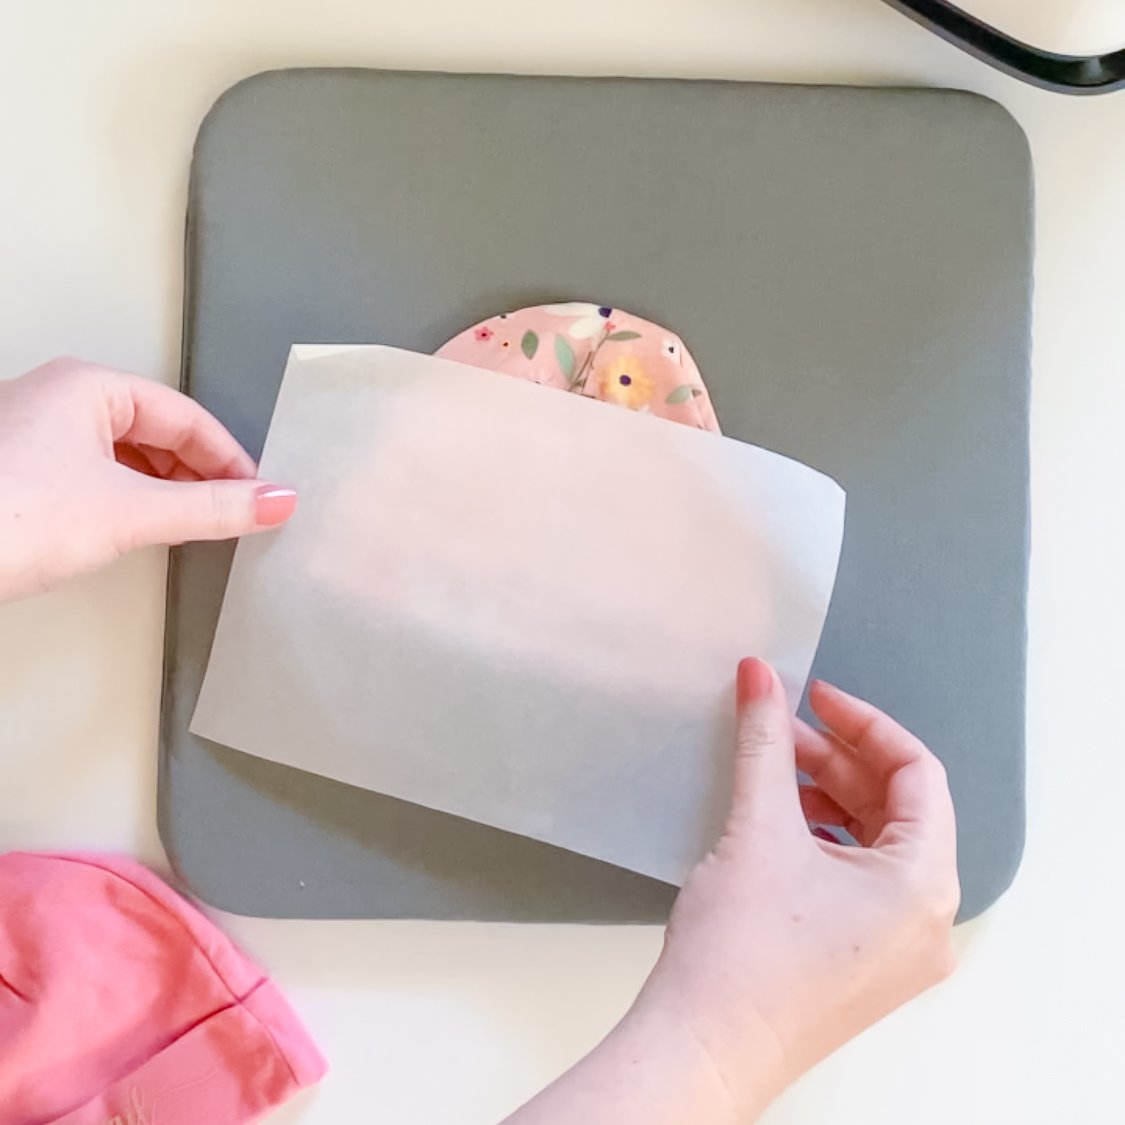
Parchment Paper: to put between your decal backing and your iron or heat press. While not required for the heat press, I’m often paranoid about the backing melting and from having used an iron for many years to transfer HTV, old habits die hard!
Weeding & Transfer Toolset: for weeding away excess HTV and prepping decals to transfer to your hats.
SUPPLIES LIST:
[for 2 hats]
HTV BLANKS & MATERIALS
Baby Hats x 2
Heat Transfer Vinyl x 6” x 2”
TOOLS & OTHER SUPPLIES
Cricut Heat Press
Cricut Craft Cutter
Standard Grip Mat
Heat Press Mat
Parchment Paper
Weeding & Transfer Toolset

DIRECTIONS
STEP 1: DESIGN & CUT YOUR DECALS
Start by creating a new project, then select the text button to create a text box on the screen. Choose the font for your baby hat and type the first name or text you want to personalize the band with, which you can toggle between Cricut’s own family of fonts as well as all your system fonts. I chose a font I own called hello honey that you can download here for personal use! I have the full font bought so I can use the tails on the letters and the fun connecting hearts for the first and middle name hat, which was only $15 when I bought it, so still pretty affordable and I use it all the time!

The max size I made my decals was based on the height of my hat band, ideally 5.5” x 0.75”, so now it’s time to adjust your text so that all your lettering fits. In my case, the front and back “tails” on the letters and the heart connecting the first and middle name set were 3 different fonts in the same family, so I started by making these letters, then typing the rest of the name in the standard hello honey font. Once all the letters I wanted to connect were the same font size, I used the line spacing function on the upper toolbar to adjust the multi-letter groups as close as I could, then dragged and dropped the front and back letters to where they naturally fit in the name.
Once your letters are spaced to your liking, use the weld function on the lower right toolbar to make your text a single cut curve. Finally, use the resizing tool on the top toolbar to first change the height to 0.75” or your own preference, then confirm that the length is less than the max length. Repeat the process for all your names, then select Make it to cut out your decals.
Note: If you cannot get your letters spaced close enough to be under the max length, move them as closer together as you can reasonably make them, then go back into the sizing and, clicking the padlock to unlock it, change the width of the name to your max length.


Cut out on mirror mode with the material set from the options given, in my case Everyday Iron On HTV, with HTV shiny side down. I also like to specify the pressure setting to “More,” though this isn’t a requirement and instead a preference so that I’m sure it cuts deeply enough on little decals like this!
STEP 2: WEED & TRANSFER DECALS
Remove the mat from your cutter, keeping the material attached to make weeding easier. Weed away the excess HTV, then remove from the mat and cut away the extra backing around the decals so each individual name design is separated. Now it's time to transfer them to the hats!

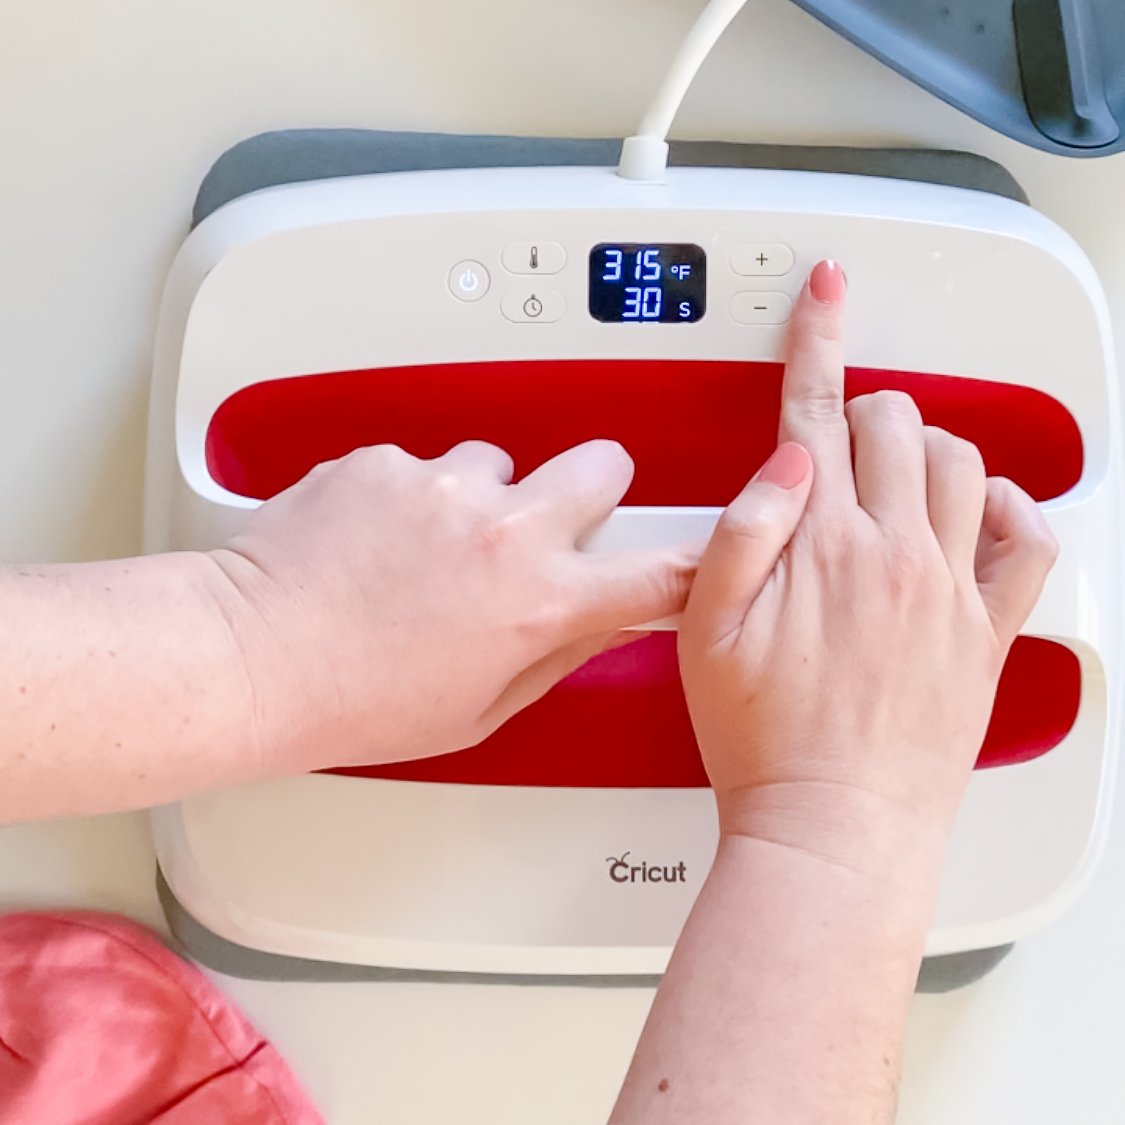
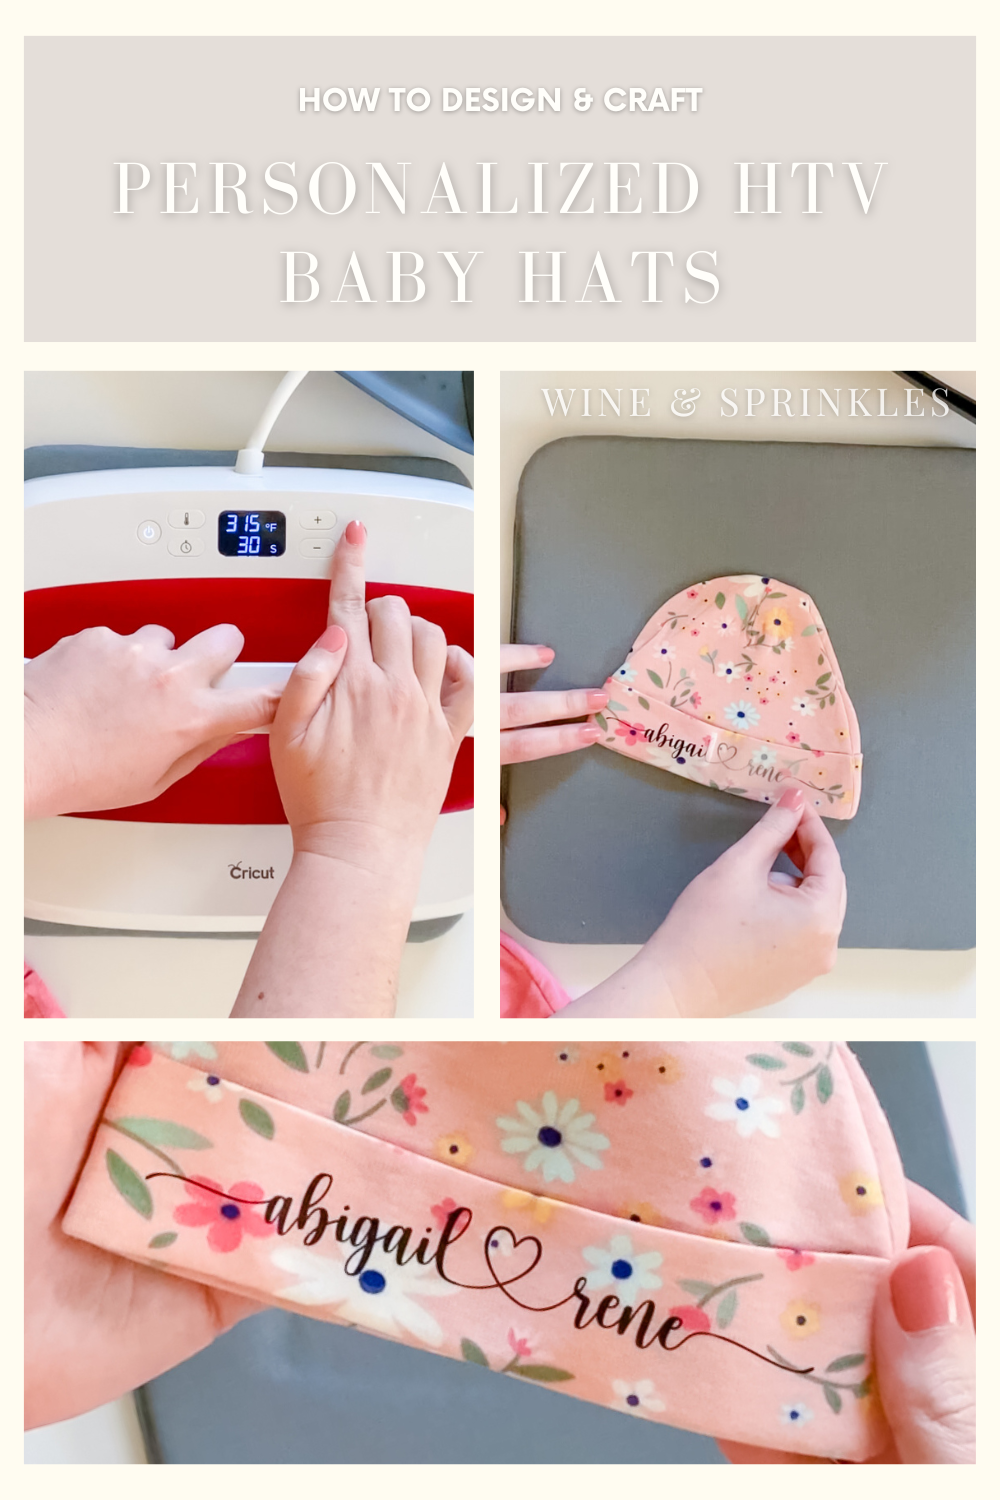
Start by preheating your heat press to the right temperature based on the koozies and material you are using, which can be found by using the Cricut Heat Guide. Change the temperature by pressing the thermometer button until the temperature on the screen blinks, then use the arrows to the right of the screen to change the temperature to what you wish. You can likewise do this for the timer by pressing the watch icon button and, once the timer is blinking, change it with the same arrows. Keep your heat press in its stand while it's preheating and anytime it's hot and you aren’t pressing something to keep you and your work surface safe! For my baby hats and Everyday Iron On HTV pressed on the heat press mat, my press was set to 315℉ for 30 seconds.
Once your press is preheated, place a hat centered on the heat mat, then press it for 5 seconds to preheat the material and flatten the band for an easy work surface. Place the decal centered between the top and bottom of the hat band, backing side up, then cover with parchment paper.
Using firm pressure, press the design into the hat with your heat press, using the timer by pressing the Cricut symbol button, then remove the press when the timer runs out. Once the backing is cool enough to touch, carefully remove it to leave the name on the hat. Repeat this process for all of the hats you are crafting, then you’re done!


SEE OUR RELATED POSTS HERE:


OUR MOST RECENT BLOG POSTS:


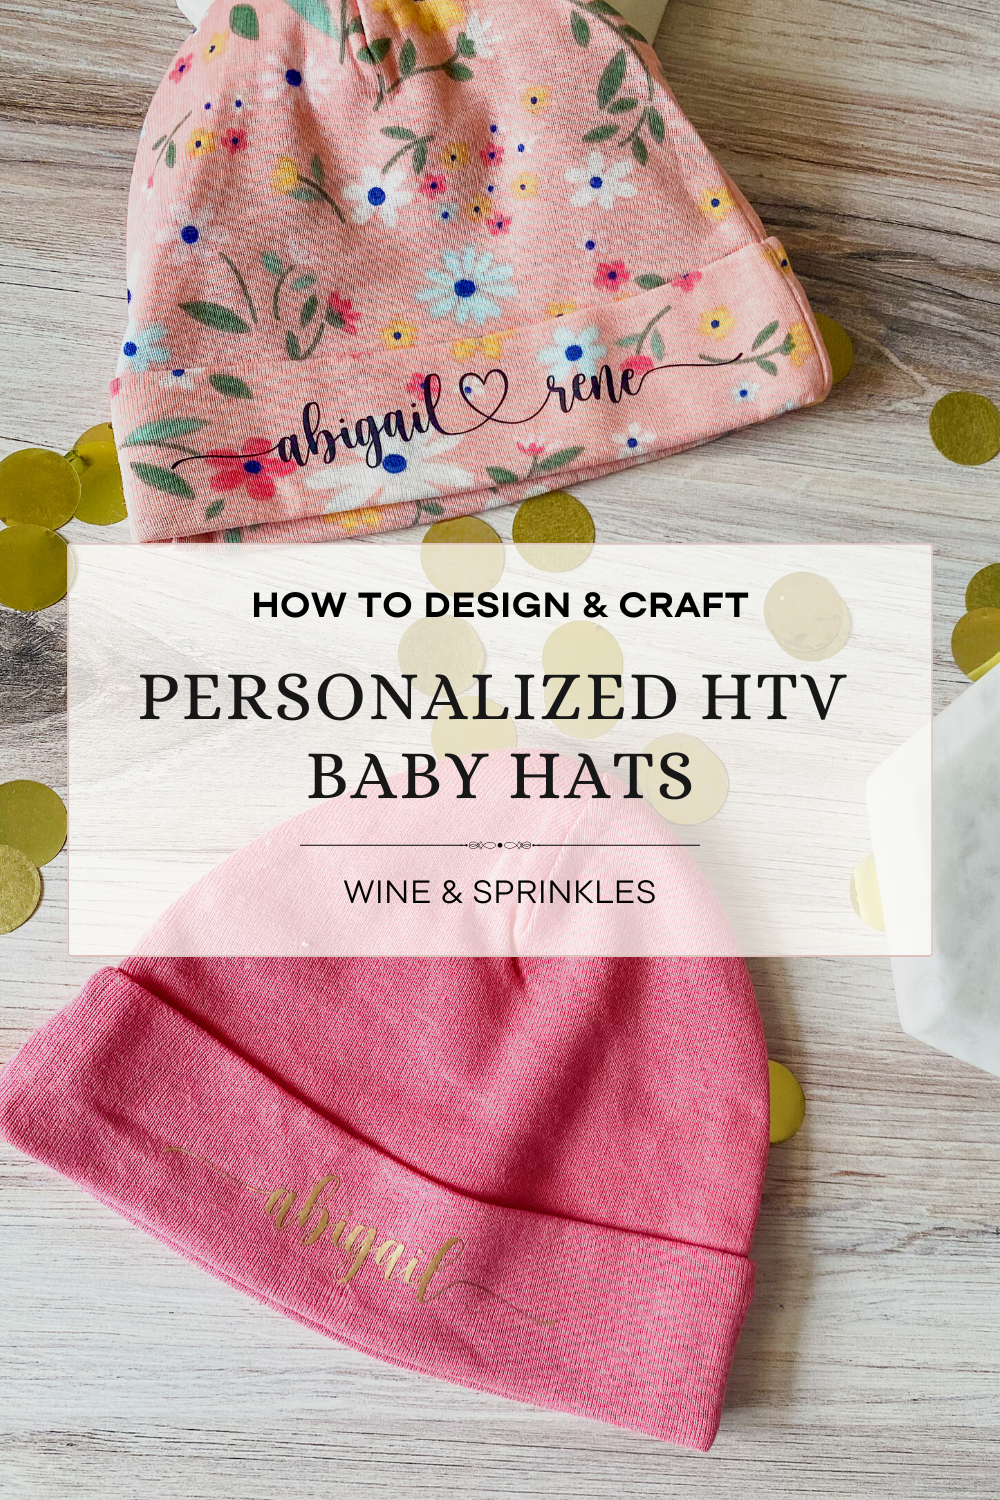
OUR PINS FOR THIS POST:

Calling all Aires, Pisces, and every sign in between! I think astrology is super fun, which any of my guests who attended my Zodiac Summer’s Eve Party can attest, and I love to make fun zodiac themed gifts for my favorite friends that love it too! For those who don’t have the time or astrological inspiration to make their gifts, this guide is for you!