This post contains affiliate links, meaning that if you click on a link I will recieve a small comission. This costs you nothing extra and I only promote products I use and love! You can read our full disclosure here

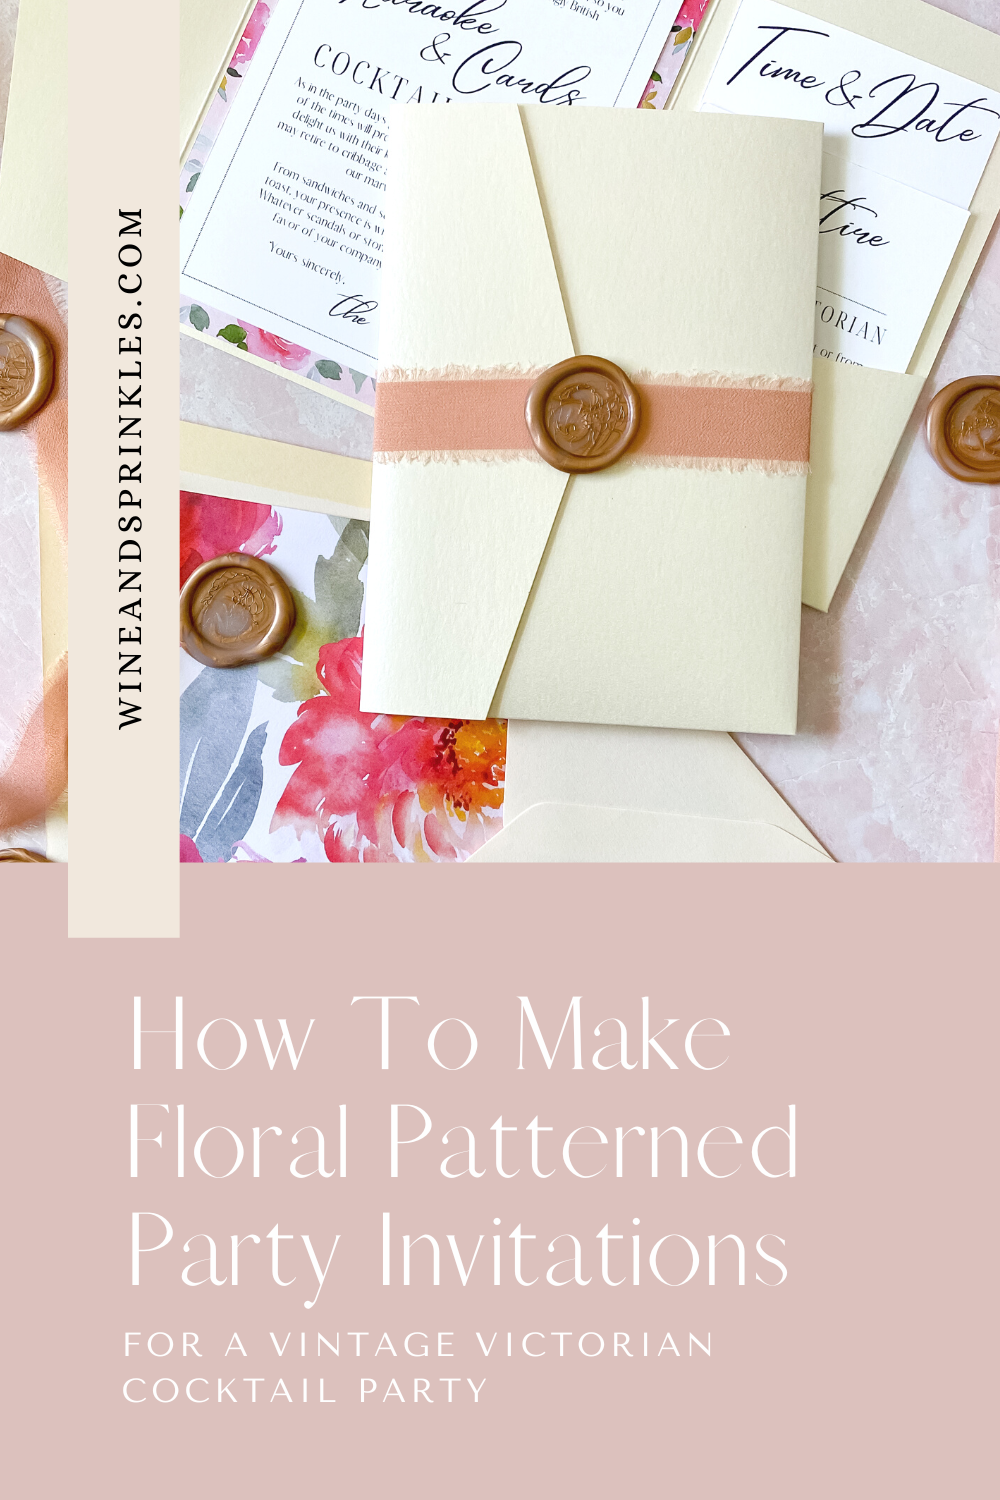
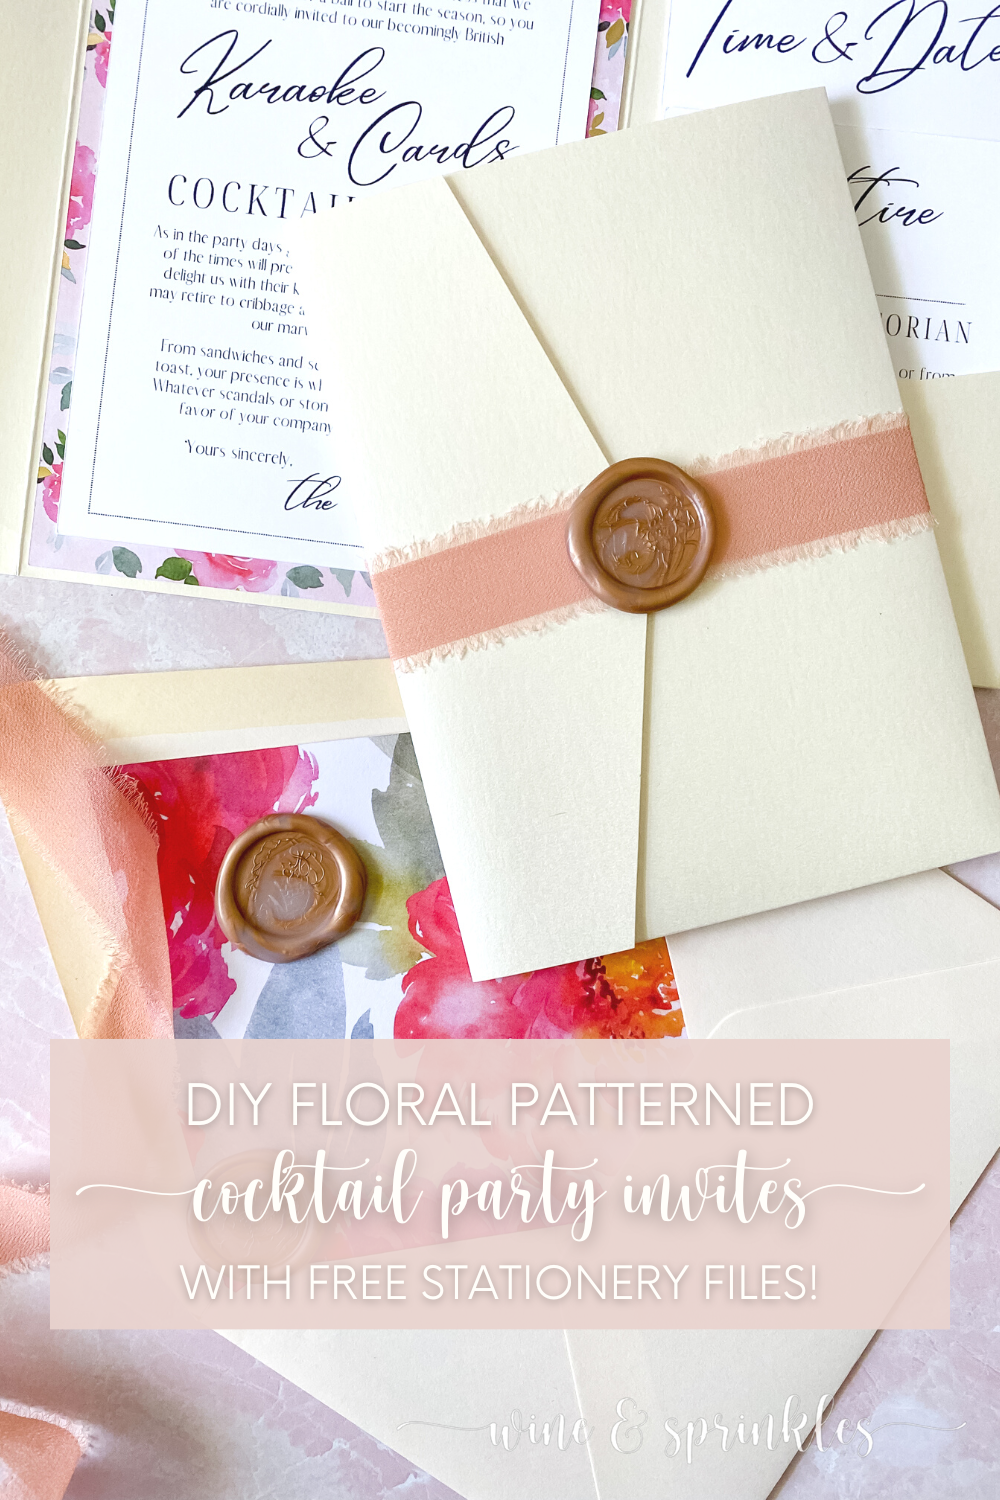
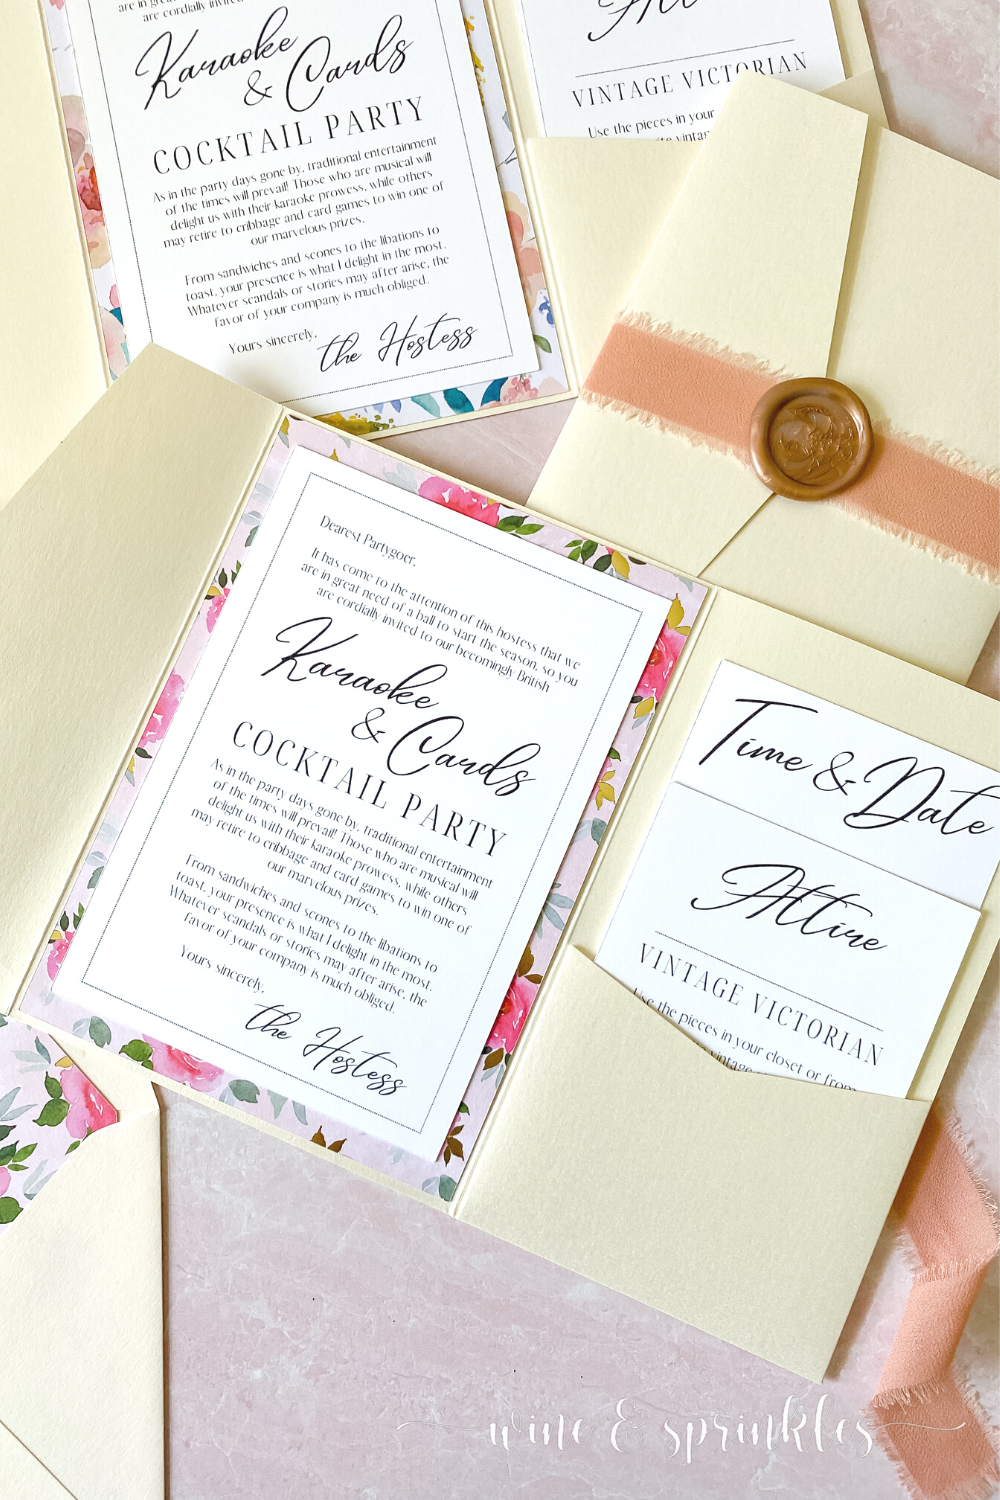
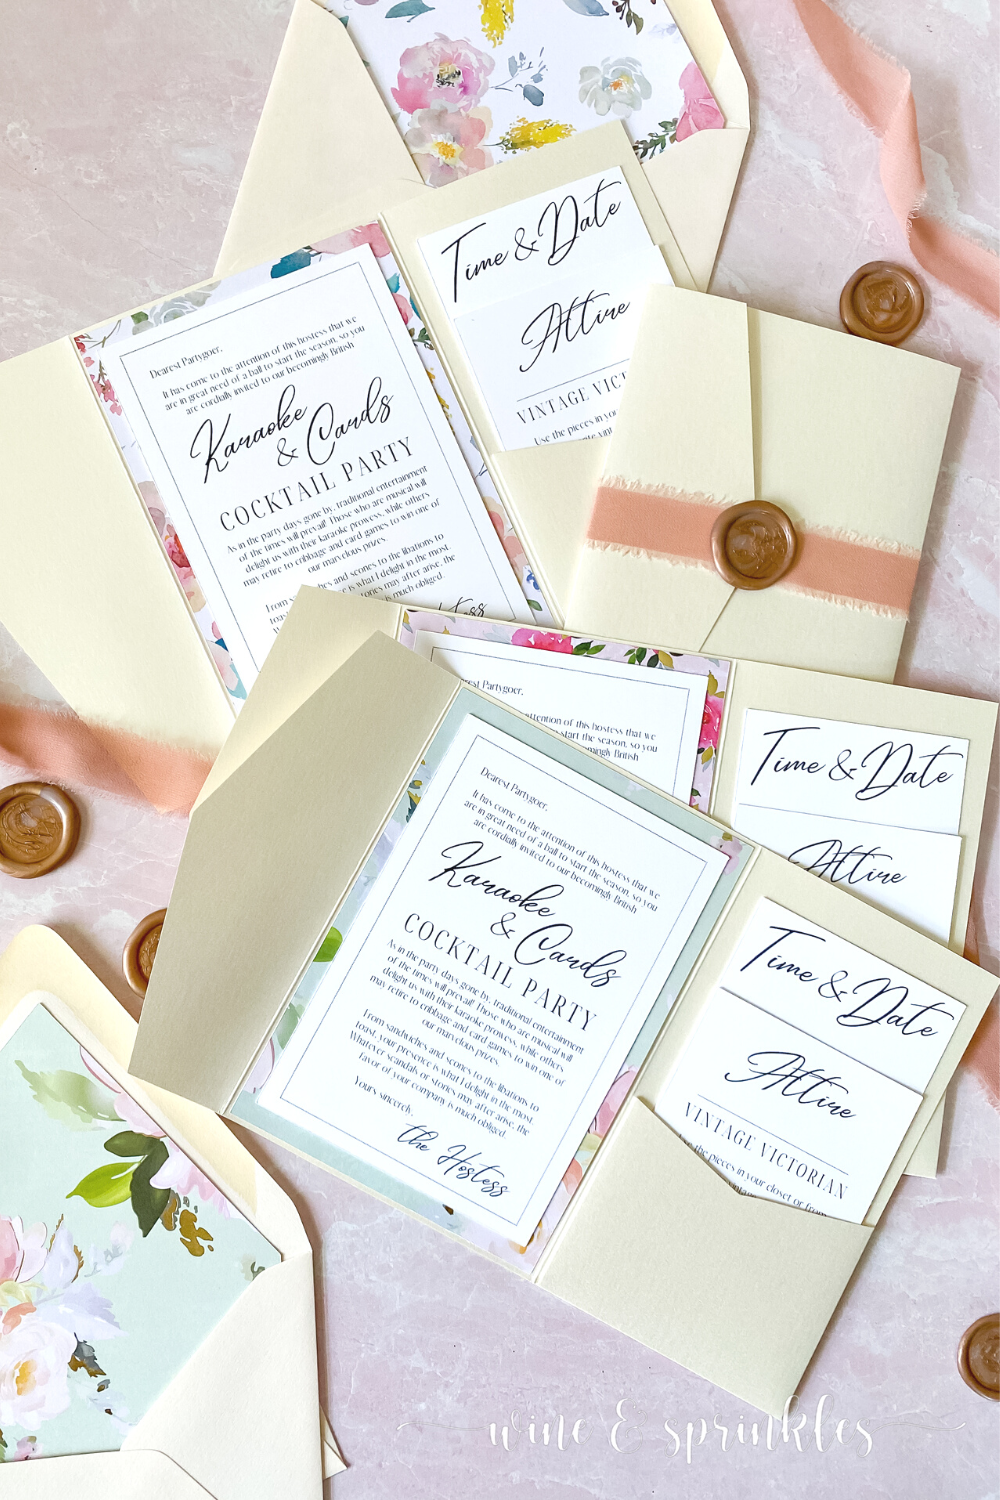
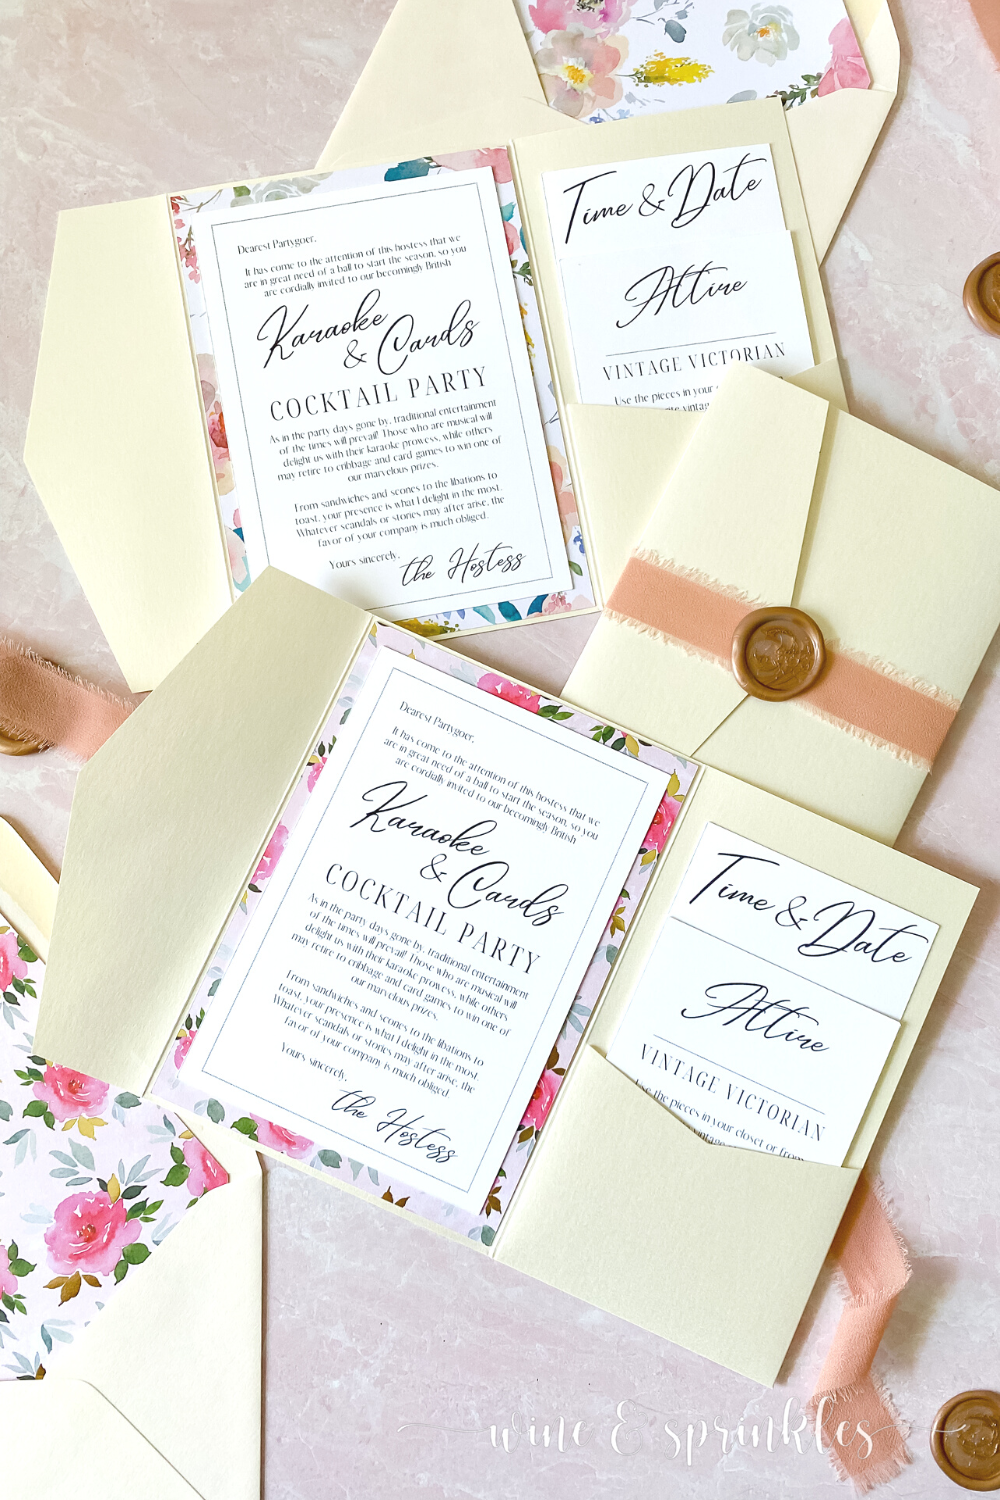
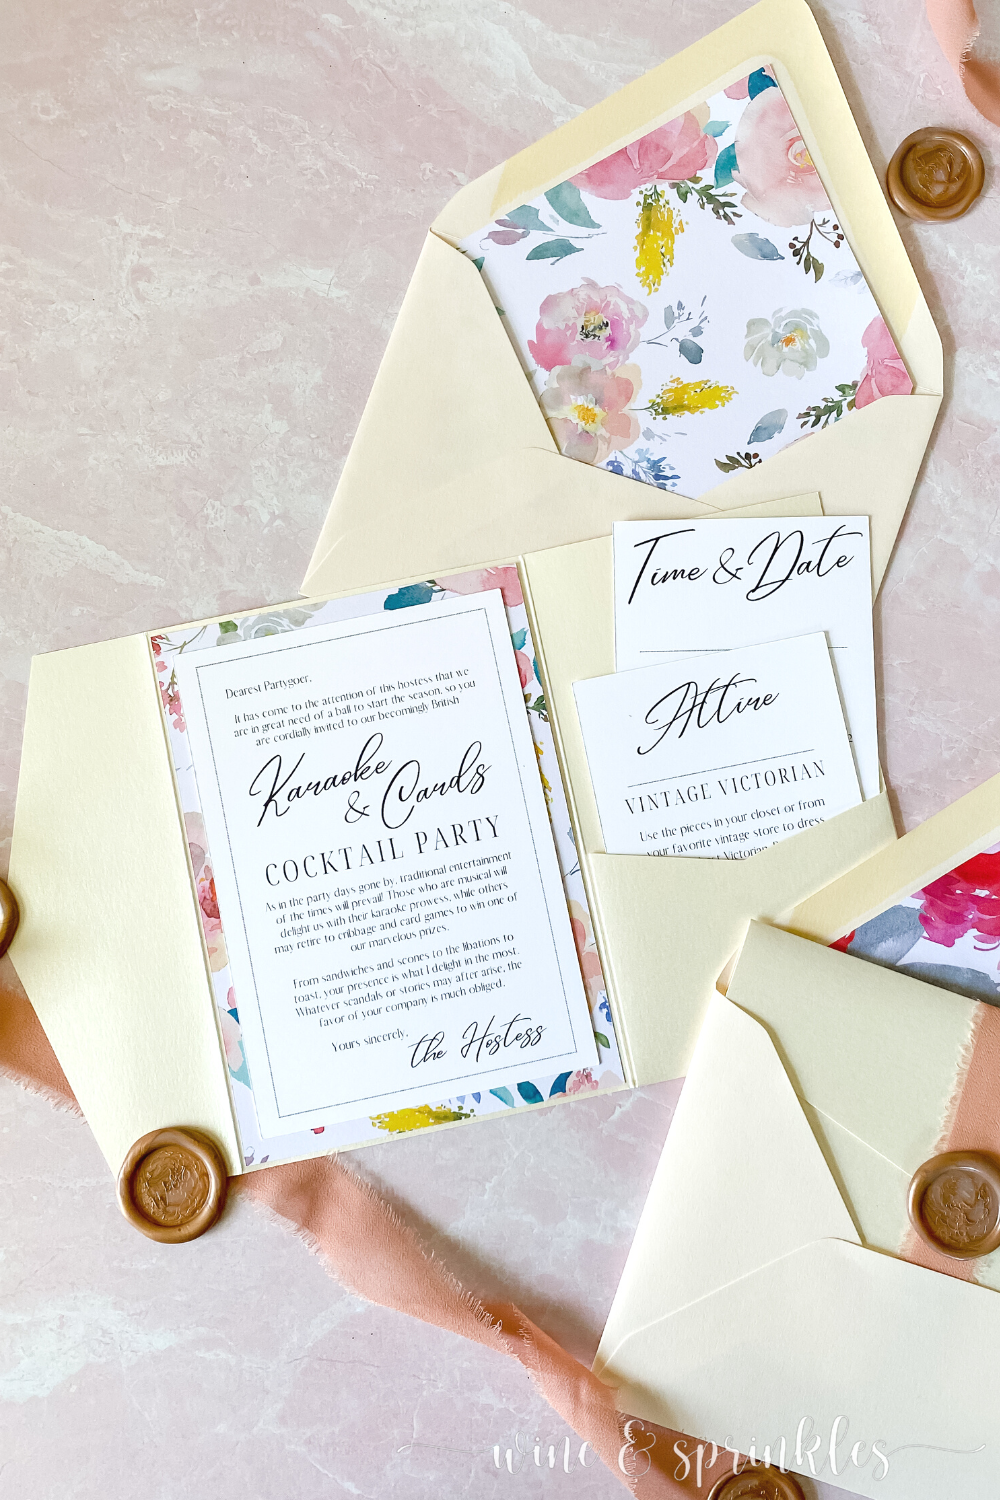
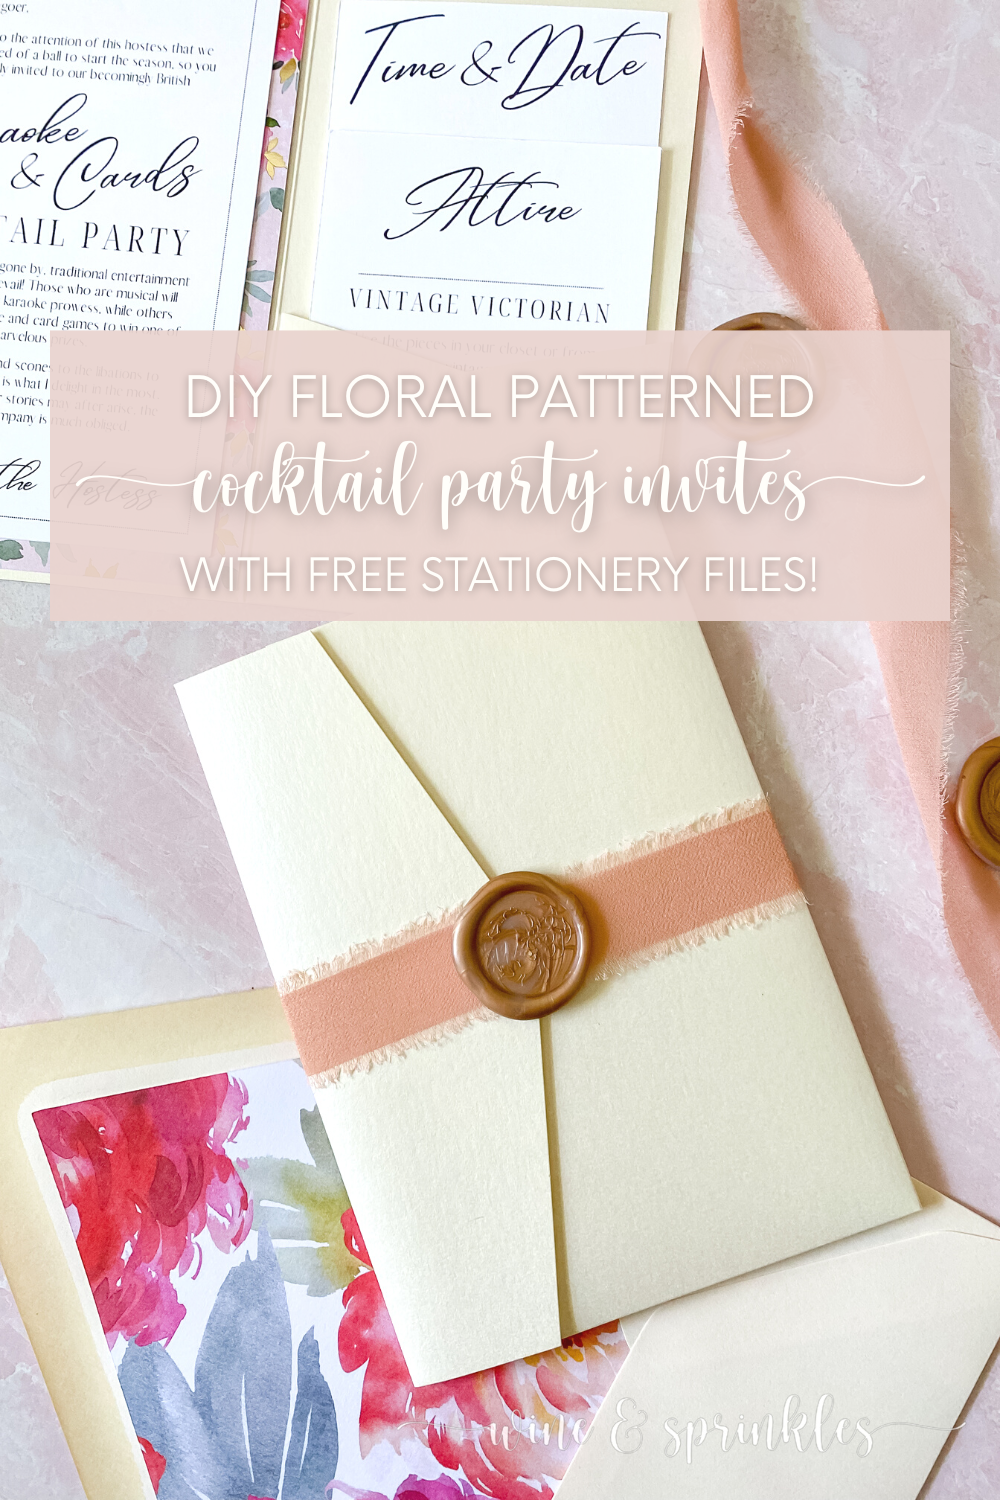
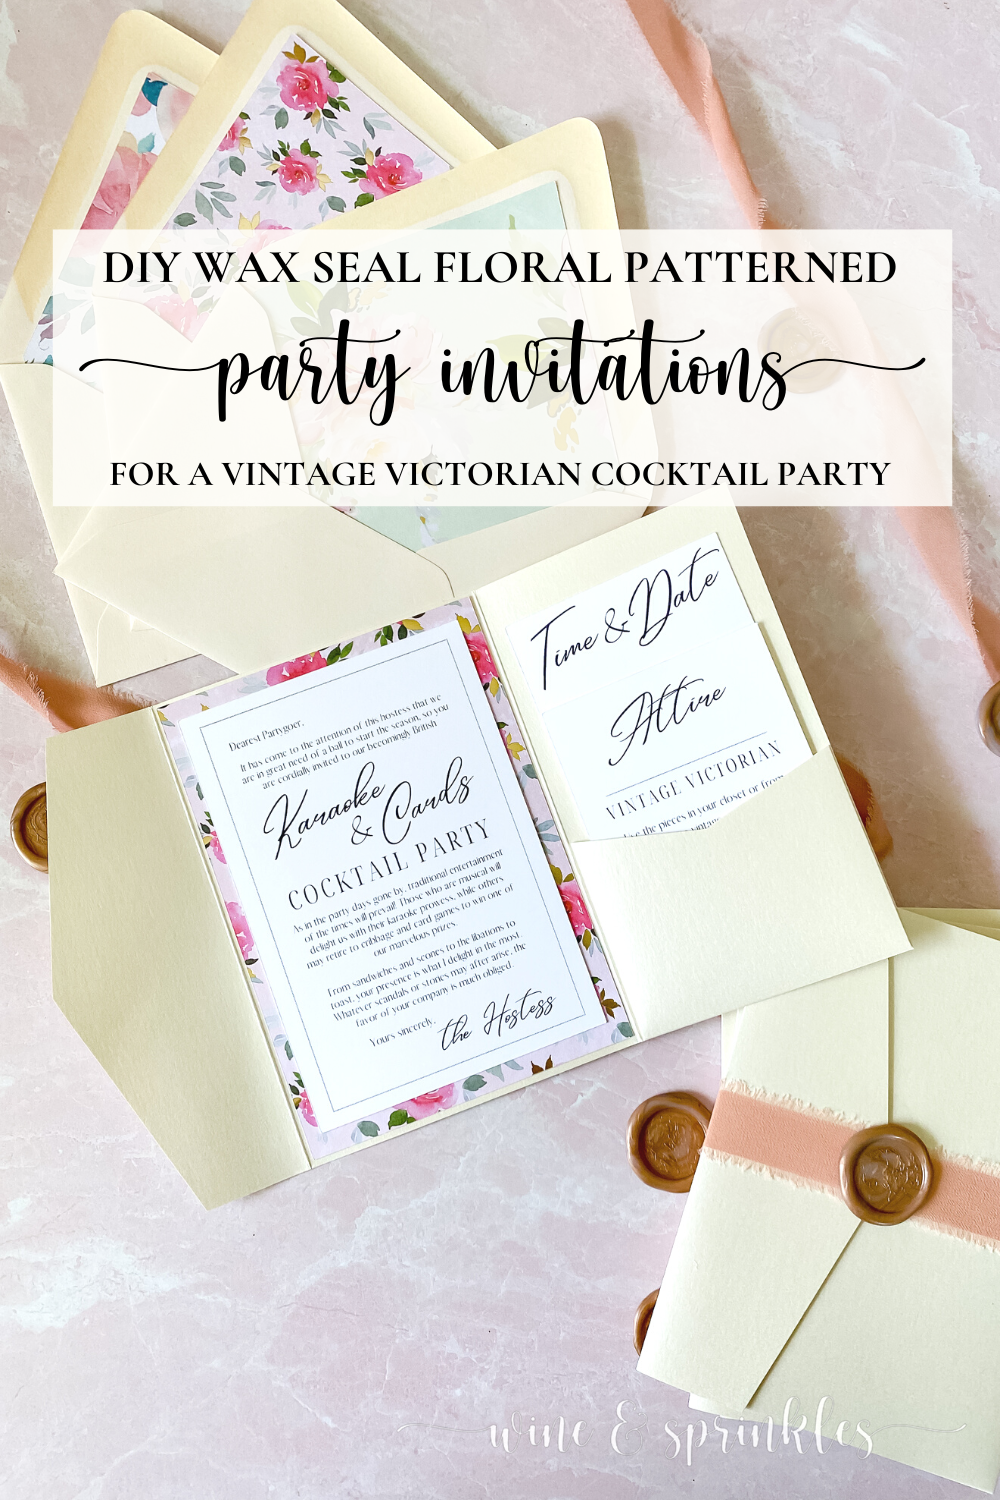
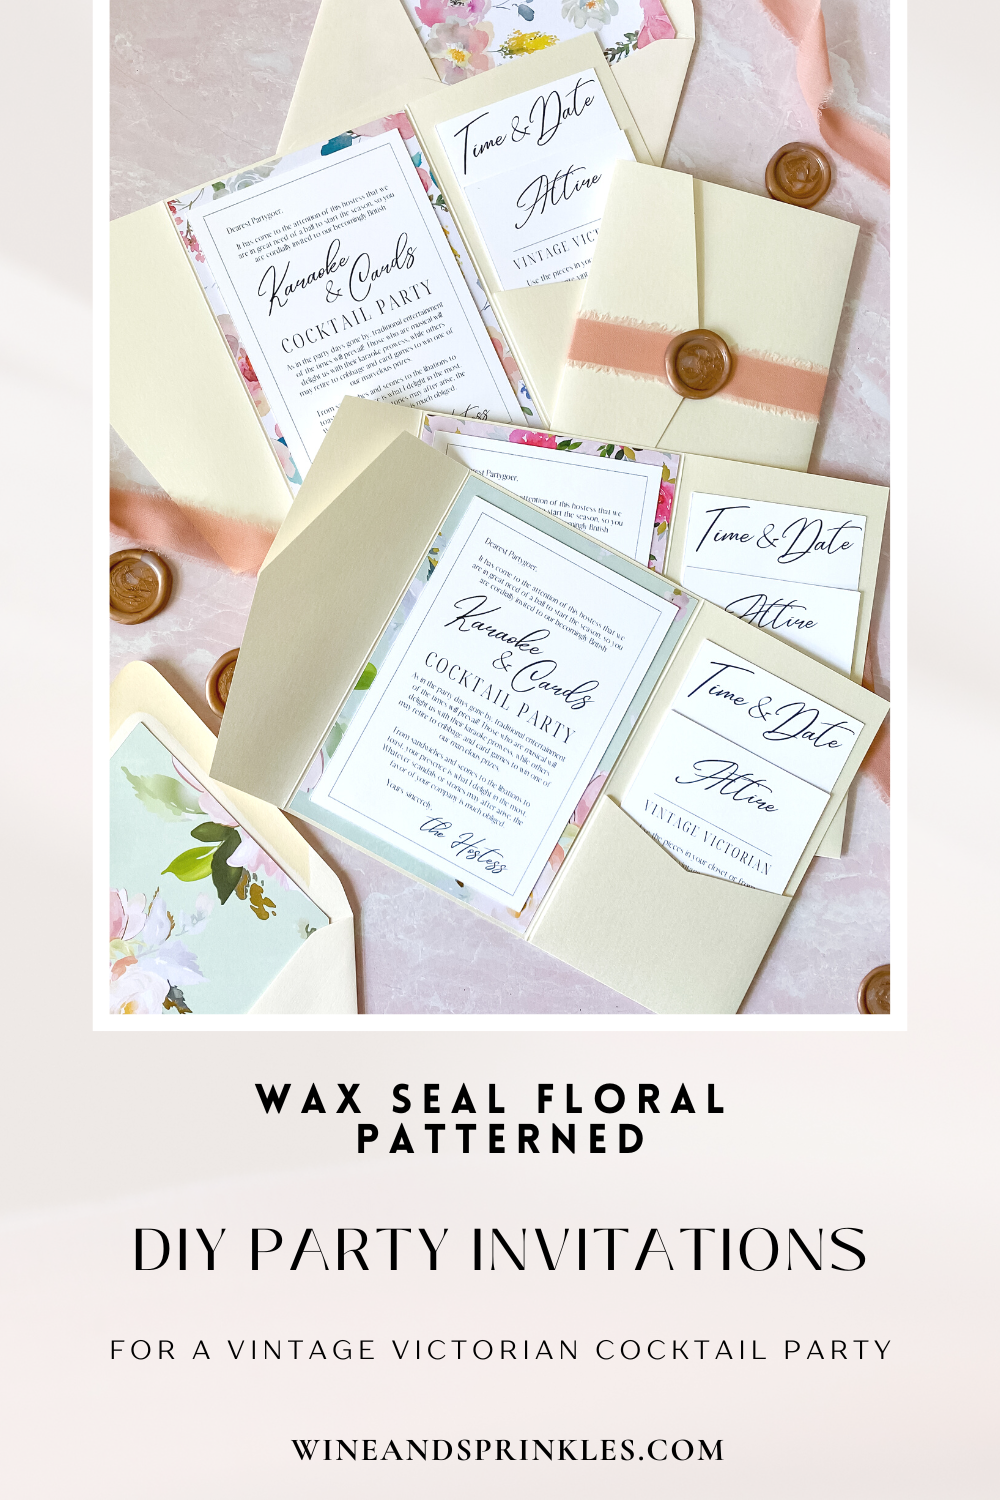
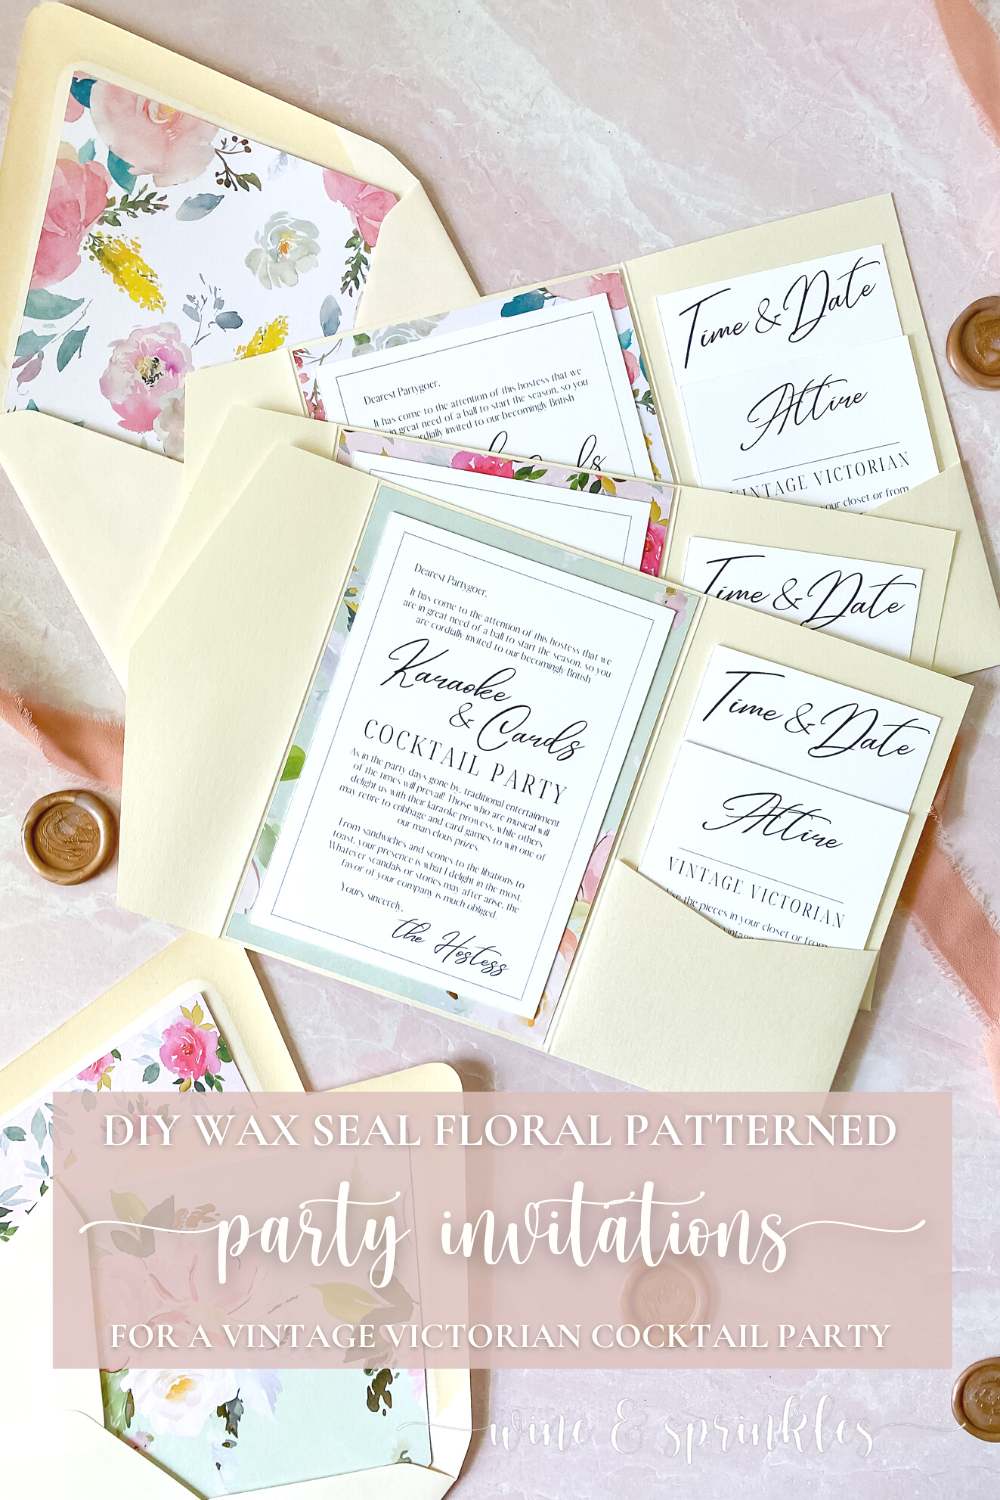
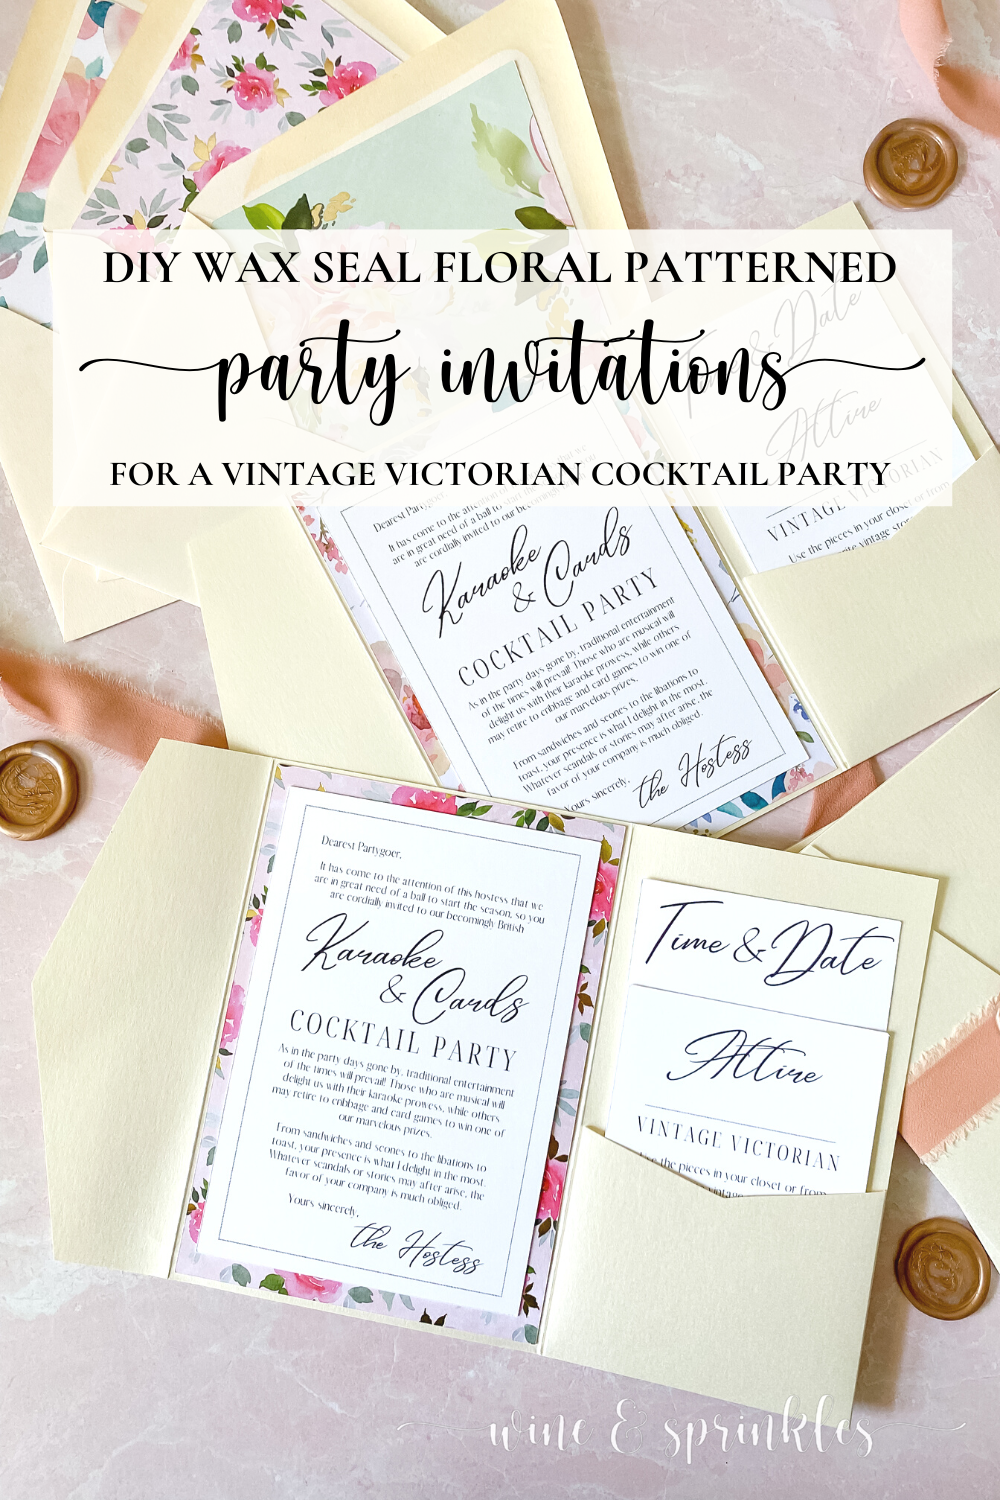
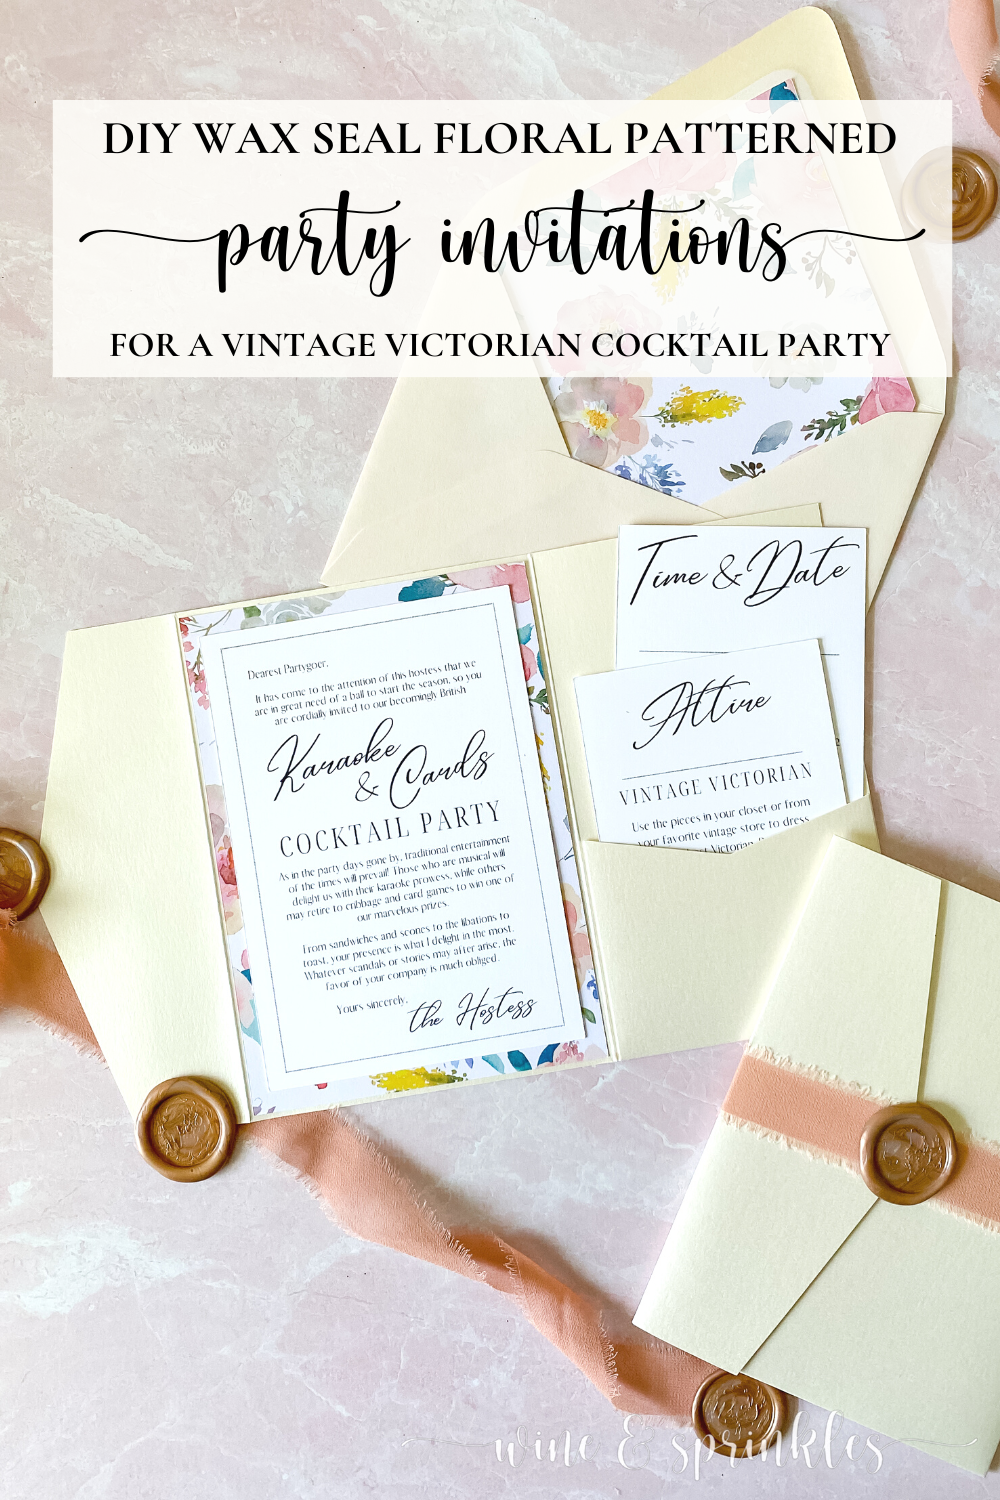
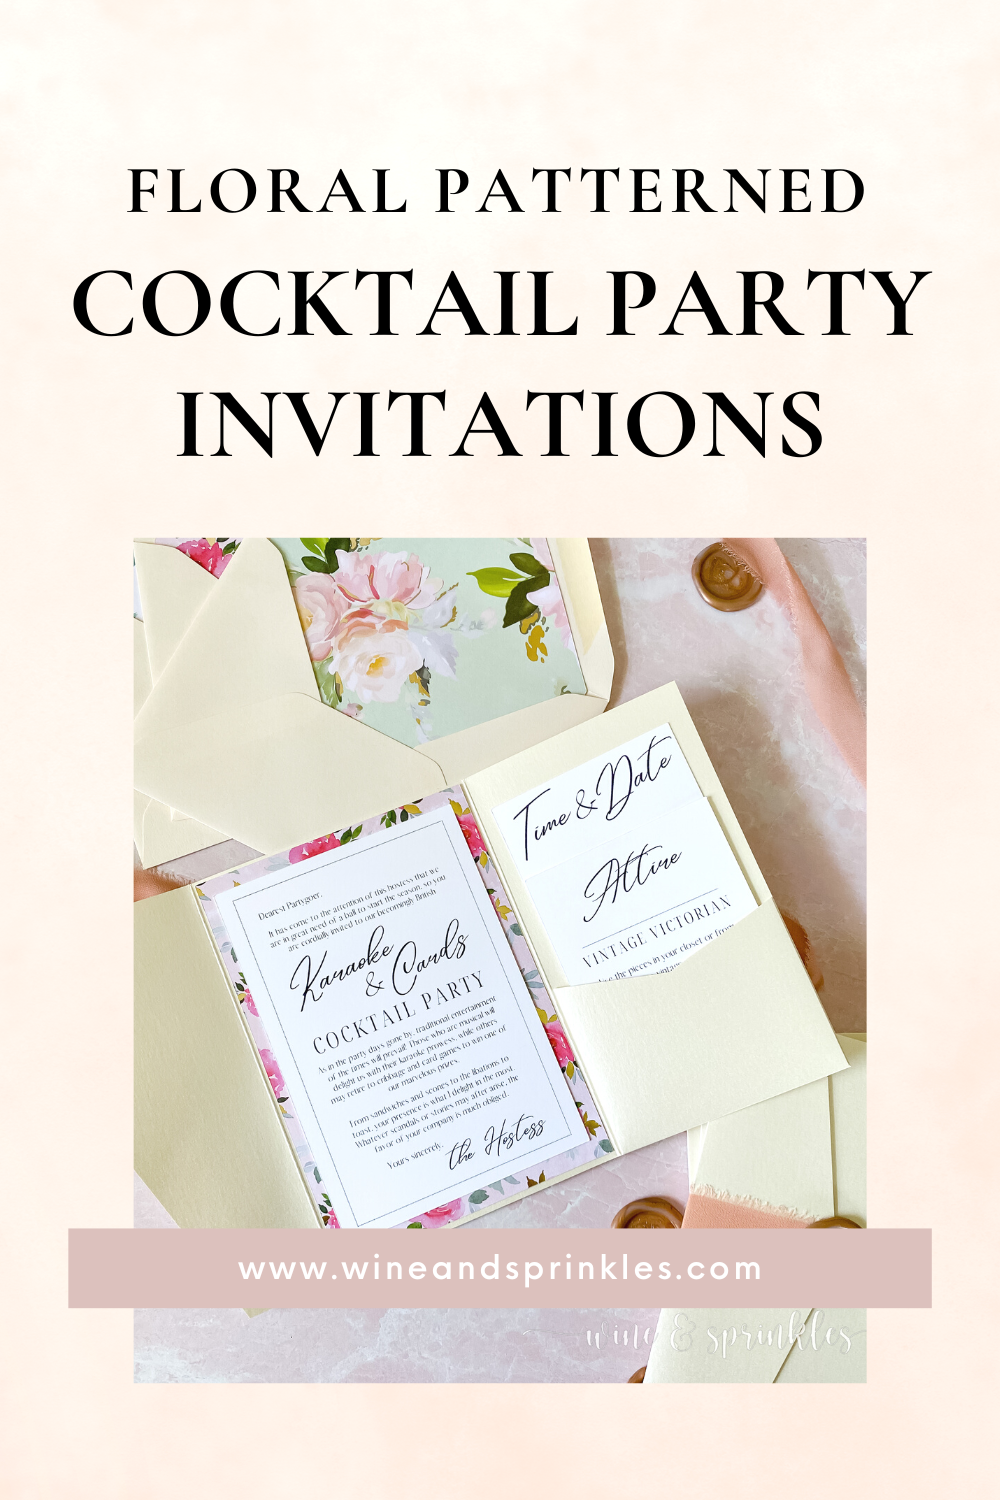
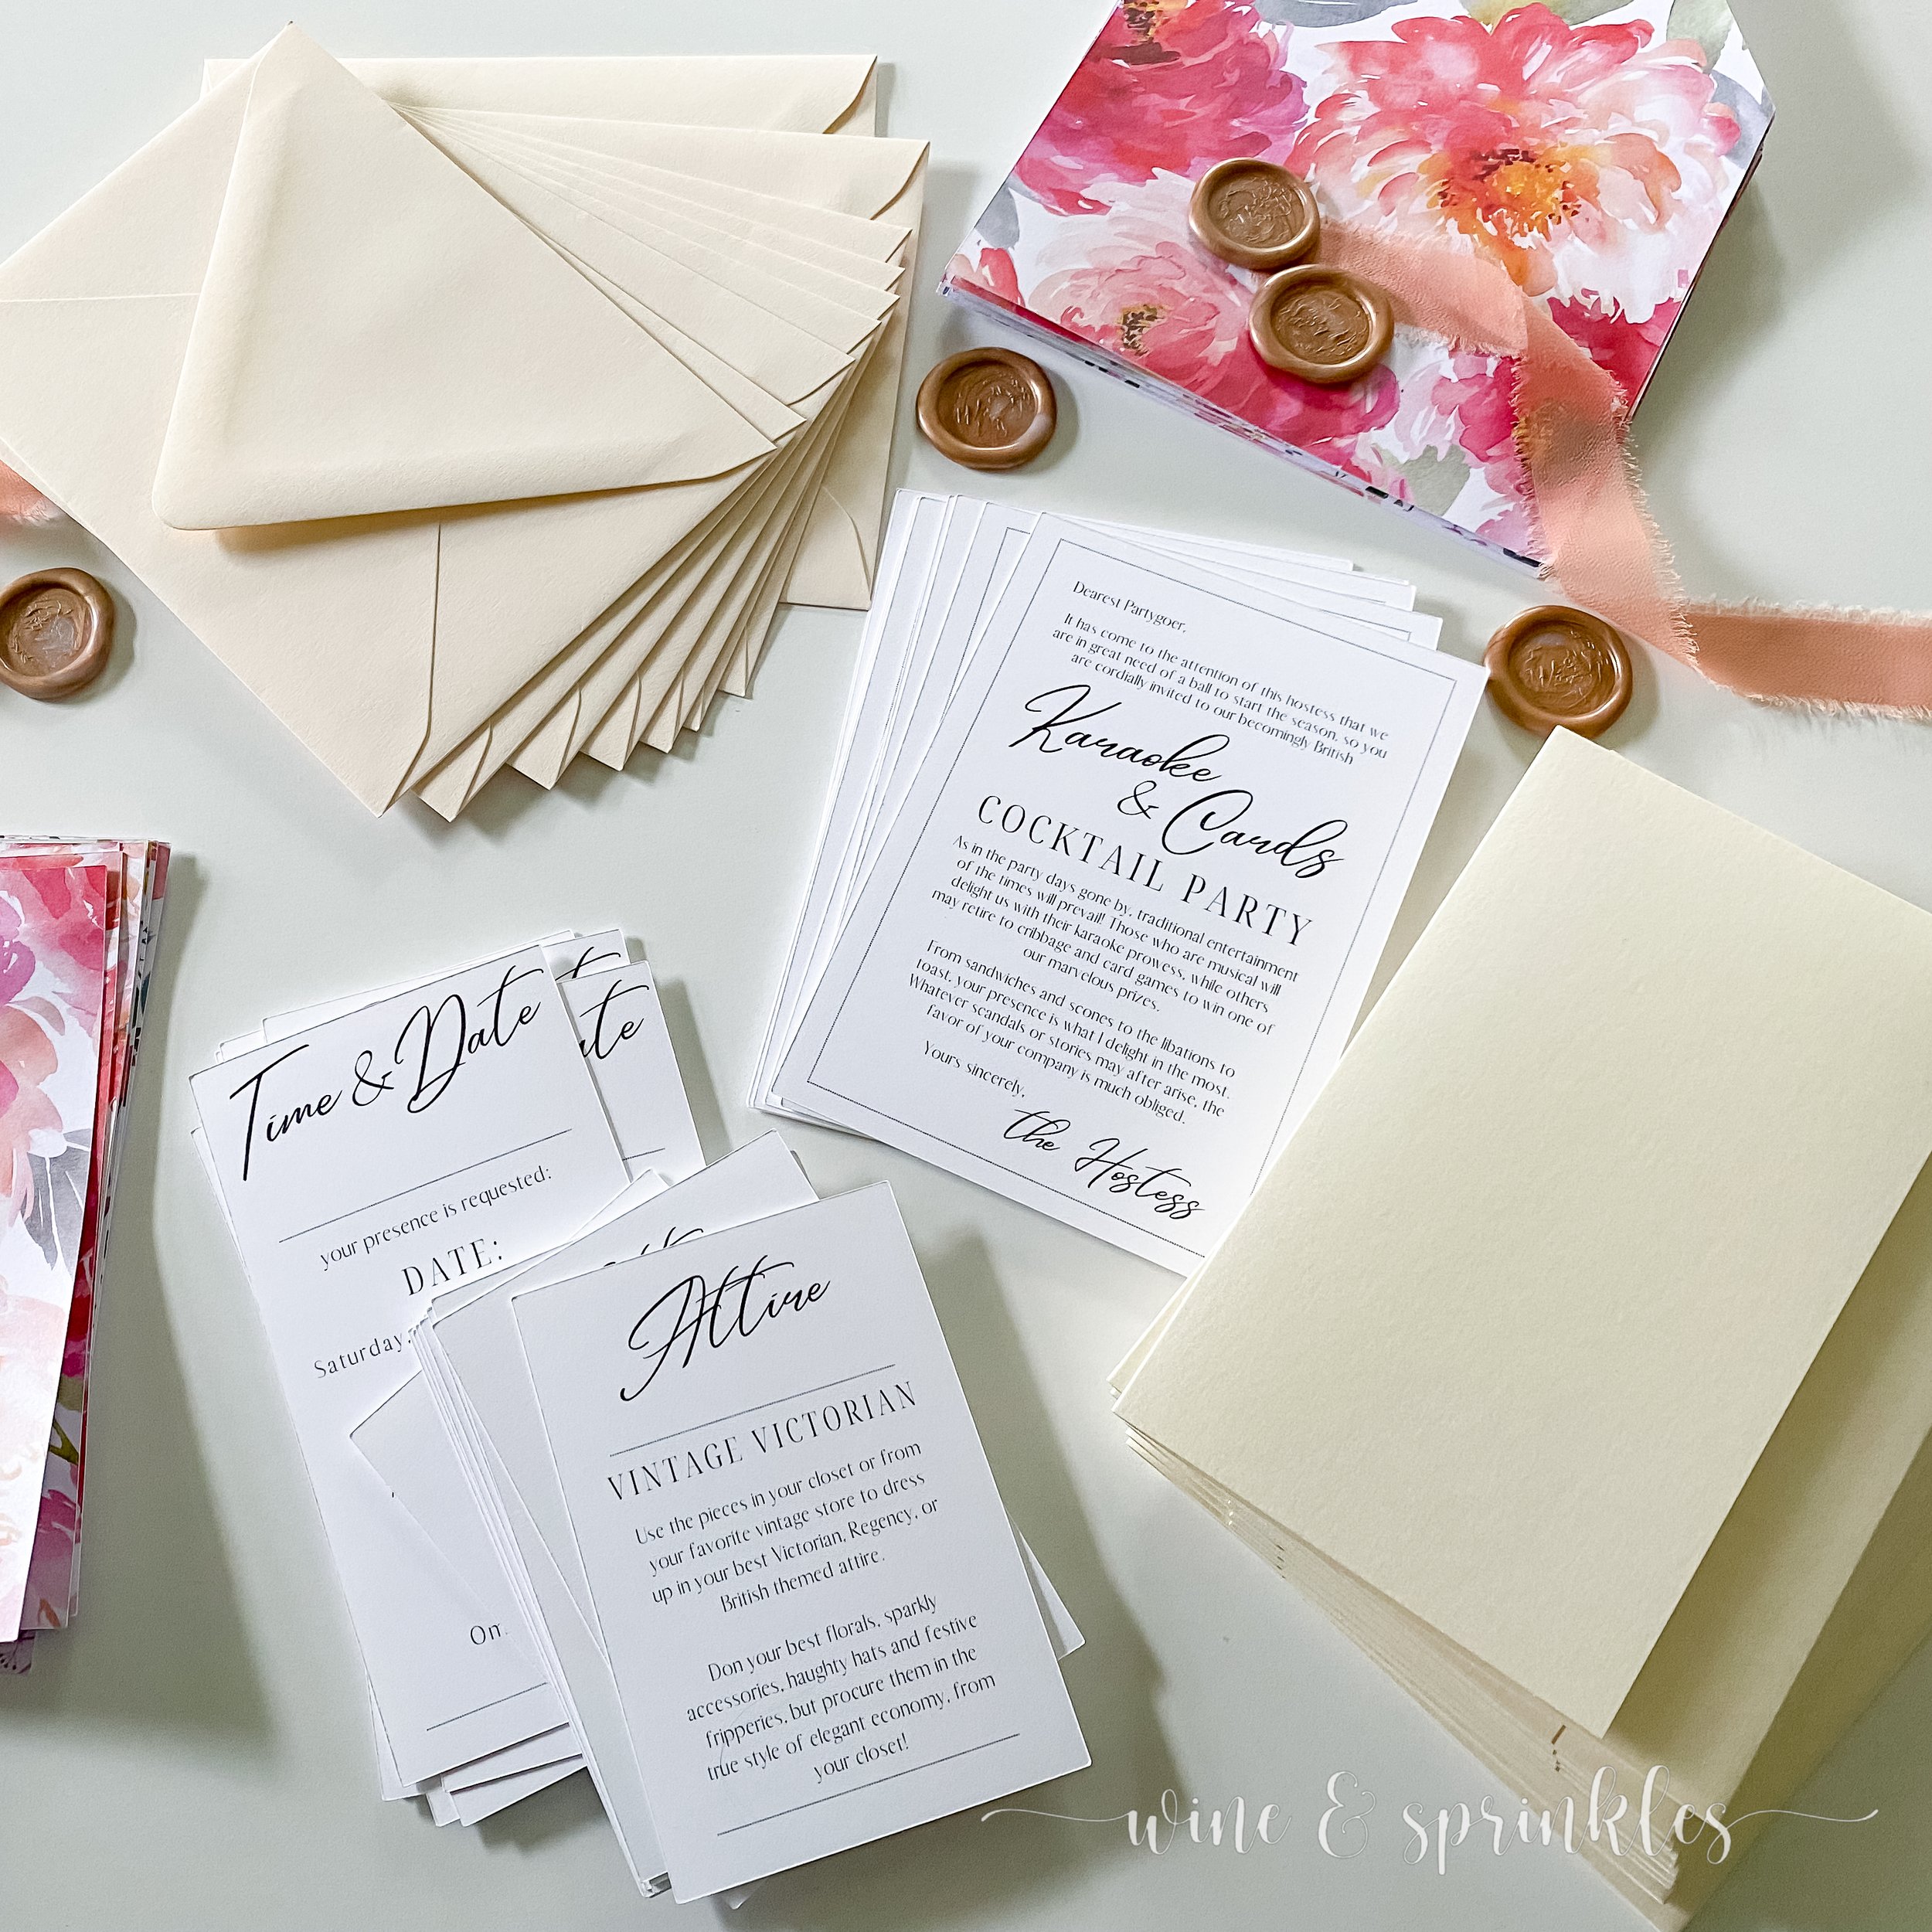
To properly announce any ball, you need an impressive invitation! So when I was planning my Victorian themed Karaoke & Cards Cocktail Party, I knew that the invitation to announce it would need to be pretty, informative, and most of all, floral! After a few hours of design, printing, cutting, and assembling, these mismatched floral Vintage Victorian Party Invitations were ready to send out to all my favorite people!
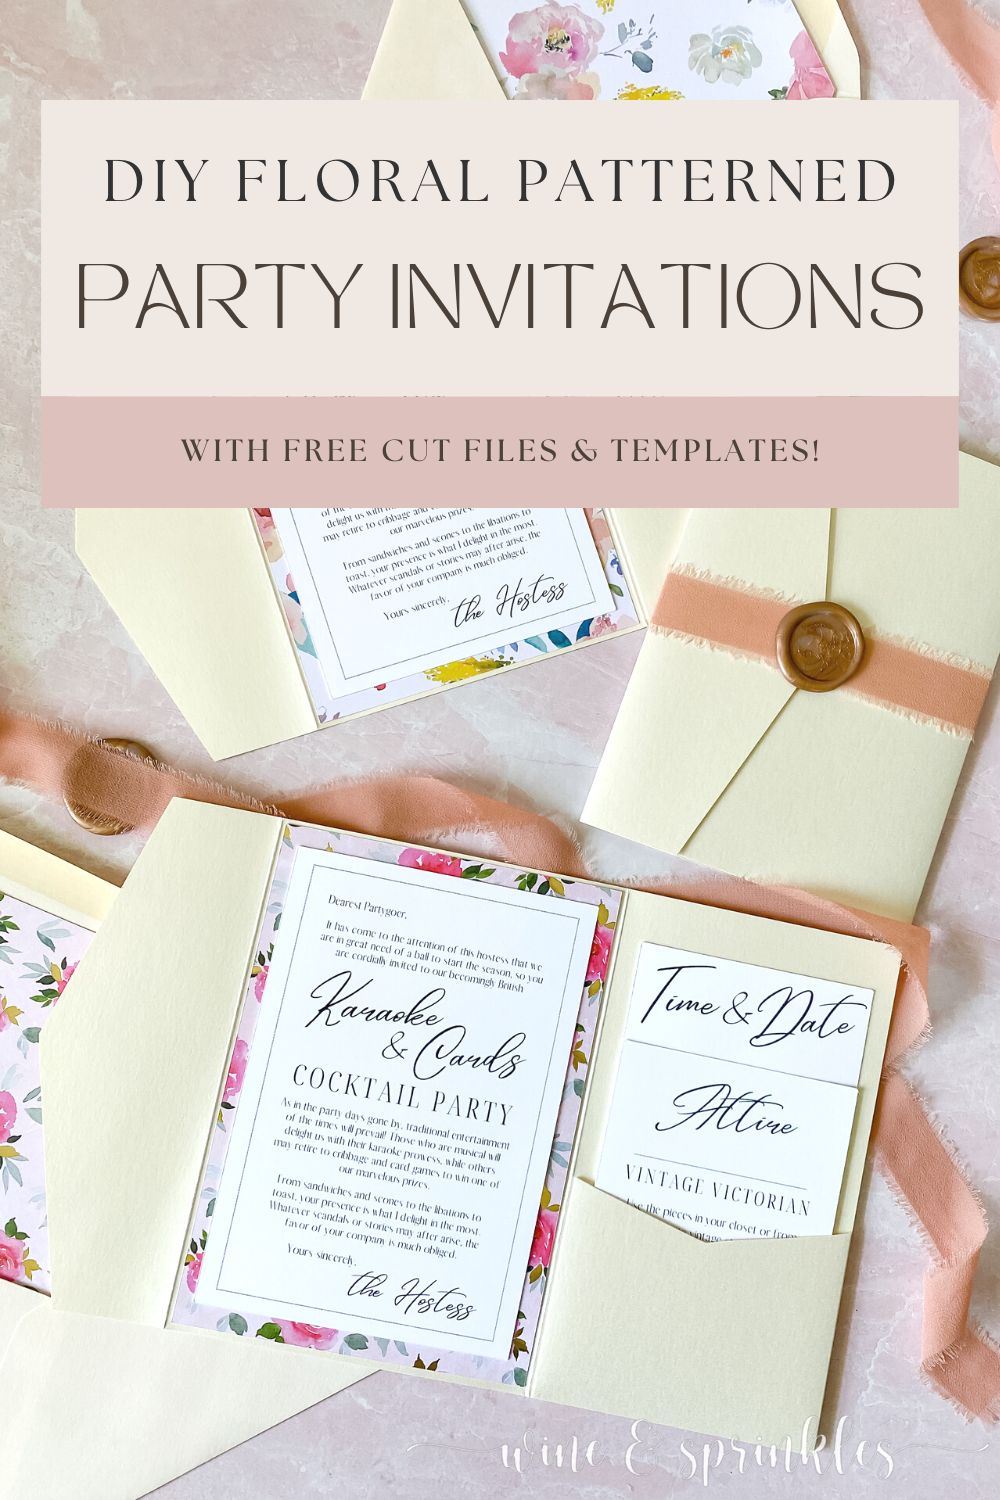
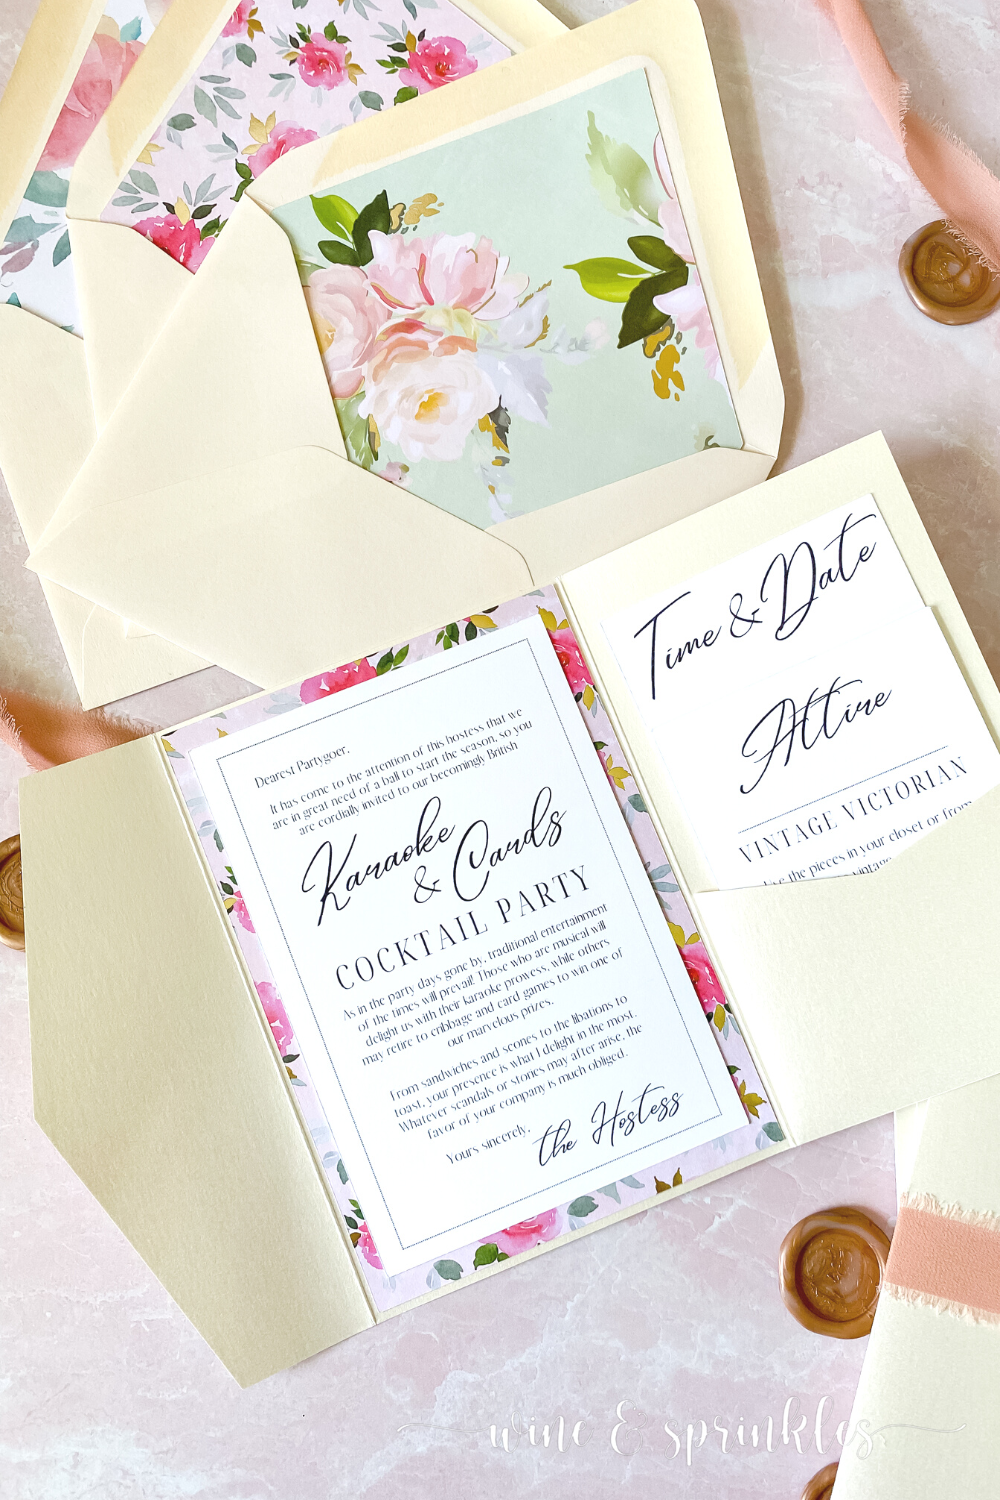
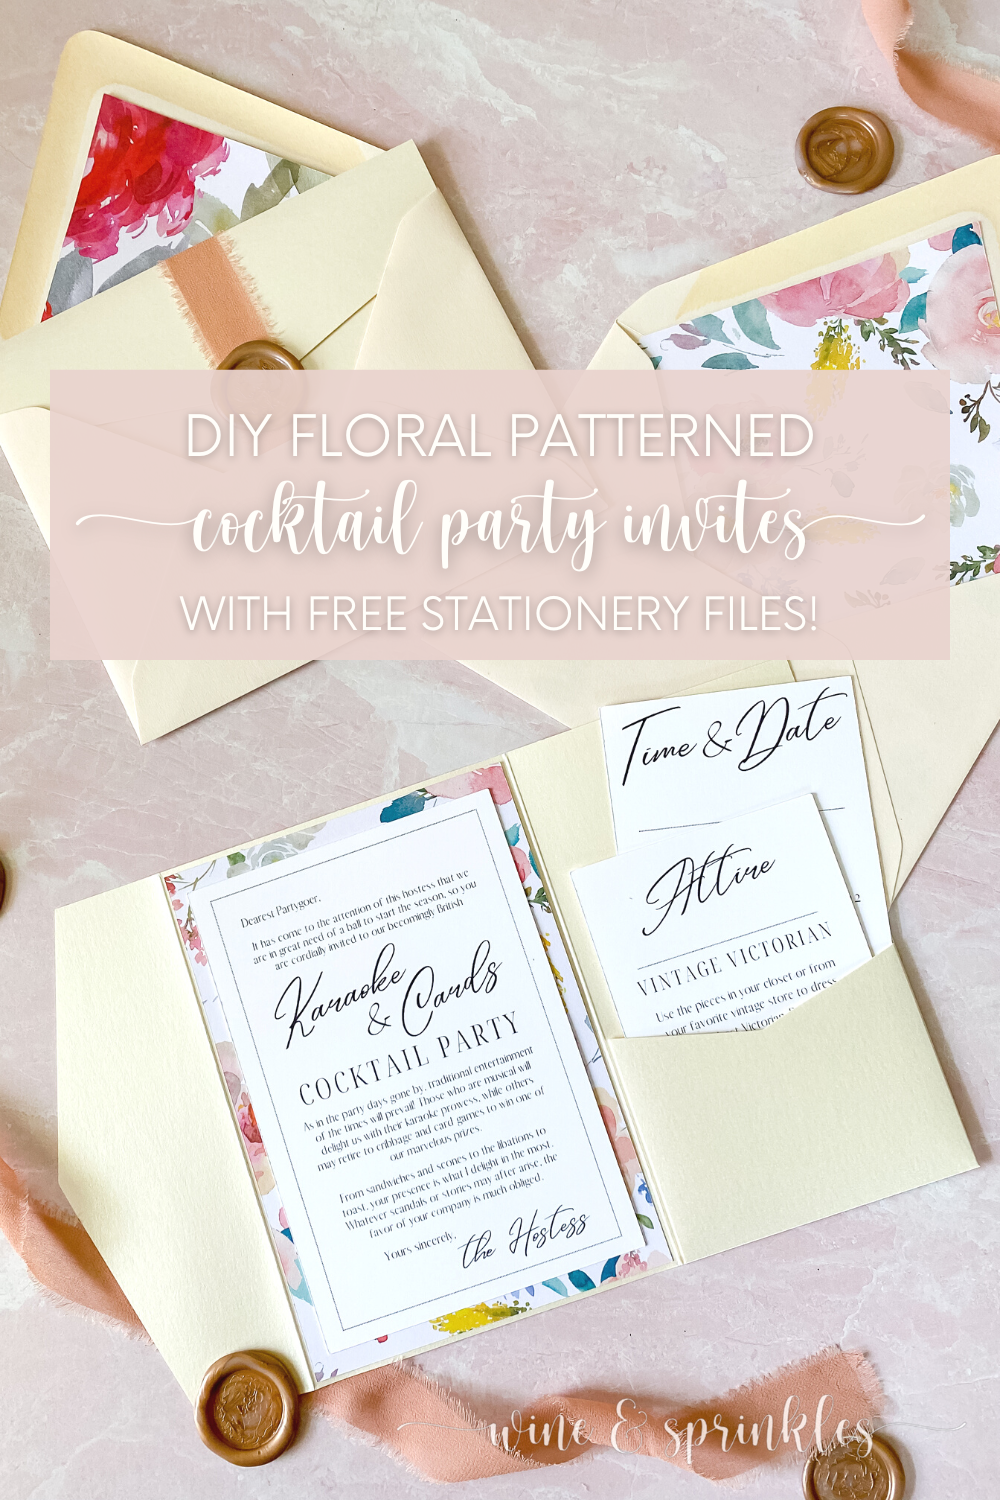
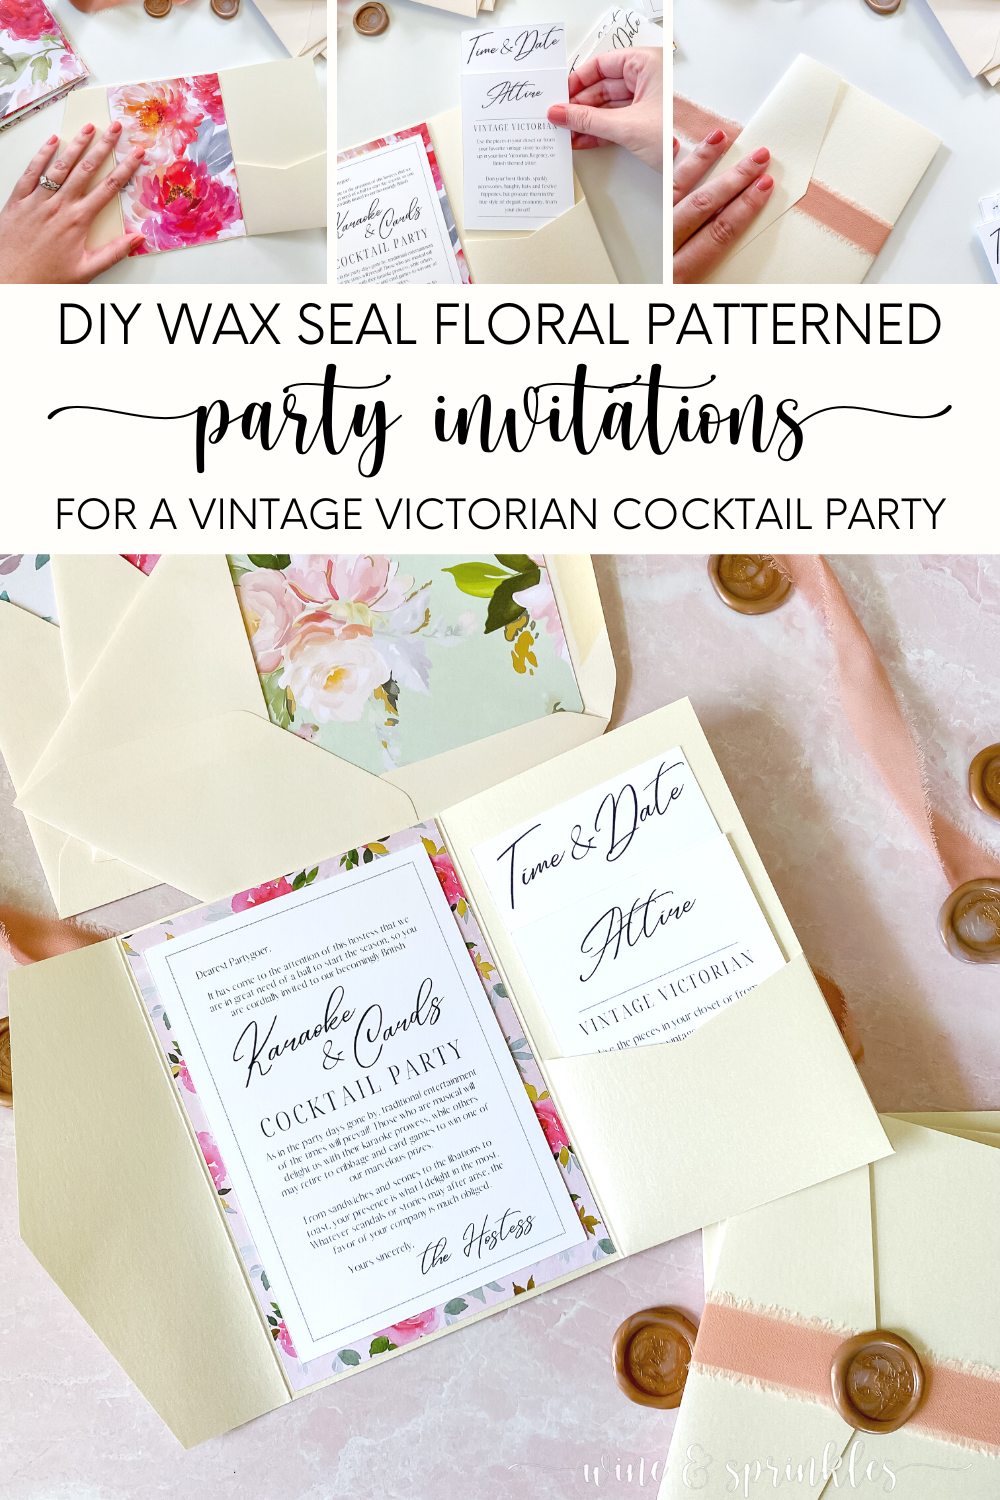
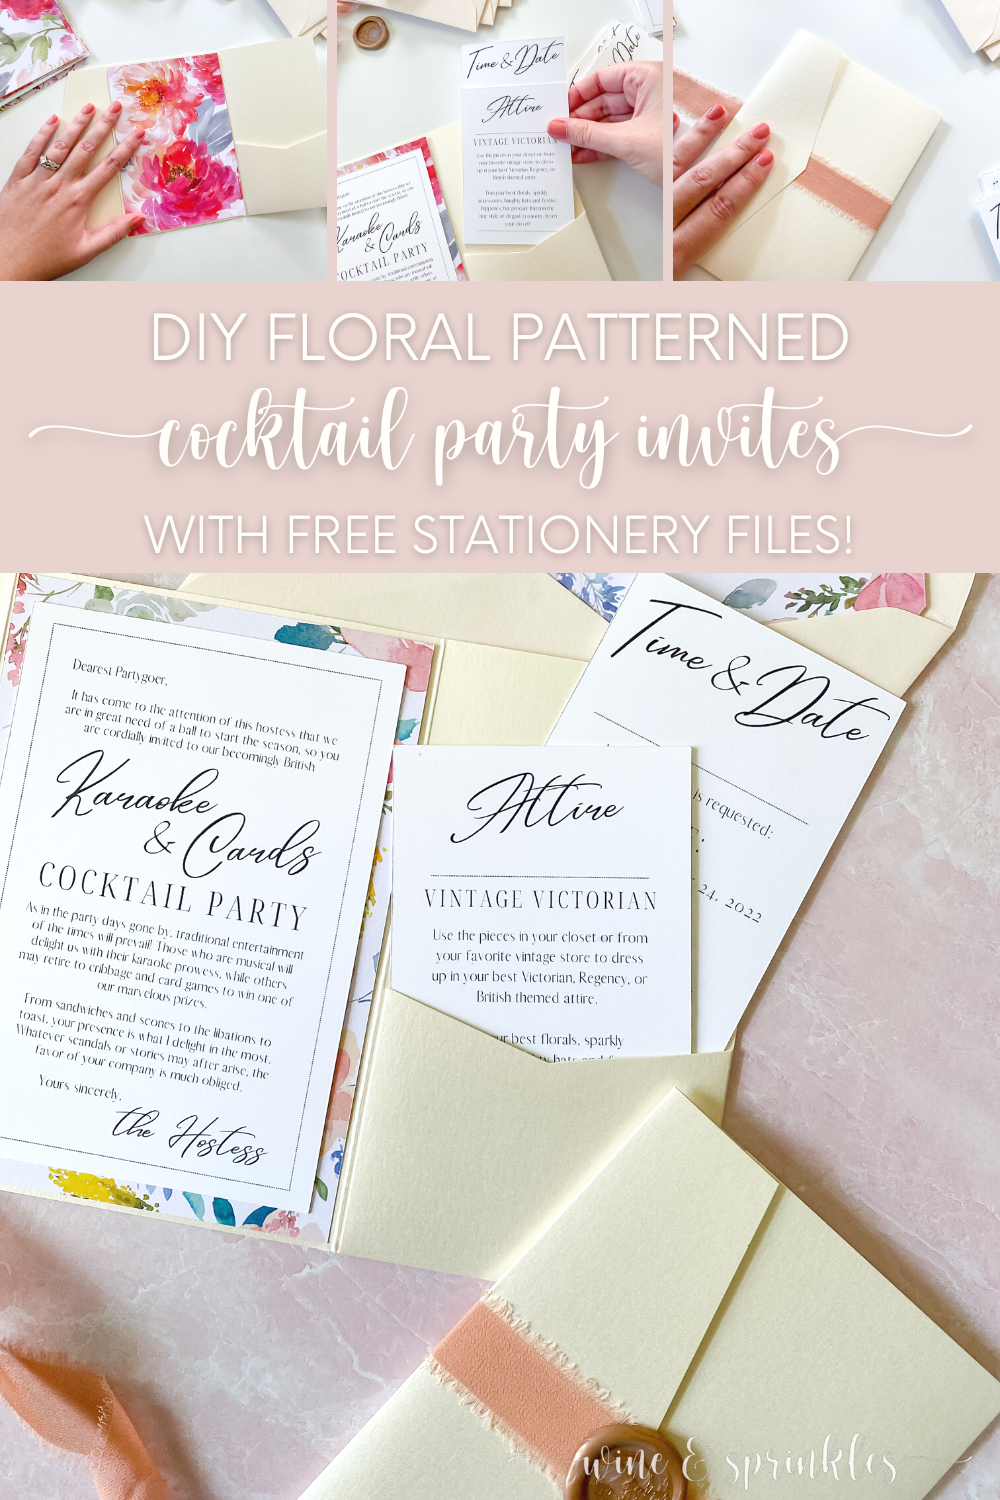
These beauties are a culmination of many projects I’ve made for this party so far, as well as being a great guide to use in creating your own custom invitations! Starting with customizing templates, this tutorial outlines printing and cutting the invitations and information cards for pocket fold invitation bases, mounting them onto pre cut Floral Patterned Invitation Mats, then finishing each wrapped in ribbon with a signature Marbled Wax Seal, sending the finished cards in a floral lined cream envelopes, the perfect vibe for my event.That being said, by changing up the patterns, colors, and card details; this method can easily be used for any event you can imagine!
For designing these invitations and their cards, I created a template that you can change up with your own party details in my favorite online graphic design software, Canva! Canva is my go to now for designing all my stationery as well as my blog graphics in general, and for this project I’m providing the cards I designed as templates for creating your own invitation cards. In addition to the standard center invitation, which I made to be similar to a favorite fictitious London gossip column, I chose to display the additional party information on two side pocket cards, namely the time, date, and address of the event for one and the suggested attire for the other. This makes it easy for those who want to throw the same style of party, just change to your own event details! But for those who want to change up more or use the presized cards and work from scratch, you can do that for your own custom invites! While Canva provides a free version of their software, I’ve used and loved their affordable monthly Pro Plan for so many years that many of the fonts I use are a part of it, and some of the ones for these cards may be too! You can always change the fonts to their free choices, sign up for their free one month pro trial or get the pro plan yourself depending on what works for you.


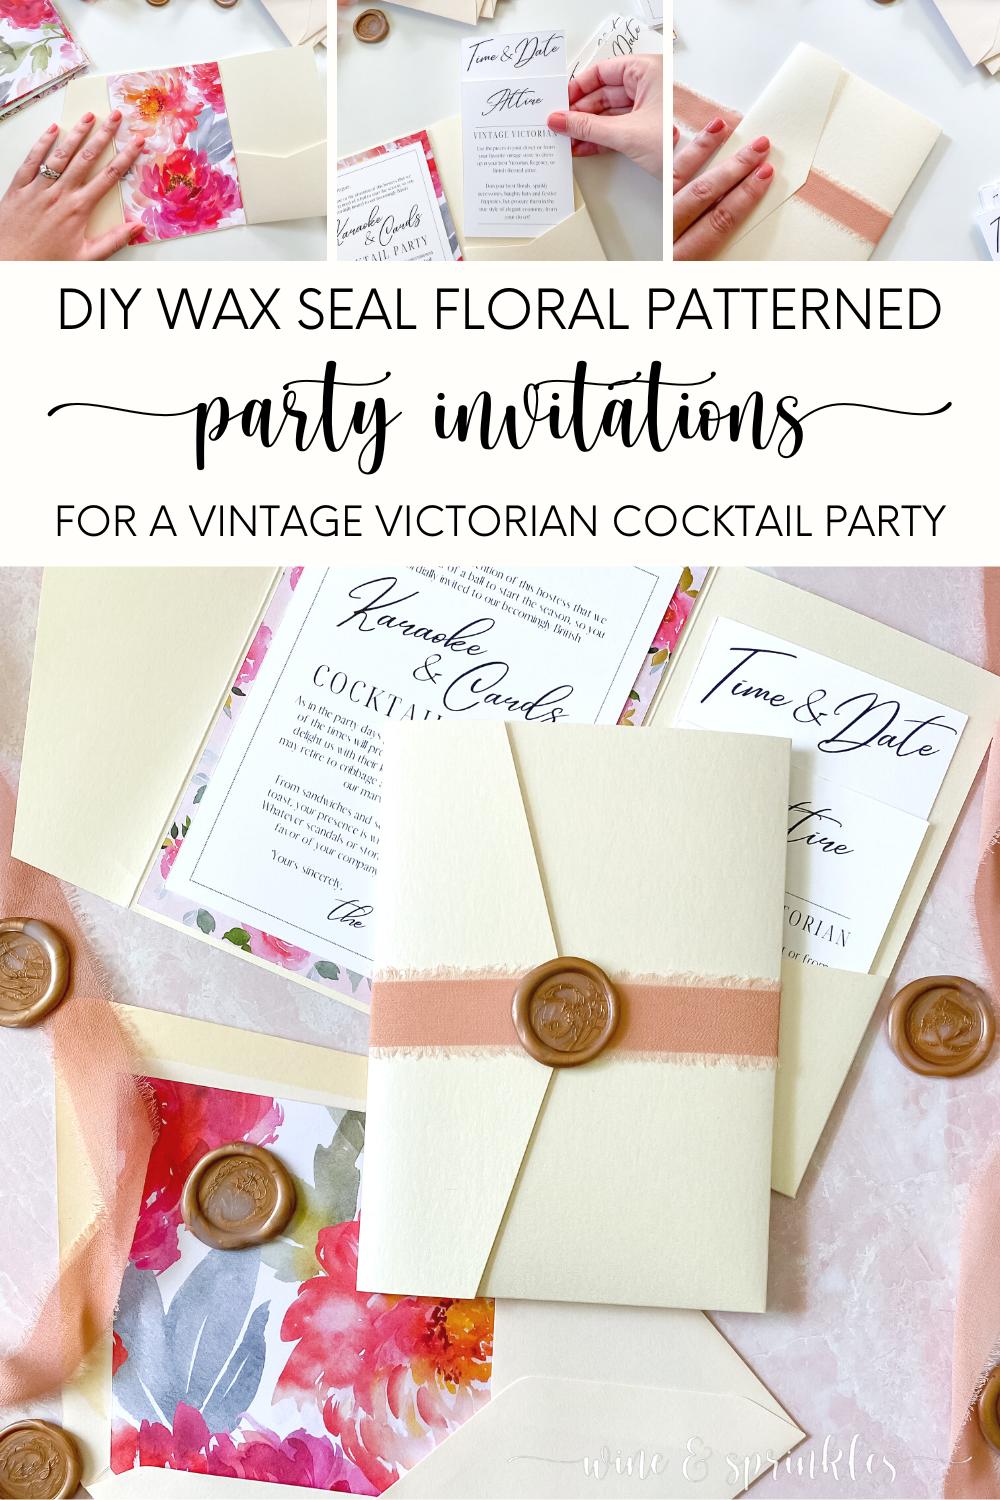
For cutting out my newly designed invite and insert files, I took advantage of one of my favorite features for Cricut Craft Cutters, the print to cut feature. After uploading the files and resizing them, I printed them on cardstock and my craft cutter took care of the rest, easily and accurately cutting all my cards with a professional feel, while taking so much less time than cutting out by hand!
As far as layered stationery like this goes, these invitations, my Zodiac Horoscope Star Charts, and the future stationery projects you’ll see this year all have something in common; and it's that I use the pocket folds and envelopes from my favorite stationery supplier and affiliate partner, Cards and Pockets! Specializing in DIY wedding stationery supplies, they are my go to for beautiful papers, housing a myriad of different pocketfold invitation bases, mats, envelopes, and paper in a variety of mattes, glitters, and metallic hues; with almost 200 colors to choose from! I wanted my Floral Patterned Invitation Mats to be the focal point of these invitations, so I stuck with a gorgeous Opal A7 Pocketfold to display my invitation and info cards, finished with a creamy Vellum Outer Envelope and a matching Floral Patterned Envelope Liner. I can't wait to experiment more with all the different colors and styles Cards & Pockets provides, but for this stationery set these were the perfect pick!


The Pascala Monogrammed Stamp made a return for more fabulous Marbled Wax Seals, the perfect design for finishing these floral invitations, thanks to my affiliate partner as well as favorite sealing wax and stamp supplier, Artisaire! I can’t wait to add to my own collection soon for my future paperie, and with the myriad of gorgeous designs my bigger problem will be wanting too many! To find your own perfect stamp for your party projects, check out all the beautiful designs Artisaire offers here, and to learn more about their products as well as the different methods of making wax seals, see my review on all the fabulous products I’ve bought or received from them so far!
These mismatched floral invitations were the perfect presentation for inviting my guests and I’m sure to use this method as a starting point for my future party stationery adventures! Whether using this tutorial as a guide for your own custom stationery or to make invites to your own Vintage Victorian Party, you’re sure to create custom cards that will impress your own guests!
SUPPLIES
PAPER & STATIONERY SUPPLIES
Cardstock: for printing and cutting the invitations and insert cards for your stationery. I found that I could cut two of the insert cards or one invitation per sheet, so you’ll need three pieces of cardstock per two invitations.
A7 Envelopes: For housing and mailing your finished invitations, Cards & Pockets has so many color options to pick from! I went with a creamy Vellum color for these invites, wanting the floral pattern inside the envelope to be the star, but you can customize your envelopes to any color you love for your own project.
Pocketfolds: used both for mounting invitations and displaying informational cards, the traditional A7 Pocketfold was the best base for this invitation! I love the variety of styles and colors of these stationery basics that Cards & Pockets provides, so you’re sure to be seeing more of these as well as some of their other base card options too in my future stationery projects. I used the shimmery Opal colored pocket folds for this project, loving the elegant and classic base for my floral invitation mats as well as for my Vintage Victorian theme, but just like the envelopes, look through all their colors and textures for your own unique color combination!
Patterned Paper Envelope Liners & Mats: while I kept my envelope and pocket folds traditional, where I had fun with florals was in the invitation mats and envelope liners, creating them out of floral patterned scrapbook paper. I made each invitation set with a matching liner and mat, but with the patterns of the pieces changing with each card, so every guest got a unique floral pattern! You can find the tutorial linked above to make your own in your own patterned paper, with the mats and liners being sized for the standard A7 invitation pieces for this project.
Self Adhesive Wax Seals: for completing these invitations with an elegant seal, the Marbled Self Adhesive Wax Seals I created with my Pascala Monogrammed Stamp from Artisaire was the perfect choice! The delicate blooming flower in rose gold and vellum was a gorgeous accent to the pops of floral in my stationery, but if you don’t have time or the supplies to marble your own seals, check out all the beautiful self adhesive wax seals Artisaire supplies, with the dozens of patterns and colors they have, you’re sure to find something you love!
Chiffon Ribbon: for a soft vintage and romantic feel, this rose gold fringe chiffon ribbon was just what I wanted! Its one inch width made it the right size for showing off the wax seals, along with being a great way to match them to my Wax Seal Gable Gift Boxes! I found I needed 12 inches of ribbon for each invitation.
TOOLS & OTHER SUPPLIES
Craft Cutter: For this as well as many of my stationery projects, using the print to cut feature on my Cricut Craft Cutter made short work of cutting my invitations and information cards! It does such a good job of accurately cutting prints and saves me lots of time trying to hand cut cards to the same quality, especially with text heavy designs like this where I want a crisp white edge to all my cards.
Light Grip Cutting Mat: for most of my stationery projects using a craft cutter, I prefer the light grip cutting mat. It keeps the card stock securely in place, but I’m not worried about tearing the paper while I’m trying to remove it.
Printer & Ink: for printing out your invitations and insert cards with the print to cut border on them for cutting out with your craft cutter.
Double Sided Tape: for securing your mats and liners inside your envelopes and pocketfolds
SUPPLIES LIST:
[for 12 invitations]
Cardstock x 18
A7 Envelopes x 12
Pocketfolds x 12
Patterned Paper Envelope Liners & Mats x 12
Self Adhesive Wax Seals x 12
Chiffon Ribbon x 12 ft
Craft Cutter
Light Grip Cutting Mat
Printer & Ink
Double Sided Tape

DIRECTIONS
STEP 1: DESIGN & SAVE YOUR INVITATION & INSERT CARDS
1. Open the templates provided in Canva, then change the date, time, address and any other details you like, then save each file to your computer as a .png file to your computer.
Click Here for the Main Invitation Card
STEP 2: CALIBRATE YOUR CRICUT CRAFT CUTTER
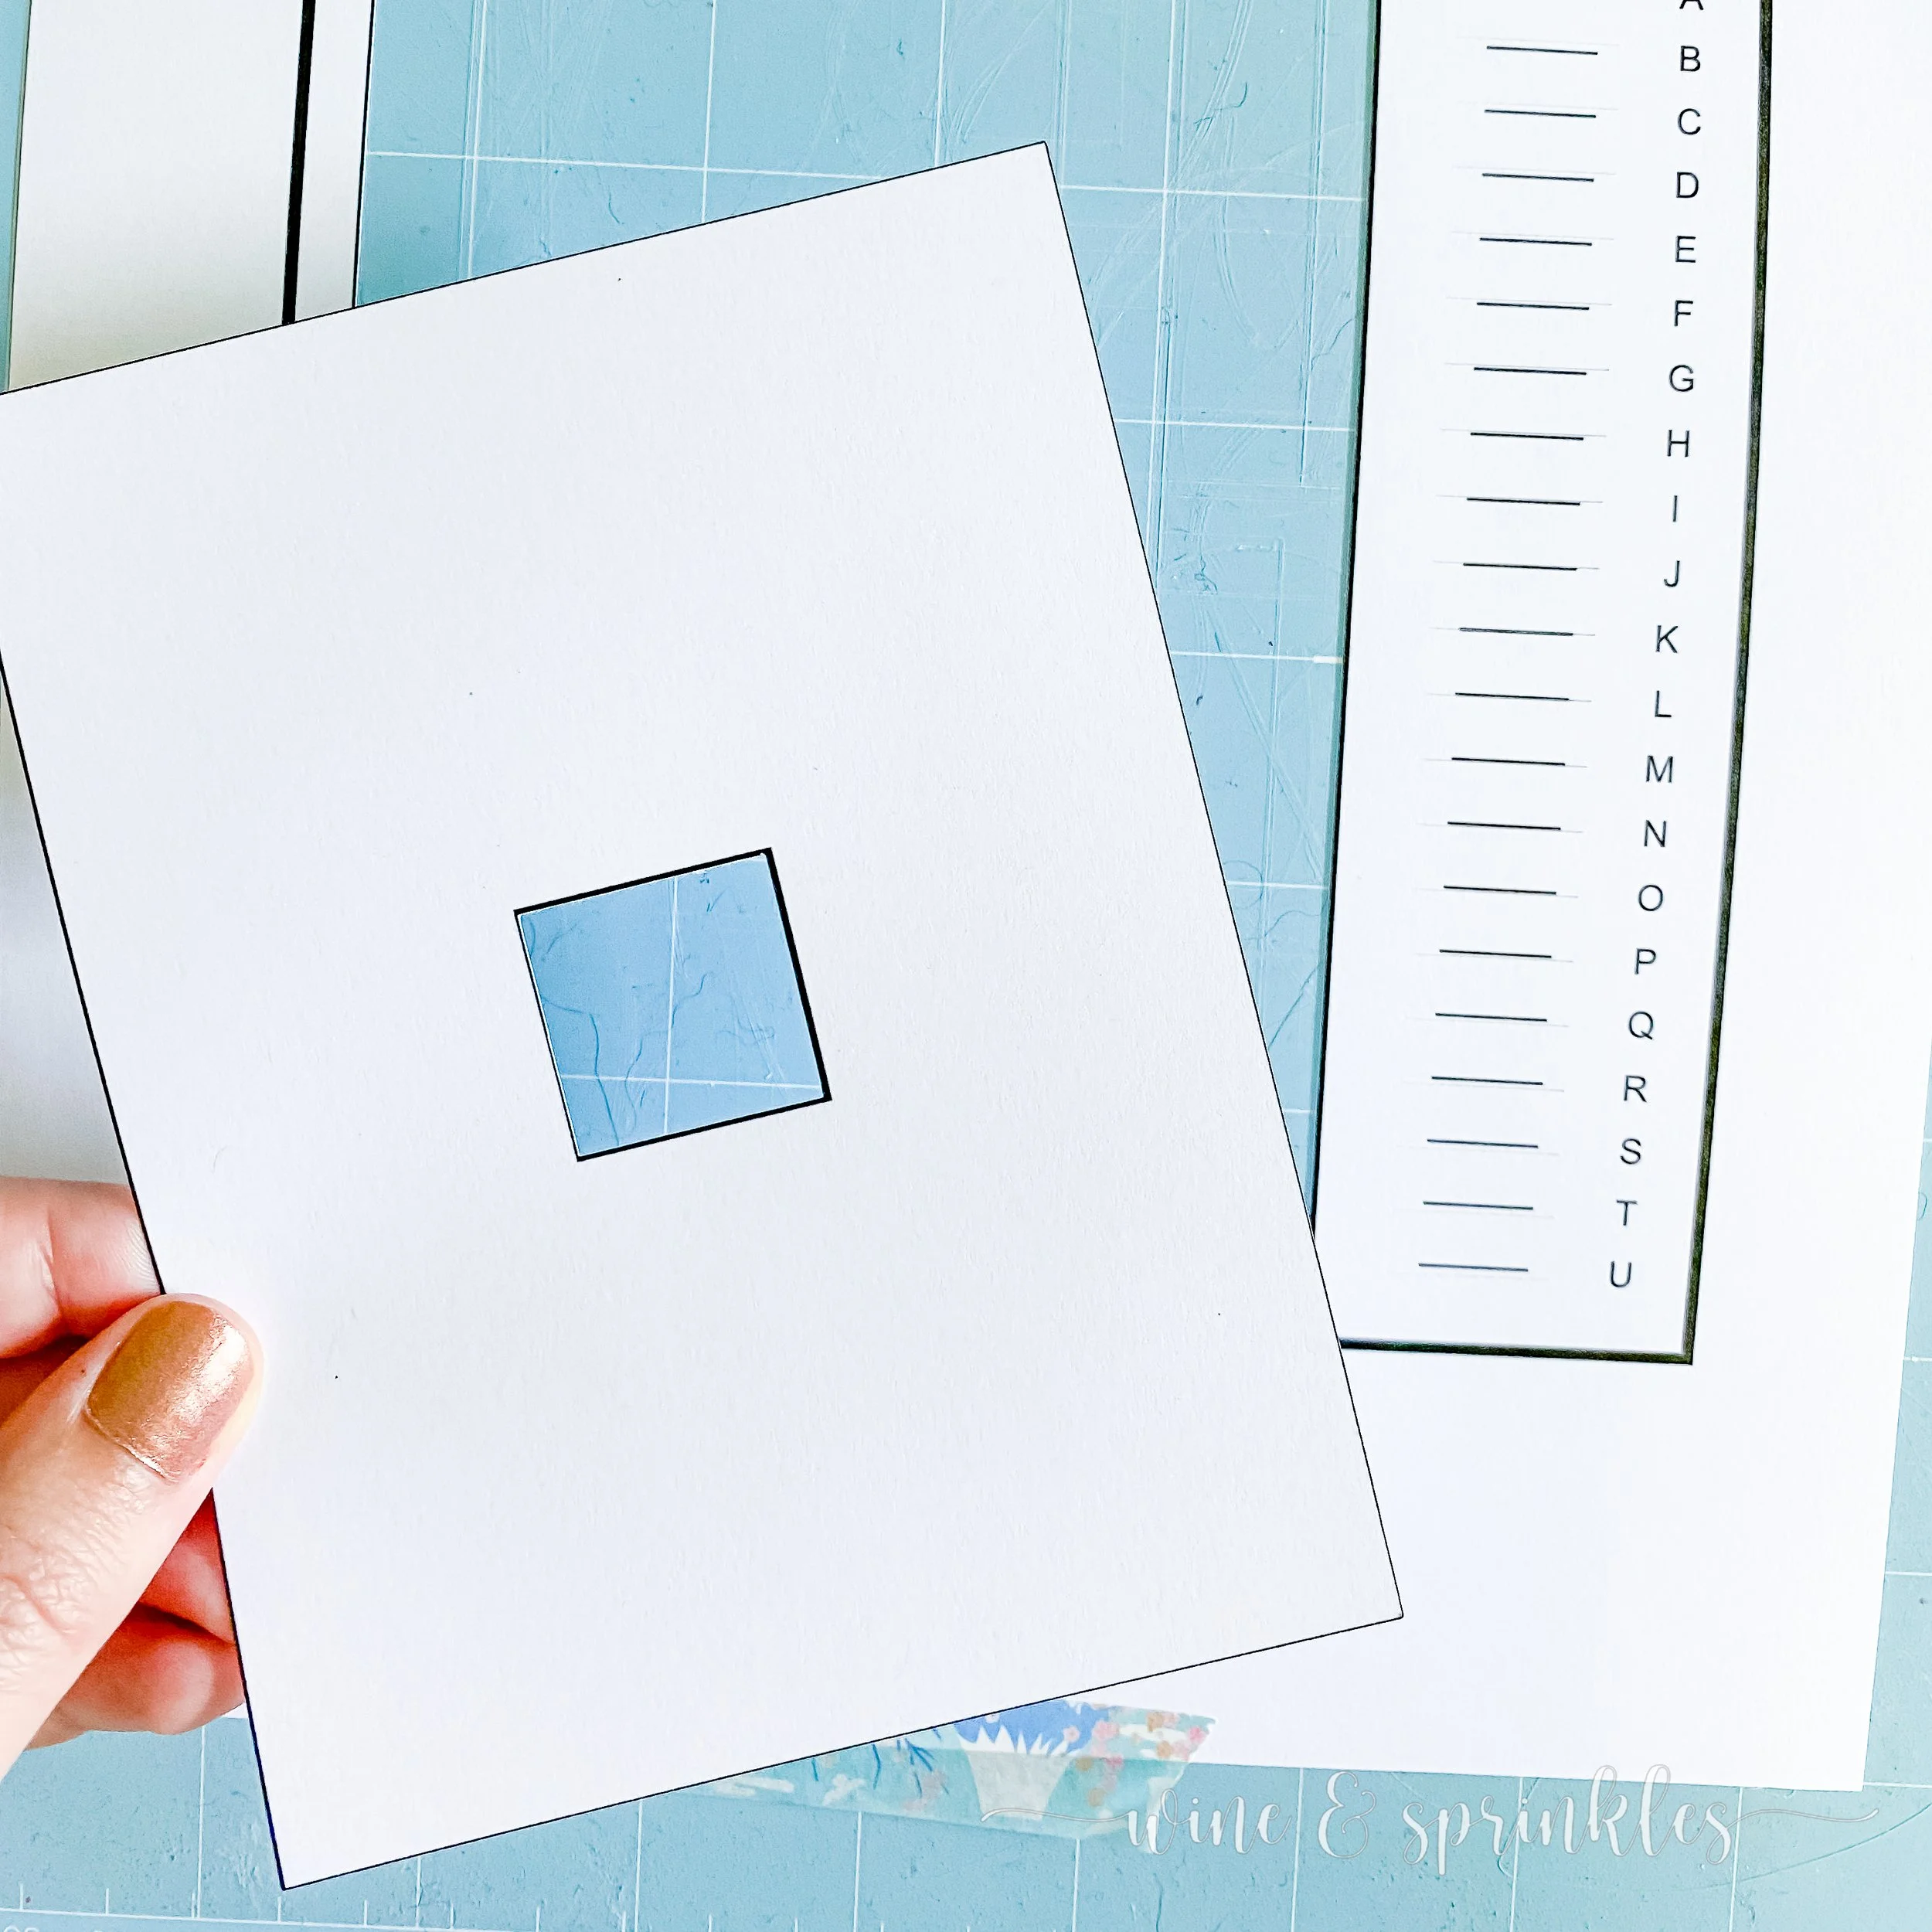
2. Before I start any Print then Cut Projects, I like to calibrate my craft cutter so that it cuts most accurately, and the process is pretty straight forward. After opening a new project, start by selecting the “Calibration” option on the list of choices under the Main Menu Icon, shown as three horizontal lines. This will bring up a new popup window, then select the Print then Cut button.


3. Follow the prompts to Print the calibration sheet and load it onto the mat and into your craft cutter, then press Continue. The cutter will then make its initial scans and cuts, then ask you to inspect the cardstock without removing the mat. Based on how your cardstock was cut, answer the question, then press Continue.


4. This will start a second round of cuts along the numbered row and lettered column of the calibration test sheet. When the machine is finished cutting, inspect the cardstock again, without unloading, and answer the question based on how your machine cut the cardstock.

5. After this, the machine will make a final test cut around the large rectangle on the calibration test sheet, then ask if you are happy with the cut. If you select yes, the machine saves its current settings from calibration and takes you back to your project, if you select no it will restart the calibration process again with these new settings, and you can repeat it until the cuts are to your satisfaction. Once you are happy with the cut, press continue to upload your files to print then cut.

STEP 3: IMPORT & RESIZE YOUR FILES
Upload your three card files as print and cut designs in the Cricut Design Software by the following:

6. Select the Upload button on the lower left of the screen, then click upload image and select the card design file. Follow the prompts, choosing “Complex” as the image type and at the end select to import the file as a Print then Cut image. After pressing upload, repeat this process with all the card files, then select your newly imported files and click Add to Canvas to import them into the workspace on the software screen.


7. Once your files are imported, change the sizes of your cards using the dimensions toolbar in the upper right of the screen to:
Invitation Card: 4.5” x 6.5”
Time & Date Card: 3.5” x 6.5”
Attire Card: 3.5” x 5”
Once each card is resized, copy and paste the designs for the Attire Card as well as the Time and Date card so that there are two of each, then select “Make” in the lower right side of the screen to set up the file to be printed and cut.


STEP 3: PRINT THEN CUT YOUR CARDS
8. Check your files on the mat set up screen and make sure the material size is 8.5 in x 11 in. and that the card appears properly sized in the mat setup picture. On the second mat that contains a Time & Date card, select the card, then using the three dot menu on the upper left of the card, select the “Move Object” and move it to the mat containing the first card. Rotate both 90 degrees so they can both be printed and cut on the same sheet of paper, then press Continue.


9. Next, Select the Send to Printer Button, which will open a separate popup screen. Make sure the printer is set to the one you want to use, the number of sheets you want printed is the correct amount for the number of cards you want to make, and that the “Add Bleed” Selection is off; then Select Print to print your cards. Print the cards on the cardstock you wish to use on the best quality settings your printer allows. You’ll notice that I made two of both the attire and party date cards fit on a single sheet, while only one invitation fits per page; so print twice as many invitation sheets to the number of insert card sheets to keep your numbers consistent.


10. Load the printed cardstock, design face up, along the upper left hand side of your cutting mat as shown in the picture on the screen. If your adhesive mat is low on stickiness, I like to secure the top and bottom of my cardstock with washi tape to provide extra security while cutting them out, but this is optional! Set the Material to Cardstock+ for the older (Cricut Explore) machines or to the material closest to the cardstock weight you are using in from the menu for newer (Maker or Maker 3) models, then press the loading button on your craft cutter to load the mat into the machine. Press the “Go” Button to start the scanning and cutting process, and when the cutter is complete the loading button will blink to indicate to unload the mat.
11. Remove your mat and freshly cut cards, disposing of the extra cardstock; then, load your next printed sheet onto the mat and repeat the cutting process until you have cut out all the invitation, attire, and party date cards you need.

STEP 4: ASSEMBLE YOUR INVITATIONS


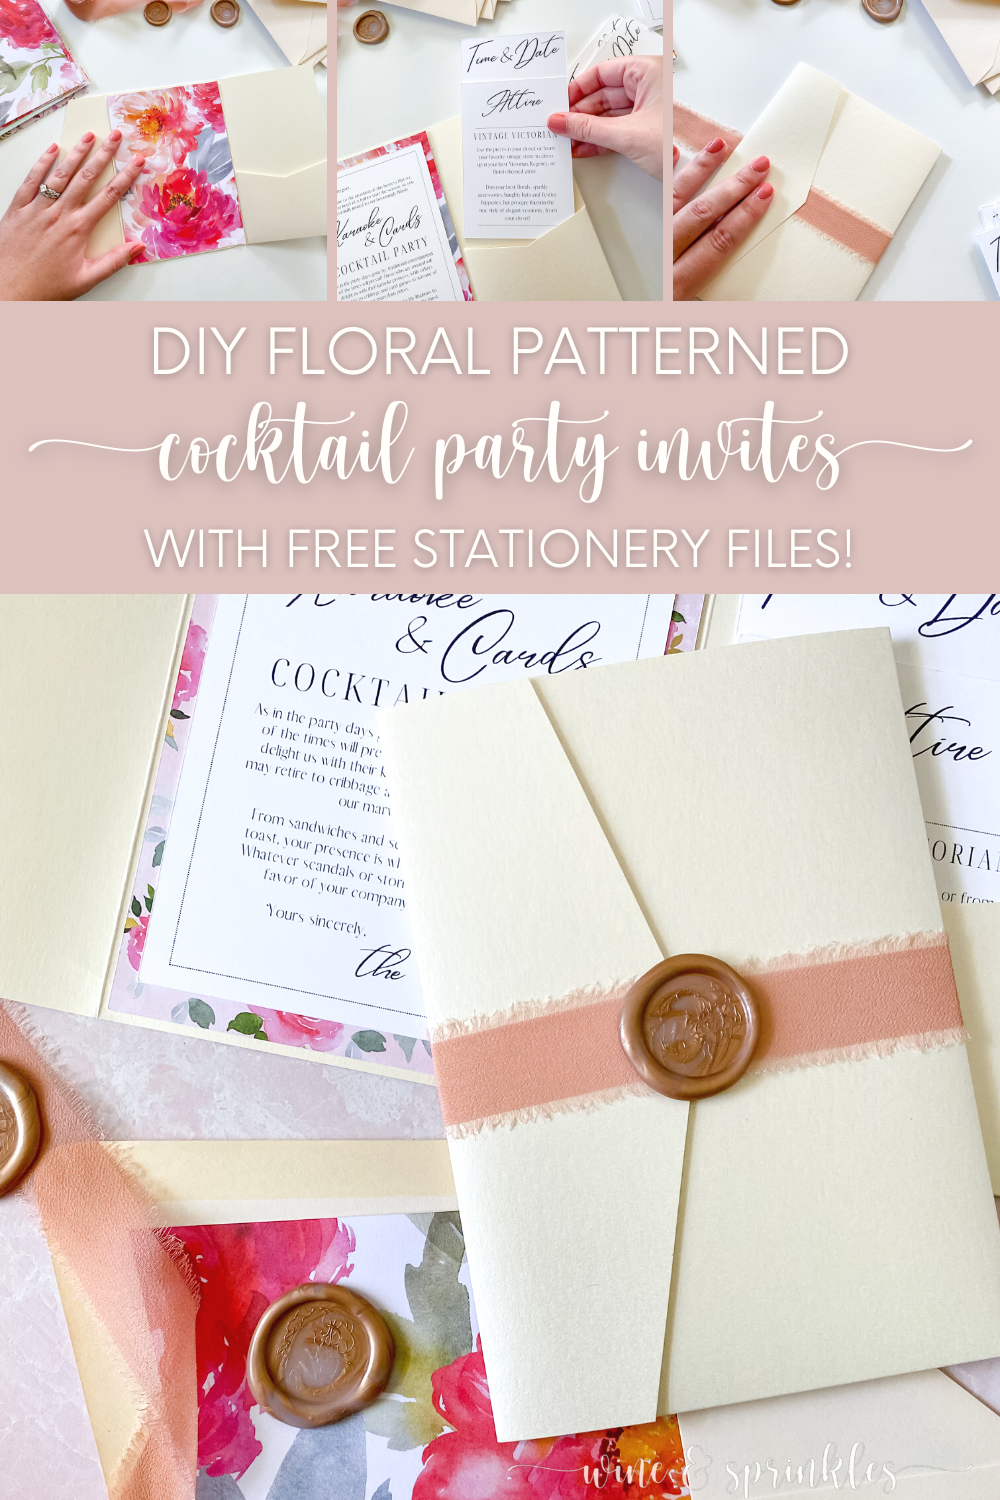
12. Start by securing your patterned paper mats and envelopes to their corresponding stationery items, which is also described when creating them in the DIY Patterned Paper Envelope Liners & Invitation Mats post. Slide the envelope liner into the envelope, centering the point with the top of the envelope and securing it with double sided tape. Add double sided tape to the back of the invitation mat, then likewise center it in the invitation area of the pocket fold and press to secure it, creating a floral lined envelope with a matching matted invitation.


13 Using double sided tape, line the back of the cardstock invitation along the top and bottom, then center it on the invitation mat, pressing down to stick it to the paper. Layering the attire card over the time and date card, place them in the right hand pocket of the invitation so that the bottoms of the cards are flush and the heading text on both cards is visible, as shown in the photos.


14. Wrap a ribbon around your closed invitation, then trim so that the edges just overlap. Tuck one side of the ribbon under the opening fold of the pocket, centering it to the point. Open the flap and place a small piece of double sided tape under where the point should be, then press the end of the ribbon to secure it there. Close the pocket and wrap the ribbon around it, where there will now be an open space between the end of the ribbon and the point on the pocketfold. Remove the adhesive from the back of your marbled seal, then stick it over the point on the pocketfold, both securing the ribbon and closing the invitation.


15. Slide your invitation into your lined envelope and seal, then repeat the process for all the invitations you are creating!
I absolutely love how these invitations turned out but even more I adore the guide they helped me create that I’m sure to use as a starting point for so many of my future stationery and paperie projects. By taking these step by step from design to assembly, I learned all the ins and outs of layered pocket invitations like these ones, and now I can't wait to keep designing clever cards and crafts for all my friends and family!

SEE OUR RELATED POSTS HERE:
OUR MOST RECENT BLOG POSTS:


OUR PINS FOR THIS POST: