Wedding

Vellum Paper Rose Escort Card Holders

This post contains affiliate links, meaning that if you click on a link I will recieve a small comission. This costs you nothing extra and I only promote products I use and love! You can read our full disclosure here

DIY Paper Rose Place Cards #diywedding #cricutproject #placecards

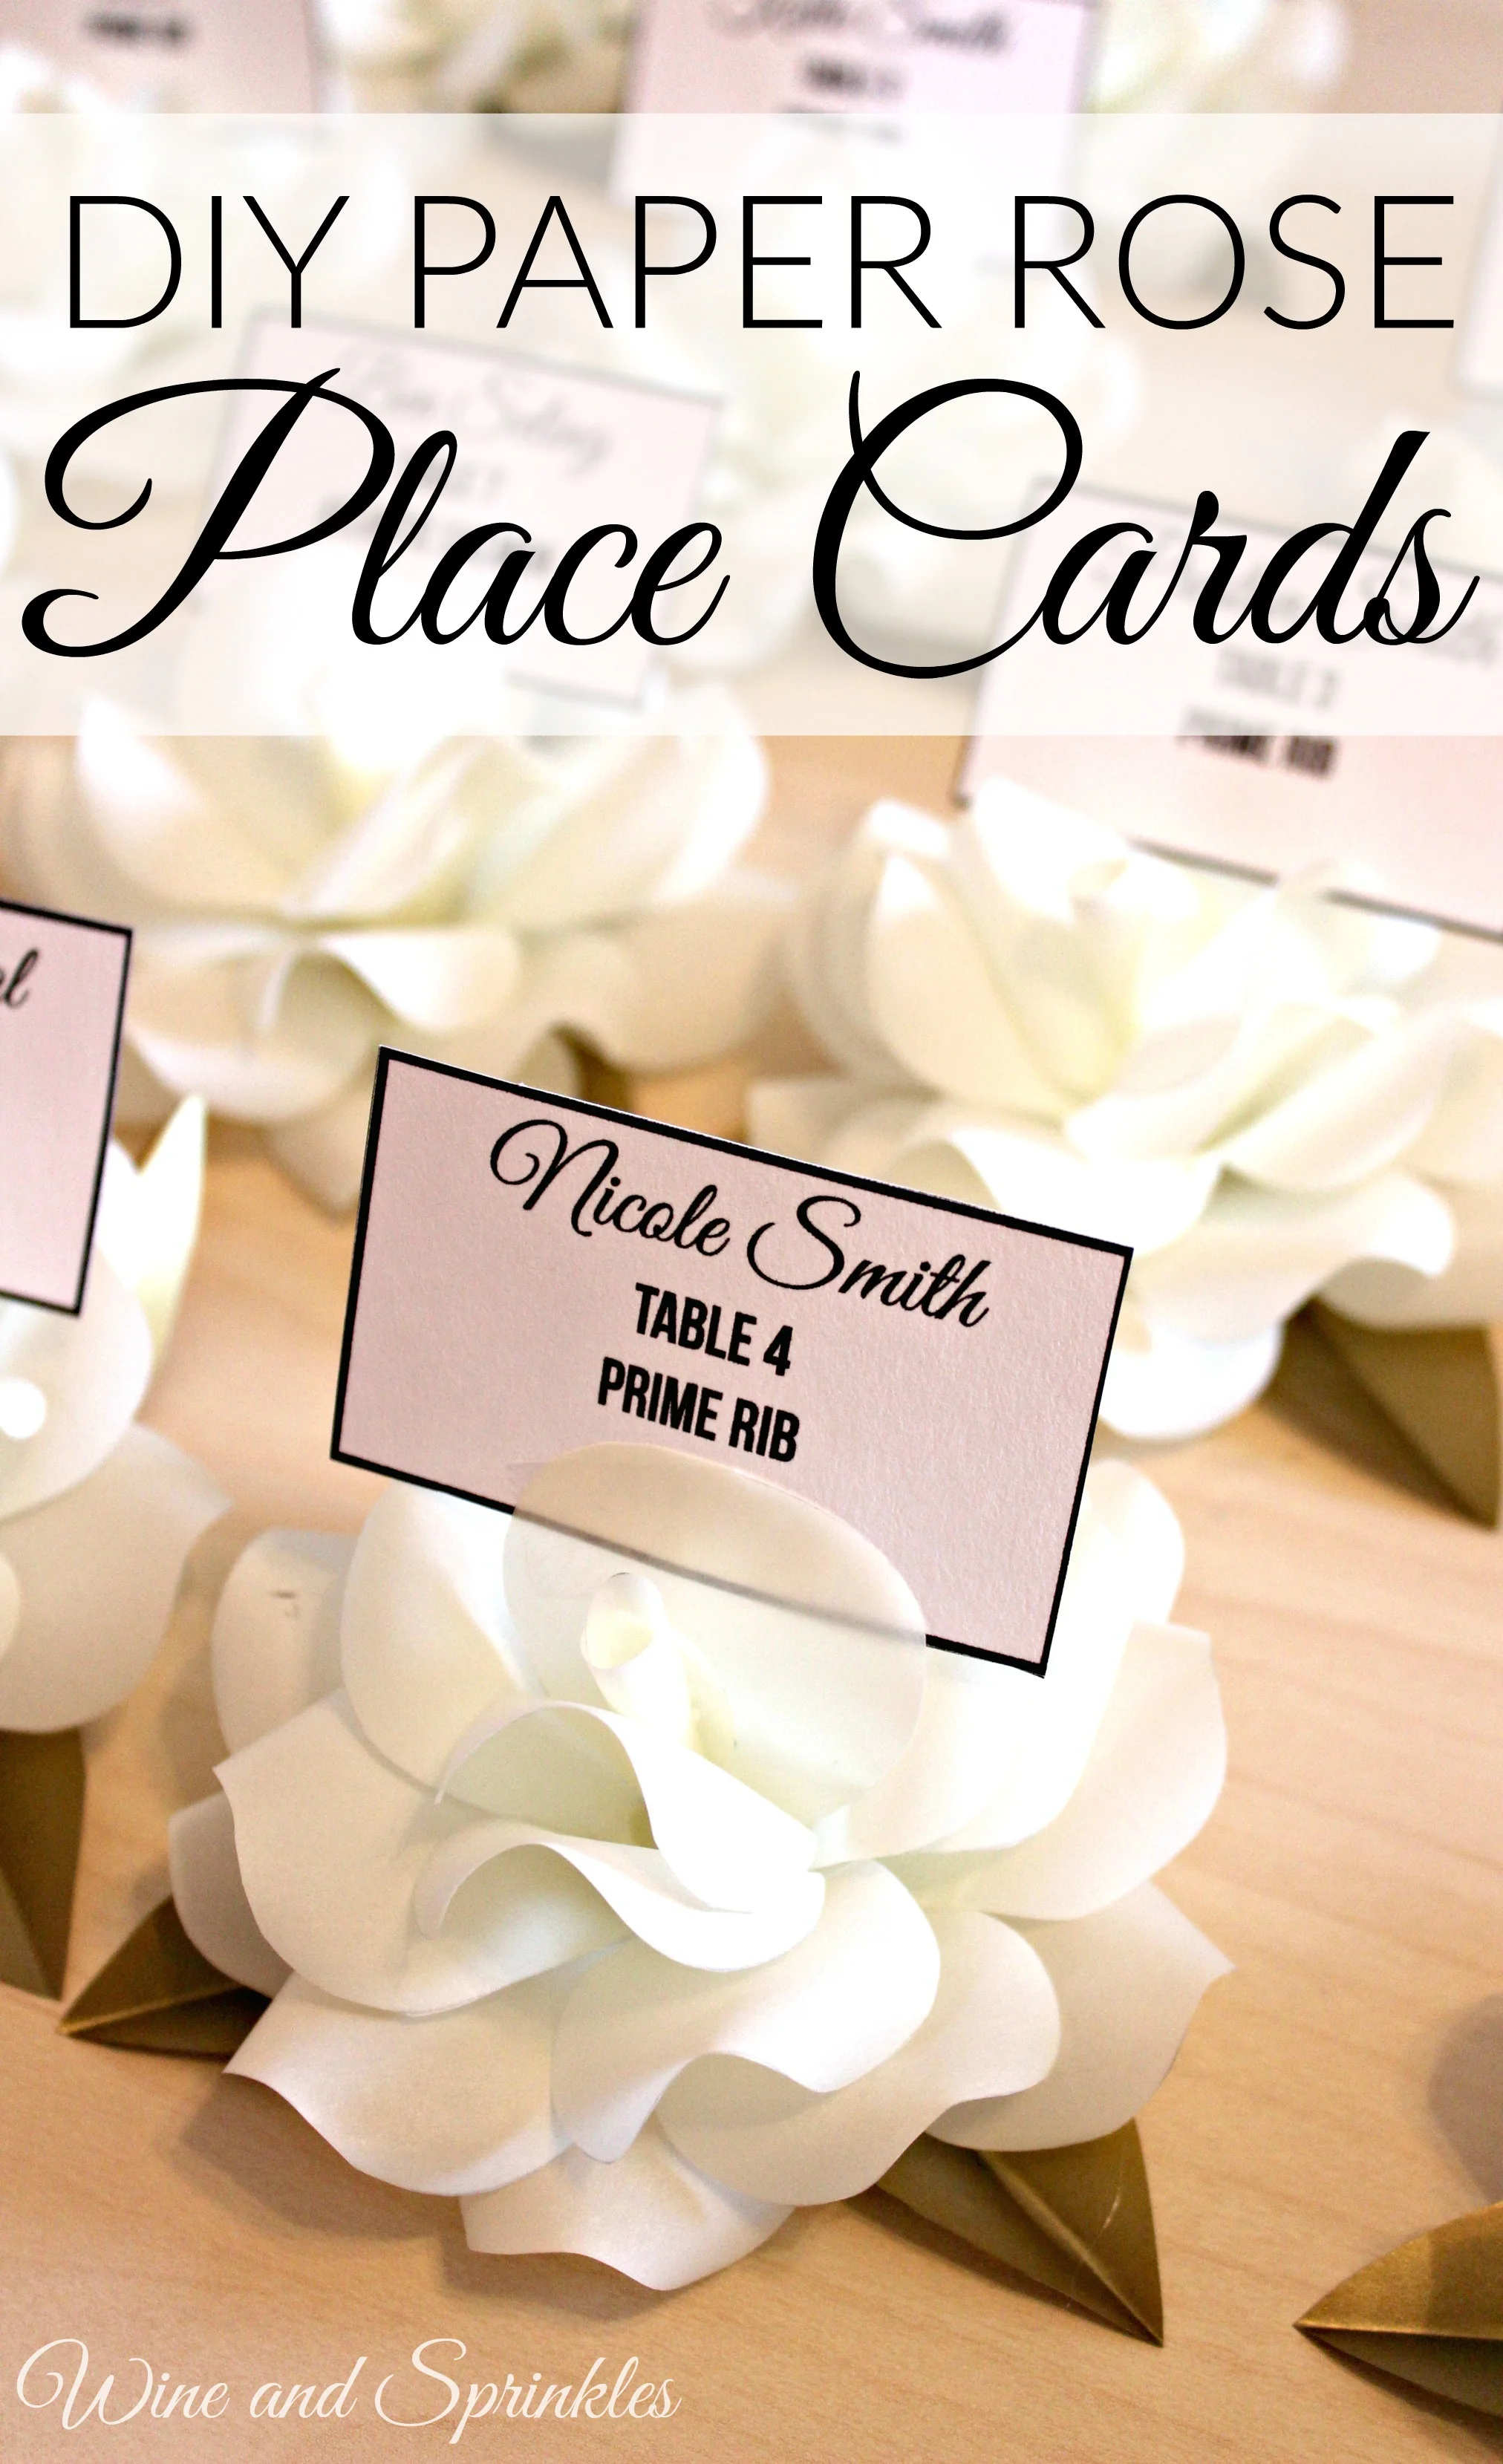
With all my leftover roses from the Beauty and the Beast Shower, I have been looking for a new home for them. Luckily, they worked out perfectly for my sorority sister’s Rustic Glam Gold Wedding! Her main flowers are white roses, so these beauties were the perfect accent to go with her existing floral arrangements. With that in mind, we decided these would be perfect as place card holders for her guests!

While the assembly of the flowers is the same as in the previous Vellum Roses post, there are a couple other steps to make them the perfect escort card holders. In particular, I used vinyl to color the leaves a pretty metallic gold to go with the wedding colors and then secured each place card with double sided tape to ensure that they all stayed with their flowers and were easy to set up the day of!

Supplies:
Cream Vellum
Paper Modgepodge
Hot Glue Gun and Glue Sticks
Escort Cards (I printed mine on cardstock and cut them into 2” x 3” rectangles)
Gold Vinyl (optional)

1.     Print, cut out, and assemble the roses like in the Vellum Roses tutorial. Take care to not fold or attach the leaf portions to your flowers yet.

DIY Paper Rose Place Cards #diywedding #cricutproject #placecards

2.     Design, print, and cut out your escort cards (I used the font Good Vibes and Bebas Neue). Using double sided tape, tape the back of the card to the front of one of the petals. I generally taped mine a few petals out from the center were the card was clearly readable. Once you have all your cards taped, set the flowers aside but try to keep them in whatever order you want them placed for the wedding.

3.     If you are using vinyl on your leaves, remove backing from your vinyl and lay it down on your work surface, adhesive side up. Arrange as many leaves as you can on the sheet and smooth them down, making sure there are no air bubbles. Using scissors, cut leaves out of the vinyl.

DIY Paper Rose Place Cards #diywedding #cricutproject #placecards

4.     Fold two of the three leaves as shown in the original tutorial. For the third leaf, fold in the opposite way as the other two leaves so that it will prop up the back of the flower.

DIY Paper Rose Place Cards #diywedding #cricutproject #placecards

5.     Using hot glue, attach the leaves to the flowers, making sure the “proper” leaf is in the back, perpendicular to the escort card.  (Sorry these are a little blurry!)

DIY Paper Rose Place Cards #diywedding #cricutproject #placecards

I wasn’t sure how I’d feel about the leaves being gold but as it turned out I adored it! With the roses being a little translucent themselves the gold leaves gave a magical quality to the roses, which of course I loved! I ended up being able to pack them up in a box with glass dividers so that they would move around and would stay in order for their trip up to their mountain wedding. What would you use for your escort cards?
DIY Paper Rose Place Cards #diywedding #cricutproject #placecards

Frosted Glass Guestbook Sign

This post contains affiliate links, meaning that if you click on a link I will recieve a small comission. This costs you nothing extra and I only promote products I use and love! You can read our full disclosure here

Pinterest 1.jpg

So many weddings these days come with the cutest guest books, gone are the days of just a book and pen! My husband and I had people sign the mat of a picture frame, but I’ve seen puzzle pieces, messages in a bottle, and photobooks used as other great guest book alternatives! One thing you should think about with these guest books is to make sure your guests know they are supposed to sign it. With that in mind, I designed this lovely little Guestbook sign for the gold rustic wedding I have been DIYing for.

This is similar to the DIY Wedding Frames I did previously, but with just a little extra detail of the tree with the frosted glass to give a special touch to this sign. Originally I was going to do this with a mirror, but the silvery finish of the mirror and the gold made it look too Christmassy as opposed to wedding. However, if silver is one of your metallics, doing this project with a mirror instead of a frame would look beautiful!

Supplies:
Picture Frame (I used an 8” x 10” picture frame)
Removable Vinyl
White Vinyl
Scrapbook Paper
Frosted Glass Paint
Craft Cutter and Tool Set
Adhesive Mat
Sign our Guestbook Cut File

1.    Like the DIY Wedding Frames, trace and cutout the correct size of paper based on your frame and mount in your frame.

Supplies with text.jpg

2.     Cut out your Tree or other design with the Cricut. I found a free piece of clipart for mine. Use removable vinyl and measure your glass to ensure that you make it the right size. Using transfer paper, affix your design onto your frame.

Tree Transfer with text.jpg
Tree ready to paint with text.jpg

3.     Remove the glass from your frame or, if like mine your frame and glass are one piece, cover the frame with painter’s tape. Using your frosted glass paint, cover your picture frame or glass with 2 to 3 coats of paint, waiting between coats for the paint to dry. 

painted tree with text.jpg

4.     Once the paint is dry, remove your vinyl tree design. Depending on how think your paint layer is, it is helpful to use the hook tool that comes with the Cricut or a toothpick to lift some of the skinnier branches while not pulling up the paint as well.

Removing Tree with Text.jpg
Tape Removed with text.jpg

5.     Now, cut out the “Sign our Guestbook” Lettering with your craft cutter similar to the DIY Wedding Frames, but size the file based on the height and width of the frame you chose.

6.     Cut out the design, weed the excess vinyl and transfer it to the front of your frame with transfer paper and you are done!

Finished Frame with text.jpg

I love that the frosted glass still shows the tree slab design on the paper and the actual tree design gives a little extra dimension to the whole sign. At the end of mine, I actually painted the frame a more champagne gold to go with the others I had made and it turned out perfect! What other wedding signs would you make for your wedding? :)

Easy DIY Wedding Signs

This post contains affiliate links, meaning that if you click on a link I will recieve a small comission. This costs you nothing extra and I only promote products I use and love! You can read our full disclosure here

While Wedding Season really starts in late Spring I seem to have gotten all my wedding DIY fun in this September! Two of my sorority sisters are getting married this month and I have had so much fun making things for their big days!

One of the often overlooked details in wedding decorations are signs, so I have designed two simple ones for the Gift Table and Favor Table in 5 x 7 frames, so that they are easy to pack, look cute, and were super easy to make! This bride is having an upscale rustic wedding in golds, cream and teal, so I incorporated the rustic tree slices in the gold background paper with white lettering to make it easy to read and also give the signs an upscale feel. After all, white writing is far harder to come by than almost any other color with printers; luckily that’s where a craft cutter comes in handy!

The best part of this project is that is it totally customizable to your colors and theme, you simply have to pick the paper, frames, and colors that you want to personalize them for your big day!

Note: This post may contain affiliate links, meaning that if you click a link and make a purchase, I will receive a small commission. This costs nothing additional for you and I only promote items I use and love!

Supplies:
Picture Frames of Choice (I got mine from a Walmart a while back)
Scrapbook Paper
White Adhesive Vinyl
Transfer Paper
Craft Cutter and Tool Set
Adhesive Mat
Gifts and Cards Cut File
Thank you Sign Cut File

1.     Upload the Cut files into the Cricut Software and cut out on the vinyl color of your choice. I used removable vinyl and would recommend it if you want to use the frames again for a non-wedding purpose. I sized my cut files to be 6” wide.

Supplies with Text.jpg

2.     Cut out the sign lettering on your choice of vinyl. Weed out the excess vinyl. Using grid patterned transfer paper, measure and cut out two 5” x 7” pieces. Cut it out along the grid lines; it will make the vinyl transfer so much easier!

3.     Take the glass out of the frames and arrange the lettering where you would like it on the glass. If needed, you can tape the sides of the vinyl backing to keep it in place but I found it to be uneccesary.

4.     Lining up the Transfer paper to the top left corner of the glass, cover the entire piece of glass with the 5” x 7” transfer paper piece. Using a smoother or your hands, smooth out any air bubbles.

Vinyl Collage 1 with text.jpg

5.     Now, lift the transfer paper and vinyl design off the glass, making sure to not completely remove the transfer paper from the glass; keeping it stuck will keep your letters right where you wanted them! Once the vinyl design is removed from the backing, take the backing off the glass.

6.     Restick the transfer paper to the glass to adhere the lettering. Smooth out any air bubbles, then completely remove the transfer paper, leaving the lettering exactly where you wanted it on the glass.

finished glass with text.jpg

7.     For the background in the frame, trace around the glass of your frames then cut it out with scissors. Place the background paper behind the glass in the frame and you are done!

tracing background with text.jpg
finished DIy with text.jpg

While I made just the two signs for the Gift Table and Favor Table, you could also easily use this for table numbers, buffet signs, or your guestbook sign! I think I will do these again for my next shower; they are so easy and can be totally customized to whatever theme you want! What would you use these signs for? :)

Instagram 1.jpg

Beers and Bowties Groomsmen Invitations

This post contains affiliate links, meaning that if you click on a link I will recieve a small comission. This costs you nothing extra and I only promote products I use and love! You can read our full disclosure here

Beers and Bowties Groomsman Proposal #willyoubemygroomsman #bestman #groomsman

Is it just me or does it seem like groomsmen get the short end of the stick in the “getting invited” department? Granted, they don’t generally have to put in the same hours as the bridesmaids but they should certainly get a fun invitation too!

Beers and Bowties Groomsman Proposal #willyoubemygroomsman #bestman #groomsman

This idea actually came to me while I was designing my Bridesmaid Wine Labels as I was trying to think of a fun, cheap way to invite the groomsmen with a similar theme. Enter this dashing 6 pack of beers, bow-tying up for the occasion!

There are two parts to this tutorial, making the bowties and covering and labelling the 6 pack holder. I don’t think its necessarily required to cover the 6 pack holder itself, but I did just for fun and a Cricut makes this an easy and quick project for inviting your groomsmen. The best part about the bow ties is that you can pick your pattern so each 6 pack doesn’t have to match, but instead can be themed to each groomsmen. I just used extra scrapbook paper I had and they turned out super cute!

Beers and Bowties Groomsman Proposal #willyoubemygroomsman #bestman #groomsman

Supplies:
6 Pack of Beer
Colored Paper for Bowties
Adhesive Vinyl (I used Black and Gray for the background and White for the Words)
Tape
Transfer Paper
Craft Cutter and Tool Set
Adhesive Mat
Bow Tie Cut File
6 Pack Label Cut File

Covering the Holder:

Beers and Bowties Groomsman Proposal #willyoubemygroomsman #bestman #groomsman

1.     Pick the Background Color for your 6 pack holder. I did mine half gray and half black so that you can see the way it looks with different bowties.

2.     Lay the holder flat onto the back of the vinyl sheet and trace around the top and sides. Cut the Vinyl along those lines with scissors.

Beers and Bowties Groomsman Proposal #willyoubemygroomsman #bestman #groomsman

3.     Peel and Stick the vinyl to the sides of the holder. I made mine a little longer just in case and then trimmed off the excess vinyl when I was done to about ½” above the holder. Once trimmed, I folded the vinyl over the edges of the holder to create a smooth line.

Beers and Bowties Groomsman Proposal #willyoubemygroomsman #bestman #groomsman

4.     Once your holder is covered, import the 6 pack label file into the Cricut Design Software. Measure the height of your holder and resize the image to 1” less than that height (I made mine 5” ).

Beers and Bowties Groomsman Proposal #willyoubemygroomsman #bestman #groomsman

5.     Cut out the design in your chosen color and weed out the excess vinyl. Using Contact Paper, transfer the label to the 6 pack holder.

Beers and Bowties Groomsman Proposal #willyoubemygroomsman #bestman #groomsman

Making Bowties:

1.     Upload the Bow Tie Cut File into the Cricut Design Software.

2.     Cut out bowties with you Cricut craft Cutter. I was able to get 6 bowties per sheet so each piece of paper can be used for one 6 pack. I would highly recommend using the light grip adheasive mat (its purple) so that you don’t have to worry about the paper sticking to your mat too much and ripping when you try to remove them.

Beers and Bowties Groomsman Proposal #willyoubemygroomsman #bestman #groomsman

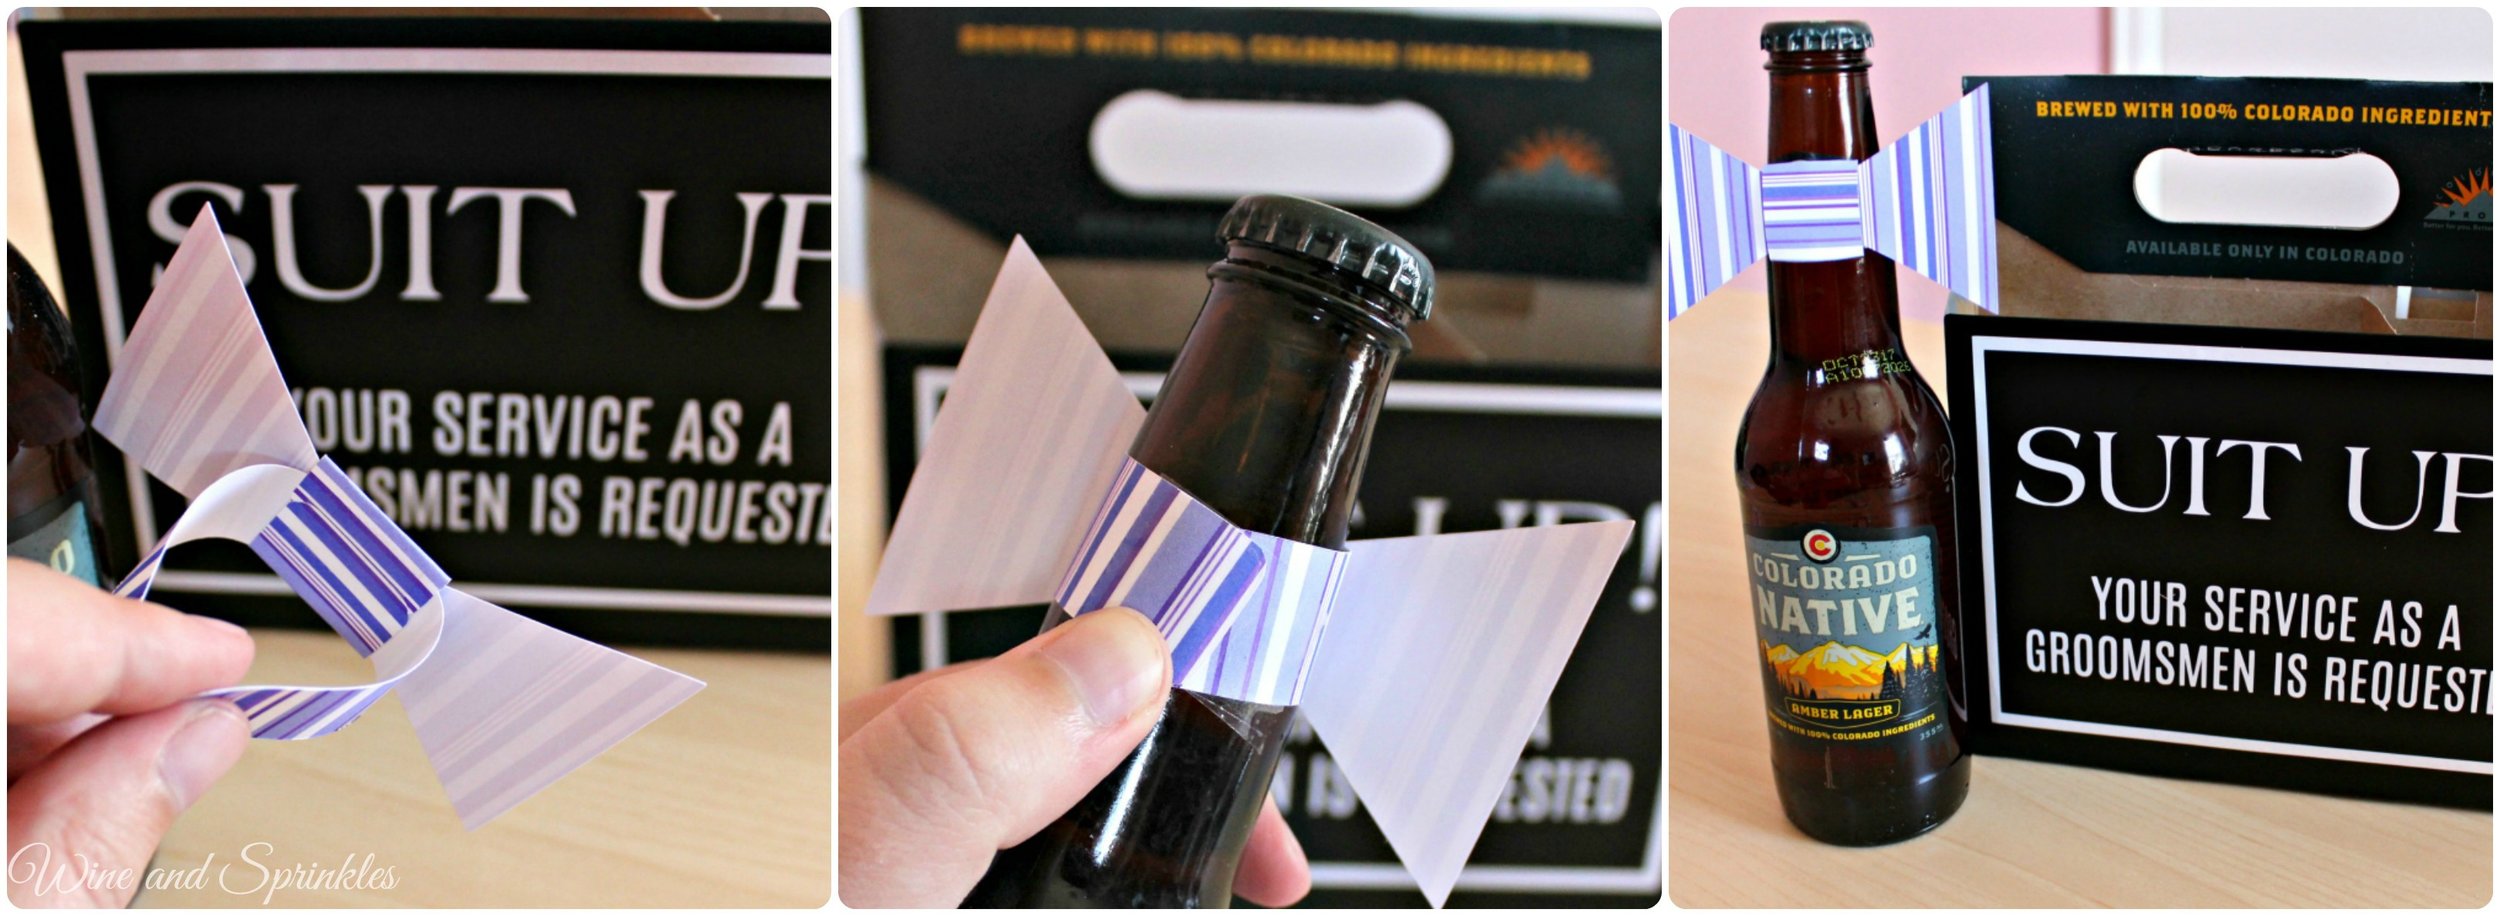
3.     Remove your bowties from the mat. Using the smaller rectangular piece, fold around the center of the bowtie and tape the two edges together, so that the longer collar piece can be threaded through the center.

4.     Thread the long rectangular collar piece through the loop, with the pretty side of the paper facing towards the back of the bowtie.

Beers and Bowties Groomsman Proposal #willyoubemygroomsman #bestman #groomsman

5.     Wrap the Bowtie around your beer bottle, once you have the bowtie positioned how you want it; tape the ends of the collar together. Repeat for all remaining bowties and bottles.

6.     Once completed, put all the newly bowtied beers back into the holder and its ready to go!

Beers and Bowties Groomsman Proposal #willyoubemygroomsman #bestman #groomsman

As you can see, these are easy and quick to make if you have a craft cutter, just buy your guys their favorite 6 pack, cut, tape, and you’re ready to go! Plus, these boys have to put up with a lot of wedding craziness for the next couple months, never hurts to start it off with a beer. :)

Beers and Bowties Groomsman Proposal #willyoubemygroomsman #bestman #groomsman

Bridesmaid Proposal Wine Labels

This post contains affiliate links, meaning that if you click on a link I will recieve a small comission. This costs you nothing extra and I only promote products I use and love! You can read our full disclosure here

Bridesmaid Wine Label Pin.jpg

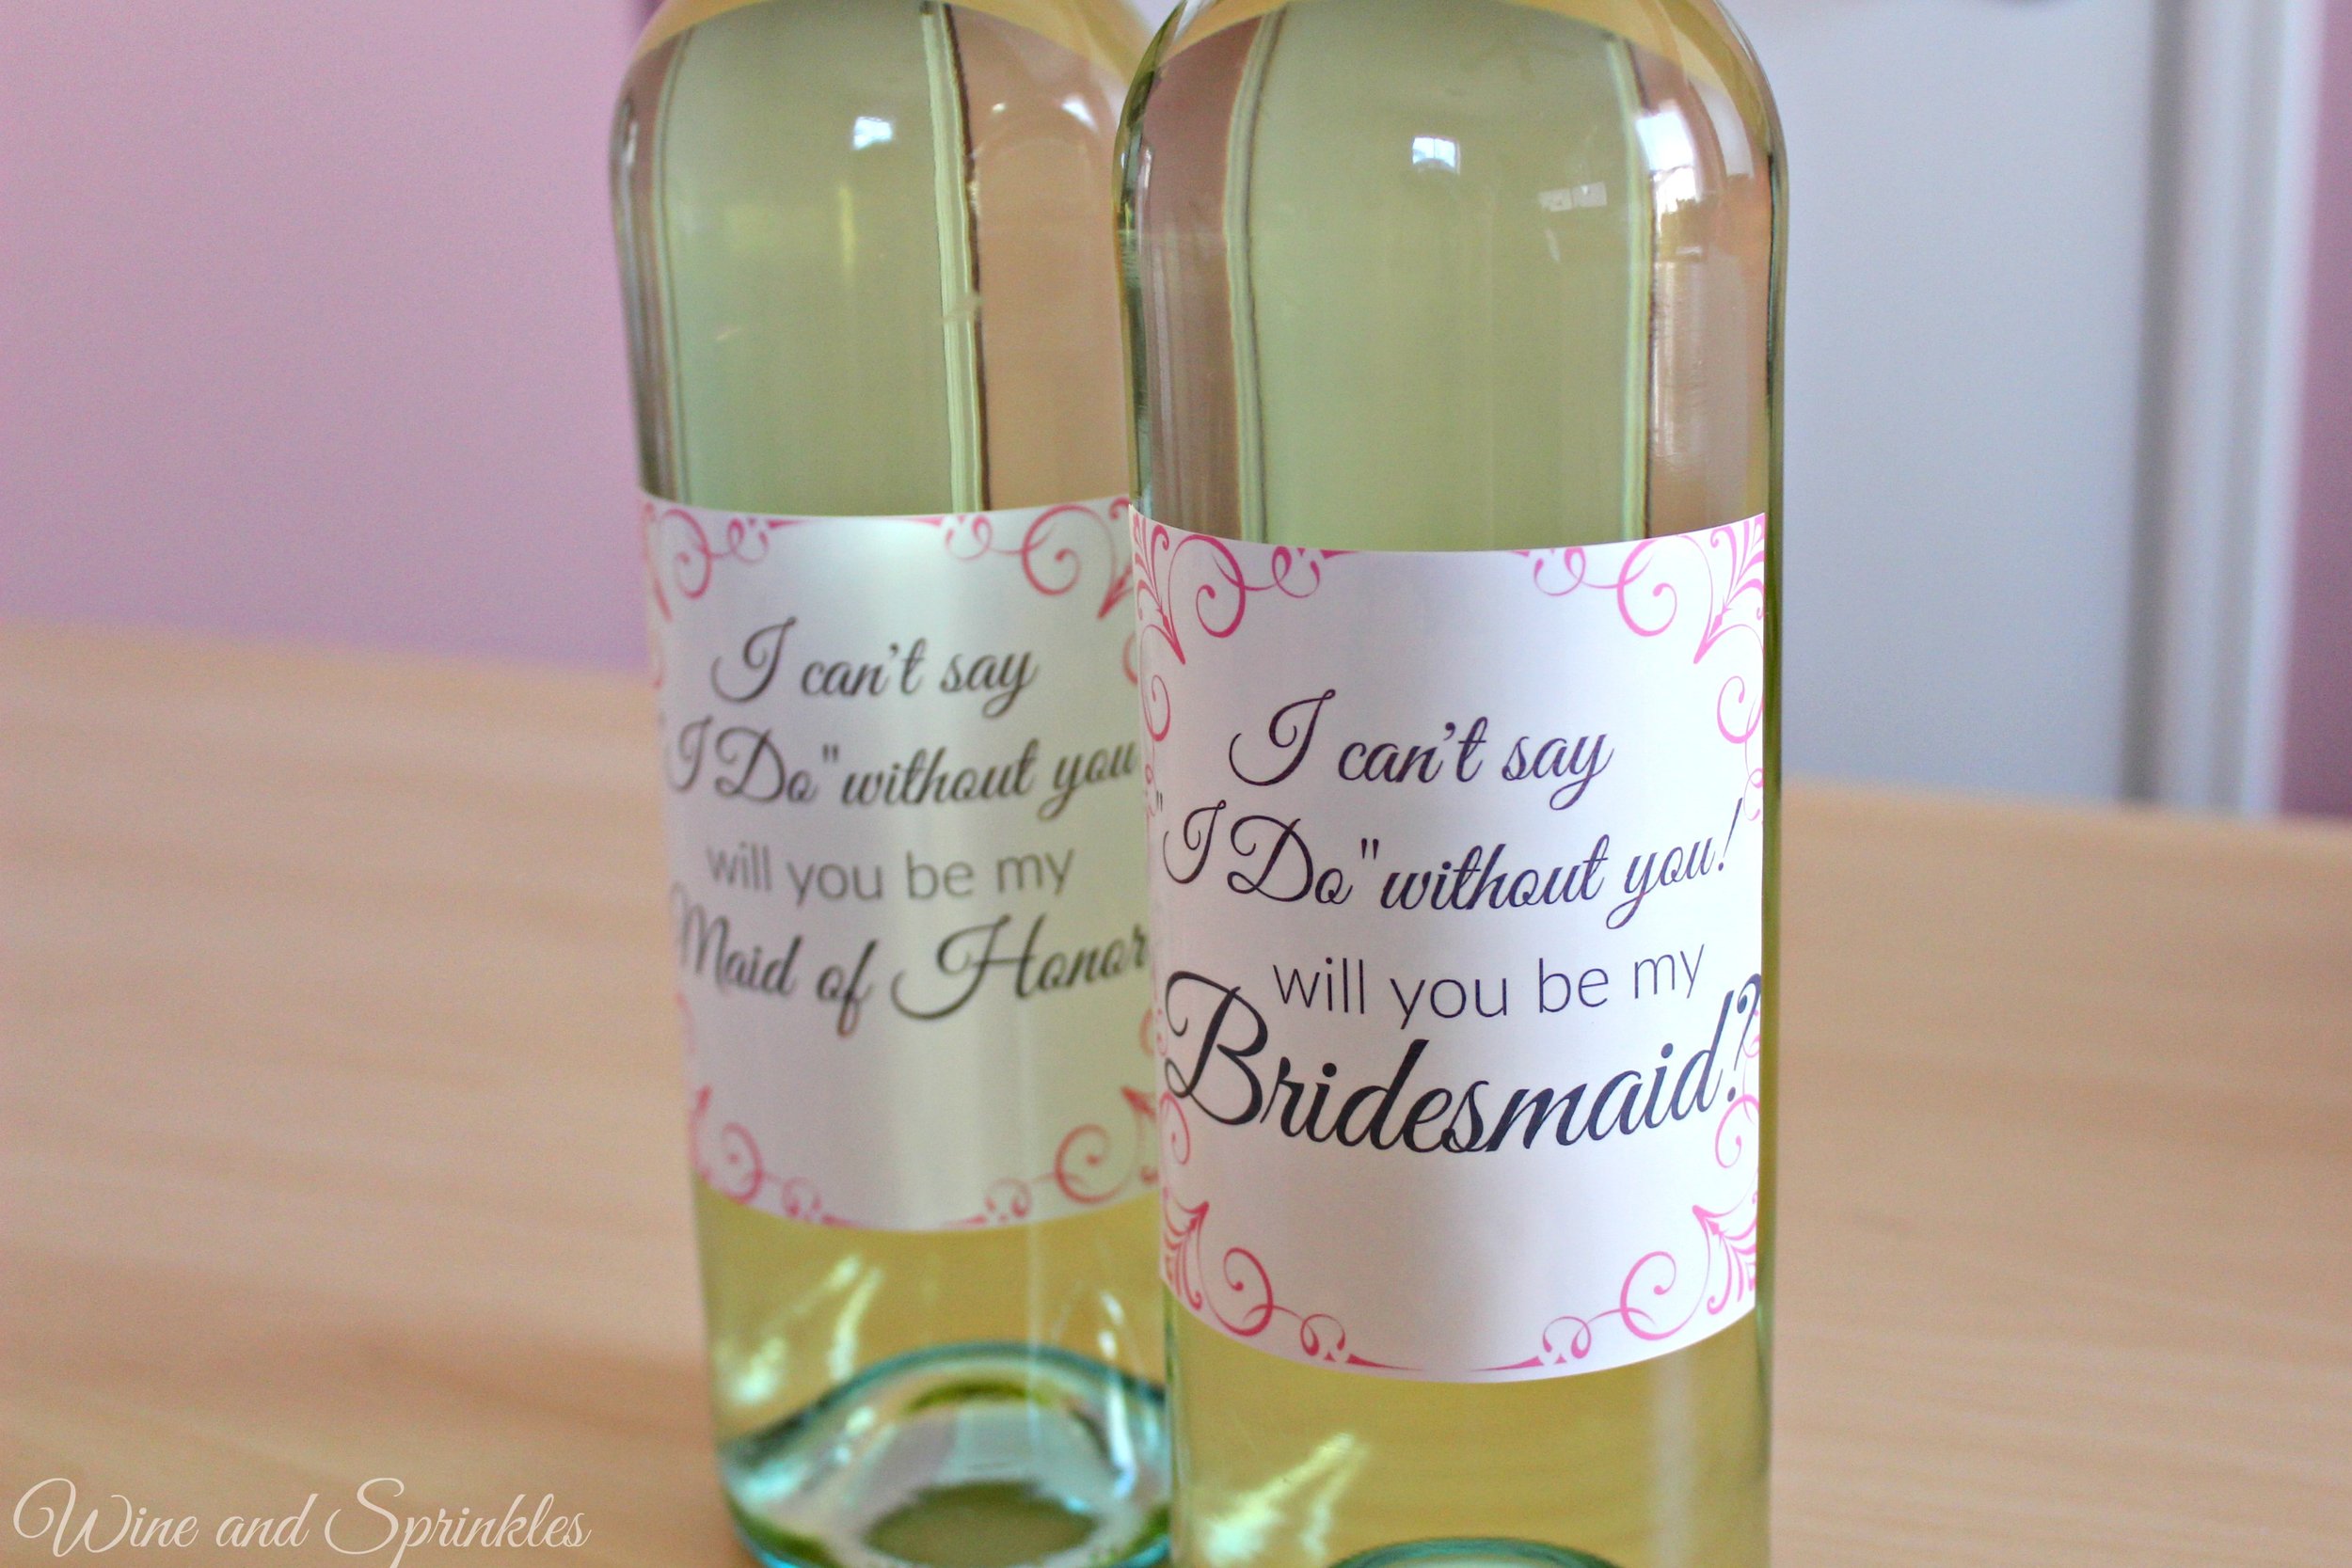
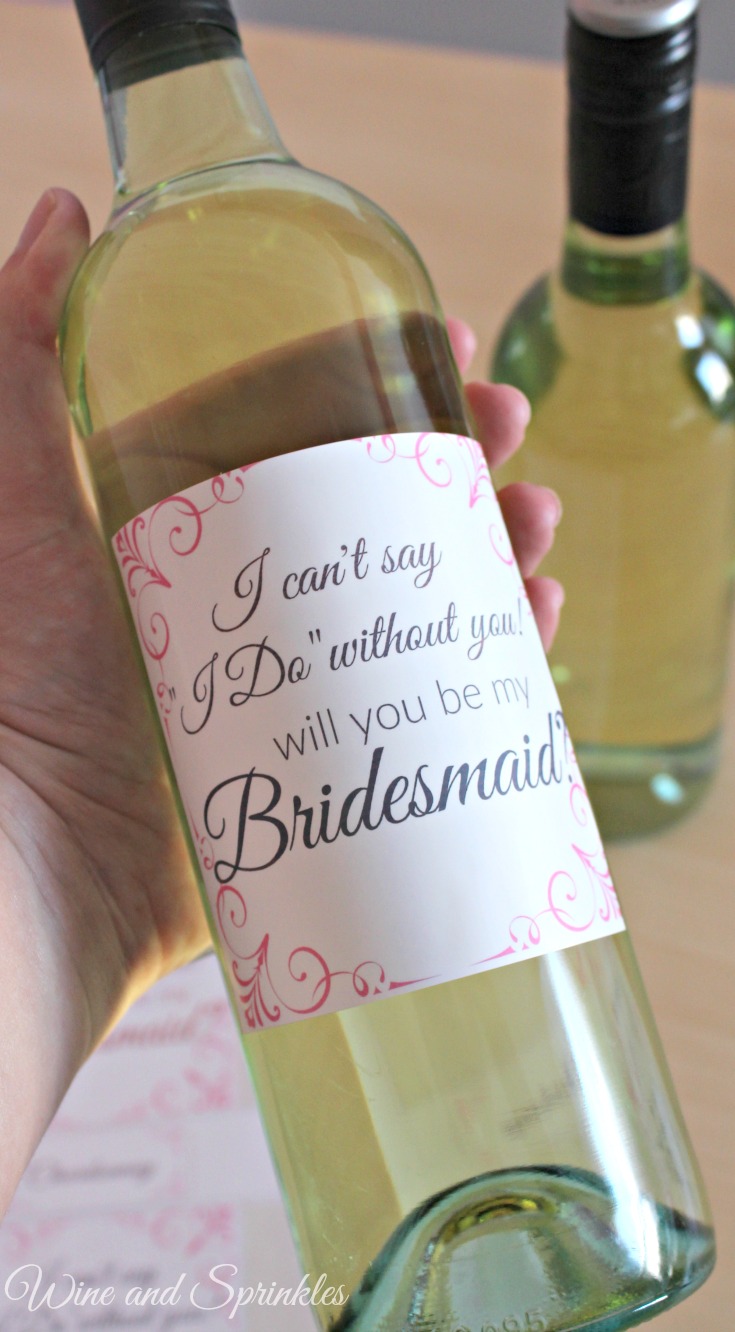
What Bridesmaids wouldn’t appreciate a bottle of wine to toast to the new wedding journey? I love the idea of giving a bottle of wine; it’s always appreciated and is not that expensive compared to the other bridesmaids invitation options out there. I must say I bought a bunch of swag for my maids to invite them, and while I don’t regret it in the least (they did A LOT of DIY) most people don’t want or need to drop a bunch of cash on their bridal party invitations.

Making these Bridal Party Invitations is very straightforward and turned out so cute! I would recommend wines in clear bottles for the labels to show to their best advantage, but you can use them on most any wine bottle you like!

Finished Label Pin 2 with text.jpg

Supplies:
Wine Bottle Labels
Wine Label Printable
Wine of Choice

1.     Download the Printable and Print your labels. I have made them specifically for Chardonnay wine bottles but you can always use something else and not use the top strips. :)

Supplies with text.jpg

2.     Soak off the Label from your wine bottles with hot soapy water. Scrub any remaining residue off with a sponge and dry the outside of the bottles.

3.     Peel off the label and affix it to your cleaned bottle. I found the edge of the bottle and used the vertical line to line up my label so it would be level.

Labelling Collage.png
finished labels no gems.jpg

4. If using the Chardonnay labels, wrap them around the top where the foil meets the bottle.

Chardonnay Collage.png

5.     Optional: Glue on a few clear and pink gems to give your bottles some extra sparkle! I just used regualr tacky glue and some extra gems I had lying around from previous bachelorette parties. :)

This is a wonderful way to invite your maids and it really only costs as much as the wine and a set of labels. Want to design your own labels? The company that created these label sheets has an online design studio so you can always come up with a design all your own!
D.I.Y. Loose Tea Favors

This post contains affiliate links, meaning that if you click on a link I will recieve a small comission. This costs you nothing extra and I only promote products I use and love! You can read our full disclosure here

DIY Loose Tea Tin Favors #diywedding #printables

As much as I love teacups and teacup candles as favors, in reality that is just too expensive for everyday shower favors. That’s where these lovely tea tins come in! For a Beauty and the Beast feel, I modified a free piece of rose clipart that reminded me of the stained glass window in the original movie.

DIY Loose Tea Tin Favors #diywedding #printables

1.     Fill the tea tins with the tea of your choice. It took around 3 Tbsp of tea per tin to fill it about 2/3 full.

2.     Print your labels. I always print a test page of the labels to make sure they line up with your label paper. My printer was a little bit testy about printing them perfectly on the lines but since the rose pattern overlaps the label anyway it didn’t really cause any issues for my labels. :)

3.     Lastly, place the label on the lid of the tin and you are done!

DIY Loose Tea Tin Favors #diywedding #printables

Yes this is literally the easiest tutorial ever, making it a great last minute favor your guests will love! I’m already thinking of other fun foods for these tins; mixed nuts, coffee, sprinkles? :) What food would you give away in these cute little tins?


SEE OUR RELATED POSTS HERE:

 
DIY Loose Tea Tin Favors #diywedding #printables

D.I.Y. Wood Wick Teacup Candles

This post contains affiliate links, meaning that if you click on a link I will recieve a small comission. This costs you nothing extra and I only promote products I use and love! You can read our full disclosure here

There is nothing that adds a fun vintage flair to a shower quite like these teacup candles. And they are so versatile! I will be using them for a Beauty and the Beast themed bridal shower, but they could just as easily be used for a tea party, Jane Austen Shower, or Mother’s Day Brunch!

Teacups Favor with text.jpg

For me, the wood wicks were a requirement on this batch, they just remind me so much of a fire in the hearth, and for a Beauty and the Beast Shower, it is the perfect touch since most of the story takes place in the winter where crackling fires are most welcome! In addition, the teacups are the perfect ode to my favorite characters, Mrs. Potts and Chip!

I have wanted to make these candles for a while but was always discouraged for one reason, finding the teacups! While you can find teacups at yard sales and estate sales, I could rarely find them and when I could, they were $10+ per cup! Luckily, I had the thought to check Etsy for teacups and I was not disappointed! :)

I was very impressed with the Etsy shop, The Acerage, which I purchased my teacups from. First, they were half the price I see at estate sales for the same cups due to what they term “minor damage.” So when I received them I was expecting some stains, chips, or even small cracks. Imagine my surprise when all the cups that came not only were in great condition (I could hardly find any chips), but they were in fact much better than the aforementioned teacups I paid double for at the estate sale! I have linked in the supplies the set I used, which are great to make a whole set of candles for shower favors. When someone orders them, the listing will disappear but as soon as they gather the next set they list it again.

If giving the teacups as a favor is not quite in your budget, use them as bridal shower prizes and only make a couple! I have been using them for the last couple showers I have gone to as prizes for games and they have been beloved by all!


Supplies:  

Mismatched Teacups and Saucers
Wooden Candle Wicks
Candle Wax*
Candle Pouring Pot
Powdered Candle Dye
Essential Oils for Scent

*I used leftover candle stubs, but the wax linked here will make about 20 -8oz teacup candles

1.  Melt wax on low heat in your pot. If, like me, you are using candle stubs, remove the wicks from the old candles once the wax is completely melted using either tongs or a fork.

2. For these candles, the full wax wick is far too long. Insert the wood wick into its metal stand and place in the cup. Cut the wicks at the top of the teacup with a pair of scissors, then remove the candle wax from heat and soak them in the wax for 10 minutes. Soaking these wicks is VERY IMPORTANT, they are not like the standard wicks that are already coated in wax and not soaking them will lead to the candles not staying lit.

3. Once wicks have been soaked, remove them with tongs or a fork. Once they are cool enough to handle (I was able to touch them immediately) insert them into the metal holder stands included and let dry.

4. Now, attach the wicks to the bottom of your teacups by dipping the metal holder into the melted wax, then position at the bottom of the jar. 

5. Let the wax cool for a couple more minutes, then add color and fragrance of your choice. The ones I have recommended are great for candles, bath bombs, soaps, and bath salts, so you can get a lot of use out of them! I made pastel pink, purple, and yellow candles that were scented as peppermint-lemon, lavender-lemon, and rosemary-lemon (I know you can't tell that I like lemon).

pouring candles.png

6. Pour cooled (but still liquid) wax into the teacups. Reserve about 25% of your wax to remelt and top off your candles if a divot is created in the middle due to the wax cooling. The cooler the wax is, the less of a divot will form. Some of mine with the cool wax needed no additional wax to fill in, while the ones where I started with hot wax needed a lot of extra to make them look nice!

7. Once candles are cooled and solidified, remelt the excess wax and fill in any divots that were caused during the first pour. Now you have a lovely set of candles for your home or favors for your next party!

These have been by far one of my favorite DIY projects I have done lately and a project I have wanted to do for a long time! Now I just need to find homes for all the teacups I can’t keep, time for a tea party! :)

Bride Tribe Tumblers

This post contains affiliate links, meaning that if you click on a link I will recieve a small comission. This costs you nothing extra and I only promote products I use and love! You can read our full disclosure here

If there is one thing I love making for Bridal Parties, it is Tumblers! They are so cute and so useful for getting ready gifts, bachelorette party favors, or even to ask your maids in the first place.

For these tumblers, I was looking for a free dream catcher file for a more unique “Bride Tribe” tumbler, but none of them were suiting my fancy. Then I found this amazing one on Etsy! For a couple bucks it was well worth the price! Better yet, its an SVG file which are super easy to import into the Cricut Craft Cutter software.

For these tumblers and many of the wedding and bridal projects you will see on this blog, having a Cricut is required. I can’t say enough good things about mine, I wish I had had it when I was crafting for my own wedding! It would have saved me hours of work and many of the projects I did would have turned out even better! If you are a crafter, a bride, or even part of the bridal party I would highly recommend one, the one-time purchase will serve you well. :) Not only can you make tumblers like these, but you can also use it for custom cut invitations, iron on clothing, paper crafts, and removable vinyl wall decorations. I could go on and on but needless to say they are awesome!

Supplies:

Gold Adhesive Vinyl
Metallic Teal Adhesive Vinyl
Transfer Paper
Purple Tumblers
Craft Cutter and Tool Set
Adhesive Mat
Dream Catcher File
Bride File
Bride Tribe File


1.     Download the Dream catcher File and import into the Cricut software. You can do this by going to the software; and, after making a new project, click the upload button. Import the file, the click Continue.

Cricut 1-2

2.    Press save for the file to be uploaded to the software, then click the image under the Upload Tab. Select Insert Images" to insert it into the current project.

Cricut 3-4

3.     Size the dream catcher to 3.25” wide, then remove the unneeded cuts. For this image, ungroup the cuts using the button on the upper right.

Cricut 5

4.     Now, select each of the first 5 cuts and press the red "x" on the image to remove it.

Cricut 6-8

5.     Once the excess cuts are removed, copy and paste the number of dream catchers you need then click the "Make it" Button in the upper right. You can get up to six dream catchers per 12” x 12” sheet of vinyl. Press Continue to got to the cut Screen. On the Cricut itself, set the dial to "Vinyl", load the mat with Gold Vinyl, and press the Cricut button to cut.

Cricut 9-10

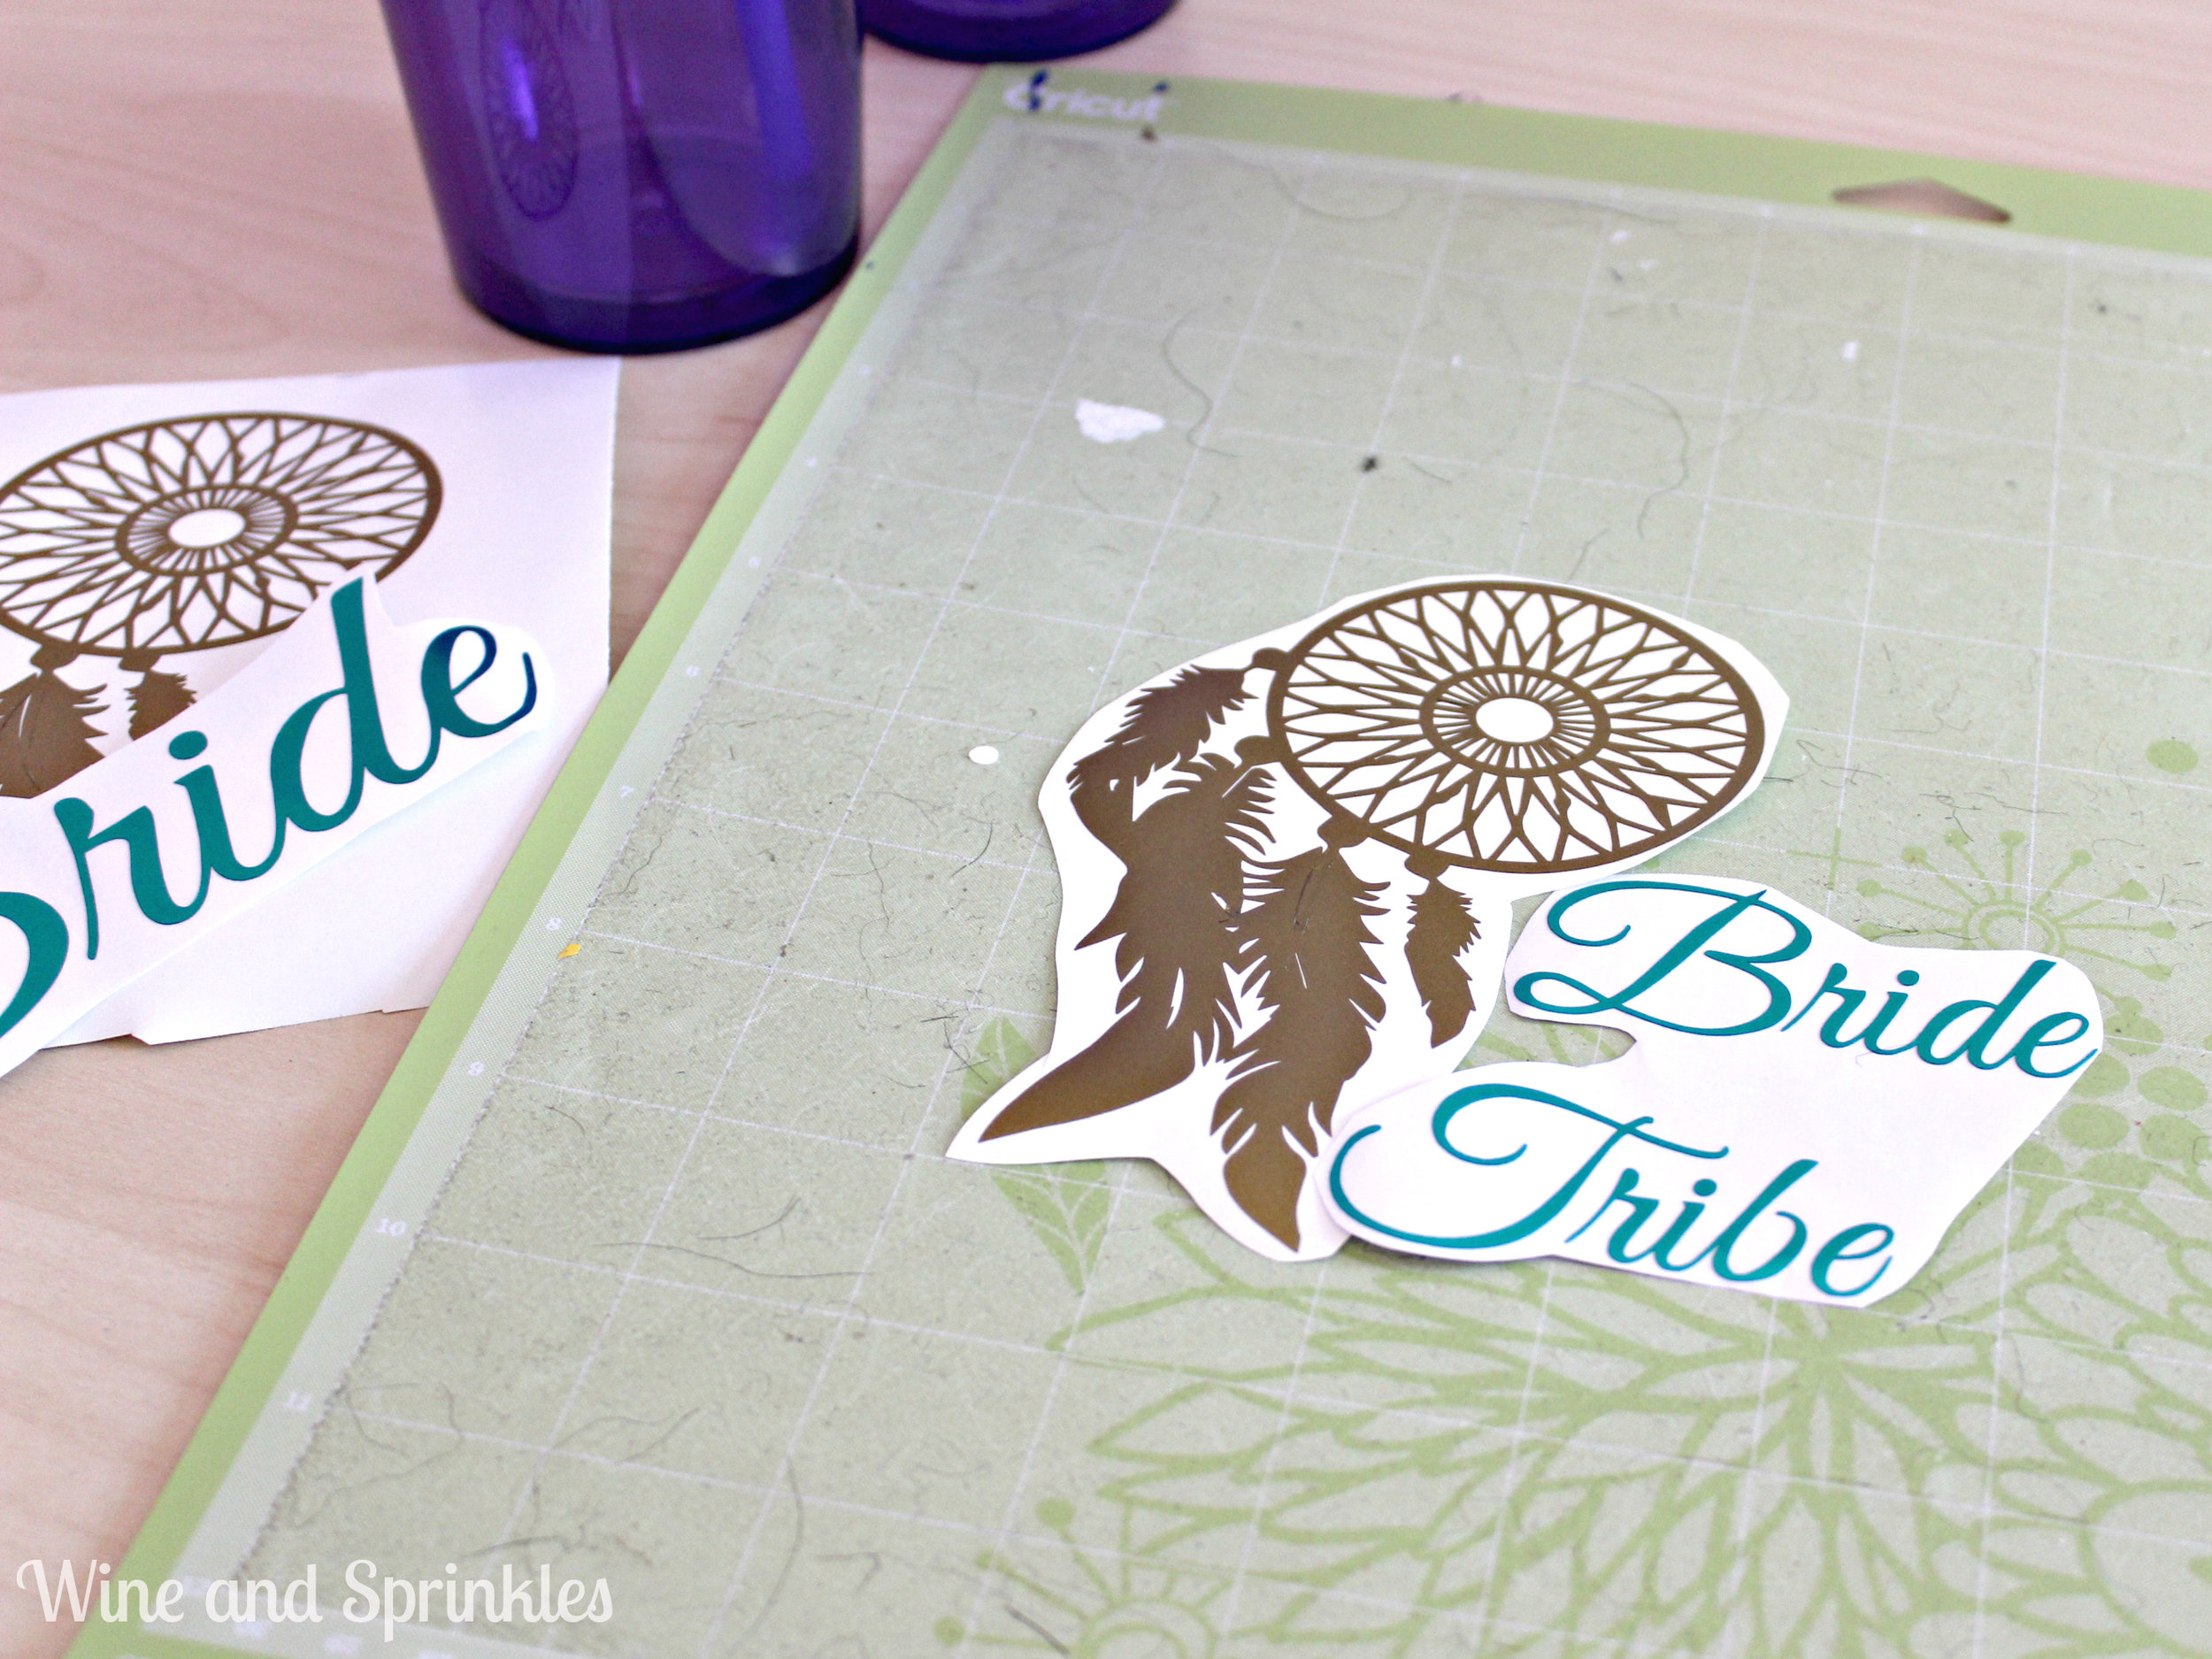
6.     Similarly, import the “Bride” and “Bride Tribe” pictures into the software, sizing them to be 2.5” tall. Cut these out in the Metallic Teal Vinyl.

7.     Remove the excess vinyl (known as weeding) until just the images and words you want to transfer are remaining.

8.     Cut away the excess backing around your vinyl designs. Fix them to the vinyl mat based on how you would like them to transfer onto the tumbler. As you can see from mine, I nested the “Bride Tribe” words into the bottom right of the Dream Catcher.

vinyl arrangement

9.     Cover the design with transfer paper. Push out all the air bubbles and press it into the design, such that when you lift the transfer paper the design comes up with it without its backing. I prefer the lined transfer paper as it makes it easier to orient the designs on their final resting places.

transfer paper

10.     Starting at the top of the tumbler, line up and press the transfer paper onto the tumbler, working top left to bottom right. Because it is curved, it will not stay exactly parallel with the top, this is ok! Pres the transfer paper as flat as you can against the tumbler, rubbing the design especially to get out any air bubbles. Lift the transfer paper, leaving the design on the tumbler.

Bride Tribe Tumbler

11.     For the Bride Tumbler, I wanted the letters to overlap the Dream Catcher. So the same steps as above are followed, but you first transfer the dream catcher, then the test as two separate transfers.

Bride Tumbler

Using these basic instructions, you can also design whatever tumbler you like to make your own custom tumblers for you, your bride, or your wedding party (if you are the bride!).

D.I.Y. Wooden Wick Candles

This post contains affiliate links, meaning that if you click on a link I will recieve a small comission. This costs you nothing extra and I only promote products I use and love! You can read our full disclosure here

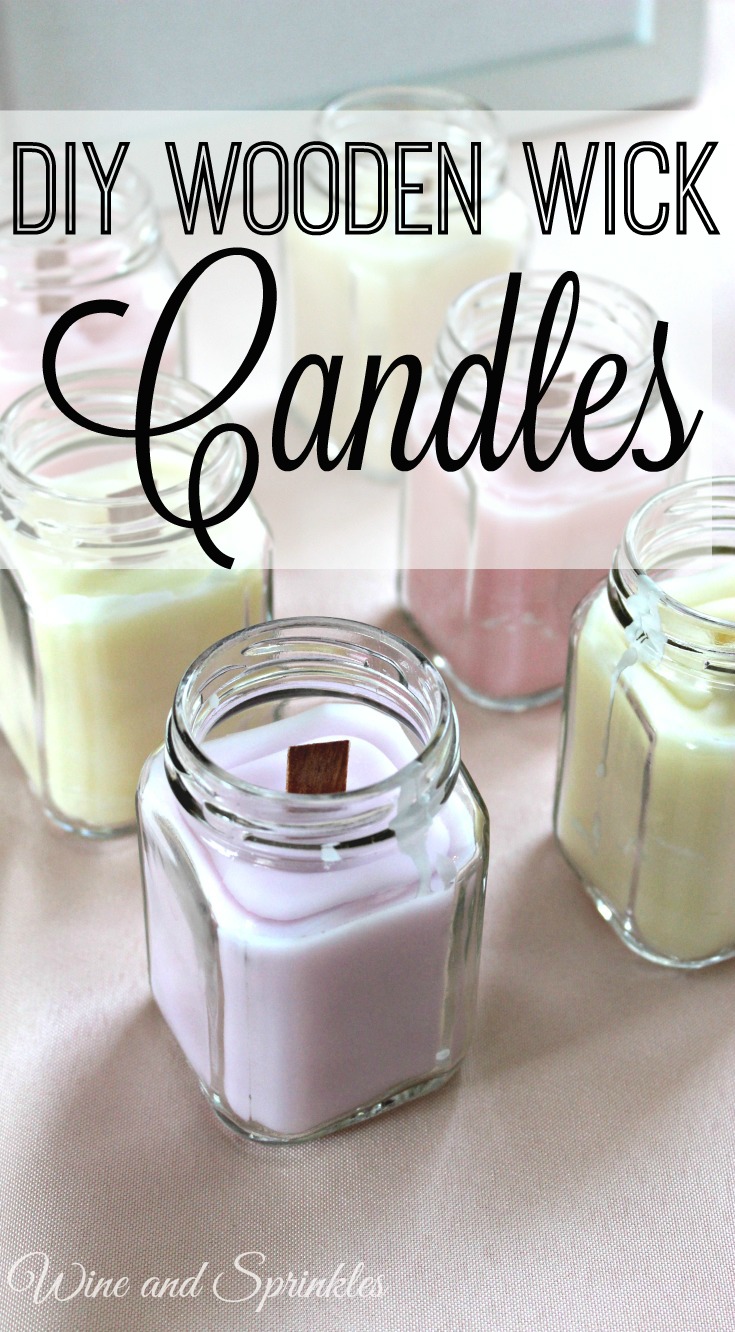
DIY Wooden Wick Candles #candles #diy

These lovely crackling candles first came to be based on my own bridal shower. One of my friends won one as a prize and absolutely loved it! When it finally burned out a couple weeks ago, I went looking for a way to replace it as her birthday present. Luckily, I had the thought to check for the wooden wicks first!

DIY Wooden Wick Candles #candles #diy

I love these wooden wicks compared to the regular ones, where you can achieve the comfort of a crackling fire with a little candle. I didn’t realize it would be so easy to make them myself, or that amazon would have had such an assortment to choose from (last time I doubt that Amazon doesn't have everything under the sun).

DIY Wooden Wick Candles #candles #diy

Now, I have a wonderful assortment of these candles which were cheap to make and so nice to have! I would highly recommend making them if you have candle stubs at home; I used the ends of my wedding candles for them and was able to make a bunch of them in both leftover favor jars and teacups as prizes for upcoming showers and gifts for my friends! These also work wonderfully for Bridal Shower favors, Wedding Favors, or Baby Shower Favors!

DIY Wooden Wick Candles #candles #diy

Some things to note on this project: for your candle making supplies, you need a pouring pot or an old pot you don’t care about to melt the wax. I made the unfortunate choice of using one of my cooking pots with an old measuring cup and it took me a good couple hours to get all the wax remnants out. Seeing as I could’ve bought an actual candle pouring pot for a little over $10, it would’ve been a far better choice and I wouldn’t have been spilling wax all over the place!

Supplies:  
Wooden Candle Wicks
6 oz Jars with Lids
Candle Wax*
Candle Pouring Pot
Powdered Candle Dye
Essential Oils for Scent

*I used leftover candle stubs, but the wax linked here will make about 26 -6oz candles

1.  Melt wax on low heat in your pot. If, like me, you are using candle stubs, remove the wicks from the old candles once the wax is completely melted using either tongs or a fork.

2. For these candles, the full wax wick is far too long. Cut the wicks in half with a pair of scissors, then remove the candle wax from heat and soak them in the wax for 10 minutes. Soaking these wicks is VERY IMPORTANT, they are not like the standard wicks that are already coated in wax and not soaking them will lead to the candles not staying lit.

DIY Wooden Wick Candles #candles #diy

3. Once wicks have been soaked, remove them with tongs or a fork. Once they are cool enough to handle (I was able to touch them immediately) insert them into the metal holder stands included and let dry.

4. Now, attach the wicks to the bottom of your jars by dipping the metal holder into the melted wax, then position at the bottom of the jar. 

5. Let the wax cool for a couple more minutes, then add color and fragrance of your choice. The ones I have recommended are great for candles, bath bombs, soaps, and bath salts, so you can get a lot of use out of them! I made pastel pink, purple, and yellow candles that were scented as peppermint-lemon, lavender-lemon, and rosemary-lemon (I know you can't tell that I like lemon).

DIY Wooden Wick Candles #candles #diy

6. Pour cooled (but still liquid) was into the jars. Reserve about 25% of your wax to remelt and top off your candles if a divot is created in the middle due to the wax cooling. The cooler the wax is, the less of a divot will form. Some of mine with the cool wax needed no additional wax to fill in, while the ones where I started with hot wax needed a lot of extra to make them look nice!

7. Once candles are cooled and solidified, remelt the excess wax and fill in any divots that were caused during the first pour. Now you have a lovely set of candles for your home or favors for your next party!

The crackling of these candles makes me want to make a slew of them for a fall or winter wedding, just with different colors and scents. :) What would you make these cute little candles for?

DIY Wooden Wick Candles #candles #diy

Chocolate Dipped Cookie Spoons

This post contains affiliate links, meaning that if you click on a link I will recieve a small comission. This costs you nothing extra and I only promote products I use and love! You can read our full disclosure here

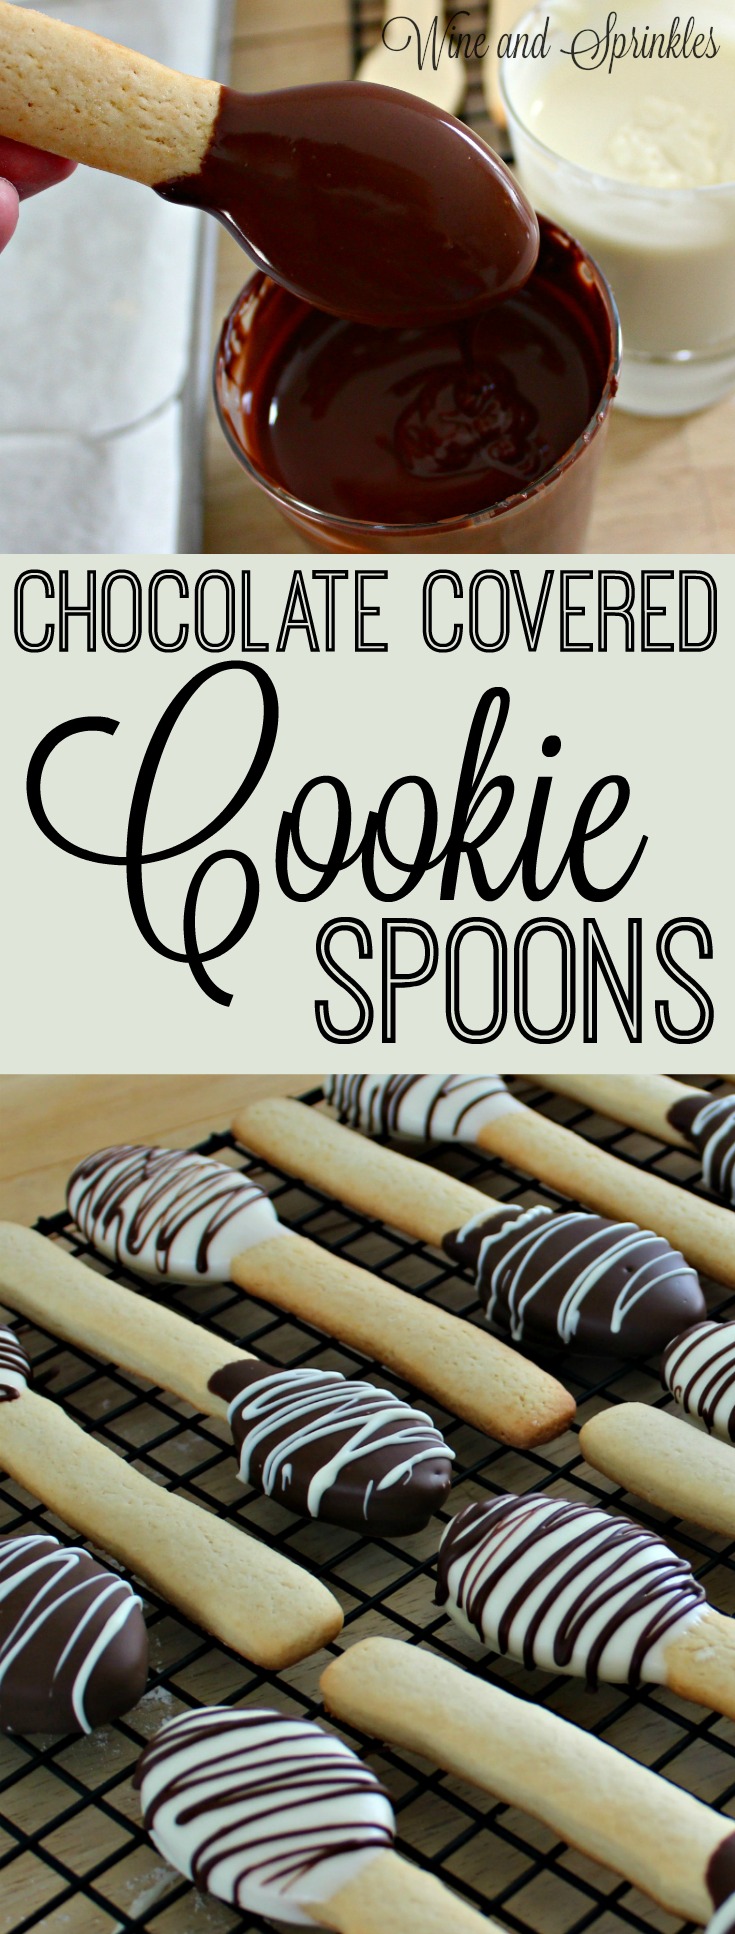
Chocolate Covered Cooker Spoons #cookie #favors

These adorable cookie spoons are something that I was planning on doing for my wedding out of town guest bags; but I never got around to making them! They go perfect with a cup of cocoa and are a wonderful addition to a coffee bar. :) The best part is that they are quite cheap to make, 120 spoons for about $50 if you have to buy all the ingredients.

Supplies:
Spoon Shaped Cookie Cutter
2 – 10 oz White Candy Melts
2 – 10 oz Chocolate Candy Melts
Sugar Cookie Dough (Here is my recipe)

1.     Prepare the Sugar Cookie dough according to the recipe you plan to use. For the recipe I used, it will make around 120 spoons if you use all the dough. In general you want the dough to hold its shape and not flatten out, so try not to use the store bought stuff (If you do, add a little flour into the dough before rolling it out).

Chocolate Covered Cooker Spoons #cookie #favors

2.     Sprinkle flour on your work surface and roll the dough out to a little over ¼” and cut out spoons with the cookie cutter. Transfer to a cookie sheet and bake for 10-12 minutes. Try to have your cookies come out on the crispier side; that will help them keep their strength for being dipped into coffee.

Chocolate Covered Cooker Spoons #cookie #favors

3.     Once your cookies are cooled, melt the chocolate melts according to the package. Dip the end of each spoon into the chocolate then lay on parchment paper to cool. I put my candy melts in glasses so that it made dipping the cookies easier and made half of my cookies white and half dark chocolate.

4.     Once the chocolate has hardened, use a spoon to drizzle the extra chocolate over the spoons, and you’re done!

Chocolate Covered Cooker Spoons #cookie #favors

These cookies are easy to make into cheap favors by simply putting them in cellophane bags and are the perfect addition to a welcome bag for a winter wedding! Leave any questions you have in the comments!

Chocolate Covered Cooker Spoons #cookie #favors

DIY Personalized Wedding Matches

This post contains affiliate links, meaning that if you click on a link I will recieve a small comission. This costs you nothing extra and I only promote products I use and love! You can read our full disclosure here

One of my favorite ideas that came into play with our wedding was the Cigar Bar I designed for my husband and his fraternity brothers. It gave the guys a fun "manly" thing to do during the wedding and everyone told us how much they liked it! Now for me, no cigar bar is complete without personalized matches, and no better time to personalize everything than for your wedding! As I searched, I couldn't seem to find anything quite right so I decided to design my own! It was surprisingly easy and I love the way they turned out!

Note: This post contains affiliate links, which means that if you click on one of the product links and choose to purchase, I will receive a small commission. This does not affect your price in any way and I only promote products I use and love! :)

Supplies:


Full Sheet Adhesive labels (I used Avery 5156)

Matches Template

1. Using the matchbook template, start by putting your own information into the text boxes. The font I used for our names and location is called Baroque Script, so if you want it to look exactly like these matches make sure to have the font downloaded beforehand!

2. Print out the matches and cut them out with scissors. Next, line up the top of the matchbook and the sticker. Make sure that the sandpaper strip is on the side that won't be covered by the sticker.

3. As shown above, adhere the sticker starting at the top, then smoothing around the entire matchbook. Below you see a finished matchbook.

flower explosion

This project really added a special touch to our big day and as you can see its quite easy to do! After the initial measuring and designing of the template it only took about two hours to cut and make 100 matchbooks! Stay tuned for more fun wedding crafts!

DIY Wine Charm Favors

This post contains affiliate links, meaning that if you click on a link I will recieve a small comission. This costs you nothing extra and I only promote products I use and love! You can read our full disclosure here

To celebrate the hubs and I first year of marriage, I took a look back at all the DIY I did through the course of my wedding and selected some of the projects to feature here on Wine and Sprinkles! The first is our wedding favors, homemade wine charms. They are surprisingly easy to make and make a cute memorable, and transportable wedding favor!

Note: This post contains affiliate links, which means that if you click one of the links and choose to purchase, I will receive a small commission. This does not affect your price in any way and I only promote products I use and love!

Supplies:
Assorted beads (I chose blue and silver)
Assorted Charms
Earring Wire Hoops
Jump Rings
Needle nose pliers
 

1.  First, attach the small jump rings to all of the charms you intend to use. In the pack I mentioned there are some that just don't look wine charm material, so order an extra pack. 

2. Using the needle nose pliers, flatten the wire on the hoop so that the beads and charms can easily slide on. Then slide on your beads and charms however you like. As you can see below I did silver, blue, charm, blue the silver for a nice symmetrical look.

flower explosion

3. Finally, re-bend the wire hoop's tip to its original position to look all the beads and charms in place.

And then you're done! We ended up pairing two to a favor box, but these could easily be made into sets of 4-8 to give away as Christmas presents or wine tasting favors as well. :) Now go get yourself a glass of wine to try out your new charms on!