This post contains affiliate links, meaning that if you click on a link I will recieve a small comission. This costs you nothing extra and I only promote products I use and love! You can read our full disclosure here
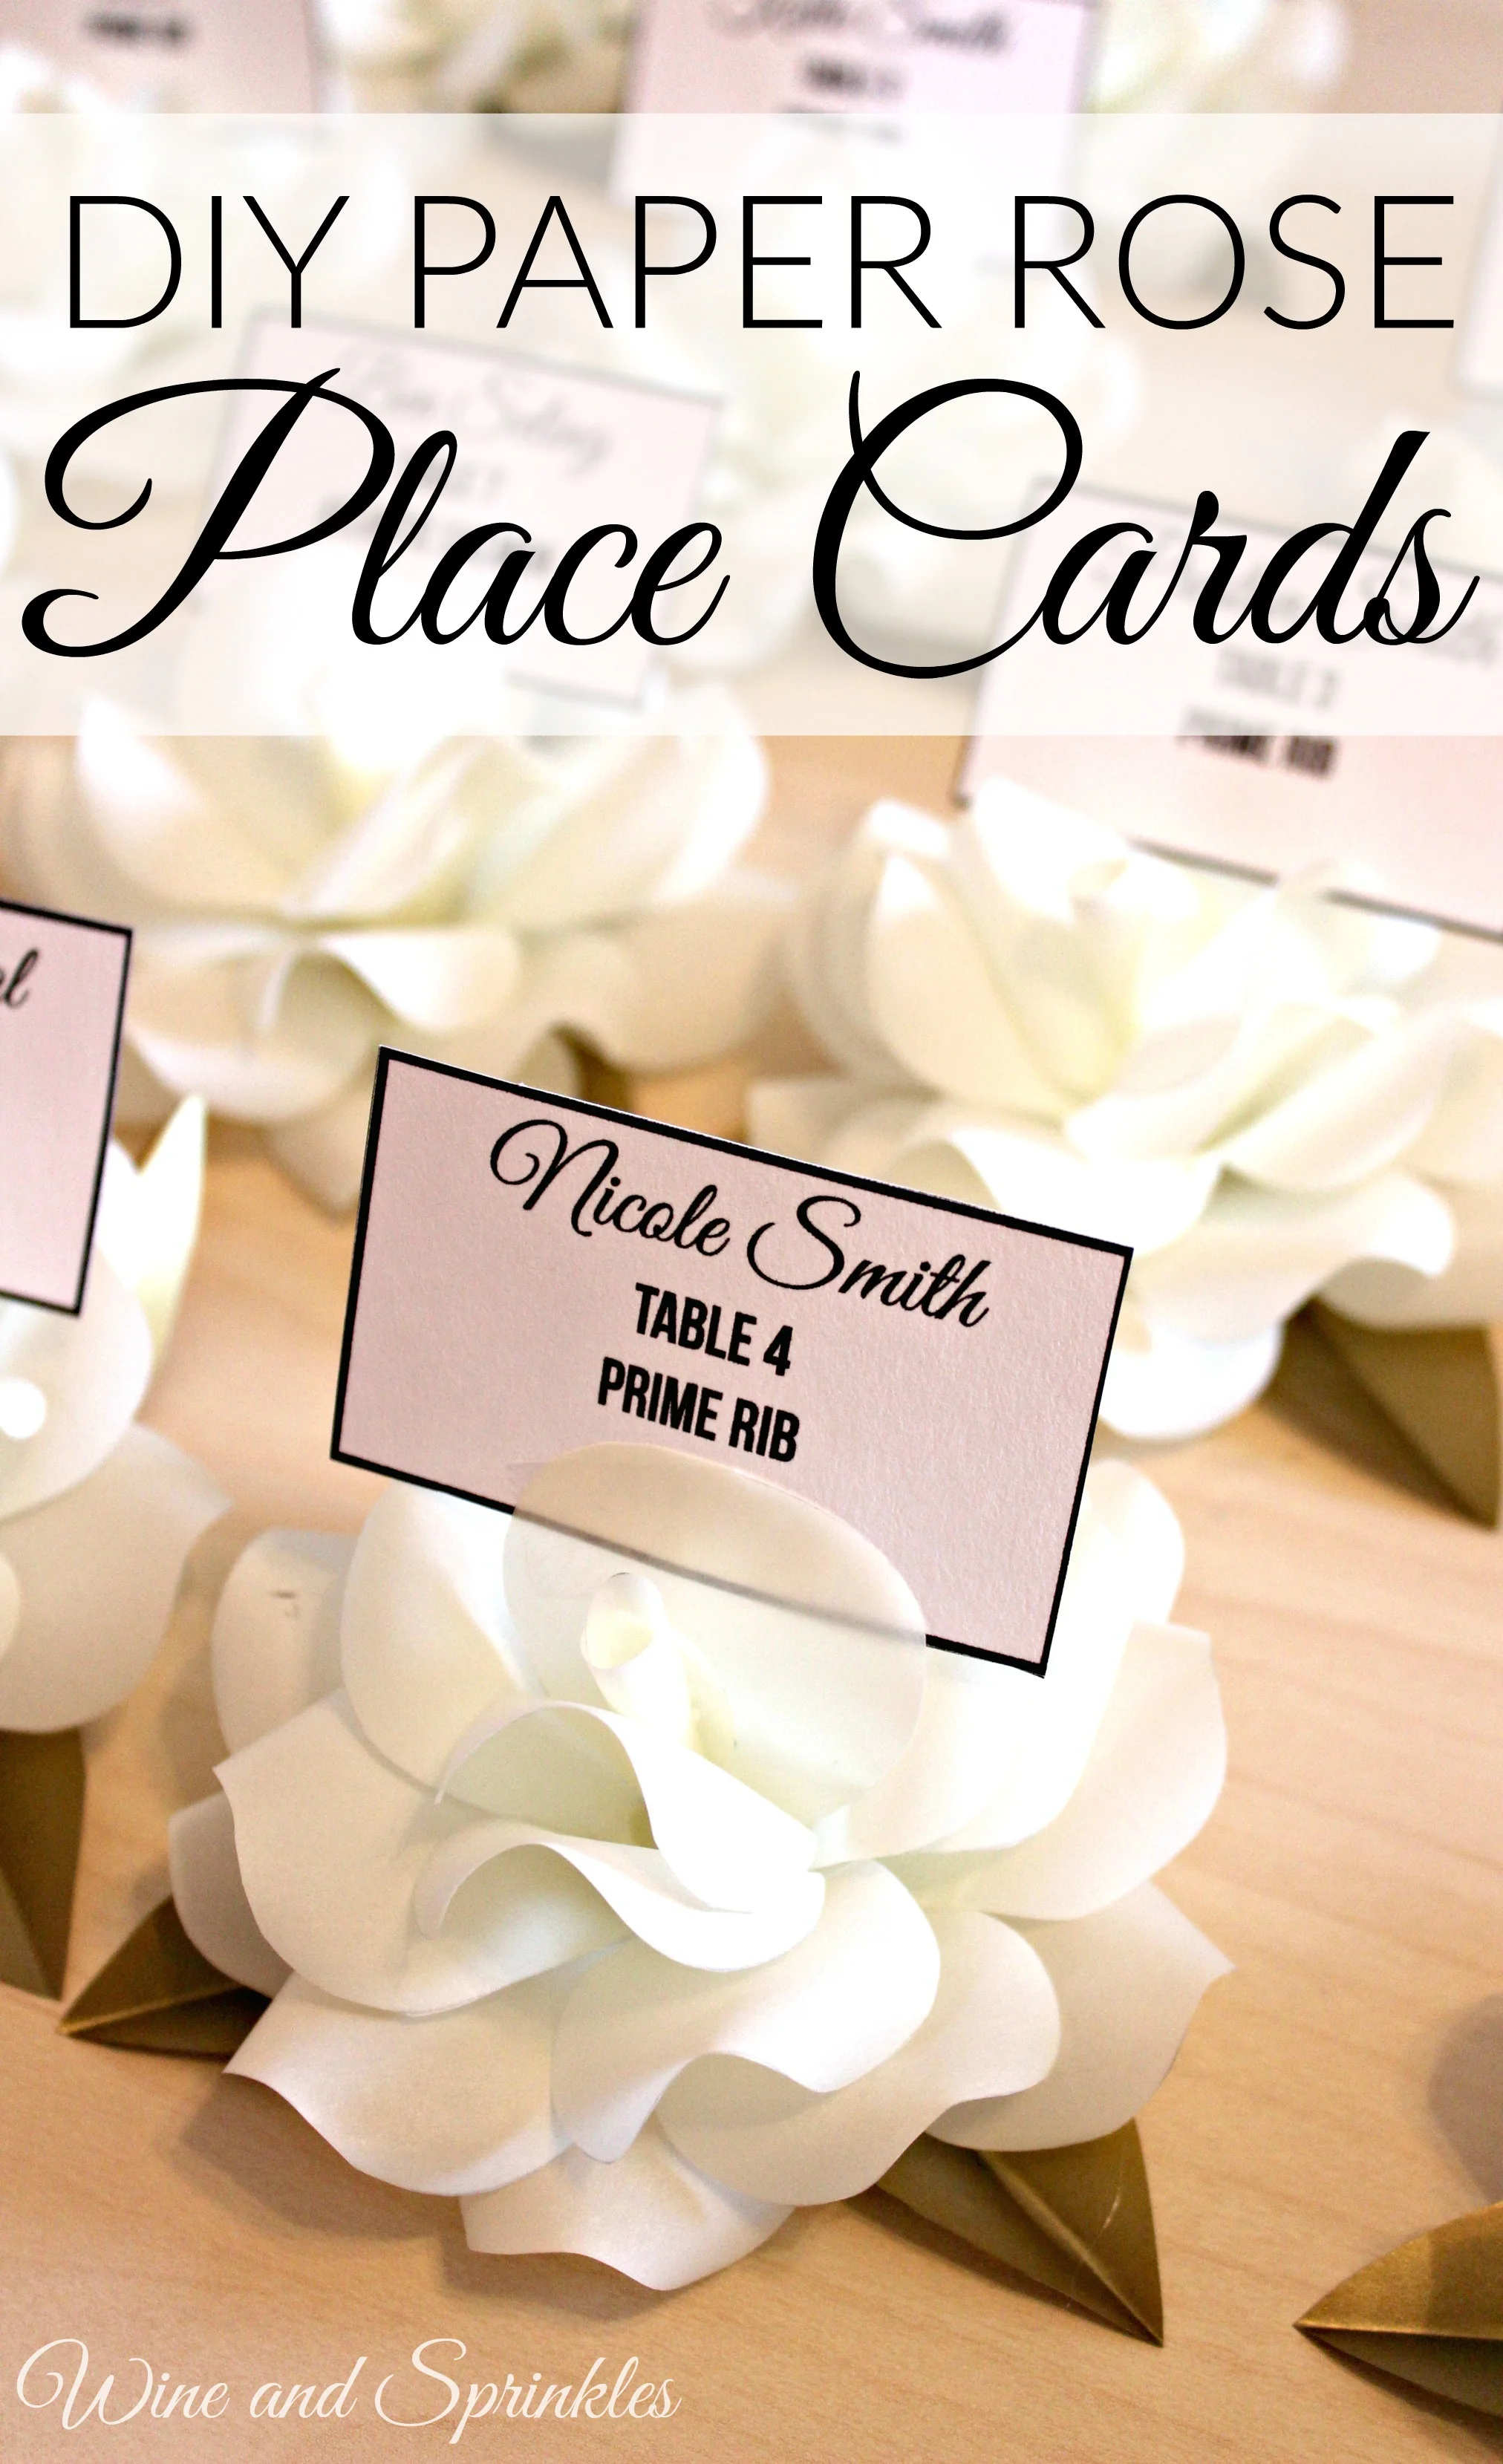
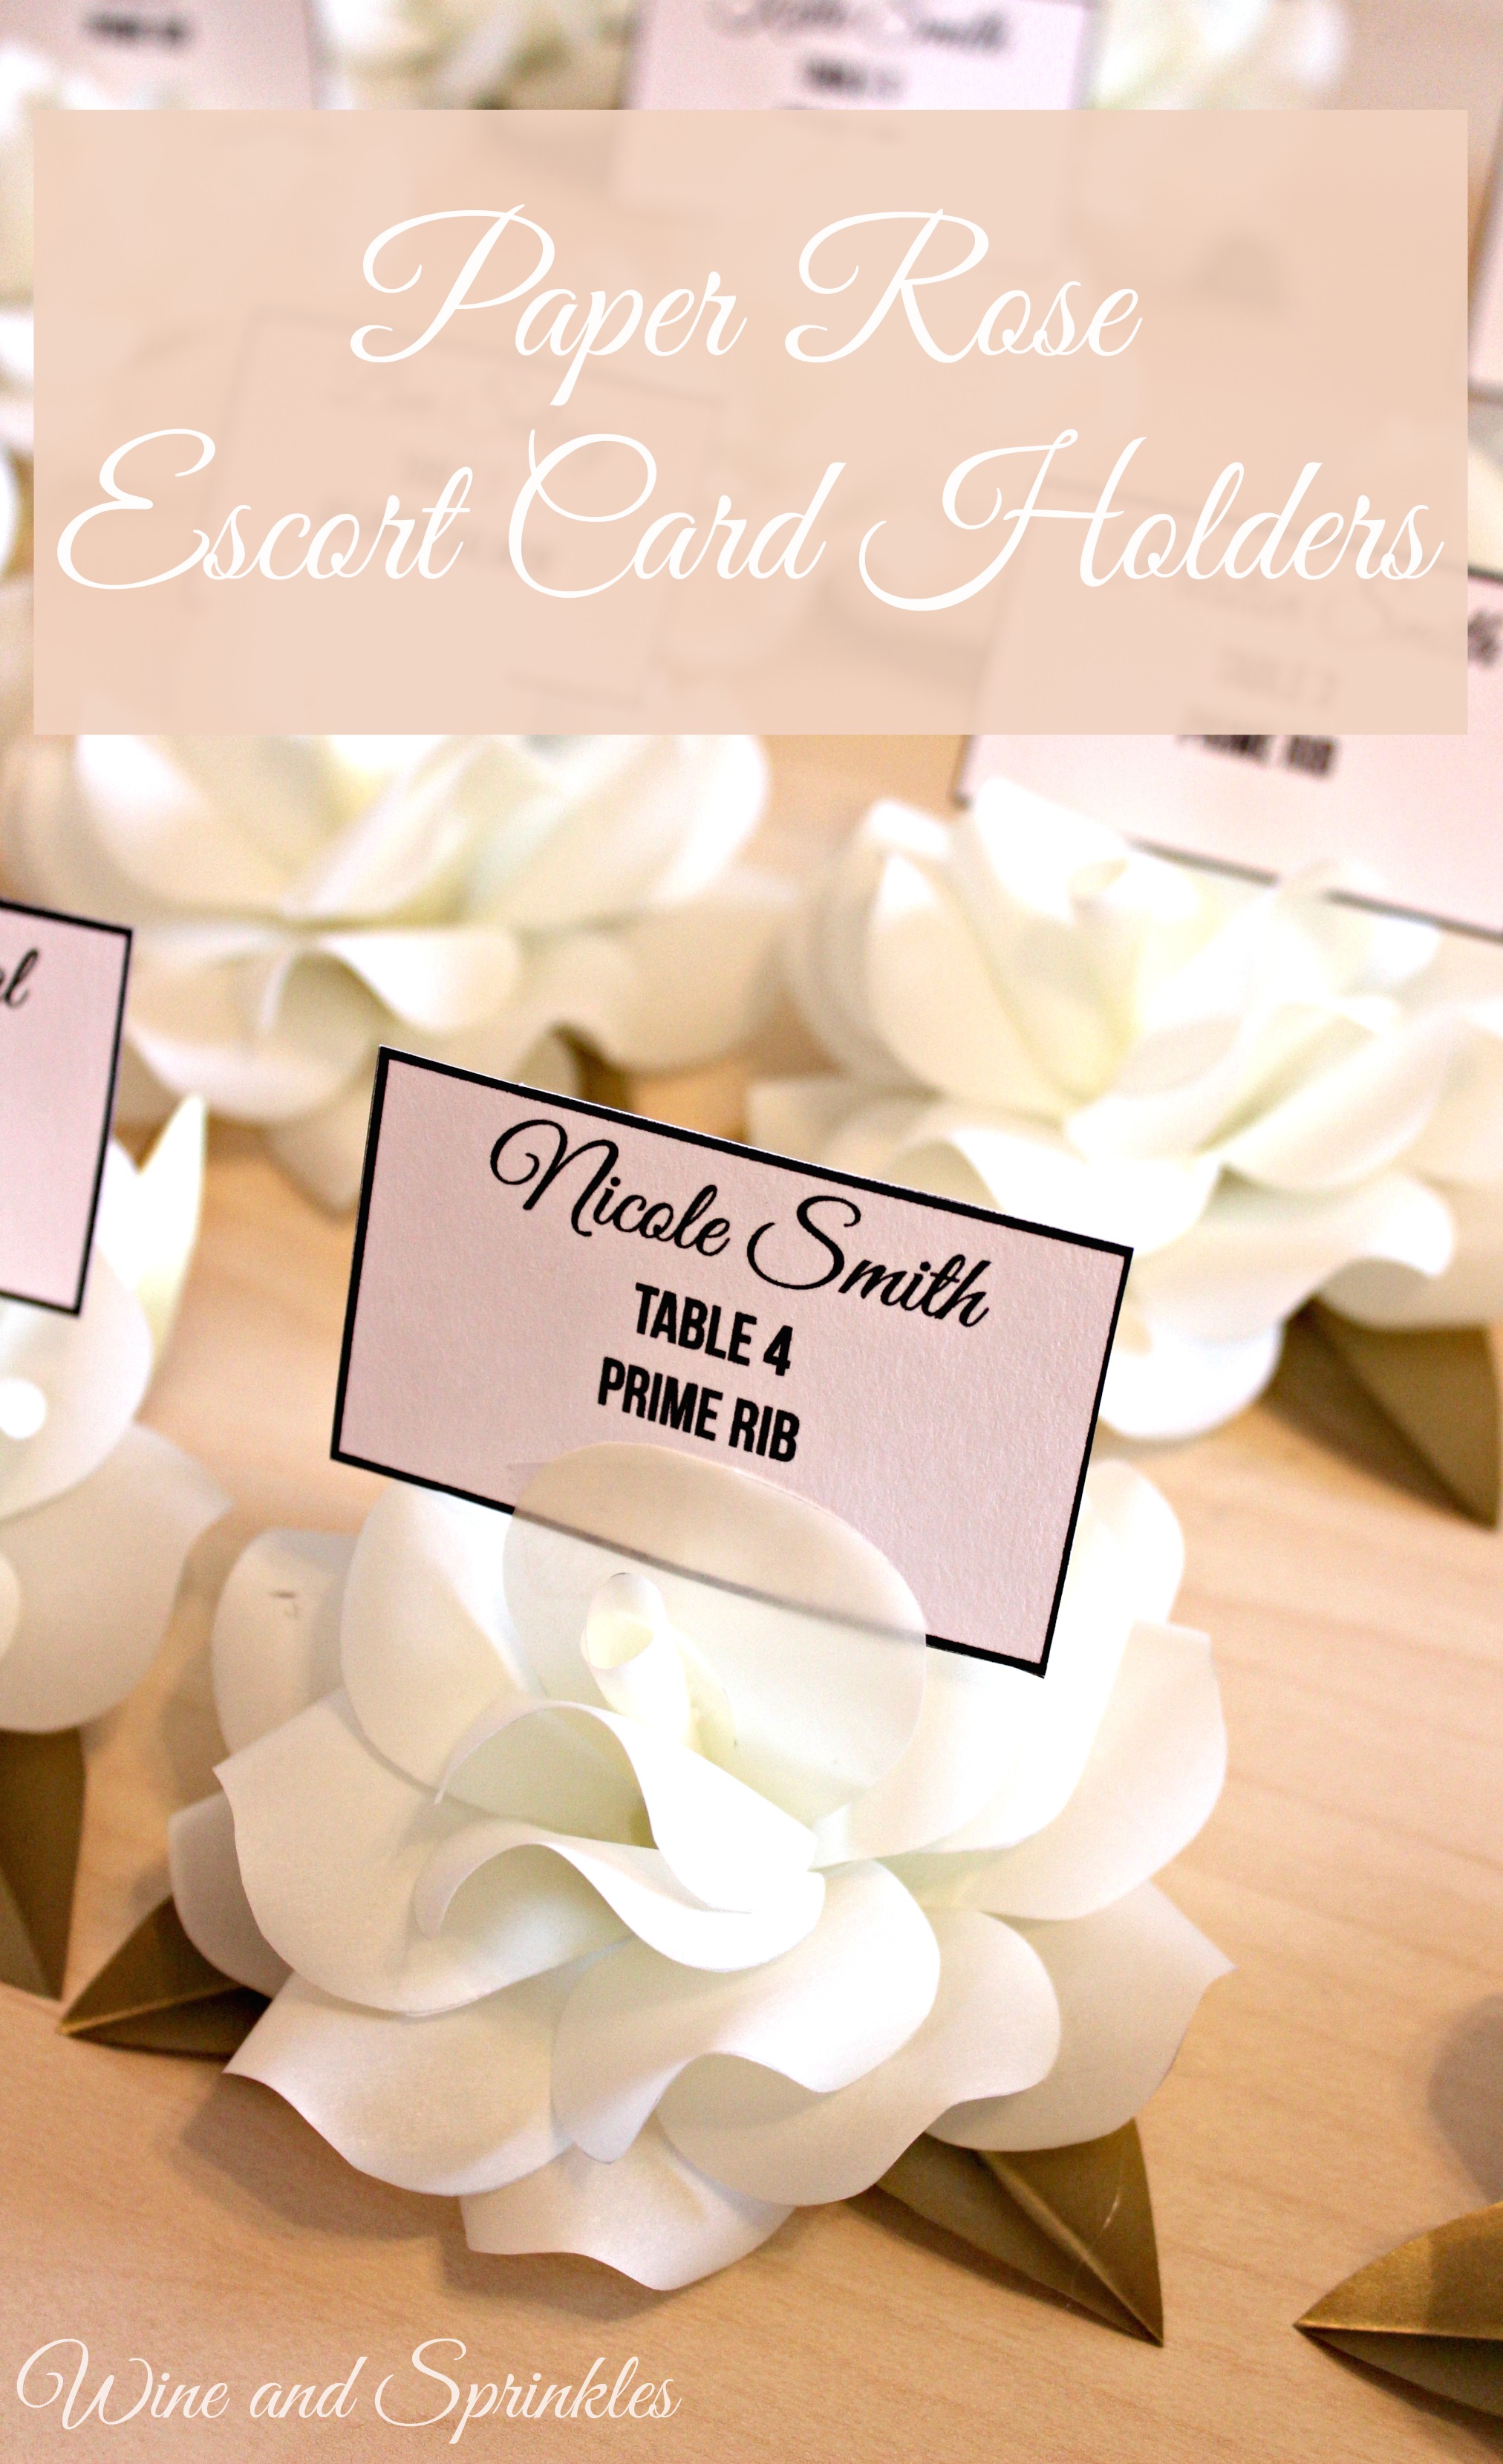
With all my leftover roses from the Beauty and the Beast Shower, I have been looking for a new home for them. Luckily, they worked out perfectly for my sorority sister’s Rustic Glam Gold Wedding! Her main flowers are white roses, so these beauties were the perfect accent to go with her existing floral arrangements. With that in mind, we decided these would be perfect as place card holders for her guests!
While the assembly of the flowers is the same as in the previous Vellum Roses post, there are a couple other steps to make them the perfect escort card holders. In particular, I used vinyl to color the leaves a pretty metallic gold to go with the wedding colors and then secured each place card with double sided tape to ensure that they all stayed with their flowers and were easy to set up the day of!
Supplies:
Cream Vellum
Paper Modgepodge
Hot Glue Gun and Glue Sticks
Escort Cards (I printed mine on cardstock and cut them into 2” x 3” rectangles)
Gold Vinyl (optional)
1. Print, cut out, and assemble the roses like in the Vellum Roses tutorial. Take care to not fold or attach the leaf portions to your flowers yet.

2. Design, print, and cut out your escort cards (I used the font Good Vibes and Bebas Neue). Using double sided tape, tape the back of the card to the front of one of the petals. I generally taped mine a few petals out from the center were the card was clearly readable. Once you have all your cards taped, set the flowers aside but try to keep them in whatever order you want them placed for the wedding.
3. If you are using vinyl on your leaves, remove backing from your vinyl and lay it down on your work surface, adhesive side up. Arrange as many leaves as you can on the sheet and smooth them down, making sure there are no air bubbles. Using scissors, cut leaves out of the vinyl.
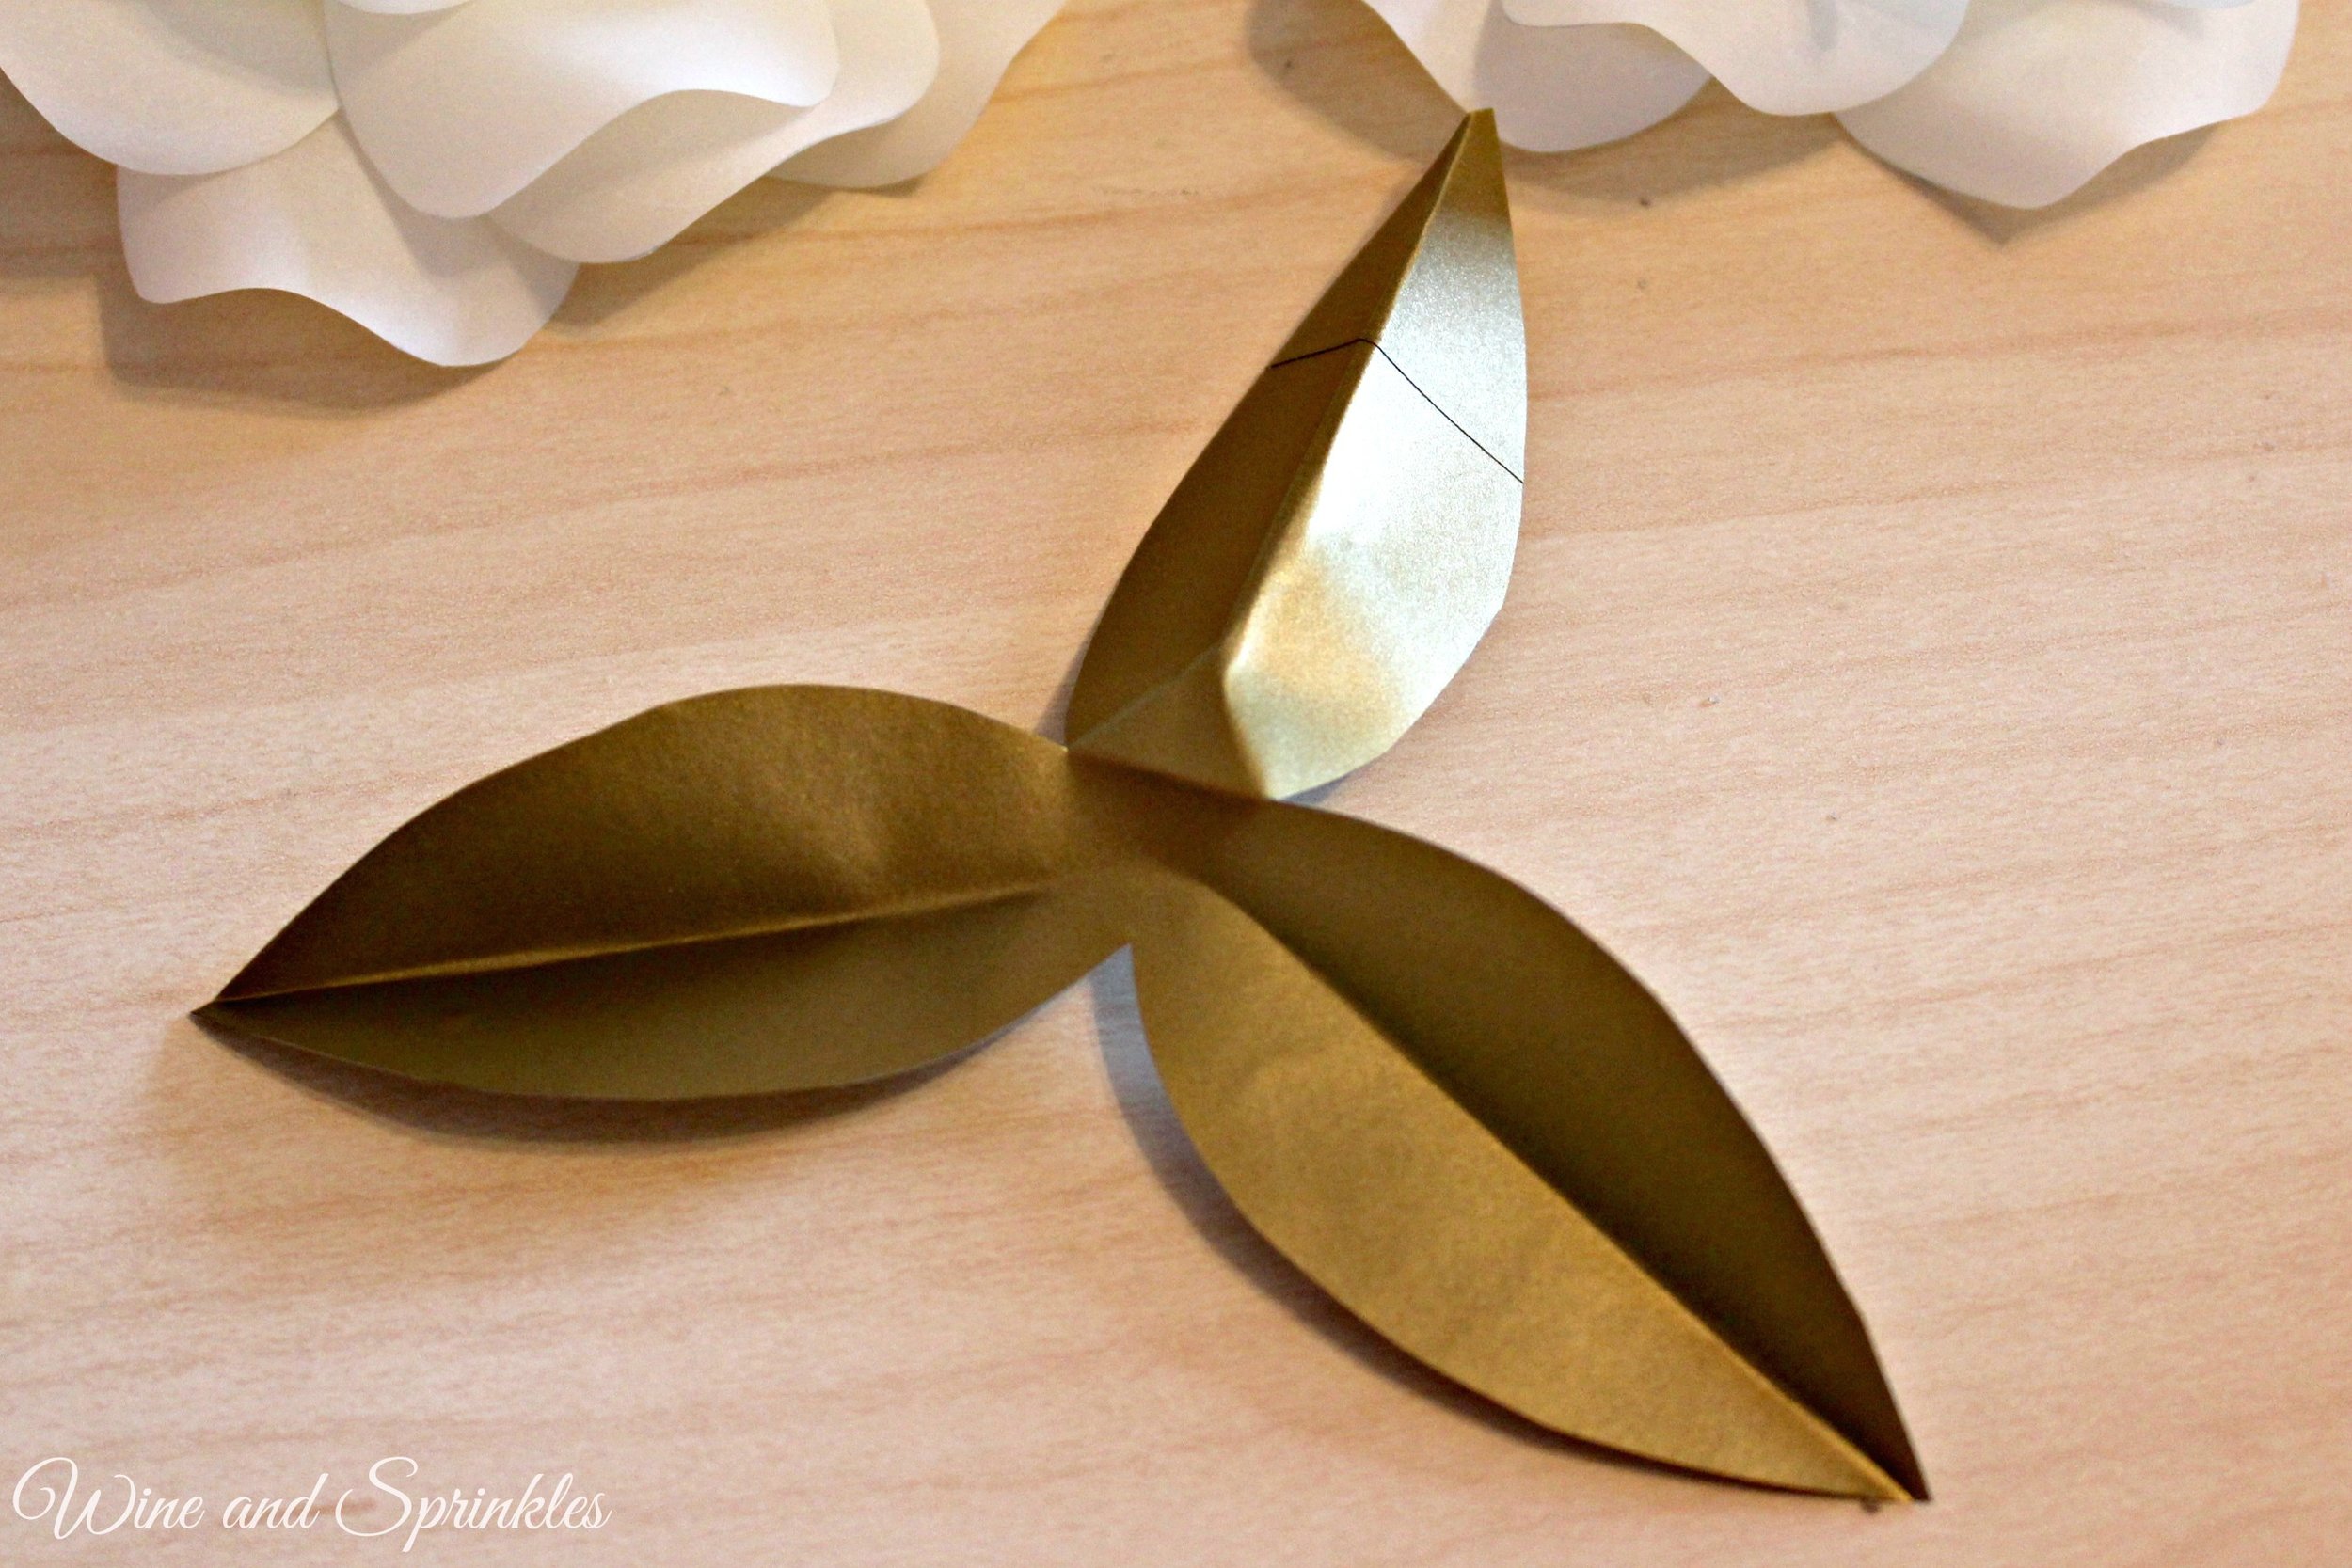
4. Fold two of the three leaves as shown in the original tutorial. For the third leaf, fold in the opposite way as the other two leaves so that it will prop up the back of the flower.

5. Using hot glue, attach the leaves to the flowers, making sure the “proper” leaf is in the back, perpendicular to the escort card. (Sorry these are a little blurry!)
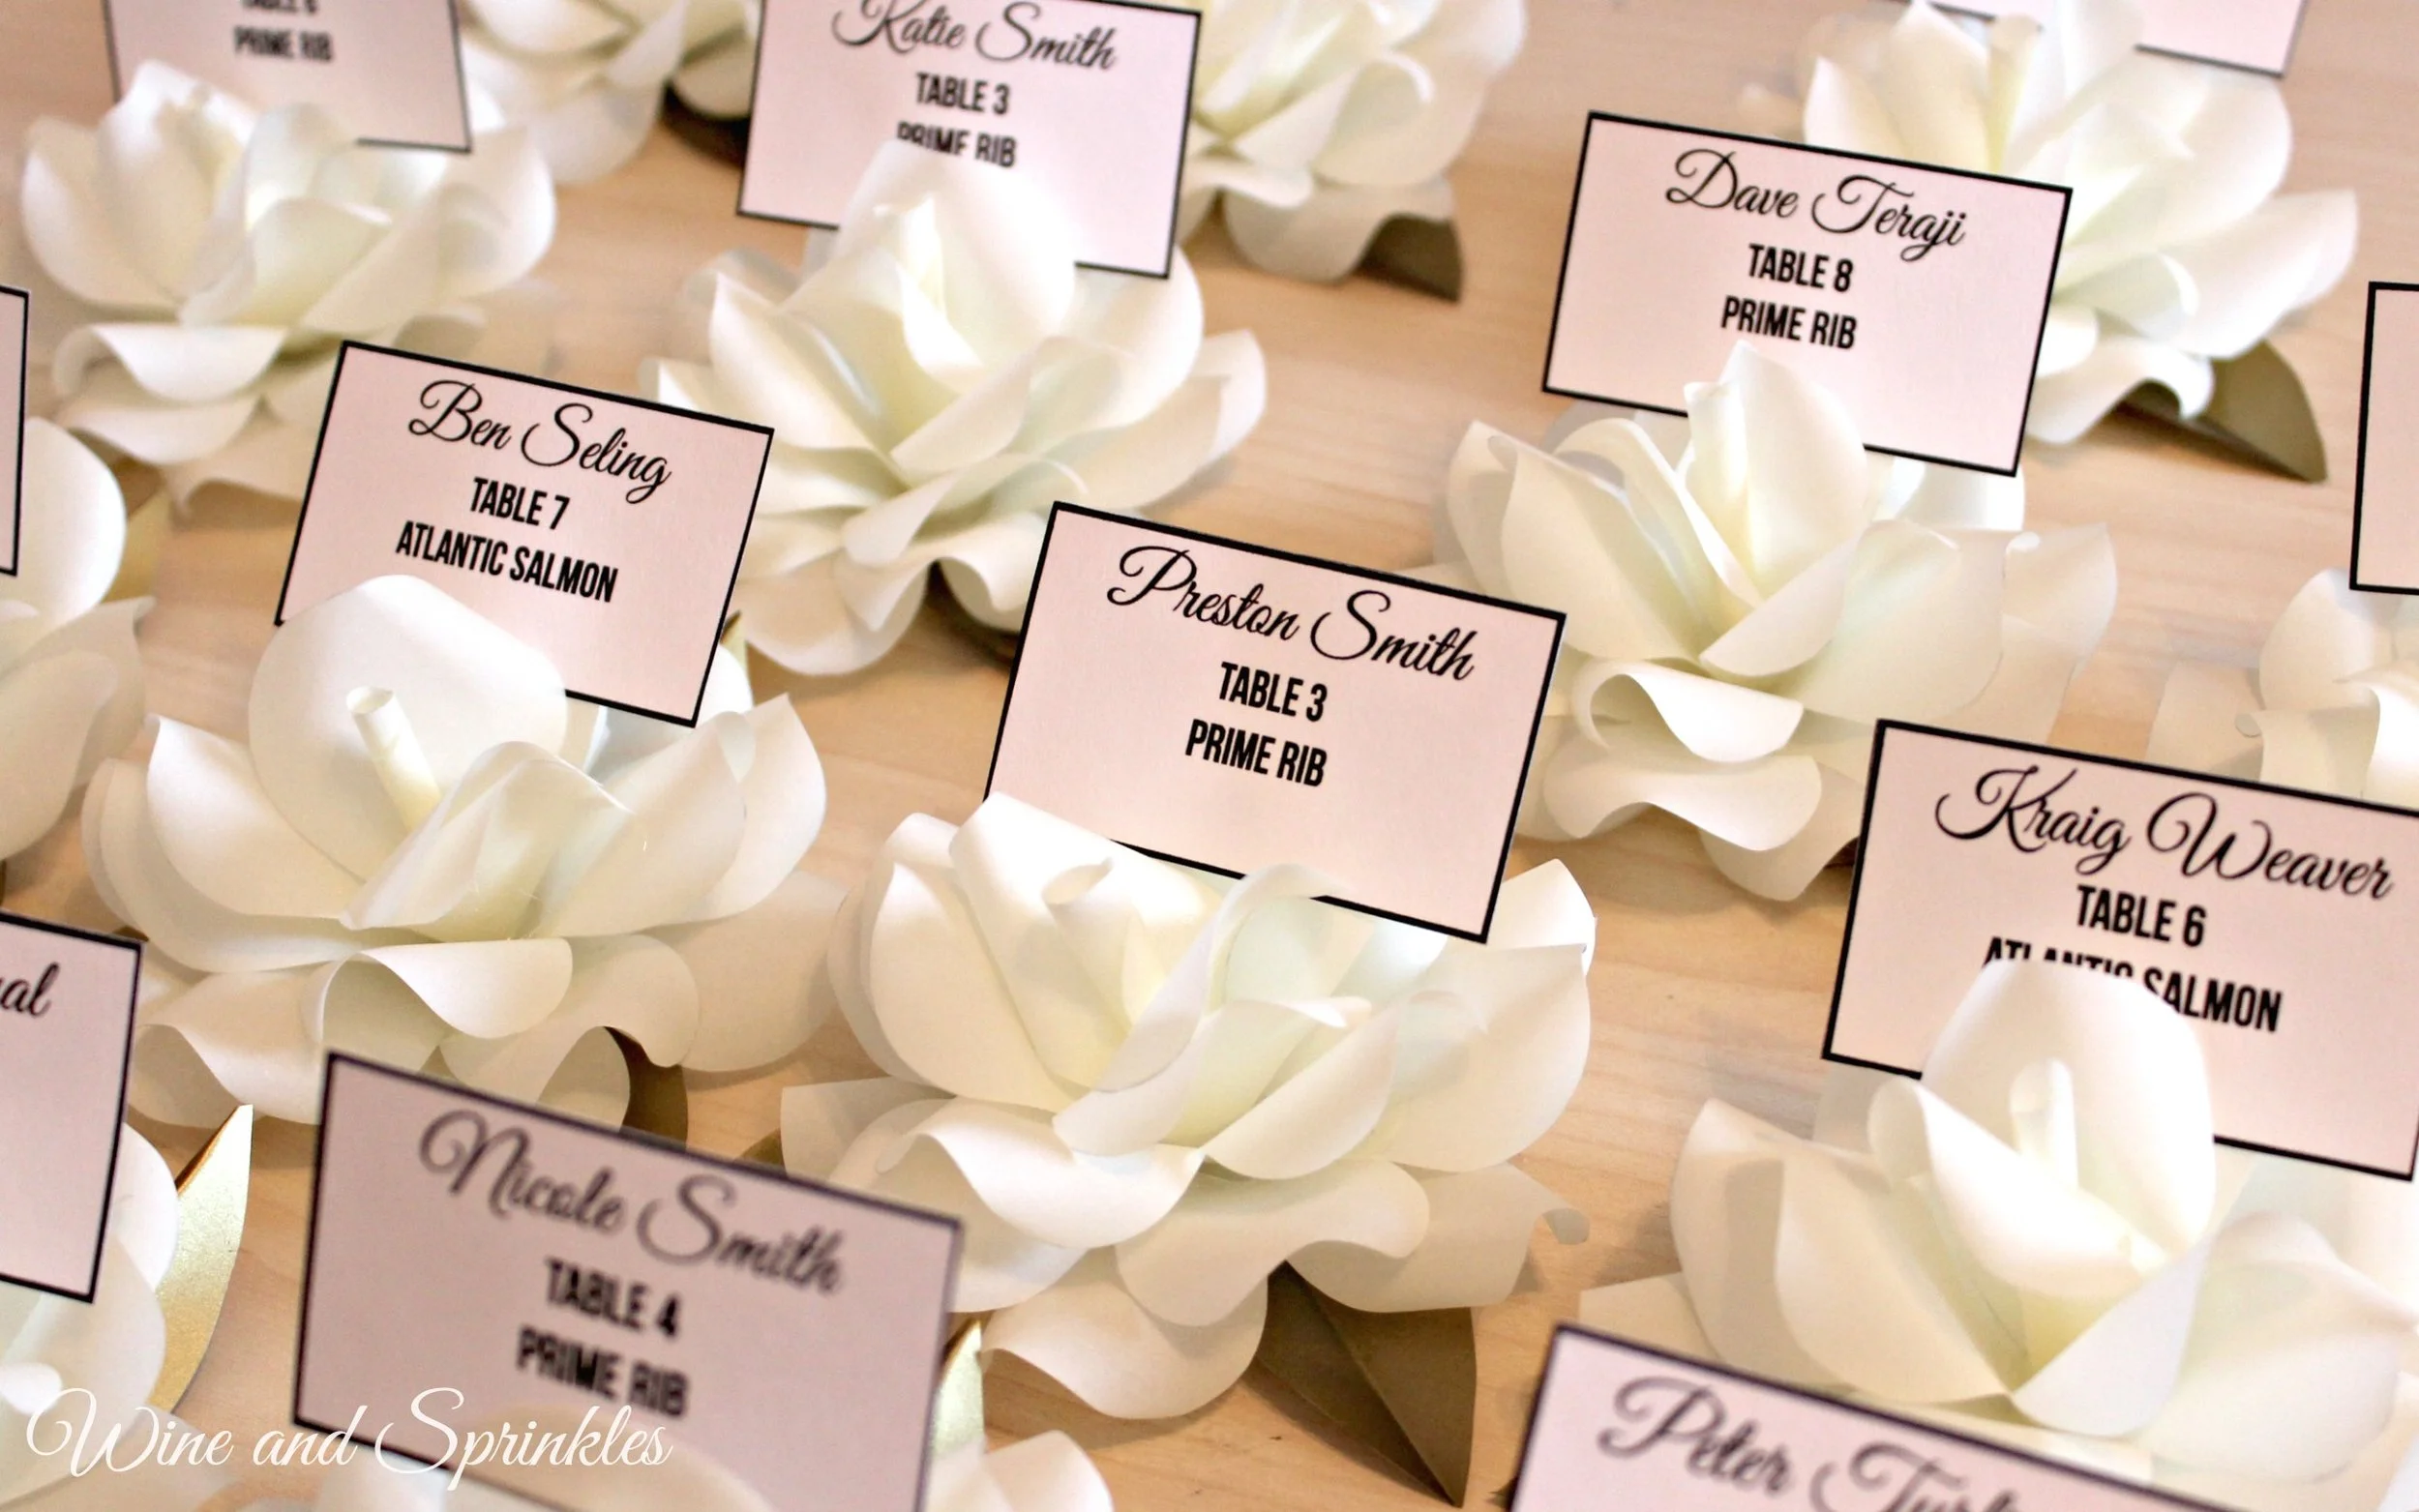
I wasn’t sure how I’d feel about the leaves being gold but as it turned out I adored it! With the roses being a little translucent themselves the gold leaves gave a magical quality to the roses, which of course I loved! I ended up being able to pack them up in a box with glass dividers so that they would move around and would stay in order for their trip up to their mountain wedding. What would you use for your escort cards?