This post contains affiliate links, meaning that if you click on a link I will recieve a small comission. This costs you nothing extra and I only promote products I use and love! You can read our full disclosure here
As you read this post, you’ll notice a lot of bolded words, some that highlight pink and link to other posts and products, and others that don’t do anything. That’s because I am still writing and working on the posts those words go to! As these posts get published, I’ll be updating this post until all the projects are complete! Subscribe to my Newsletter or Follow me on Facebook to keep updated on when I post new content!

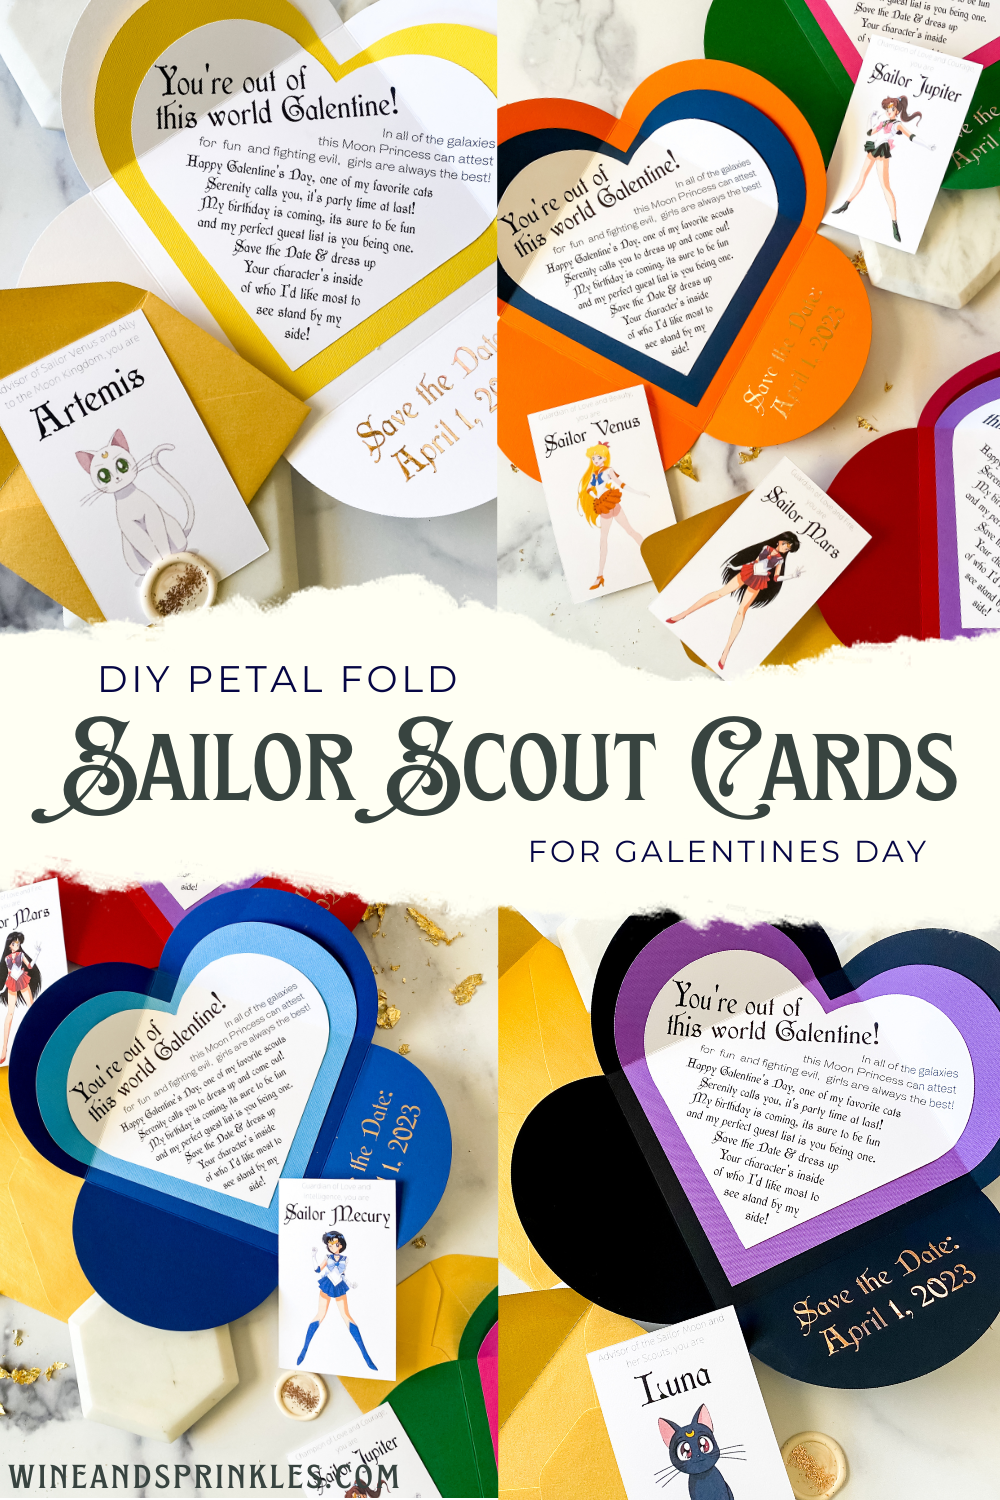
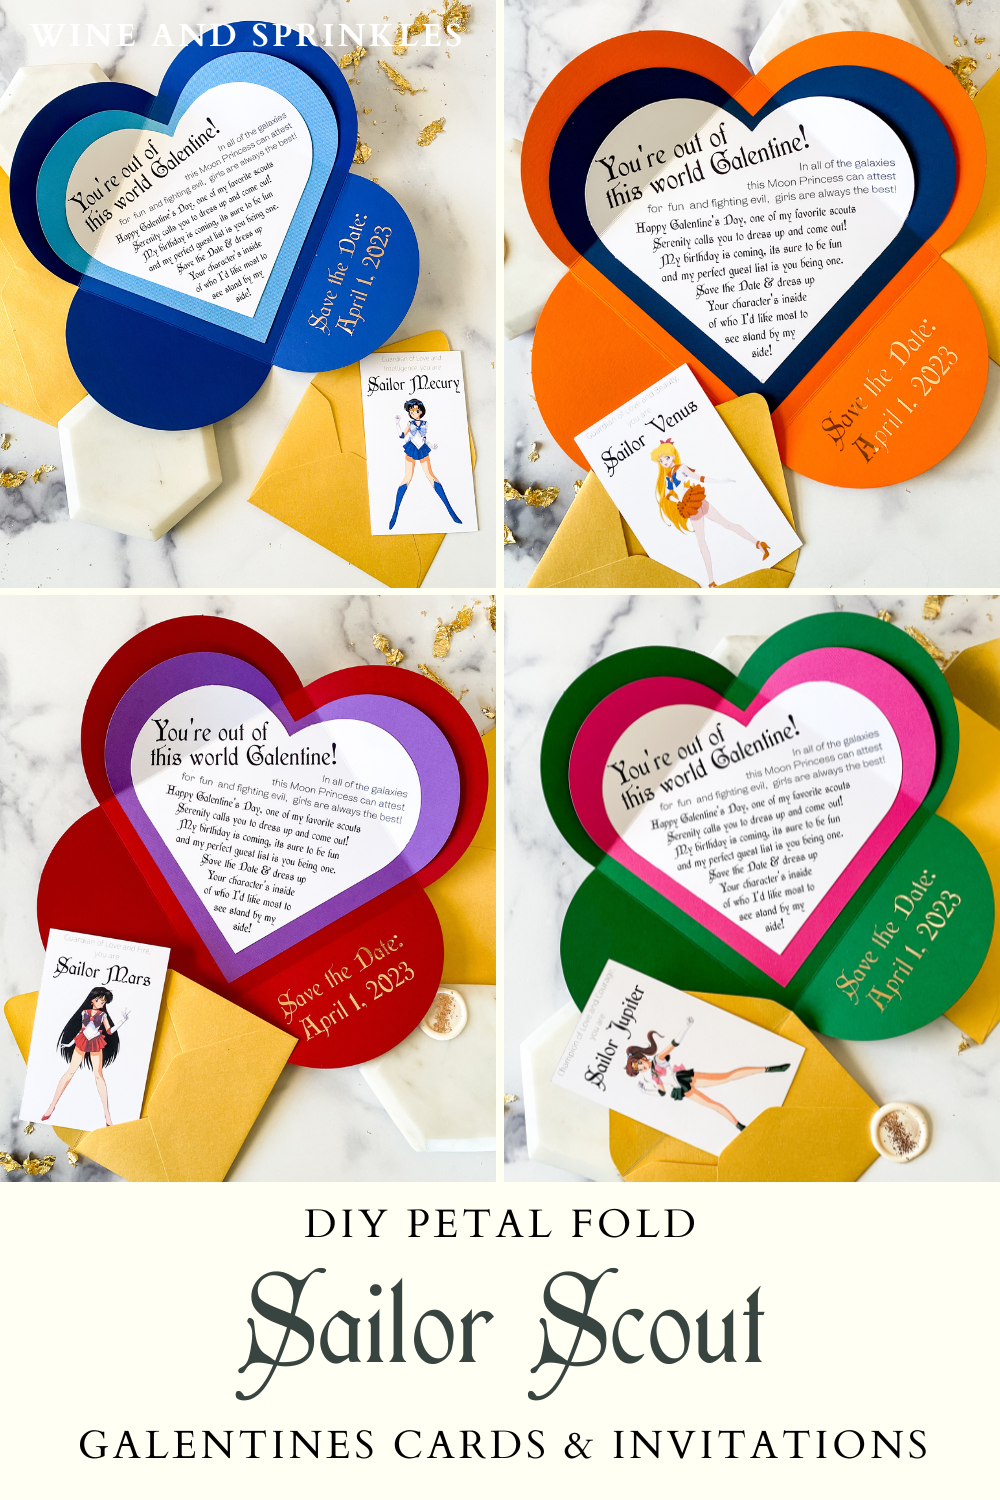
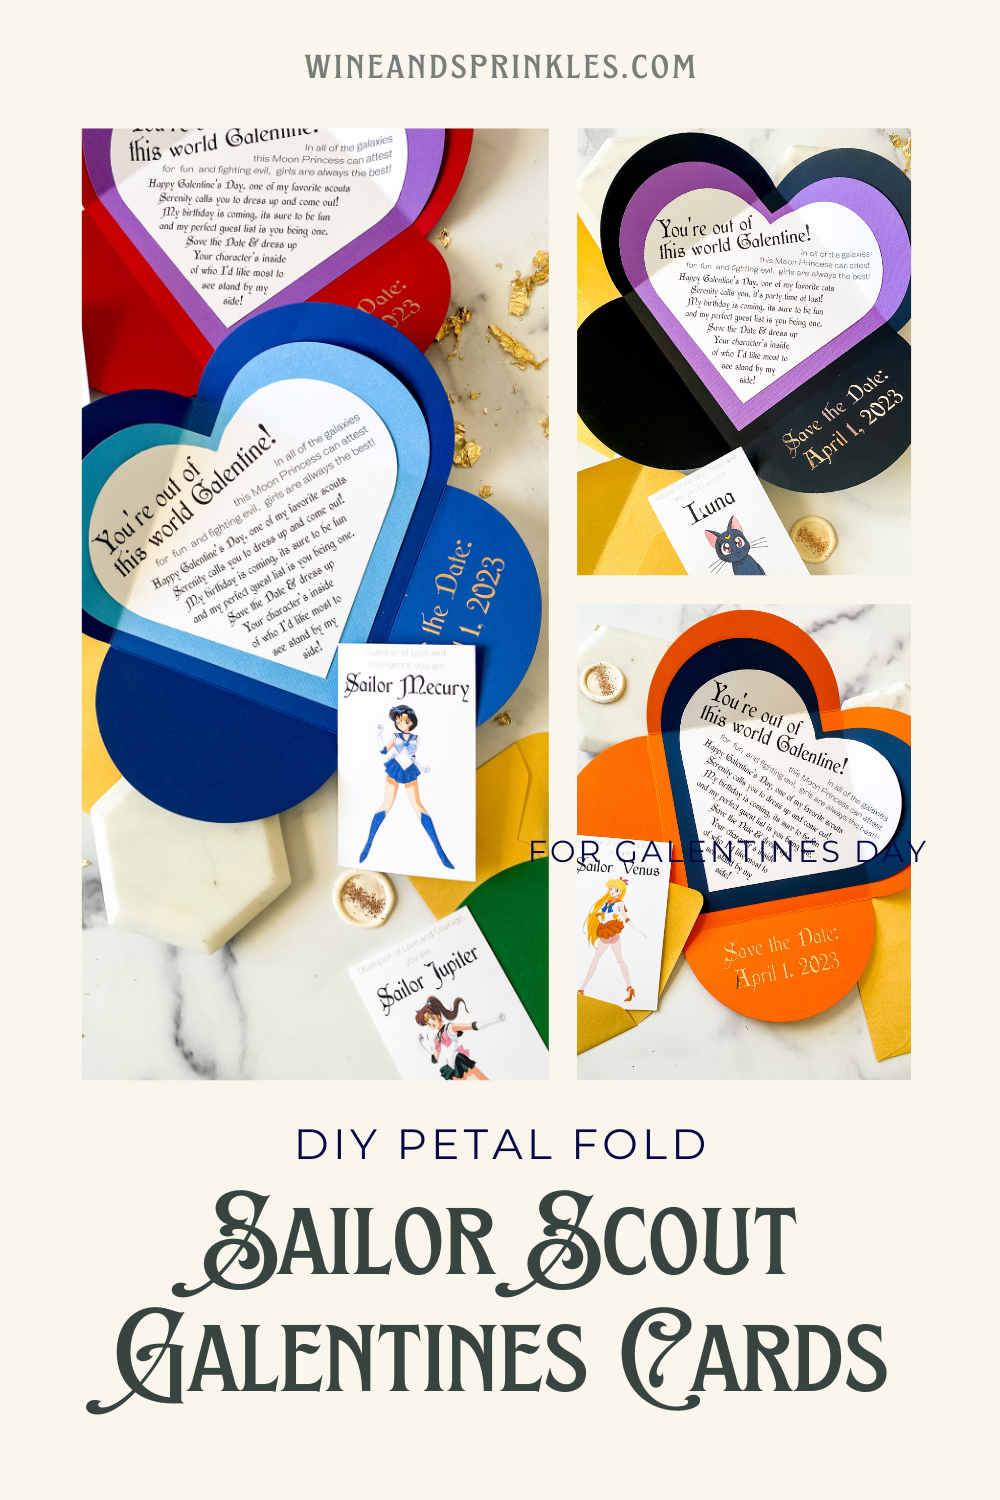
If there’s something I miss about the Valentine’s Days of childhood, its all the fun paper cards you’d get in a decorated shoebox, plus all the candy of course! So when I was inviting some of my favorite friends to my birthday this year, I used it as a reason to revive the old DIY Valentines vibe by making them all Galentine’s Day Cards, each themed after characters in one of my favorite animes, Sailor Moon!
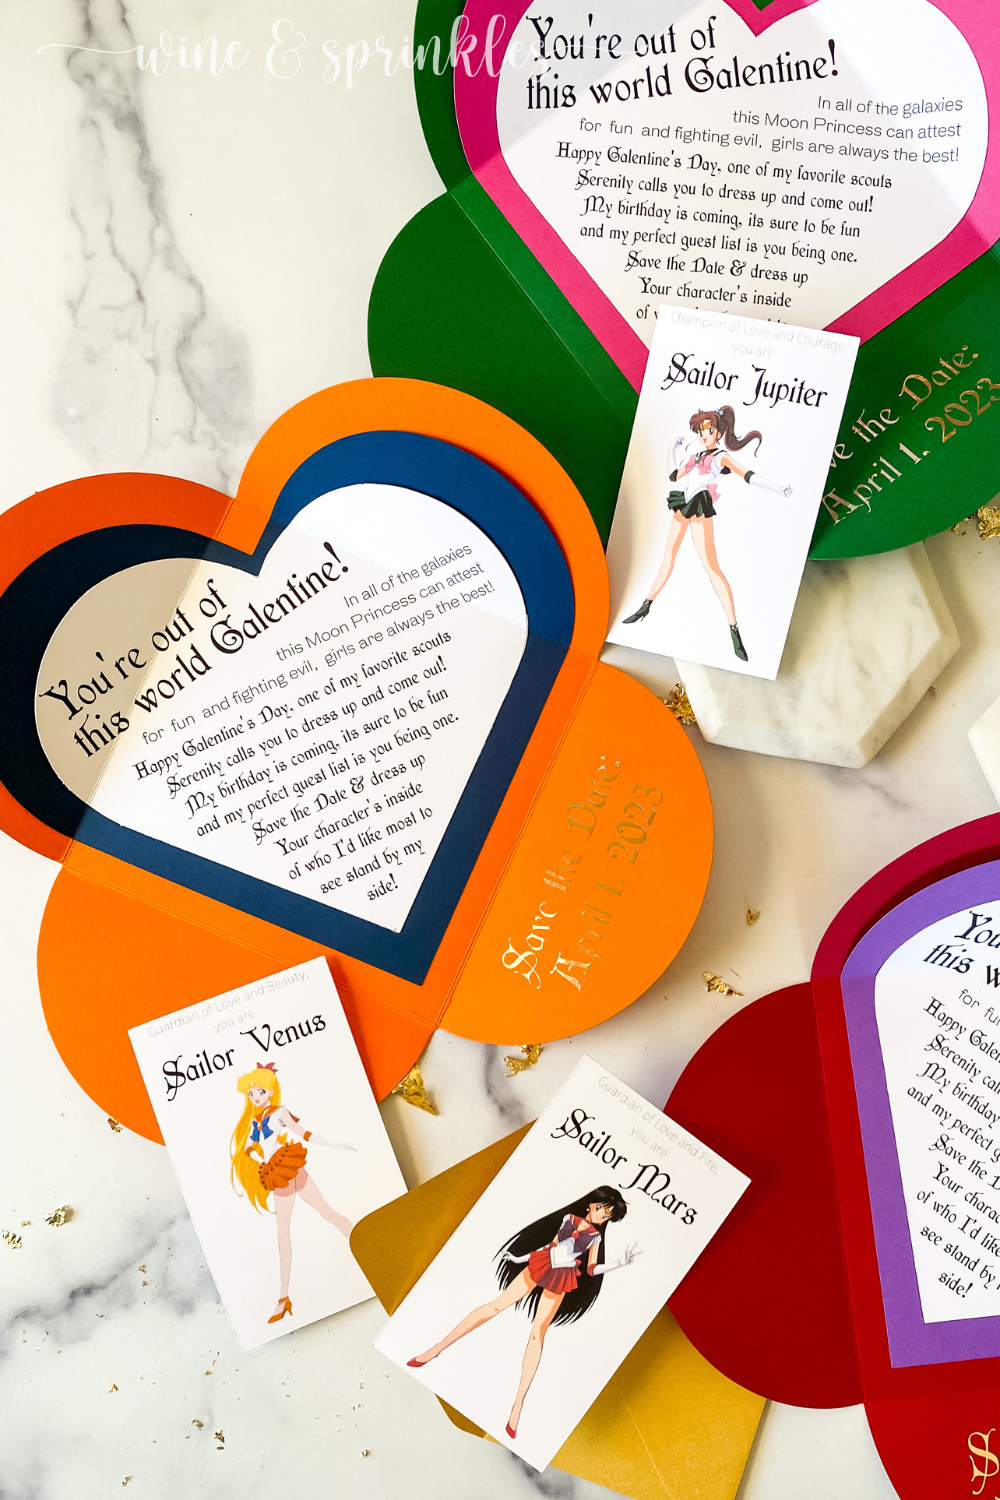
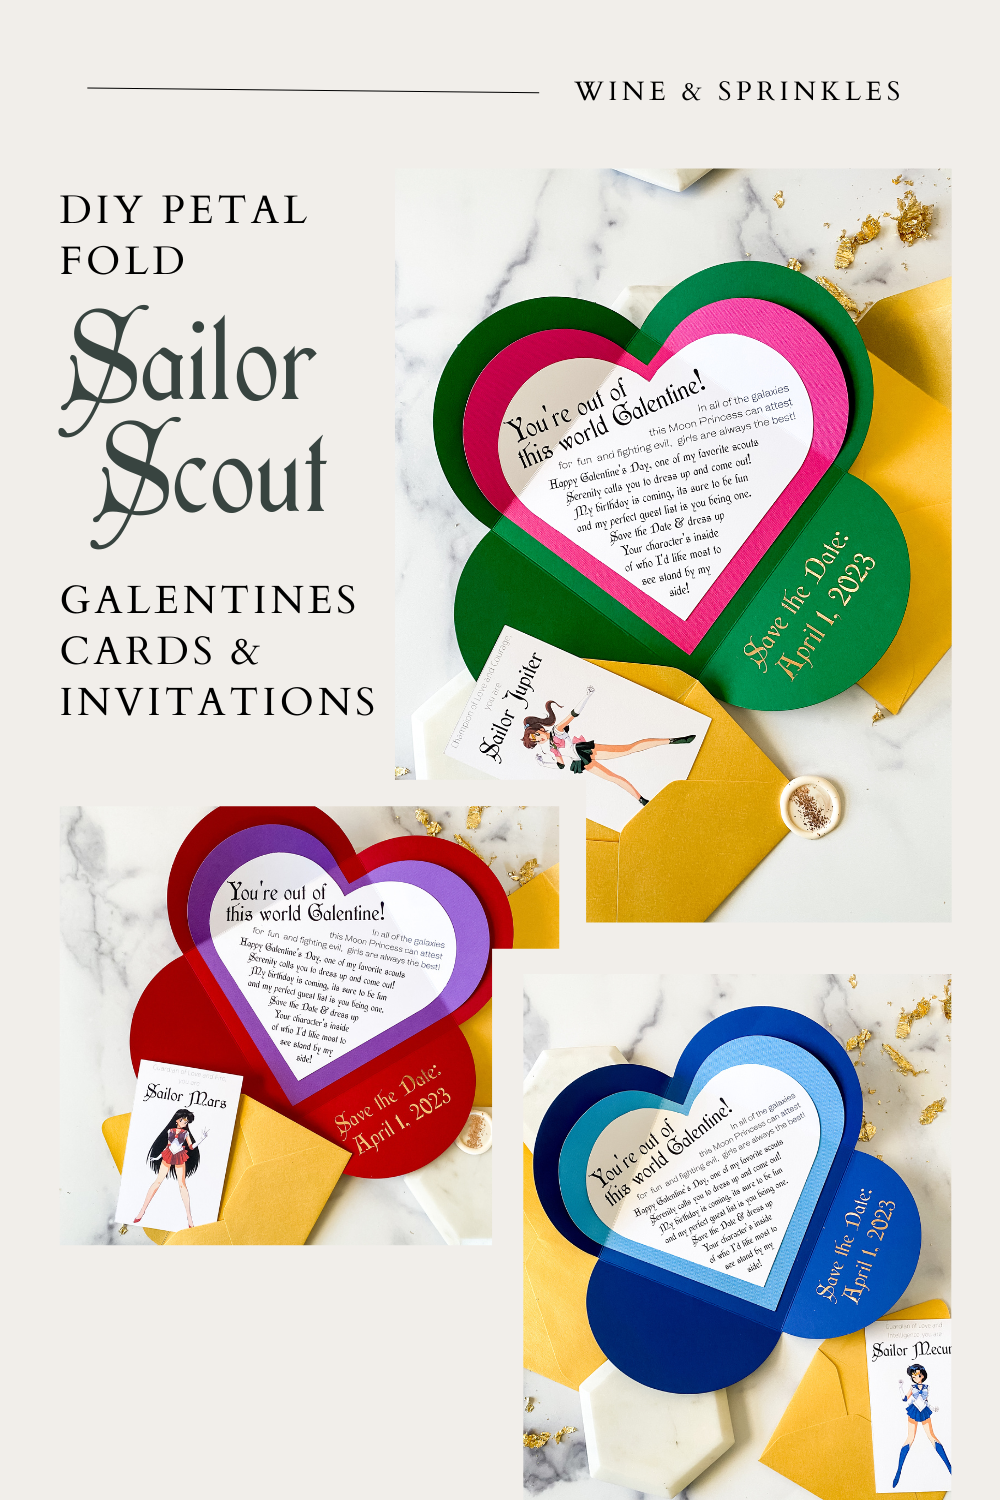
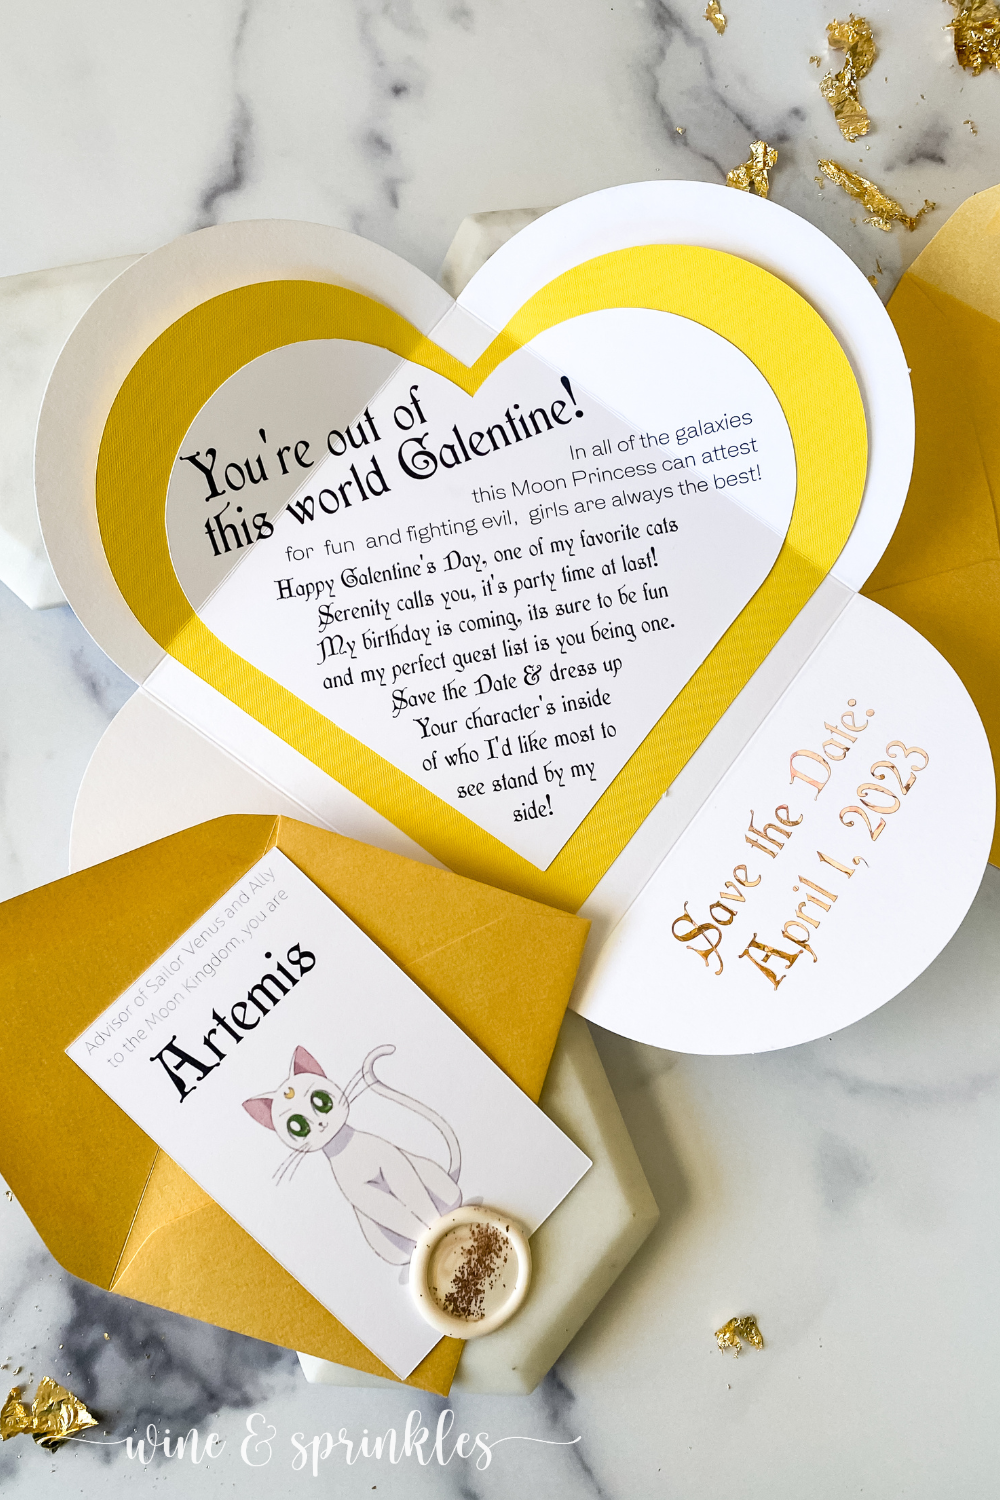
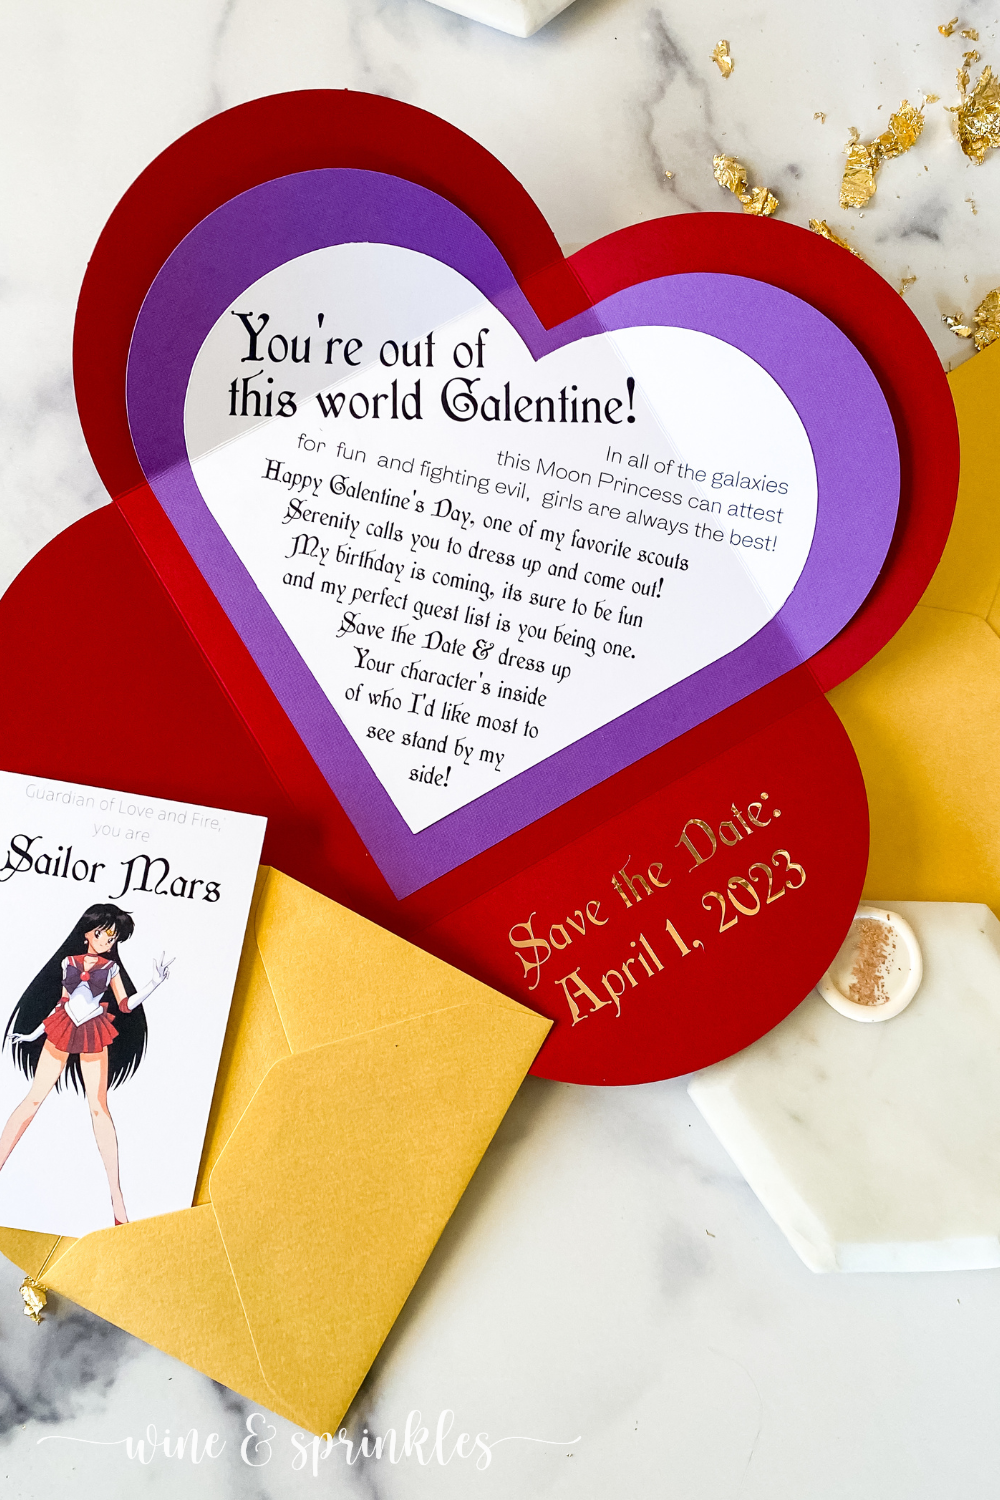
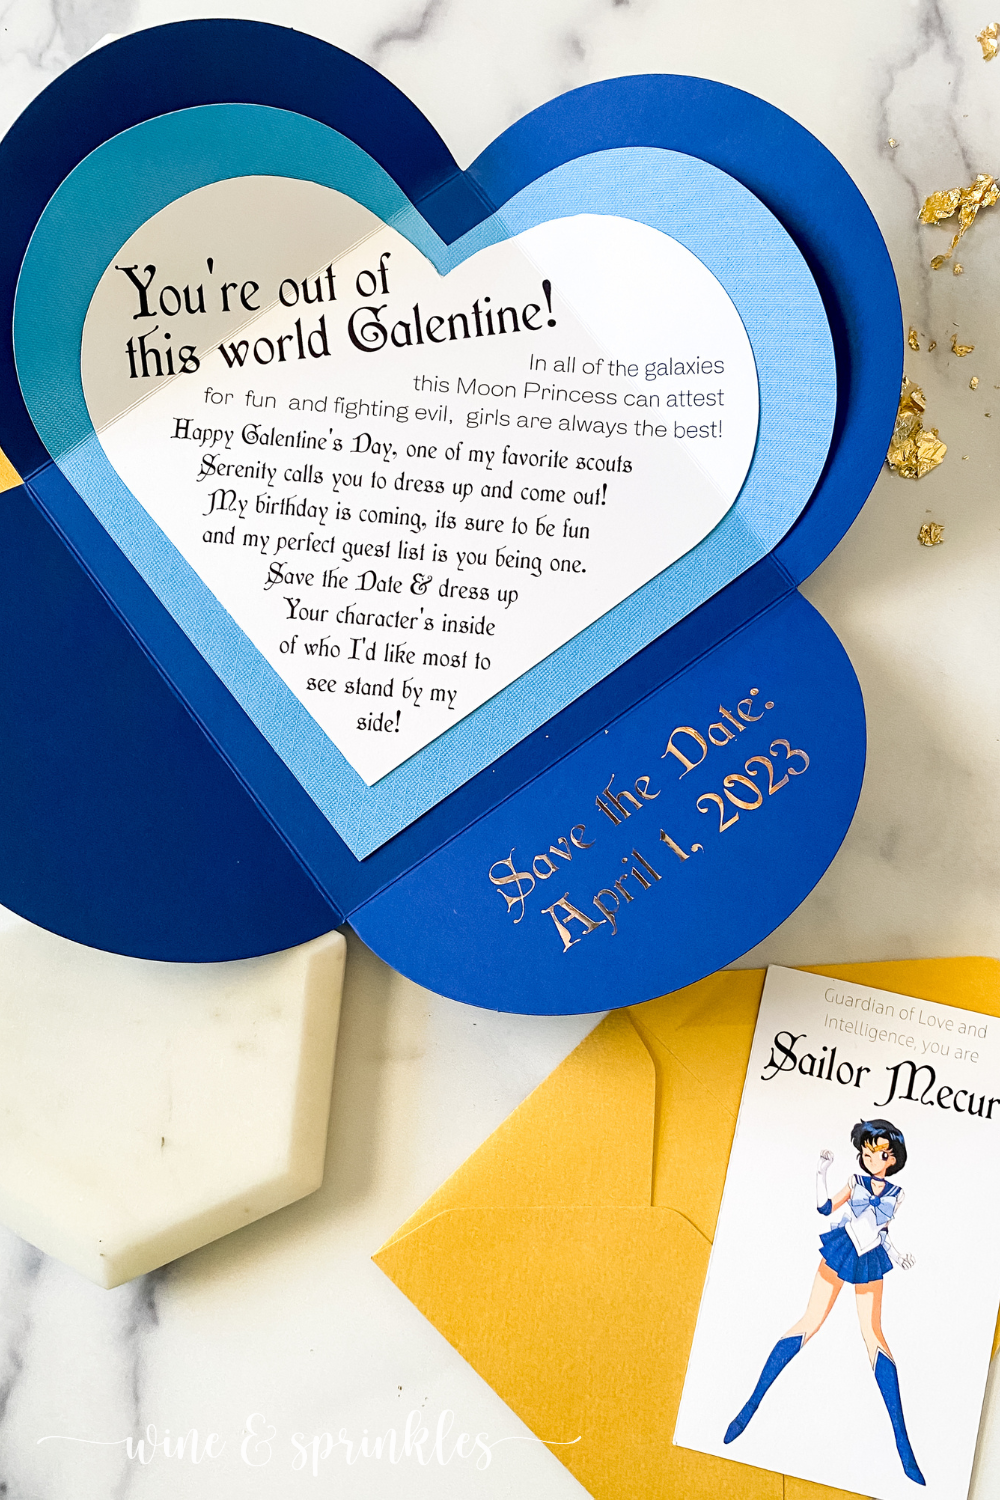
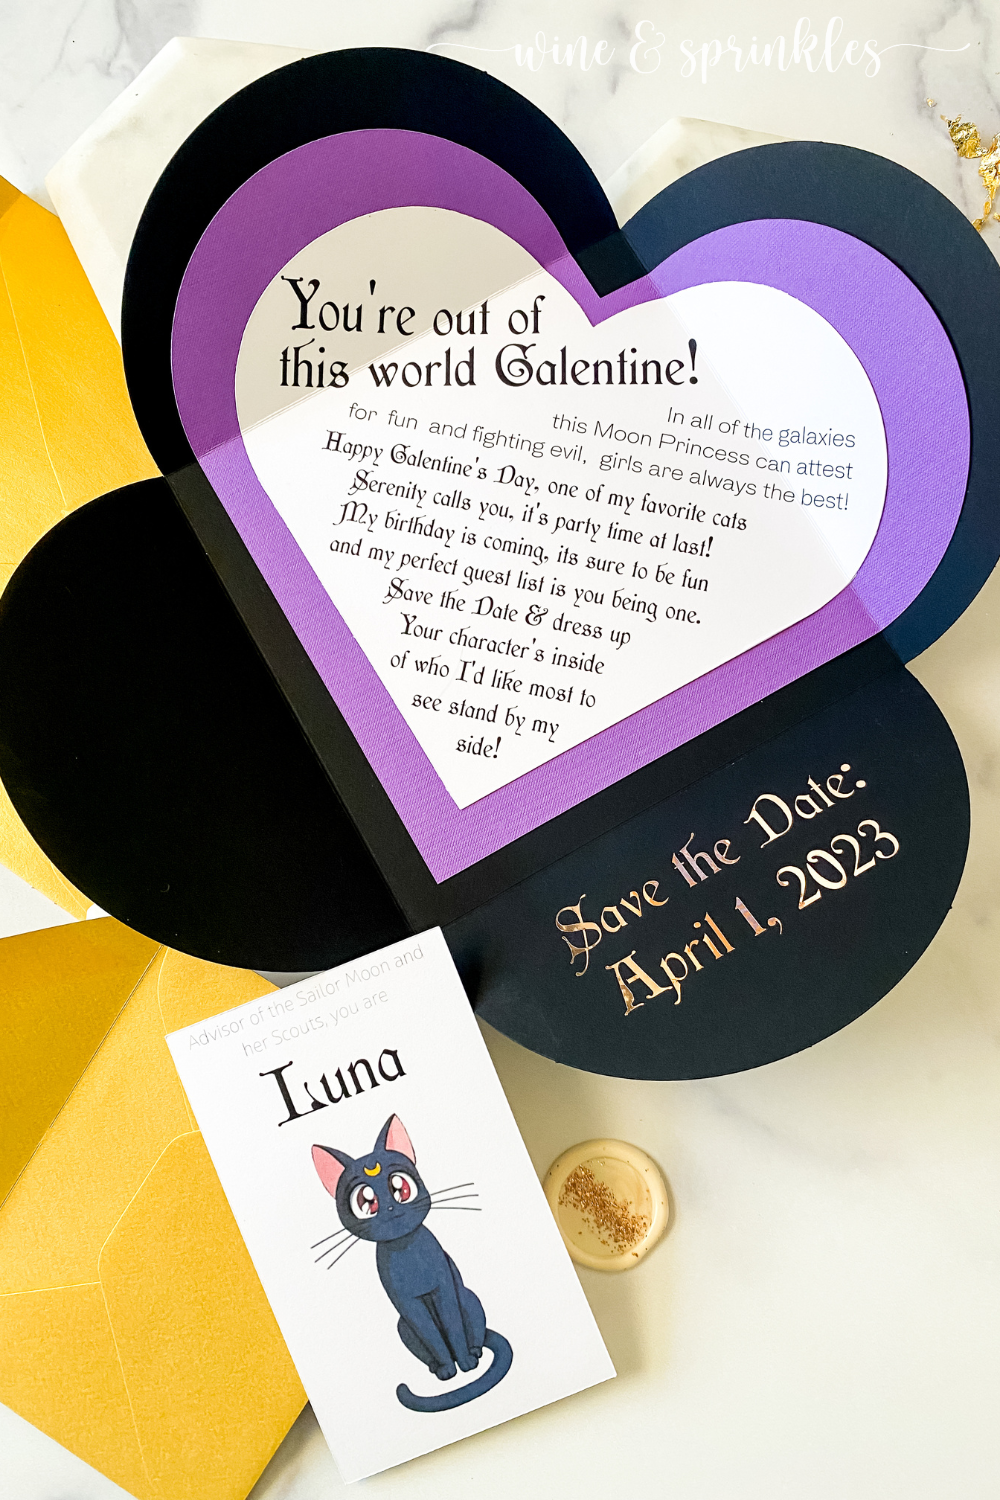
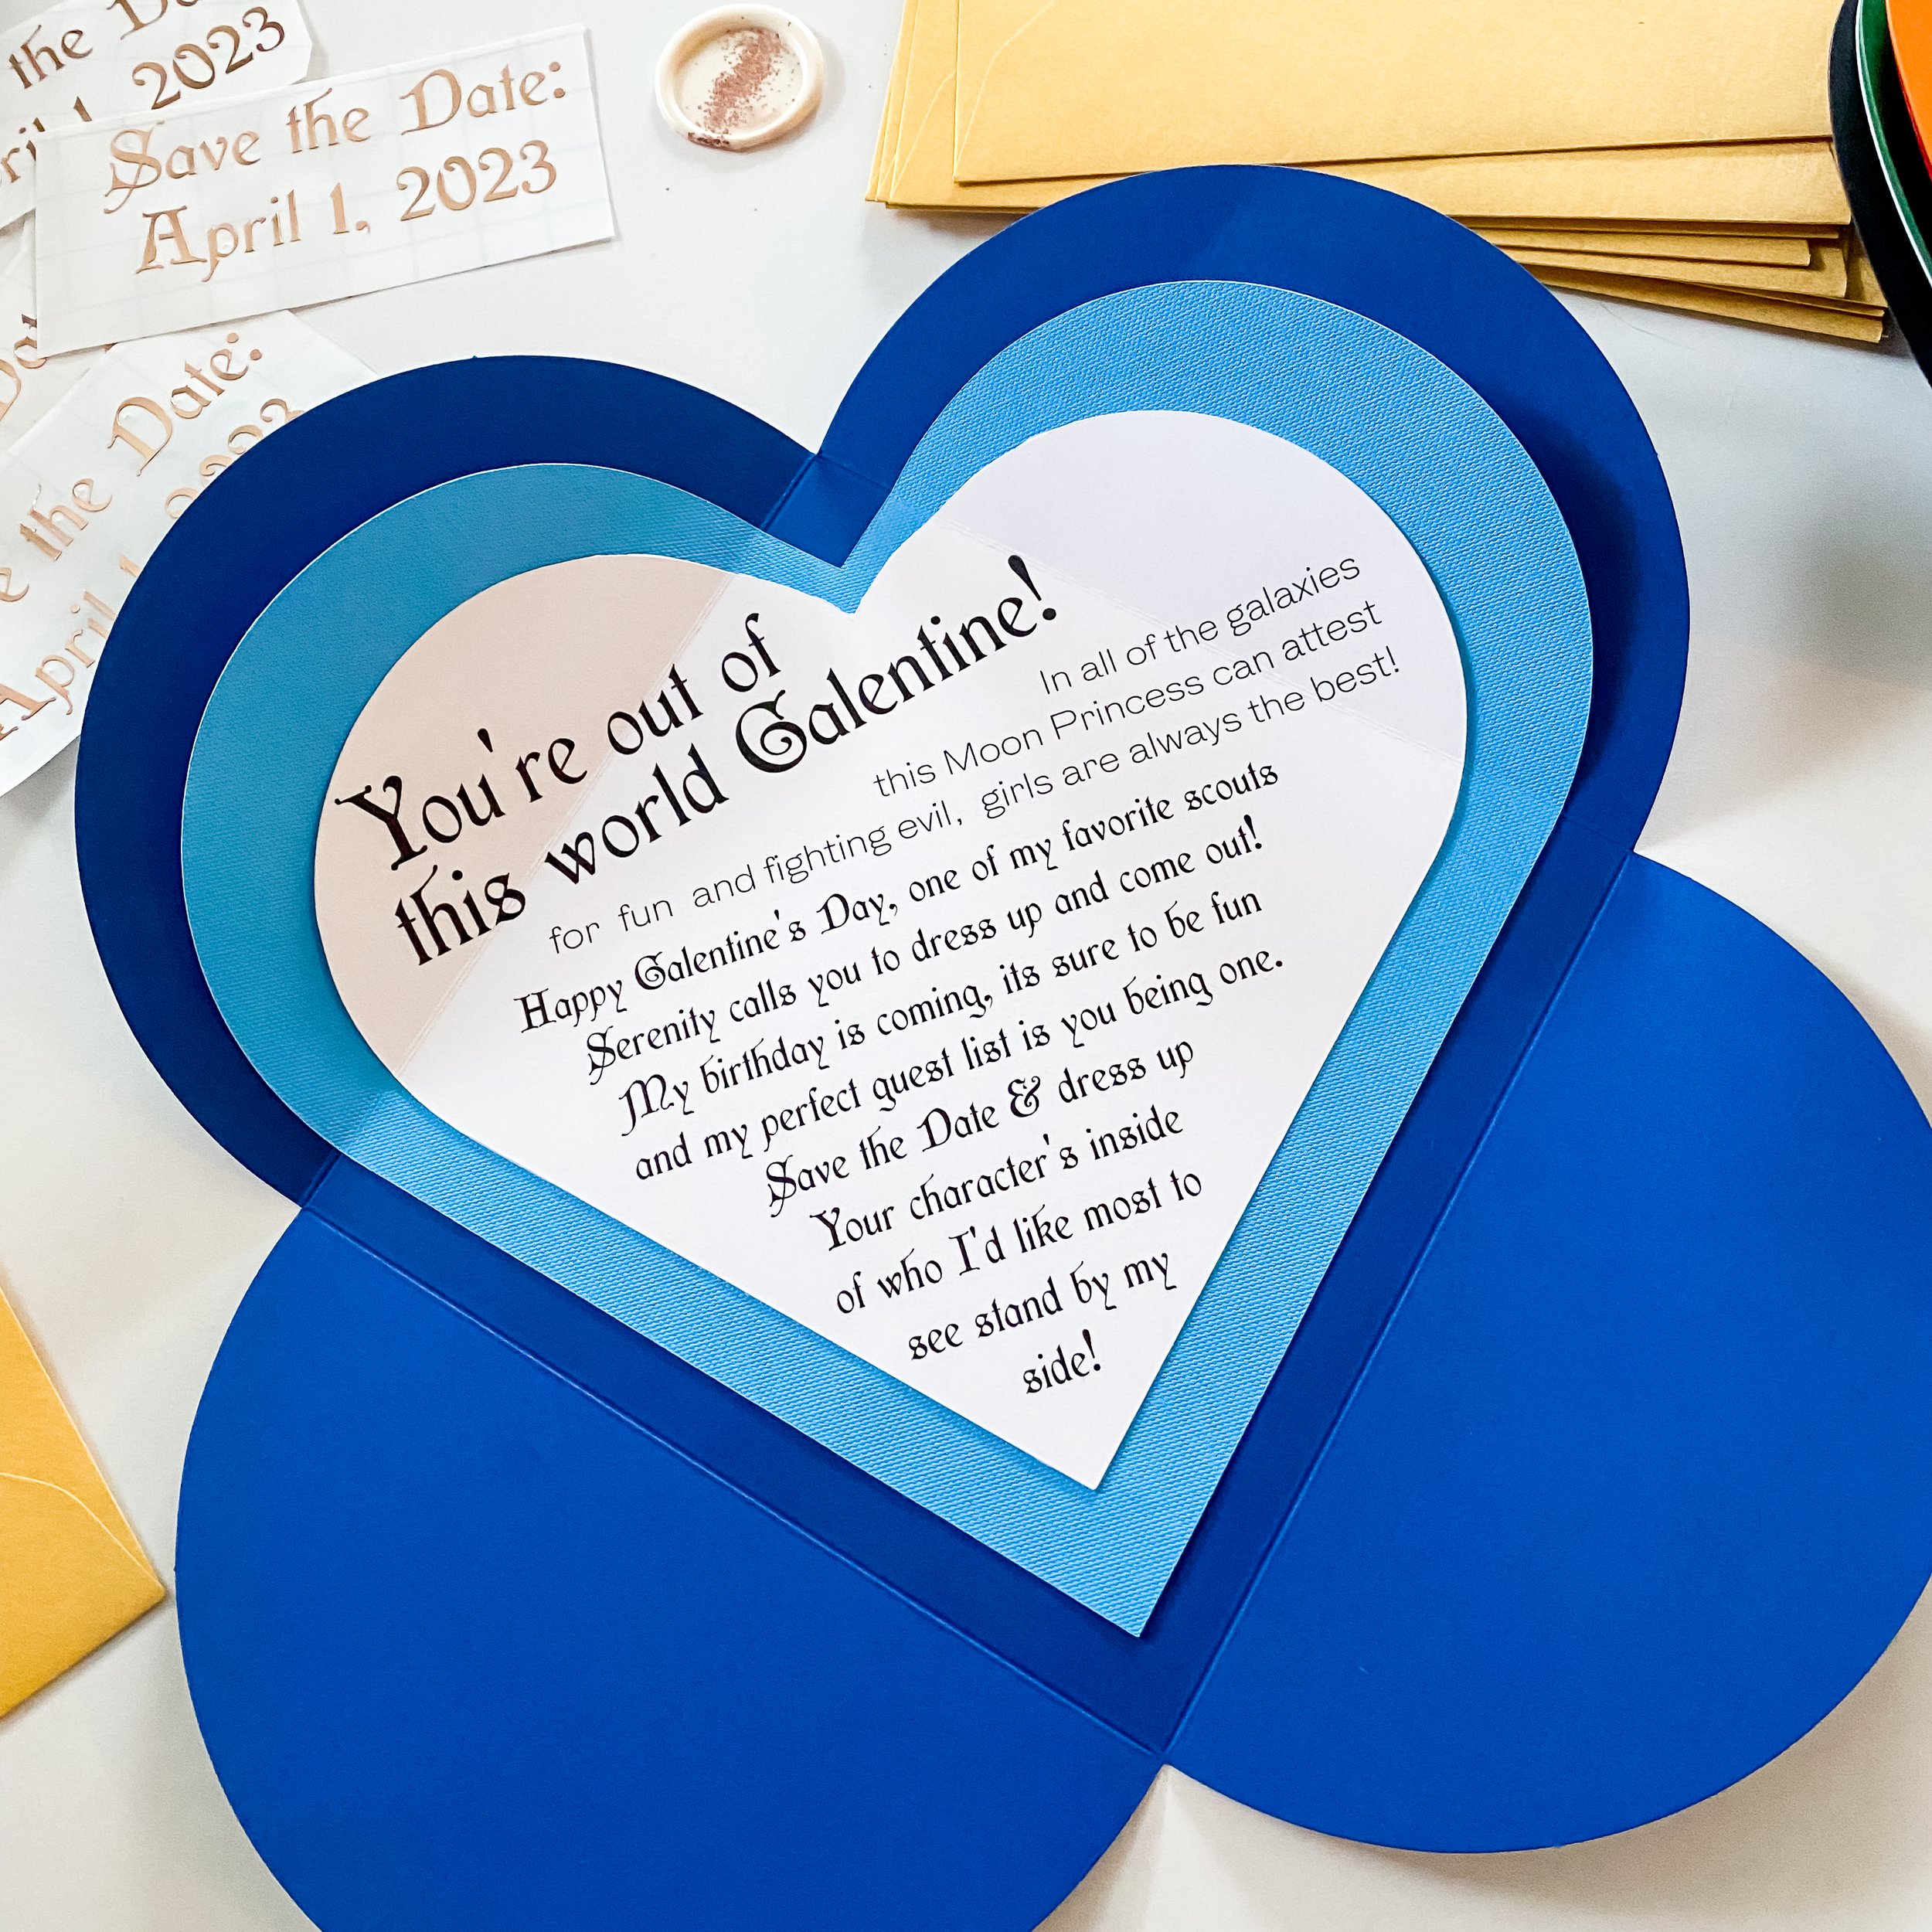
Each of these invitations featured a pinwheel style card that unfolded to reveal a heart shaped poem on a colored mat with a small envelope, each containing a different character who is one of Sailor Moon’s friends in the show! Each was finished with a gold foil vinyl decal with the date of the party, cut in a free Sailor Moon-esque font called WishMF. These cards were the finishing touch on a whole set of accessories themed Sailor Scout Galentine’s Gift Boxes, where like these cards, each box was themed to a different scout so that each of my friends was invited to dress up as the scout I liked for them most! This gave me a great chance to test a bunch of different colors from one of my favorite online stationery shops, Cards & Pockets!
Cards & Pockets specialized in supplies for creating your own DIY wedding stationery, and since I found them I’ve been looking for other unique ways to use their plethora of different pocketfold cards and envelopes in my own party paperie. In this case it was the perfect time to try out their Petal Fold Base Cards, but with a heart themed twist! I created heart shaped mats and invitations with Moonie themed poems styled after the two types of characters that were being given to my friends, the Sailor Scouts and the two cats, Luna and Artemis!


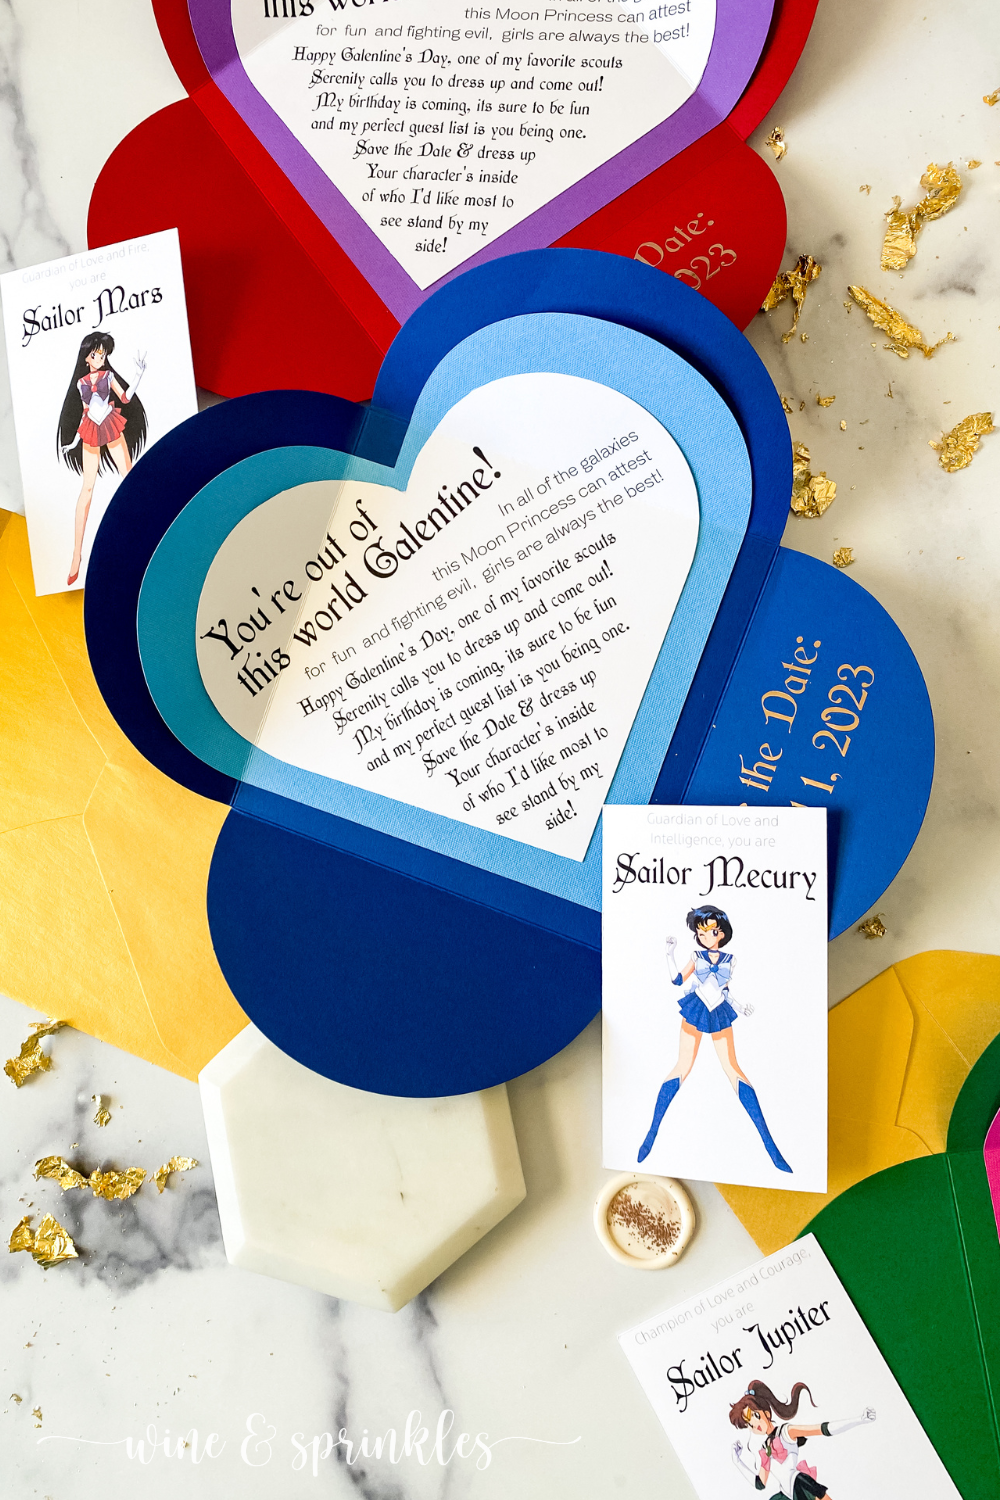
While I themed the mats and Petal Folds’ colors after the characters, I also included a sealed character card in each invitation, which I designed to fit easily inside the RSVP Envelopes that Card’s & Pockets supplies, and like the scout’s tiaras, I just had to make them gold! There are so many colors to pick from with all of the Cards & Pockets family of products, I’d recommend scrolling through them all and making sure you don’t have your own favorites to try!
For cutting out these unique cards, I took advantage of both the print then cut and stationery scoring capabilities of my new Cricut Maker, and it did a fabulous job as always! This was my first time trying to score anything in the software, and the scoring stylus I received in my Everything Materials Pack with my Maker made is so easy to do, just secure it into the first tool holder and it will score then cut each card in the same go. This was perfect for prepping my heart shaped cards and mats for the petal fold base cards, after folding along the score lines I could just line them up into two of the petals, and they looked like they alway belonged there! And while this is hardly my first time creating my own Print then Cut invitations in Cricut’s Design Software, my Maker did a great job of cutting everything smoothly and accurately as always.


If you aren’t a Moonie or would rather write your own handwritten notes to your favorites than use my delightful poems, I’ve also included a blank heart that is scored like the invitations too, so the limit to these Valentine’s is what you want them to be! You can see how I made them and the supplies I used below, as well as access the design and cut files for creating these cute cards for your circle of friends!
SUPPLIES
PAPER & STATIONERY SUPPLIES
Petal Fold Base Cards: For creating the base of these galentines cards, it was the perfect opportunity to try out a base card from Cards & Pockets that I’ve been eyeing for some time, the Petal fold base card! These types of cards are generally used in wedding invitations for displaying the invitation in the center, with any additional cards and envelopes enclosed inside the folded pinwheel, so that when guests open them it looks like the petals of a flower unfurling with all the info they need! I picked out a rainbow of colors to create the cards based on the hues I thought best matched the skirts of each scout, with the inner heart shaped mats matching their bows. The colors I used for each card were:
Mercury - Sapphire
Venus - Mandarin
Mars - Red
Jupiter - Lockwood Green
Luna and Artemis were a little different, in that I used mat colors I thought best suited them and petal fold colors to match their fur, which were:
Luna - Ultra Black
Artemis - Snow White
Square Envelopes: for holding the finished invitations, these beautiful square envelopes, also from Cards & Pockets, were an excellent choice and as expected a perfect fit for the petal fold base cards! I chose a gorgeous Gold for all the envelopes I used, inspired by the sailor scout tiaras and to give the whole set a common color.
RSVP Envelopes: for housing the character cards inside the petal folds while also keeping them a surprise to the recipient, I used Cards & Pockets RSVP envelopes and they worked splendidly! I kept the color consistent between these and the larger envelopes to keep the focus on the colorful invitations and petal folds, with the Gold looking great for both.
Colored Cardstock: for creating the main invitation mat in the shape of hearts. I broke into the cardstock from my Cricut Everything Materials Pack I got with my new Maker, using a sheet of fuschia for Jupiter, blue for Mercury, yellow for Artemis and two light purple for Mars and Luna, and supplementing a dark blue sheet for Venus from extra cardstock I had already.
Cardstock: for creating the main invitation card and the scout and cat card inserts, good old white cardstock is the perfect fit! I'd recommend a lighter cardstock for these cards so that they are easier to fold up once assembled, in the 65-80 gsm range
Adhesive Foil Vinyl - for creating the save the date decals for the petal fold base cards. While I got a variety pack of beautiful adhesive foil in my Everything Materials Pack, I ended up using some in gold that I already had to better match the envelopes and not overload these already colorful invitations with another hue!
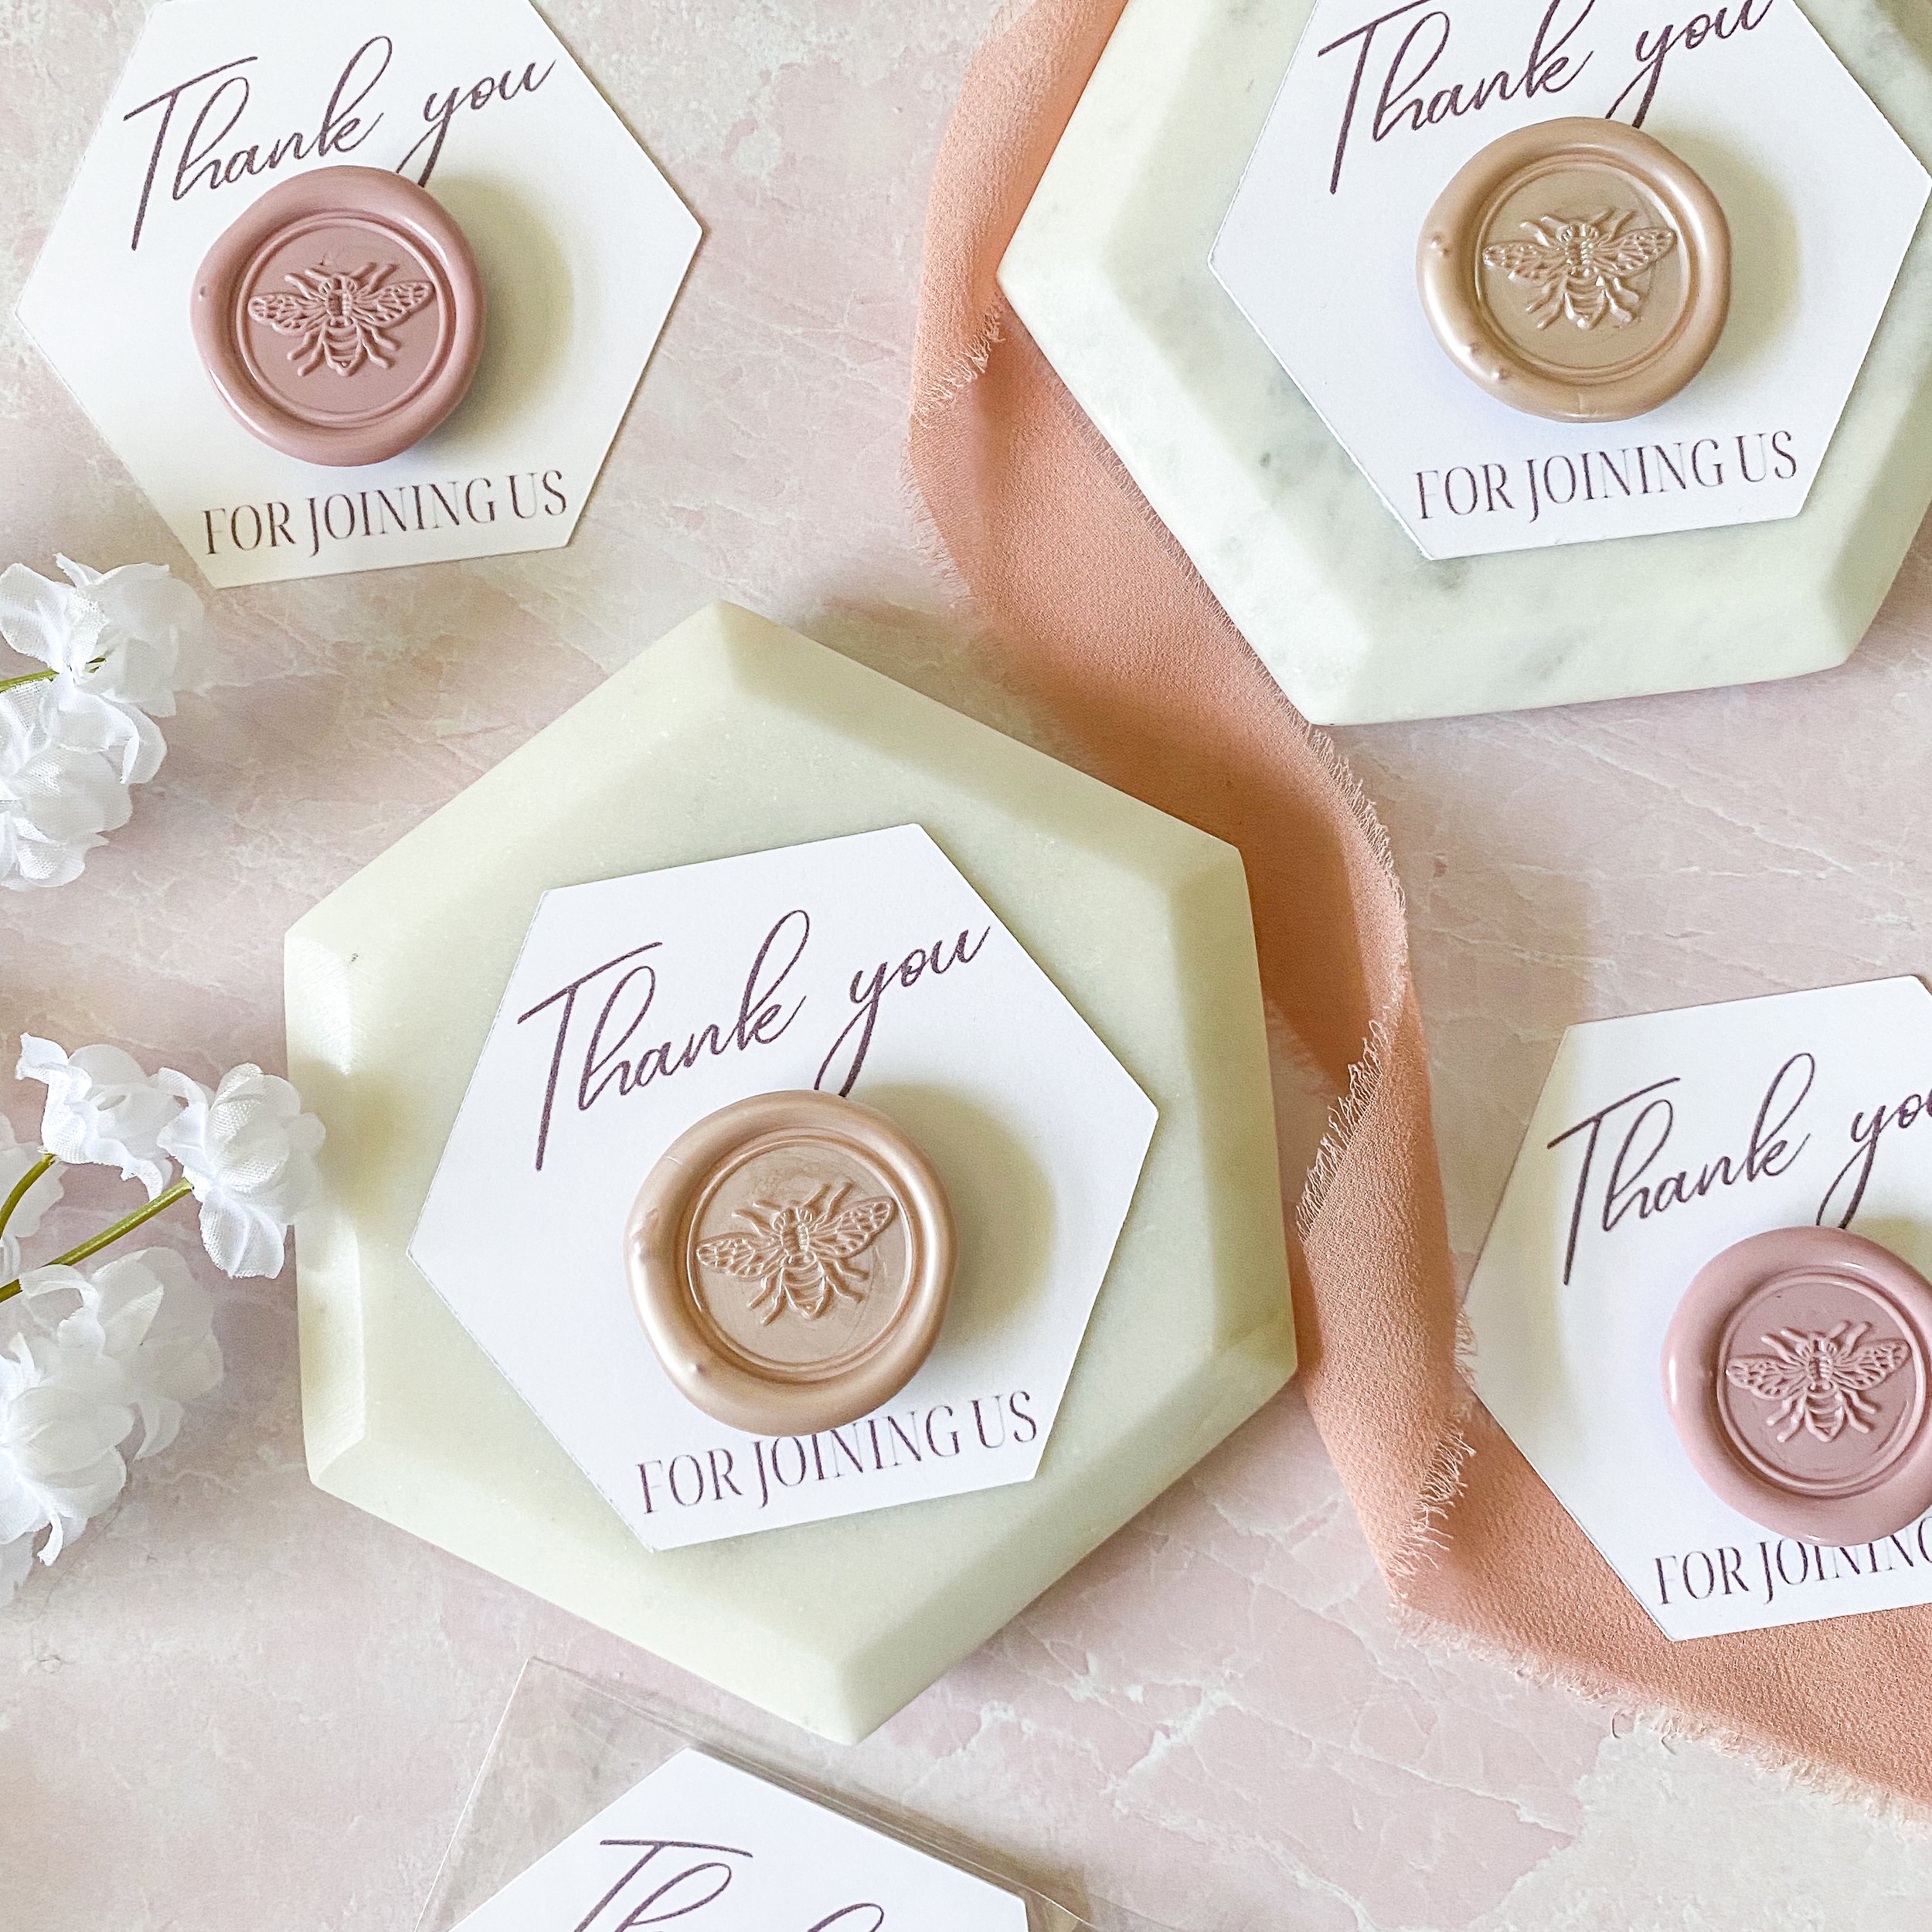
Glitter Self Adhesive Wax Seals: for sealing my envelopes and adding the perfect sparkly celestial touch to my invitations! I created these beauties while I was experimenting with all the lovely products of my favorite sealing wax and stamp supplier, Artisaire! I was so excited to find a project to use these blank glittered seals on, with the Buttercream Sealing Wax giving these seals the look of a full moon with a sprinkling of glitter that can’t help but remind me of the Sailor Moon transformation scenes.
TOOLS & OTHER SUPPLIES
Craft Cutter: for cutting out all the invitation mats, cards, and decals, this is a project where the versatility of the maker shines! I used it not only for cutting out the cardstock and foil for everything, but also creating score lines in the mats and invites so that they folded just how I wanted them to!
Scoring Stylus: for scoring the lines of the heart shaped mat and invitation cards so that they fold easily. This lovely stylus came with my Everything Materials Bundle that came with my Maker when I got it, but you can also order them separately for all sorts of stationery fun!
Light Grip Mat: for securing materials for cutting out invitation mats, the invitation cards, and the adhesive foil decals. Whenever I work with paper on my Cricut, I always use the light grip mats, though you could use a standard grip for the decals if you choose.
Double Sided Paper Adhesive: for securing your invitation mats and cards to the petal fold base. While I’ve used a variety of different glues and adhesives, generally based on what's in the house, I used double sided tape here and it worked great!
Printer & Ink: for printing out your heart shaped invites and character cards. I’ve had my Brother printer for years and it continues to do a great job every time.
DESIGN TEMPLATES & FILES
Cricut Design File: for these cards and invitations, I took advantage of being able to design the prints and cuts as I like, then saved it in a shareable link for all of you! In the tutorial below, I’ll walk you through how to use it for creating your own cards like these ones and you’re sure to see my future Cricut design projects set up this way, so you aren’t stuck uploading stuff you don't have to!
The Wish MF Font: this is the font I used for making the decals for the save the date portion of the cards, which you can download for free for personal use and also use to make your own decals!
SUPPLIES LIST:
[for 6 cards]
PAPER & STATIONERY SUPPLIES
Petal Fold Base Cards x 6
Square Envelopes x 6
RSVP Envelopes x 6
Colored Cardstock x 6
Cardstock x 8
Adhesive Foil Vinyl x 5” x 12” sheet
TOOLS & OTHER SUPPLIES
Craft Cutter
Scoring Stylus
Light Grip Mat
Double Sided Paper Adhesive
Printer & Ink
DESIGN TEMPLATES & FILES
Cricut Design File
The Wish MF Font

DIRECTIONS
STEP 1: CALIBRATE YOUR CRICUT CRAFT CUTTER
Before I start any Print then Cut Projects, I like to calibrate my craft cutter so that it cuts most accurately, and the process is pretty straight forward. After opening a new project, start by selecting the “Calibration” option on the list of choices under the Main Menu Icon, and follow the prompts the software gives you. I use the cardstock that I’m printing on for my calibrations. After your machine is calibrated, it’s time to begin the project!
STEP 2: ACCESS DESIGN FILE & CUT CARDS
Start by opening the design file by clicking the link here, in the supplies list, or the button below. This will send you to the Cricut Design Software, where the designs for both the sailor scout and cat poem cards, the character cards, the invitation mats, a smaller scored heart card to use if you want blank cards instead of my poems. and the Save the Date Decals that I used for my project. Select “Customize” to open it as a design file that you can manipulate and to get each of the pieces ready for cutting.
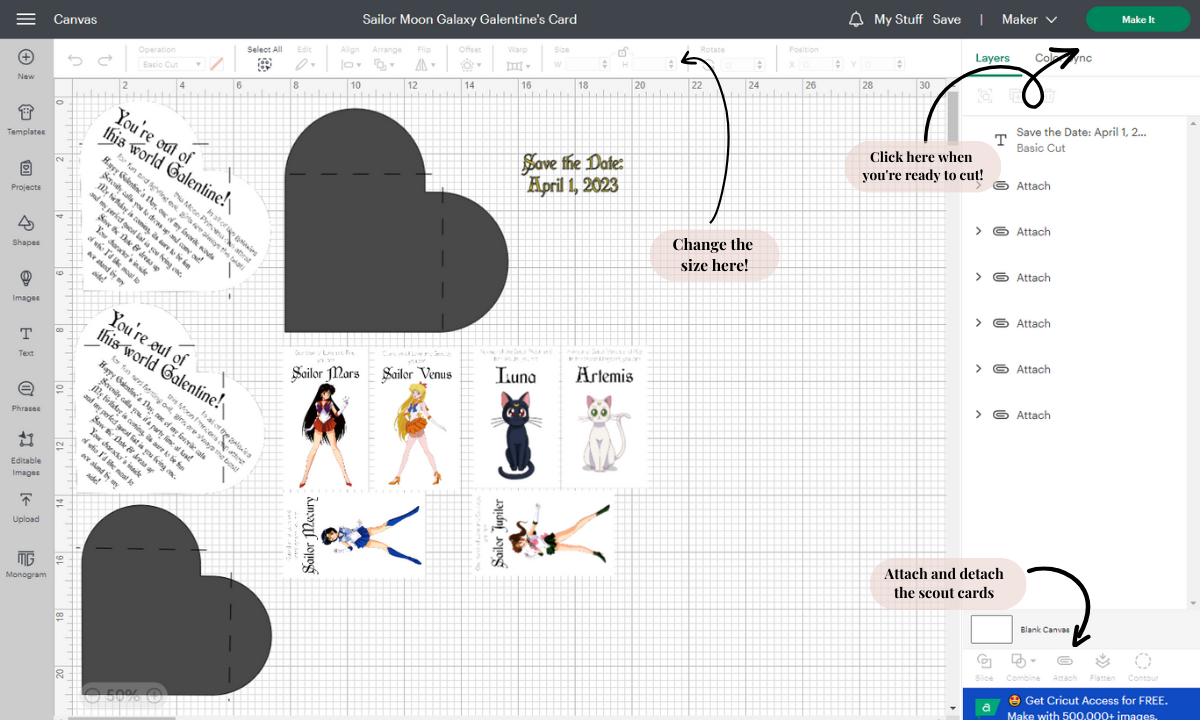
Start by changing the text for the Save the Date Decal to the Date of your choice, resizing it to be under 3.75” wide if necessary. Copy and paste the decal for as many as you need, in my case 6 for four scouts and two cats. You’ll notice that I used a fun themed font here called WishMF, which you can download for your own personal use in this project as well or pick your favorite font in the Design software.
Then, decide which of the inner poem cards you want to cut. You’ll see on the left part of the canvas, there are three styles of cards to choose from with their score lines set: scouts, cats, and a blank card in case you want to handwrite something yourself! If you don’t need one of the cards, you can exclude it from being cut either by selecting and deleting it, or hovering over its layer on the right side of the screen and clicking the eyeball on the right so that the symbol shows it crossed out..
You’ll notice my character cards are grouped so that they fit on a single sheet, so to work with them individually, click the “Detach” function in the lower right toolbar. If you need to resize these, use the padlock on the upper toolbar to change them to whatever size best fits your needs.
For this cutting project, you’ll be doing a mix of print to cut cards, standard cardstock cuts, and vinyl decals. You’ll see that my heart cards and mats all have dashed lines running through them, these are scoring lines for each so that they are easy to fold for your petal folds! I started by doing the Print to Cut Cards, then followed with the invitation mats then finally the Save the Date Decals, so this file has the layers ordered so that its the order it will cut them in here too!
STEP 3: PRINT THEN CUT YOUR INVITATION & CHARACTER CARDS
Once the files are resized and manipulated as you choose, select “Make” in the upper right side of the screen to set up the files to be printed and cut. It will show you all the mats of materials you will be cutting, starting with the print to cut cards.
Check your files on the mat set up screen and make sure the material size is 8.5 in x 11 in. for the print to cut mats, and that the cardstock hearts and vinyl decals appear properly sized on their mat setup pictures, then press Continue.


Next, Select the Send to Printer Button, which will open a separate popup screen. Make sure the printer is set to the one you want to use, the number of sheets you want printed is the correct amount for the number of cards and tags you want to make, and that the “Add Bleed” Selection is off; then select Print. Print the character cards and as many heart poem cards on the cardstock you wish to use on the best quality settings your printer allows.

Load the printed cardstock, design face up, along the upper left hand side of your cutting mat as shown in the picture on the screen, then make sure if you printed everything at once (as I often do) that the mat selected on the left of the cutting screen is the same design as the printed cardstock. Set the Material from the Design software options based on the weight of cardstock you used, then press the loading button on your craft cutter to load the mat into the machine. Secure the Scoring Stylus in the left tool holder of your Maker and the standard cutting blade in the right.


Press the “Go” Button to start the scanning, cutting, and scoring process, and when the cutter is complete the loading button will blink to indicate to unload the mat. Remove your mat and freshly cut cards, disposing of the extra cardstock and folding along the score lines; then, load your next printed sheet onto the mat and repeat the cutting process until you have cut out all the poems and character cards as you need. Now it’s time to move onto your cardstock cuts!


STEP 4: CUT YOUR CARDSTOCK MATS


Load the cardstock you want to use for your mat, along the upper left hand side of your cutting mat as shown in the picture on the screen, then set the material from the Design software options based on the weight of cardstock you are using, then press the loading button on your craft cutter to load the mat into the machine. Confirm that the Scoring Stylus in the left tool holder of your Maker and the standard cutting blade in the right.
Press the “Go” Button to start the cutting and scoring process, and when the cutter is complete remove your mat and freshly cut invitation mats, disposing of the extra cardstock and folding the flaps along the score lines; then, load and repeat the cutting process until you have cut out all the colored cardstock mats as you need.


If you choose to go the blank card route, this is when the smaller hearts will get cut instead of in the Print to Cut card sets, so repeat this cutting process for your blank invitation cardstock too for as many blank invitations as you want. Once all your cardstock hearts are cut and scored, it's time to finish the cutting phase with the Save the Date decals.
STEP 4: CUT YOUR SAVE THE DATE DECALS

For your date decals, load your Maker with the vinyl of your choice on its adhesive mat. Cut out with the material set from the options given, in my case Adhesive Foil Vinyl. I also like to specify the pressure setting to “More,” though this isn’t a requirement and instead a preference so that I’m sure it cuts deeply enough on lettering decals like this!
Remove the mat from your cutter, keeping the material attached to make weeding easier. Weed away the excess vinyl, then remove from the mat and cut the backing so that each decal is separate for transferring.
Now it's time to put it all together and assemble your cards!
STEP 5: ASSEMBLE YOUR CARDS
Start by dividing up the petal folds, invitations mats, poems, and character cards based on the colors you are using for each individual invitation. You can see my color combinations here which I’ve outlined based on each character:
Mercury - Sapphire Petal Fold with Light Blue Cardstock Mat
Venus - Mandarin Petal Fold with Dark Blue Cardstock Mat
Mars - Red Petal Fold with Purple Cardstock Mat
Jupiter - Lockwood Green Petal Fold with Pink Cardstock Mat
Luna - Ultra Black Petal Fold with Purple Cardstock Mat
Artemis - Snow White Petal Fold with Yellow Cardstock Mat


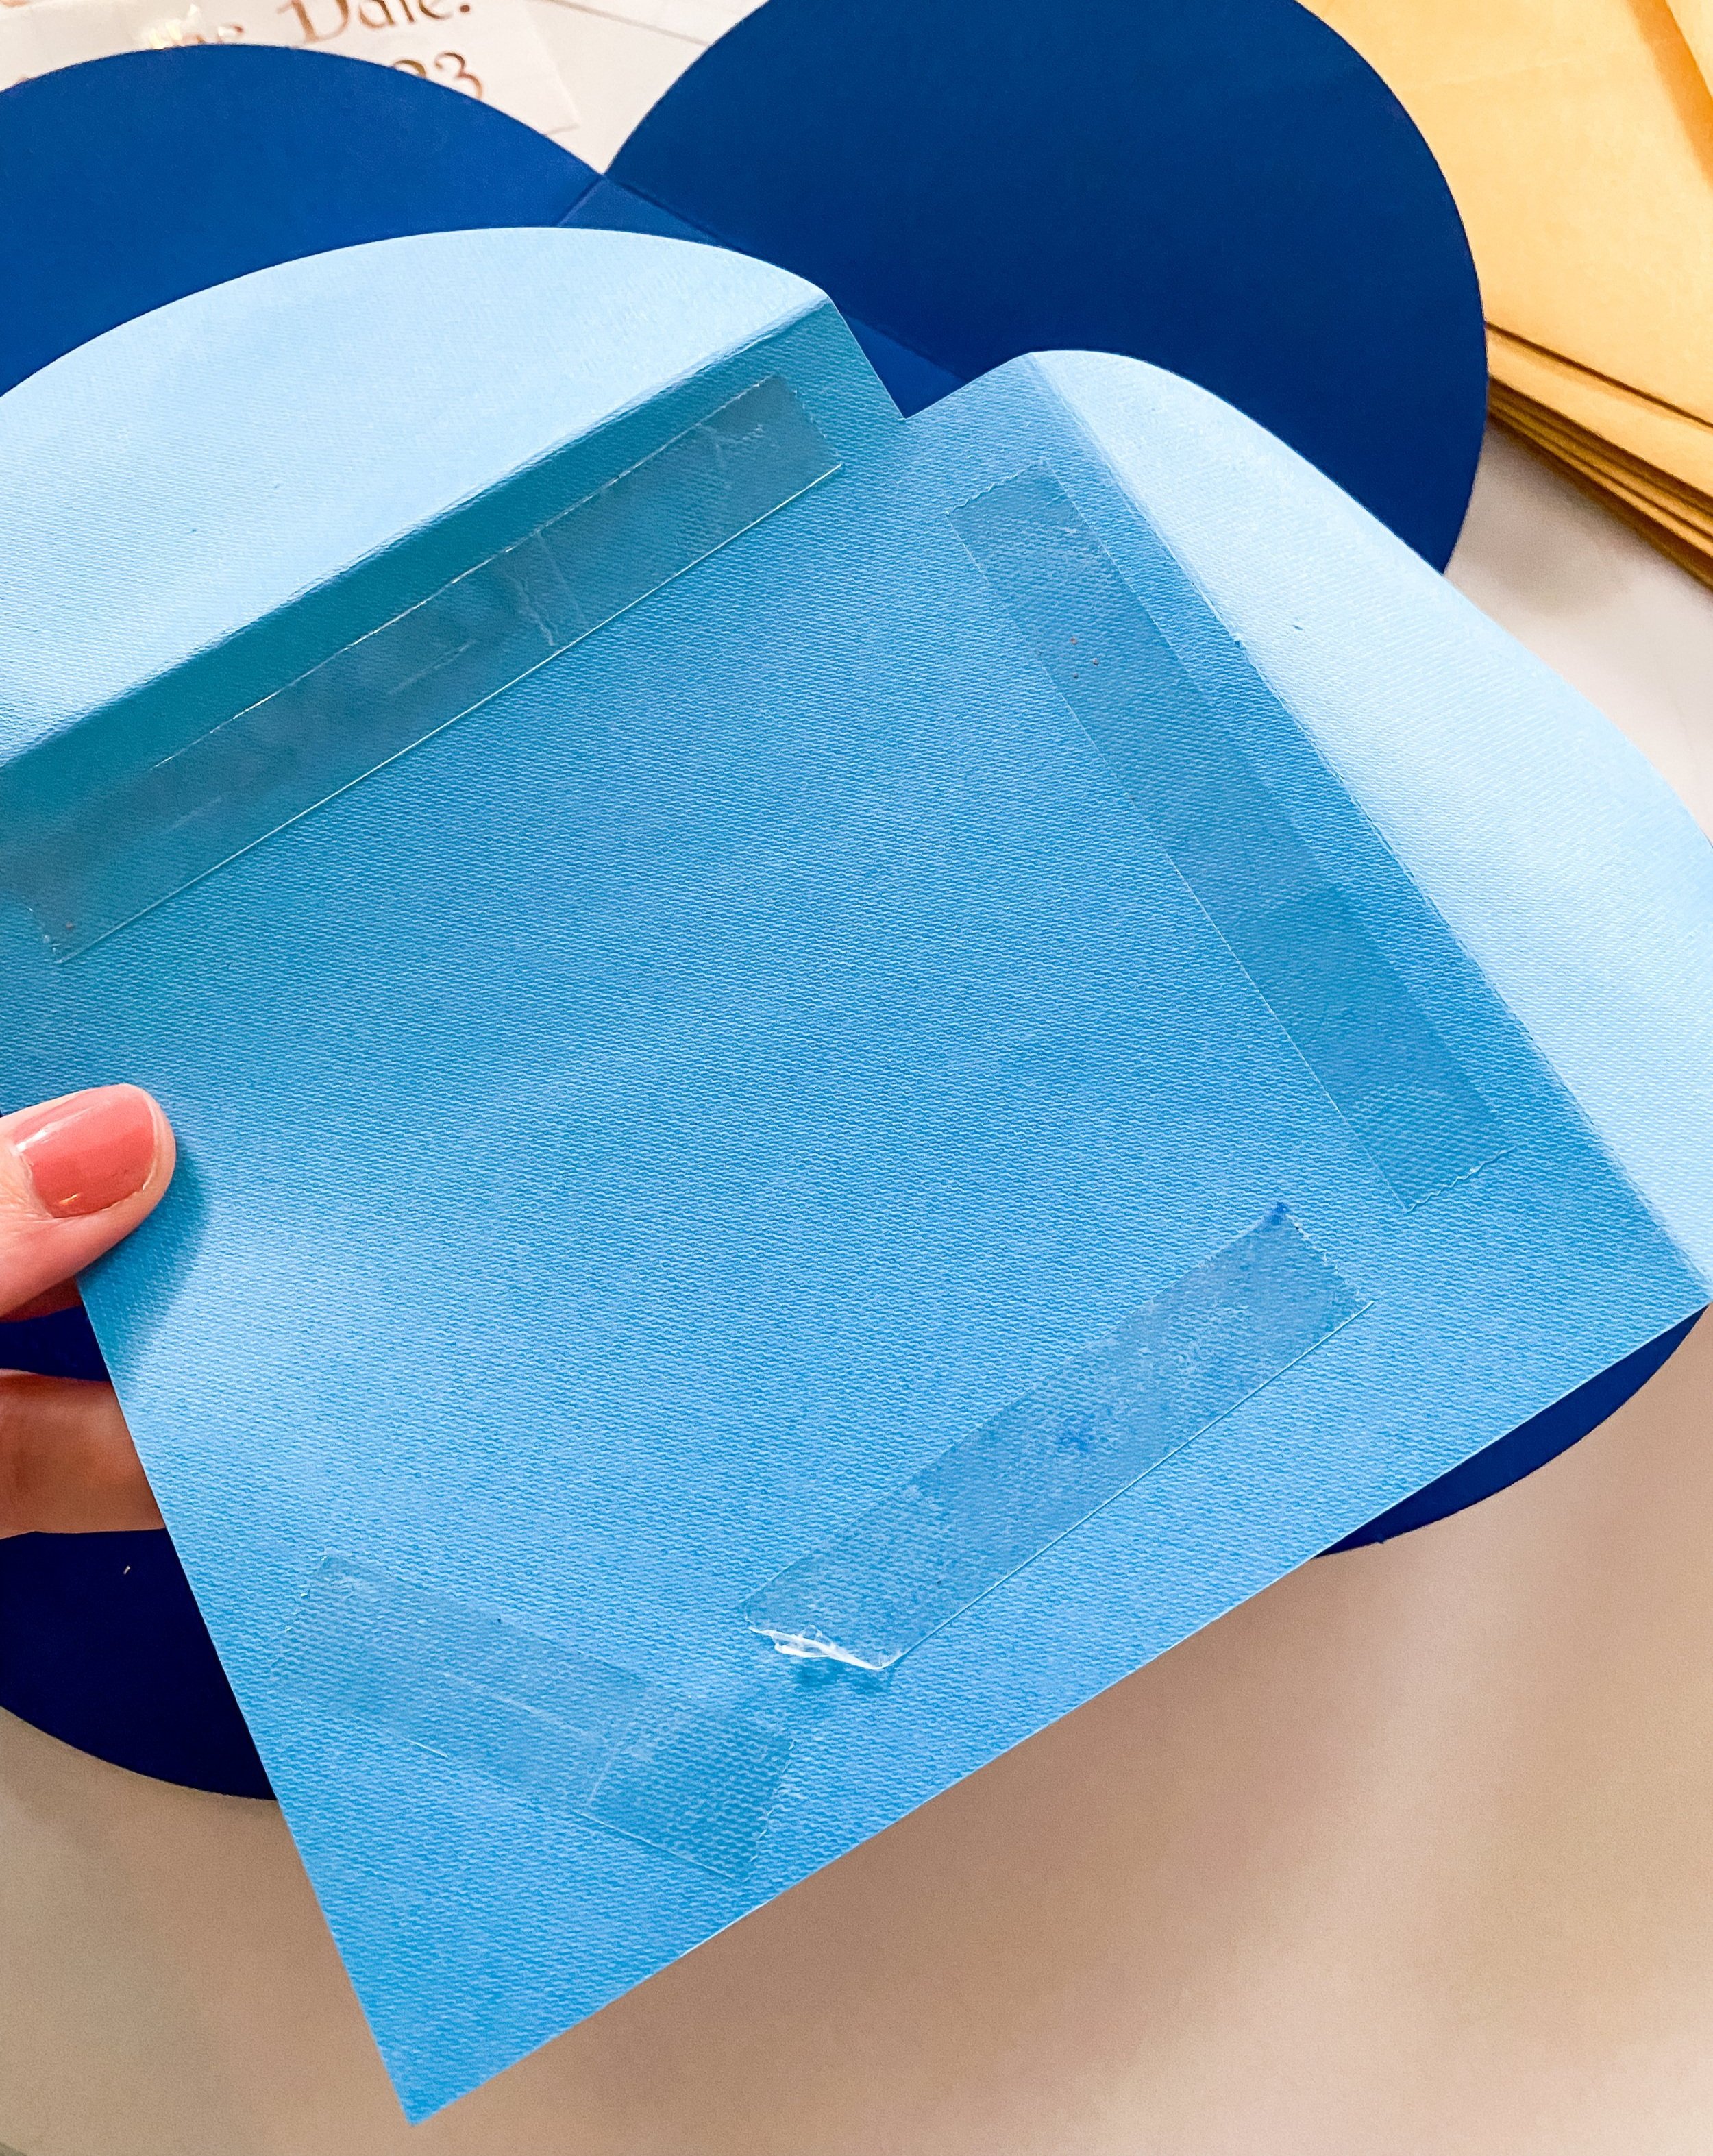

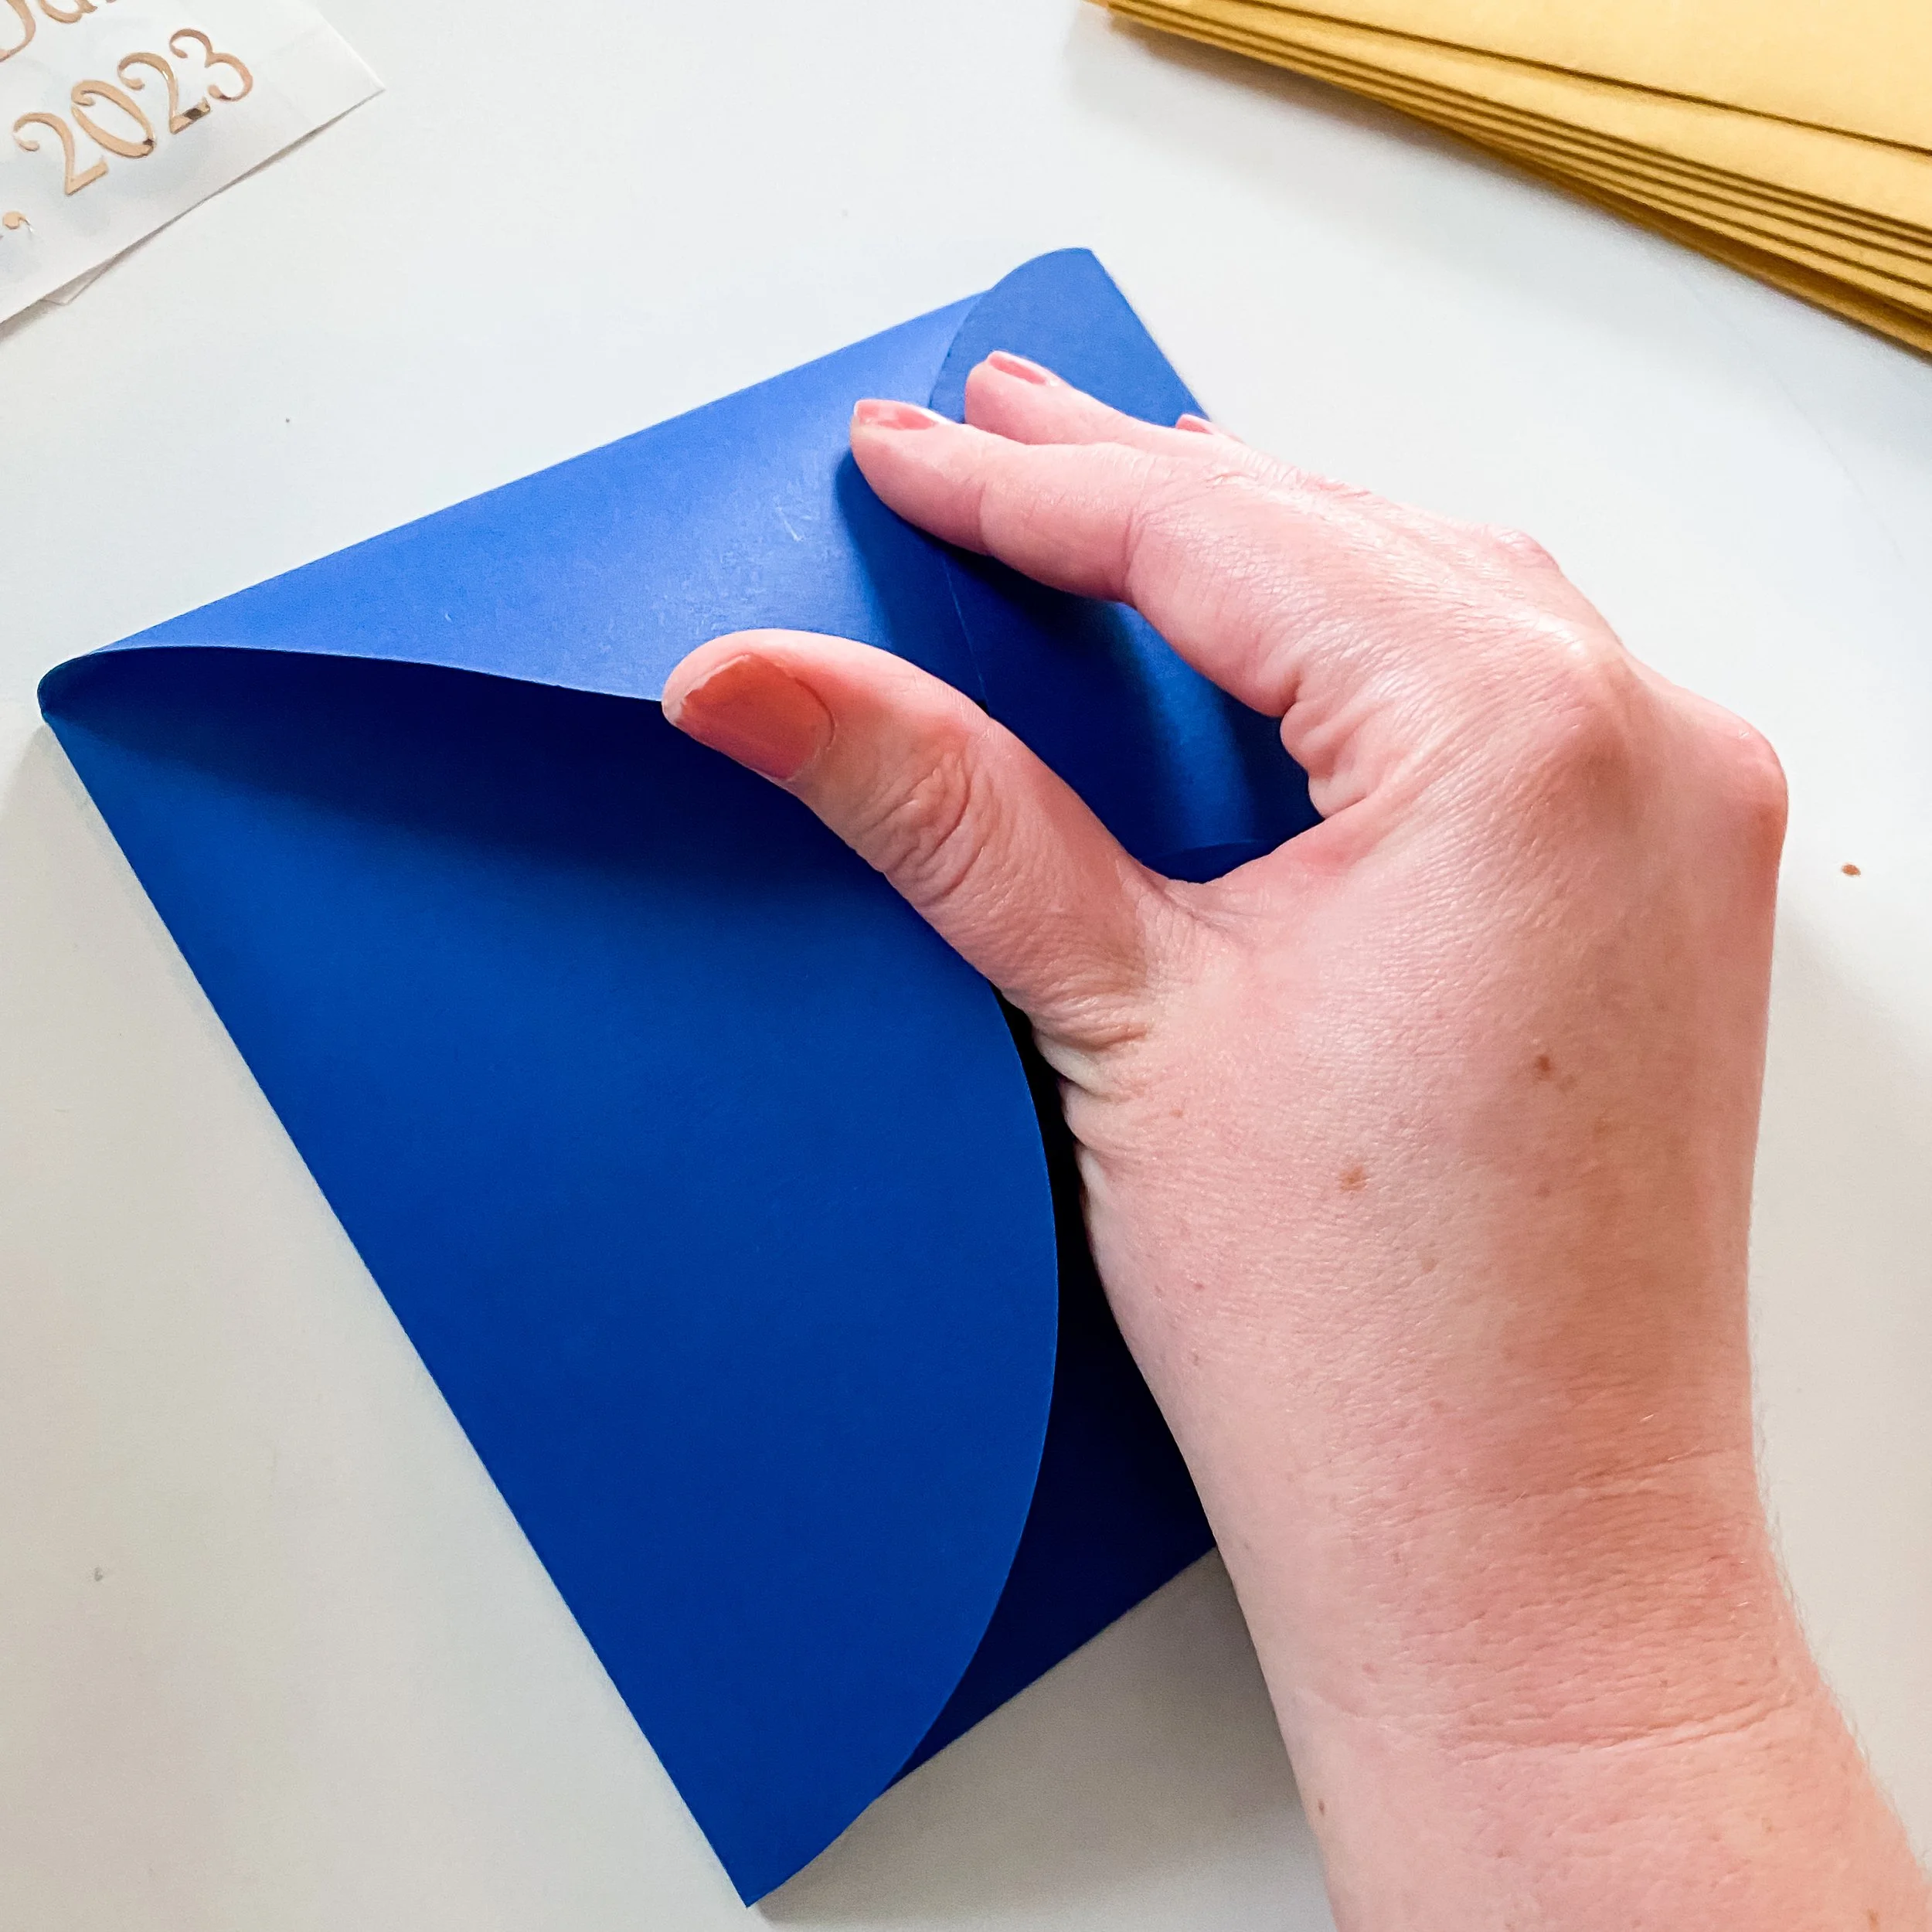
Start by layering the petal fold, mat, and invitation card on top of each other, folding down the heart flaps inside the petal folds to next them together. Then, using double sided tape, line the back of the mat along where it will stick to just the square middle of the petal fold, I found taping the flaps to the petals just lead to the cards pulling apart! Secure the mat into the petal fold, lining up the heart flaps with the folds of the outer card and shown. Likewise, secure the invitation card to the mat in the same fashion, securing it with double sided tape inside the mat along the fold lines, only taping the lower part of the card.


Using a piece of 2.5” x 4.5” piece of transfer tape, align your Save the Date decals as shown in the photo, with the bottom of the top line of text along the second set of ½” blocks. Using the smoother tool, press the design into the transfer tape, then lift the tape with the design for transferring.


Lining up the top of the tape along the fold of the lower right petal of the card, gently press the lettering into the petal, then remove the transfer tape slowly to leave the decal on the card. The decal wants to stick more than the transfer tape to cardstock, so the more gentle you are with pressing in the tape, the easier it will be to remove without damaging the cardstock.


Finally, place your character card for the invitation in its envelope then put it inside of your invitation, folding up the petals into a pinwheel to close. Place your completed card in its outer envelope, then finish it with a wax seal by removing the seal’s adhesive backing and pressing it onto the envelope flap. Repeat this process for assembling all your invitations then give them away to your best girls!


SEE OUR RELATED POSTS HERE:


OUR MOST RECENT BLOG POSTS:


OUR PINS FOR THIS POST: