This post contains affiliate links, meaning that if you click on a link I will recieve a small comission. This costs you nothing extra and I only promote products I use and love! You can read our full disclosure here
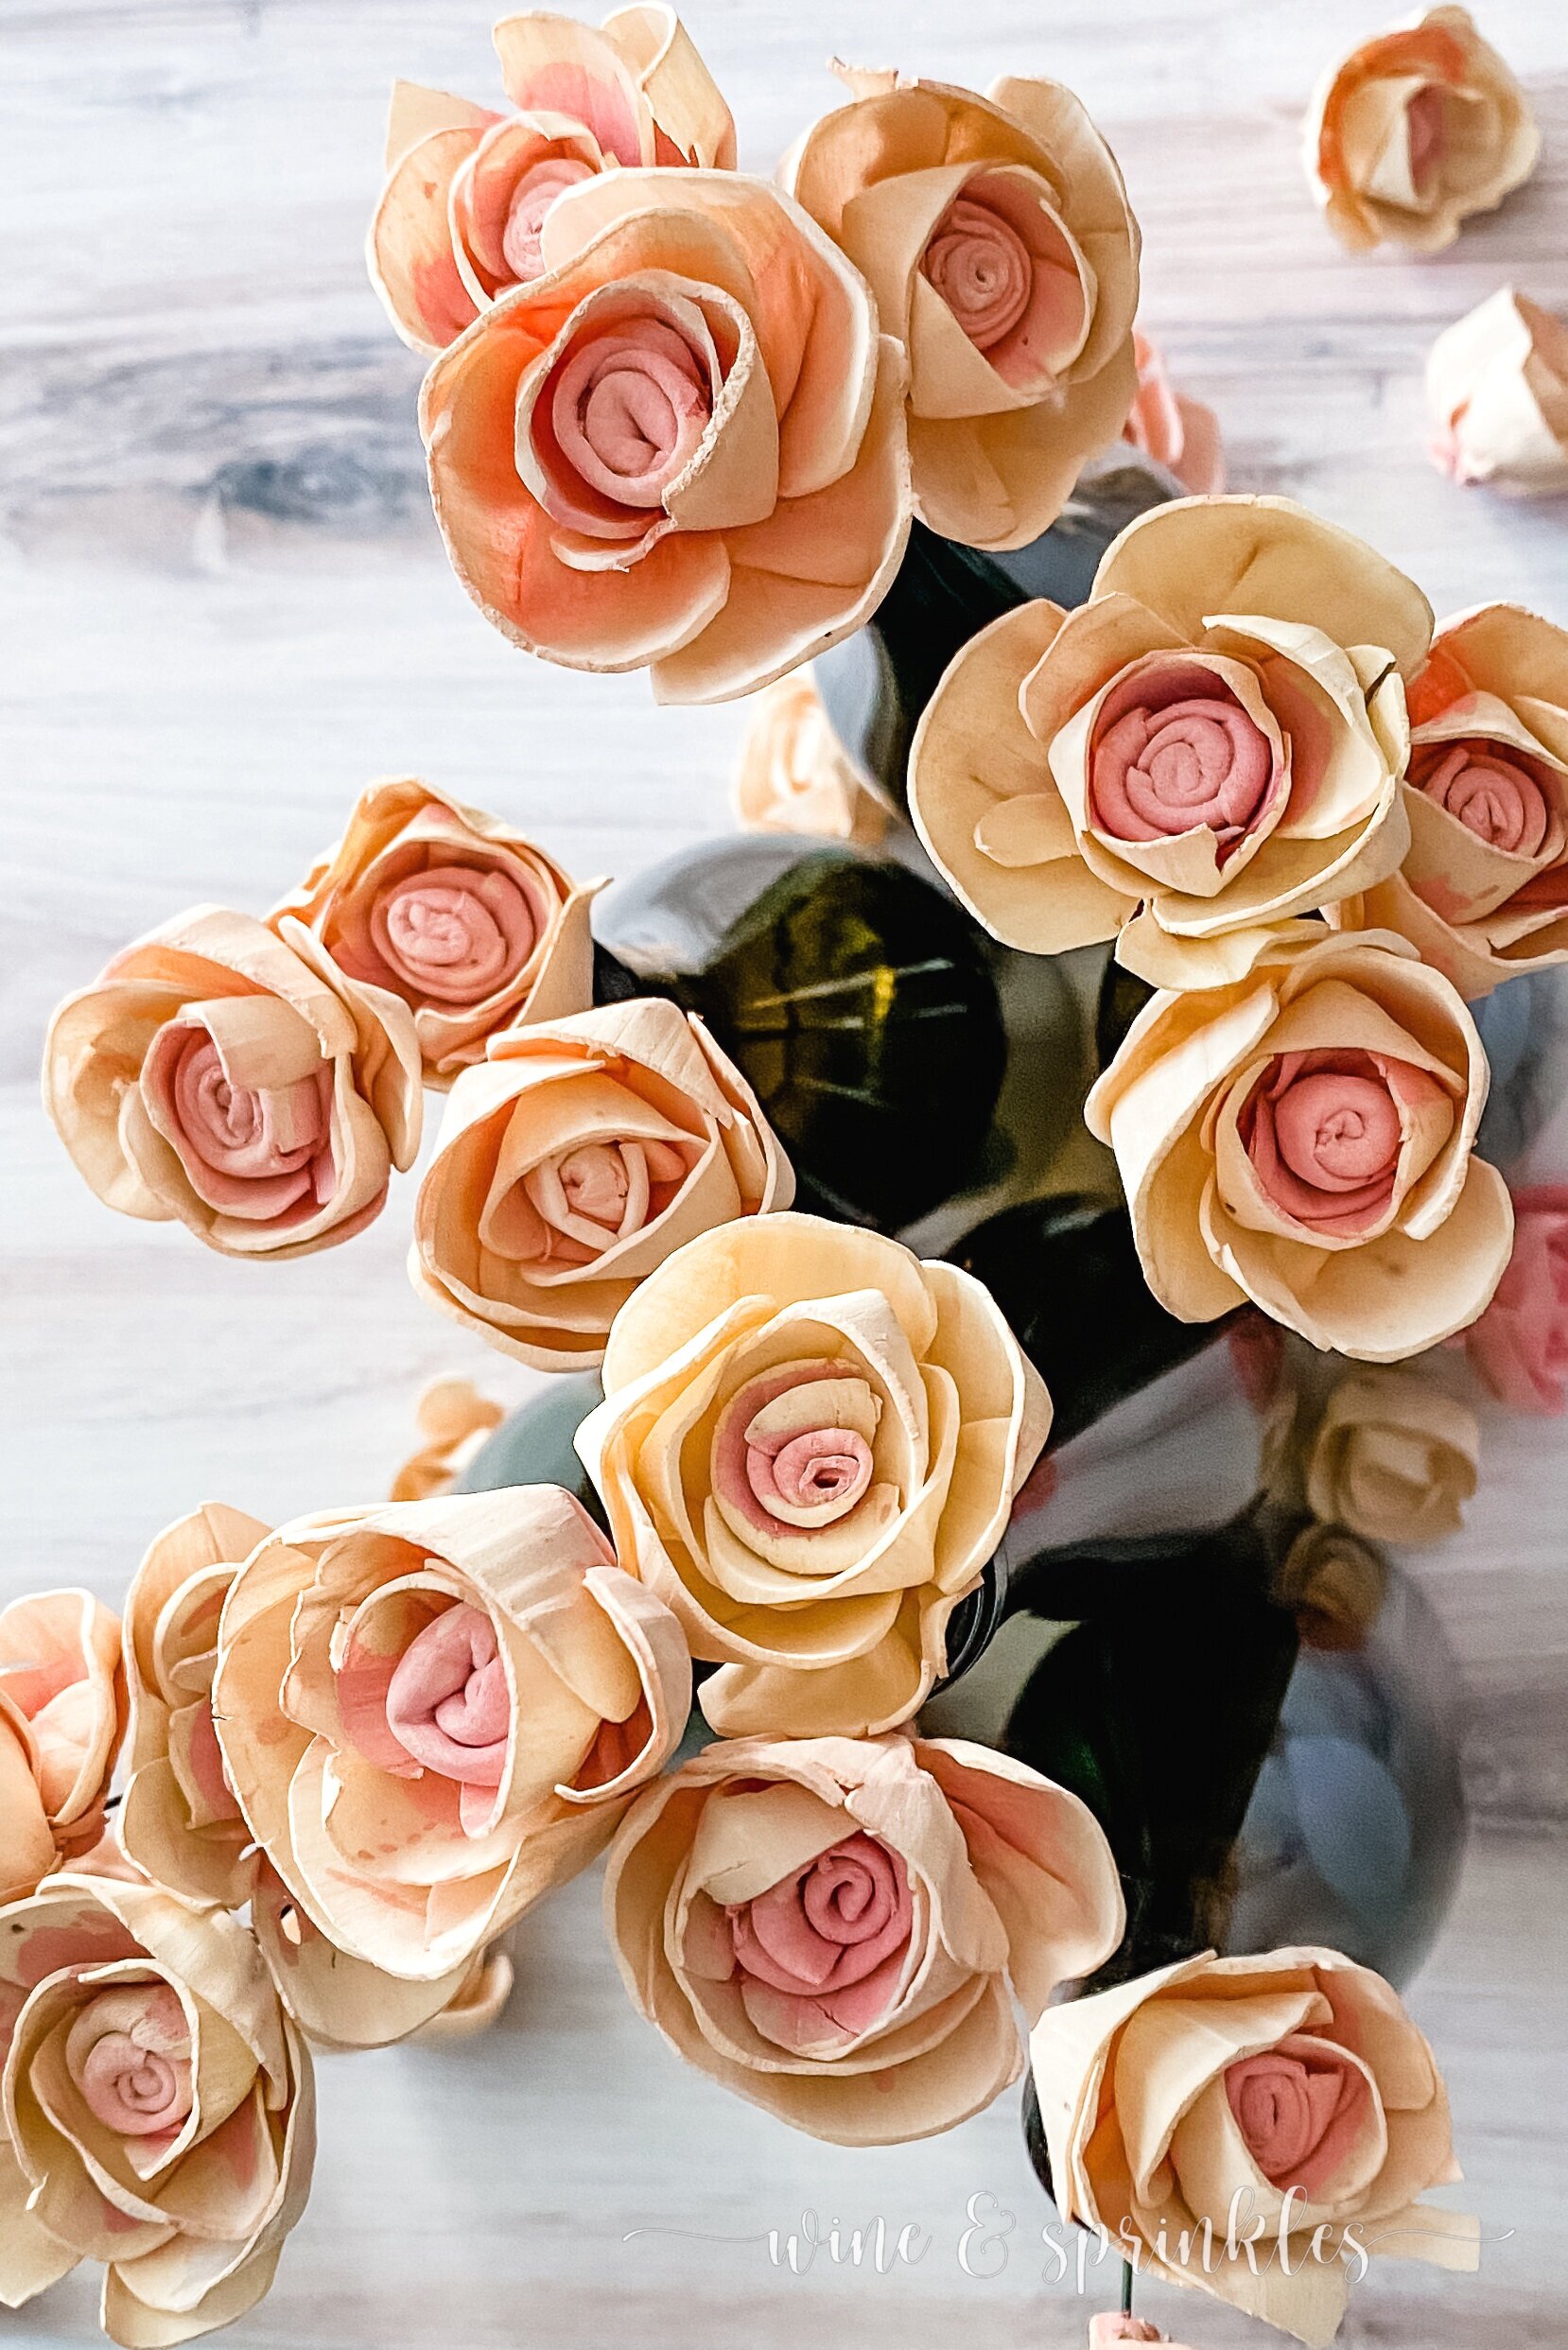
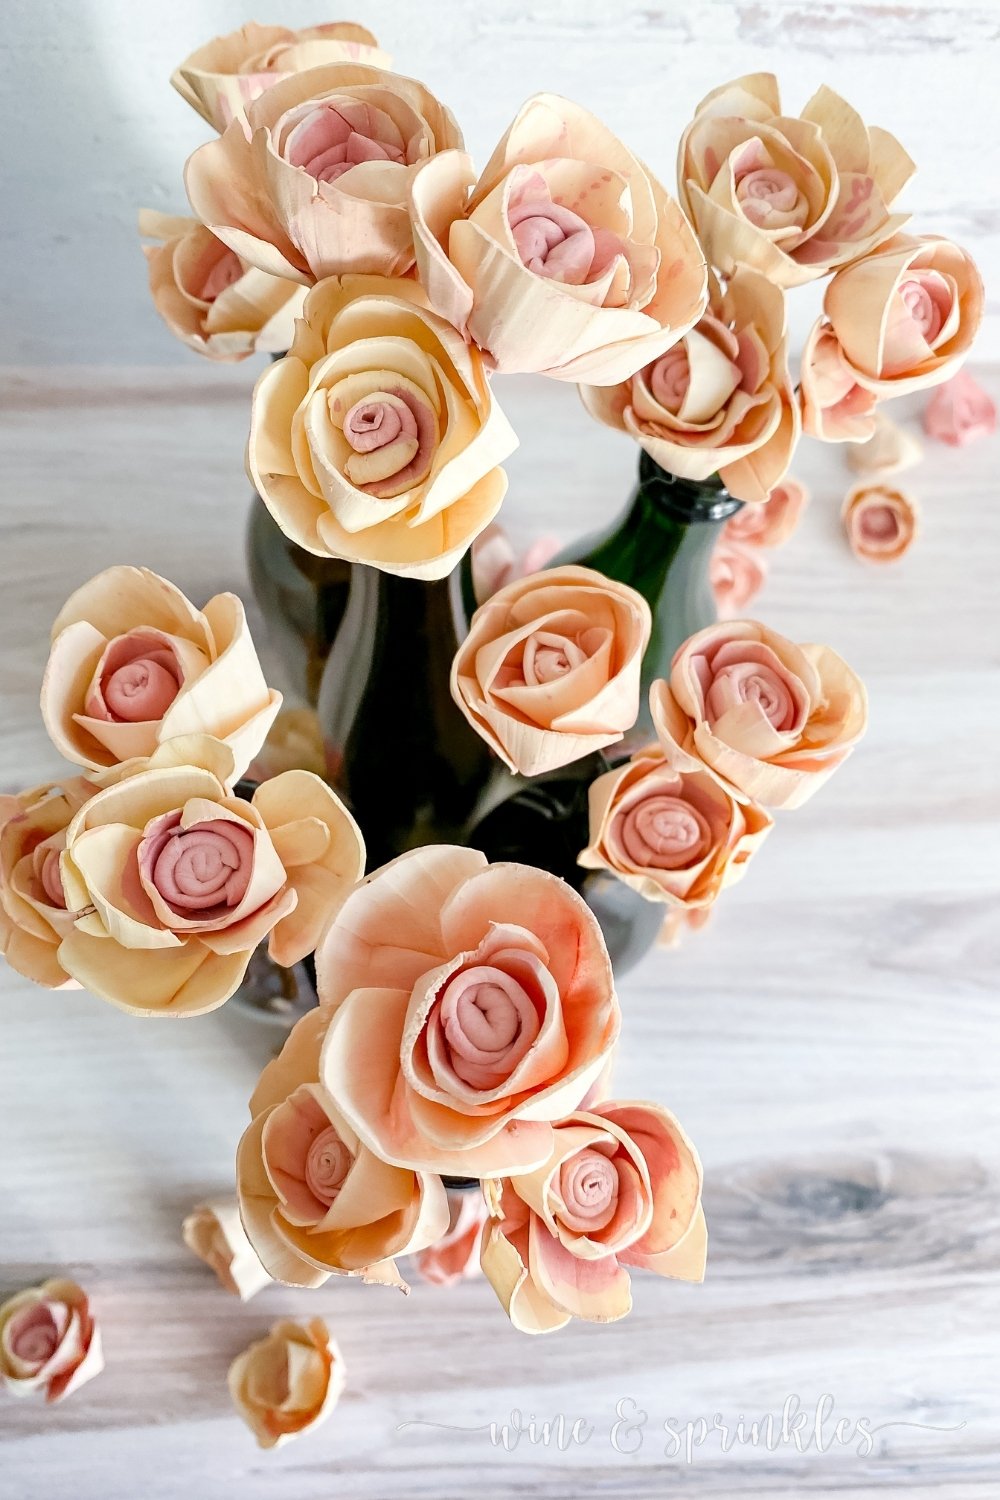
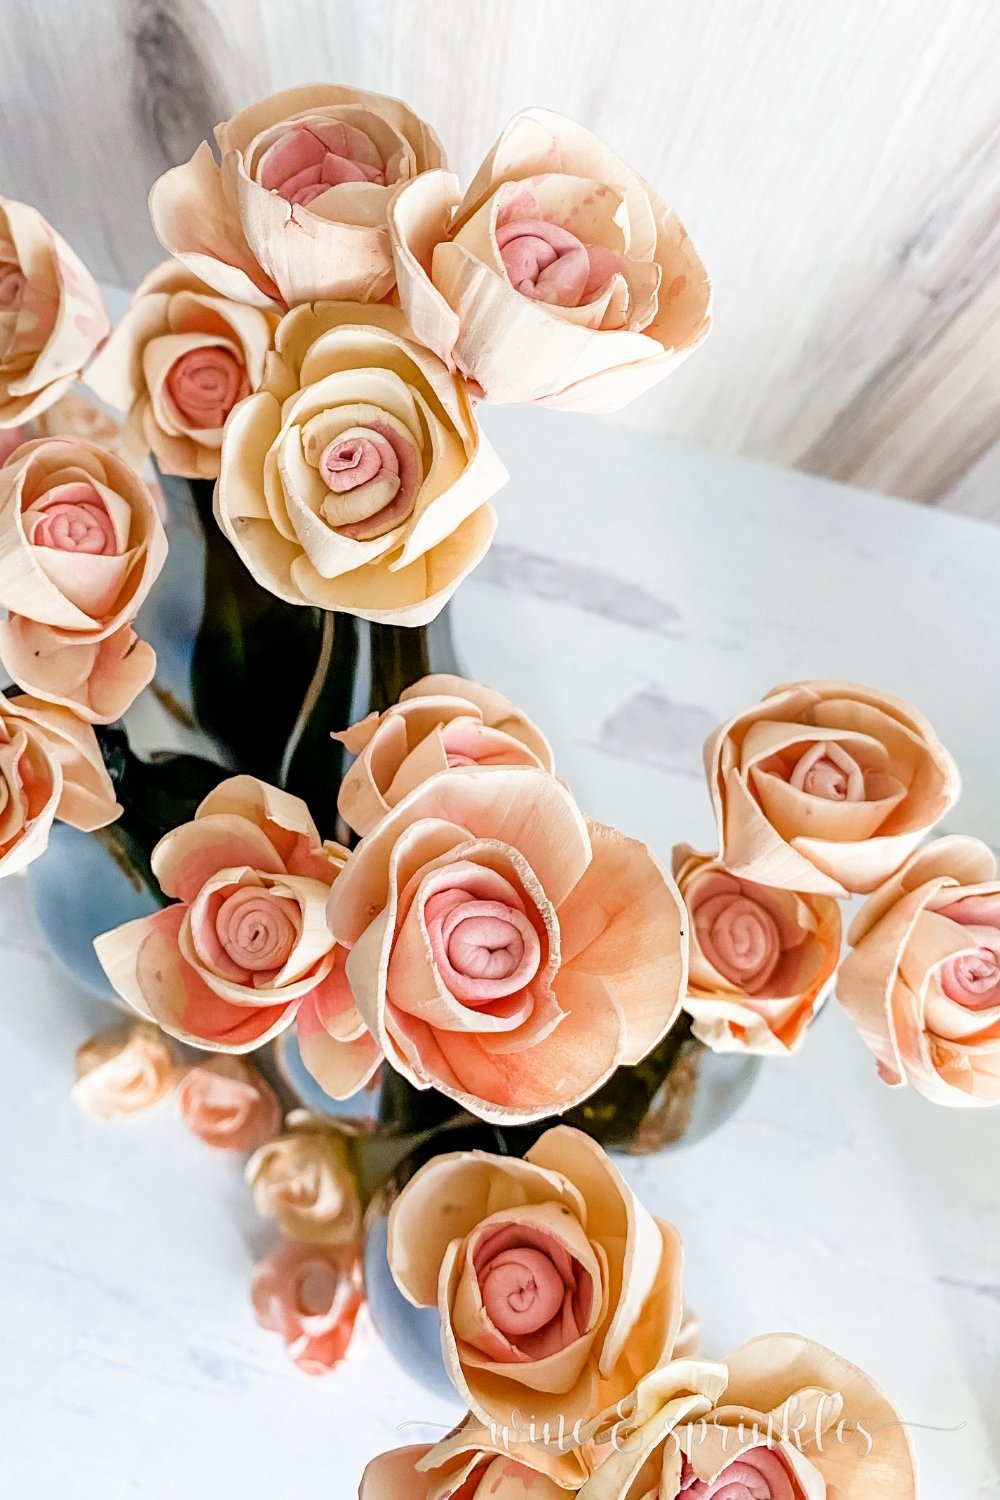
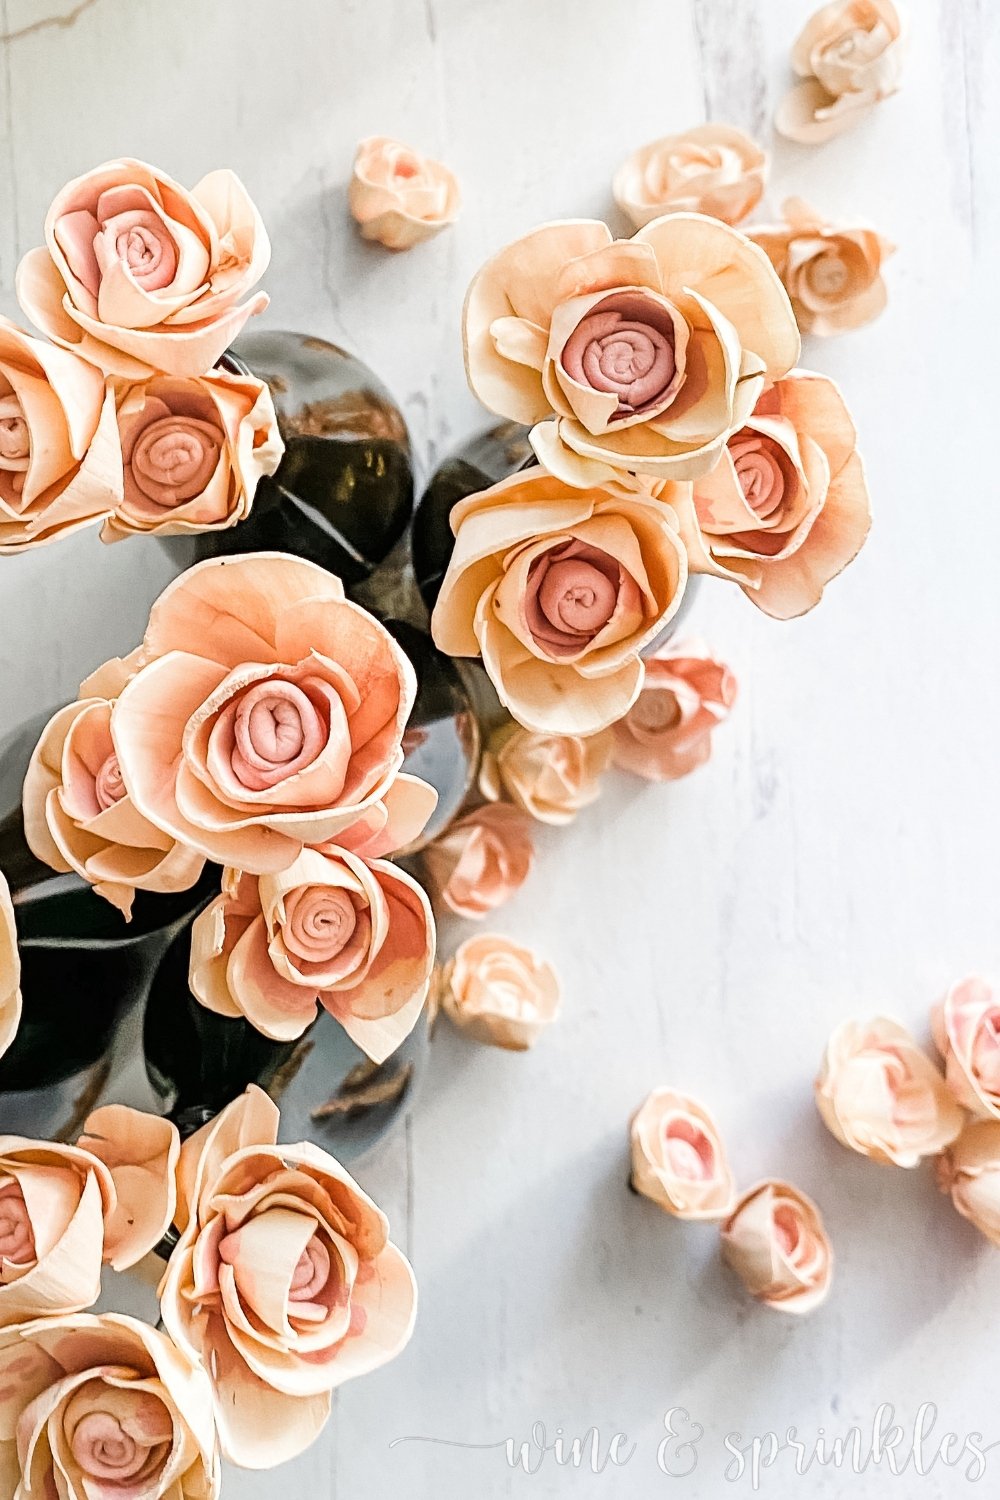
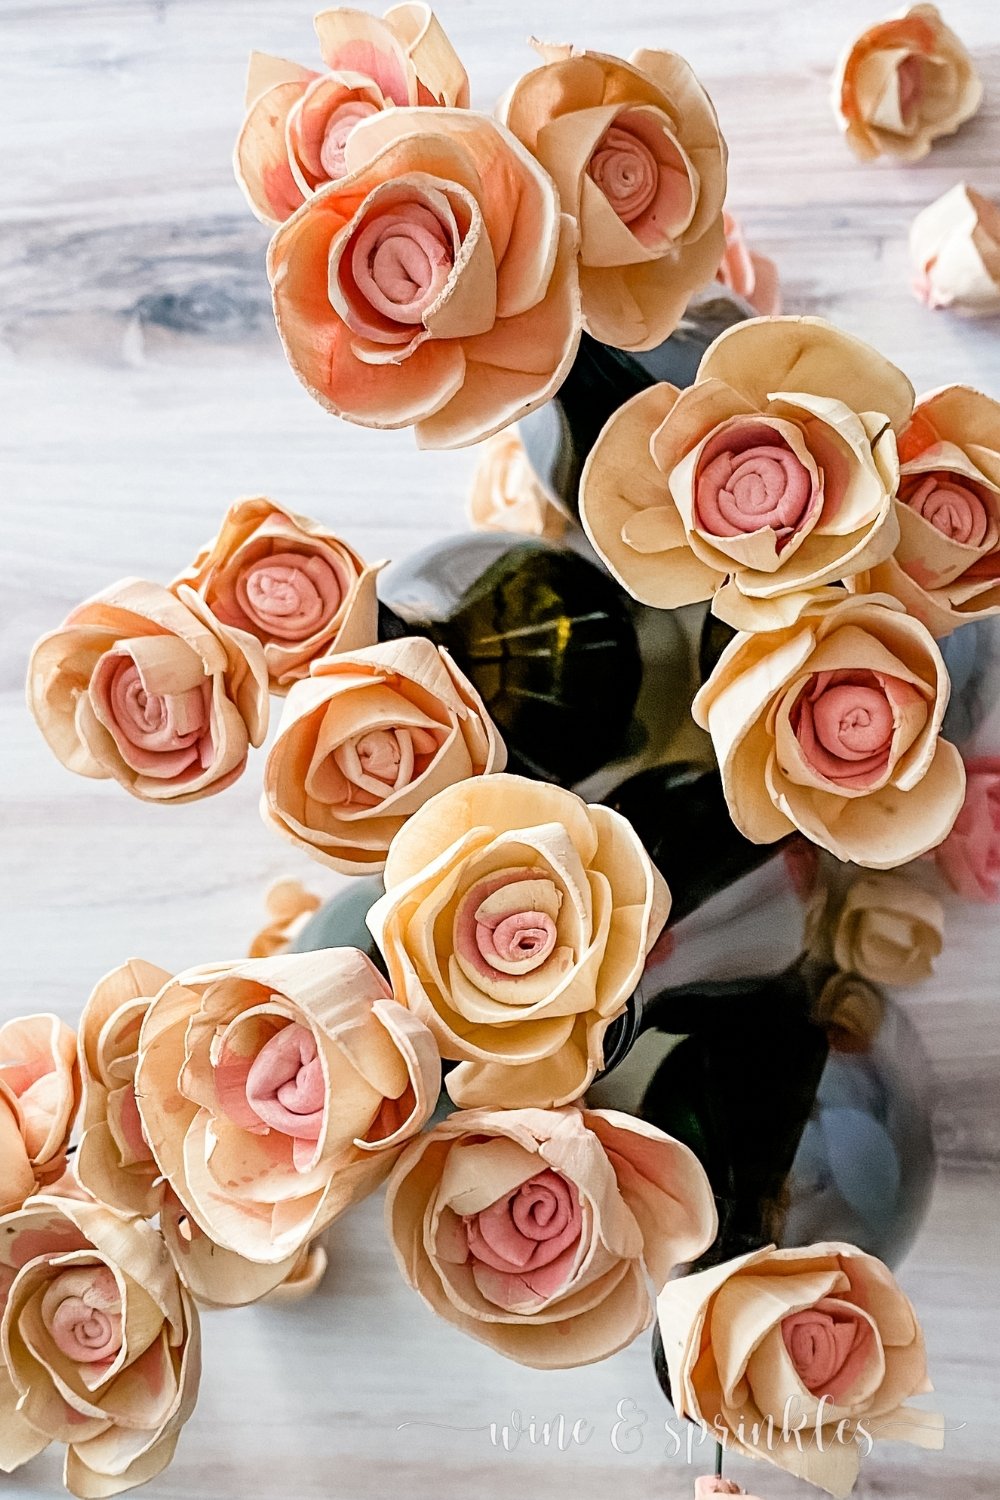
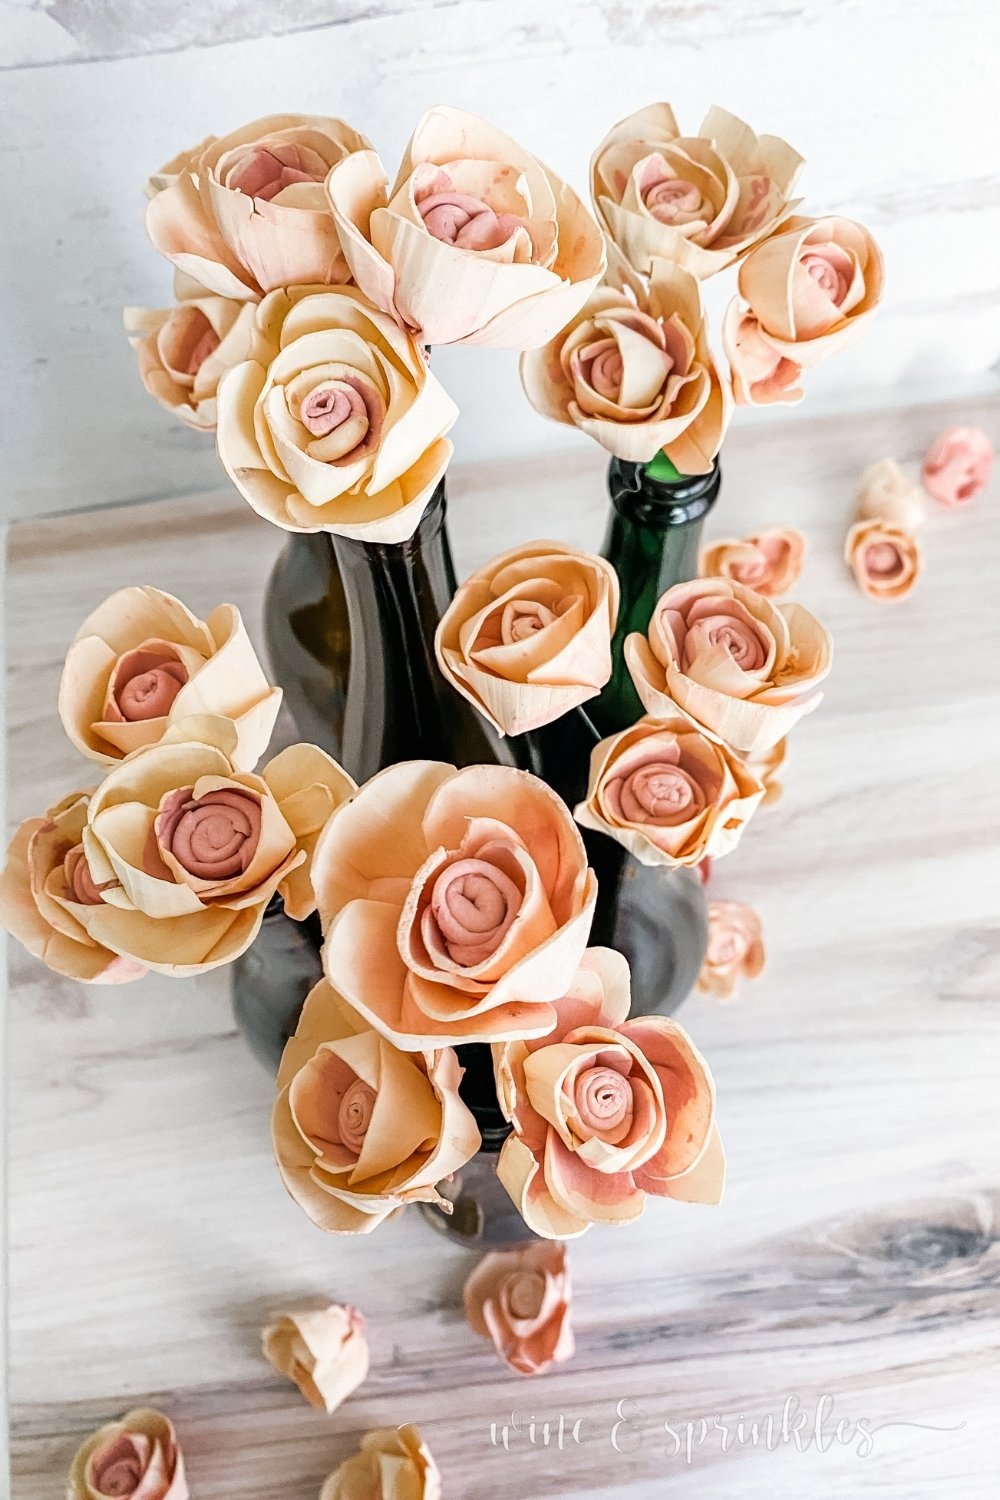
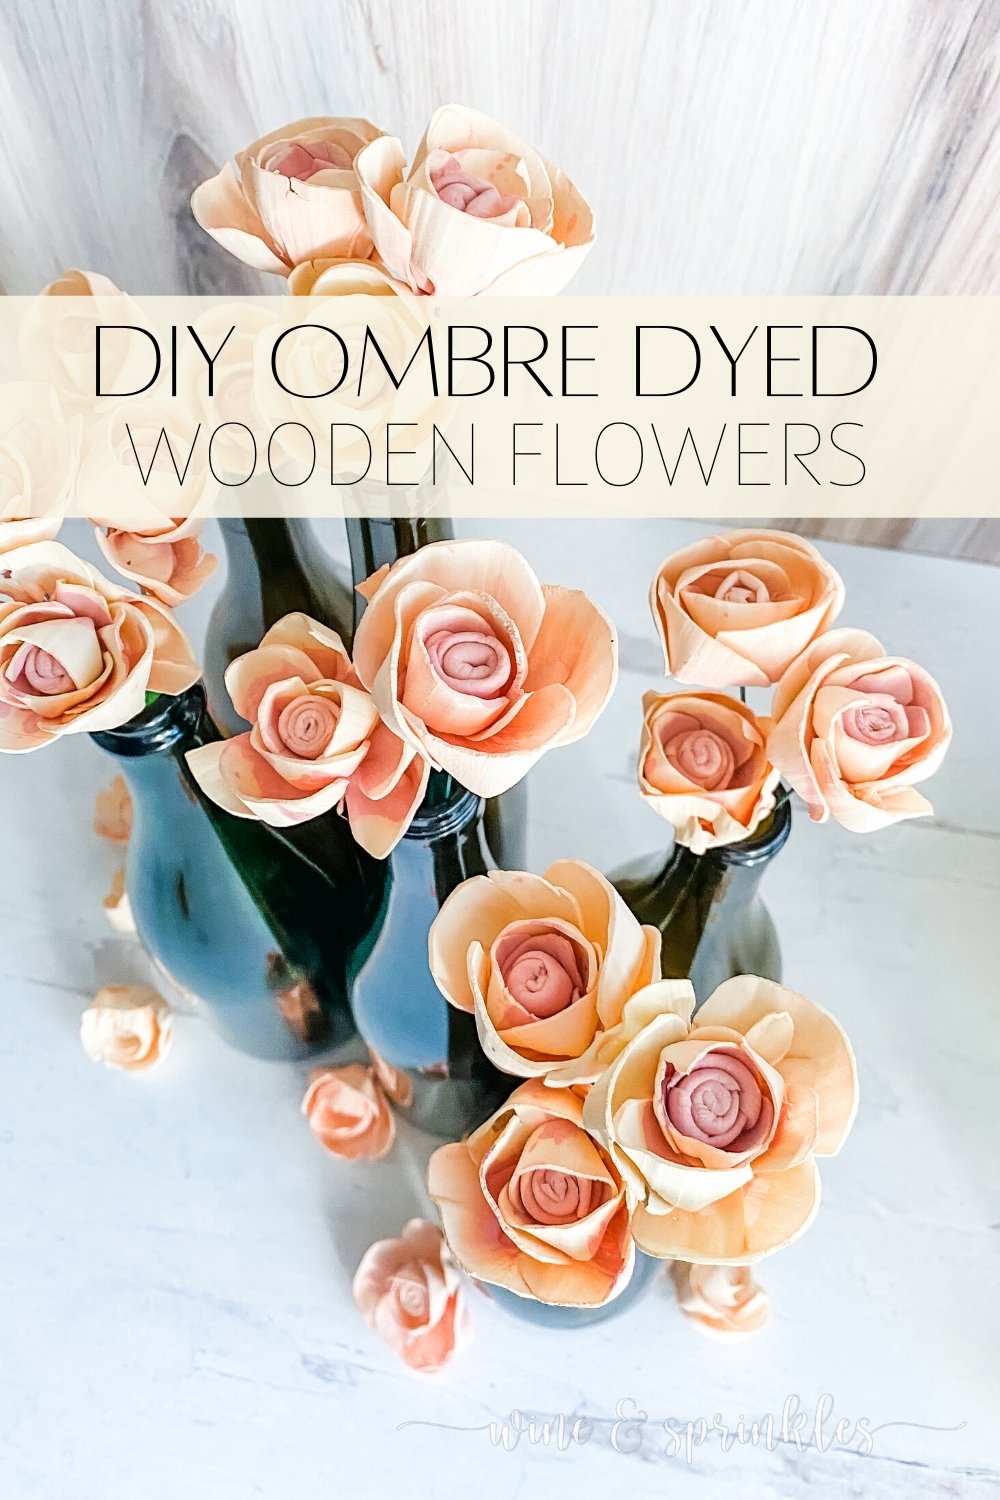
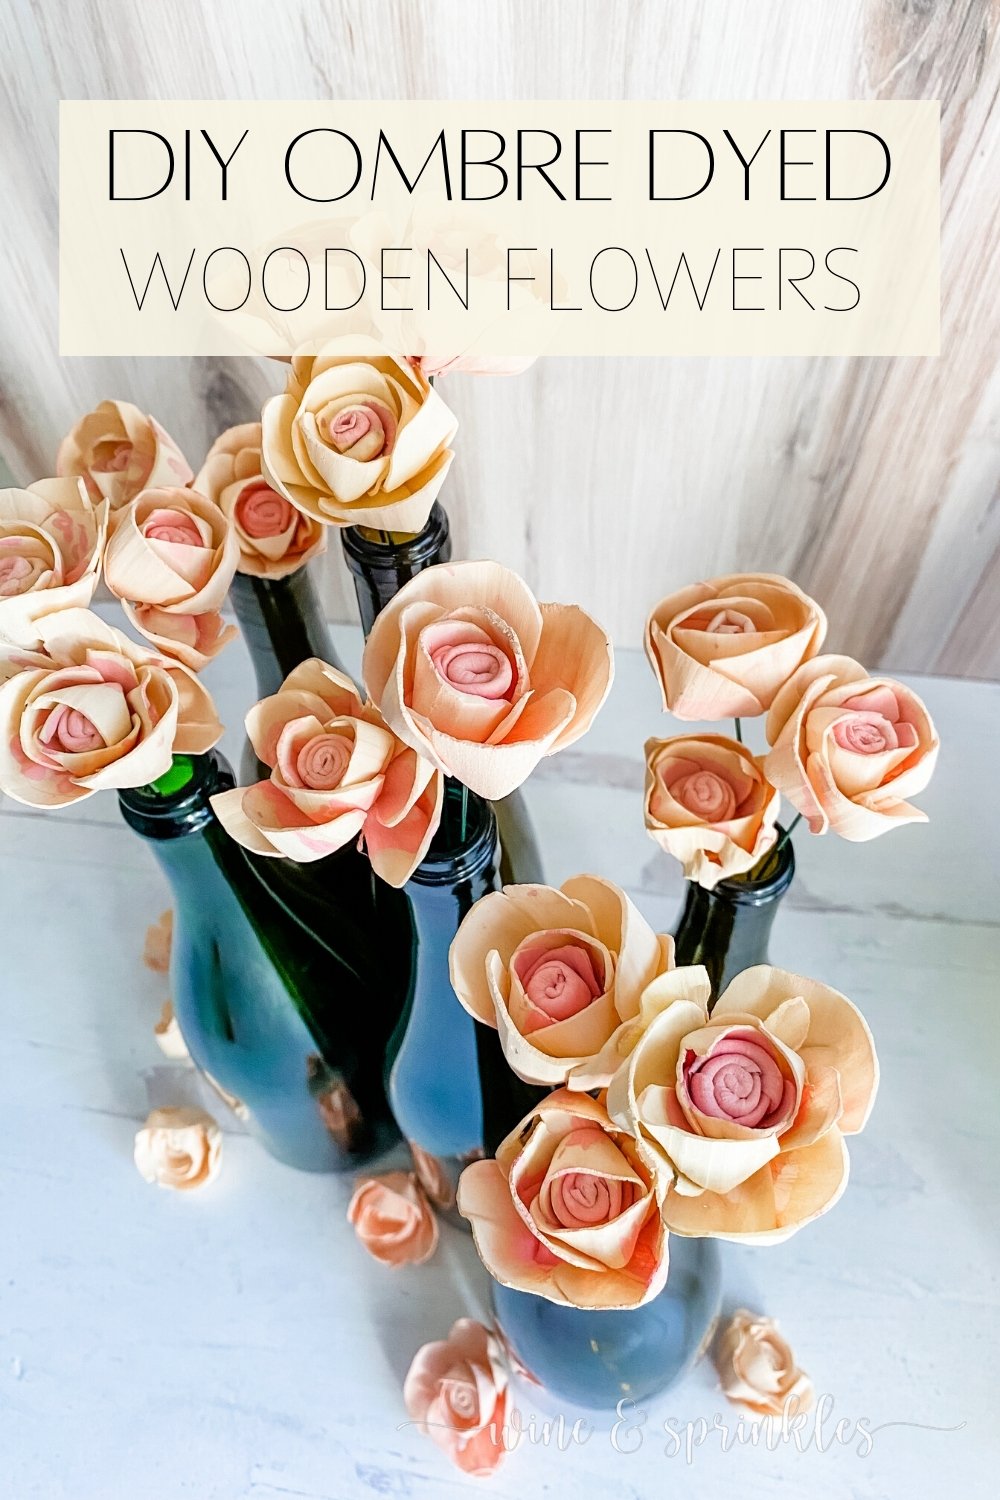
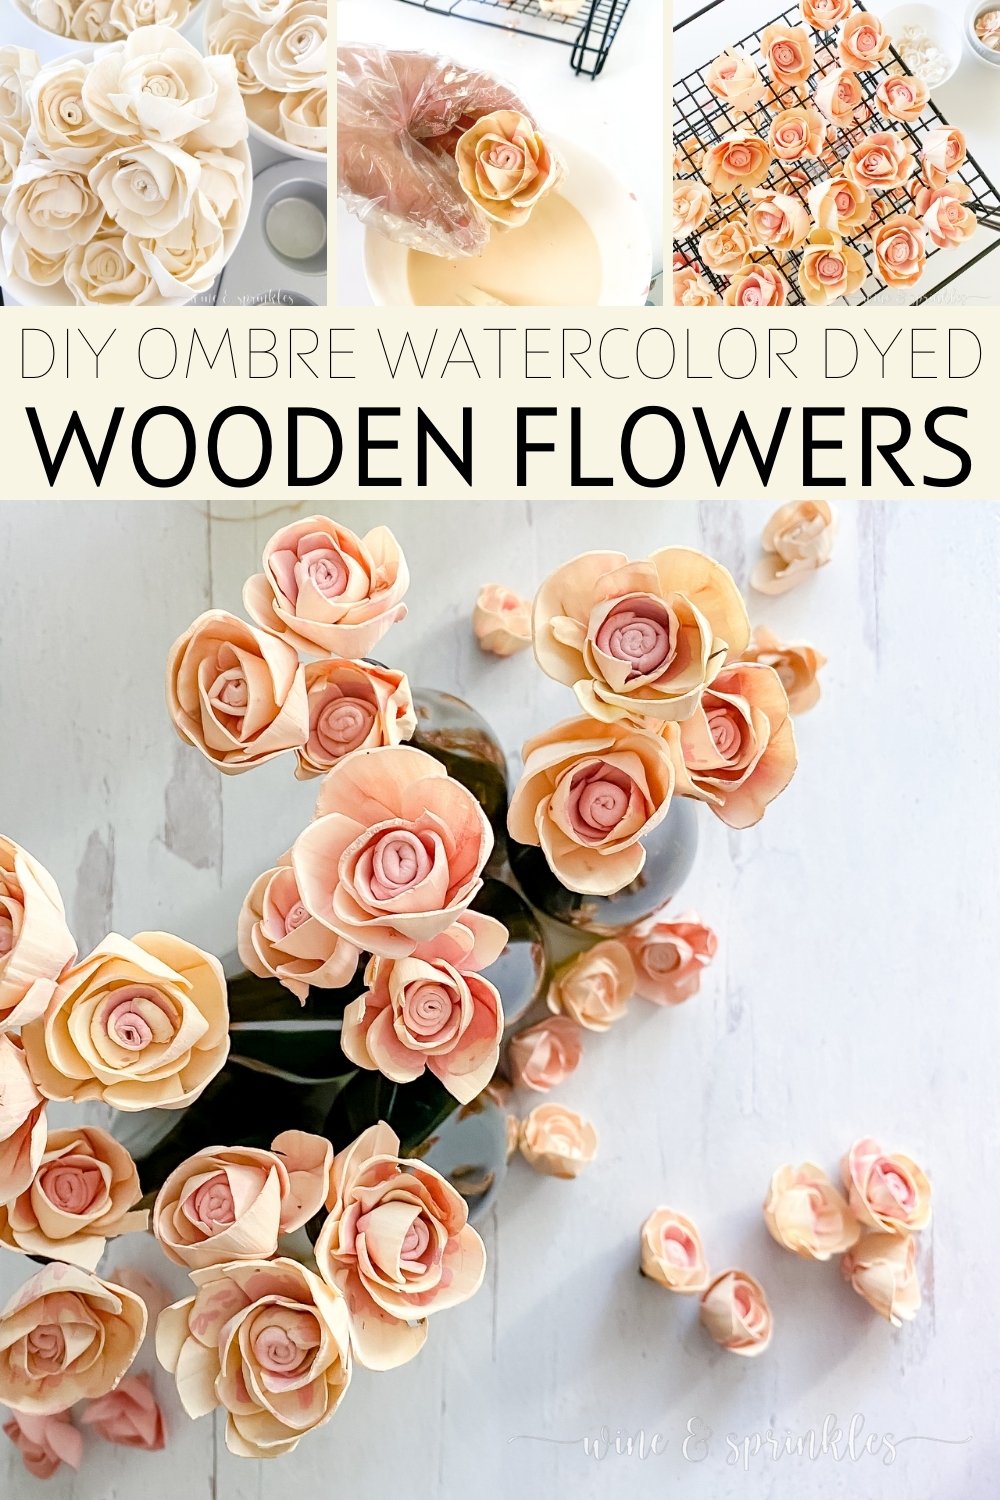
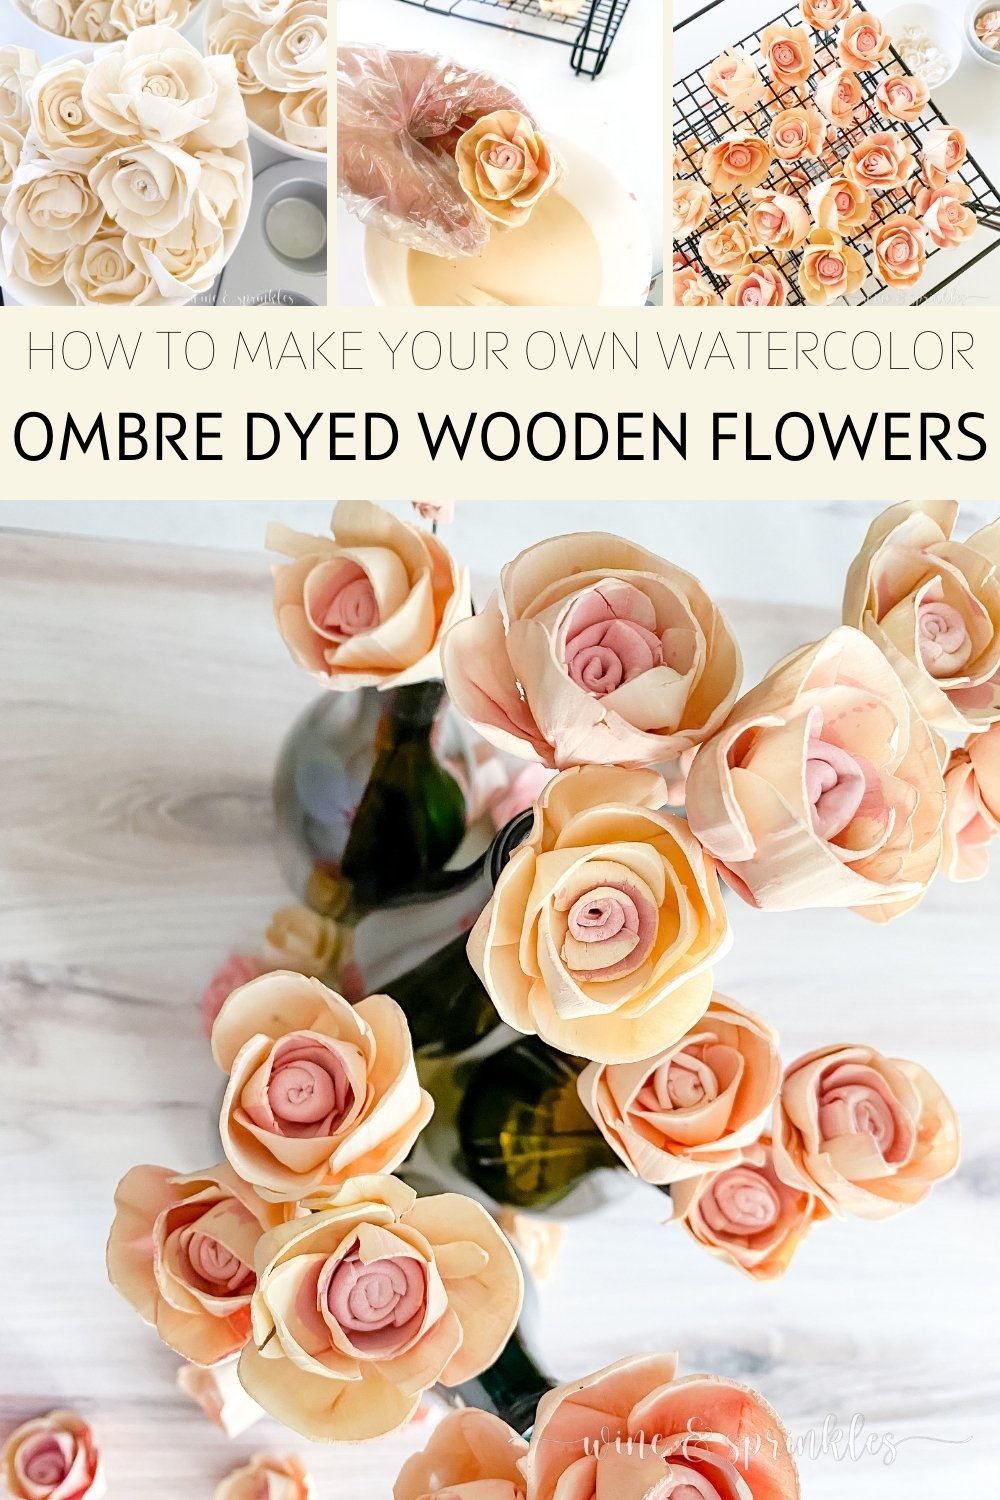
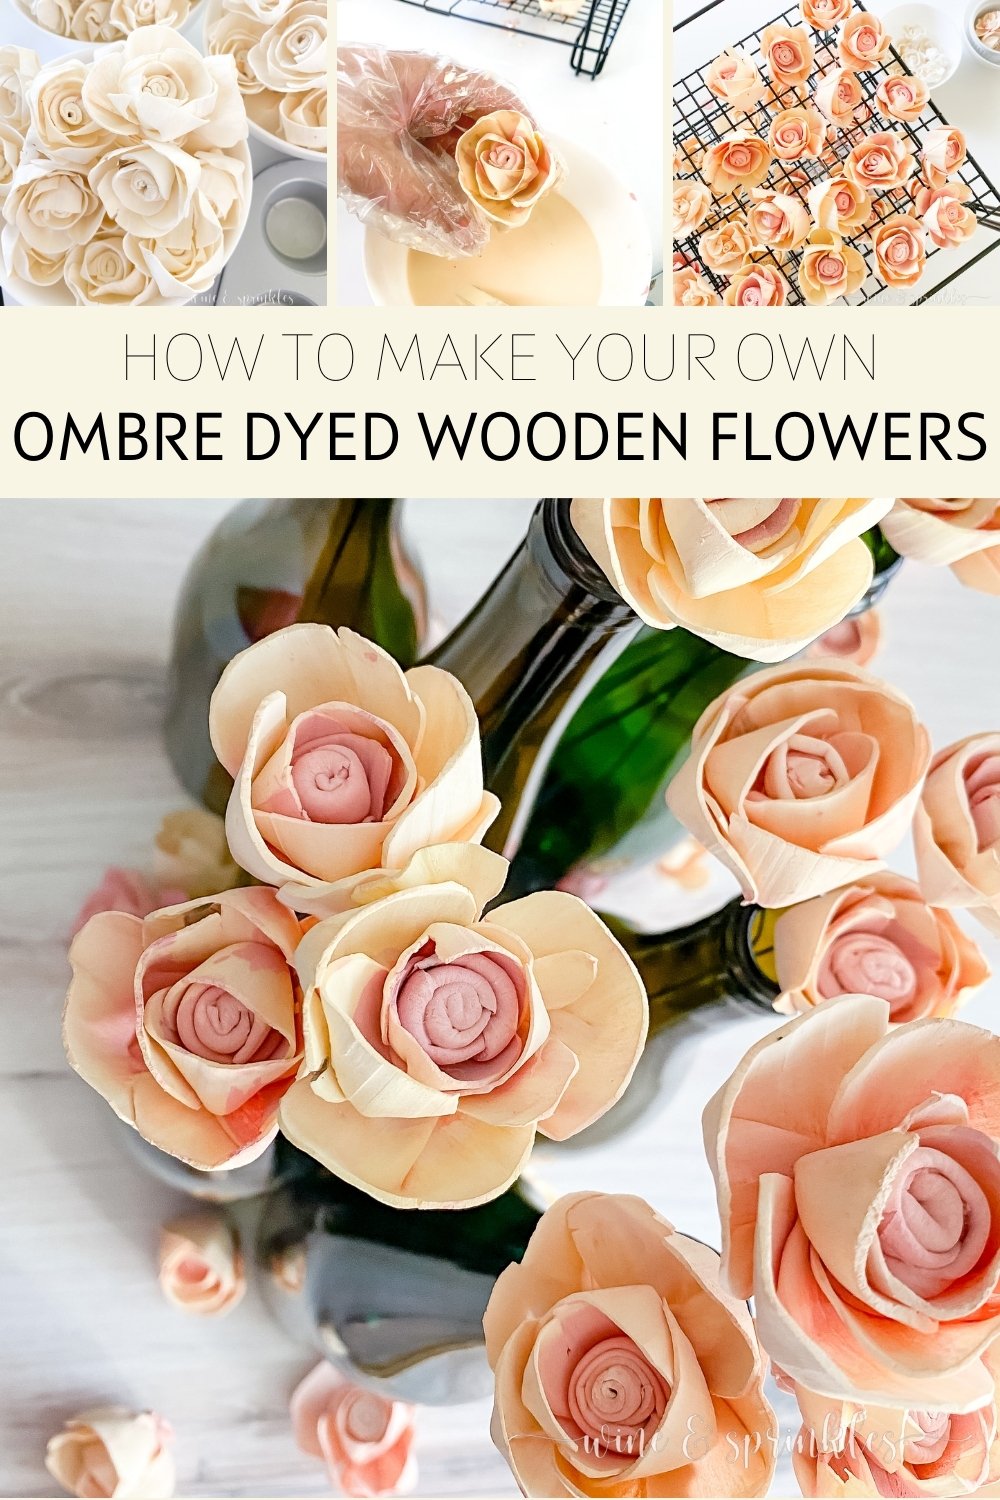
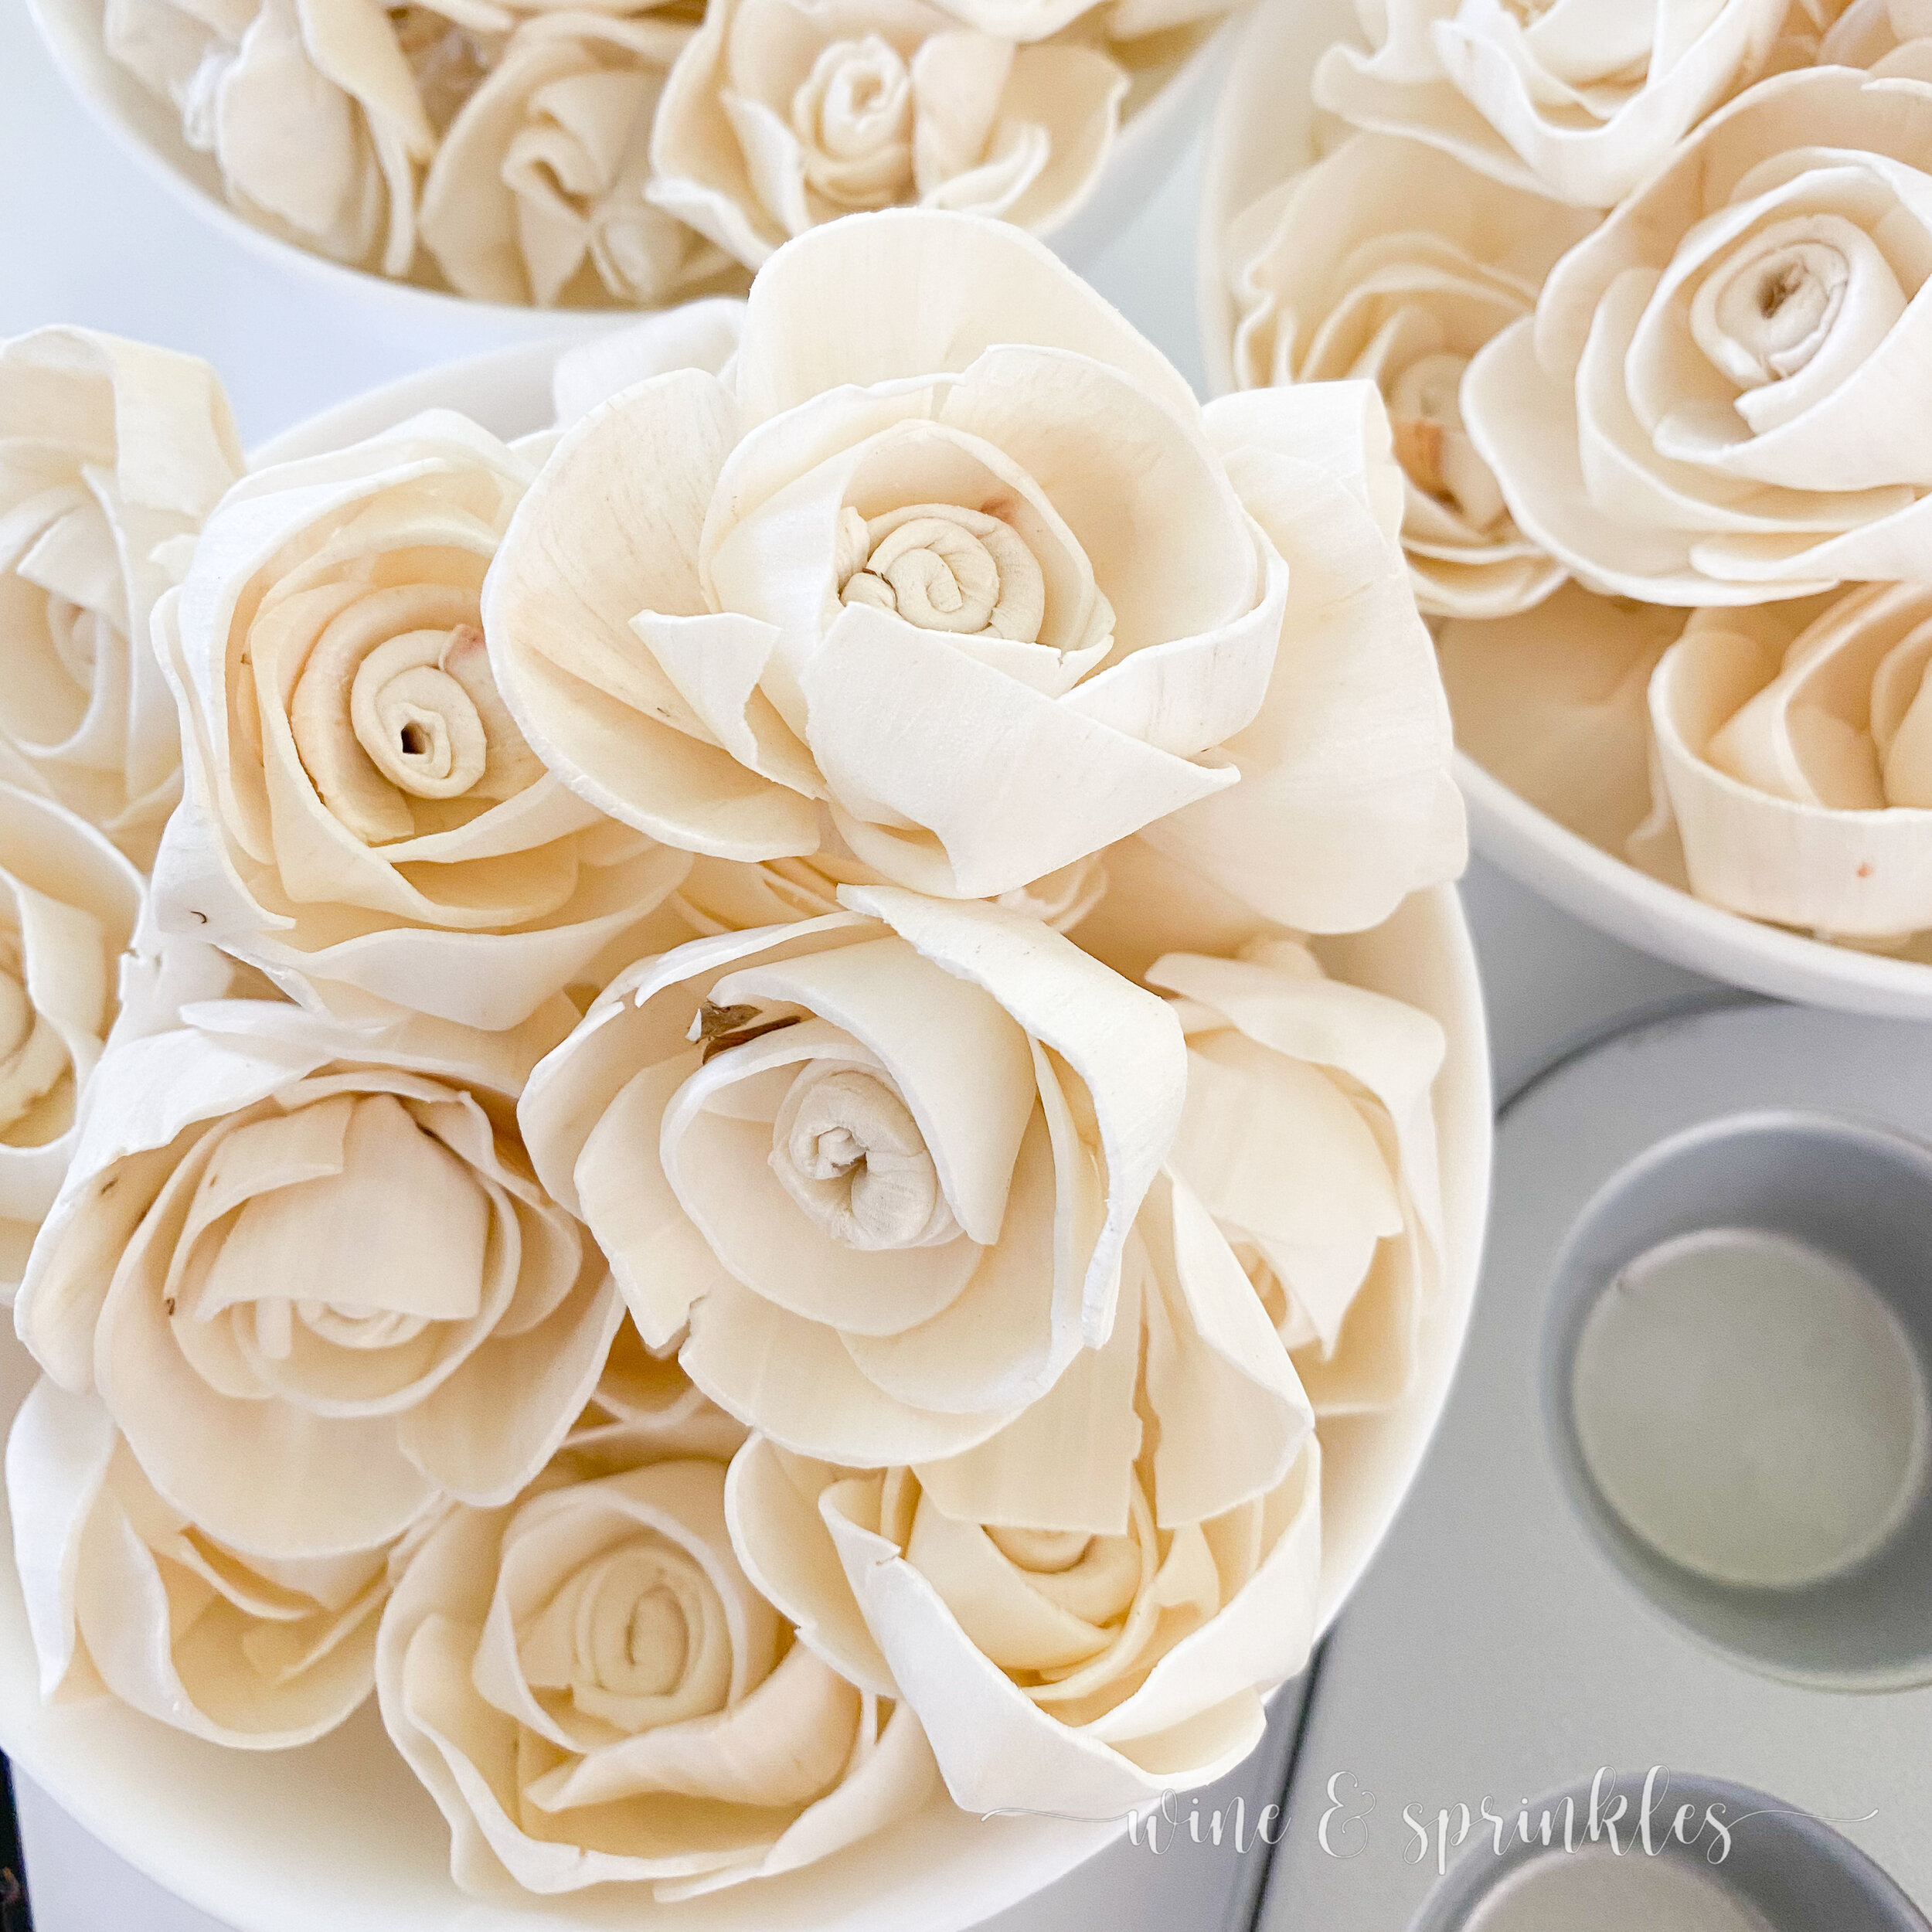
These blooms are both affordable and easily color customizable, with dozens of different colors available to order pre dyed or to dye yourself! Now I adore these beautiful buds but wanted a little diversity in the way I dyed them, since when I look at flowers outside they always seem to be a mix of colors. With my mom’s roses in mind, I picked a warm French vanilla and a light powder pink dye, I set to work on dying them a pink to cream Ombre on the petals with a powder pink center.
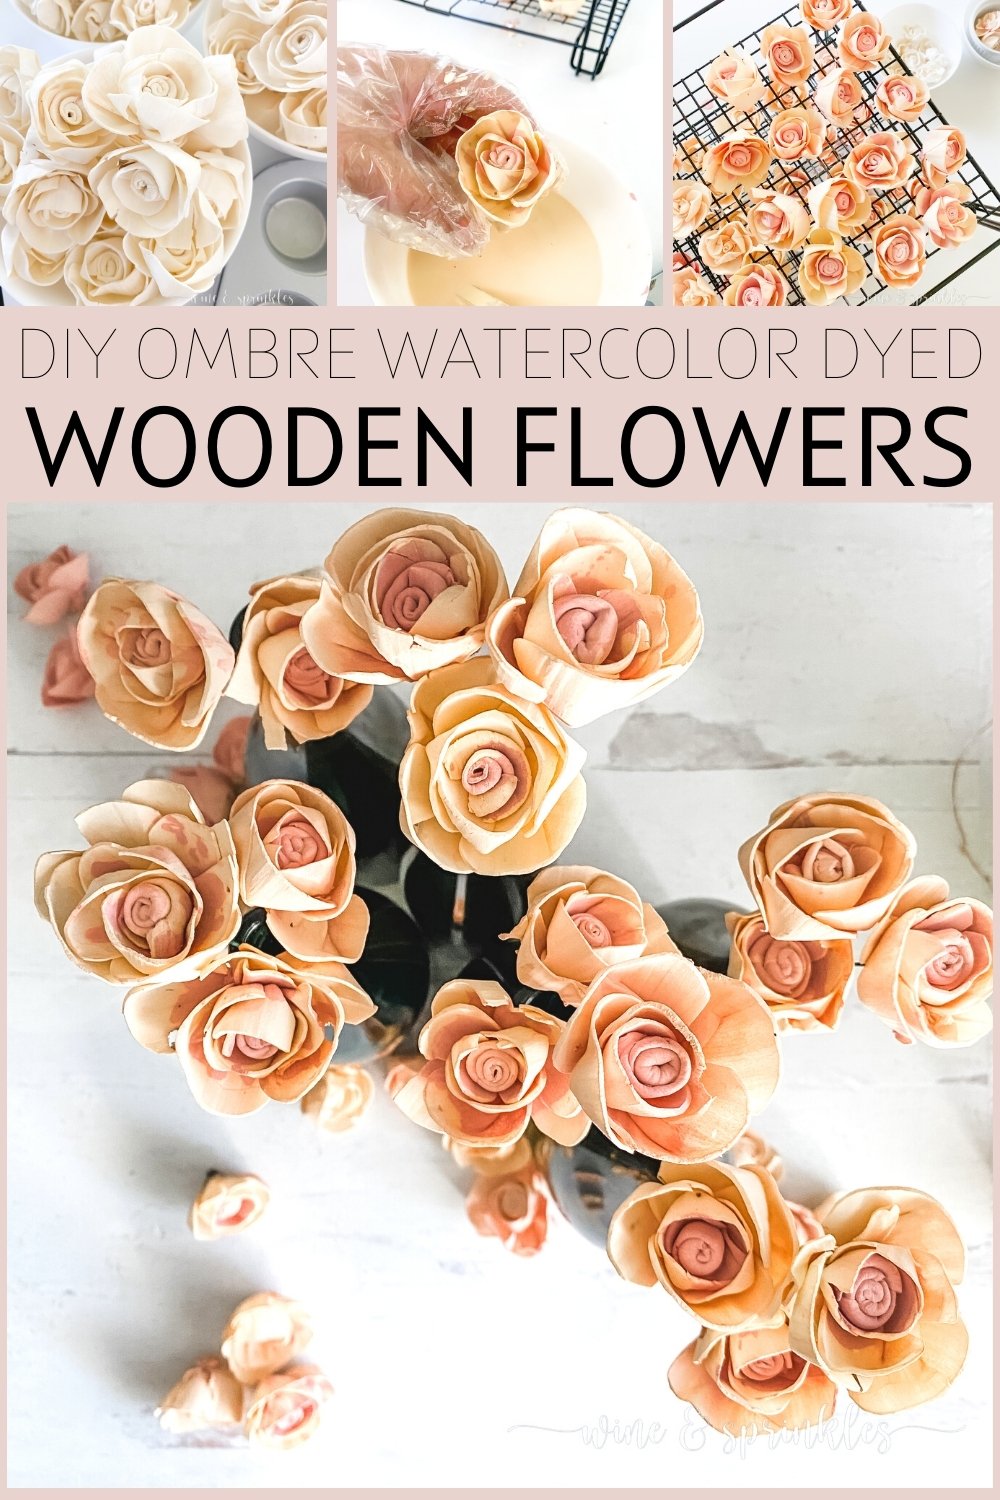
Using mini muffin tins as little colored pools to dye to bottoms of the flowers, I pipetted in between the petals and into the centers with the pink dye, then did a full dip in the French vanilla dye to color the ends of the petals and and undyed part of the flowers.


I was one of those lucky girls who had a mom that was super into gardening. We had flowers all over the front of our house and the very best were the rose bushes that made beautiful yellow and pink Ombre blooms every year. So when a company from my old hometown reached out with some beautiful and custom dyeable wooden flowers, I knew I would be starting a whole stream of amazing projects, starting with some Ombre dyed blossoms reminiscent of those beautiful childhood roses!
SOLA Wood Flowers creates wooden flowers as a unique alternative to use for wedding bouquets, centerpieces, and other floral projects; and as luck would have it they just so happen to be based in my old hometown of Ogden, Utah!


The dye didn’t combined completely with the water and would separate if it wasn’t remixed, but I found that the flowers would soak up mostly dyed water, leaving the concentrated dye liquid in the bottom of the muffin tins, where I could just top off each cavity with more hot water. This worked great for dying a couple dozen flowers, but with each water addition, as might be supposed, the vibrance of the stain was diminished. This led to a variety of different two toned blooms, from some that seem almost watercolor painted, to the ombre I was going for, to just a light touch of pink on the bottom and center petals.
I loved their colors so much, I used them to accent all my candle holders and wine bottles for my Zodiac Summer’s Eve Party to show them off before I used them for projects, and they added the perfect pop of flowers to my party! Afterwards, I paired these with their originally dyed counterparts in Powder Pink and French Vanilla for my Wooden Flower Wine Bottle Centerpieces to decorate my house for fall, while reserving a dozen or so of my dyed favorites to become Wooden Flower Accessory Clips.
I absolutely adore working with these flowers and can’t wait to try other dying and painting techniques on them for future projects, but in the meantime I’m sure to be perfecting this method and using them to create other Wooden Flower Projects for my parties and events!
SUPPLIES
WOODEN FLOWER SUPPLIES:
1.5” Wooden Flowers: For my first project with wooden flowers, I wanted to start with smaller flowers, especially since I wanted them for simple centerpieces and accessory clips. This size of flowers also fit perfectly into mini muffin tins for dying, with these Dear Holly Wooden Flowers looking like petite roses, they were perfect for my garden rose inspired dying experiments!
Wooden Flower Dye: To color these blooms, I used dyes provided by Sola Wood Flowers for this project, with there being dozens of hues to choose from on their site. You will notice they will have the consistency of paint more than dye, which you thin out by mixing with water. You will need two different colors of dye for this project, one as your base dye for the bottoms and centers of the flowers, and a top dye for the ends of the petals. For my project, I used Powder Pink and French vanilla, but I’m looking forward to trying this method for a variety of different color combinations.
OTHER SUPPLIES:
Mini Muffin Tins to hold flowers and dye the bottom color
Pipettes: I actually had these on hand because I use them in my Resin Projects, and I highly recommend them for any craft closet as I’m always finding uses for them.
Disposable Gloves, Small Measuring Cups, Dye Bowls, & Stick Sticks: You need a bowl for both your base and tip dye mixtures, measuring cups to measure dye and hot water into these bowls, and stir sticks to stir them. While gloves aren’t technically required, I used them so I didn’t dye my fingers.
Scissors: To trim the ends of the flower bases before dying
Electric Kettle (optional): You can just get hot water from your sink, but I prefer to boil it in my electric kettle both to get it hot for mixing dyes and making it easy to pour and measure.
SUPPLIES LIST:
WOODEN FLOWER SUPPLIES:
Wooden Flowers - 1.5” x 30
Base Petal Dye [Powder Pink] - 1 oz.
Tips Petal Dye [French Vanilla] - 1 oz.
OTHER SUPPLIES
Mini Muffin Tin x 1
Pipettes x 2
Disposable Gloves, Measuring Cups, Dye Bowls, & Stir Sticks
Scissors
Electric Kettle

DIRECTIONS

Start by trimming the backs of your flowers with craft scissors to about half of their starting length. This will help the flowers sit deeper in the mini muffin tins for their base dye, but not so short that you have to worry about your beautiful blooms unravelling.
In separate bowls, mix your dyes with hot water, I boiled mine in an electric kettle in these proportions:
Base Color - Powder Pink - 1 oz. dye to 4 oz. hot water
Tip Color - French Vanilla - 1 oz. dye to 4 oz. hot water
Set the extra water aside to add to the muffin tins later.
Put on your gloves, then fill each mini muffin tin ⅓ - ½ full of the base dye mixture, reserving any extra dye to pipette in between the petals.


4. Press a flower into each mini muffin tin until the base touches the bottom, then use your pipette to cover the center of the flower and in between the petals with the base dye, leaving the tips dry for the second dying.
(Note: when I needed extra base dye, I could easily pipette out some from the bottom of the tins to add between the petals, but after the first set I dyed only 9 instead of 12 flowers at a time, using the three empty cavities to mix extra pink dye for this step.)


5. Once the dye has soaked through the center and between the petals, transfer the flower to your large bowl containing your tip colored dye, coating the entire flower. Let the excess dye drip off, then gently fluff the wet petals out from the center and place on a cooling rack to dry. Repeat with all the flowers in the tin until it is empty. This is the first round of flowers that are dyed, and will also be the most vibrant.
6. After this second dye, gently fluff out the petals, then place in the open air to completely dry for the next 24 hours. I used a Three tiered cooling rack for mine, and while it took a little scrubbing to get the dye off, it worked perfectly for drying dozens of flowers at once.


7. For the next rounds of flowers you are dying, refill the muffin tins with extra water as necessary to keep the water level the same in the tins, using the pipette to get dye solution from the cavities to cover the inside of the flowers. After my first set of twelve, I started dying them 9 at a time, using the empty 3 mini muffin cavities to hold extra dye to pipette over the flowers. For the 2 oz. of dye I used, I watered colored 30 flowers a combination of powder pink and French vanilla before the muffin tin dye was too low to continue, 3 rounds of flowers total. After you are done two tone dying, transfer the dye from the muffin tin to a bowl if you want to single dye any of your flowers.


To use any extra dye to color more flowers, simply dip your undyed flowers in the dye bowl of your choice, making sure all the petals get covered. This dye actually works with cold and warm water, so when I was done two tone coloring I dyed a bunch of my extras solid colors to accent these Ombre Buds in my future centerpieces. I mixed the end of my pink dye with my French vanilla for a warm blushy color for some of my extras, along with several in each of my original dye colors.
SEE OUR MOST RECENT POSTS HERE:


OUR PINS FOR THIS POST: