This post contains affiliate links, meaning that if you click on a link I will recieve a small comission. This costs you nothing extra and I only promote products I use and love! You can read our full disclosure here
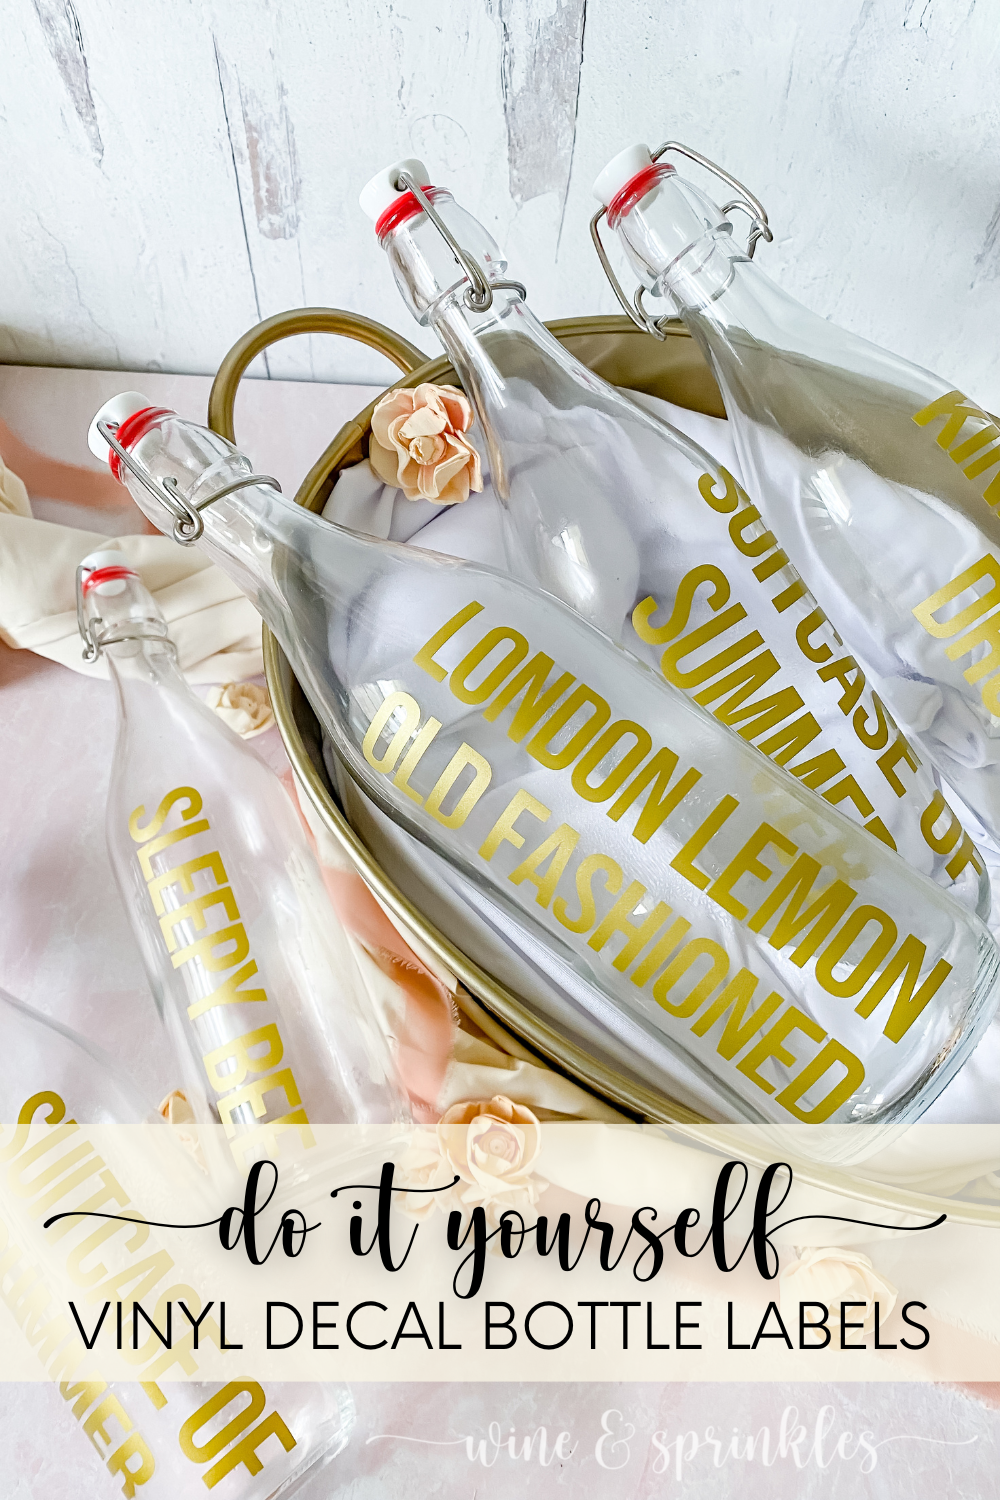
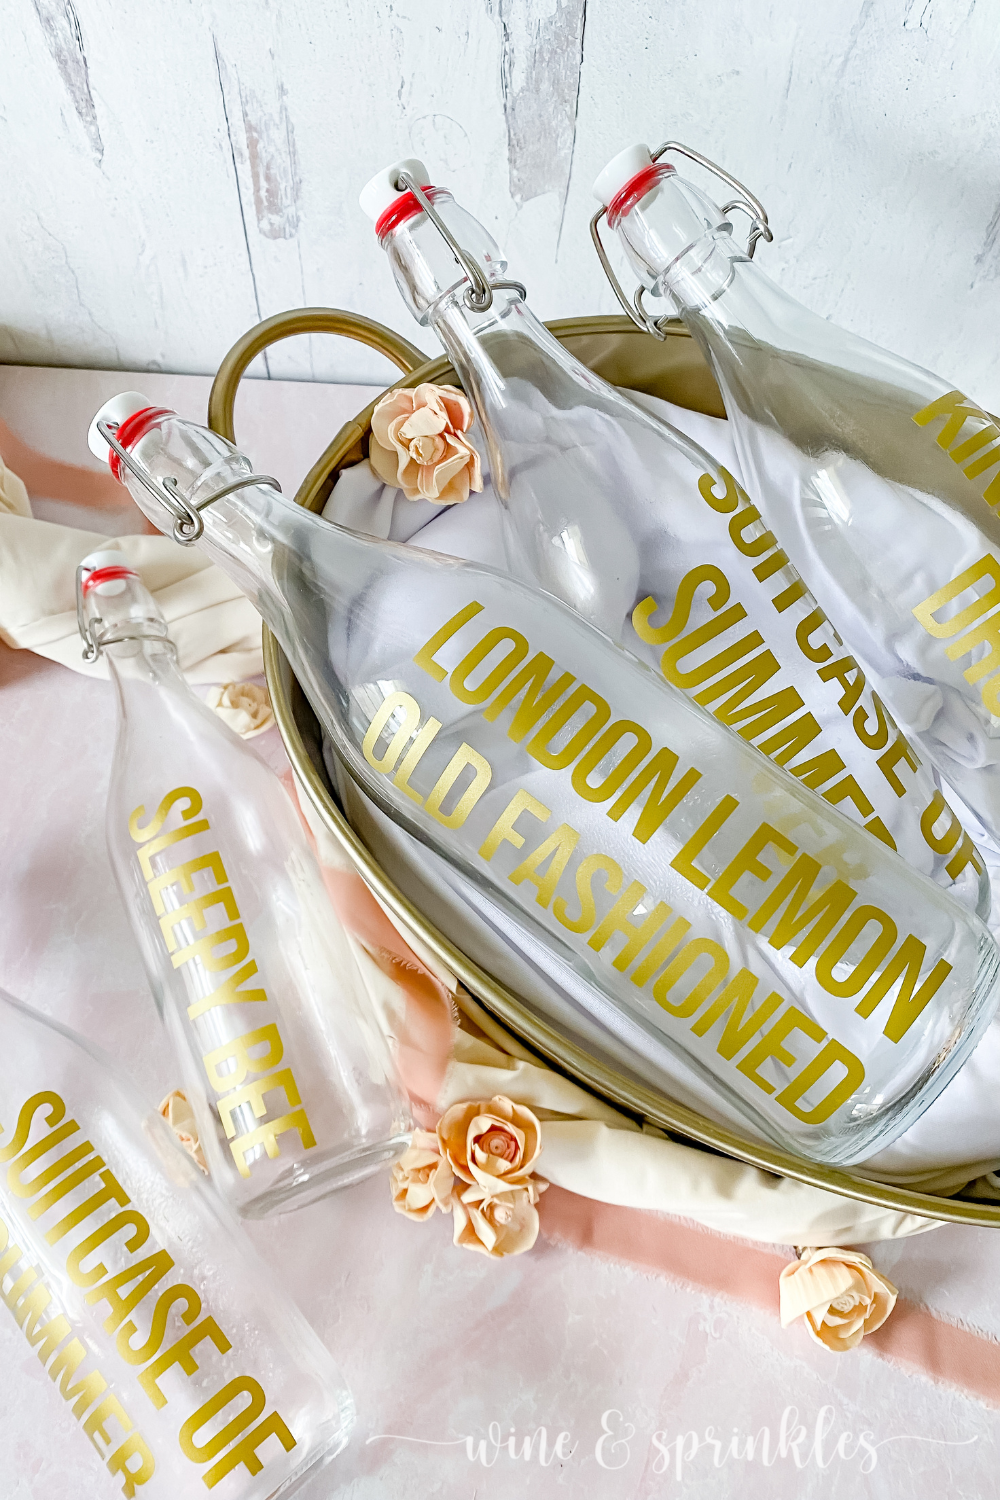
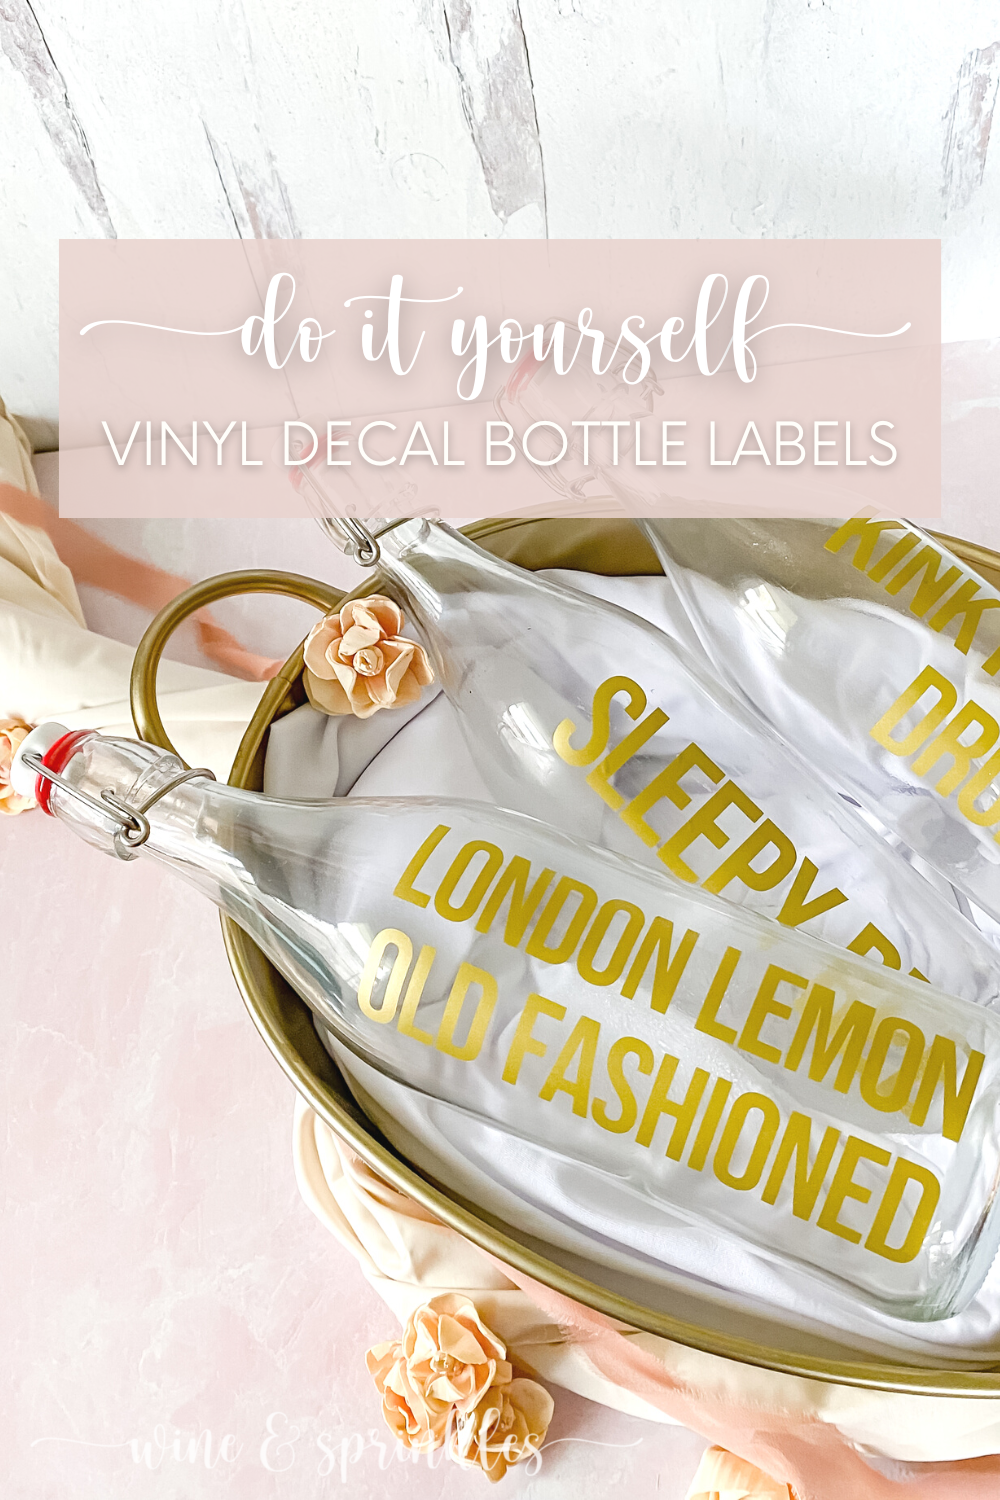
When it comes to keeping all my cocktails in order for my parties and events, my favorite method has to be these Vinyl Bottle Labels. If you’ve read any of my party posts you’ve seen them make an appearance, from my Goddess of Spring 30th Birthday to my most recent Karaoke & Cards Vintage Victorian Party, I always use these to label my various cocktails, making it easy for guests to find what drink the are looking for, while being able to remove them when the party's over and the bottles are being cleaned out for the next event. So for those that are new to the craft cutter lifestyle, I’m making this simple tutorial for making bottle labels, with the sizing, fonts, tips and tricks I use when creating them and other vinyl decals.
For making these labels as well as a myriad of other Vinyl and HTV Projects, there’s nothing I love using more than my Cricut Maker! I recently upgraded myself to the newer machines in the lineup, and just like the ones I’ve used for years they are perfect at their precise cuts! From baby onesies to tumblers to tank tops and shirts, I love creating different decals and using them in crafting gifts for my friends and family, as well as for my party signage and details!
Unlike most of my vinyl projects, I use Removable Vinyl for the labels in this project, which easily stays on in ice buckets throughout the night while also being the easiest to remove when it's time to change what cocktail goes in the bottles. I’m sure to use these labels again and again for my upcoming parties, being an easy label to make the night before an event and easy to customize to any cocktail I create!


SUPPLIES
BLANKS FOR DECAL TRANSFER
Glass Bottles: I use these swing top bottles for storing my cocktails, so I size my lettering to this size every time! However, these decals are easy enough that you can resize them to any bottle you might want to label. I find measuring them with a sewing tape is helpful when deciding on bottle decal sizes.
VINYL & TRANSFER TAPE
Removable Vinyl: Unlike most of my Vinyl Projects, this is the time when I prefer using removable vinyl, it's certainly sturdy enough to stay put for a night in an ice bucket and getting wet but can be removed cleanly after the event. I generally use this pretty gold removable vinyl for my labels, but almost any color works so you can choose your palette accordingly.
Gridded Transfer Tape: I love gridded transfer tape when doing any kind of lettering, it makes it easy to get your letters aligned and keep them straight when transferring to a more cylindrical surface like these bottles.
CRAFT CUTTER & ACCESSORIES
Craft Cutter: for cutting these decals as well as for many of my HTV, vinyl, and stationery projects, my favorite tool in my arsenal is my new Cricut Maker! I upgraded my setup last year, purchasing it and its Cricut Everything Materials Bundle for my projects this year, and so far I’ve loved every time I’ve used it!
Cutting Mat: For cutting this removable vinyl, either a standard or light grip mat will do the job, I’ve used both and not had problems with either.
Weeding & Decal Transfer Tools: for cleaning up the excess vinyl you don’t want to transfer and helping you transfer the vinyl you do!
SUPPLIES LIST:
[for 6 labeled bottles]
Swing Top Bottles x 6
Removable Vinyl x 1 - [12” x 12”]
Transfer Tape x 1 - [12” x 12”]

DIRECTIONS
PART 1: DESIGN, CUT & WEED YOUR DECALS
1. Start by creating a new project, then select the text button to create a text box on the screen. Type in the lettering you want for your bottle, making it two lines if needed, then choose the font you like best. I chose a font I own called hello honey that you can download here for personal use for my first set of bottles, but lately I’ve been using Bebas Neue, which can also be downloaded for free and is much easier to weed and read!
2. The max size you can make your bottle decals is 3” x 6.25”, so now it’s time to adjust your text so that all your lettering fits. Start by locking the dimensions using the padlock icon, then adjust the letter spacing to put your letters as close together as you can while making it legible, then change the size of the label to make it the maximum allowed length.Then, if you label is too tall, use the line spacing function to get the lines closer together and remaining within the maximum height.
Note: If you cannot get your letters spaced close enough to be under the max length or height, move them as closer together as you can reasonably make them, then go back into the sizing and change the largest dimension to the max decal size, so it can stay as close to the other decals as possible.


3. Once your letters are spaced to your liking, if your text is a script cursive style font, like hello honey, use the combine function from the lower right hand toolbar to make your text a single cut curve. Repeat the process for all your labels, then select Make it to cut out your decals.
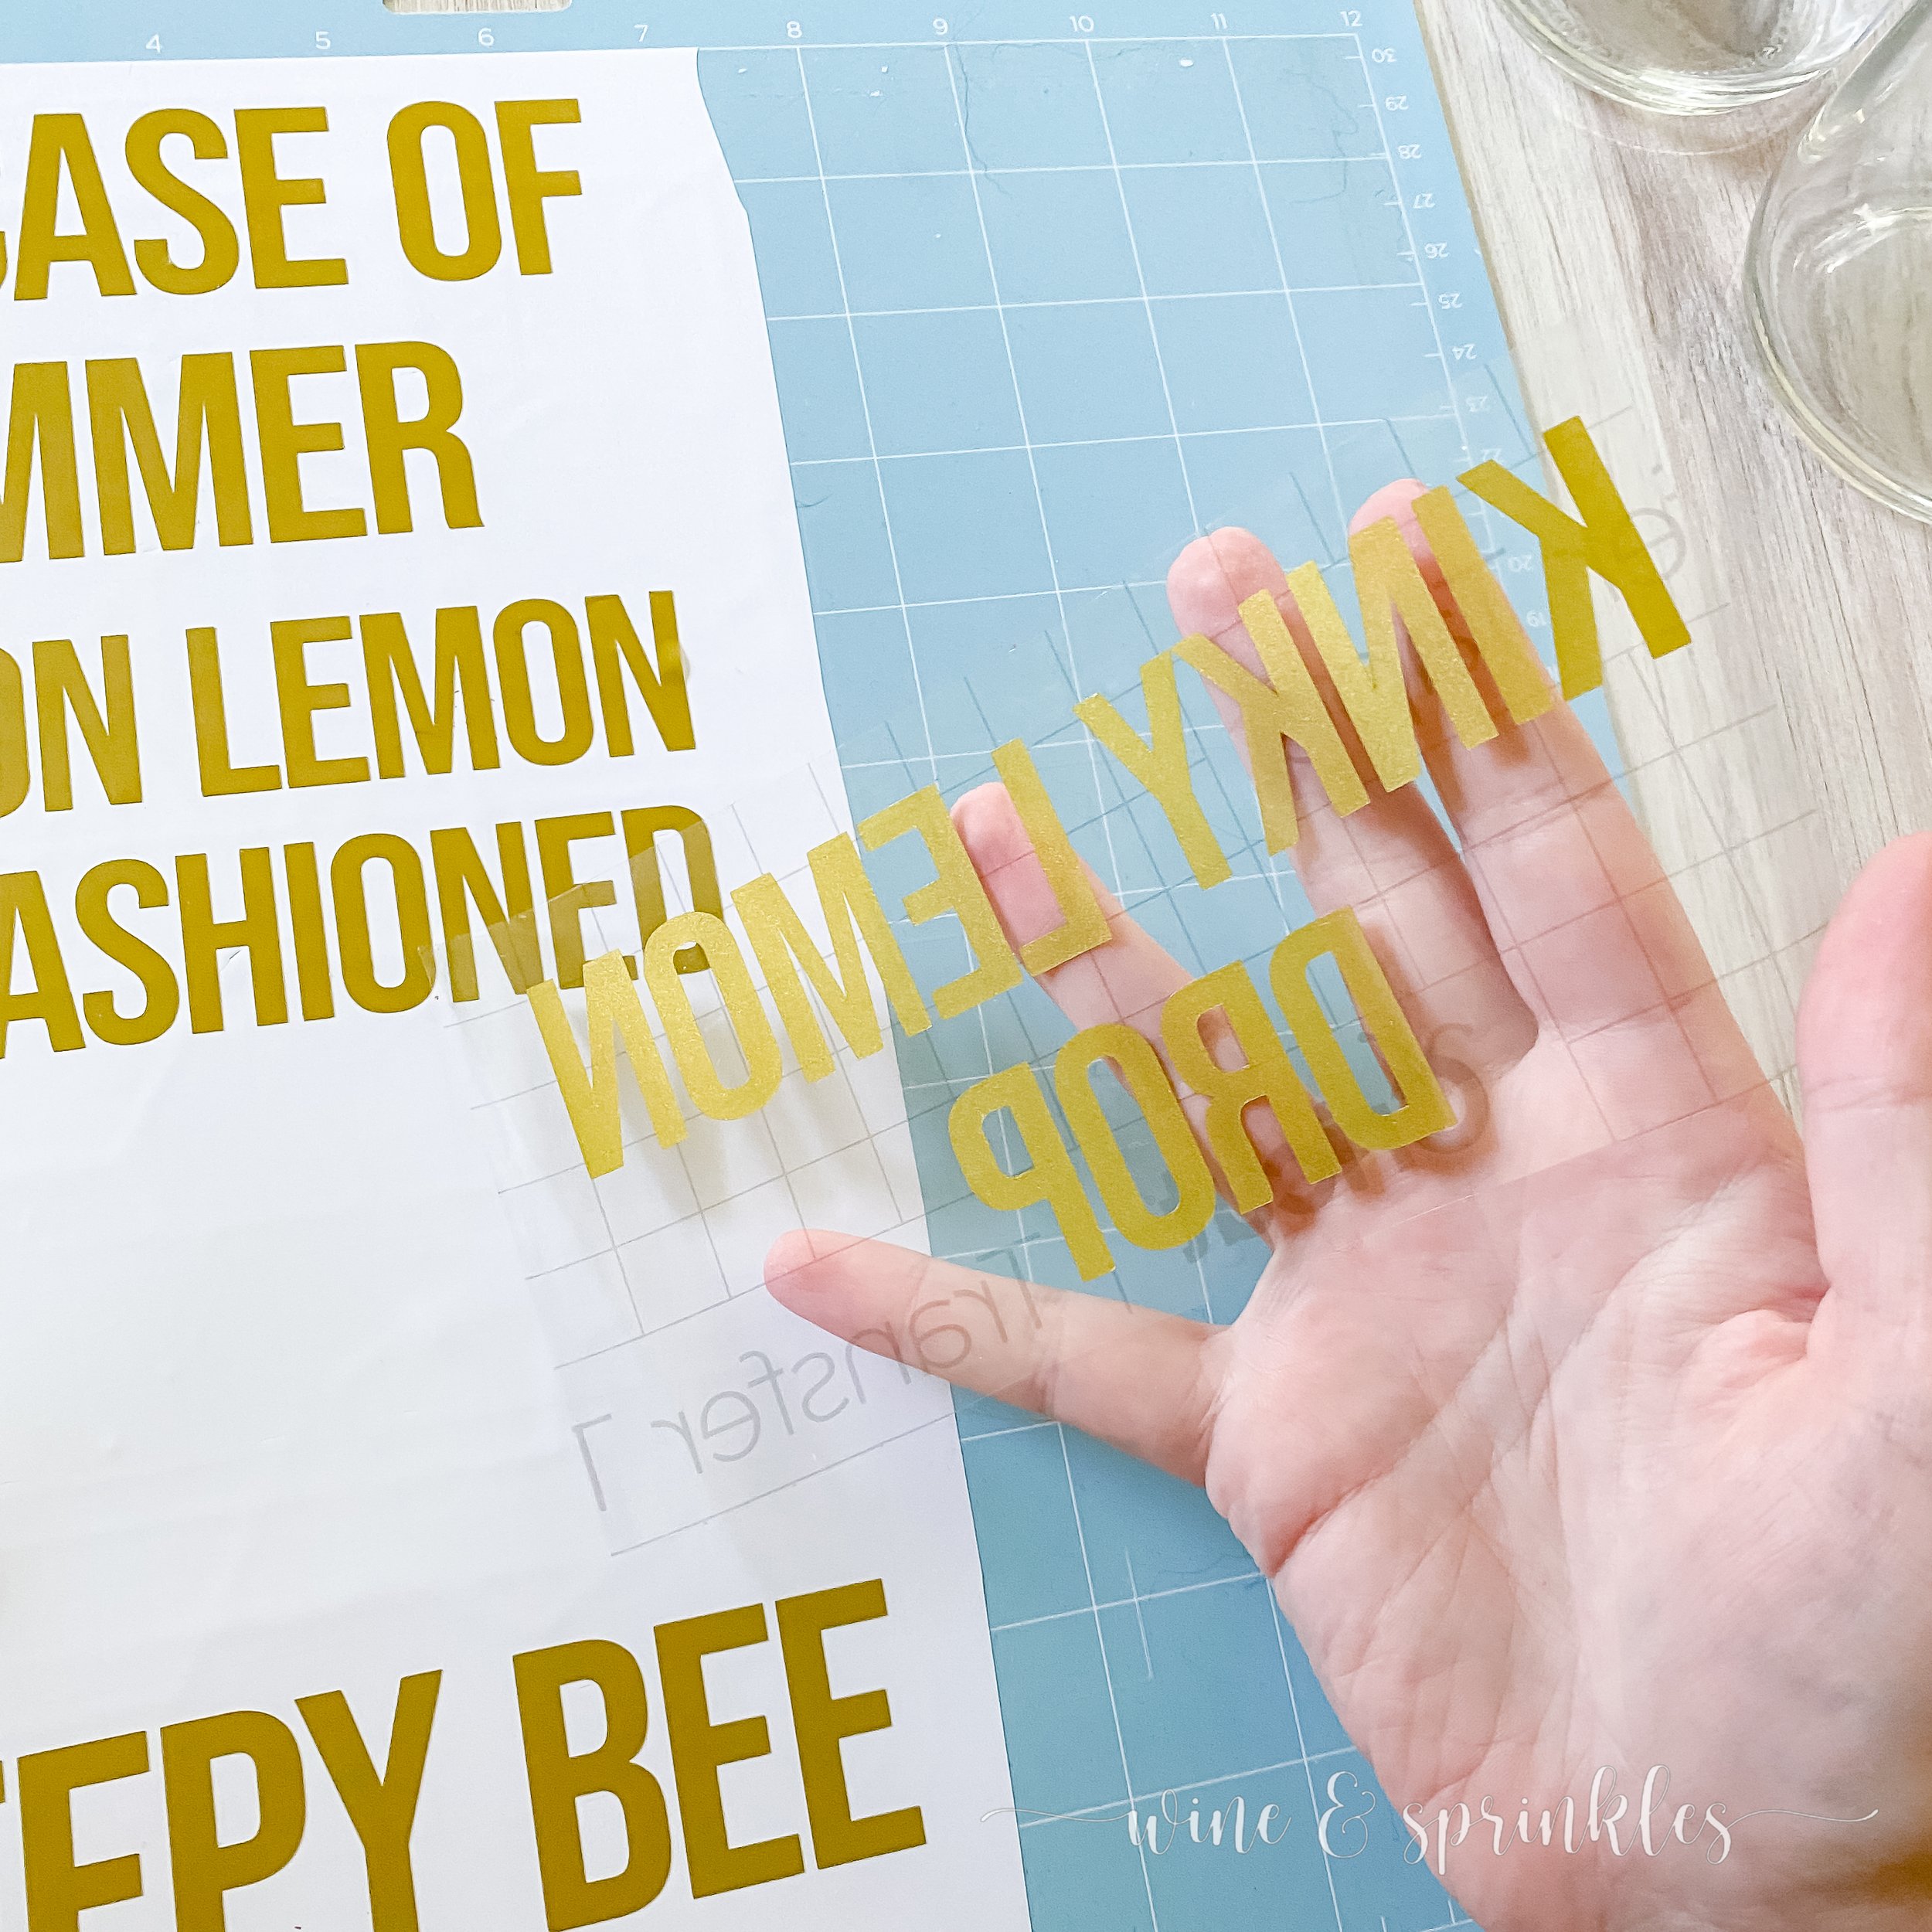
Cut out on removable vinyl with the correct material selected in the software and follow its prompts to load and unload your material. Weed away the excess vinyl, then cut the backing so each label is separated to transfer to the bottles.
PART 2: TRANSFER YOUR DECALS
4. Once the designs are cut, weed away the extra vinyl and cut a piece of transfer tape to 3.5" x 7". Cut away any excess backing from the vinyl design and smooth transfer tape over the design, aligning it with the text and gridlines, with one set of the 0.5” blocks to the right of the decal. Using the smoother tool, smooth the tape over the vinyl, removing any air bubbles. Remove the tape and decal from the backing, making sure that the entire decal transfers to the transfer tape.


5. Now, transfer the design to your bottle. Arrange the design such that the short right side of the transfer tape is along the bottom edge of the bottle, as shown in the photos. Starting by pressing along the center of the transfer tape outward, trace the letters to smooth them onto the bottle, removing any air bubbles. Remove the transfer tape, leaving the design on the bottle.
6. Use the smoother tool or your finger to retrace the letters after removing the transfer tape to smooth out any additional air bubbles. Repeat with the remaining bottles.


Being both useful for cocktail labeling at home bars as well as great practice for transferring decals to curved surfaces, these labels are an easy project that anyone can use to start working with their craft cutter and is a great way to get into vinyl labeling of all kinds, from tumblers to wine glasses! You’re sure to see these labels again and again for my own parties, so start crafting your own cocktails and display them to your guests in style too!
SEE OUR RELATED POSTS HERE:


OUR MOST RECENT BLOG POSTS:


OUR PINS FOR THIS POST: