This post contains affiliate links, meaning that if you click on a link I will recieve a small comission. This costs you nothing extra and I only promote products I use and love! You can read our full disclosure here

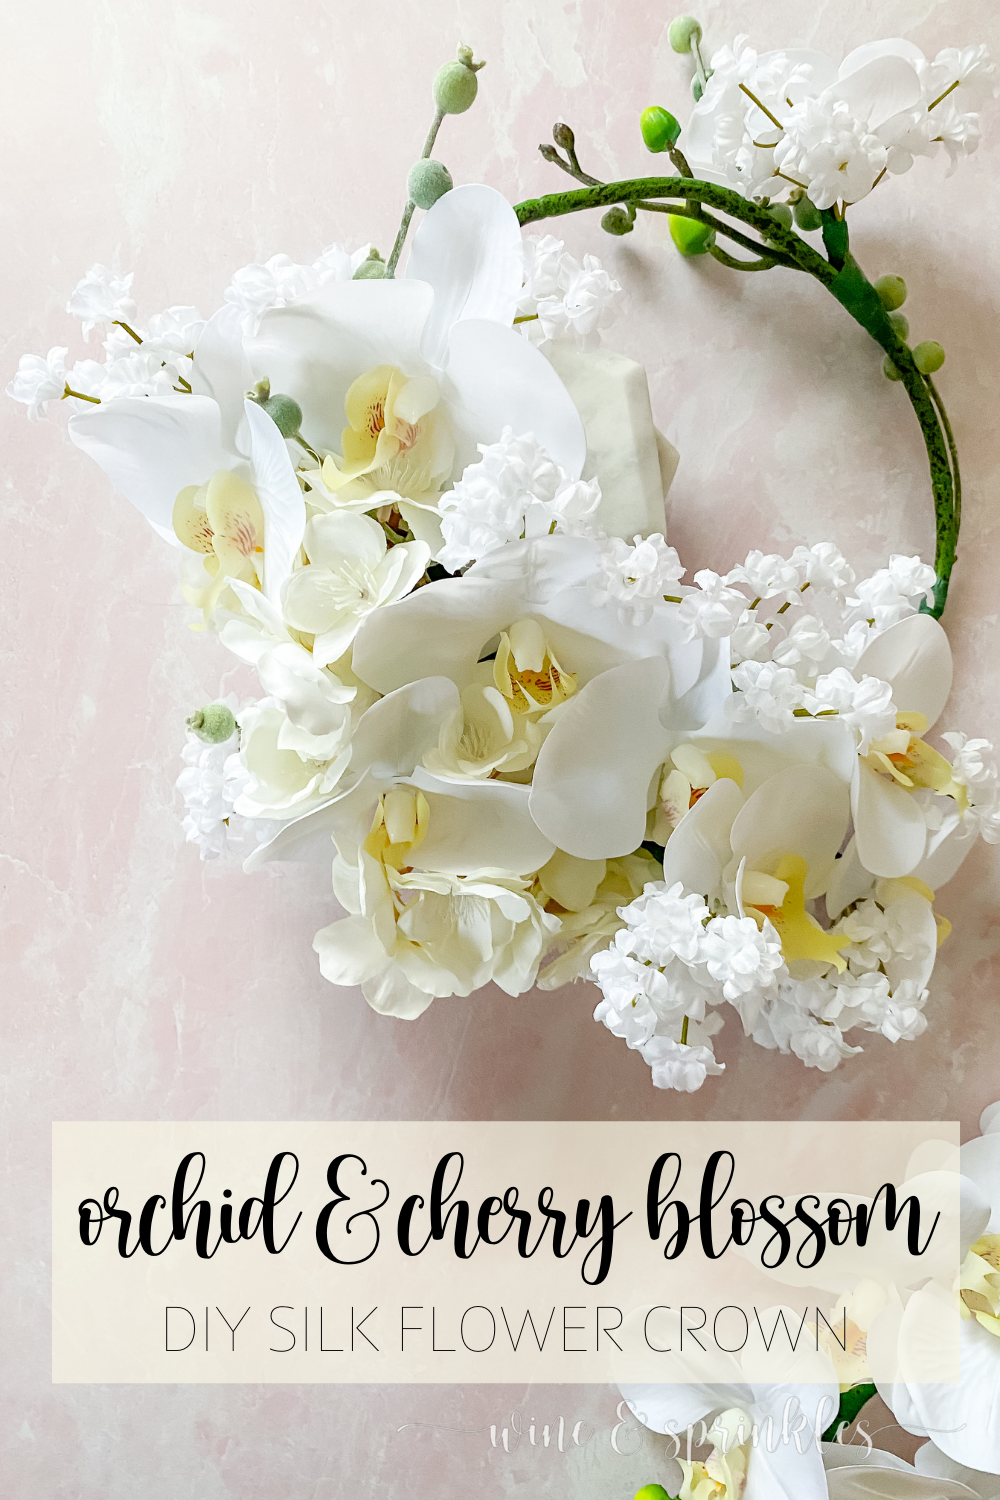
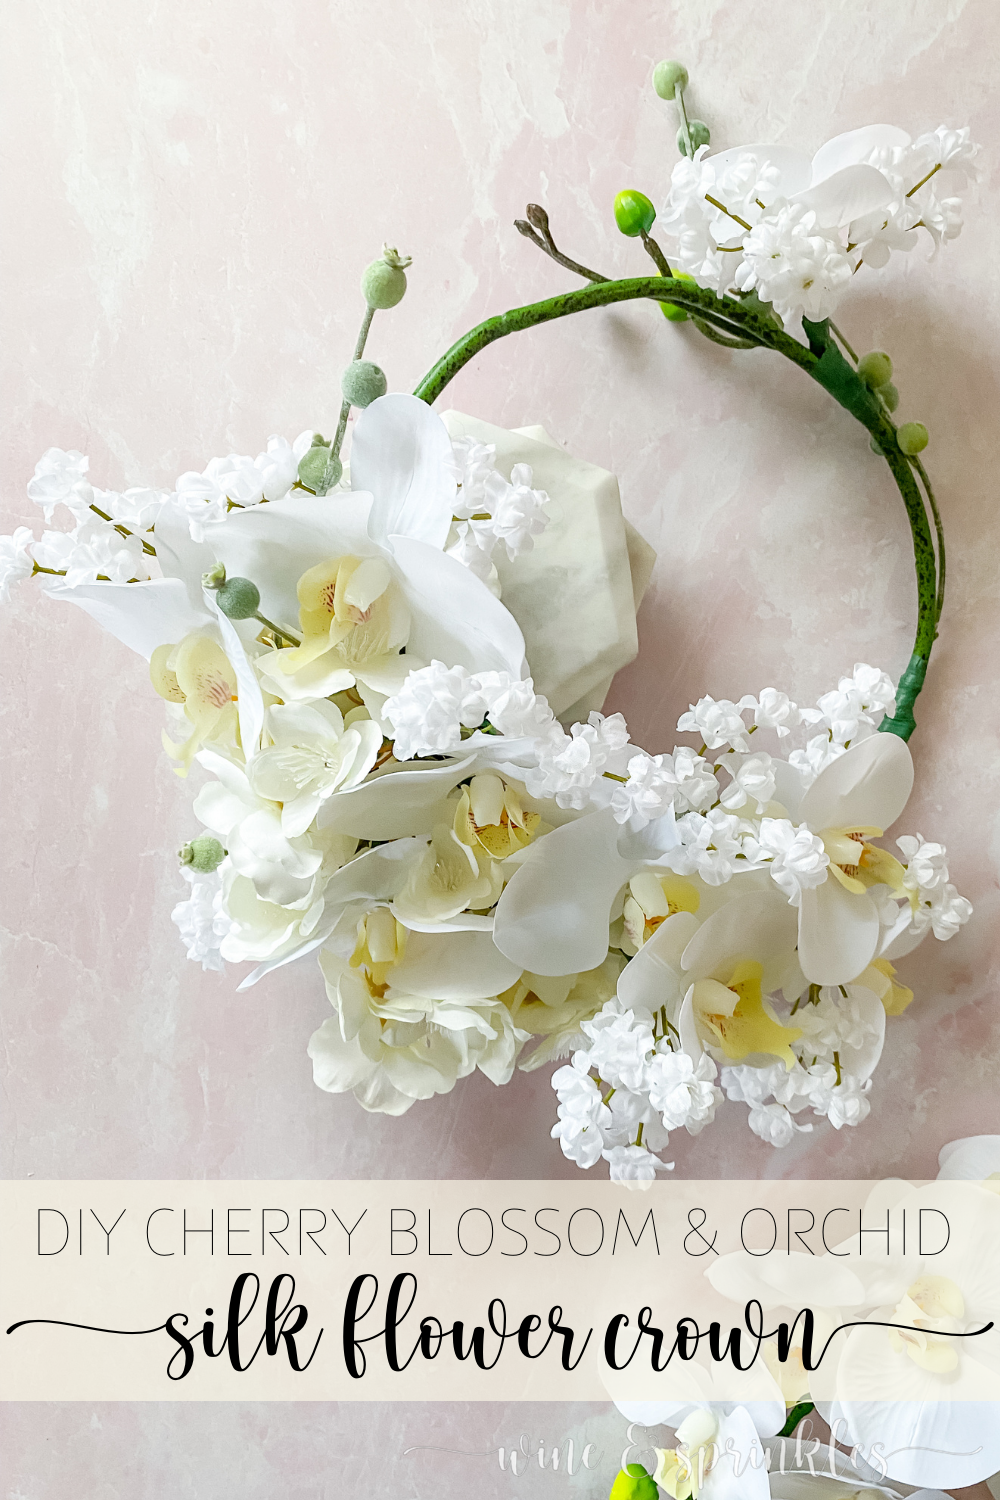
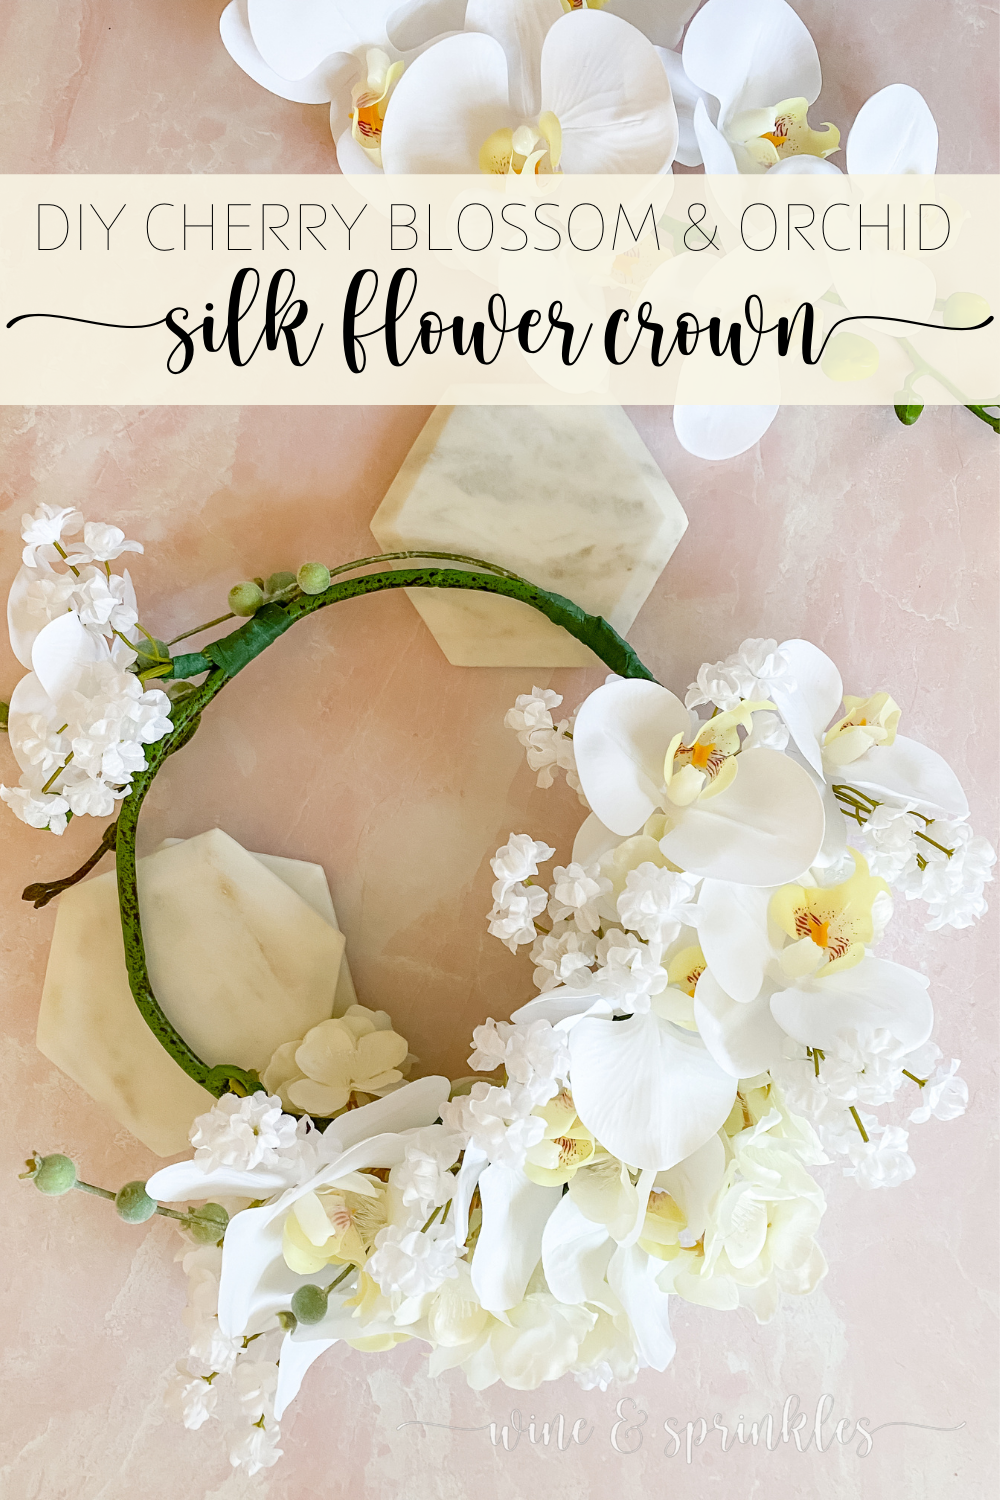
When one of my best friends and favorite people asked for a crown for her 30th birthday trip, I knew I wanted to make something island inspired and special! So when my husband surprised me with a new pet orchid, which just so happens to be my friend’s favorite flower, it served as inspiration for making this Island inspired silk flower crown for my friend’s birthday trip in the Bahamas! So now about a year after my first flower crown creation, I crafted a new beauty for my friend’s 30th birthday, this Orchid and Cherry Blossom silk flower crown.
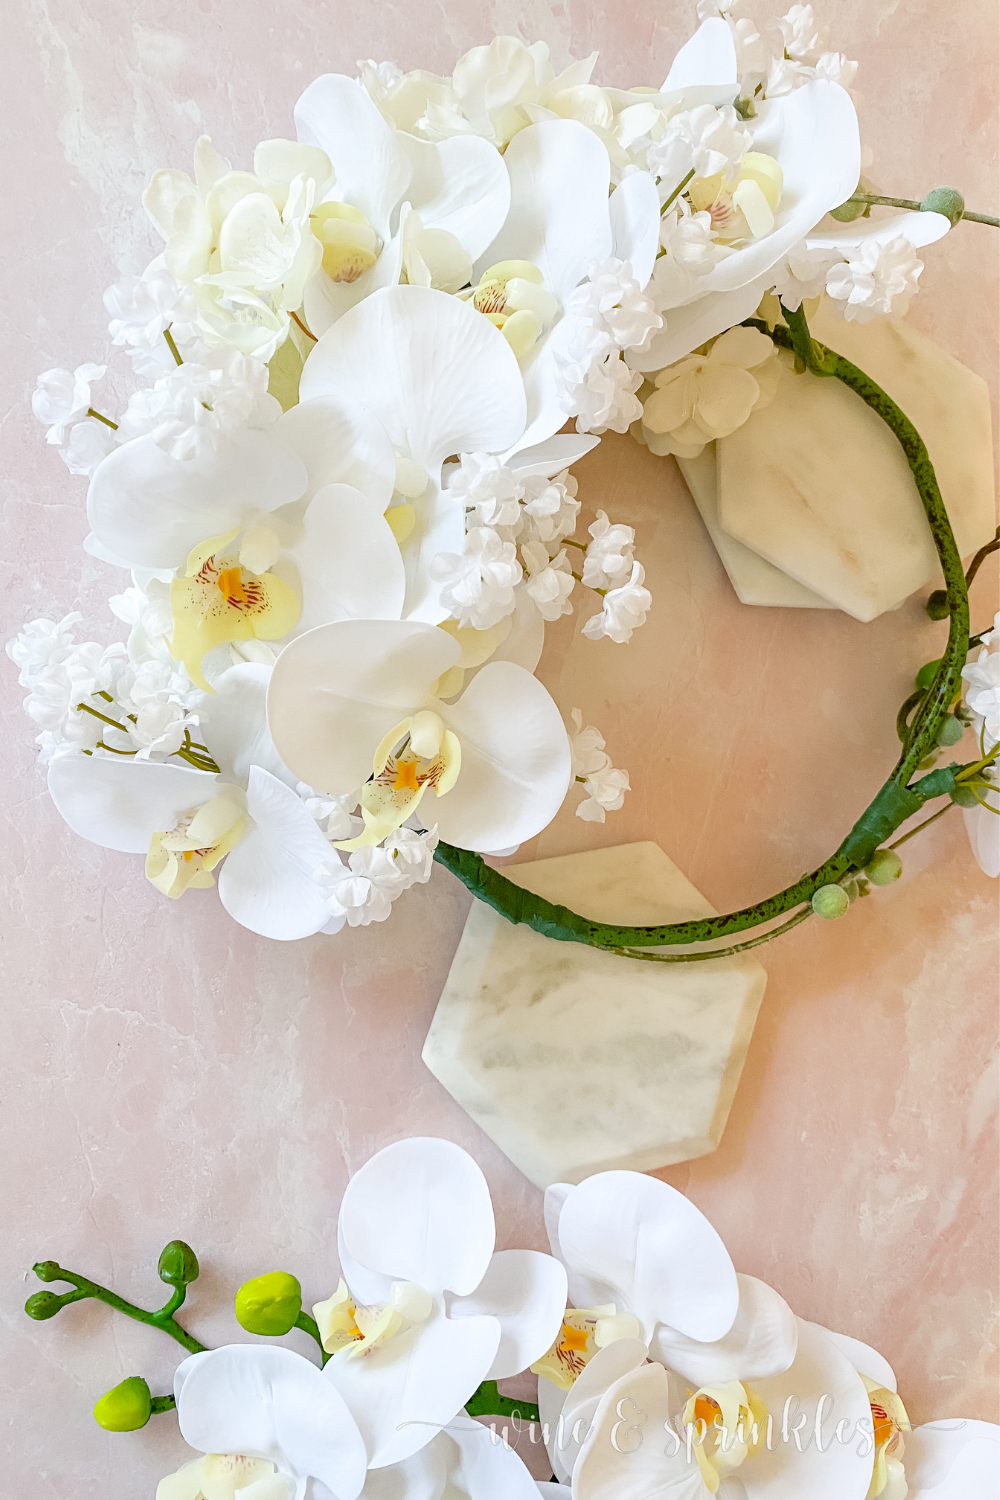
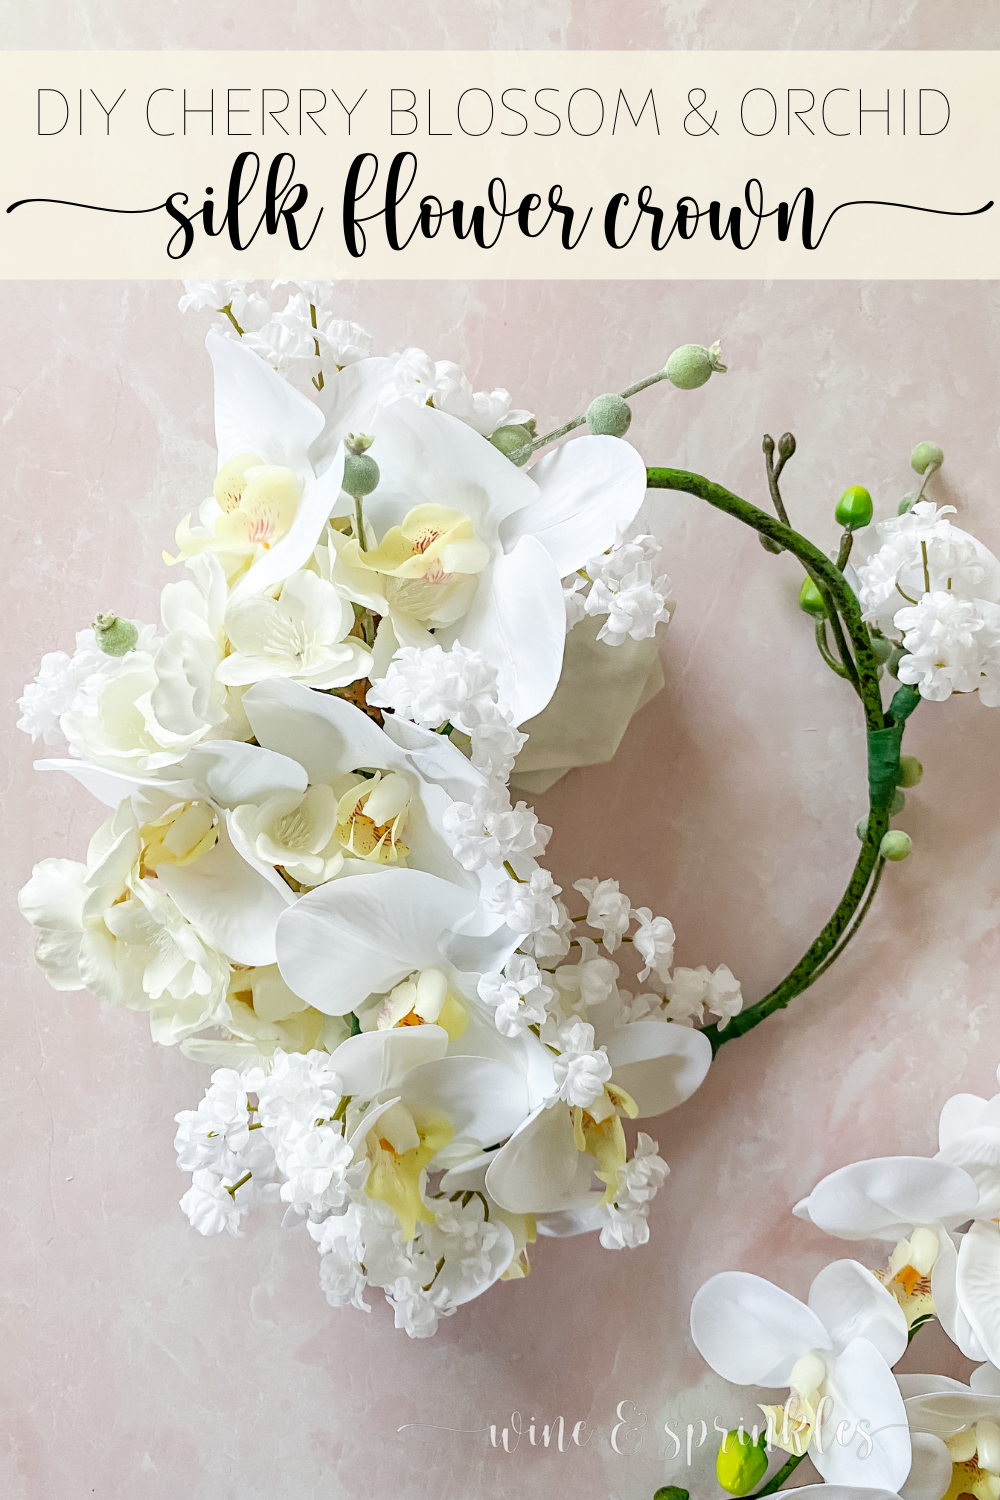
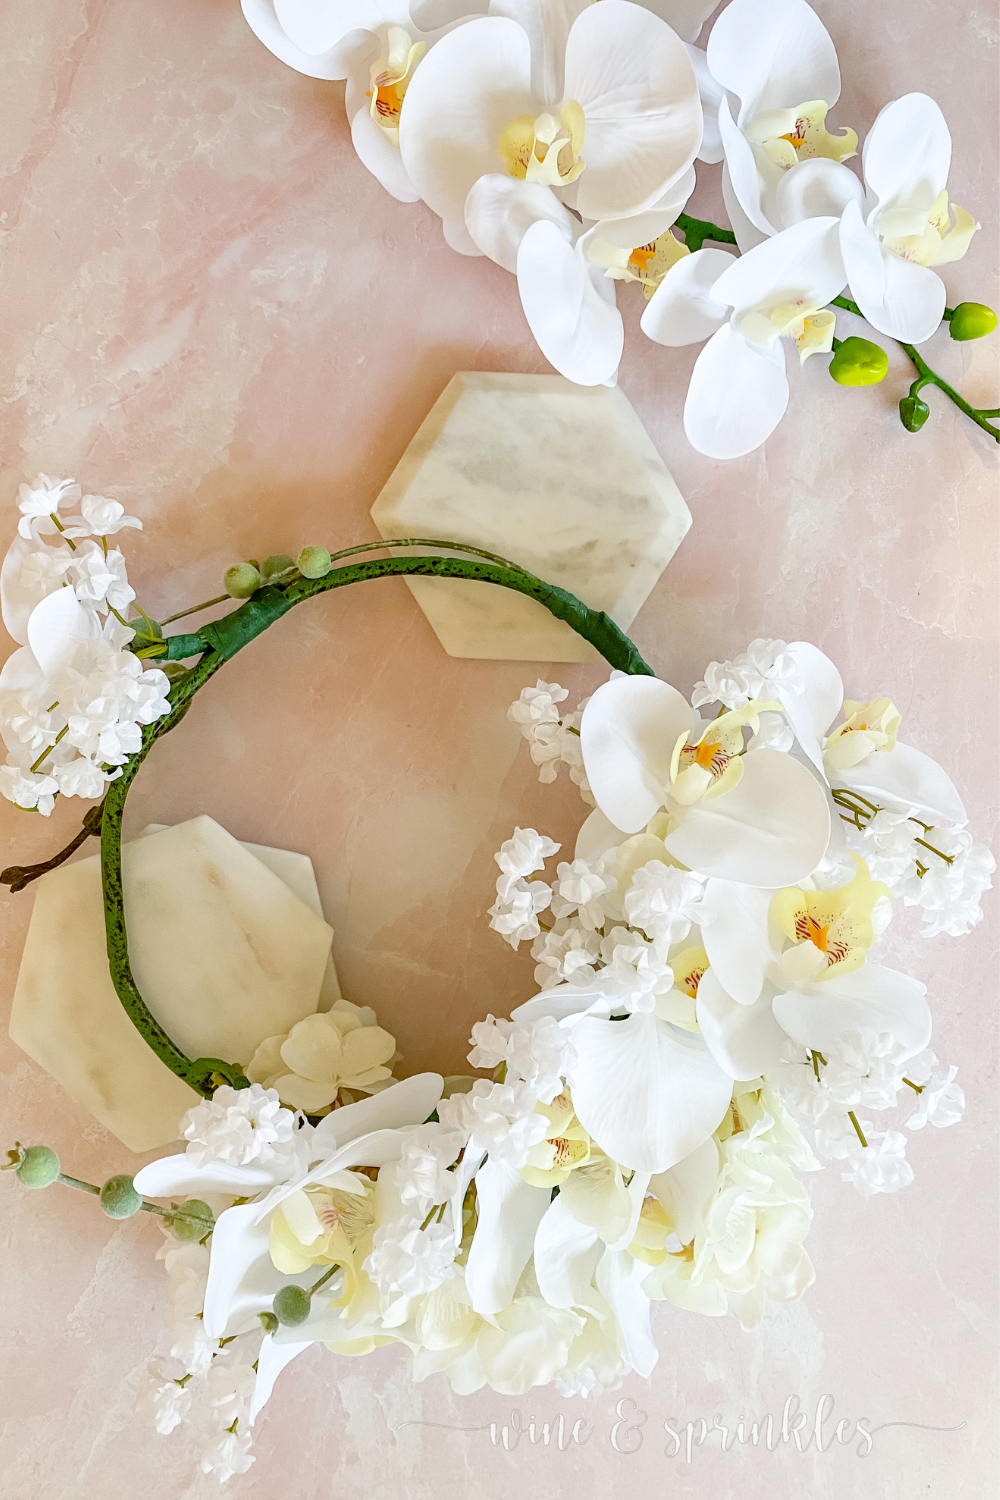
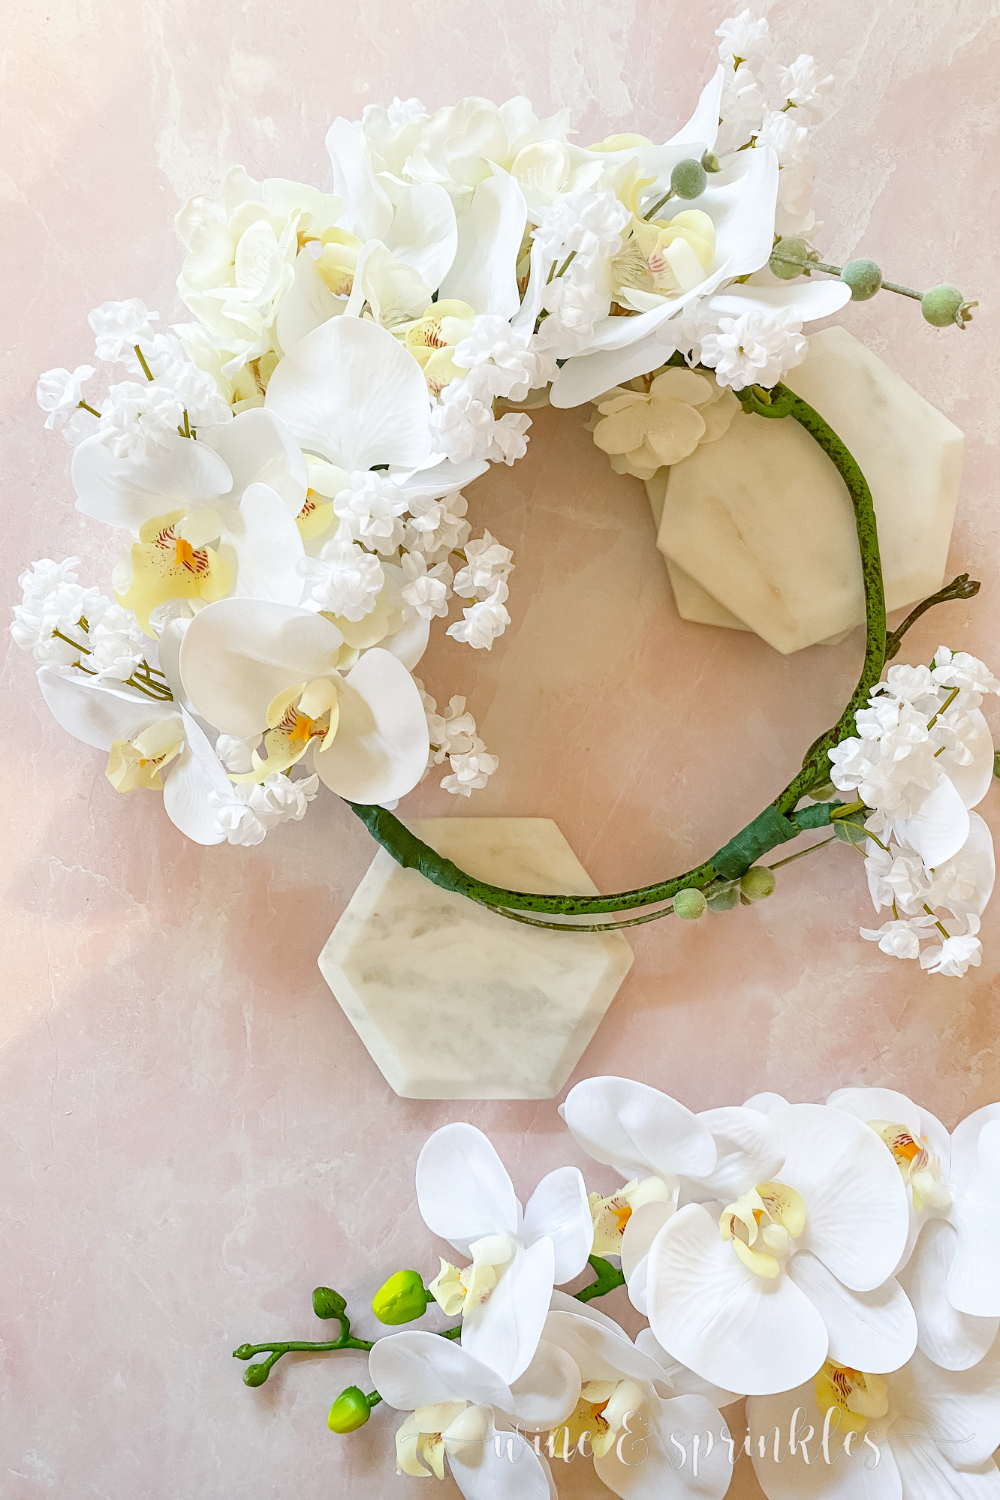
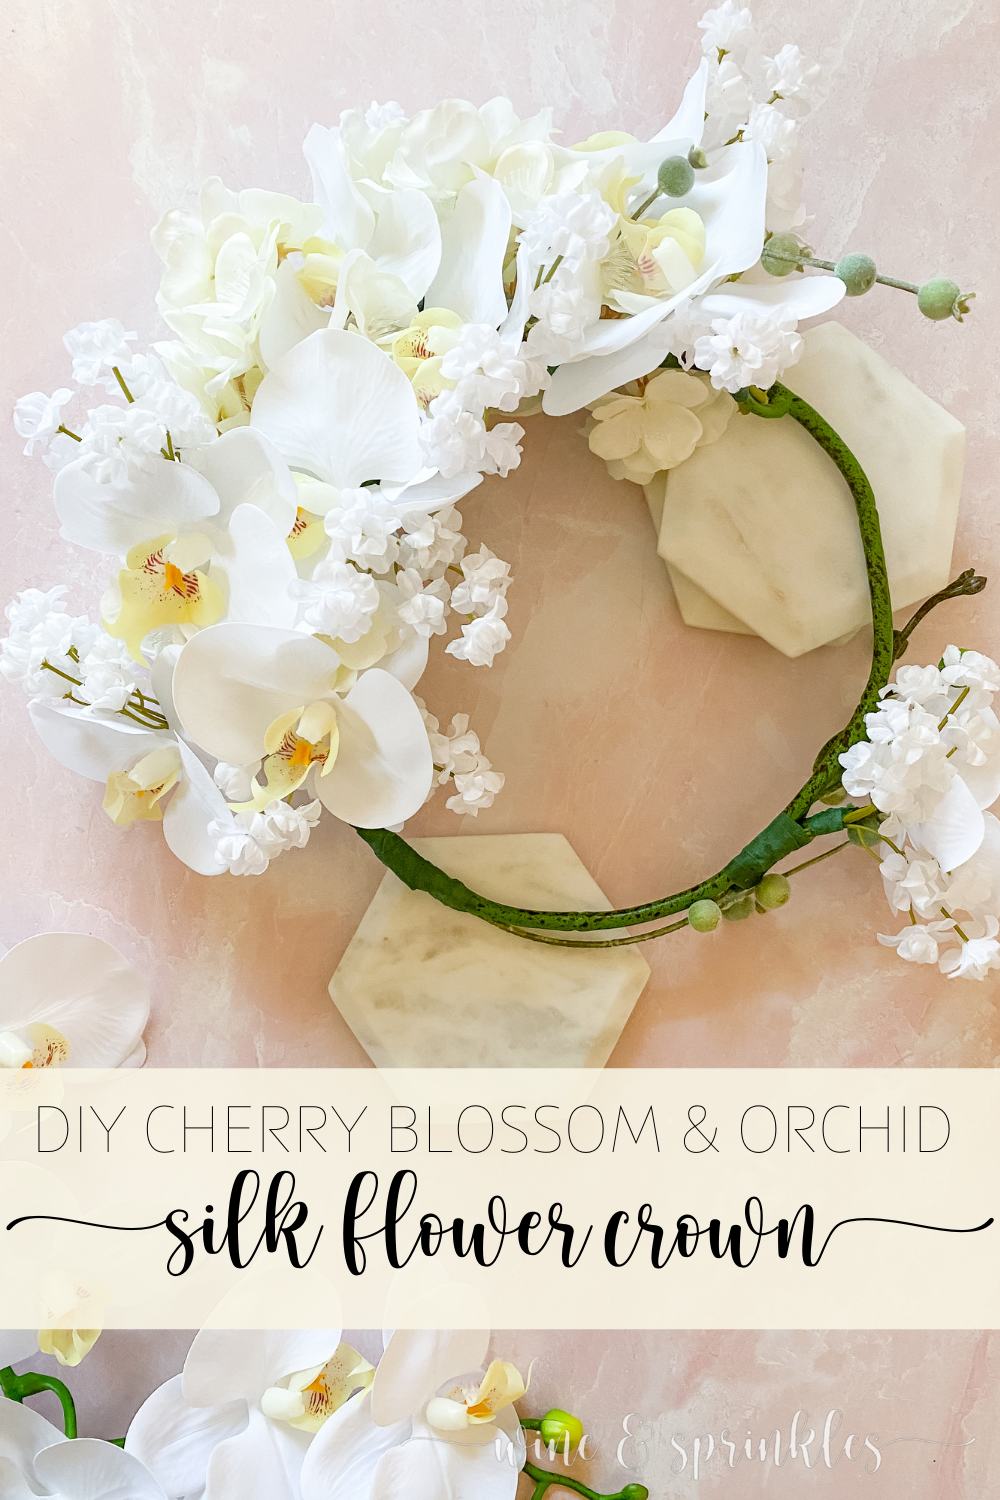
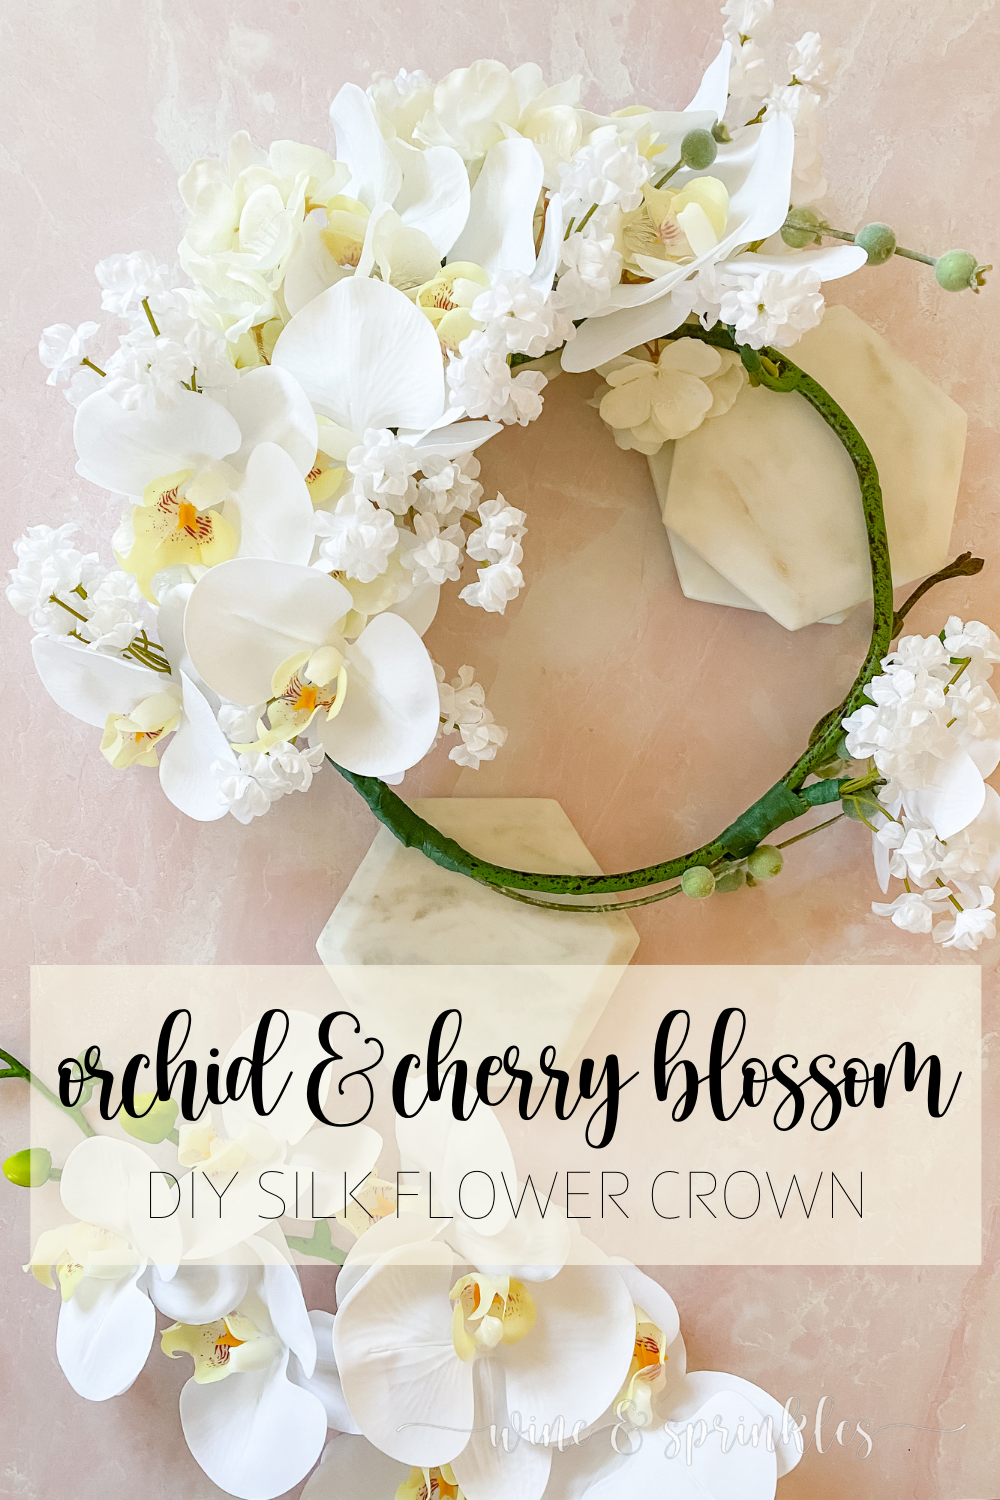
While my first flower crown was inspired by my favorite flowers of Spring, this lady was made with island blooms and my friend’s favorite flowers! A long orchid branch forms the base of this beautiful crown, with some Japanese inspired cherry blossoms for adding volume and a cascading effect down the side. Along with these, I included some of my extra sprigs of babies breath and berry pods from my Silk Eucalyptus Flower Garland leftovers, and this beauty was ready to bedeck the head of my birthday girl!
While I went to Amazon for a quick delivery of the white orchid branch I used for the base of my crown, all the support flowers were leftover cuttings from my Goddess of Spring Party’s flower arrangements and projects; which I bought from one of my favorite online flower companies, Afloral! I highly recommend these blooms; they are great quality, come in so many colors and types of flowers, and I’ll certainly be using my extras for crowns like these and other Silk Flower Garlands and Centerpieces in the future! To learn more about Afloral and all their beautiful products, check out my review on what I’ve bought from them so far here!
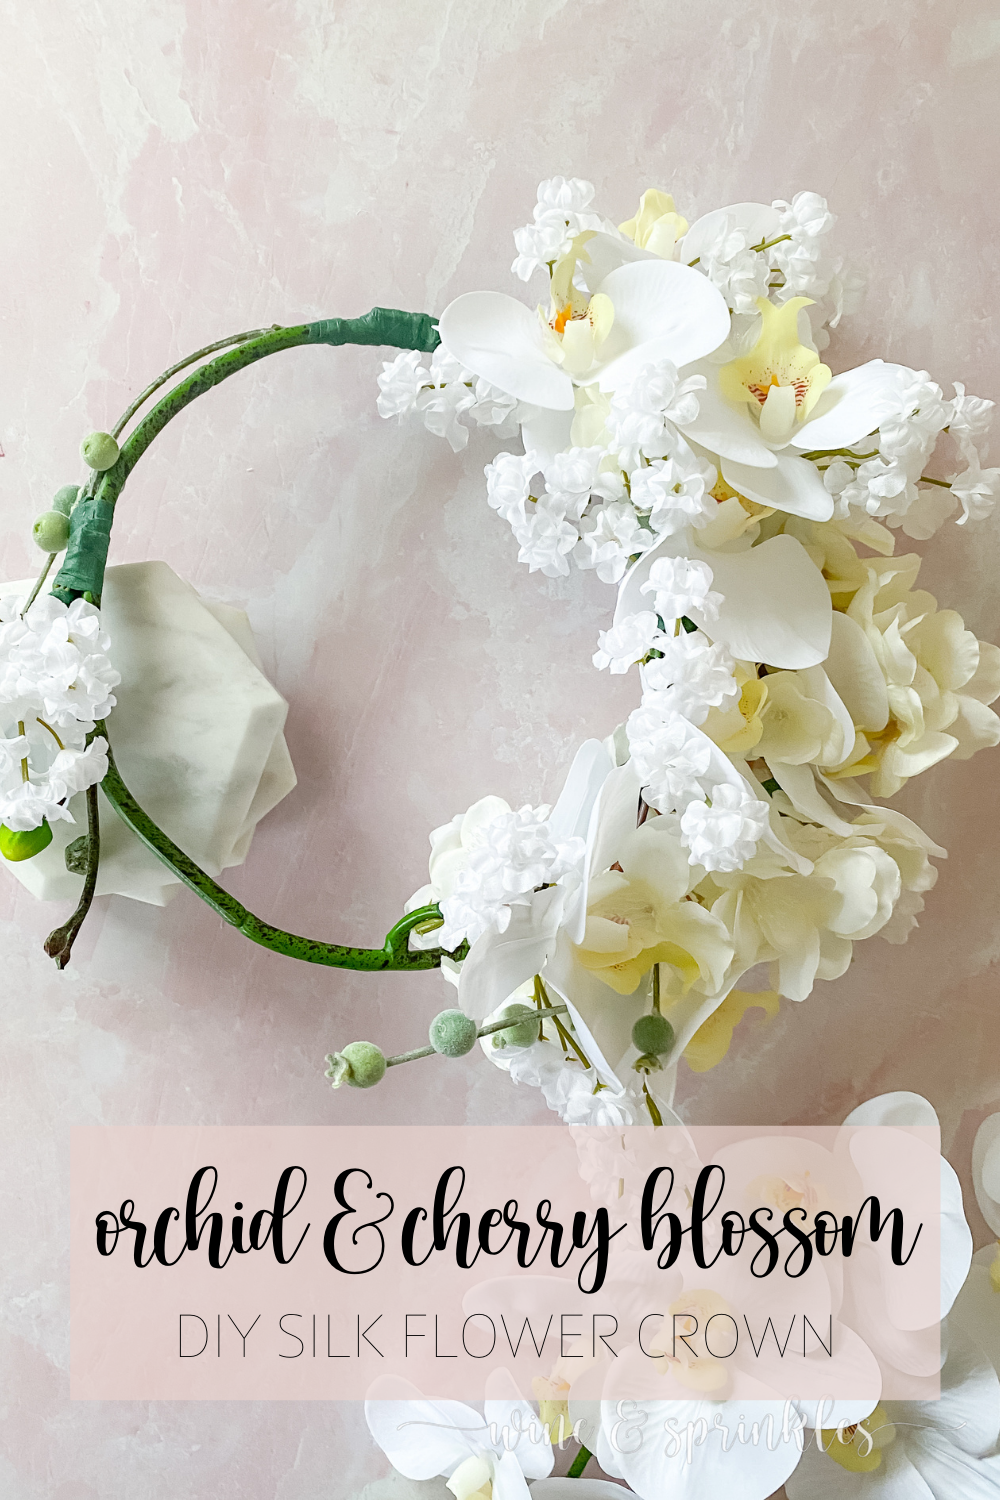
Similarly to my Peony & Cherry Blossom Crown, I made the design for this asymmetrical and with my smaller silk flowers building out from my orchid branch base crown, all securely wrapped in floral tape. Unlike my first crown though, I experimented with breaking up the orchids on my branch so I could form a floral cluster to attach to the crown as a single piece to arrange behind the ear, while also attaching small bunches of flowers to each orchid, adding the cherry blossom branch last to be the filler flower. The result was this gorgeous girl, a perfect crown for the island princess!

SUPPLIES
MAIN FLOWERS
Orchid Branch: the star of this crown is definitely the white orchids, and this branch proved to be the perfect base for making this crown. While my flowers came in a set of two, you only need one branch for each crown, even with cutting the end flowers for the side fascinator. While I got my stem from Amazon this time, I also recommend looking at all the beautiful Orchids on Afloral’s website to pick your perfect orchid base!
Cherry Blossom Branch: I’m using a piece that's about 10” long off of one of the branches I used making different flower arrangements for my Goddess of Spring 30th Birthday to tuck into the orchids, though the branches I ordered originally are much larger than this little snippet for flower filler. These long branches also make for excellent crown bases, so save the extra to turn into a spring style flower crown like the Peony & Cherry Blossom Crown I made!
SUPPORT FLOWERS
Babies Breath: this filler flower added some lovely petite blossoms to adorn each orchid bloom, as well as being an affordable floral option for so many of my crowns and centerpieces! Each stem of babies breath makes 9 clusters of blossoms, which I used two to three for each of my orchids, so you’ll need 2-3 stems of this.
Berry Pods: these whimsical pods added just the little pop of green that I needed! While they are harder to find these days, I linked all the different green fillers from Afloral, where I originally purchased these, to pick berries or another unique filler to personalize your crown!
TOOLS & OTHER SUPPLIES
Floral Shears: for trimming your stems
Floral Tape: for taping your crown and flowers together
Sewing Tape: to measure your head and make your crown the right size!
SUPPLIES LIST:
[for 1 flower crown]
Orchid Branch x 1
Cherry Blossom Branch x 1
Babies Breath x 3
Berry Pods x 2
Floral Shears x 1
Floral Tape x 1
Sewing Tape x 1

DIRECTIONS
PART 1: CREATE THE FLOWER CROWN BASE
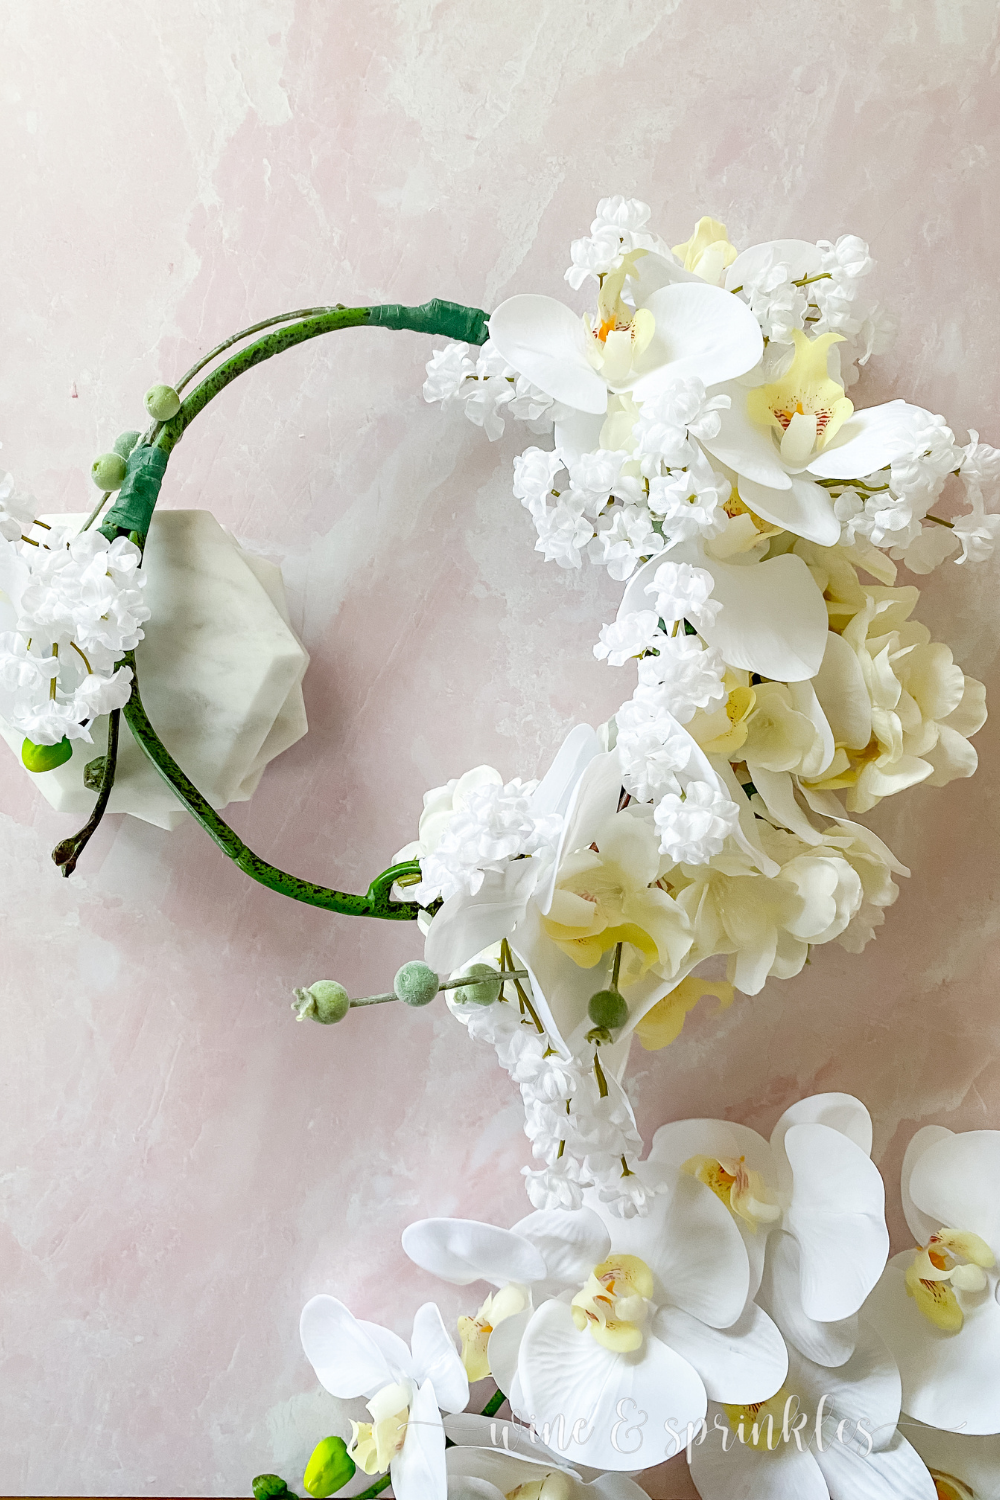
1. Using silk flower shears, cut the end of your orchid branch at the notch where it meets the next flower up, creating a small stem that you can use for attaching to the side of the crown later. Set aside the rest of your long orchid branch to create the crown base; then trim the stems on your support flowers and branches so that they are about 1-2” long, leaving this to use for securing them to your crown. Trim your berry pods or greenery two be at least three separate sprigs, while trimming your babies breath to be clusters of three to four blossoms each.


2. Using a sewing tape, measure around your head where you would like the flower crown to lay. Taking your orchid branch, arrange the stems so they overlap a couple inches and, when taped together, their overall circumference of your crown base is the same as your head. I found this to be easiest by measuring my head, then using the sewing tape to measure the branch from the base of the flower down the stem. Hold the end of the stem where you measured your head circumference to be, then bring it to meet the flower side of your crown.
Bring the ends of your branches together to form a ring, then secure with floral tape along where the stem overlaps to create the base of your crown.


PART 2: ARRANGE & ATTACH SUPPORT FLOWERS


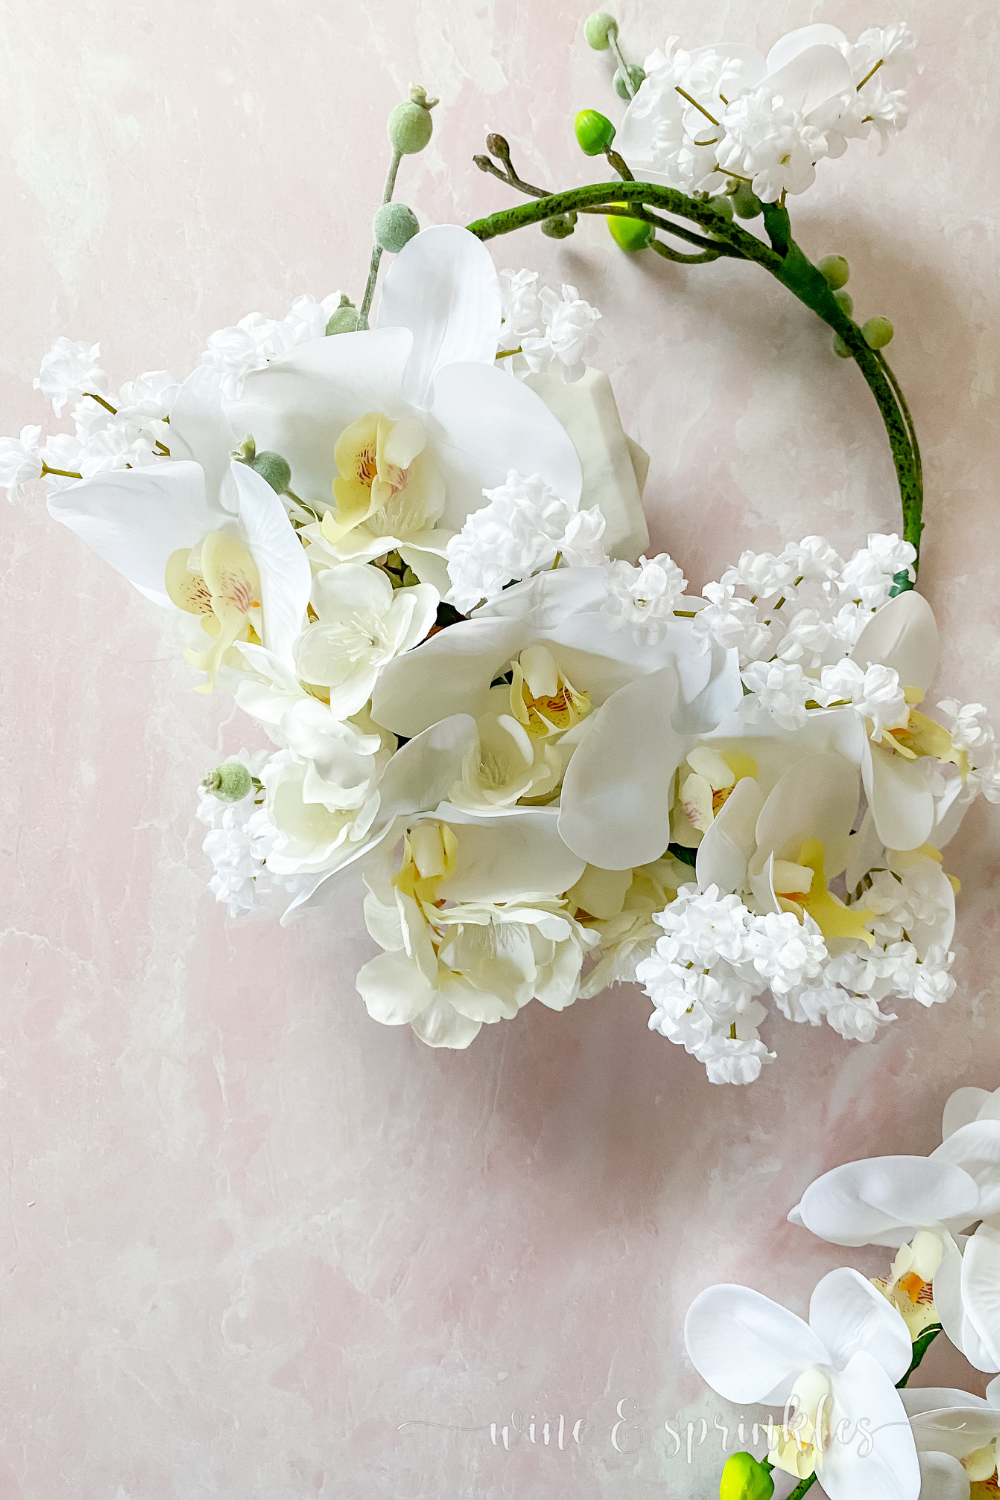
3. Now it’s time to start adding your flowers to the crown. Generally, I start with bigger flowers and work in but in this case, I wanted to add the cherry blossom branch in last so that I could arrange my small flower pieces around the orchid blossoms and use their stems to tape these accents; then use the cherry blossoms for the final fill in, floral taping, and securing.
Start with the babies breath blossoms, floral taping small clusters of them around each orchid blossom. I used two to three clusters of 3-4 blooms that were leftovers from other flower projects per orchid, working down the crown until each blossom has a small floral fan of tiny blossoms behind it. Depending on where the orchids were facing on the crown, I taped these blooms so that they were always fanning away from the orchid cascade, without blocking any orchid faces.


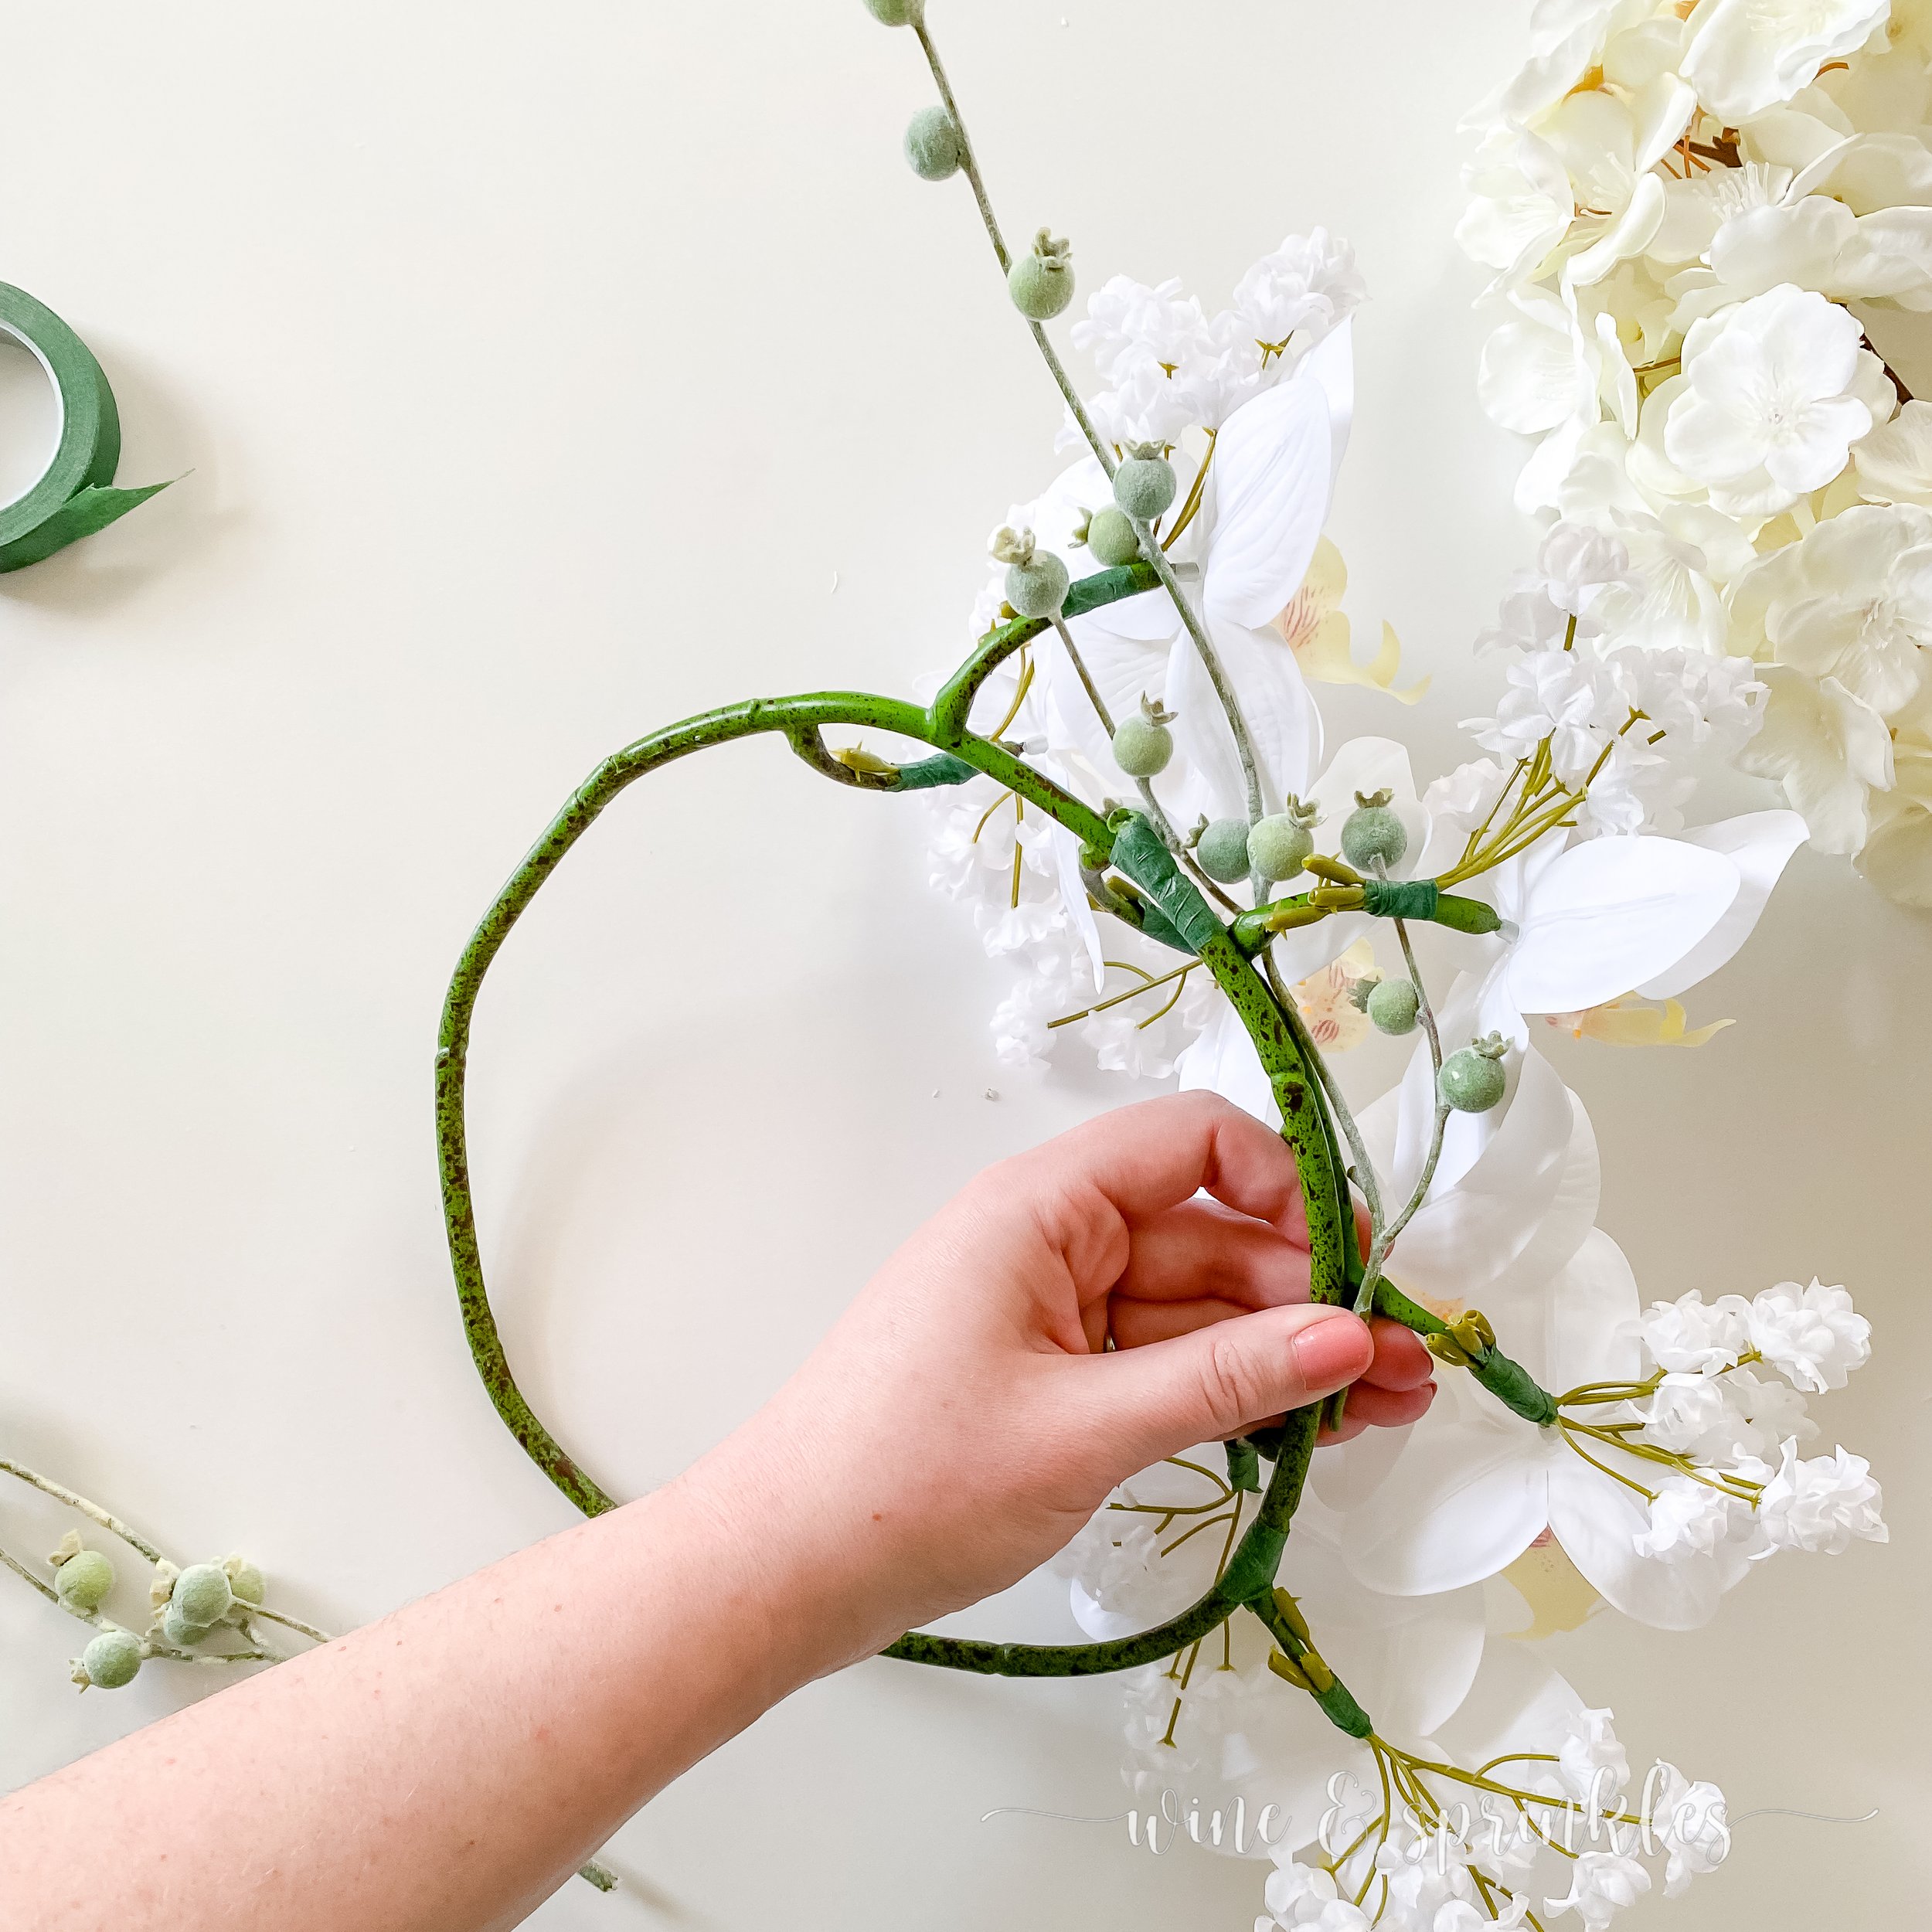

4. Next, take two of your berry pod sprigs and weave them along the top of your flower crown base, taping each in a couple spots along the crown so that they follow the shape of the flower cascade, popping out whimsically out towards the top of the crown. These berry pods do a great job of adding a little extra interest to the top view of the crown, but are even better at framing the face from the underside of the crown!


5. Finally, it's time to add your cherry blossom branch. Arrange the branch to go along the outside edge of the crown, tucking the branches and flowers on either side of the orchids, wrapping it around the top side of the crown. Tape the branch with floral tape as you go to secure it. Once the branch is secure, tuck and fluff the cherry blossom clusters around the orchid face to fill in empty space and complete the base portion of your crown. Tuck and wrap your berry pod and blossom branches together, so that the orchid faces are all showing with the support flowers fanning out around them. I used a little extra floral tape on my cherry blossoms and berry pods so they curved to the crown better, use your own creative eye to get them just right!

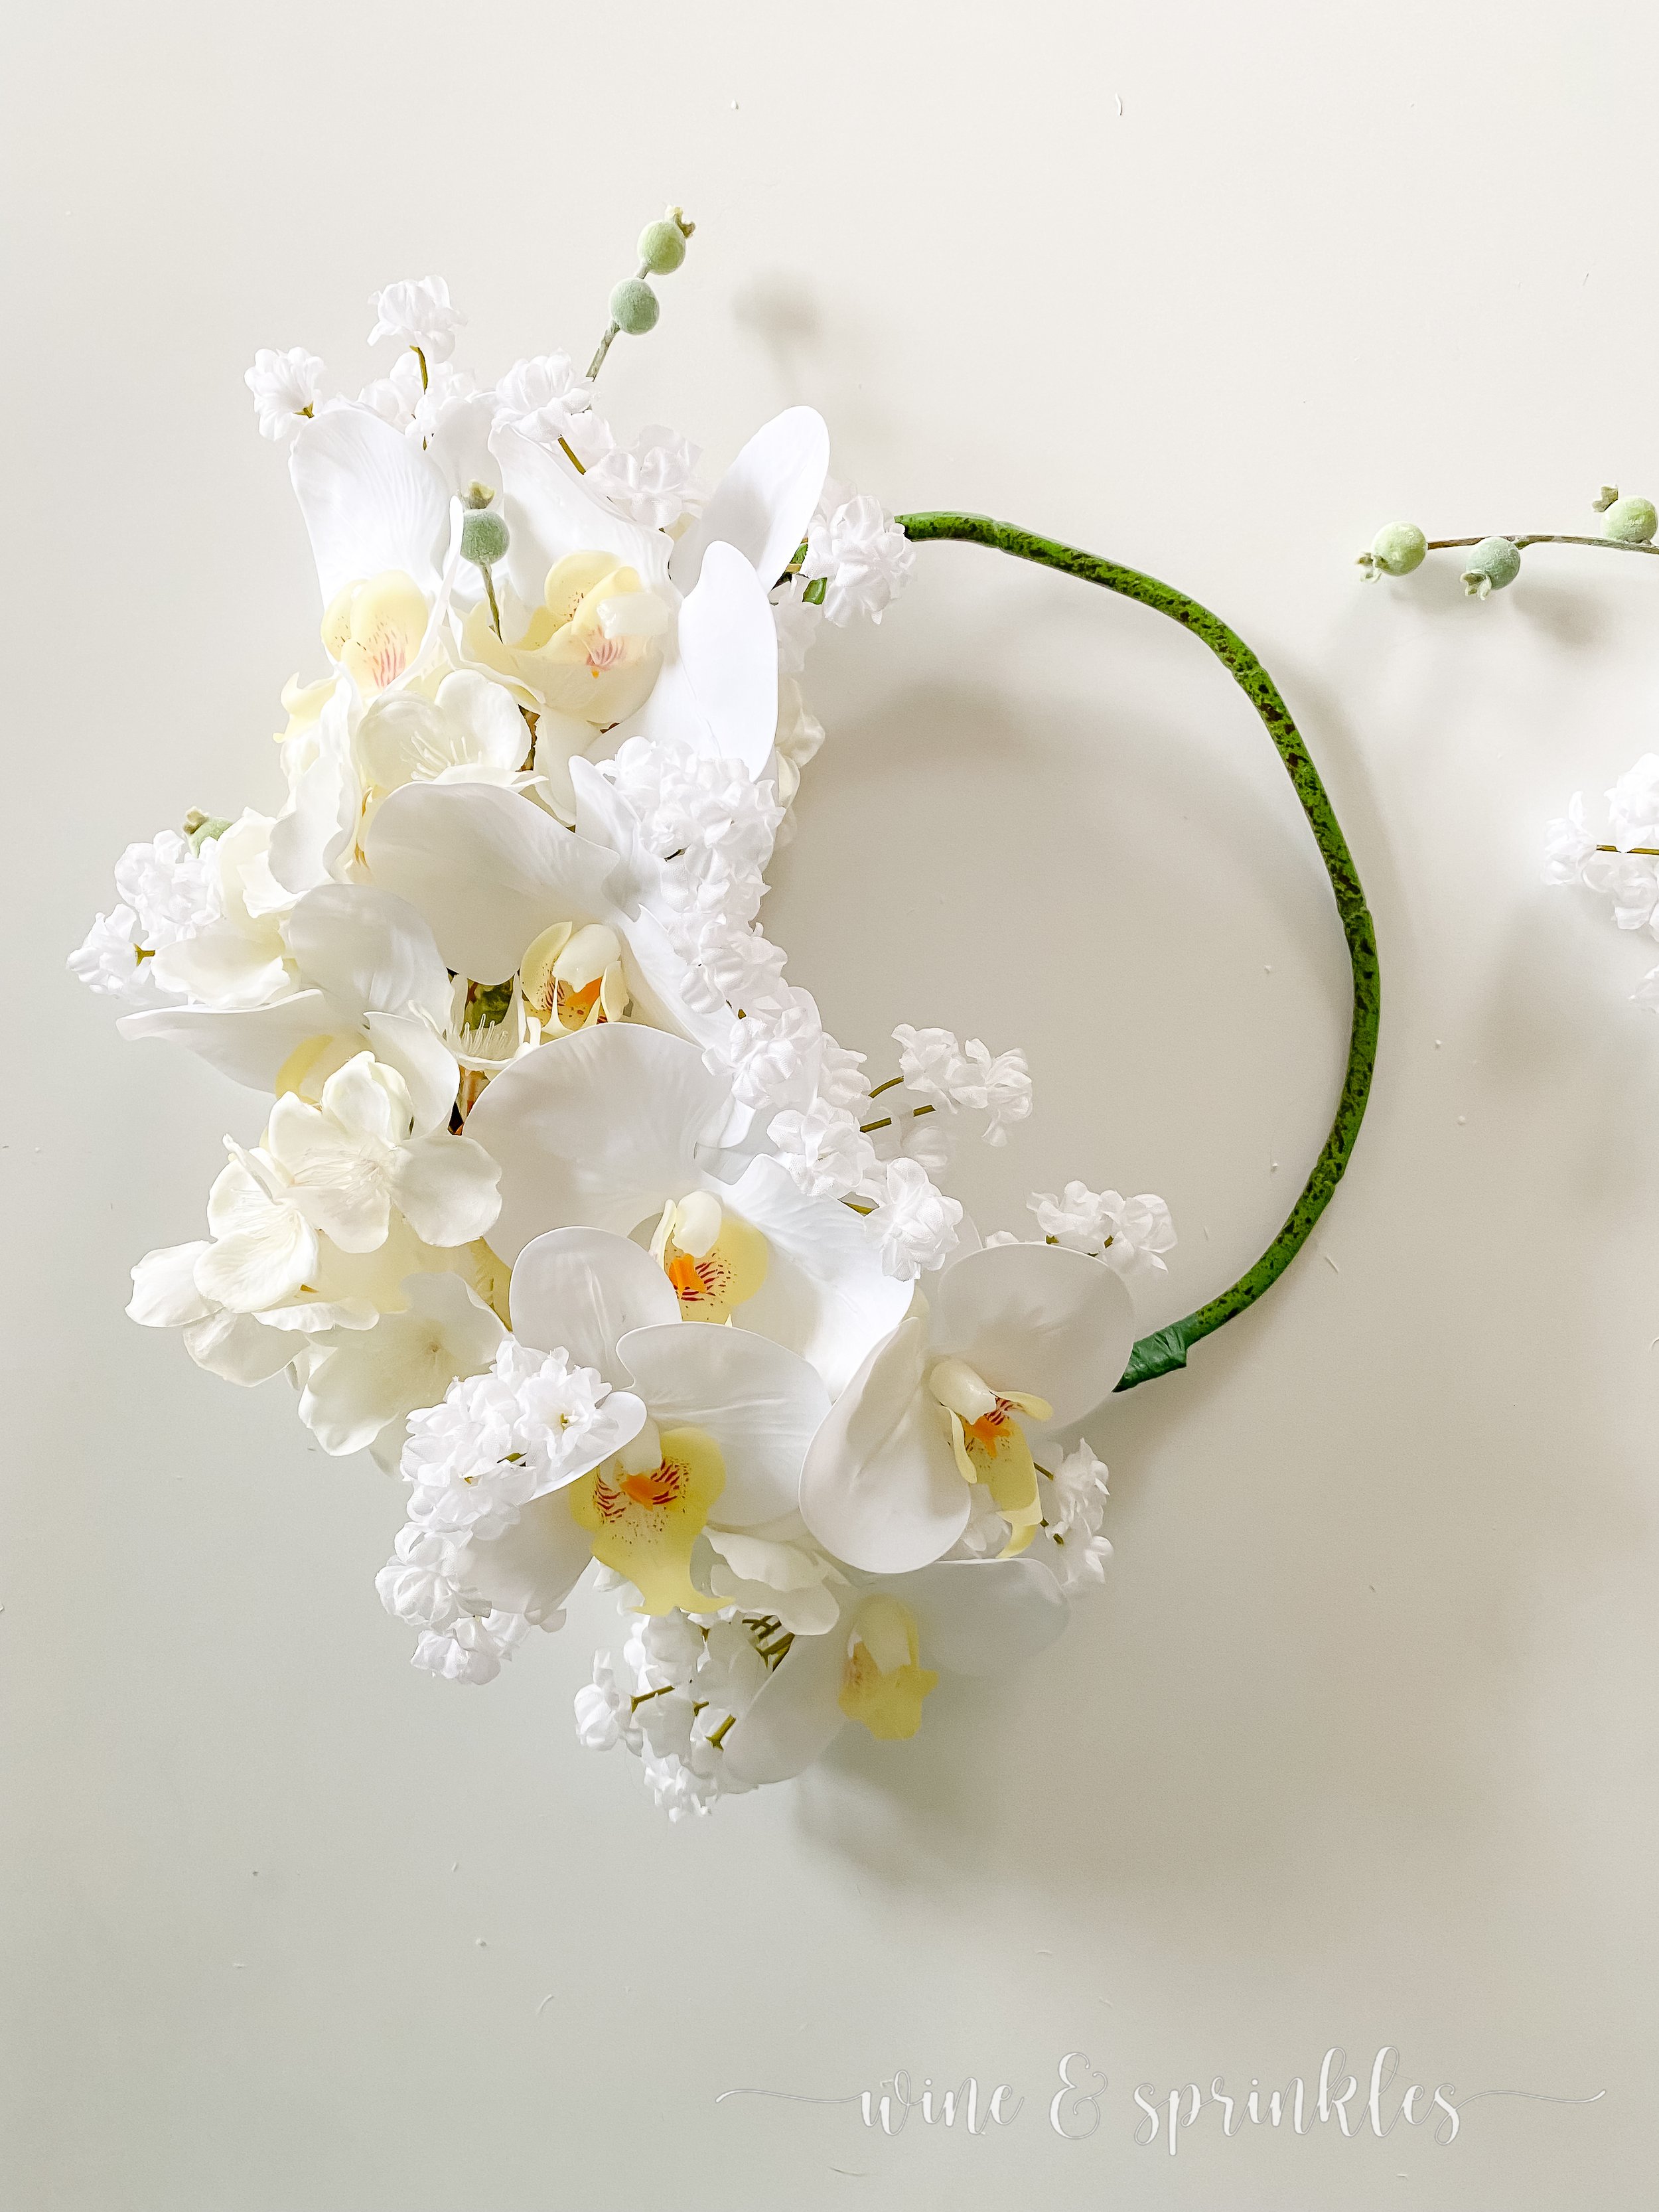
PART 2: CREATE & ATTACH SIDE FASCINATOR


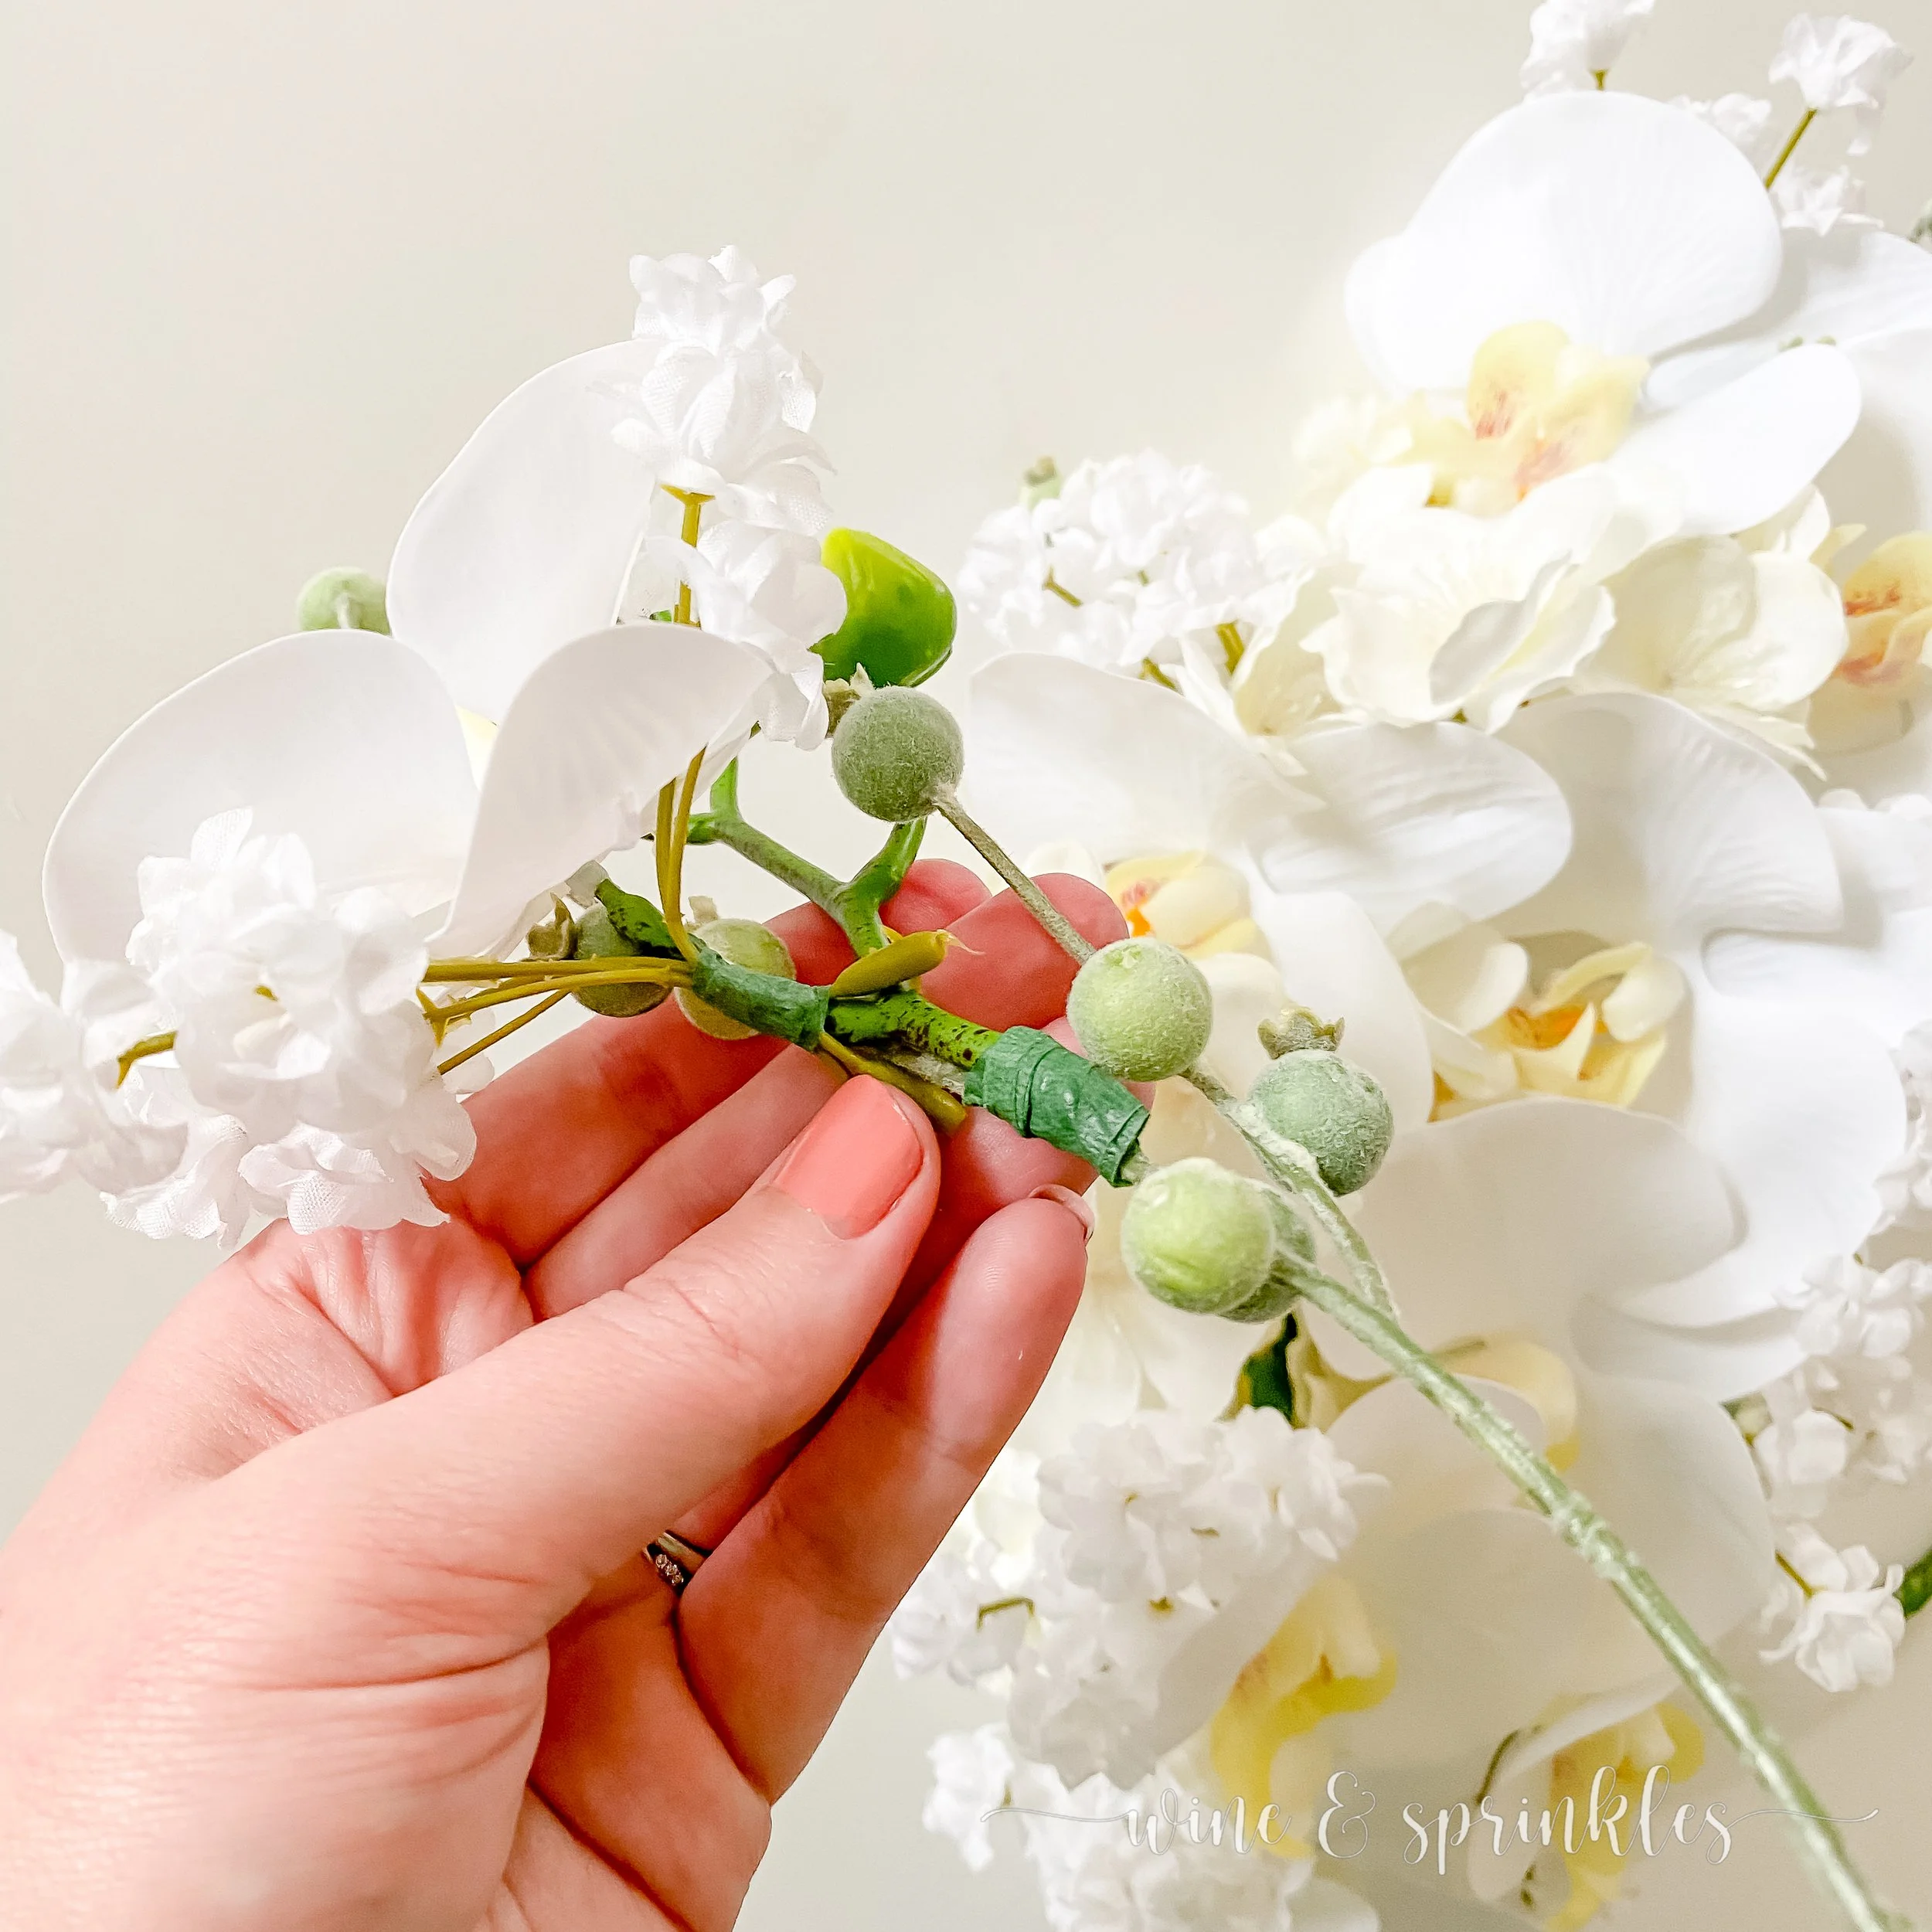
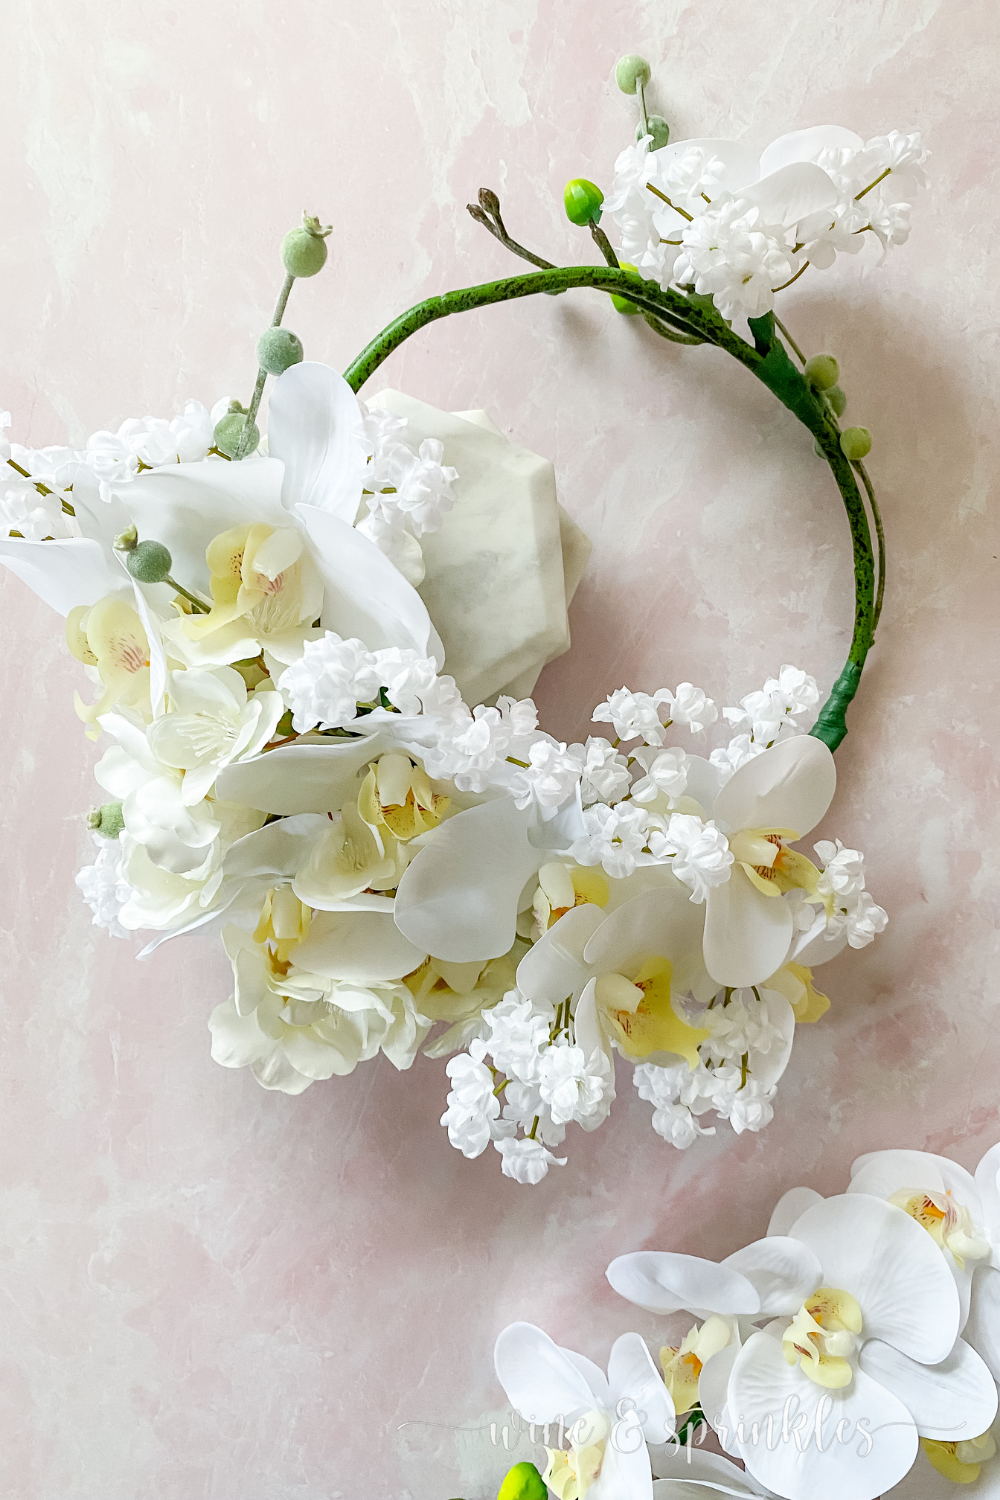
6. The last piece of this crown is a little cluster of flowers and berries to attach to the bare branch side of the crown and act as an island style flower behind the ear on the opposite side from the floral cascade. Similar to how you attached them before, start by taping in clusters of babies breath around the single orchid you originally trimmed from your branch, with the blossoms fanning out behind the orchid face. Then tape this flower cluster along the middle of your third berry spray, so that the berries form a longer branch to attach to the crown. Finish your crown by floral taping the finished flower and berry branch to the opposite side of the crown along the bottom of the branch and the orchid flower’s stem, positioning it where it hits right around your ear when wearing it.


This asymmetrical beauty was beloved both by the birthday girl and myself, as well as by all the lovely ladies that came on the trip. In fact, orchid flower crowns in a variety of styles have now been requested by them all, so keep checking in to see our newest flower crown creations and get inspired to make your own!

SEE OUR RELATED POSTS HERE:


OUR PINS FOR THIS POST: