D.I.Y. Loose Tea Favors

This post contains affiliate links, meaning that if you click on a link I will recieve a small comission. This costs you nothing extra and I only promote products I use and love! You can read our full disclosure here

DIY Loose Tea Tin Favors #diywedding #printables

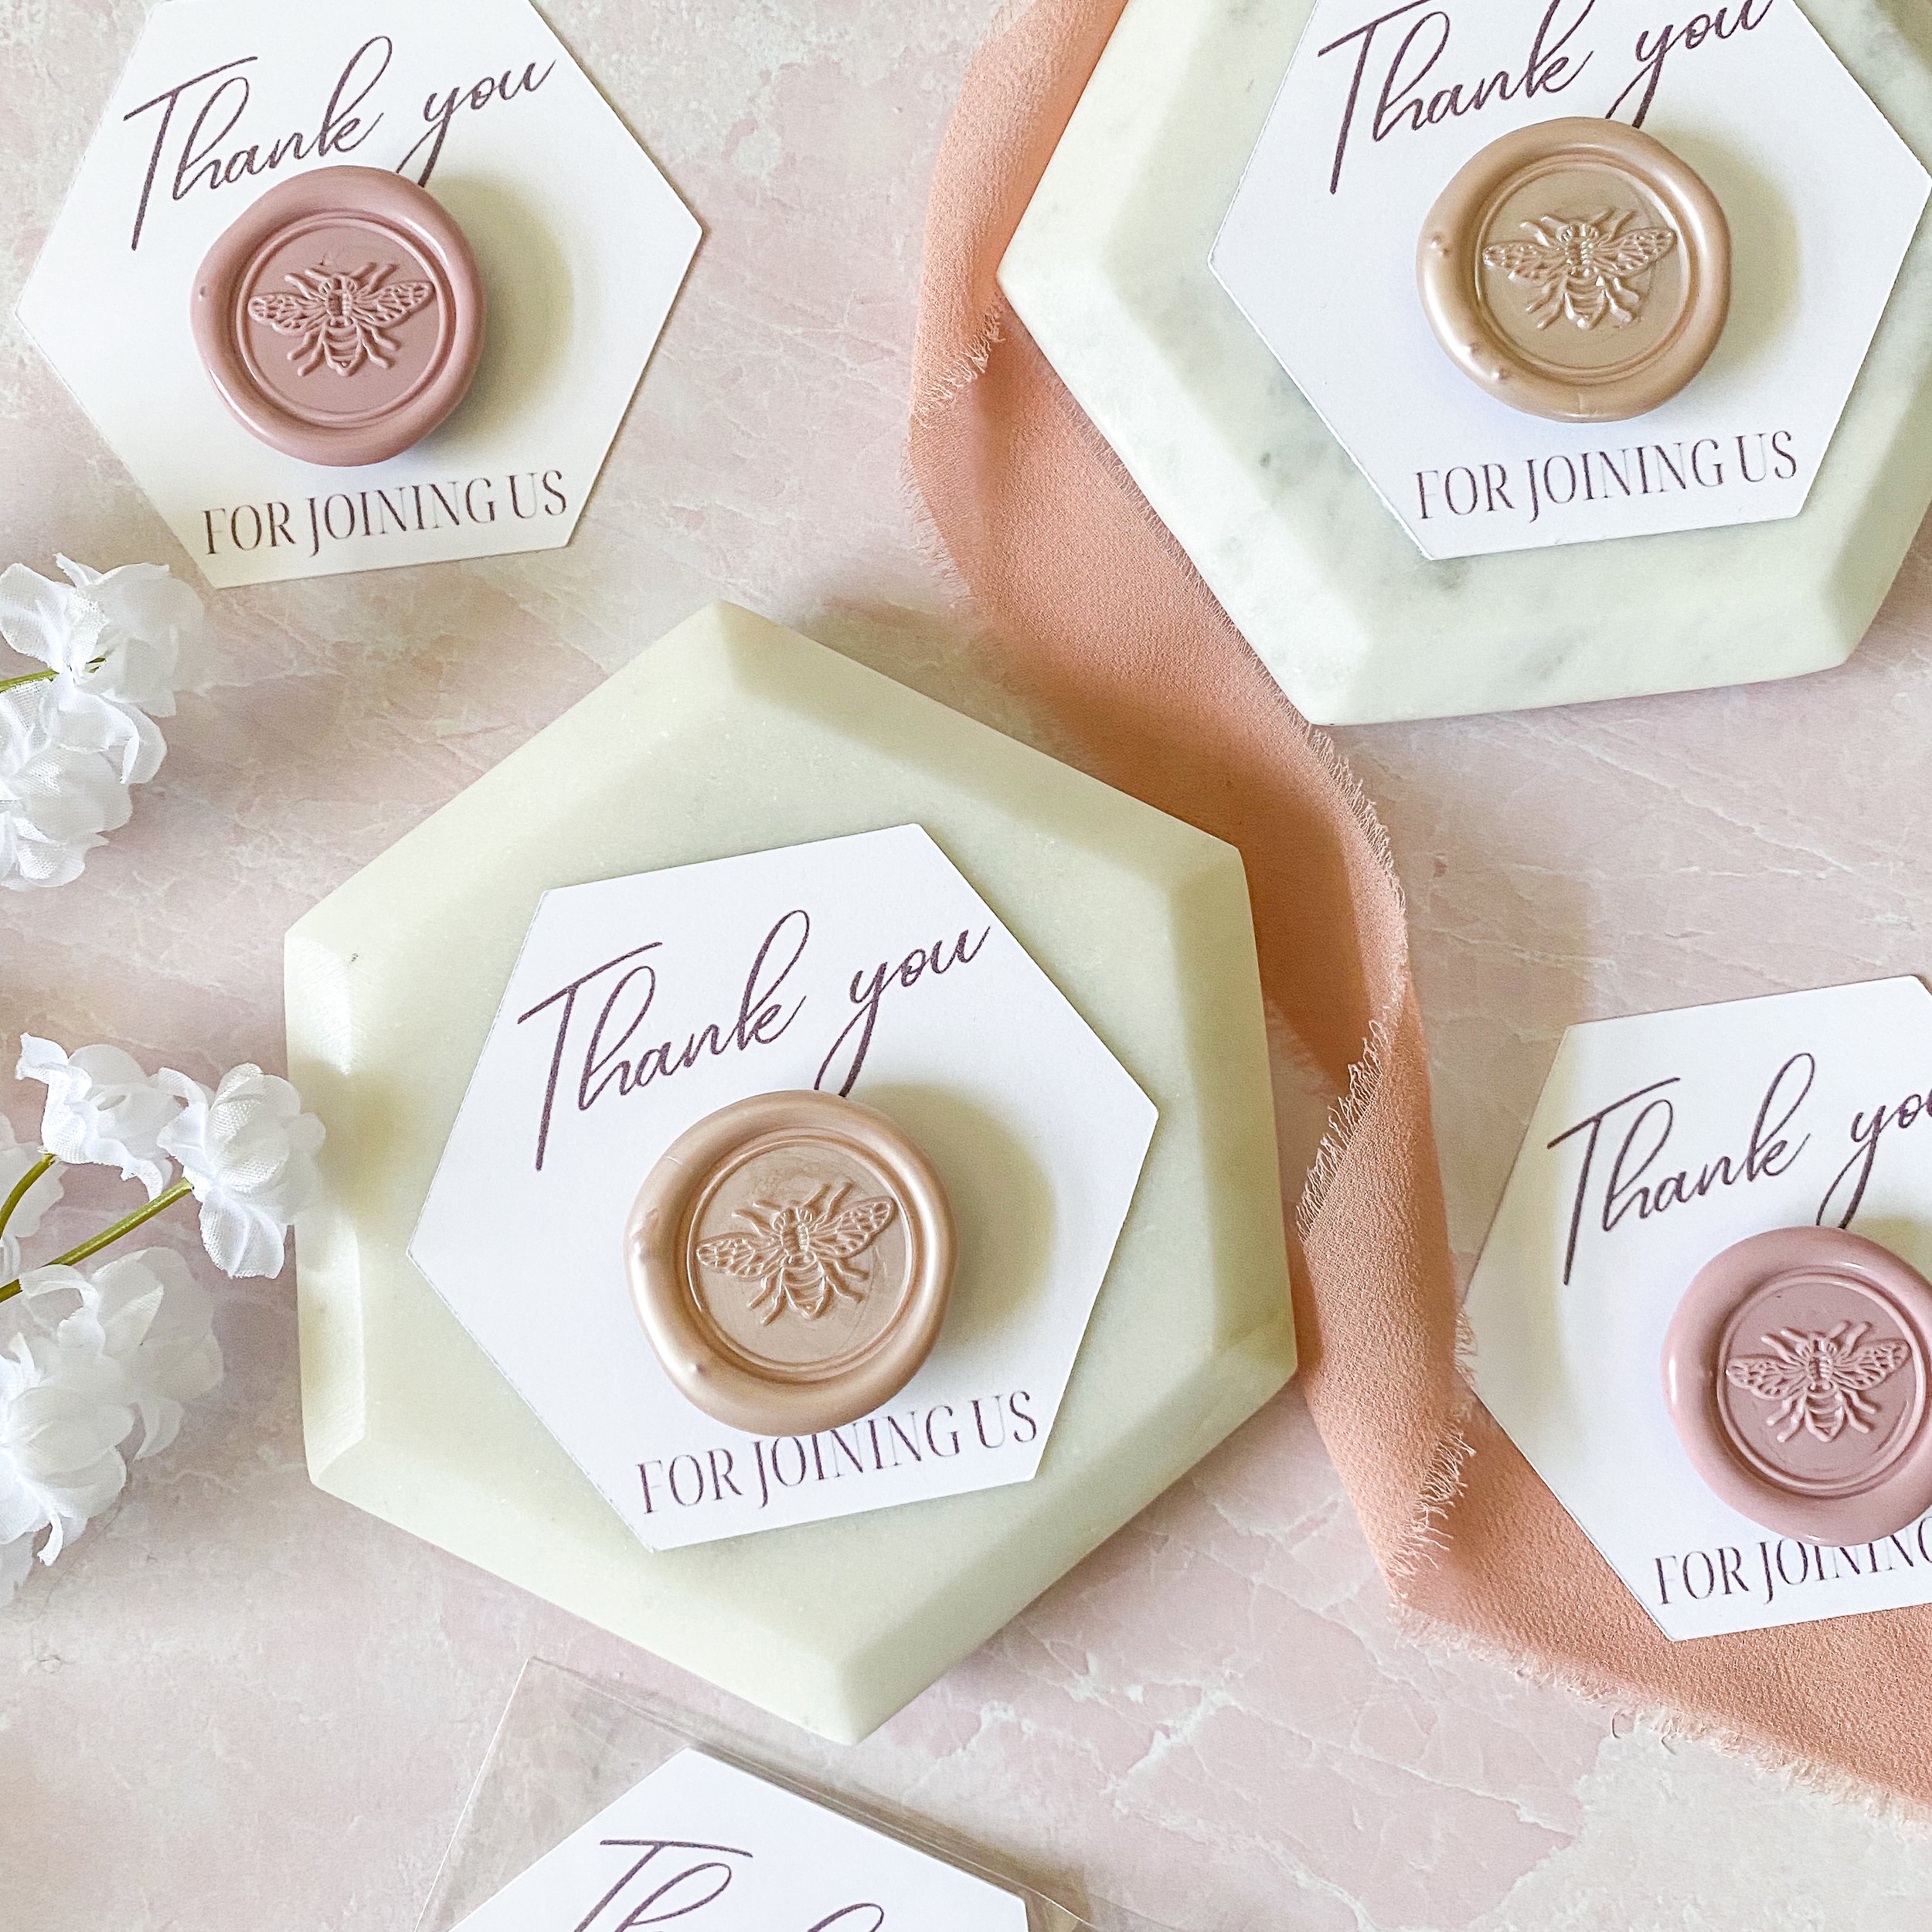
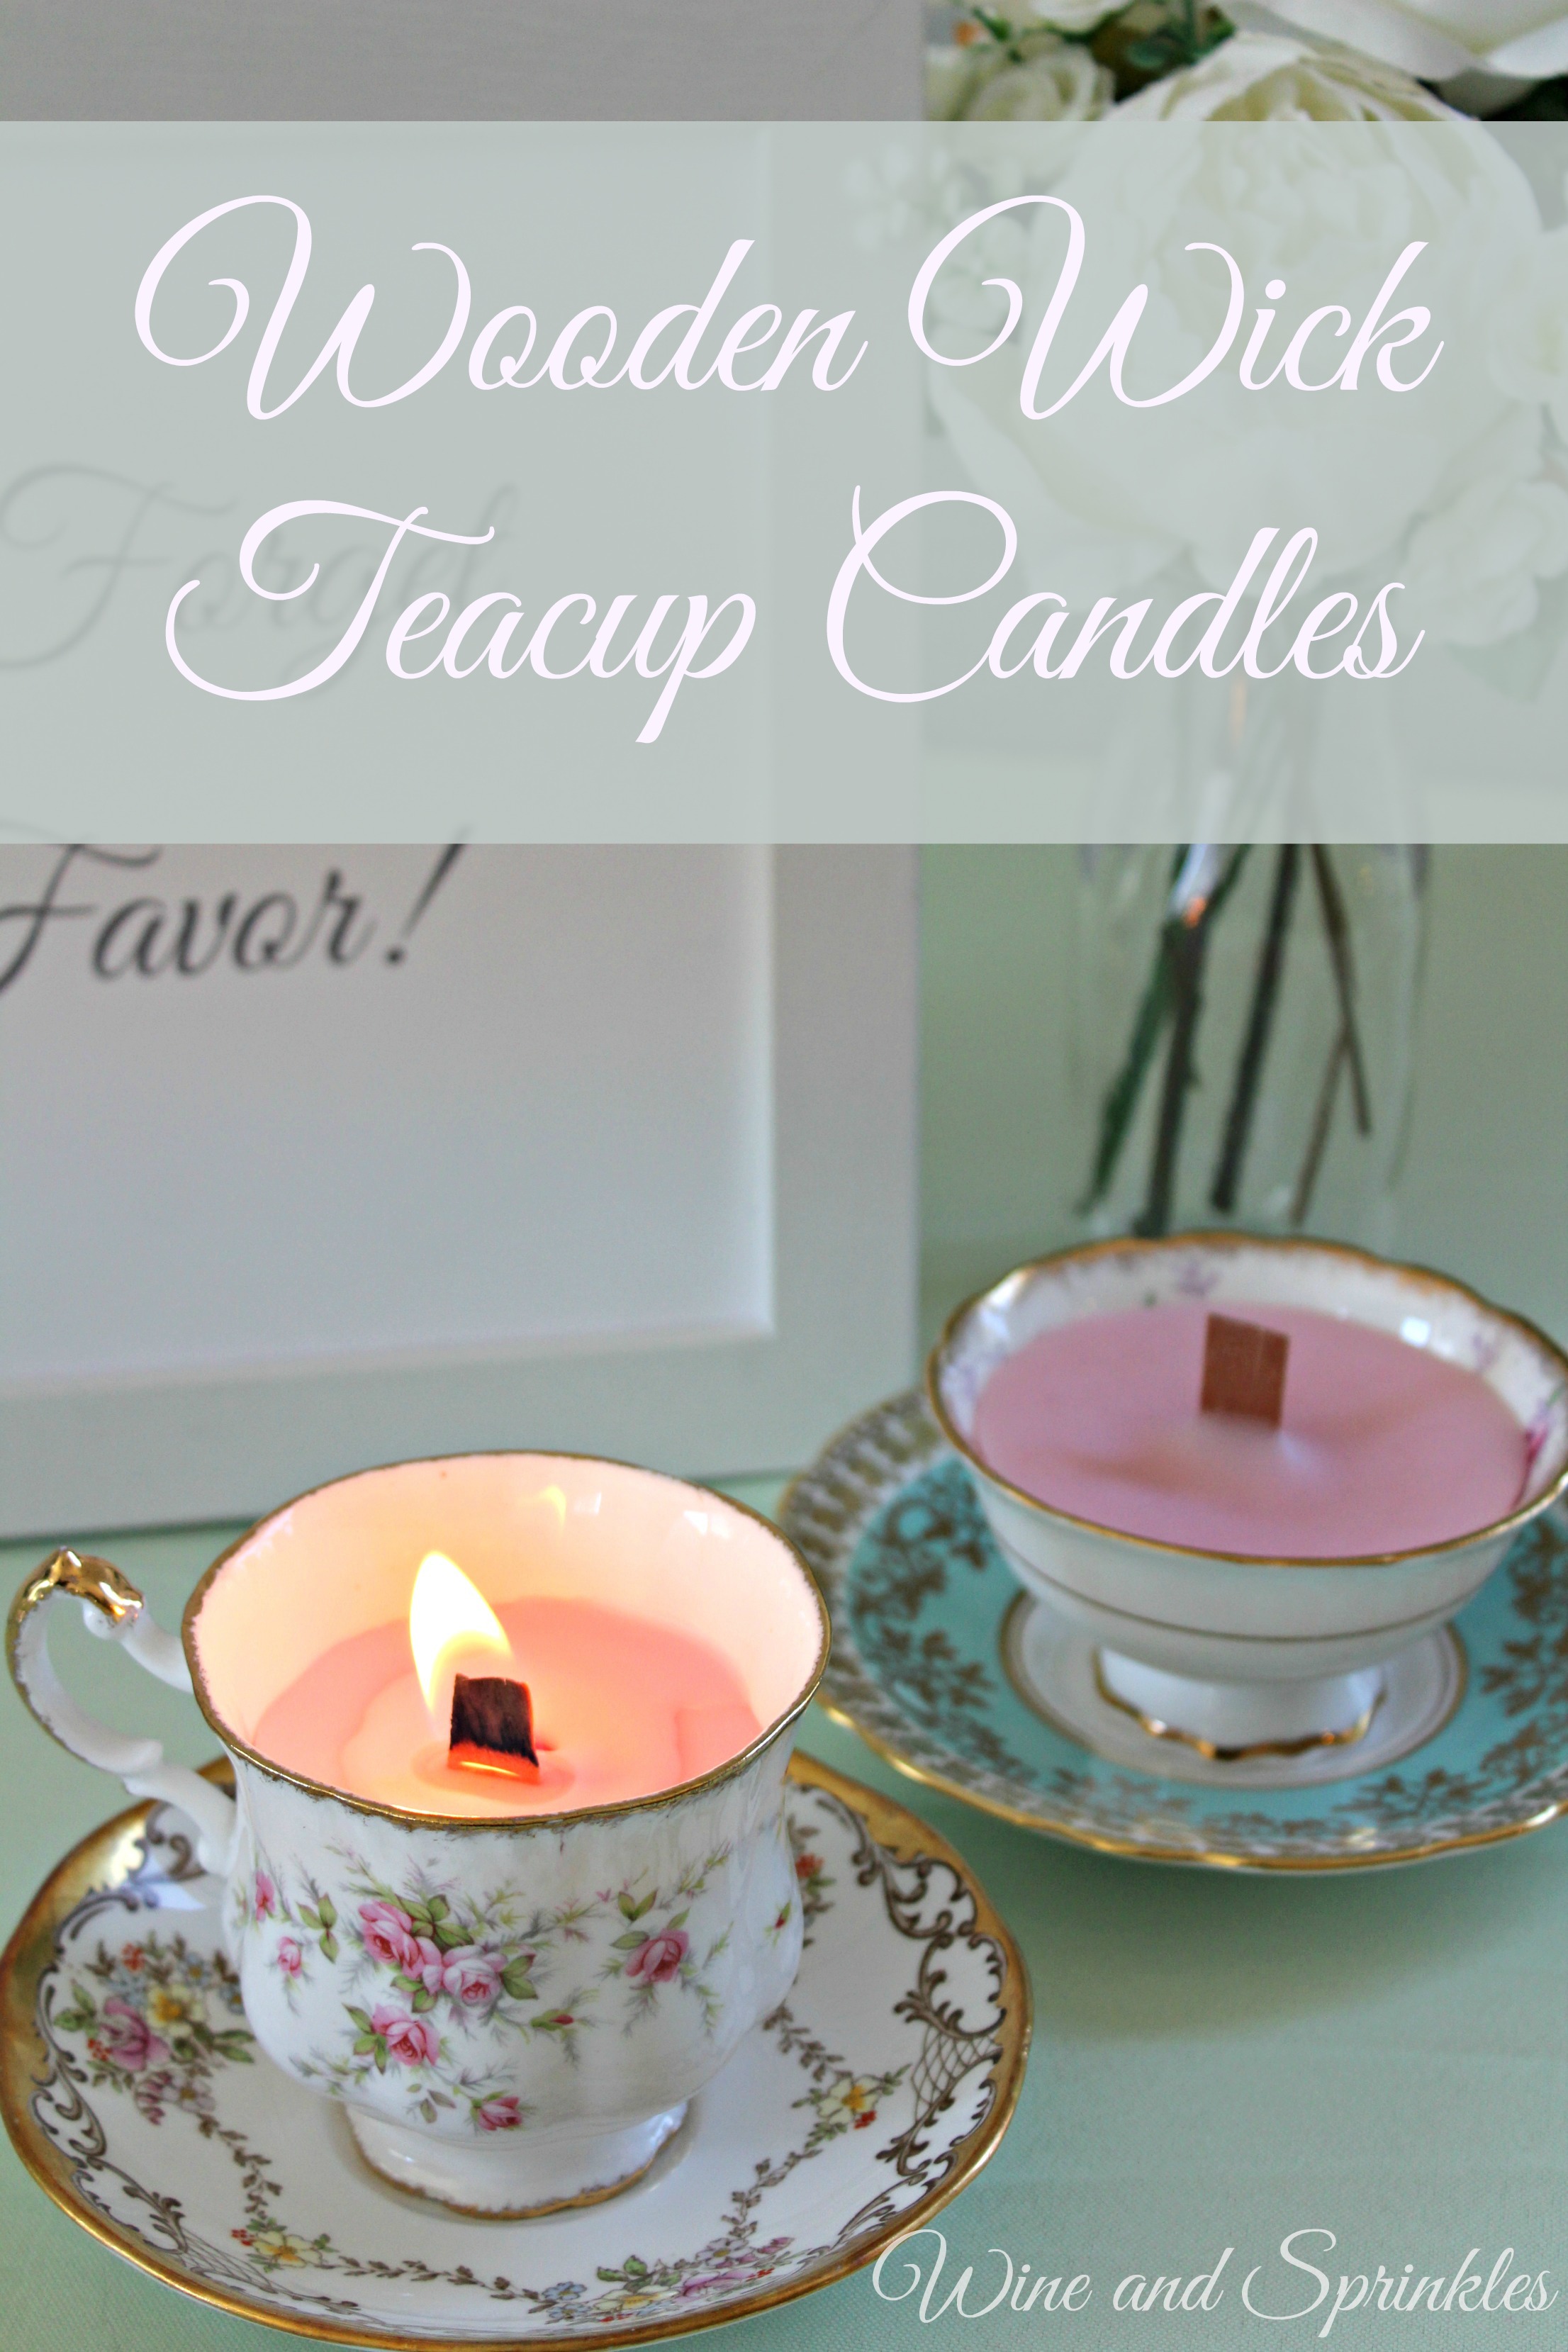
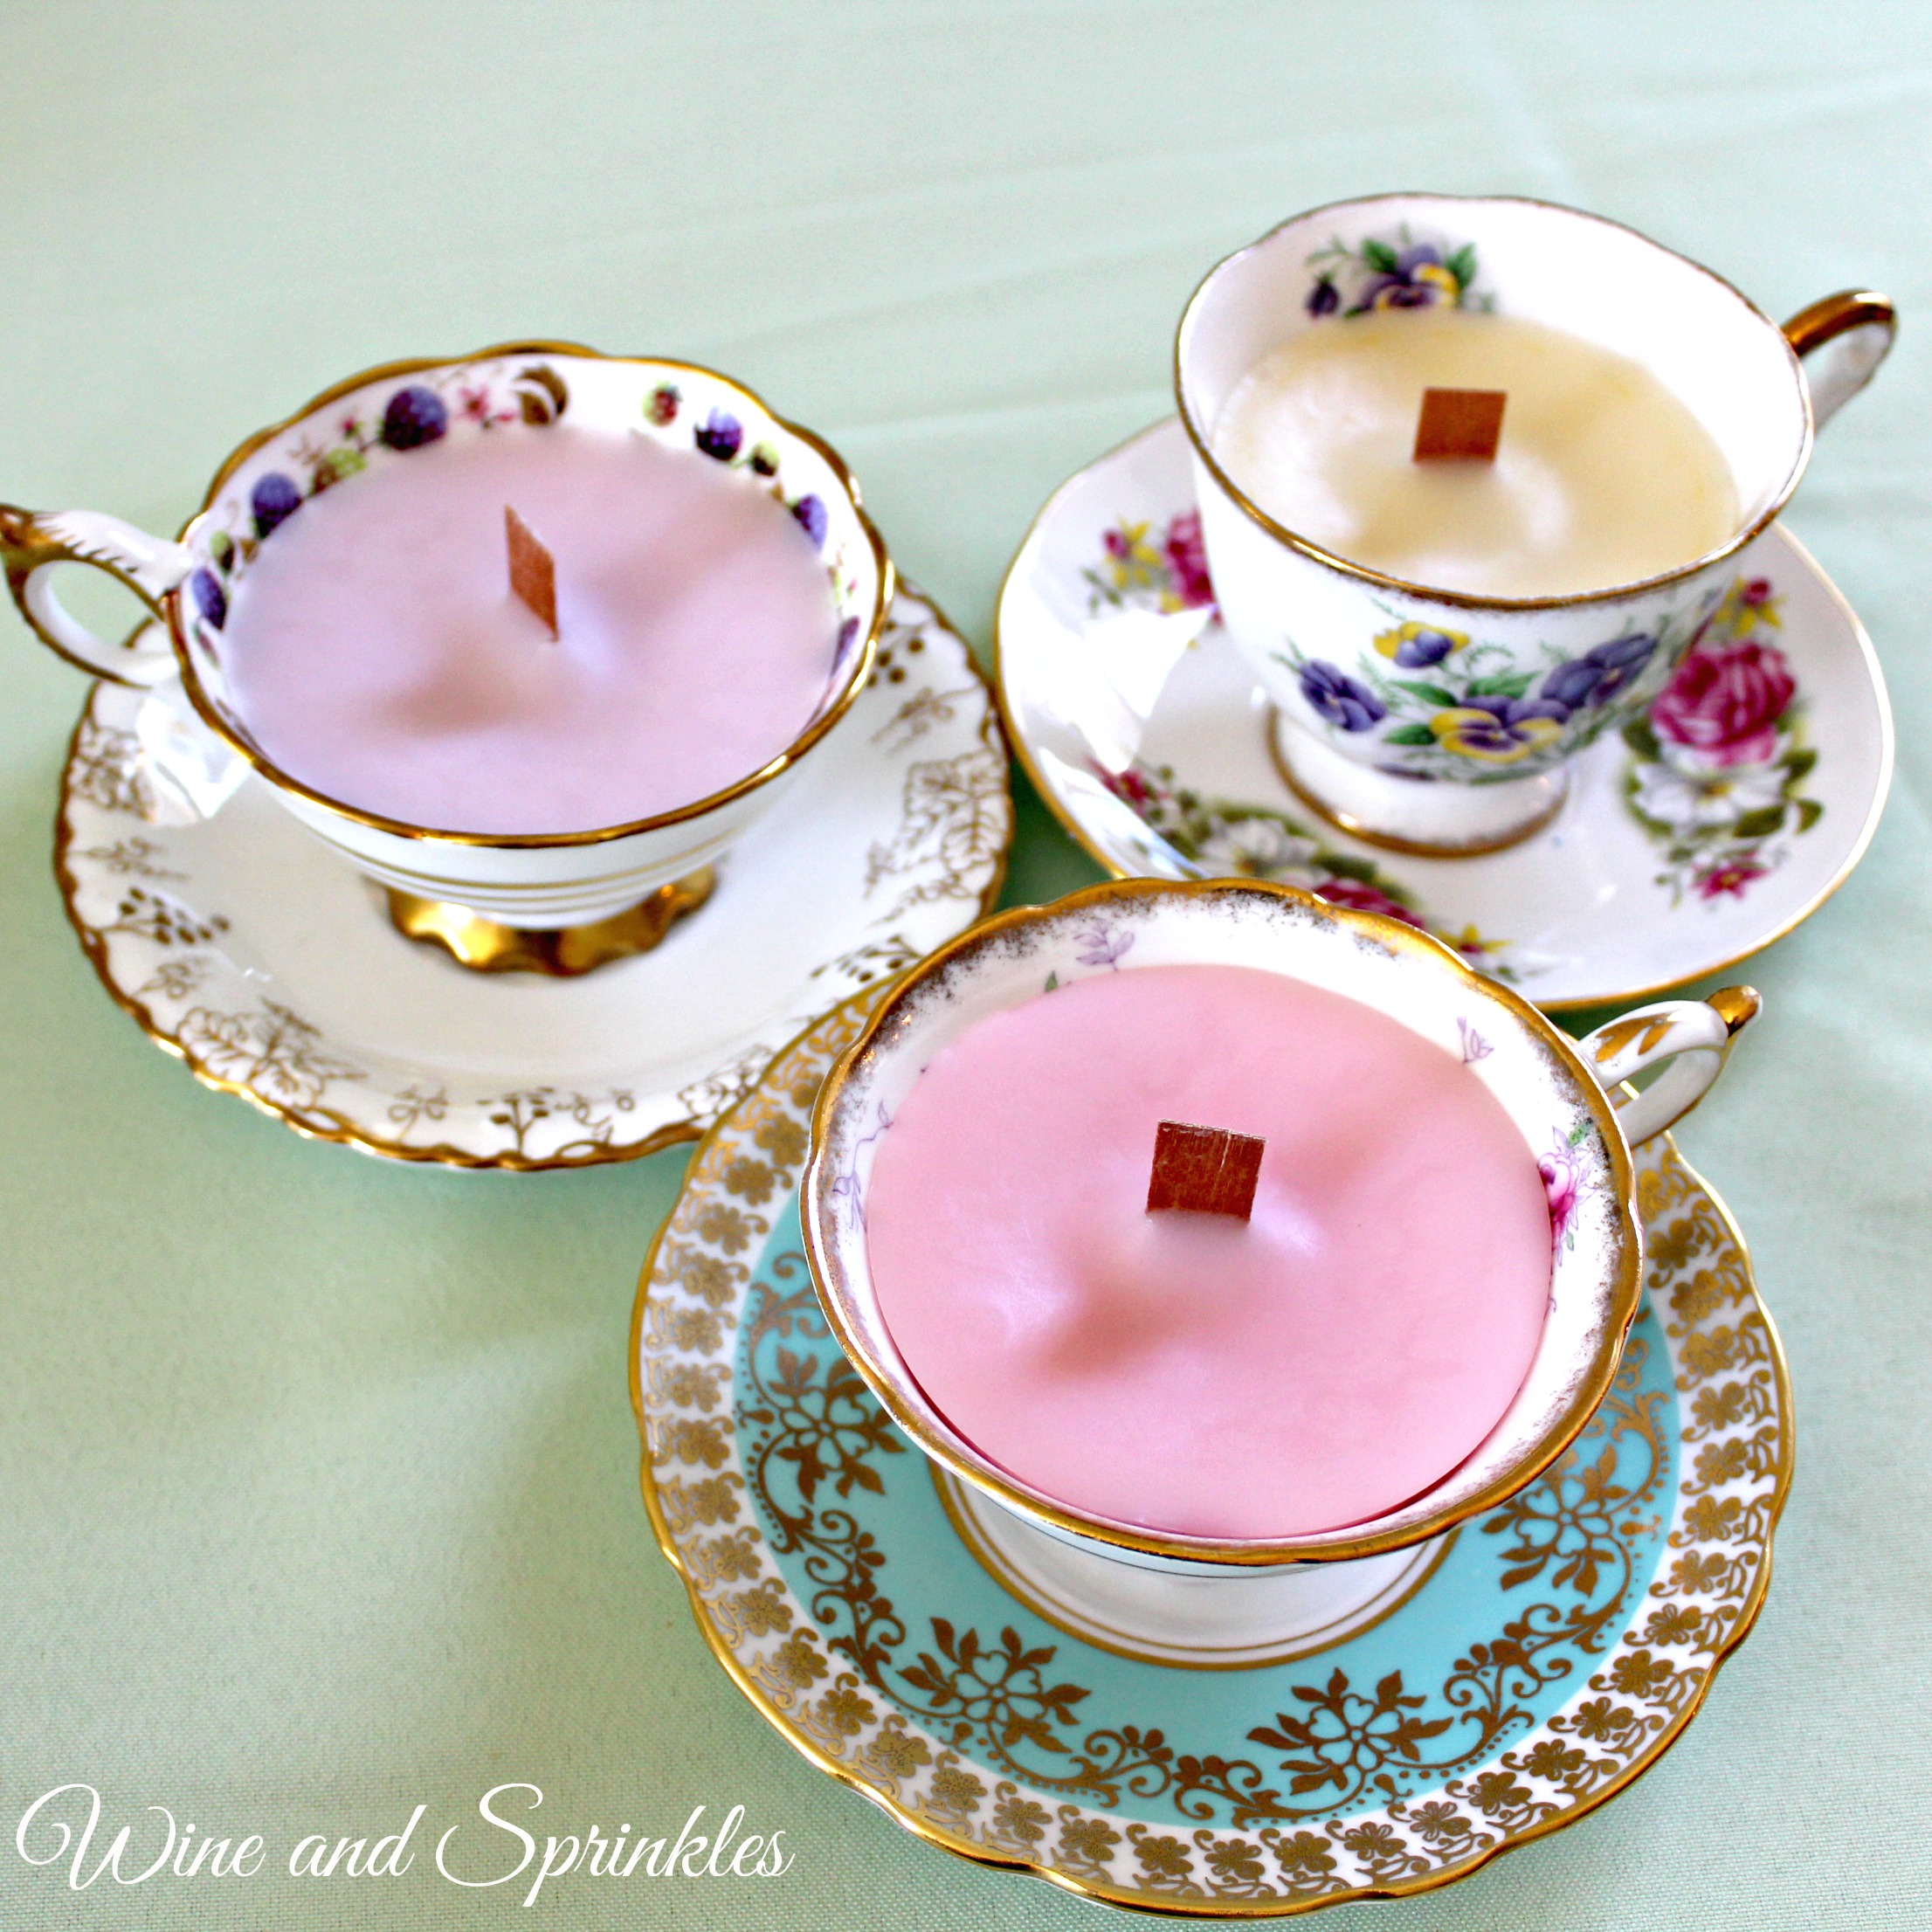
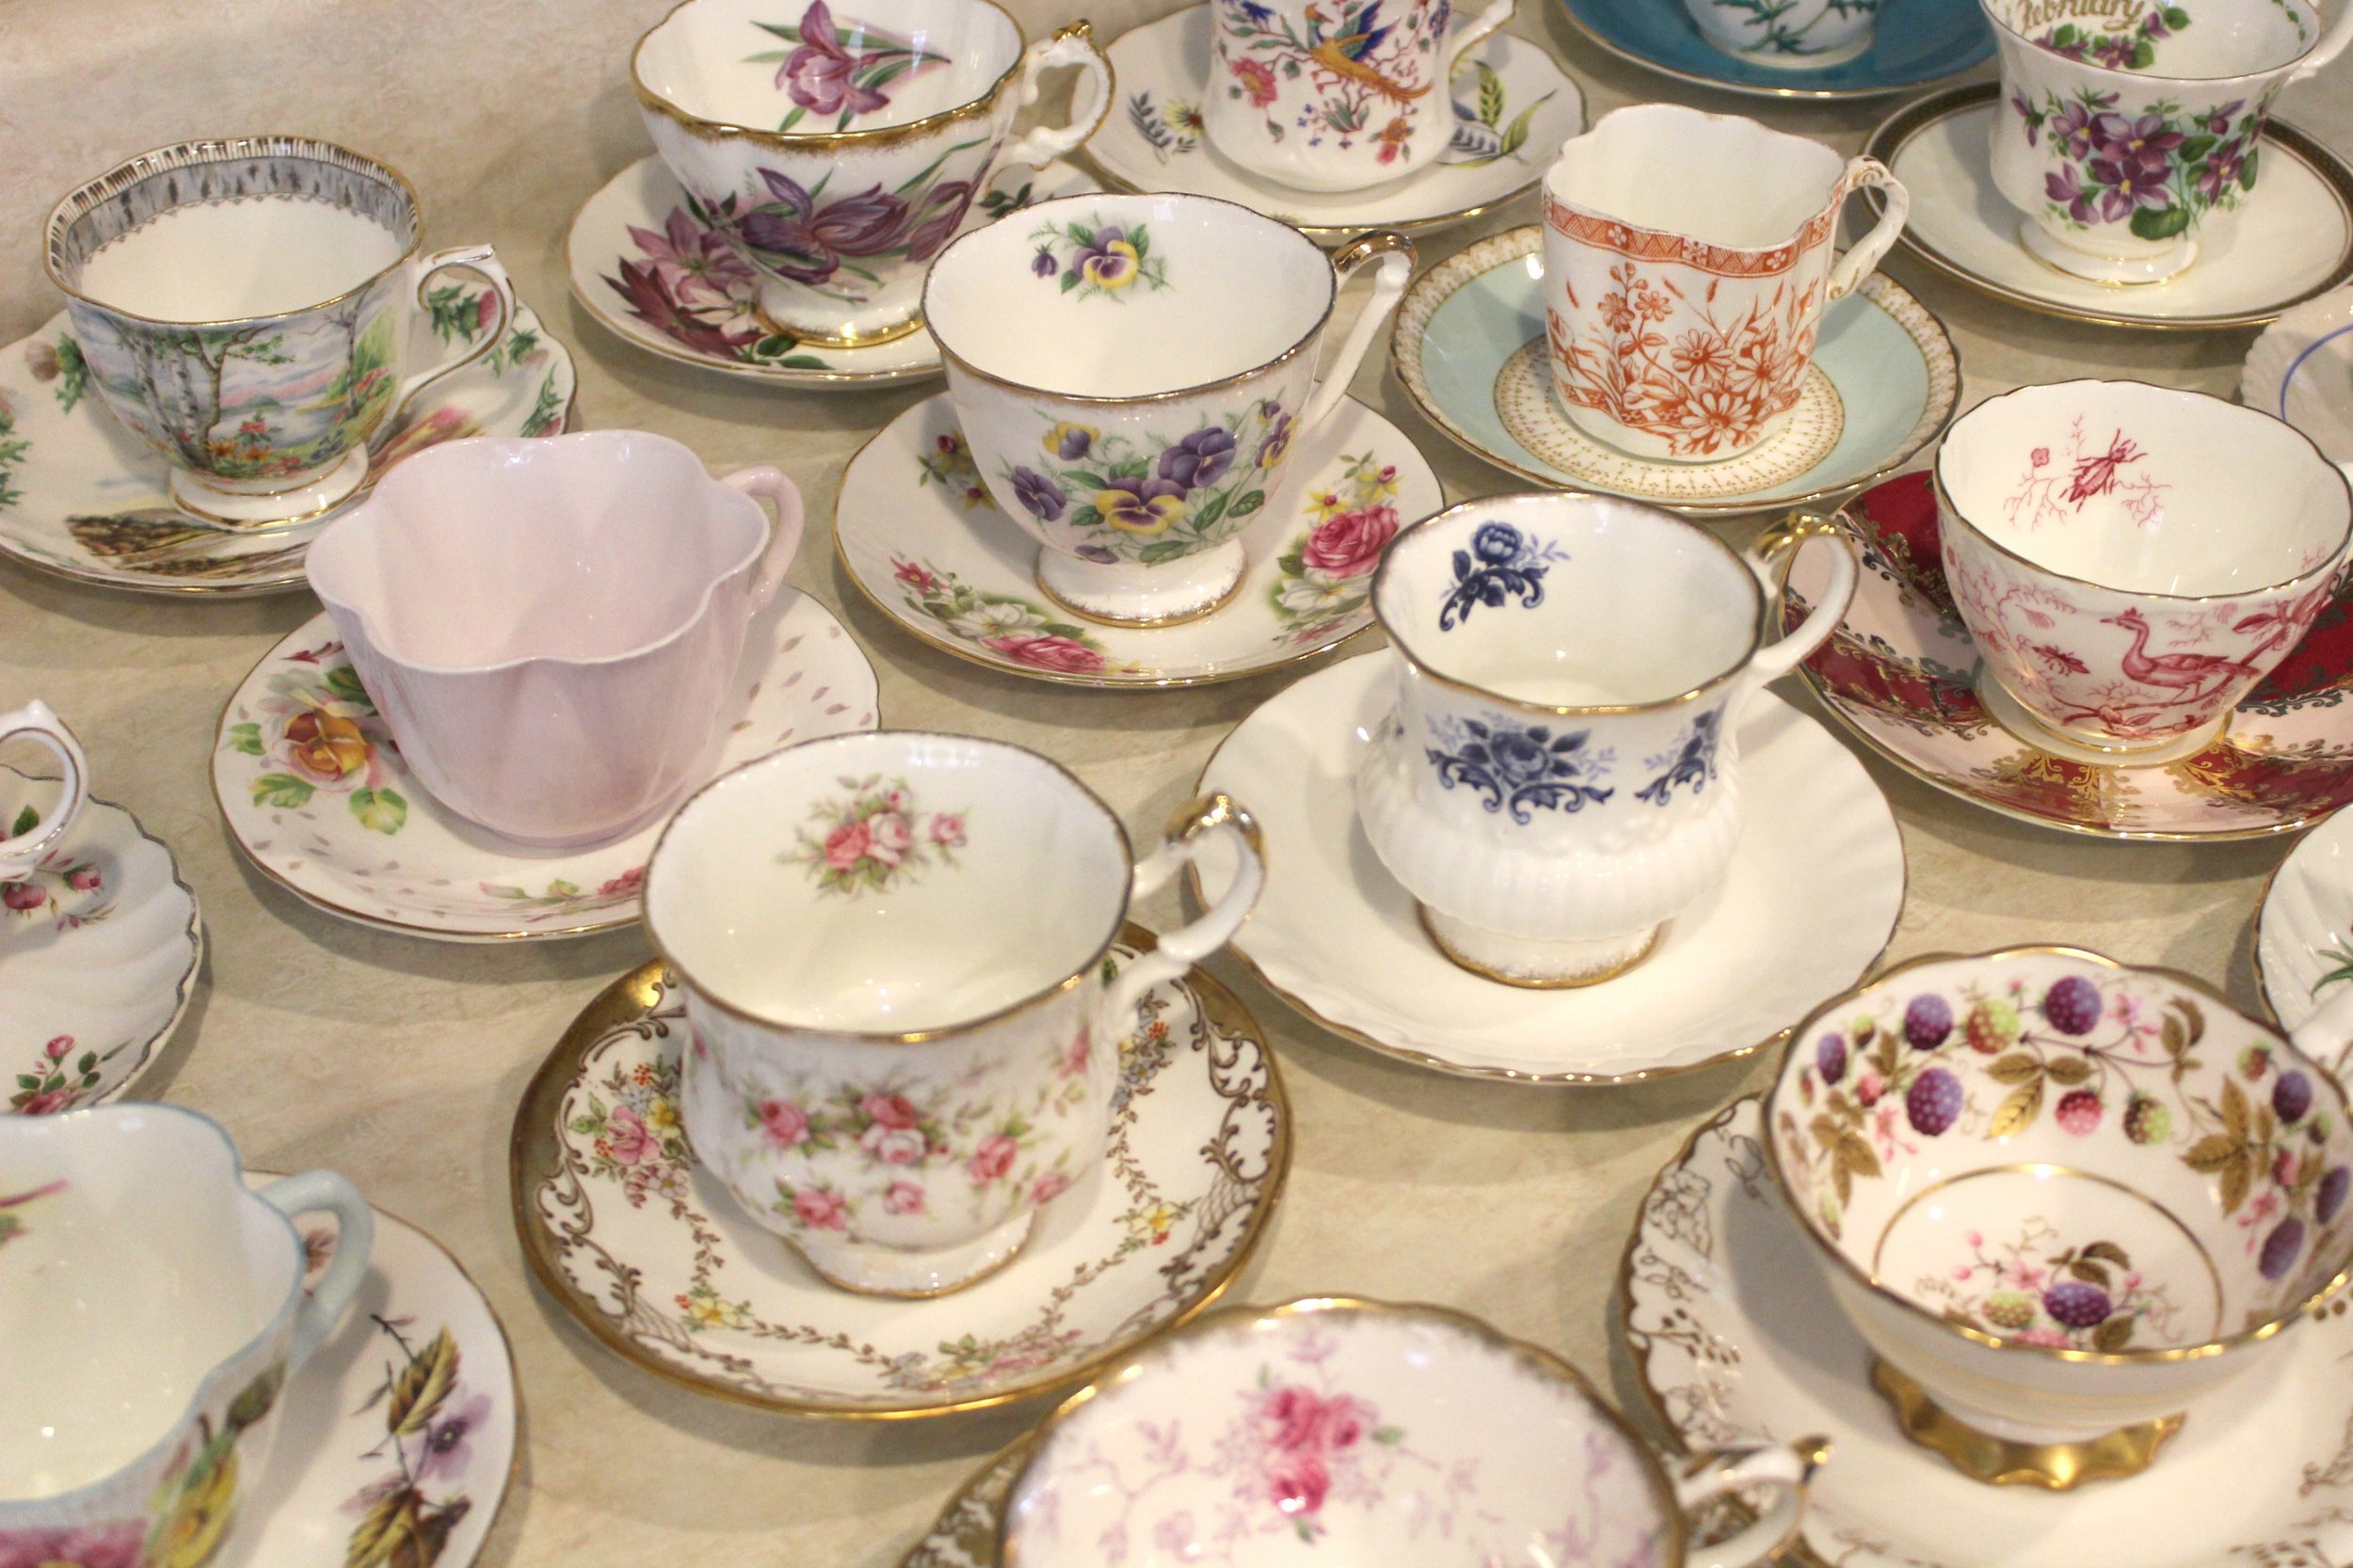
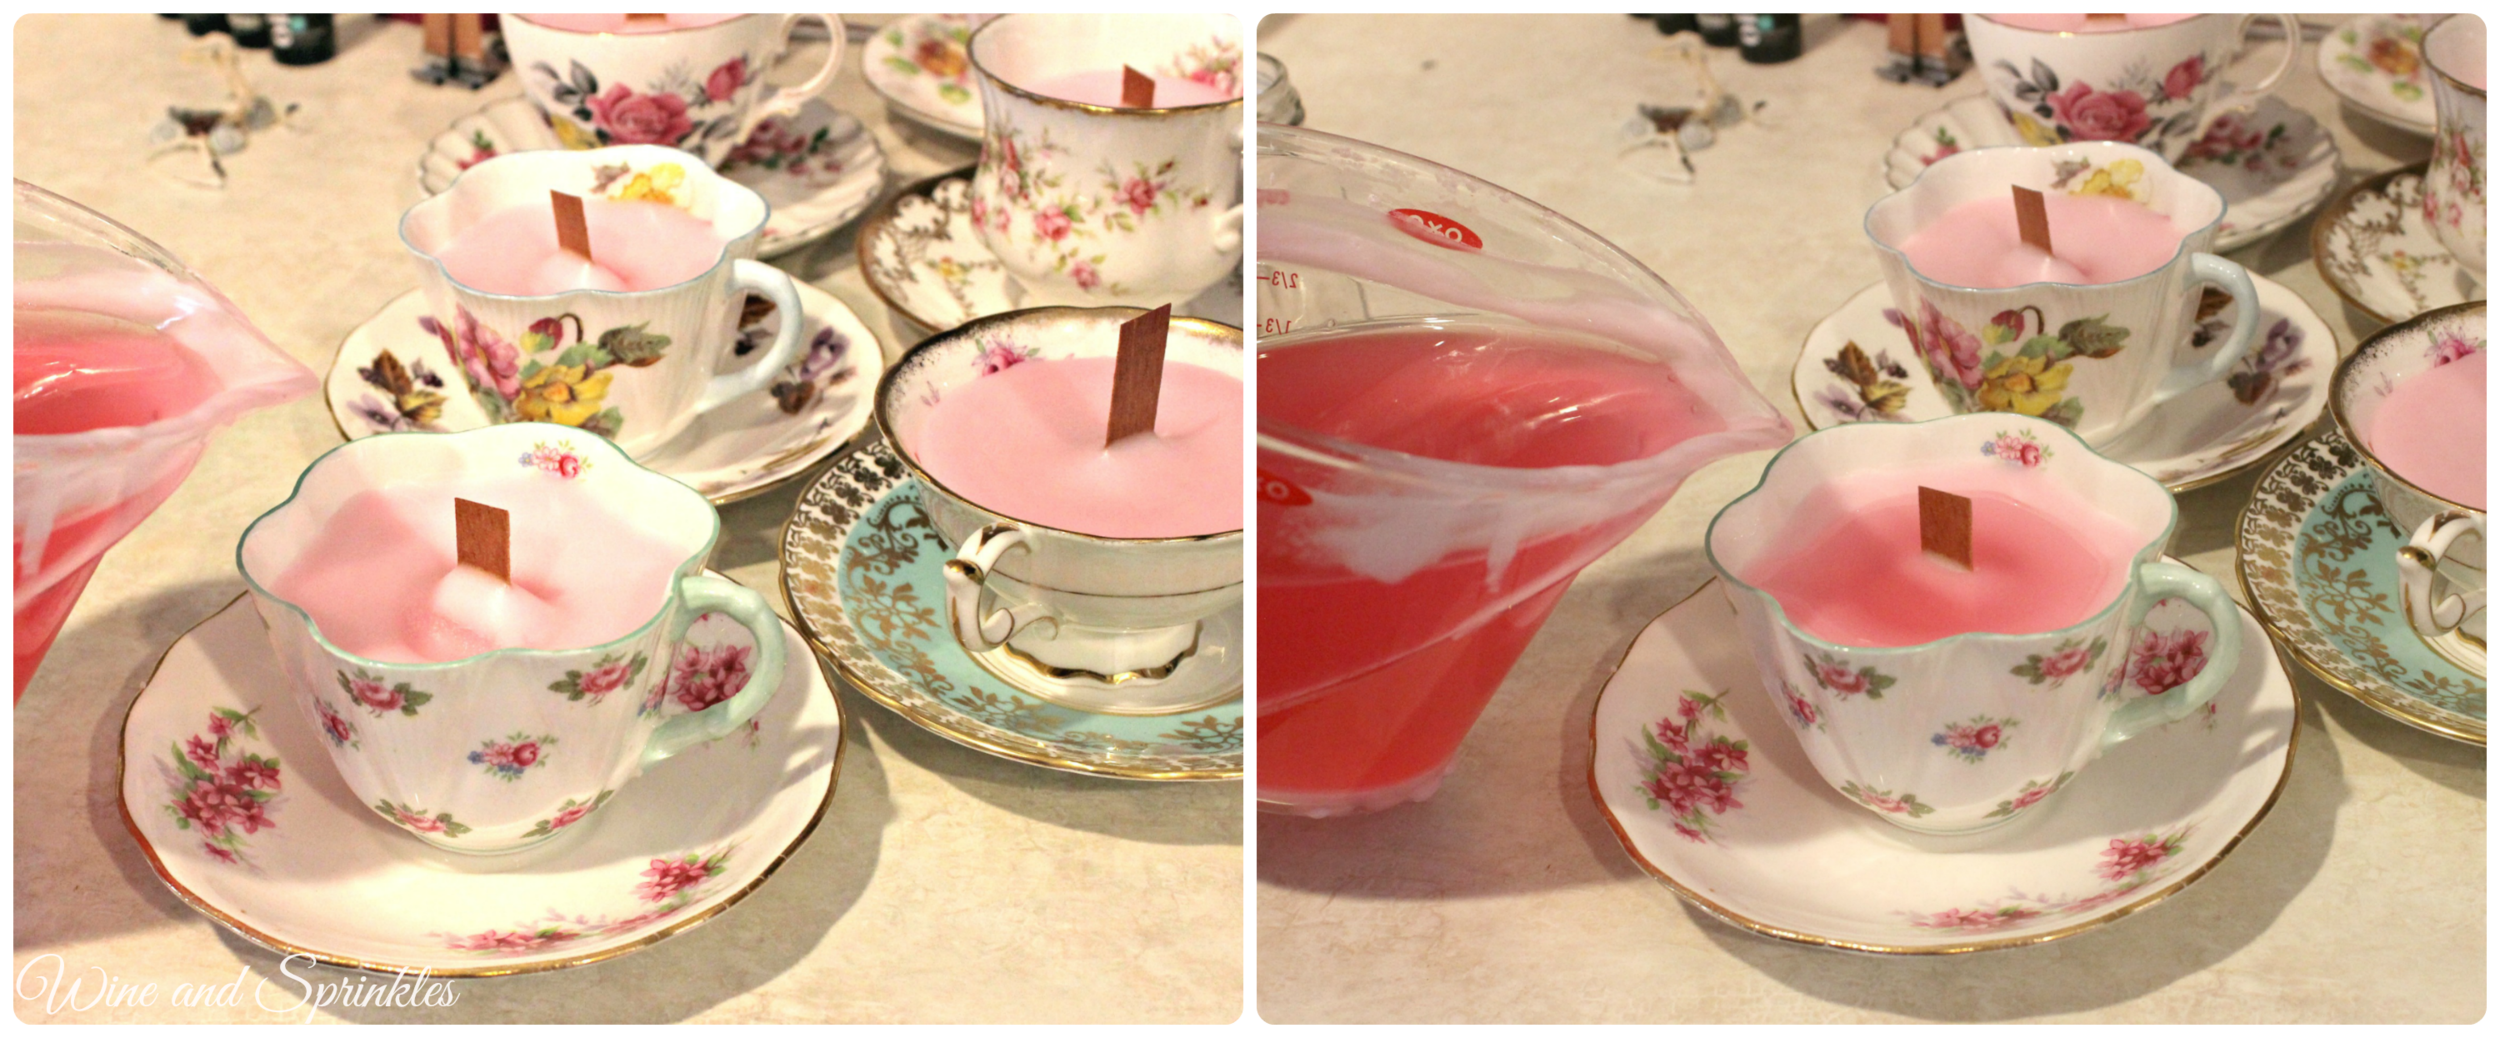
As much as I love teacups and teacup candles as favors, in reality that is just too expensive for everyday shower favors. That’s where these lovely tea tins come in! For a Beauty and the Beast feel, I modified a free piece of rose clipart that reminded me of the stained glass window in the original movie.

DIY Loose Tea Tin Favors #diywedding #printables

1.     Fill the tea tins with the tea of your choice. It took around 3 Tbsp of tea per tin to fill it about 2/3 full.

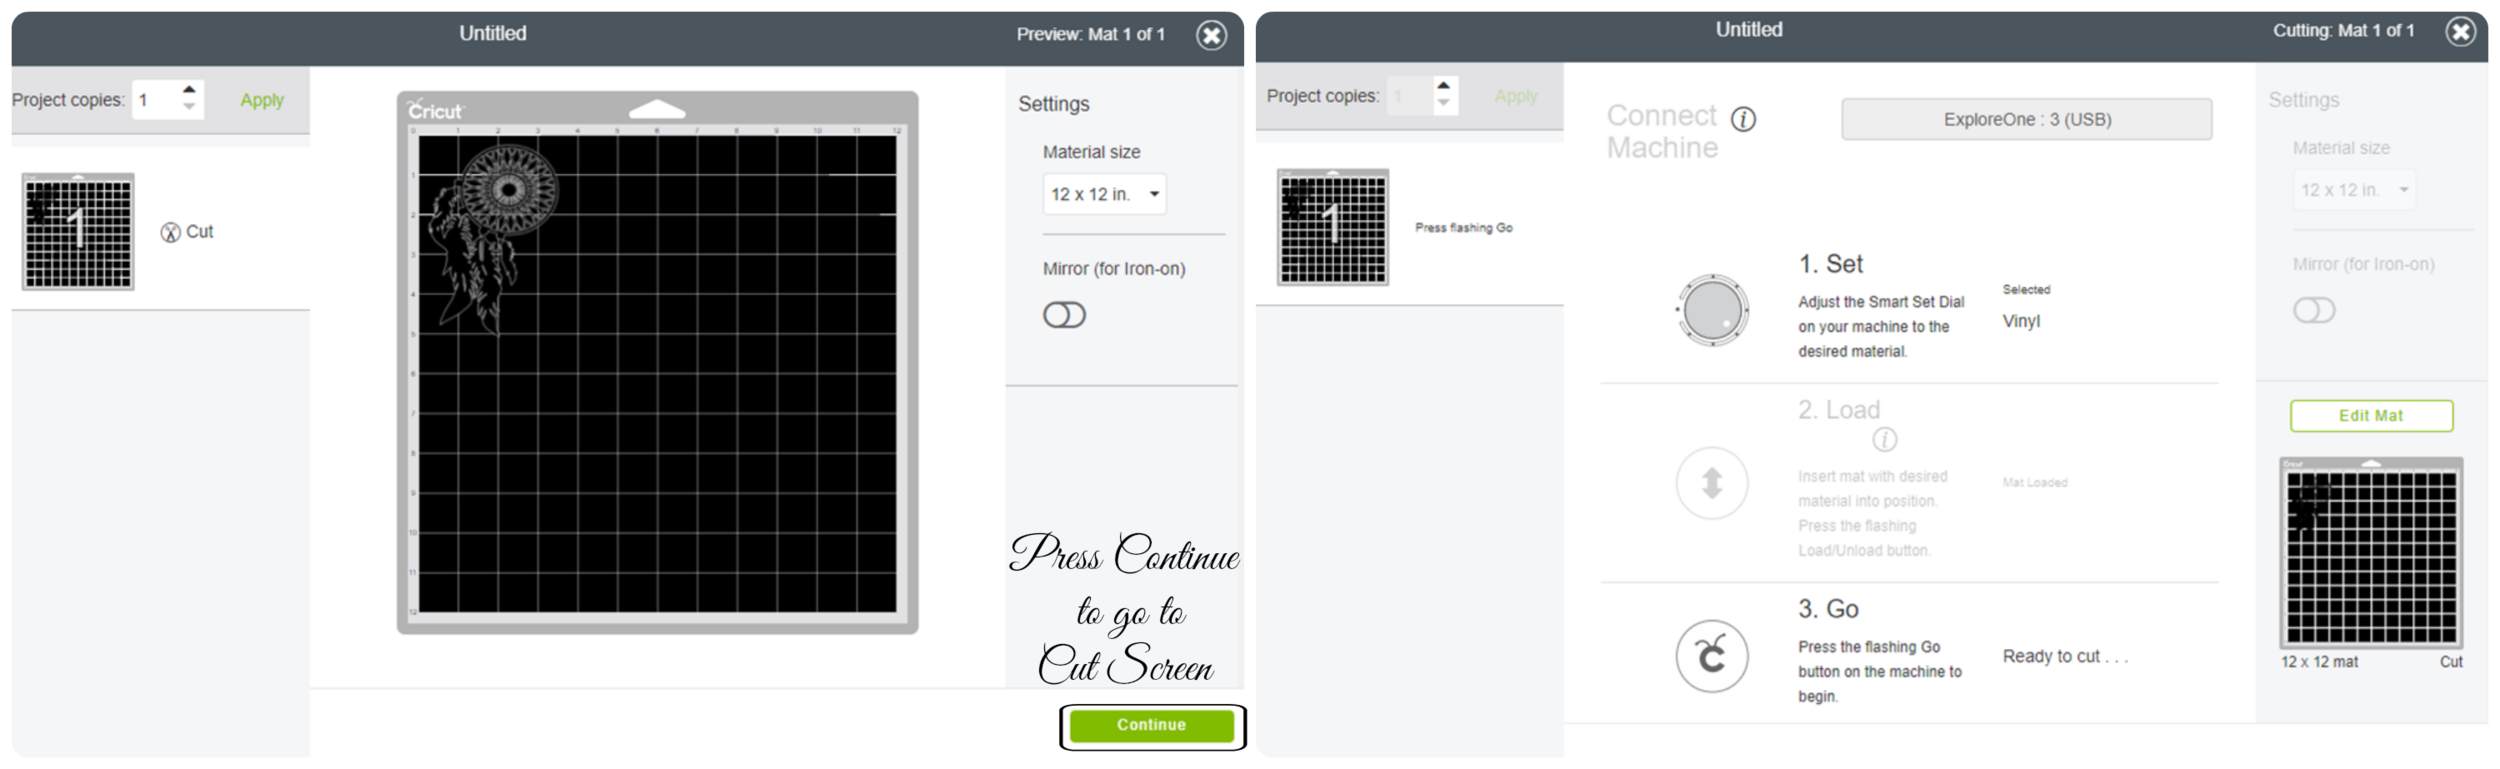
2.     Print your labels. I always print a test page of the labels to make sure they line up with your label paper. My printer was a little bit testy about printing them perfectly on the lines but since the rose pattern overlaps the label anyway it didn’t really cause any issues for my labels. :)

3.     Lastly, place the label on the lid of the tin and you are done!

DIY Loose Tea Tin Favors #diywedding #printables

Yes this is literally the easiest tutorial ever, making it a great last minute favor your guests will love! I’m already thinking of other fun foods for these tins; mixed nuts, coffee, sprinkles? :) What food would you give away in these cute little tins?


SEE OUR RELATED POSTS HERE:

 
DIY Loose Tea Tin Favors #diywedding #printables

D.I.Y. Wood Wick Teacup Candles

This post contains affiliate links, meaning that if you click on a link I will recieve a small comission. This costs you nothing extra and I only promote products I use and love! You can read our full disclosure here

There is nothing that adds a fun vintage flair to a shower quite like these teacup candles. And they are so versatile! I will be using them for a Beauty and the Beast themed bridal shower, but they could just as easily be used for a tea party, Jane Austen Shower, or Mother’s Day Brunch!

Teacups Favor with text.jpg

For me, the wood wicks were a requirement on this batch, they just remind me so much of a fire in the hearth, and for a Beauty and the Beast Shower, it is the perfect touch since most of the story takes place in the winter where crackling fires are most welcome! In addition, the teacups are the perfect ode to my favorite characters, Mrs. Potts and Chip!

I have wanted to make these candles for a while but was always discouraged for one reason, finding the teacups! While you can find teacups at yard sales and estate sales, I could rarely find them and when I could, they were $10+ per cup! Luckily, I had the thought to check Etsy for teacups and I was not disappointed! :)

I was very impressed with the Etsy shop, The Acerage, which I purchased my teacups from. First, they were half the price I see at estate sales for the same cups due to what they term “minor damage.” So when I received them I was expecting some stains, chips, or even small cracks. Imagine my surprise when all the cups that came not only were in great condition (I could hardly find any chips), but they were in fact much better than the aforementioned teacups I paid double for at the estate sale! I have linked in the supplies the set I used, which are great to make a whole set of candles for shower favors. When someone orders them, the listing will disappear but as soon as they gather the next set they list it again.

If giving the teacups as a favor is not quite in your budget, use them as bridal shower prizes and only make a couple! I have been using them for the last couple showers I have gone to as prizes for games and they have been beloved by all!


Supplies:  

Mismatched Teacups and Saucers
Wooden Candle Wicks
Candle Wax*
Candle Pouring Pot
Powdered Candle Dye
Essential Oils for Scent

*I used leftover candle stubs, but the wax linked here will make about 20 -8oz teacup candles

1.  Melt wax on low heat in your pot. If, like me, you are using candle stubs, remove the wicks from the old candles once the wax is completely melted using either tongs or a fork.

2. For these candles, the full wax wick is far too long. Insert the wood wick into its metal stand and place in the cup. Cut the wicks at the top of the teacup with a pair of scissors, then remove the candle wax from heat and soak them in the wax for 10 minutes. Soaking these wicks is VERY IMPORTANT, they are not like the standard wicks that are already coated in wax and not soaking them will lead to the candles not staying lit.

3. Once wicks have been soaked, remove them with tongs or a fork. Once they are cool enough to handle (I was able to touch them immediately) insert them into the metal holder stands included and let dry.

4. Now, attach the wicks to the bottom of your teacups by dipping the metal holder into the melted wax, then position at the bottom of the jar. 

5. Let the wax cool for a couple more minutes, then add color and fragrance of your choice. The ones I have recommended are great for candles, bath bombs, soaps, and bath salts, so you can get a lot of use out of them! I made pastel pink, purple, and yellow candles that were scented as peppermint-lemon, lavender-lemon, and rosemary-lemon (I know you can't tell that I like lemon).

pouring candles.png

6. Pour cooled (but still liquid) wax into the teacups. Reserve about 25% of your wax to remelt and top off your candles if a divot is created in the middle due to the wax cooling. The cooler the wax is, the less of a divot will form. Some of mine with the cool wax needed no additional wax to fill in, while the ones where I started with hot wax needed a lot of extra to make them look nice!

7. Once candles are cooled and solidified, remelt the excess wax and fill in any divots that were caused during the first pour. Now you have a lovely set of candles for your home or favors for your next party!

These have been by far one of my favorite DIY projects I have done lately and a project I have wanted to do for a long time! Now I just need to find homes for all the teacups I can’t keep, time for a tea party! :)

Painted Wine & Martini Glass Candles

This post contains affiliate links, meaning that if you click on a link I will recieve a small comission. This costs you nothing extra and I only promote products I use and love! You can read our full disclosure here

I always love receiving those special painted wine glasses as gifts, but then I never end up using them! Either I want them all to match or I don’t want to deal with hand washing it every time I use it. Since I’ve been on a candle kick lately, I decided to turn them into candles! I made both Wine Glass Candles and Martini Glasses; both came out beautiful!

I used regular wicks on these candles but you could just as easily use the wood wicks as I previously did for my jar candles. Regardless of your choice of wick, this is a great way to use the extra unique glasses in your collection that or to turn into prizes for your next bridal shower or baby shower!

Supplies:

Wine or Martini Glasses
Candle Wax
Wicks
Candle Melting Pot
Essential Oils and Coloring (Optional)


1.     Melt down candle wax in pot over low heat. If, like me, you are using old candle stubs, remove the wicks from the wax when melted with a fork or tongs.

2.     Remove wax from heat. Let cool for 5-10 minutes; then stir in coloring and fragrance if desired. I used pink and purple for my glasses and a peppermint –lemon fragrance.

3.     Dip the end of your wick (the metal stand bit) into the wax then press it into the bottom of your glass. Wait for the wax to harden before pouring the candle. Note: I had no issues with the glasses and hot wax, but if you are worried about the wax being too hot, soak your glasses in hot water and dry them just prior to placing your wicks.

4.     Pour melted wax into the glasses. Reserve 25% of your wax to top off the candles as they cool. The cooler your wax prior to pouring, the less you will need to fix divots that form while cooling. Your wicks may not want to stand up straight when you pour the wax; I used a wooden stick placed on the top of the glass to balance the wick in the right position.

5.     Once the wax in the glass has hardened and cooled, re-melt the excess wax if needed and top off the candle to create a smooth top.

And there you have it, super easy prizes or as fun accessories to your house! What glasses or containers would you make candles out of?

Bath Salts Favor Bar

This post contains affiliate links, meaning that if you click on a link I will recieve a small comission. This costs you nothing extra and I only promote products I use and love! You can read our full disclosure here

Bath Salts Favor Bar Title.jpg

I don’t know about you but one of my favorite trends in the wedding industry are food bars; smore’s bars, mashed potato bars, mac and cheese bars, I love them all! With that in mind, I thought to myself, why not do a favor bar?

bath salts 1

Favors seem to be falling out of style with budget conscious brides and maids, but I am still a huge fan! I always want my guests to feel valued and thanked for attending and even if it’s just a little something, I think favors are a nice touch of appreciation. That being said, favors don’t have to be crazy expensive to be unique and fun for guests!

For my first favor bar, I went with bath salts! Why? Because you can easily make multiple types and colors with the same set of ingredients, then let your guests mix together their favorite combination and take it home in a cute little jar! Better yet, you can store your extra salts in Tupperware or bags to use yourself.

bath salts finished

Supplies:
Baking Soda
Epsom Salt – 5lb Bag
Deep Sea Salt – Fine Grain, 5 lb Bag
Essential Oils
Powdered Dye
Bath Salt Tags
Bath Salts Bar Sign

1.     First, start by making the basic bath salt mixture. You will use this same base for all your fragrances and colors. Mix together the following proportions of salts and baking soda:

4 cups Deep Sea Salt
5 cups Espom Salt
1 cup Baking Soda

Each 5 lb bag contains approximately 10 cups of salt so you will be able to make almost 20 cups of Bath Salts from one set of bags. I mixed my salts as two batches of the above recipe because I didn’t have a bowl big enough for 20 cups!

2.     Now, decide what containers you will display your bath salts in. I personally adore apothecary jars and have used my two sets (linked here and here :) ) for almost every party I have had. They give such a great finishing touch to any display and you can use them again and again! Whatever you decide to display your salts in, record how many cups of salts they can hold. For my jars, they hold anywhere between 2 – 4 cups of bath salts.

3.     Once you know how much each jar holds, you can start mixing in coloring and fragrance. For my salts, I used the following fragrances and colors.

Yellow – Lemongrass
Blue – Eucalyptus
Orange – Sweet Orange
Green – Tea Tree
Purple – Lavender
Pink – Peppermint

Measure the desired amount of premixed bath salts into a separate bowl. Add ¼ tsp. of color and 5-10 drops of oil depending on your preference. Whisk in oils and color until fully combined, then transfer the mixture into its associated jar. Repeat with the additional colors until you have all the fragrances you want. The great thing about the essential oils starter set is that you have a popular fragrance assortment that go well with the powdered colors!

4.     Now the final thing to do is to make sure that your guests understand what they need to do, that’s where the signs and tags come in! If you are using the fragrances and colors I have recommended, you can use the free printables available on this post! Punch a hole in each bath salts tag and tie around your apothecary jars and simply place the bath salts bar sign into an 8 x 10 frame. Make sure to place out some spoons to scoop salts and you are done!

Now I can’t take credit for the combinations on the sign, they came straight from the essential oils set I bought. But, I love what they came up with! I use the dyes and essential oils over many projects; including candles, soaps, bath bombs, and salts. You will see with my Bath Salts Bar I provided 6 oz jars to be filled and taken home, making almost 30 favors if each jar got completely filled!

blue bath salts

Bride Tribe Tumblers

This post contains affiliate links, meaning that if you click on a link I will recieve a small comission. This costs you nothing extra and I only promote products I use and love! You can read our full disclosure here

If there is one thing I love making for Bridal Parties, it is Tumblers! They are so cute and so useful for getting ready gifts, bachelorette party favors, or even to ask your maids in the first place.

For these tumblers, I was looking for a free dream catcher file for a more unique “Bride Tribe” tumbler, but none of them were suiting my fancy. Then I found this amazing one on Etsy! For a couple bucks it was well worth the price! Better yet, its an SVG file which are super easy to import into the Cricut Craft Cutter software.

For these tumblers and many of the wedding and bridal projects you will see on this blog, having a Cricut is required. I can’t say enough good things about mine, I wish I had had it when I was crafting for my own wedding! It would have saved me hours of work and many of the projects I did would have turned out even better! If you are a crafter, a bride, or even part of the bridal party I would highly recommend one, the one-time purchase will serve you well. :) Not only can you make tumblers like these, but you can also use it for custom cut invitations, iron on clothing, paper crafts, and removable vinyl wall decorations. I could go on and on but needless to say they are awesome!

Supplies:

Gold Adhesive Vinyl
Metallic Teal Adhesive Vinyl
Transfer Paper
Purple Tumblers
Craft Cutter and Tool Set
Adhesive Mat
Dream Catcher File
Bride File
Bride Tribe File


1.     Download the Dream catcher File and import into the Cricut software. You can do this by going to the software; and, after making a new project, click the upload button. Import the file, the click Continue.

Cricut 1-2

2.    Press save for the file to be uploaded to the software, then click the image under the Upload Tab. Select Insert Images" to insert it into the current project.

Cricut 3-4

3.     Size the dream catcher to 3.25” wide, then remove the unneeded cuts. For this image, ungroup the cuts using the button on the upper right.

Cricut 5

4.     Now, select each of the first 5 cuts and press the red "x" on the image to remove it.

Cricut 6-8

5.     Once the excess cuts are removed, copy and paste the number of dream catchers you need then click the "Make it" Button in the upper right. You can get up to six dream catchers per 12” x 12” sheet of vinyl. Press Continue to got to the cut Screen. On the Cricut itself, set the dial to "Vinyl", load the mat with Gold Vinyl, and press the Cricut button to cut.

Cricut 9-10

6.     Similarly, import the “Bride” and “Bride Tribe” pictures into the software, sizing them to be 2.5” tall. Cut these out in the Metallic Teal Vinyl.

7.     Remove the excess vinyl (known as weeding) until just the images and words you want to transfer are remaining.

8.     Cut away the excess backing around your vinyl designs. Fix them to the vinyl mat based on how you would like them to transfer onto the tumbler. As you can see from mine, I nested the “Bride Tribe” words into the bottom right of the Dream Catcher.

vinyl arrangement

9.     Cover the design with transfer paper. Push out all the air bubbles and press it into the design, such that when you lift the transfer paper the design comes up with it without its backing. I prefer the lined transfer paper as it makes it easier to orient the designs on their final resting places.

transfer paper

10.     Starting at the top of the tumbler, line up and press the transfer paper onto the tumbler, working top left to bottom right. Because it is curved, it will not stay exactly parallel with the top, this is ok! Pres the transfer paper as flat as you can against the tumbler, rubbing the design especially to get out any air bubbles. Lift the transfer paper, leaving the design on the tumbler.

Bride Tribe Tumbler

11.     For the Bride Tumbler, I wanted the letters to overlap the Dream Catcher. So the same steps as above are followed, but you first transfer the dream catcher, then the test as two separate transfers.

Bride Tumbler

Using these basic instructions, you can also design whatever tumbler you like to make your own custom tumblers for you, your bride, or your wedding party (if you are the bride!).

Pomander Flower Frames

This post contains affiliate links, meaning that if you click on a link I will recieve a small comission. This costs you nothing extra and I only promote products I use and love! You can read our full disclosure here

July is upon us and what does that mean? We are in the middle of Wedding Season! Better yet to me, we are in Bridal Shower Season, and I’ve been crafting for one of my best friend’s showers! I ended up being able to use a couple of the flowers leftover from the bouquets and decorations from a different wedding to make these cute little frame accents!

The best part of these is how easy they are to make; the floral foam makes it super simple as it already has the adhesive on the back and is the perfect size for making little pomander style accents to frames, signs, or table numbers. I made two types, one that was mixed hydrangeas, for my friend’s shower, and one that was spray roses for a more English feel.

Supplies:
Oasis Deco Mini Foam
Silk Flowers of your Choice (I used Purple Hydrangeas, Lilac Hydrangeas, and Spray Roses on mine)
8 x 10 Frame
Tacky Glue (Optional)

1.     Start by removing the heads of your silk flowers. Mine popped off no problem but you may need wire cutters based on the flowers you choose.

2.     Remove Floral Foam from its attached grid. Starting at the top of the round, push the head of the flowers into the foam. If they are having trouble staying put, use a little tacky glue to keep them in.

roses collage

3.     Once you have arranged the flowers as you wish, remove the adhesive backing on the back of the foam. Stick directly to the picture frame you have chosen and you’re done!

Yep it’s really that simple and they look adorable! An added plus with this foam is that if you want to use real flowers, you can simply soak it in water beforehand and then press the flower heads directly into the foam like the silk ones, just make sure to keep a little bit of their stems on. Fresh flowers will last a couple days this way. These Flower frames are super easy to make and are a cute addition to any shower, as an extra accent to wedding signs or table numbers!

D.I.Y. Wooden Wick Candles

This post contains affiliate links, meaning that if you click on a link I will recieve a small comission. This costs you nothing extra and I only promote products I use and love! You can read our full disclosure here

DIY Wooden Wick Candles #candles #diy

These lovely crackling candles first came to be based on my own bridal shower. One of my friends won one as a prize and absolutely loved it! When it finally burned out a couple weeks ago, I went looking for a way to replace it as her birthday present. Luckily, I had the thought to check for the wooden wicks first!

DIY Wooden Wick Candles #candles #diy

I love these wooden wicks compared to the regular ones, where you can achieve the comfort of a crackling fire with a little candle. I didn’t realize it would be so easy to make them myself, or that amazon would have had such an assortment to choose from (last time I doubt that Amazon doesn't have everything under the sun).

DIY Wooden Wick Candles #candles #diy

Now, I have a wonderful assortment of these candles which were cheap to make and so nice to have! I would highly recommend making them if you have candle stubs at home; I used the ends of my wedding candles for them and was able to make a bunch of them in both leftover favor jars and teacups as prizes for upcoming showers and gifts for my friends! These also work wonderfully for Bridal Shower favors, Wedding Favors, or Baby Shower Favors!

DIY Wooden Wick Candles #candles #diy

Some things to note on this project: for your candle making supplies, you need a pouring pot or an old pot you don’t care about to melt the wax. I made the unfortunate choice of using one of my cooking pots with an old measuring cup and it took me a good couple hours to get all the wax remnants out. Seeing as I could’ve bought an actual candle pouring pot for a little over $10, it would’ve been a far better choice and I wouldn’t have been spilling wax all over the place!

Supplies:  
Wooden Candle Wicks
6 oz Jars with Lids
Candle Wax*
Candle Pouring Pot
Powdered Candle Dye
Essential Oils for Scent

*I used leftover candle stubs, but the wax linked here will make about 26 -6oz candles

1.  Melt wax on low heat in your pot. If, like me, you are using candle stubs, remove the wicks from the old candles once the wax is completely melted using either tongs or a fork.

2. For these candles, the full wax wick is far too long. Cut the wicks in half with a pair of scissors, then remove the candle wax from heat and soak them in the wax for 10 minutes. Soaking these wicks is VERY IMPORTANT, they are not like the standard wicks that are already coated in wax and not soaking them will lead to the candles not staying lit.

DIY Wooden Wick Candles #candles #diy

3. Once wicks have been soaked, remove them with tongs or a fork. Once they are cool enough to handle (I was able to touch them immediately) insert them into the metal holder stands included and let dry.

4. Now, attach the wicks to the bottom of your jars by dipping the metal holder into the melted wax, then position at the bottom of the jar. 

5. Let the wax cool for a couple more minutes, then add color and fragrance of your choice. The ones I have recommended are great for candles, bath bombs, soaps, and bath salts, so you can get a lot of use out of them! I made pastel pink, purple, and yellow candles that were scented as peppermint-lemon, lavender-lemon, and rosemary-lemon (I know you can't tell that I like lemon).

DIY Wooden Wick Candles #candles #diy

6. Pour cooled (but still liquid) was into the jars. Reserve about 25% of your wax to remelt and top off your candles if a divot is created in the middle due to the wax cooling. The cooler the wax is, the less of a divot will form. Some of mine with the cool wax needed no additional wax to fill in, while the ones where I started with hot wax needed a lot of extra to make them look nice!

7. Once candles are cooled and solidified, remelt the excess wax and fill in any divots that were caused during the first pour. Now you have a lovely set of candles for your home or favors for your next party!

The crackling of these candles makes me want to make a slew of them for a fall or winter wedding, just with different colors and scents. :) What would you make these cute little candles for?

DIY Wooden Wick Candles #candles #diy

Chocolate Dipped Cookie Spoons

This post contains affiliate links, meaning that if you click on a link I will recieve a small comission. This costs you nothing extra and I only promote products I use and love! You can read our full disclosure here

Chocolate Covered Cooker Spoons #cookie #favors

These adorable cookie spoons are something that I was planning on doing for my wedding out of town guest bags; but I never got around to making them! They go perfect with a cup of cocoa and are a wonderful addition to a coffee bar. :) The best part is that they are quite cheap to make, 120 spoons for about $50 if you have to buy all the ingredients.

Supplies:
Spoon Shaped Cookie Cutter
2 – 10 oz White Candy Melts
2 – 10 oz Chocolate Candy Melts
Sugar Cookie Dough (Here is my recipe)

1.     Prepare the Sugar Cookie dough according to the recipe you plan to use. For the recipe I used, it will make around 120 spoons if you use all the dough. In general you want the dough to hold its shape and not flatten out, so try not to use the store bought stuff (If you do, add a little flour into the dough before rolling it out).

Chocolate Covered Cooker Spoons #cookie #favors

2.     Sprinkle flour on your work surface and roll the dough out to a little over ¼” and cut out spoons with the cookie cutter. Transfer to a cookie sheet and bake for 10-12 minutes. Try to have your cookies come out on the crispier side; that will help them keep their strength for being dipped into coffee.

Chocolate Covered Cooker Spoons #cookie #favors

3.     Once your cookies are cooled, melt the chocolate melts according to the package. Dip the end of each spoon into the chocolate then lay on parchment paper to cool. I put my candy melts in glasses so that it made dipping the cookies easier and made half of my cookies white and half dark chocolate.

4.     Once the chocolate has hardened, use a spoon to drizzle the extra chocolate over the spoons, and you’re done!

Chocolate Covered Cooker Spoons #cookie #favors

These cookies are easy to make into cheap favors by simply putting them in cellophane bags and are the perfect addition to a welcome bag for a winter wedding! Leave any questions you have in the comments!

Chocolate Covered Cooker Spoons #cookie #favors

DIY Mean Girls Bachelorette Tumblers

This post contains affiliate links, meaning that if you click on a link I will recieve a small comission. This costs you nothing extra and I only promote products I use and love! You can read our full disclosure here

Mean Girls Tumbler Title.jpg

If you’ve ever been on Etsy, there are so many cute and creative tumblers you can get for your bridal party! These tumblers were by far the favorite and most useful item I made for our Mean Girls Bachelorette Party. Since we had it in Las Vegas, we could easily fill them with any drink we wanted from the rooms and take them around with us as we walked the Strip and through all the different hotels and casinos. After the party is long gone, I still use mine all the time for iced coffee for work, so they make an excellent take home favor!

Once again, with a craft cutter this project becomes incredibly simple and can be customized to anything your heart desires! In addition to that, making them yourself will cost you significantly less than ordering them premade. :)

Note: This page may contain affiliate links, meaning that if you click on the link and buy the product, I will receive a small commission. This will not change your cost at all and I only recommend products I use and love!

Supplies:
Pink Tumblers
Silver Glitter Vinyl
White Vinyl
Grid lined Transfer Tape
Craft Cutter and Tool Set
Adhesive Mat

1.     Clean and dry the tumblers.

2.     Design your names: I used Pic Monkey to make both the names and titles for the Tumblers. The name is made with the Lavanderia font and the title was made with the Didact Gothic font. For the Bride I used the title “The Queen Bee” and the Bridesmaids were called “The Plastics” in true Mean Girls fashion. J You can use the design feature in PicMonkey to place text and save as a picture, which I find to be far easier than using the Cricut Design software to make the text as it tends to make the software run slowly.

Note: The Lavanderia Font is only part of PicMonkey Premium, which I use for some of my party designs and photo editing. You can do both monthly or yearly billing for it, and both are very inexpensive! :)

3.     When I made the names and titles, I made all the words the same size and part of the same picture (Names were one picture, titles were another picture). This will help with keeping them all the same size for the cutting phase. Once you have saved your text as pictures, upload them into the Cricut (or other cutter) design software. I made the longest name about 6 inches long. Cut the names out in Silver Glitter Vinyl.

Cameo 3 Bundles by Expressions Vinyl

4.     Next, import the titles into the design software. Using the names as they are sized, size the titles so that they fit nicely under the names (I did this by feel). Once you have your titles sized, delete the name picture and cut the titles out in white vinyl.

5.     After weeding the excess vinyl from the designs, cut the excess backing away from the text as much as possible. Using the sticky mat that goes with your cutter, arrange the white text under the name.

6.     Lay transfer tape over the text, aligning the gridlines under the name so that everything stays straight.

7.     Transfer the vinyl to the tumbler. Having gridline tape is very helpful here as you can use it to make sure that your text is perpendicular to the bottom of the tumbler. Press the vinyl onto the tumbler and remove the tape, and then you’re done!

Yes, that does feel like a lot of steps, but once you get the hang of it it takes no time at all! The big time crunch came in picking a font and designing the names, once I had the vinyl cut the transfer process took maybe 5-10 minutes a tumbler. Leave any questions you have in the comments!

Let's get Trashed Can

This post contains affiliate links, meaning that if you click on a link I will recieve a small comission. This costs you nothing extra and I only promote products I use and love! You can read our full disclosure here

I originally saw one of these on Pinterest  and immediately wanted to make a “Let’s get Trashed” Can for my Bride’s Bachelorette Party! As long as you have a craft cutter, this project is super easy!

Note: This page may contain affiliate links, meaning that if you click on the link and buy the product, I will receive a small commission. This will not change your cost at all and I only recommend products I use and love!

Supplies:

Office Trash Can-I found mine at Walmart
Pink Vinyl- Mine ended up coming out of a whole pack of vinyls
Silver Glitter Vinyl
Craft Cutter and Tool Set
Adhesive Mat
Transfer Tape
Let’s Get Trashed Template


1.     Using the Template Provided, cut out the words for your trash can on the silver glitter vinyl. I made mine about 11” x 11”.

2.     Now, wash and dry the surface of your trashcan so that the vinyl will stick its best. Using transfer paper (I like the Cricut transfer tape for the grid lines), adhere the words to your trashcan. I did mine at a little of a slant but do whatever you like best! To use transfer tape, take it off its backing, lay it onto the design and smooth over it to stick the vinyl to the design. Then just peel the design off its backing to be placed like a sticker.

Cameo 3 Bundles by Expressions Vinyl

3.     Next, make a couple different sized circles and cut them out in the pink vinyl. Once they are cut, just peel and stick them wherever you want on your trashcan!

I absolutely love how mine turned out and we ended up using it as an ice bucket in the hotel room. How will you use your cute new “trashed” can? :)

Disney Pin Monogram

This post contains affiliate links, meaning that if you click on a link I will recieve a small comission. This costs you nothing extra and I only promote products I use and love! You can read our full disclosure here

I have a couple friends getting married in 2017 so I have been having oodles of fun thinking of bridal shower and bachelorette themes for them. One I can't seem to get out of my head is a Disney bridal shower, so regardless of if either of them choose it in the end I have started crafting!

First up is an art piece I made for my craft room, but would look great hanging over the food or gift table at and bridal or baby shower, a monogrammed canvas. :) For this version I used Disney Pins to make the first letter of my last name, but you can make it just about any letter you want, depending on the number of pins you have. :)

Note: This page may contain affiliate links, meaning that if you click on the link and buy the product, I will receive a small commission. This will not change your cost at all and I only recommend products I use and love!

Supplies:
Disney Pins (if you don't have a collection already)
20" x 30" Canvas
1/2-1 yard Disney Fabric
Fabric Glue
 

1. First, Iron out your piece of fabric and arrange it over you canvas. I tried to make mine so that my favorite princess wasn't in the center of the fabric so she wouldn't get completely covered up by the pins. :) 

2. Once you have you fabric arranged, flip both your fabric and canvas over to the opposite side. trim the edges of the fabric so that they meet up with the edge of the canvas. Using fabric glue, stretch and adhere the short sides of fabric to the canvas. Wait until one side is dry before stretching and gluing the other so that you don't accidentally move you fabric!

3. Finish covering the canvas with the long sides in a similar fashion. I folded the corners in like a Christmas present to give it a nice clean look, as shown below:

Monogram Pic 2.jpg

4. Now that you canvas is ready, its time to pick what you want to put on it! I did an uppercase C for my last name but you could do the first letter of the bride's/baby's name, the age a child is turning on their birthday; there are lots of choices! Using Microsoft Publisher or Word, make you letter as big as you can to take up an 11" x 17" page and print.

5. If your printer is like mine, it doesn't accept that big of pages. Using the tiled printing, your letter should print onto three separate pages. Once it is printed, cut out the inside of the letter and tape the sheets together.

6. Now comes the fun part, putting on all your pins! I will admit that this is rather time consuming, but still a lot of fun. :) Arrange your letter in the center of the canvas, then start by pushing pins in along the edges of your design. I chose not to put on the pin backs until the end, which saved time in this stage.

Monogram Pic 3.jpg

7. Once the outline pins are done, fill in the middle. I ended up making one base layer and filled in the holes I had as a top layer. As I collect more pins I will fill it in to define the letter more and more.

8. After you have placed all the pins, remove your paper stencil. Turning the canvas over, put the backs into all the pins, pushing the backs in as much as possible. Once this is done, just reposition any pins that rotated while you were securing them.

Monogram Pic 4.jpg

I love this project for either a baby or bridal shower, and if the bride or mama-to-be loves Disney, it also makes a great gift to hang on their wall. :) Tune in later for more projects for a Disney themed Bridal Shower!

IMG_20160731_113503927.jpg

DIY Personalized Wedding Matches

This post contains affiliate links, meaning that if you click on a link I will recieve a small comission. This costs you nothing extra and I only promote products I use and love! You can read our full disclosure here

One of my favorite ideas that came into play with our wedding was the Cigar Bar I designed for my husband and his fraternity brothers. It gave the guys a fun "manly" thing to do during the wedding and everyone told us how much they liked it! Now for me, no cigar bar is complete without personalized matches, and no better time to personalize everything than for your wedding! As I searched, I couldn't seem to find anything quite right so I decided to design my own! It was surprisingly easy and I love the way they turned out!

Note: This post contains affiliate links, which means that if you click on one of the product links and choose to purchase, I will receive a small commission. This does not affect your price in any way and I only promote products I use and love! :)

Supplies:


Full Sheet Adhesive labels (I used Avery 5156)

Matches Template

1. Using the matchbook template, start by putting your own information into the text boxes. The font I used for our names and location is called Baroque Script, so if you want it to look exactly like these matches make sure to have the font downloaded beforehand!

2. Print out the matches and cut them out with scissors. Next, line up the top of the matchbook and the sticker. Make sure that the sandpaper strip is on the side that won't be covered by the sticker.

3. As shown above, adhere the sticker starting at the top, then smoothing around the entire matchbook. Below you see a finished matchbook.

flower explosion

This project really added a special touch to our big day and as you can see its quite easy to do! After the initial measuring and designing of the template it only took about two hours to cut and make 100 matchbooks! Stay tuned for more fun wedding crafts!

DIY Wine Charm Favors

This post contains affiliate links, meaning that if you click on a link I will recieve a small comission. This costs you nothing extra and I only promote products I use and love! You can read our full disclosure here

To celebrate the hubs and I first year of marriage, I took a look back at all the DIY I did through the course of my wedding and selected some of the projects to feature here on Wine and Sprinkles! The first is our wedding favors, homemade wine charms. They are surprisingly easy to make and make a cute memorable, and transportable wedding favor!

Note: This post contains affiliate links, which means that if you click one of the links and choose to purchase, I will receive a small commission. This does not affect your price in any way and I only promote products I use and love!

Supplies:
Assorted beads (I chose blue and silver)
Assorted Charms
Earring Wire Hoops
Jump Rings
Needle nose pliers
 

1.  First, attach the small jump rings to all of the charms you intend to use. In the pack I mentioned there are some that just don't look wine charm material, so order an extra pack. 

2. Using the needle nose pliers, flatten the wire on the hoop so that the beads and charms can easily slide on. Then slide on your beads and charms however you like. As you can see below I did silver, blue, charm, blue the silver for a nice symmetrical look.

flower explosion

3. Finally, re-bend the wire hoop's tip to its original position to look all the beads and charms in place.

And then you're done! We ended up pairing two to a favor box, but these could easily be made into sets of 4-8 to give away as Christmas presents or wine tasting favors as well. :) Now go get yourself a glass of wine to try out your new charms on!

DIY Valentine's Day Tea Cups

This post contains affiliate links, meaning that if you click on a link I will recieve a small comission. This costs you nothing extra and I only promote products I use and love! You can read our full disclosure here

As we get closer to Valentine's Day and its impending tea party, I keep finding bits and pieces that I forgot about. A few days ago I realized in a panic that I didn't have enough matching tea cups for the whole party. Yes I am a little crazy when it comes to things matching at parties, but on the bright side it gave me the idea for these little beauties, personalized Valentine's Day Tea Cups! Not only will they function as place cards when people get their tea but they become great favors for each guest to take home. The best part, in my opinion, was the price. I found plain white tea cups at Walmart for a dollar a piece and I already had all the vinyl I needed for the project so I ended up only spending $10 on the whole set!

Supplies:
Plain white teacups (i found mine at Walmart)
Permanent Adhesive Vinyl in pinks, white and red (I use Expressions Vinyl)
Craft Cutter and Tool Set
Adhesive Mat
Scissors

1. First, cut out the valentine heart using your craft cutter. You can download the one I used here. I made my hearts about 3" wide. Once cut, weed away the extra vinyl.

2. Next cut out the the names in a white matte vinyl. I used the Brush Script for my names and made sure that the longest was 2" wide maximum. Additionally, cut out 1" hearts in varying colors of pink and red, about 5 per cup.

3. Once the names are weeded, use transfer paper to adhere it to the hearts while they are still on the mat. I did mine on a slant for fun, but it is by no means required! Decide how you like them best. :)

Cameo 3 Bundles by Expressions Vinyl

4. Now, peel off the main heart just like a stick and cut a small slit in the bottom near the point. This will help you overlap the bottom that is closer to the curve.  Place squarely on the teacup, with the teacup handle on whatever side you plan to drink from (mine are right because I assumed everyone was right handed). Starting in the middle on the heart, smooth it out to the edges, starting at the top and ending at the bottom, so any excess can be easily hidden in the point.

5. Finish each teacup by sticking on the smaller assorted hearts you cut. I found that about 5 filled up the cup nicely but didn't overlap.

I absolutely adore these cups! Next year I may do something similar with champagne flutes because this tea party may become a yearly tradition. And since they are made with permanent vinyl, they are a hand washable addition to your friends mug collection! :)