This post contains affiliate links, meaning that if you click on a link I will recieve a small comission. This costs you nothing extra and I only promote products I use and love! You can read our full disclosure here

I don’t know about you but one of my favorite trends in the wedding industry are food bars; smore’s bars, mashed potato bars, mac and cheese bars, I love them all! With that in mind, I thought to myself, why not do a favor bar?
Favors seem to be falling out of style with budget conscious brides and maids, but I am still a huge fan! I always want my guests to feel valued and thanked for attending and even if it’s just a little something, I think favors are a nice touch of appreciation. That being said, favors don’t have to be crazy expensive to be unique and fun for guests!
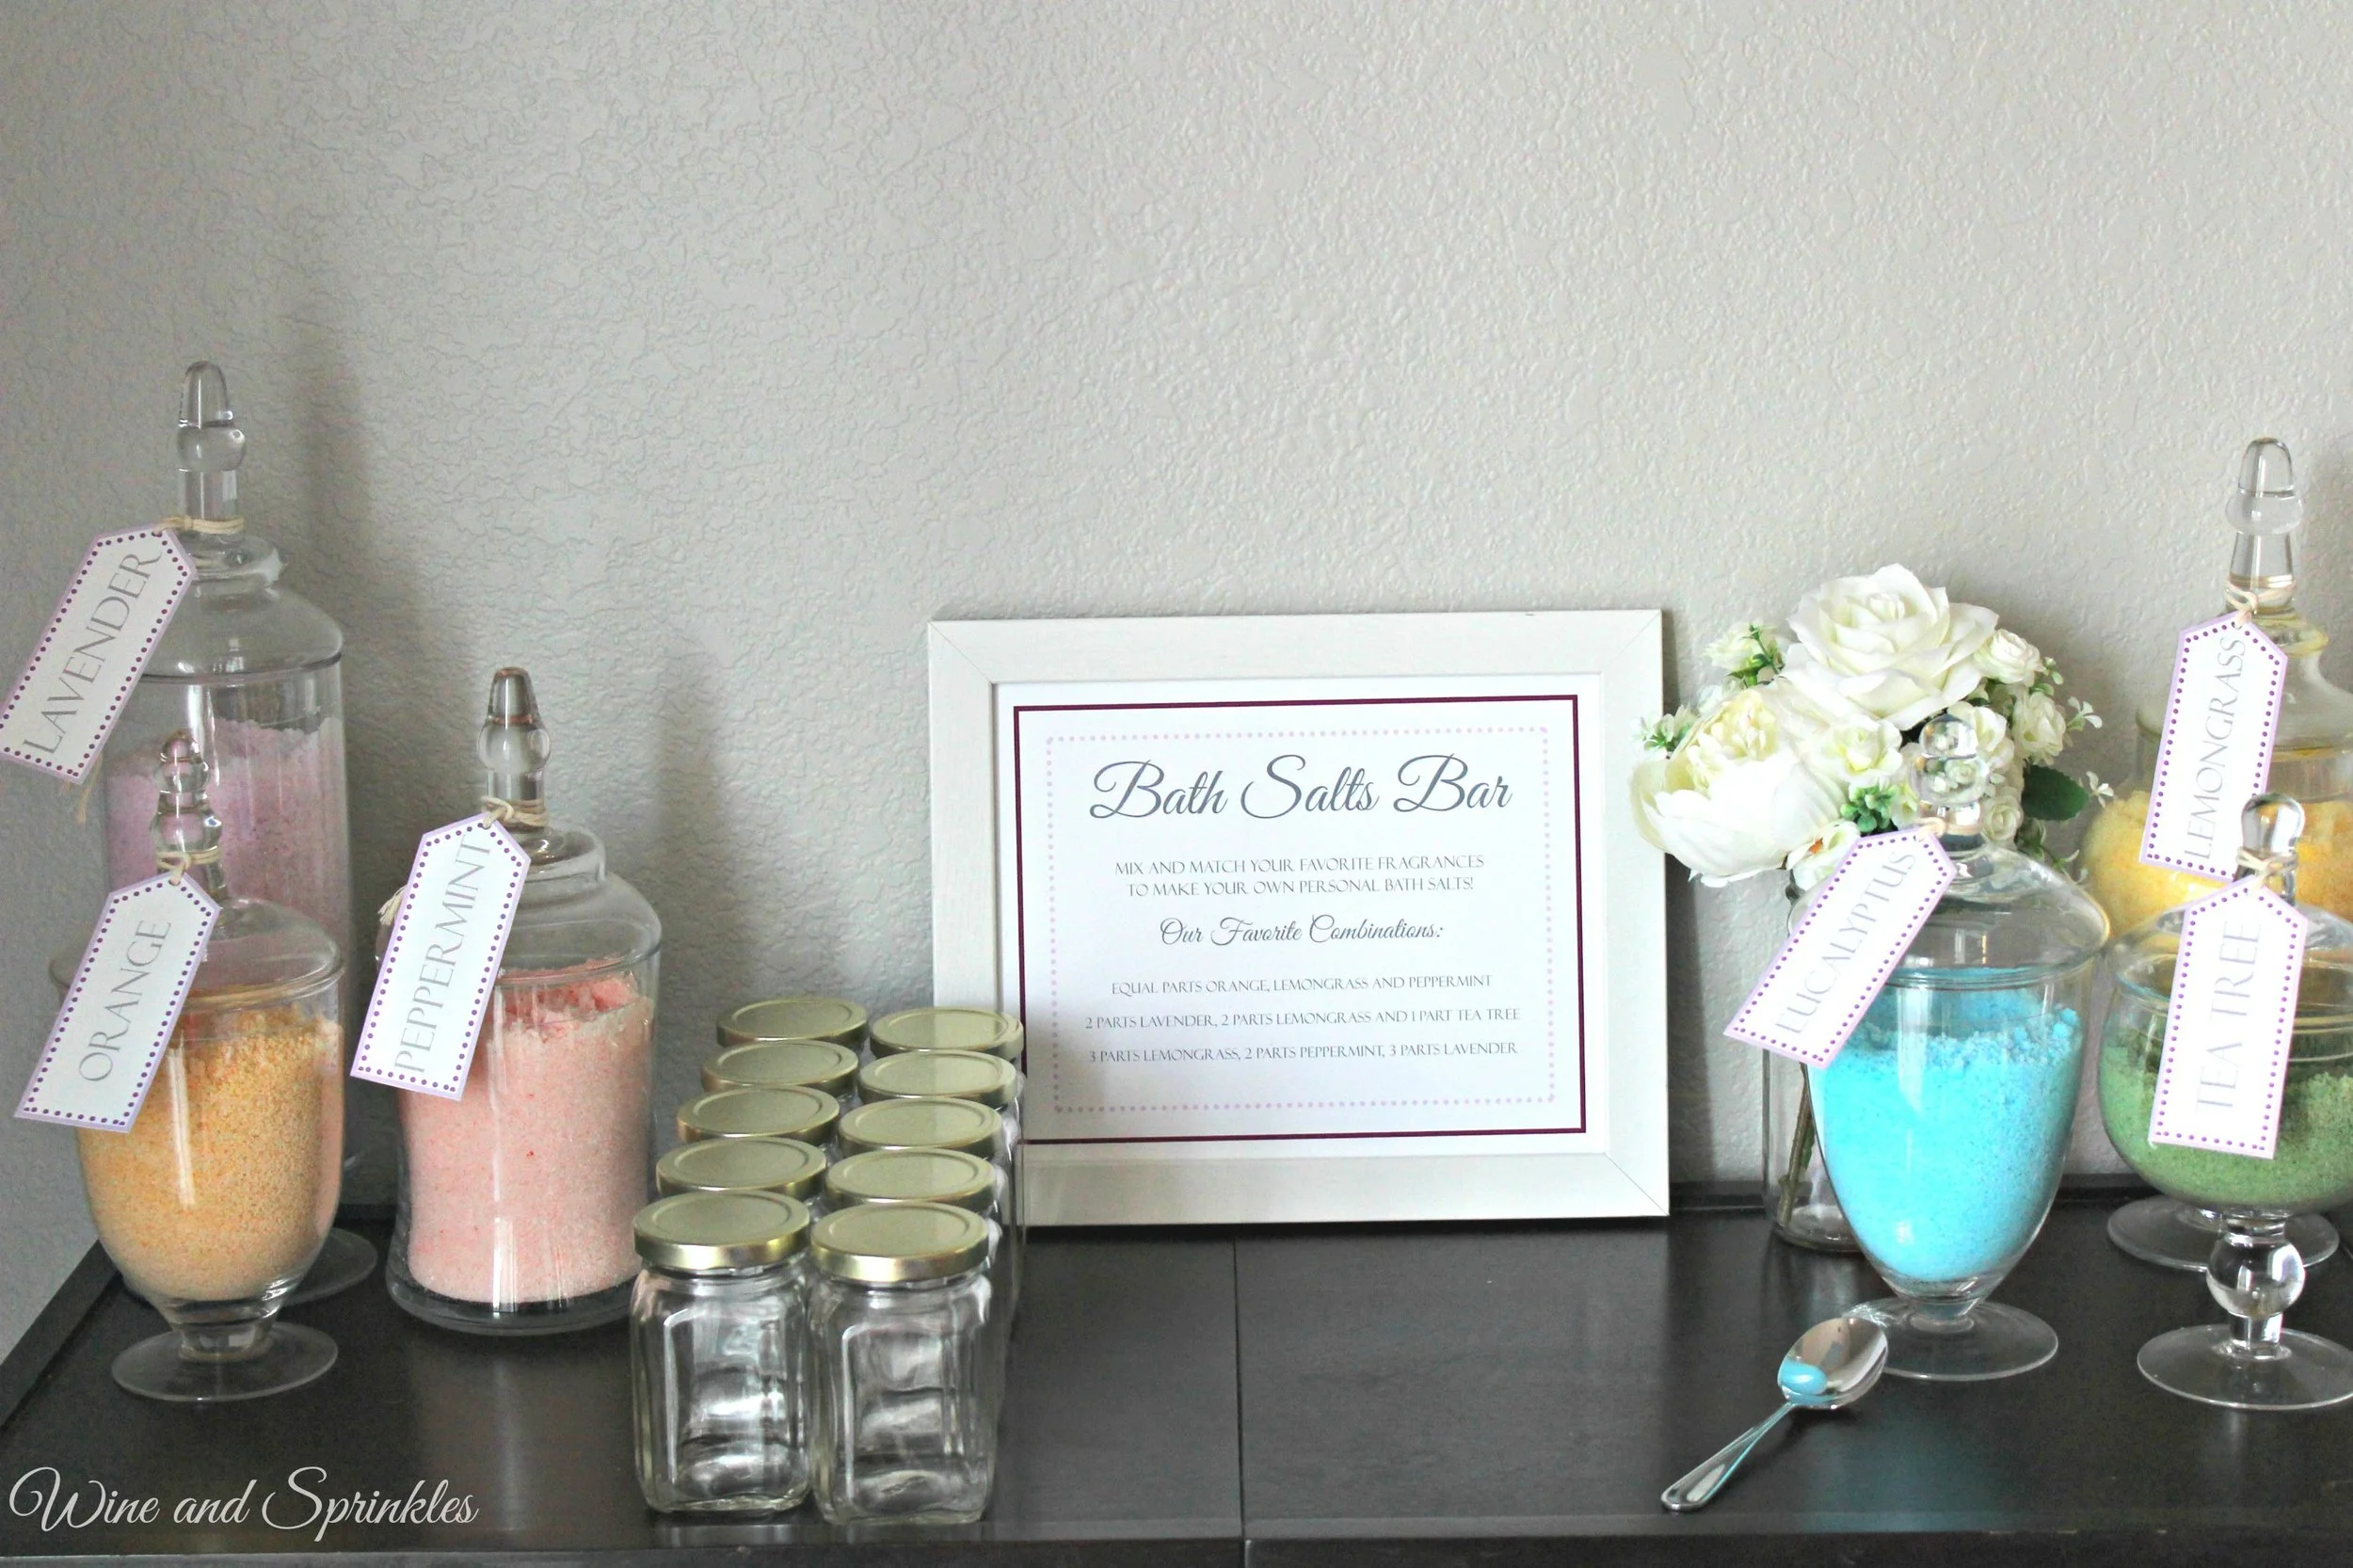
For my first favor bar, I went with bath salts! Why? Because you can easily make multiple types and colors with the same set of ingredients, then let your guests mix together their favorite combination and take it home in a cute little jar! Better yet, you can store your extra salts in Tupperware or bags to use yourself.

Supplies:
Baking Soda
Epsom Salt – 5lb Bag
Deep Sea Salt – Fine Grain, 5 lb Bag
Essential Oils
Powdered Dye
Bath Salt Tags
Bath Salts Bar Sign
1. First, start by making the basic bath salt mixture. You will use this same base for all your fragrances and colors. Mix together the following proportions of salts and baking soda:
4 cups Deep Sea Salt
5 cups Espom Salt
1 cup Baking Soda

Each 5 lb bag contains approximately 10 cups of salt so you will be able to make almost 20 cups of Bath Salts from one set of bags. I mixed my salts as two batches of the above recipe because I didn’t have a bowl big enough for 20 cups!
2. Now, decide what containers you will display your bath salts in. I personally adore apothecary jars and have used my two sets (linked here and here :) ) for almost every party I have had. They give such a great finishing touch to any display and you can use them again and again! Whatever you decide to display your salts in, record how many cups of salts they can hold. For my jars, they hold anywhere between 2 – 4 cups of bath salts.
3. Once you know how much each jar holds, you can start mixing in coloring and fragrance. For my salts, I used the following fragrances and colors.
Yellow – Lemongrass
Blue – Eucalyptus
Orange – Sweet Orange
Green – Tea Tree
Purple – Lavender
Pink – Peppermint
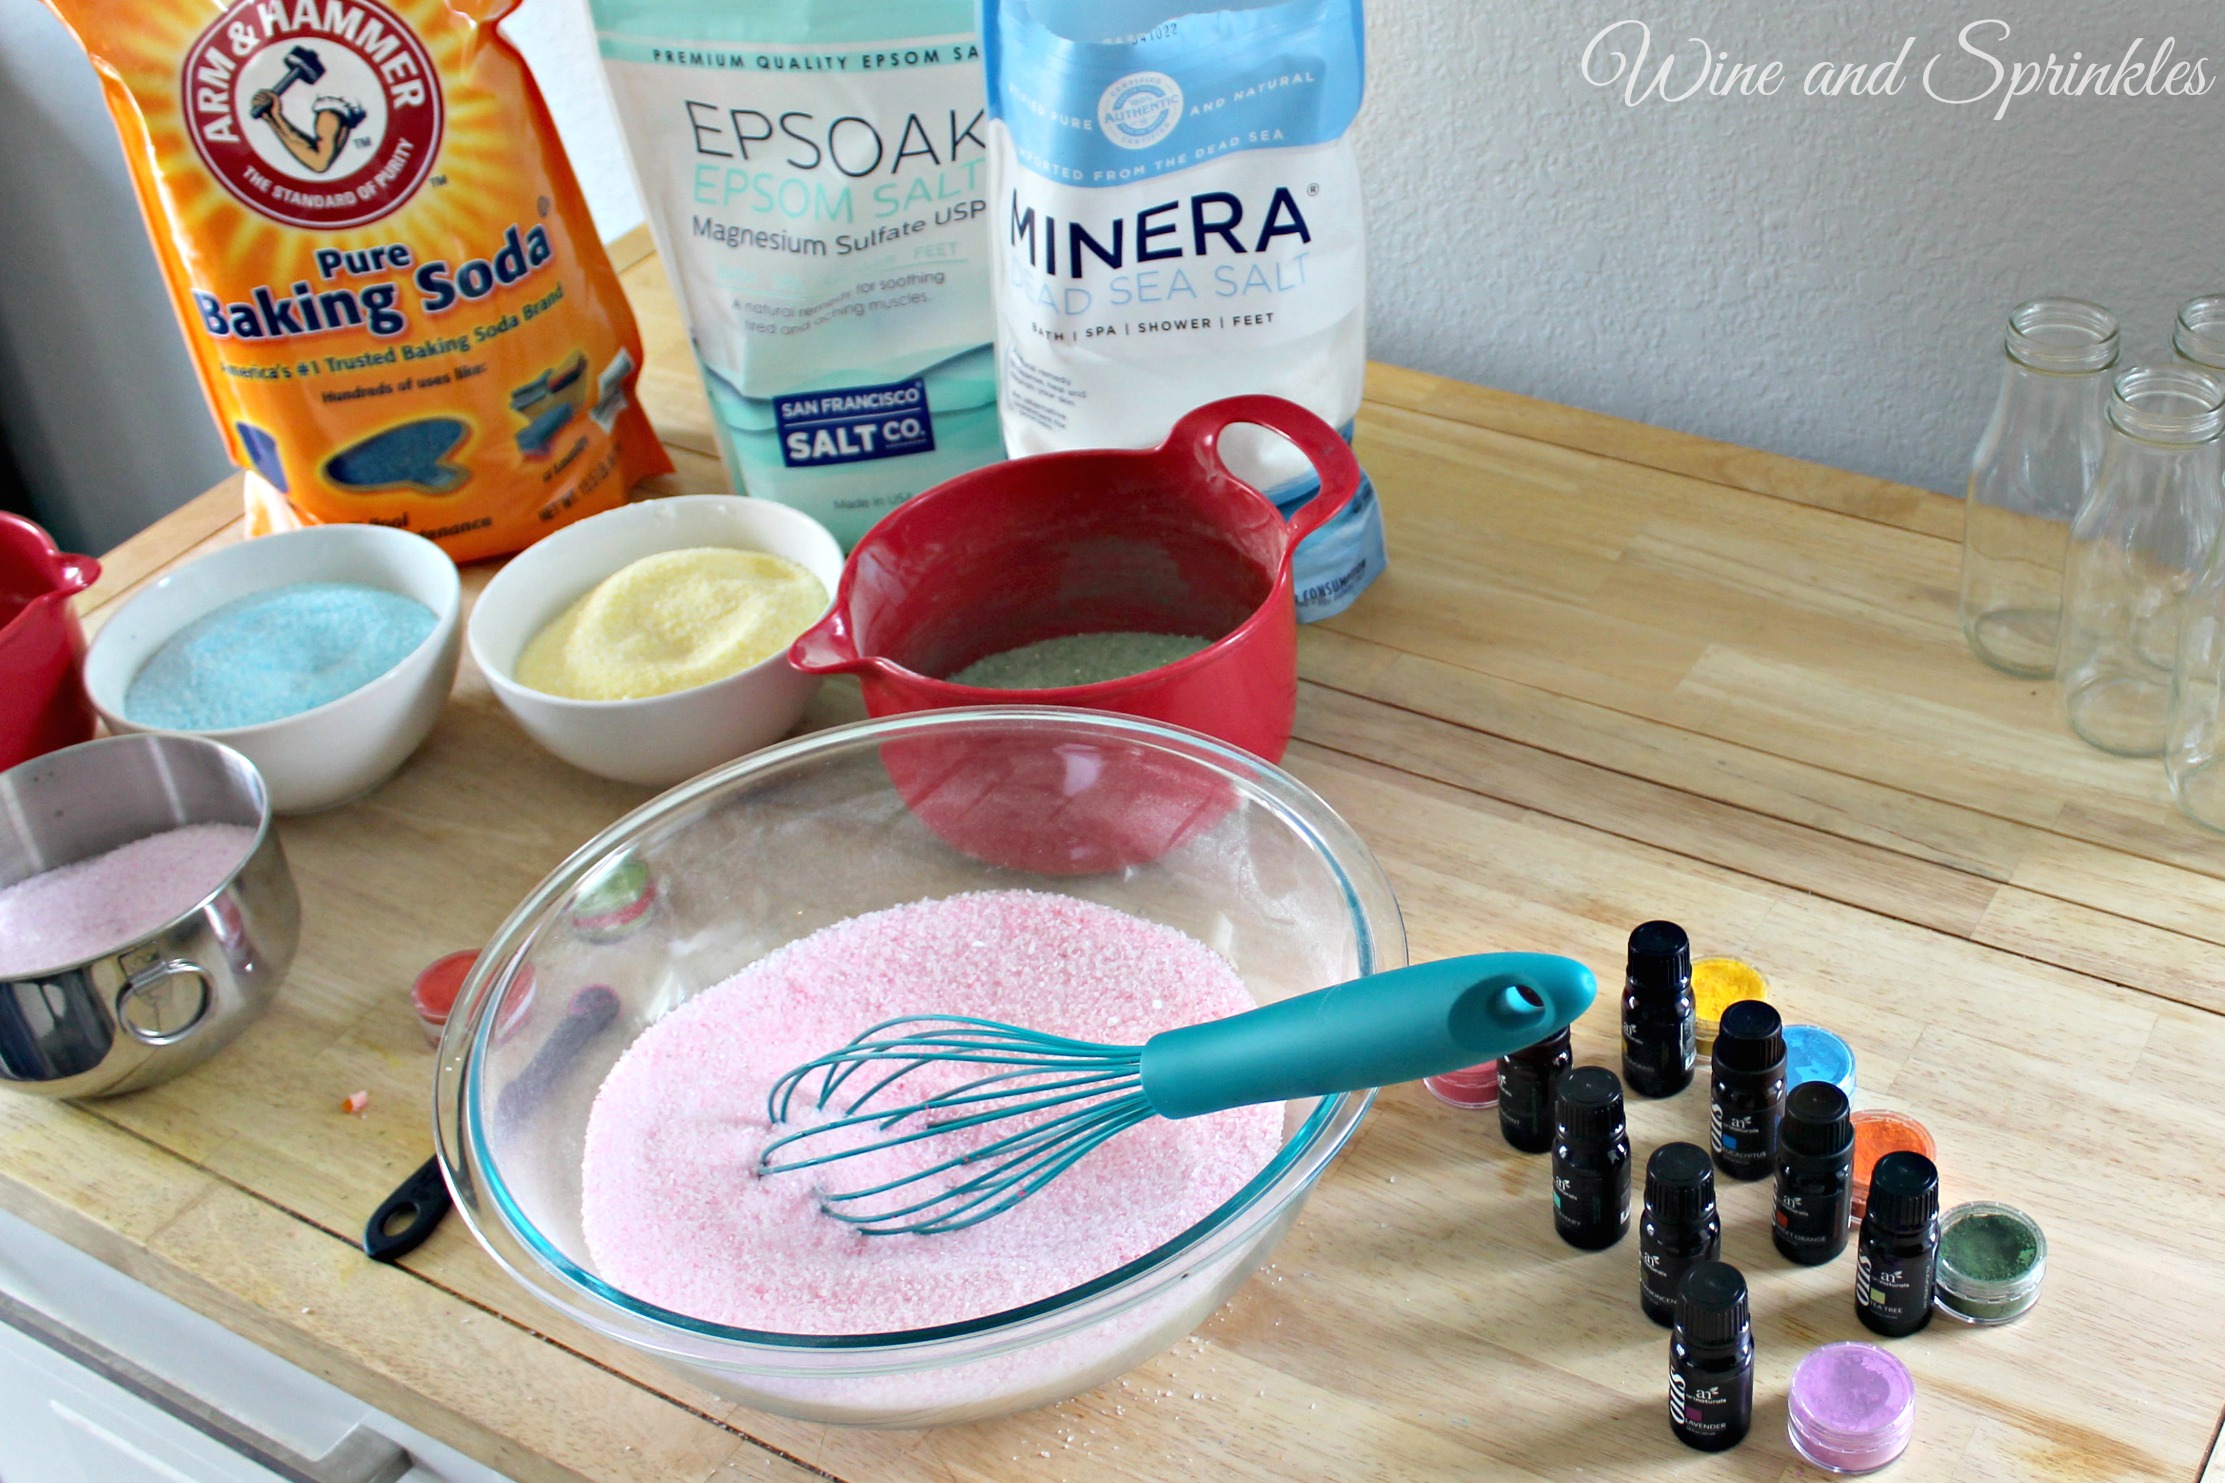
Measure the desired amount of premixed bath salts into a separate bowl. Add ¼ tsp. of color and 5-10 drops of oil depending on your preference. Whisk in oils and color until fully combined, then transfer the mixture into its associated jar. Repeat with the additional colors until you have all the fragrances you want. The great thing about the essential oils starter set is that you have a popular fragrance assortment that go well with the powdered colors!
4. Now the final thing to do is to make sure that your guests understand what they need to do, that’s where the signs and tags come in! If you are using the fragrances and colors I have recommended, you can use the free printables available on this post! Punch a hole in each bath salts tag and tie around your apothecary jars and simply place the bath salts bar sign into an 8 x 10 frame. Make sure to place out some spoons to scoop salts and you are done!

Now I can’t take credit for the combinations on the sign, they came straight from the essential oils set I bought. But, I love what they came up with! I use the dyes and essential oils over many projects; including candles, soaps, bath bombs, and salts. You will see with my Bath Salts Bar I provided 6 oz jars to be filled and taken home, making almost 30 favors if each jar got completely filled!
