This post contains affiliate links, meaning that if you click on a link I will recieve a small comission. This costs you nothing extra and I only promote products I use and love! You can read our full disclosure here

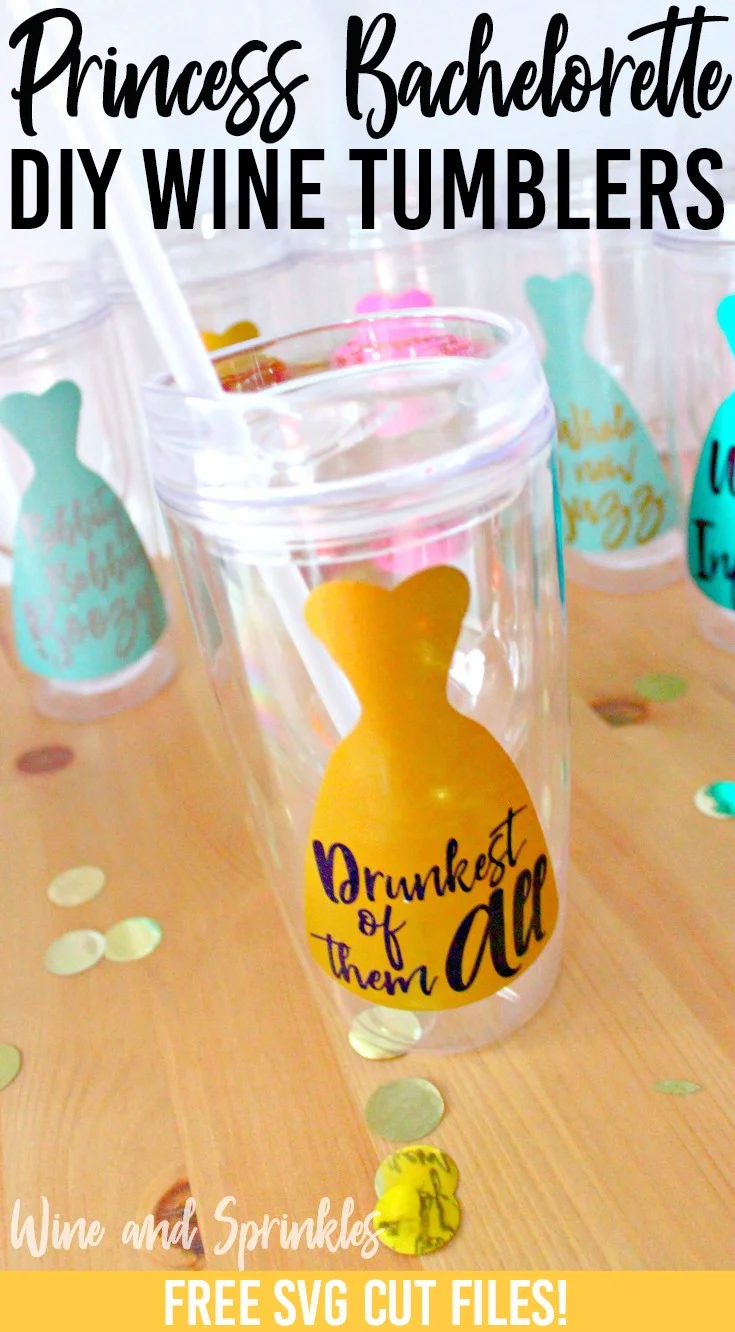
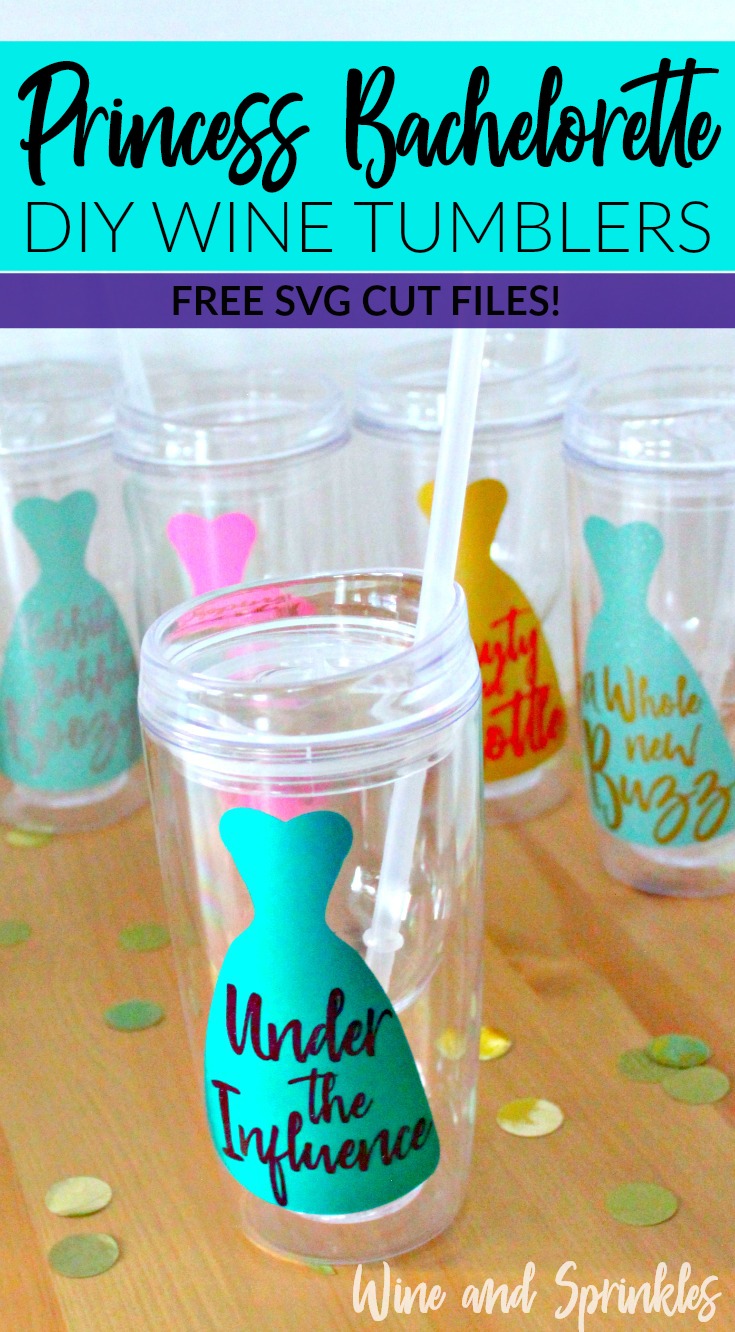
With one of my best friends getting married and living in Florida, we are thinking about doing a bar crawl in the happiest place on earth, Disney World! Regardless of whether we do or not, it inspired me to design these adorable wine tumblers; all based on different fairy tale princesses!

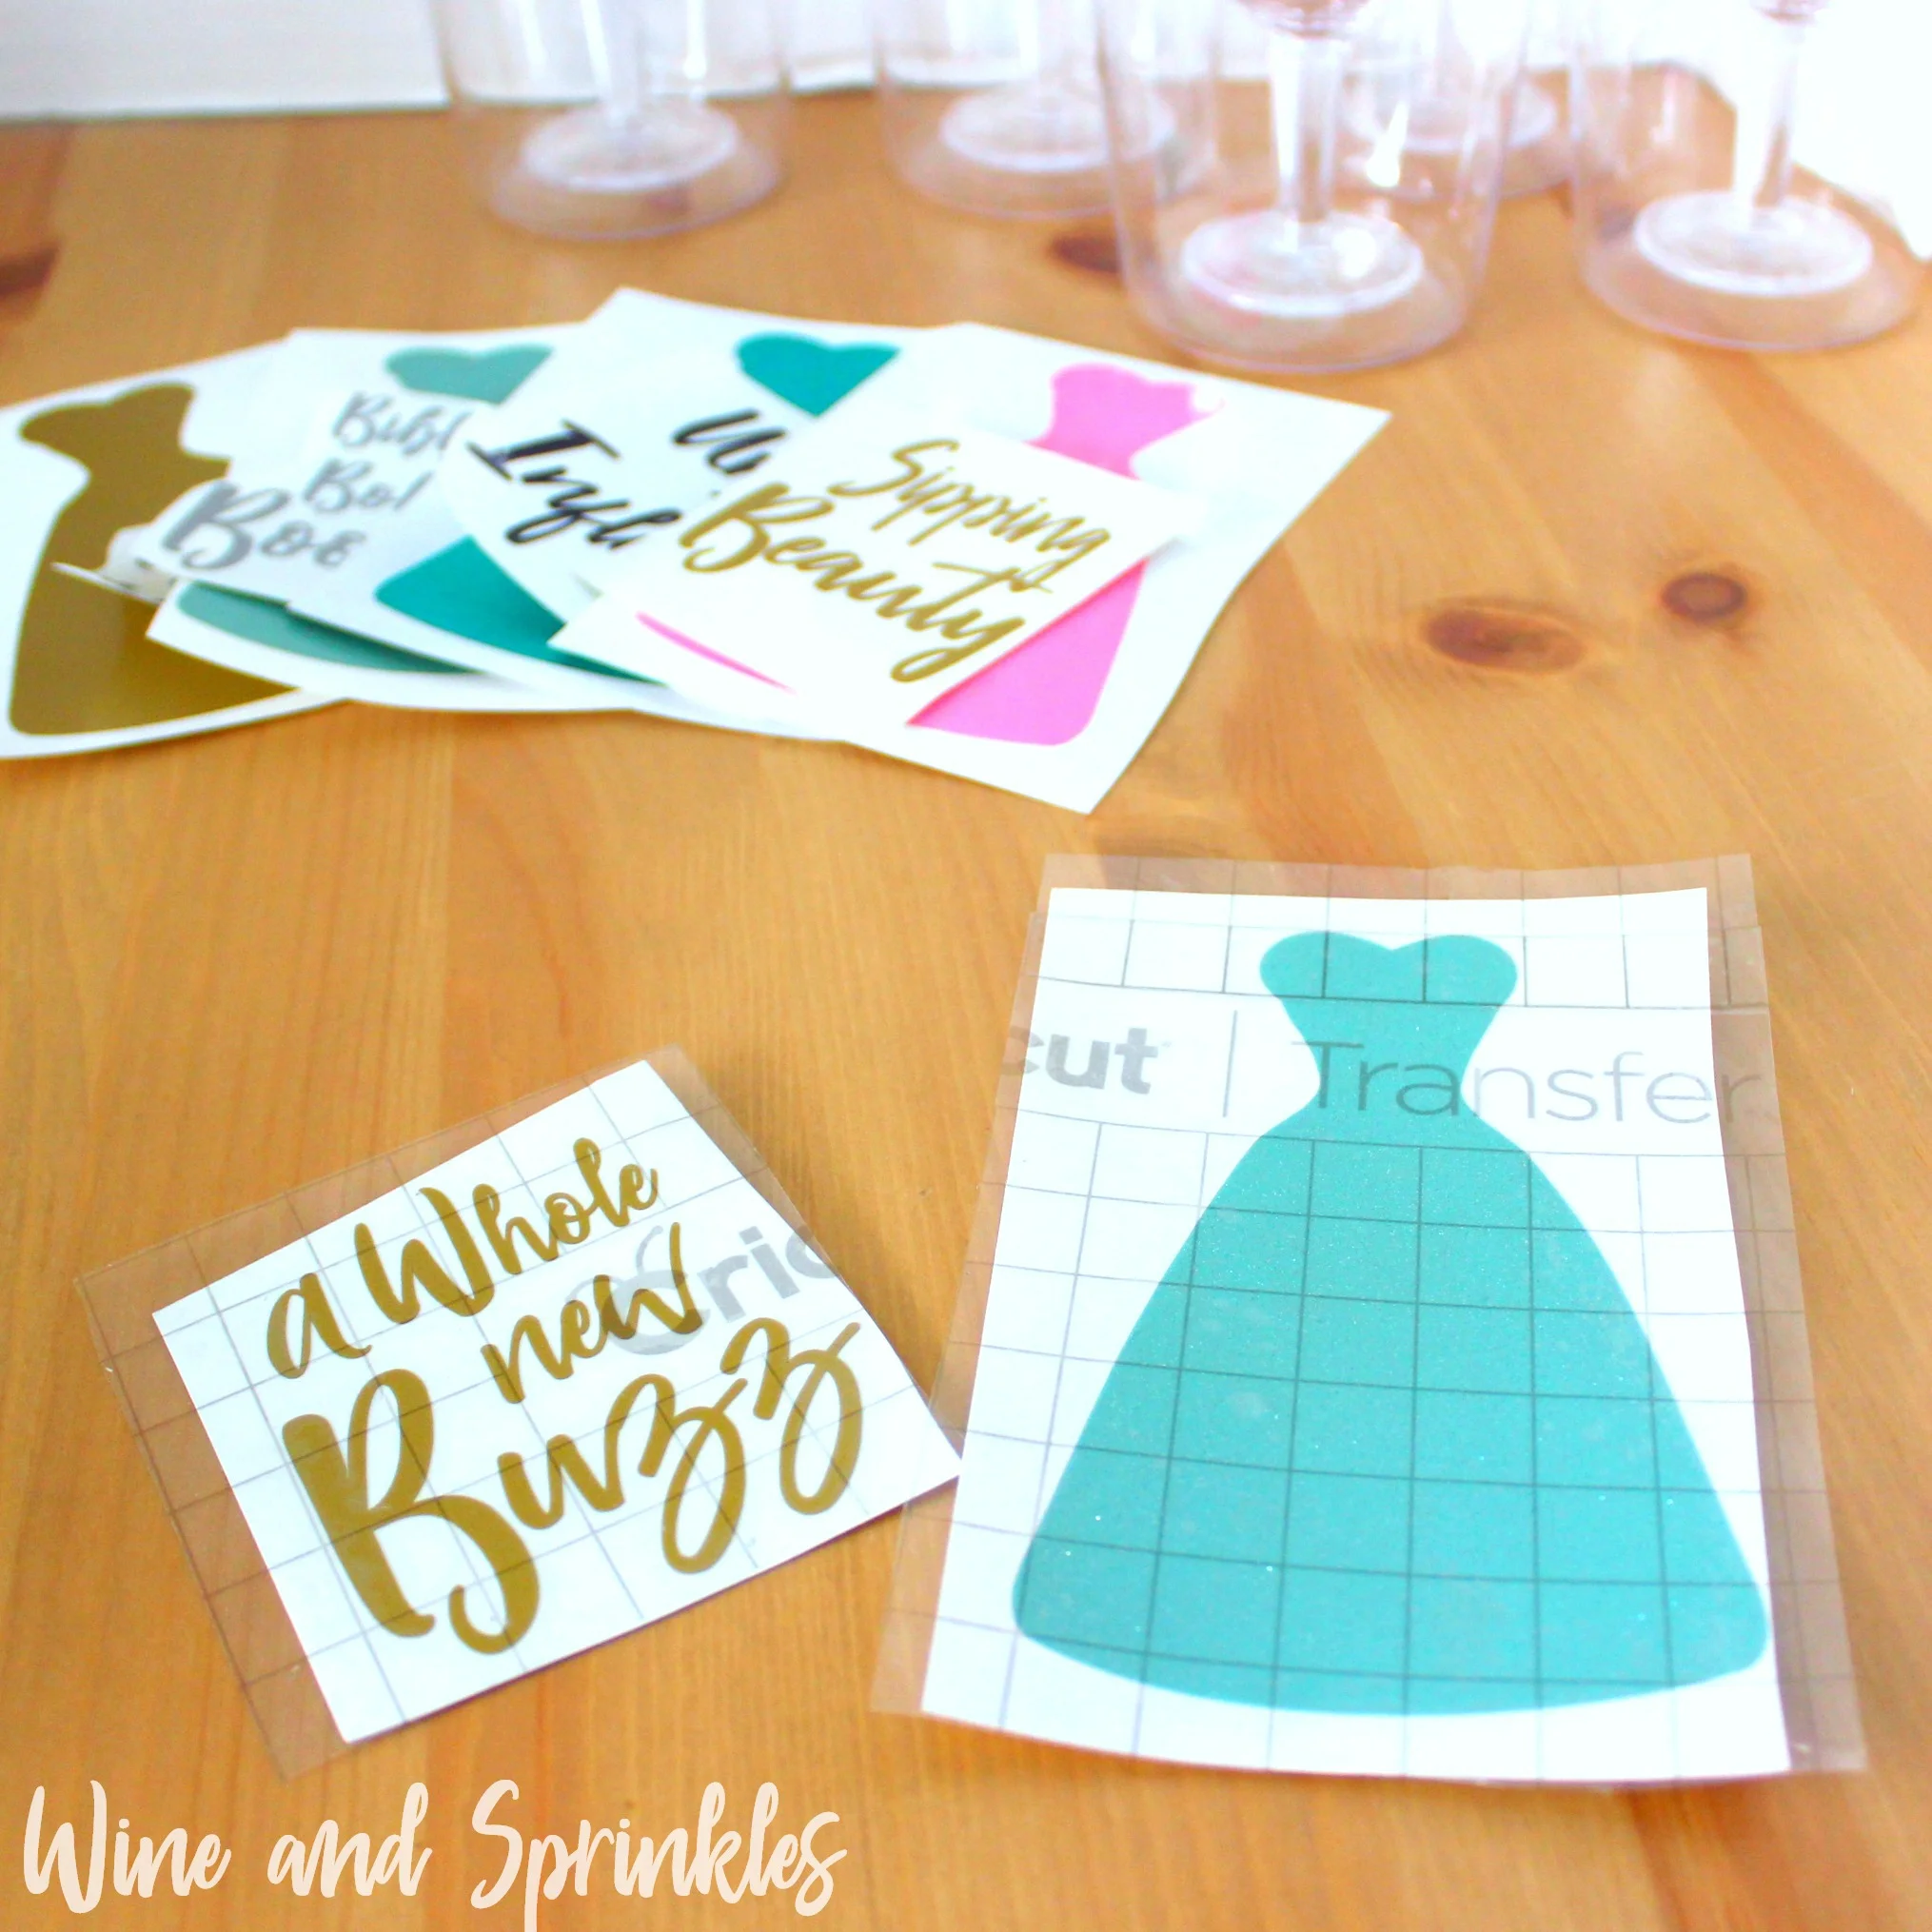
I mixed and matched vinyl I already had, so a couple may not be perfect color complements or you may want to change it up to something different, but the combinations I used were:
Sipping Beauty - Oracal 651 Soft Pink Vinyl Dress with Gold Metallic Vinyl Lettering
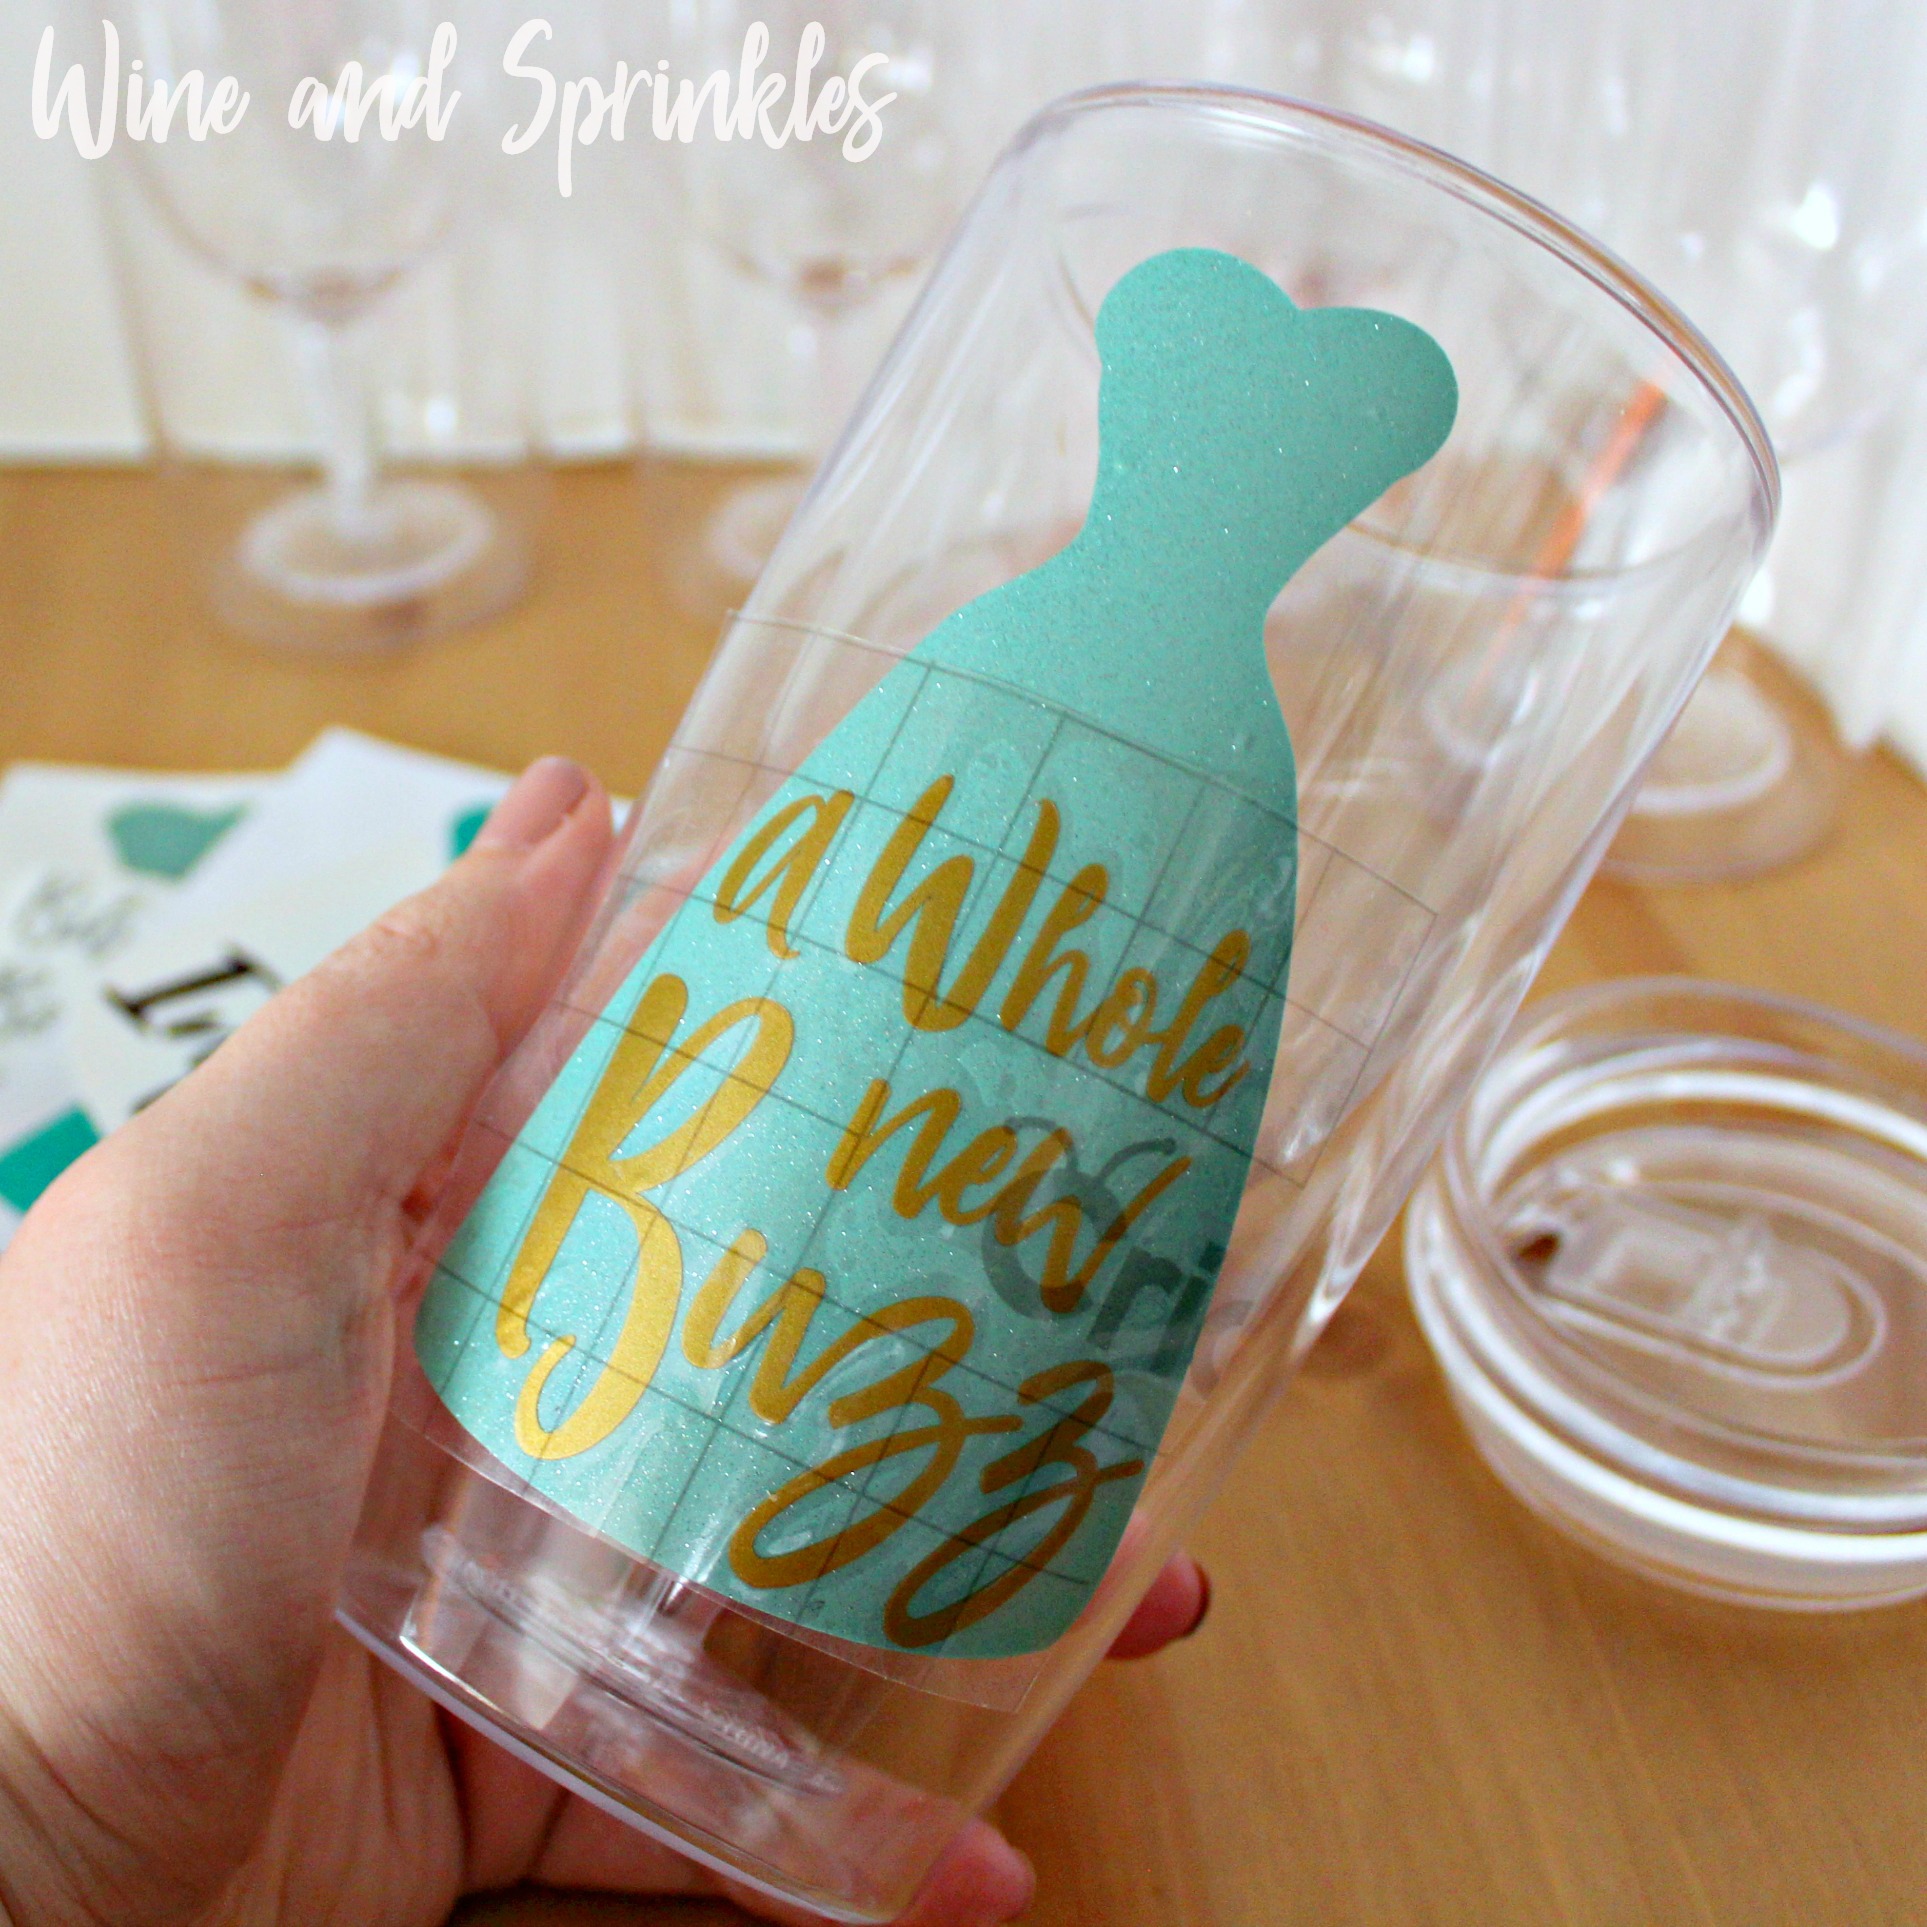
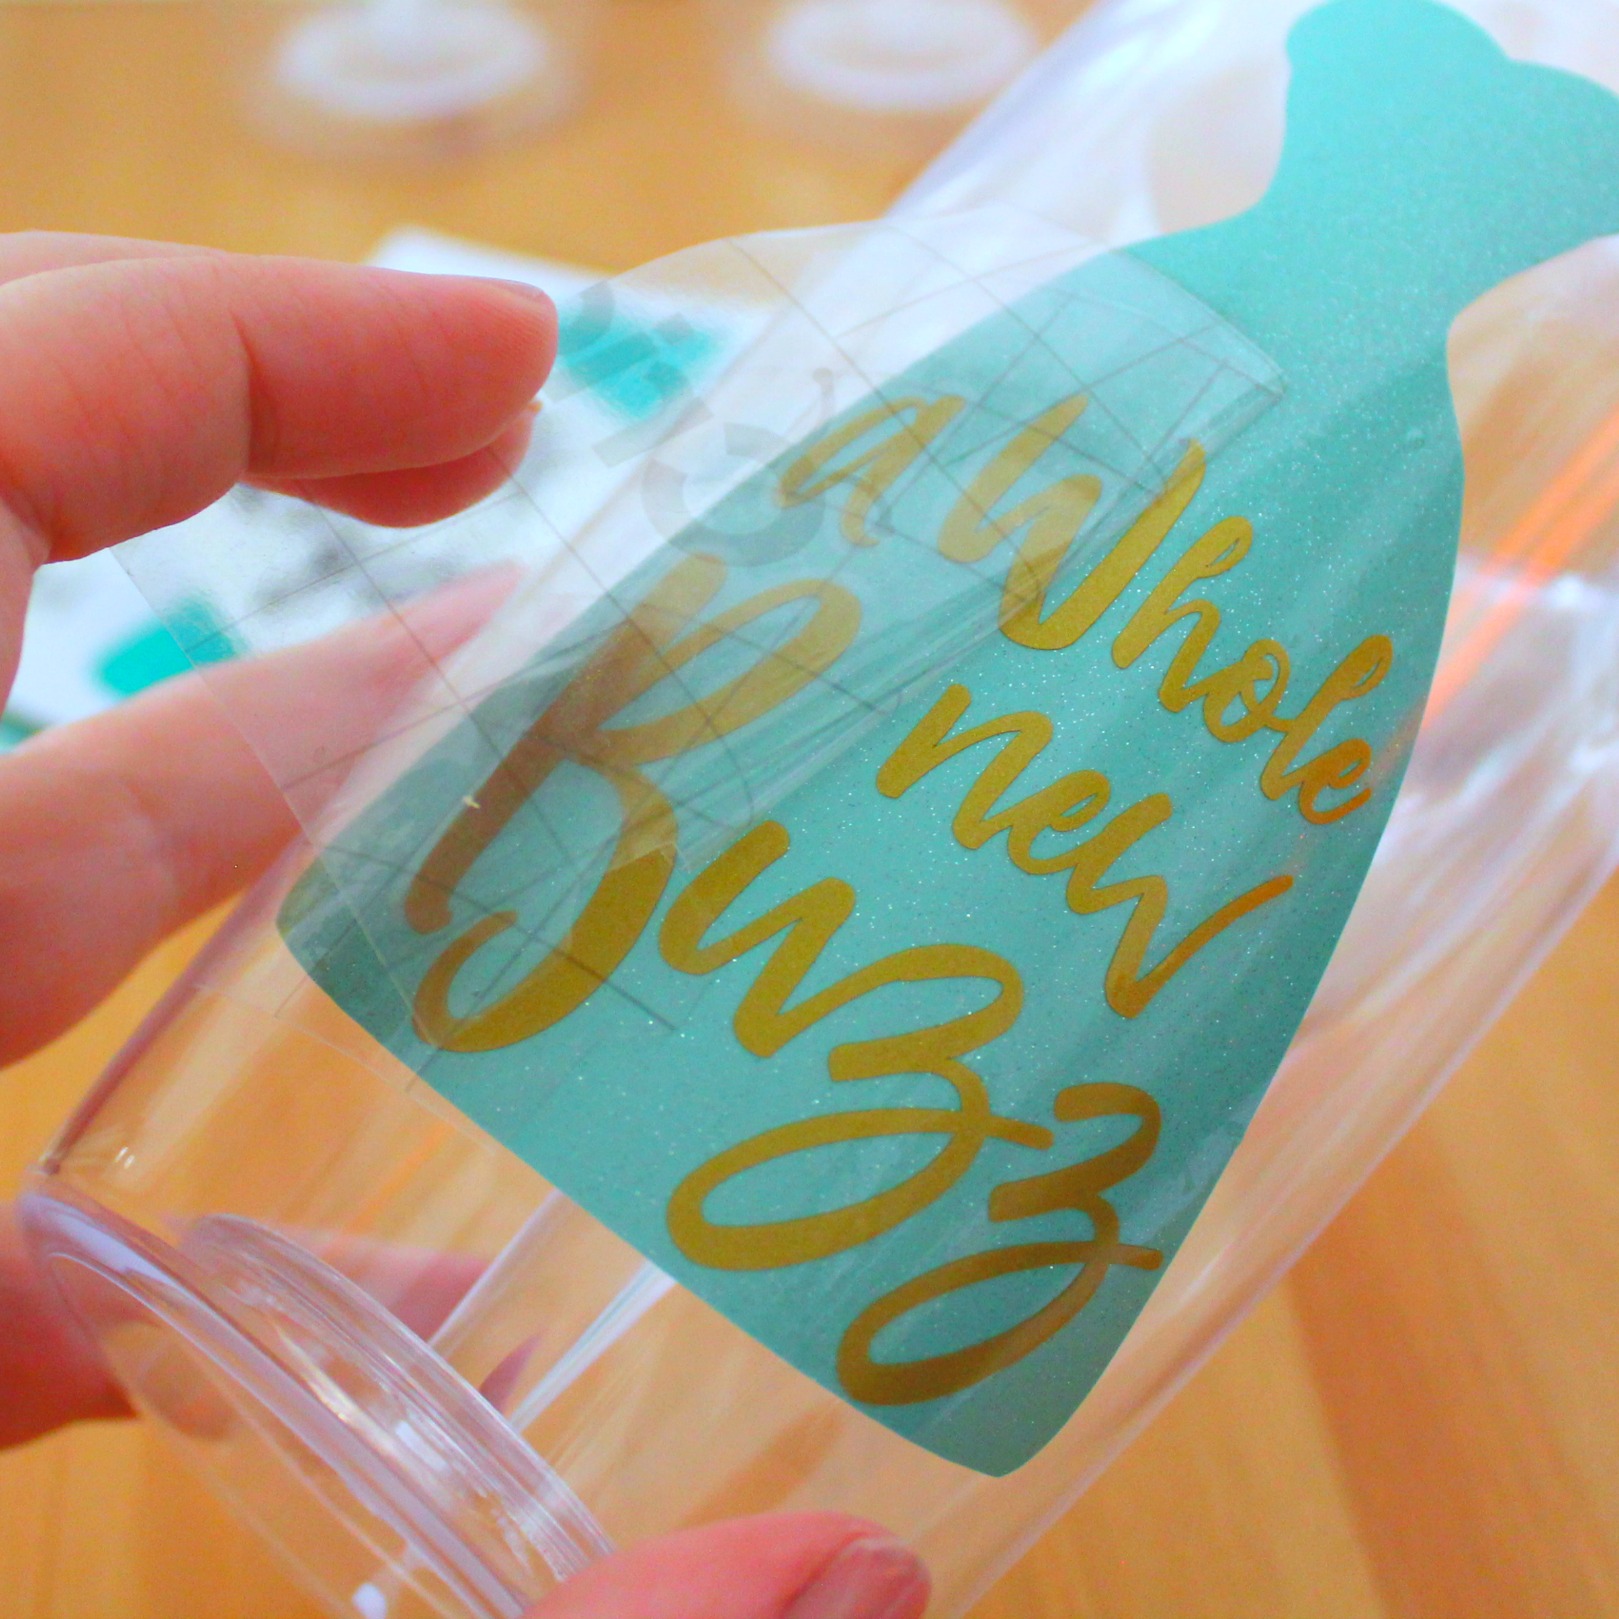
A Whole New Buzz - Tiffany Blue Glitter Vinyl Dress with Gold Metallic Vinyl Lettering
Bibbity Bobbity Boozy - Tiffany Blue Glitter Vinyl Dress with Silver Glitter Vinyl Lettering
Drunkest of them All - Oracal 651 Gold Metallic Vinyl Dress with Amethyst Glitter Vinyl Lettering
Beauty and the Bottle - Oracal 651 Gold Metallic Vinyl Dress with Red Vinyl Lettering
Under the Influence - Oracal 651 Jade Vinyl Dress with Amethyst Glitter Vinyl Lettering

I tried transferring the designs in two ways, by transferring the dress first, then the lettering; and transferring the lettering to the dress before transferring it to the tumbler. It was far easier and cleaner to transfer the designs to the tumblers in layers as well as limiting the air bubbles from transferring and keeping the whole design smooth as its transferred to a curved surface.

Supplies:
Wine Tumblers
Permanent Adhesive Vinyl
Transfer Paper
Craft Cutter and Tool Set
Adhesive Mat
Stemless Wine Tumbler Design Cut File

1. After downloading the cut files, import them into the Cricut Software. After creating a new project, select Upload Image. Select the file you wish to upload and it will automatically take you to the final upload screen, where you can name the file the select Save.
2. Cut the design(s) in your choice of permanent adhesive vinyl with the Vinyl Setting on your Cricut. The SVG Files are sized so that they will automatically cut to the size you see in the photos, but if you want to change the size you can. :)
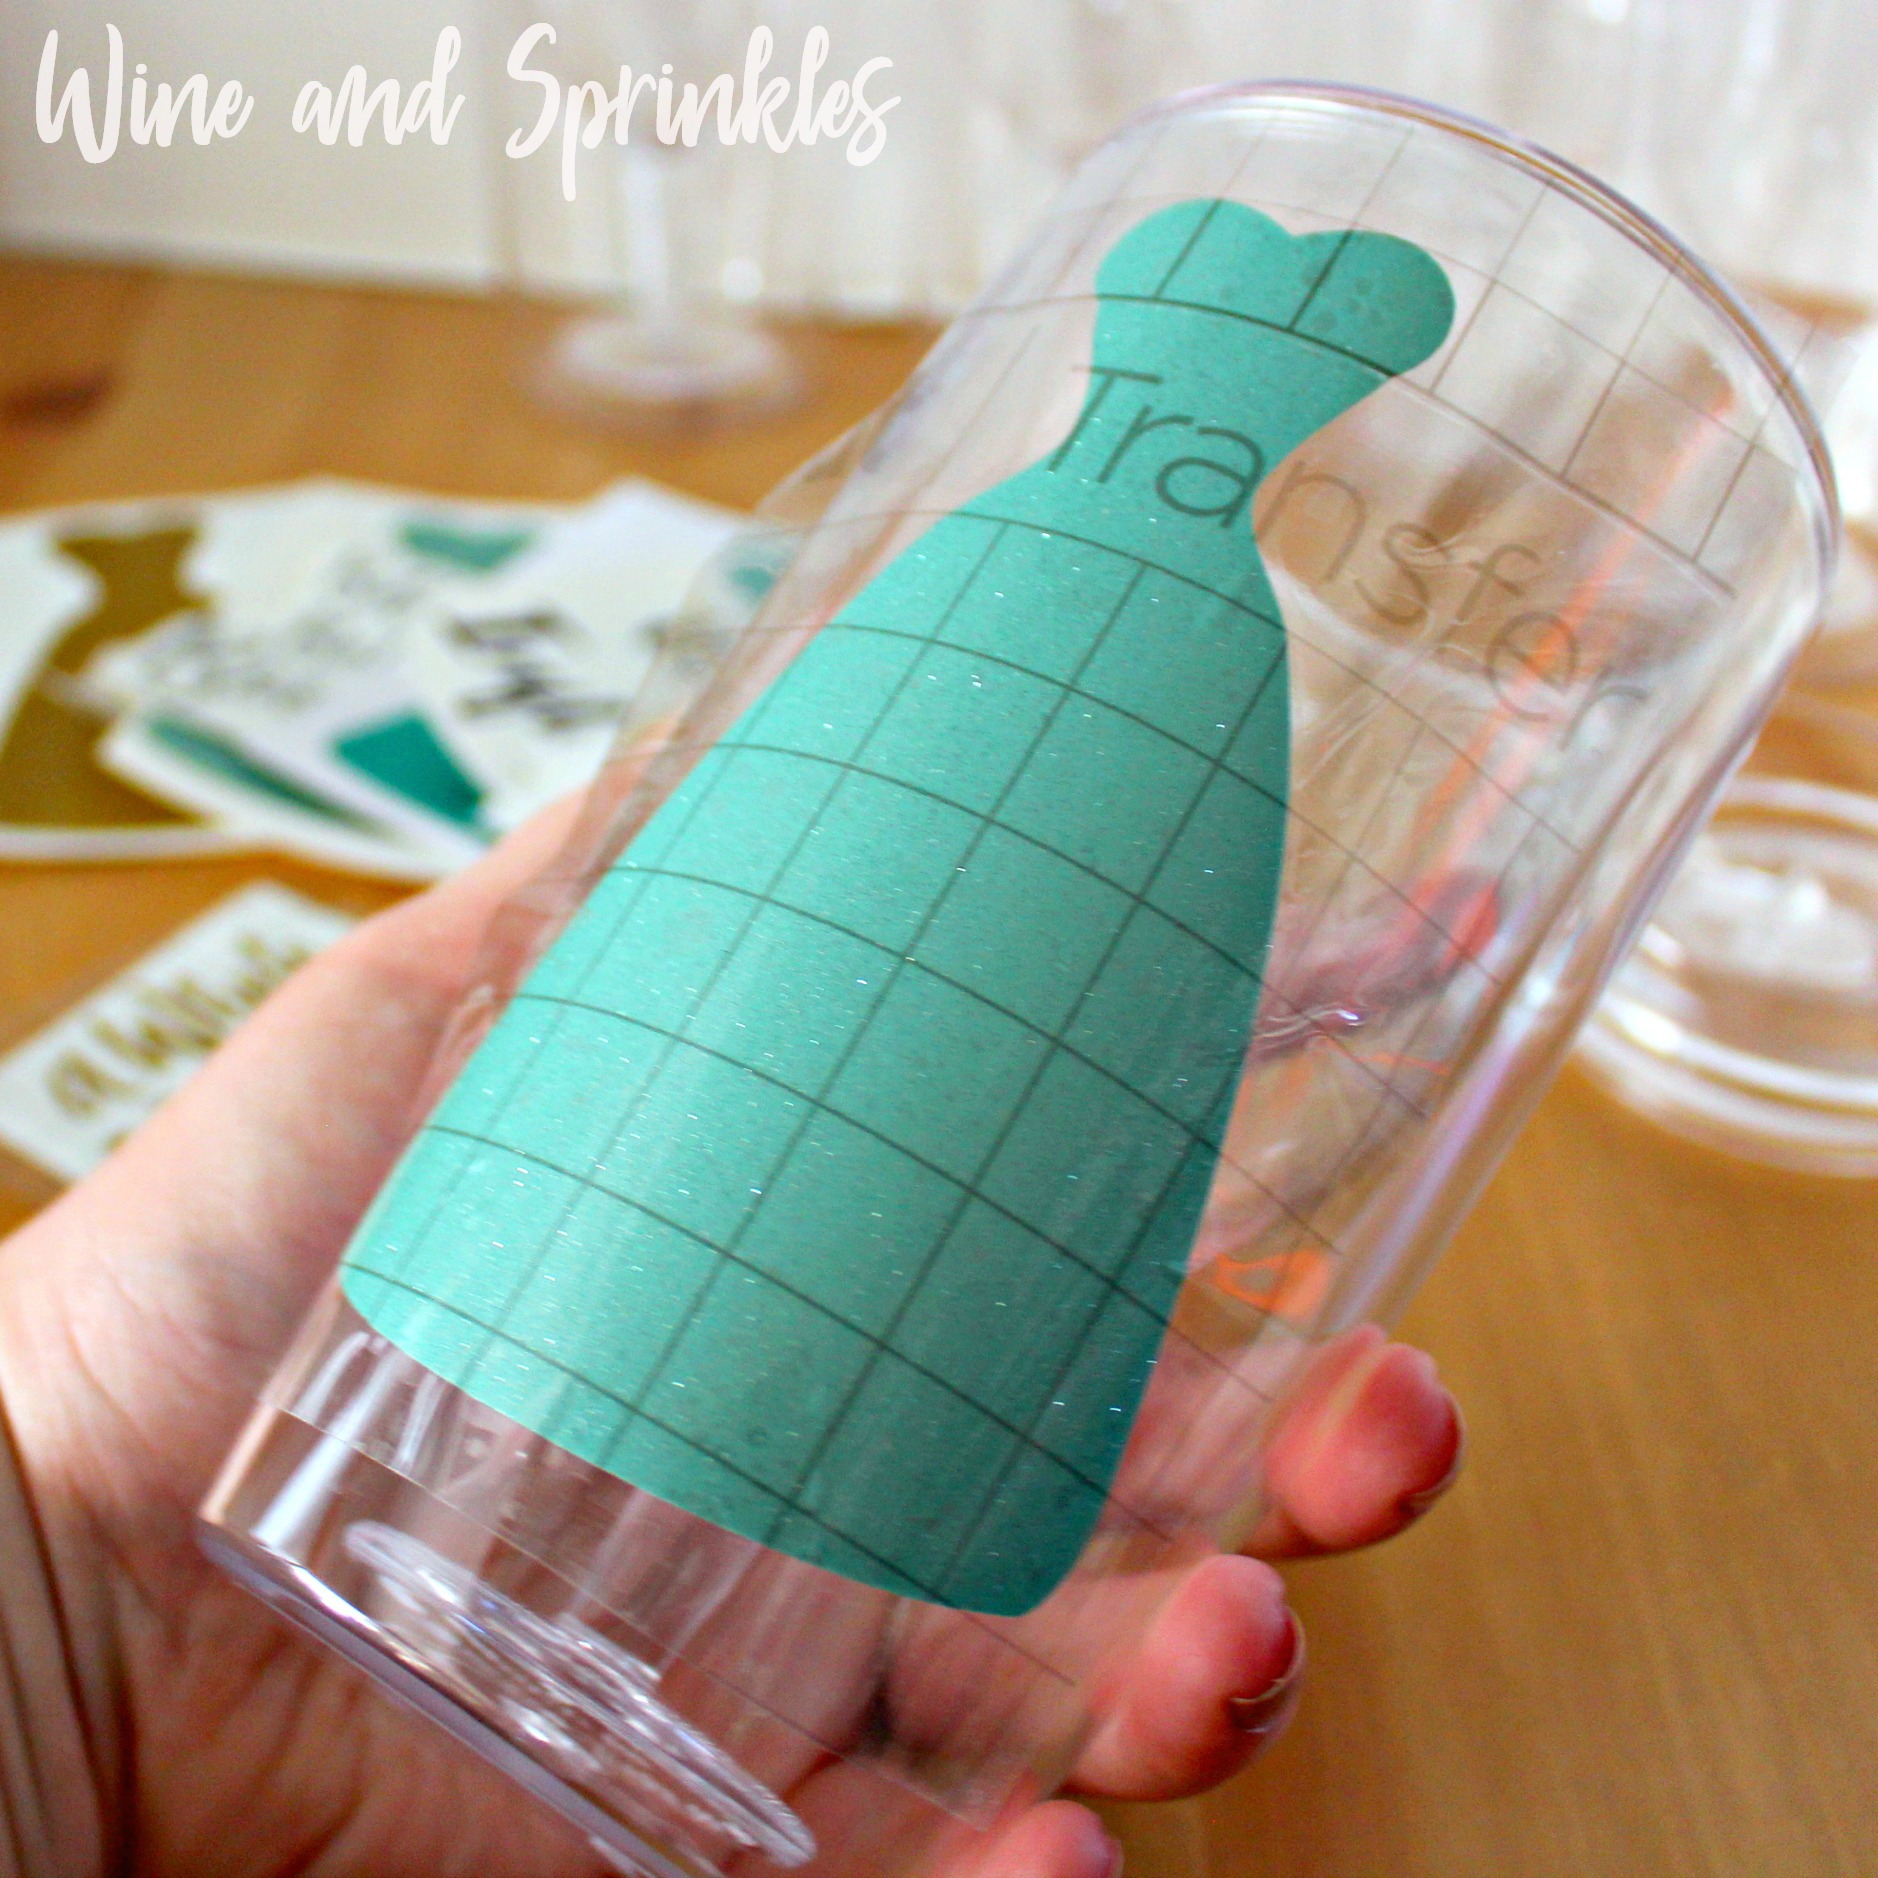
3. Once the designs are cut, weed away the extra vinyl and cut a piece of transfer tape to 3.5" x 5.5" for the dress decal and 3” x 3” for the lettering. Cut away any excess backing from the vinyl design and smooth transfer tape over the design, aligning it along the top of the dress, with one set of 1/2” blocks for ease with transferring later, as shown above. For the text, I didn’t align it to a specific piece, but rather centered the transfer tape over the design as best I could, since transferring it to the bottom of the dress isn’t a set position. Using the smoother tool, smooth the tape to the vinyl, removing any air bubbles.

4. Now, transfer the dress design to your tumbler. Remove the tape from the backing and smooth the dress onto the tumbler, aligning it along the top lip of the tumbler as shown below. It is easiest to start at the top and smooth from top to bottom, center to outside edges.
5. Remove the transfer tape from the tumbler, leaving the dress decal on the tumbler. If there are air bubbles (mine had some), smooth out the ones you can with the smoother tool and for smaller or hard to smooth bubbles, prick them with a needle and smooth them to remove them. :)

6. Now, transfer the lettering to you tumbler. Center the lettering on the bottom of the skirt of the dress, I actually didn’t have any problems aligning them since the lettering itself is staggered and made to fit inside the dress. The easiest way is to use the bottom of the dress as your guide and arrange the decal just above the bottom edge where all the letters will adhere to the dress, not the tumbler.


7. Trace the letters to smooth them onto the bottom of the dress on the tumbler, as shown above. Because the surface is curved, focus on the vinyl smoothly transferring than your transfer tape looking nice and neat. Once the design is set, remove the transfer tape from the tumbler, leaving the design on the tumbler. Repeat with all remaining tumblers.
I absolutely adore how these turned out and they are suprisingly easy to make once you’ve done one of them, so don’t be afraid! :) Take a look at our other Tumbler Projects Here! :)