This post contains affiliate links, meaning that if you click on a link I will recieve a small comission. This costs you nothing extra and I only promote products I use and love! You can read our full disclosure here

I love getting just married swag for the honeymoon and then thought of these simple Mr. and Mrs. Stemless Wine Tumblers! They are just perfect for going to the beach and can easily be made for yourself or your friends who are getting married soon!
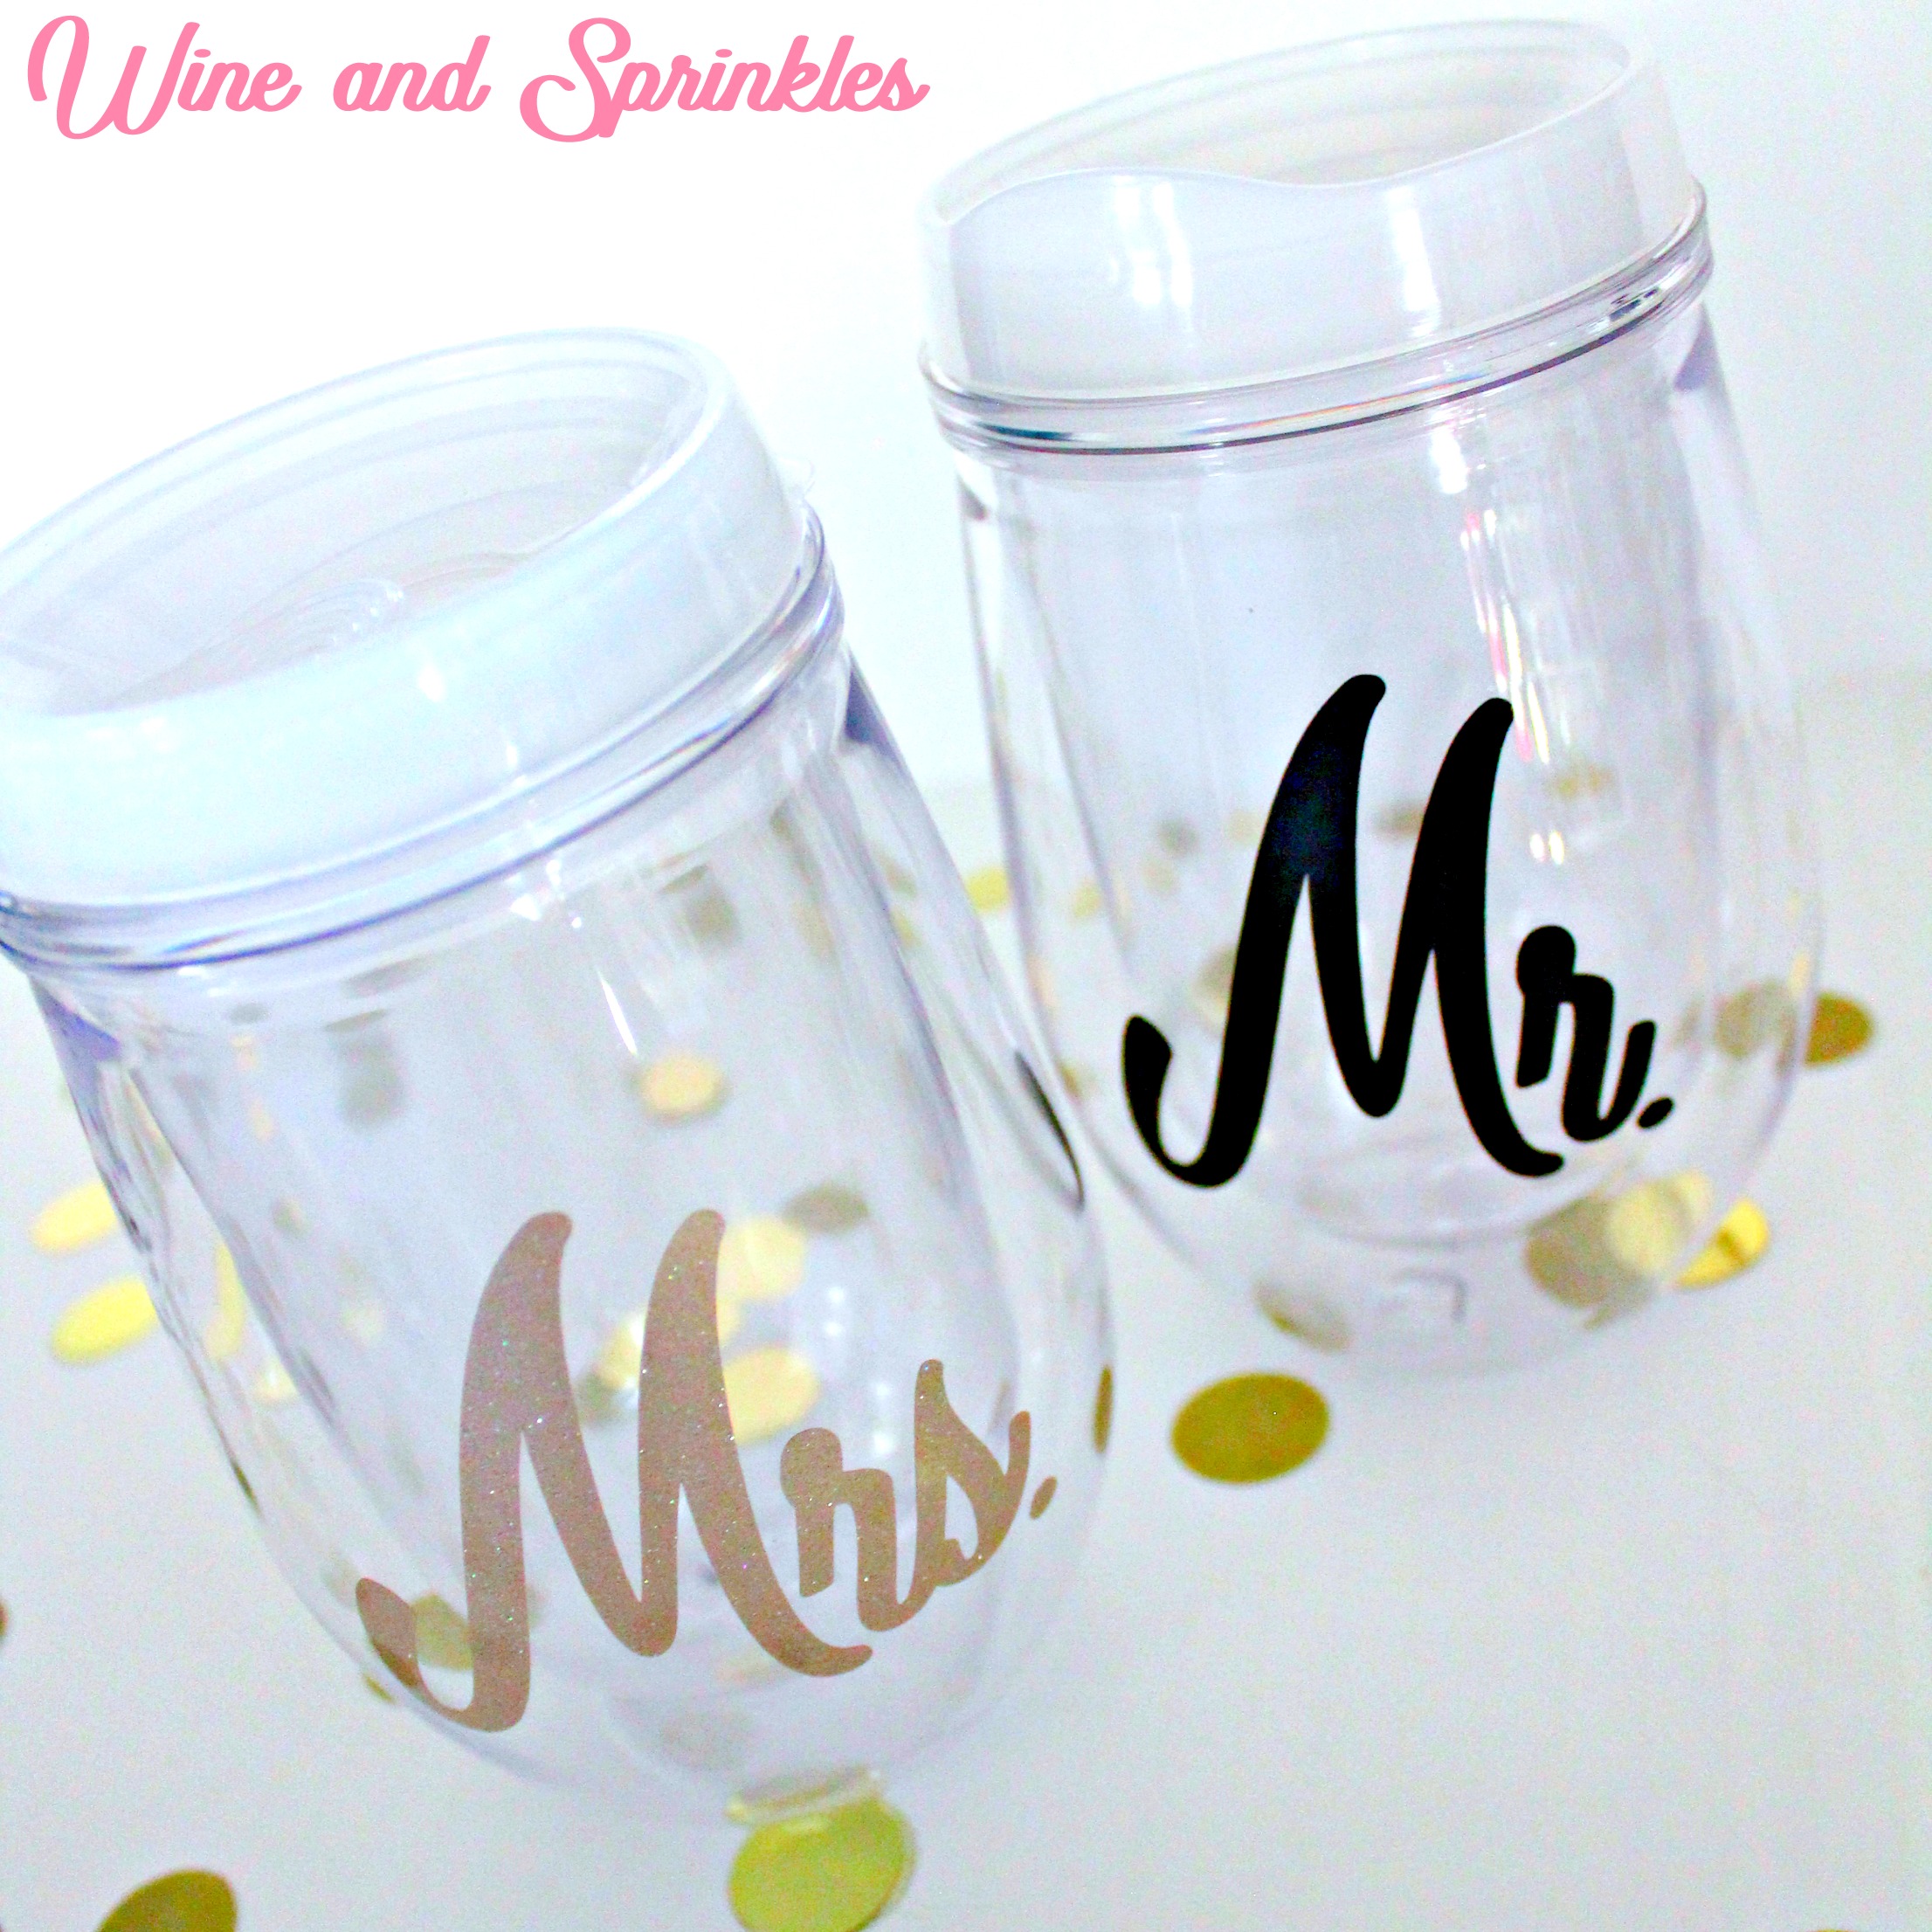
For my tumblers, I used Champagne Glitter Vinyl for the Mrs. and Oracal 651 Black Vinyl for the Mr. and I love how they turned out! This is a great beginner project if you aren’t used to transferring to curved surfaces, these tumblers are very easy to transfer to for this simple, bold design. And its super easy to weed! :)

Supplies:
Stemless Wine Tumblers
Permanent Adhesive Vinyl
Transfer Paper
Craft Cutter and Tool Set
Adhesive Mat
Stemless Wine Tumbler Design Cut File

1. After downloading the cut files, import them into the Cricut Software. After creating a new project, select Upload Image. Select the file you wish to upload and it will automatically take you to the final upload screen, where you can name the file the select Save.
2. Cut the design(s) in your choice of permanent adhesive vinyl with the Vinyl Setting on your Cricut. The SVG Files are sized so that they will automatically cut to the size you see in the photos, but if you want to change the size you can. :)

3. Once the designs are cut, weed away the extra vinyl and cut a piece of transfer tape to 2.5" x 3". Cut away any excess backing from the vinyl design and smooth transfer tape over the design, aligning it along the bottom of the text. Using the smoother tool, smooth the tape to the vinyl, removing any air bubbles. The transfer tape should overlap the backing of the design, so that you can stick the tape to an object with the backing still on the design.

4. Now, transfer the design to your tumbler. Remove the tape from the backing and directly place the design on the tumbler. Arrange the design in the middle of the tumbler about an inch from the top of the lip of the tumbler.

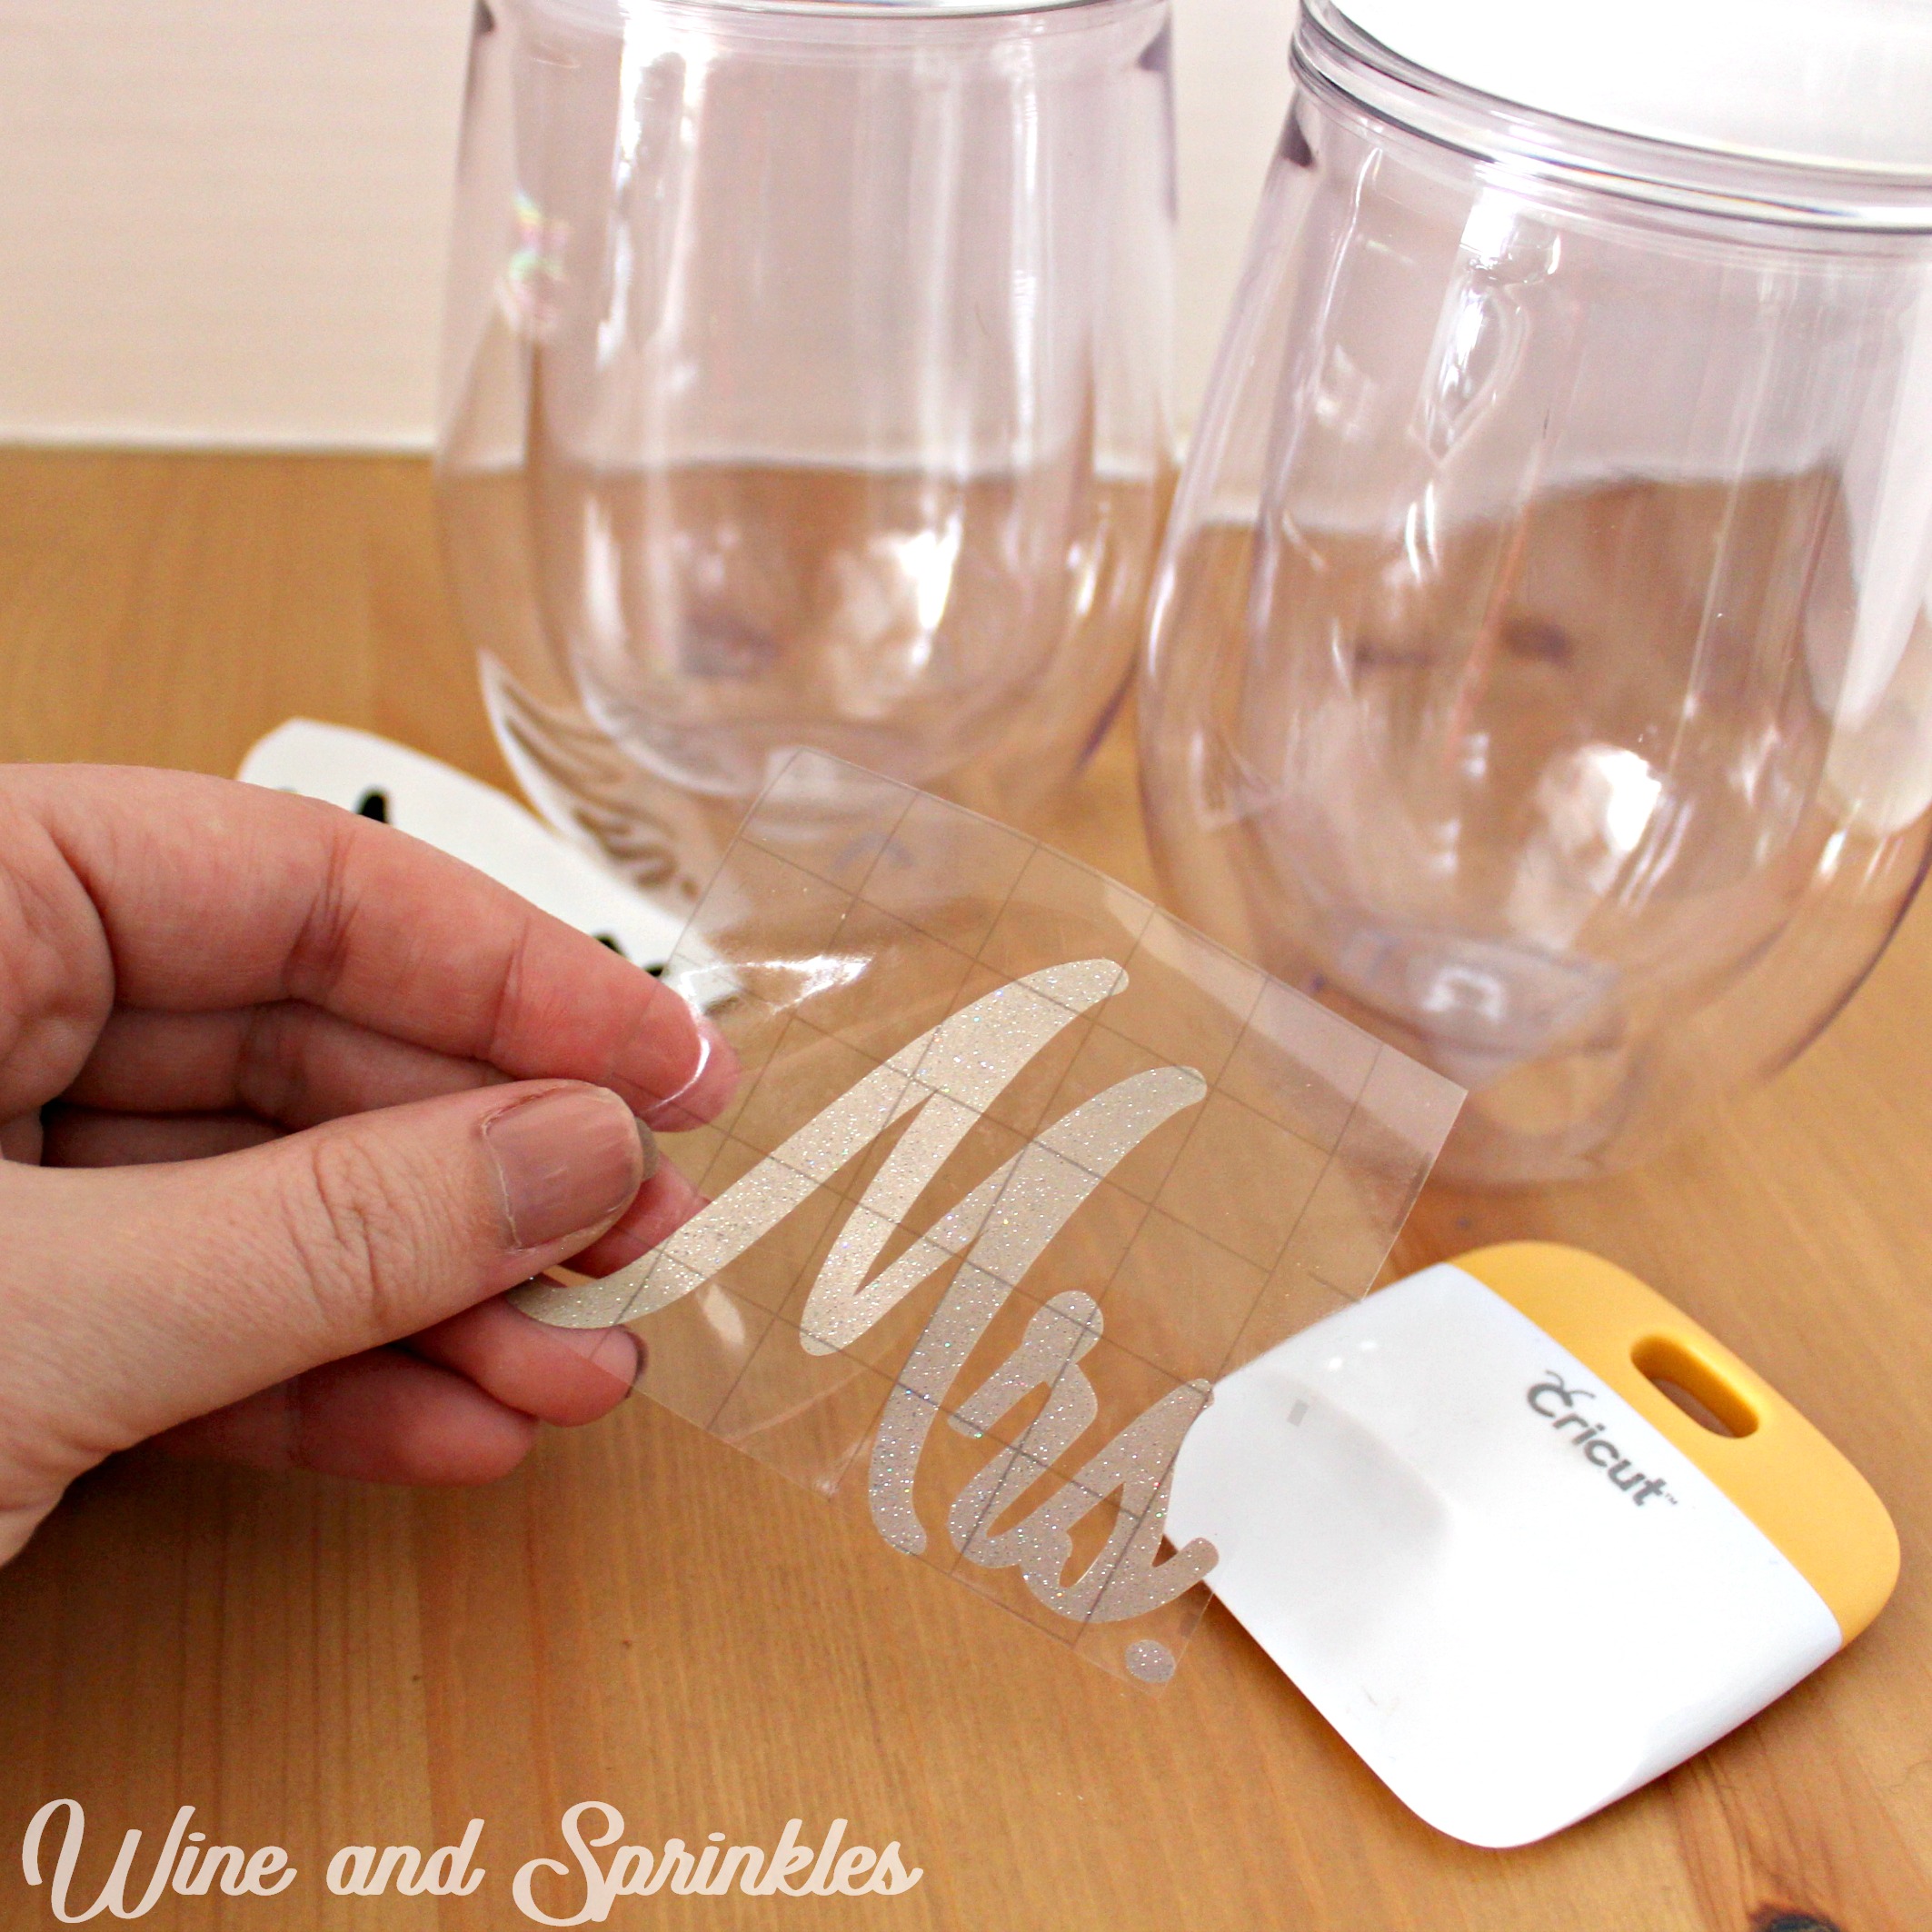
5. Working from the center to the edge of the design, trace the letters to smooth them onto the tumbler. Because the surface is curved, focus on the vinyl smoothly transferring than your transfer tape looking nice and neat. Once the design is set, remove the transfer tape from the tumbler, leaving the design on the tumbler.


6. Use the smoother tool or your finger to resmooth the design and to remove the air bubbles. Repeat with the Mr. Tumbler. :)

Write here…
