This post contains affiliate links, meaning that if you click on a link I will recieve a small comission. This costs you nothing extra and I only promote products I use and love! You can read our full disclosure here
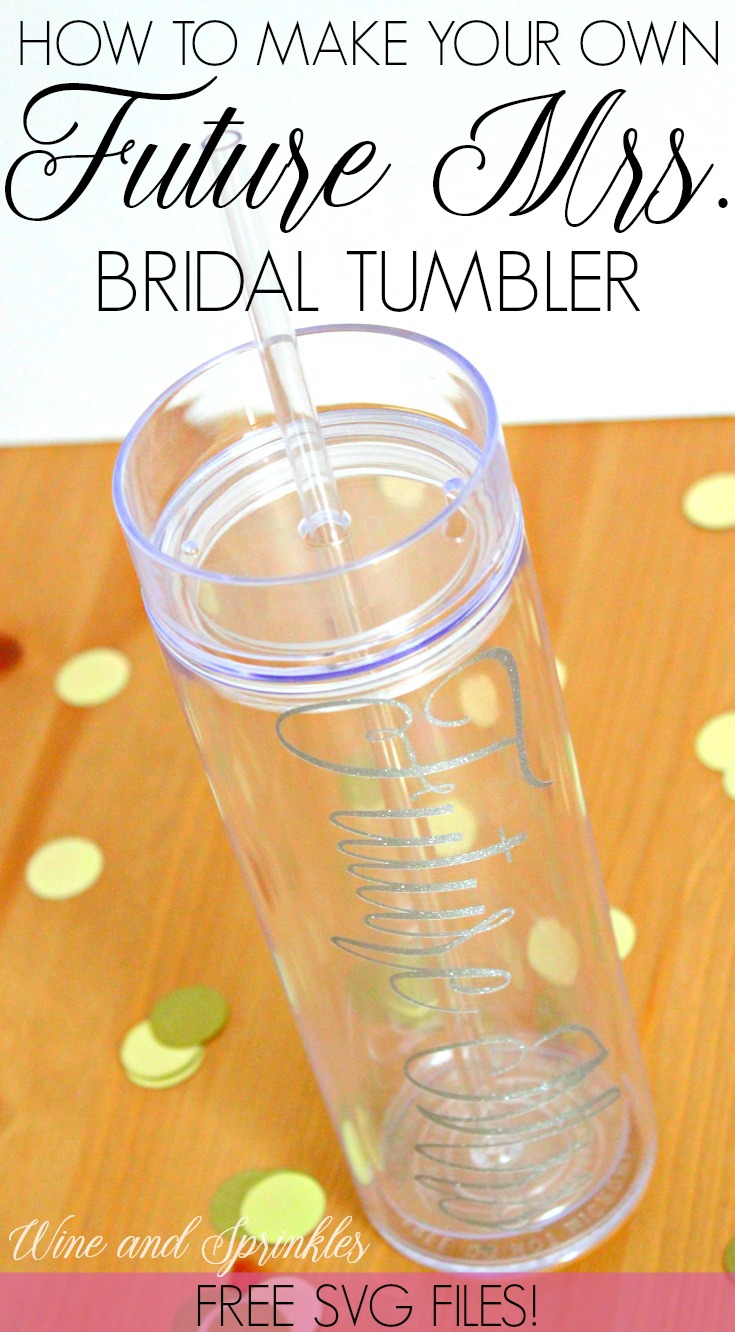
If theres’ a gift I like making for my newly engaged friends, its got to be tumblers! I’ve been having so much fun designing different decals for skinny tumblers lately, I decided to start off my tutorials for them with Just Engaged Tumbler! This “Future Mrs.” Skinny Tumbler is perfect as a work water bottle and the font is very well suited to the Glitter Permanent Vinyls.

For my tumbler, I used Silver Glitter Vinyl for the decal and I love how they turned out! While you have to be careful as far as the dot on the end of “Mrs.” this project is easy to weed and a fun first project for any new soon to be bride!

Supplies:
Skinny Tumblers
Permanent Adhesive Vinyl
Transfer Paper
Craft Cutter and Tool Set
Adhesive Mat
Skinny Tumbler Design Cut File

1. After downloading the cut files, import them into the Cricut Software. After creating a new project, select Upload Image. Select the file you wish to upload and it will automatically take you to the final upload screen, where you can name the file, then select Save.
2. Cut the design(s) in your choice of permanent adhesive vinyl with the Vinyl Setting on your Cricut. The SVG Files are sized so that they will automatically cut to the size you see in the photos, but if you want to change the size you can. :)

3. Once the designs are cut, weed away the extra vinyl and cut a piece of transfer tape to 2.5" x 7.5". Cut away any excess backing from the vinyl design and smooth transfer tape over the design, aligning it with the text and arranging it such that one set of the 1/2” blocks are along the bottom left edge of the “F",. as shown below. Using the smoother tool, smooth the tape over the vinyl, removing any air bubbles.

4. Now, transfer the design to your tumbler. Remove the tape and decal from the backing, making sure that the entire decal transfers to the transfer tape.


5. Arrange the design such that the line that you aligned to the “F” on your transfer tape is along to top edge of the lip of the tumbler, as shown below. Starting from the top and working down, trace the letters to smooth them onto the tumbler. Smooth the design to remove any air bubbles,. Remove the transfer tape from the tumbler, leaving the design on the tumbler.


6. Use the smoother tool or your finger to retrace the letters after removing the transfer tape to smooth out any additional air bubbles. Then you’re done! :)
