This post contains affiliate links, meaning that if you click on a link I will recieve a small comission. This costs you nothing extra and I only promote products I use and love! You can read our full disclosure here
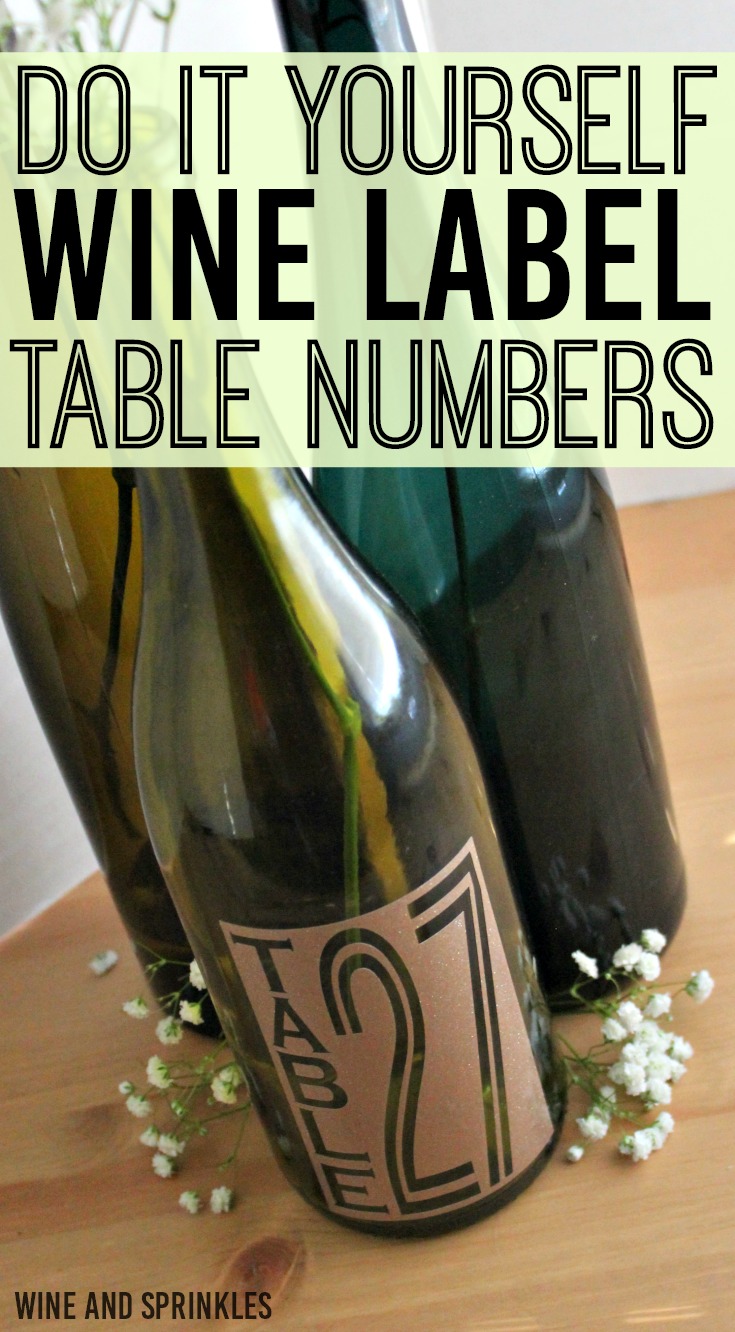
We are back for another take on Wine Bottle Table Numbers! I love wine bottle for centerpieces and having the table number on the bottle is a fun detail and a cheap way to make table numbers in general. I’ve made a couple before this and I own that there will likely be more in the future, there are so many possibilities! :)

These designs I wanted to look similar to an actual wine bottle label as far as size, with the number cut out, but as it turns out I really liked them either way. By weeding out the numbers or removing the “label” part, you can have just the Table and number in vinyl or you can choose to remove the Text and numbers, making a more label-esque choice. These two choices could easily be alternated between or you can pick your favorite of the two!

Supplies:
Empty Wine Bottles
Permanent Adhesive Vinyl
Transfer Tape
Craft Cutter and Tool Set
Adhesive Mat
Table Number Design Cut Files

1. First, soak your wine bottles in hot, soapy water to remove the labels and adhesive. I found it easiest to soak them for about 5 minutes, remove what l could, then once the label was completely removed clean up the last bits of adhesive with steel wool. :)
2. After downloading the cut files, import them into the Cricut Software. After creating a new project, select Upload Image. Select the file you wish to upload and it will automatically take you to the final upload screen, where you can name the file the select Save.
3. Cut the design(s) in your choice of permanent adhesive vinyl with the Vinyl Setting on your Cricut. The SVG Files are sized so that they will automatically cut to the size you see in the photos, but if you want to change the size you can do so to fit the wine bottles the way you like.

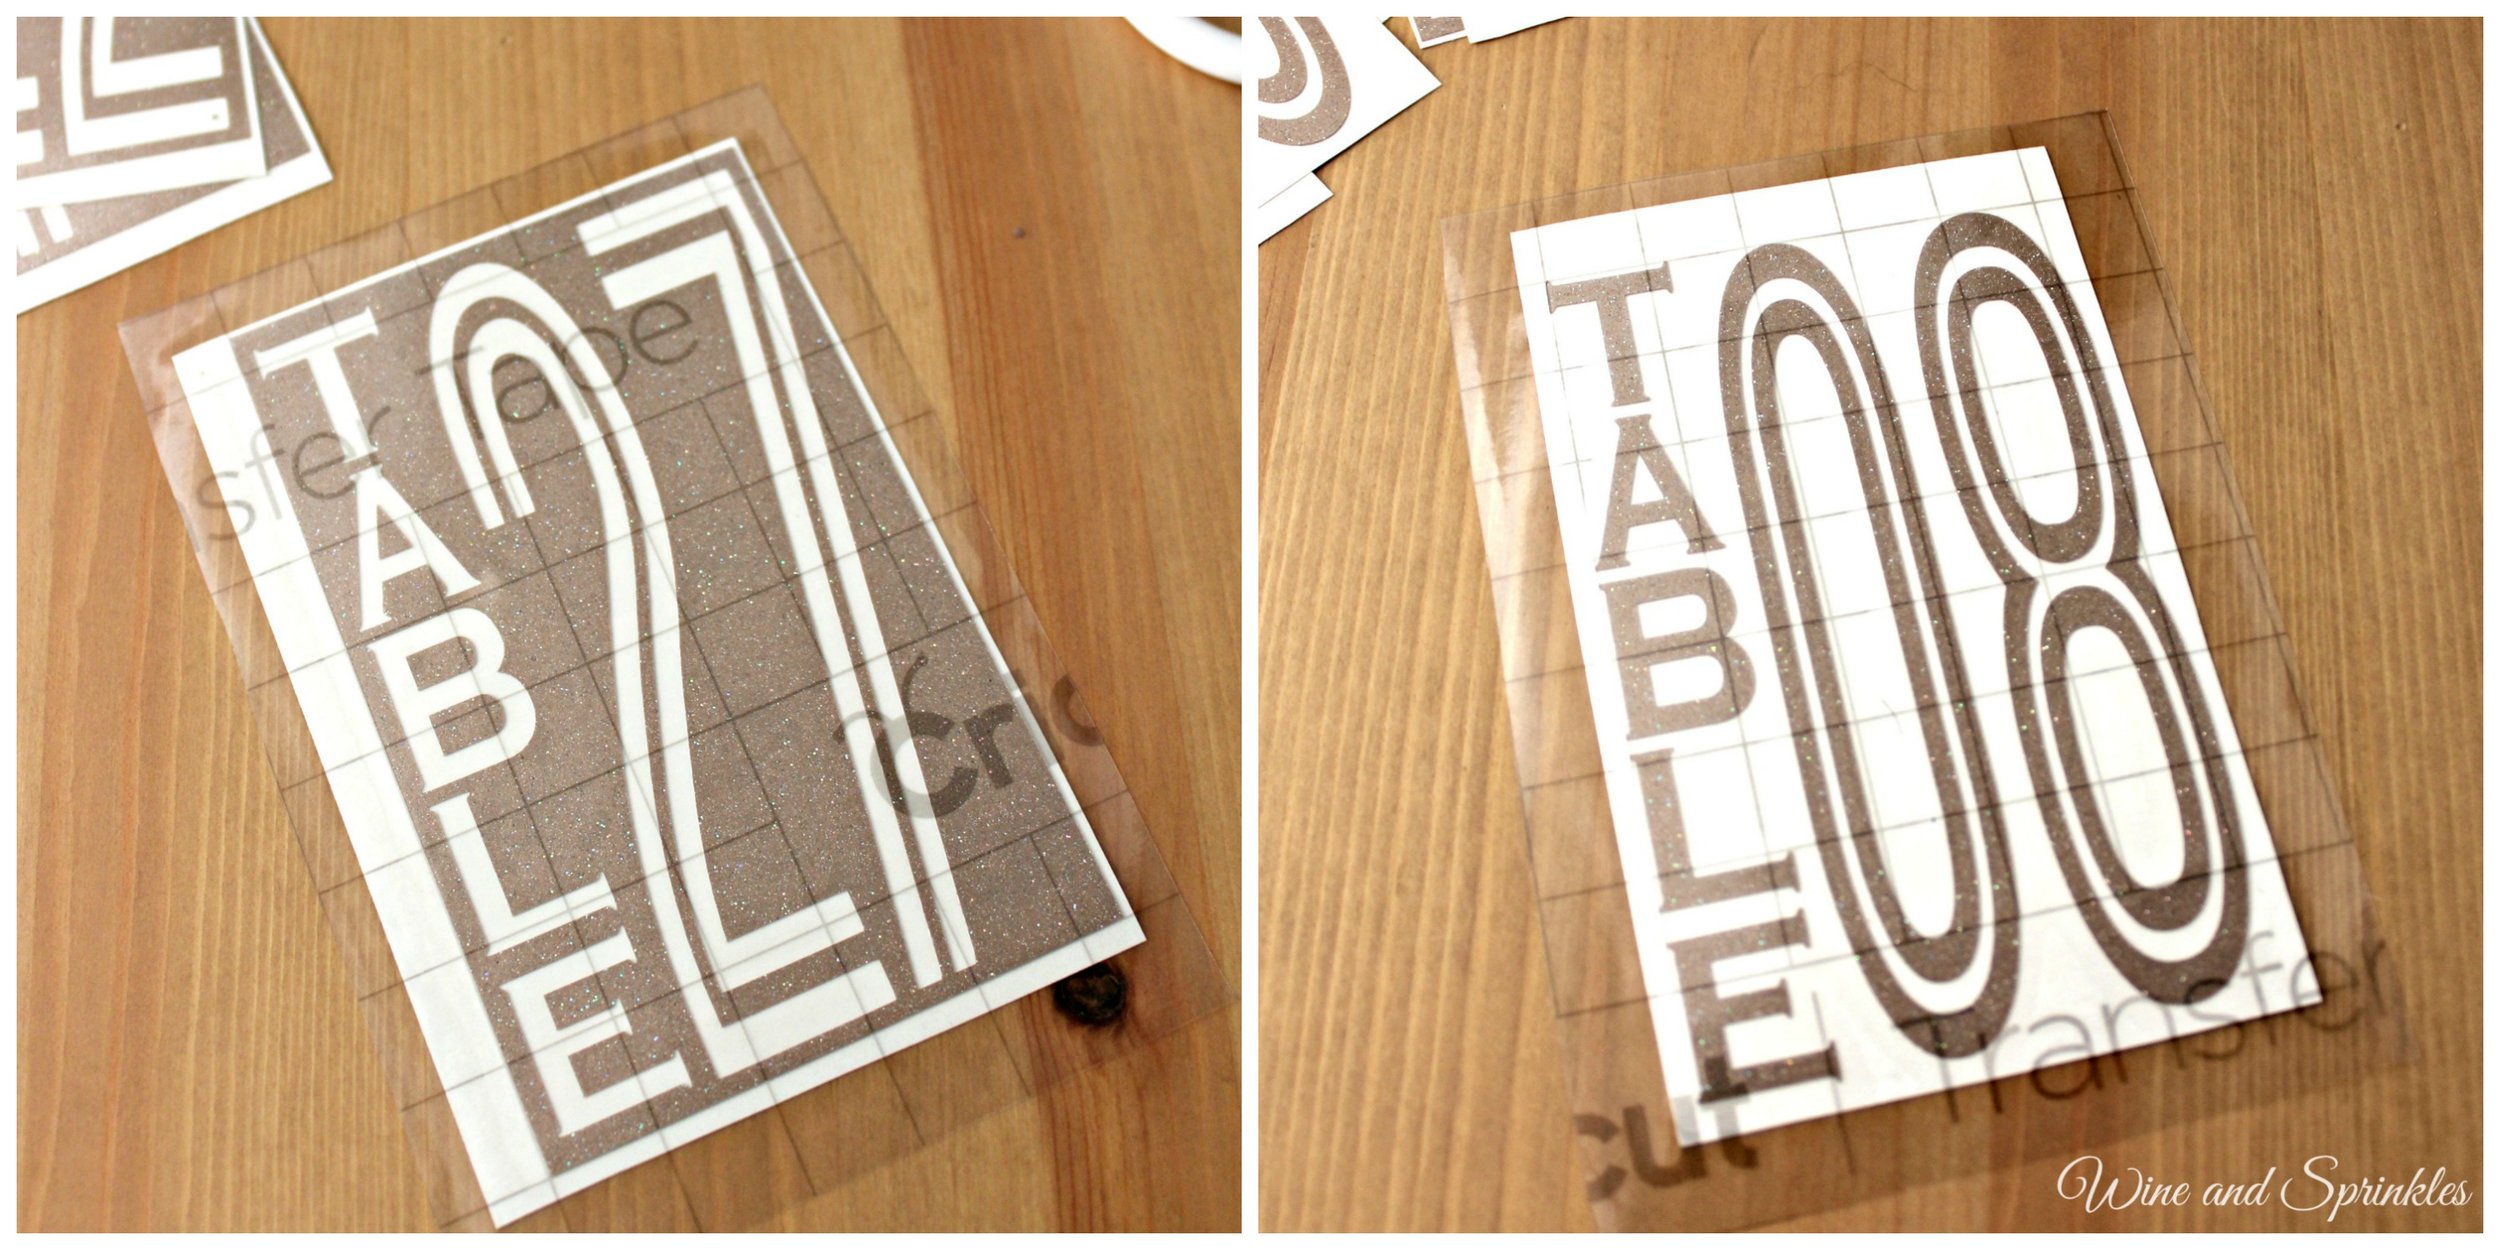
4. Once the designs are cut, weed away the extra vinyl and cut a piece of transfer taper to 3.5" x 5". You can weed these table numbers in two ways, either by weeding the numbers and text, leaving a rectangle with the Table number weeded, or by removing the rectangle, leaving the Table number in vinyl.
5. Cut away any excess backing and smooth transfer tape over the design. I aligned the rectangle table number along the gridelines of the transfer tape and for the numbers only style, I aligned the tape along the “T” and top of the number, as shown below. Using the smoother tool, smooth the tape to the vinyl, removing any air bubbles. The transfer tape should overlap the backing of the design, so that you can stick the tape to an object with the backing still on the design.
6. Now, transfer the design to your bottle. If you are comfortable centering the designs you can remove the tape from the backing and directly place the design on the wine bottle. If not, arrange the design to the bottle before removing the backing, sticking it with the overlapping transfer tape. I aligned mine to the bottom of the wine bottles, as shown in the photos below. I didn’t have much issue transferring the designs directly, but it never hurts to keep on the backing while you arrange it if you are nervous! :)

6. Once your design is placed to your satisfaction, transfer the design to the bottle. If you kept on your backing, carefully peel the tape off the backing, transferring the vinyl to the transfer tape while not unsticking it from the bottle. Remove the backing then smooth the design onto the bottle. If you didn’t use the backing, smooth design onto the bottle, using your fingers to remove air bubbles.

7. Remove the transfer tape to leave the design on the wine bottle, then repeat the process for all your additional table numbers.


