This post contains affiliate links, meaning that if you click on a link I will recieve a small comission. This costs you nothing extra and I only promote products I use and love! You can read our full disclosure here
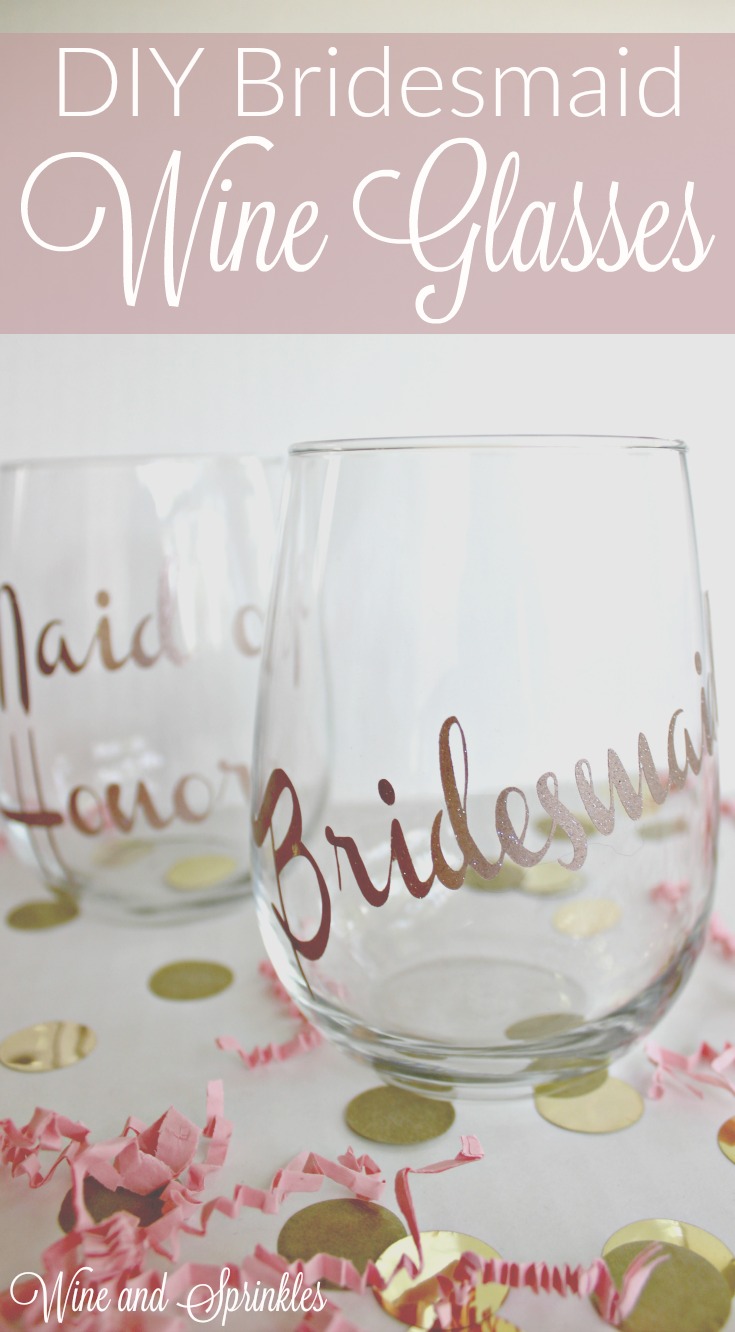
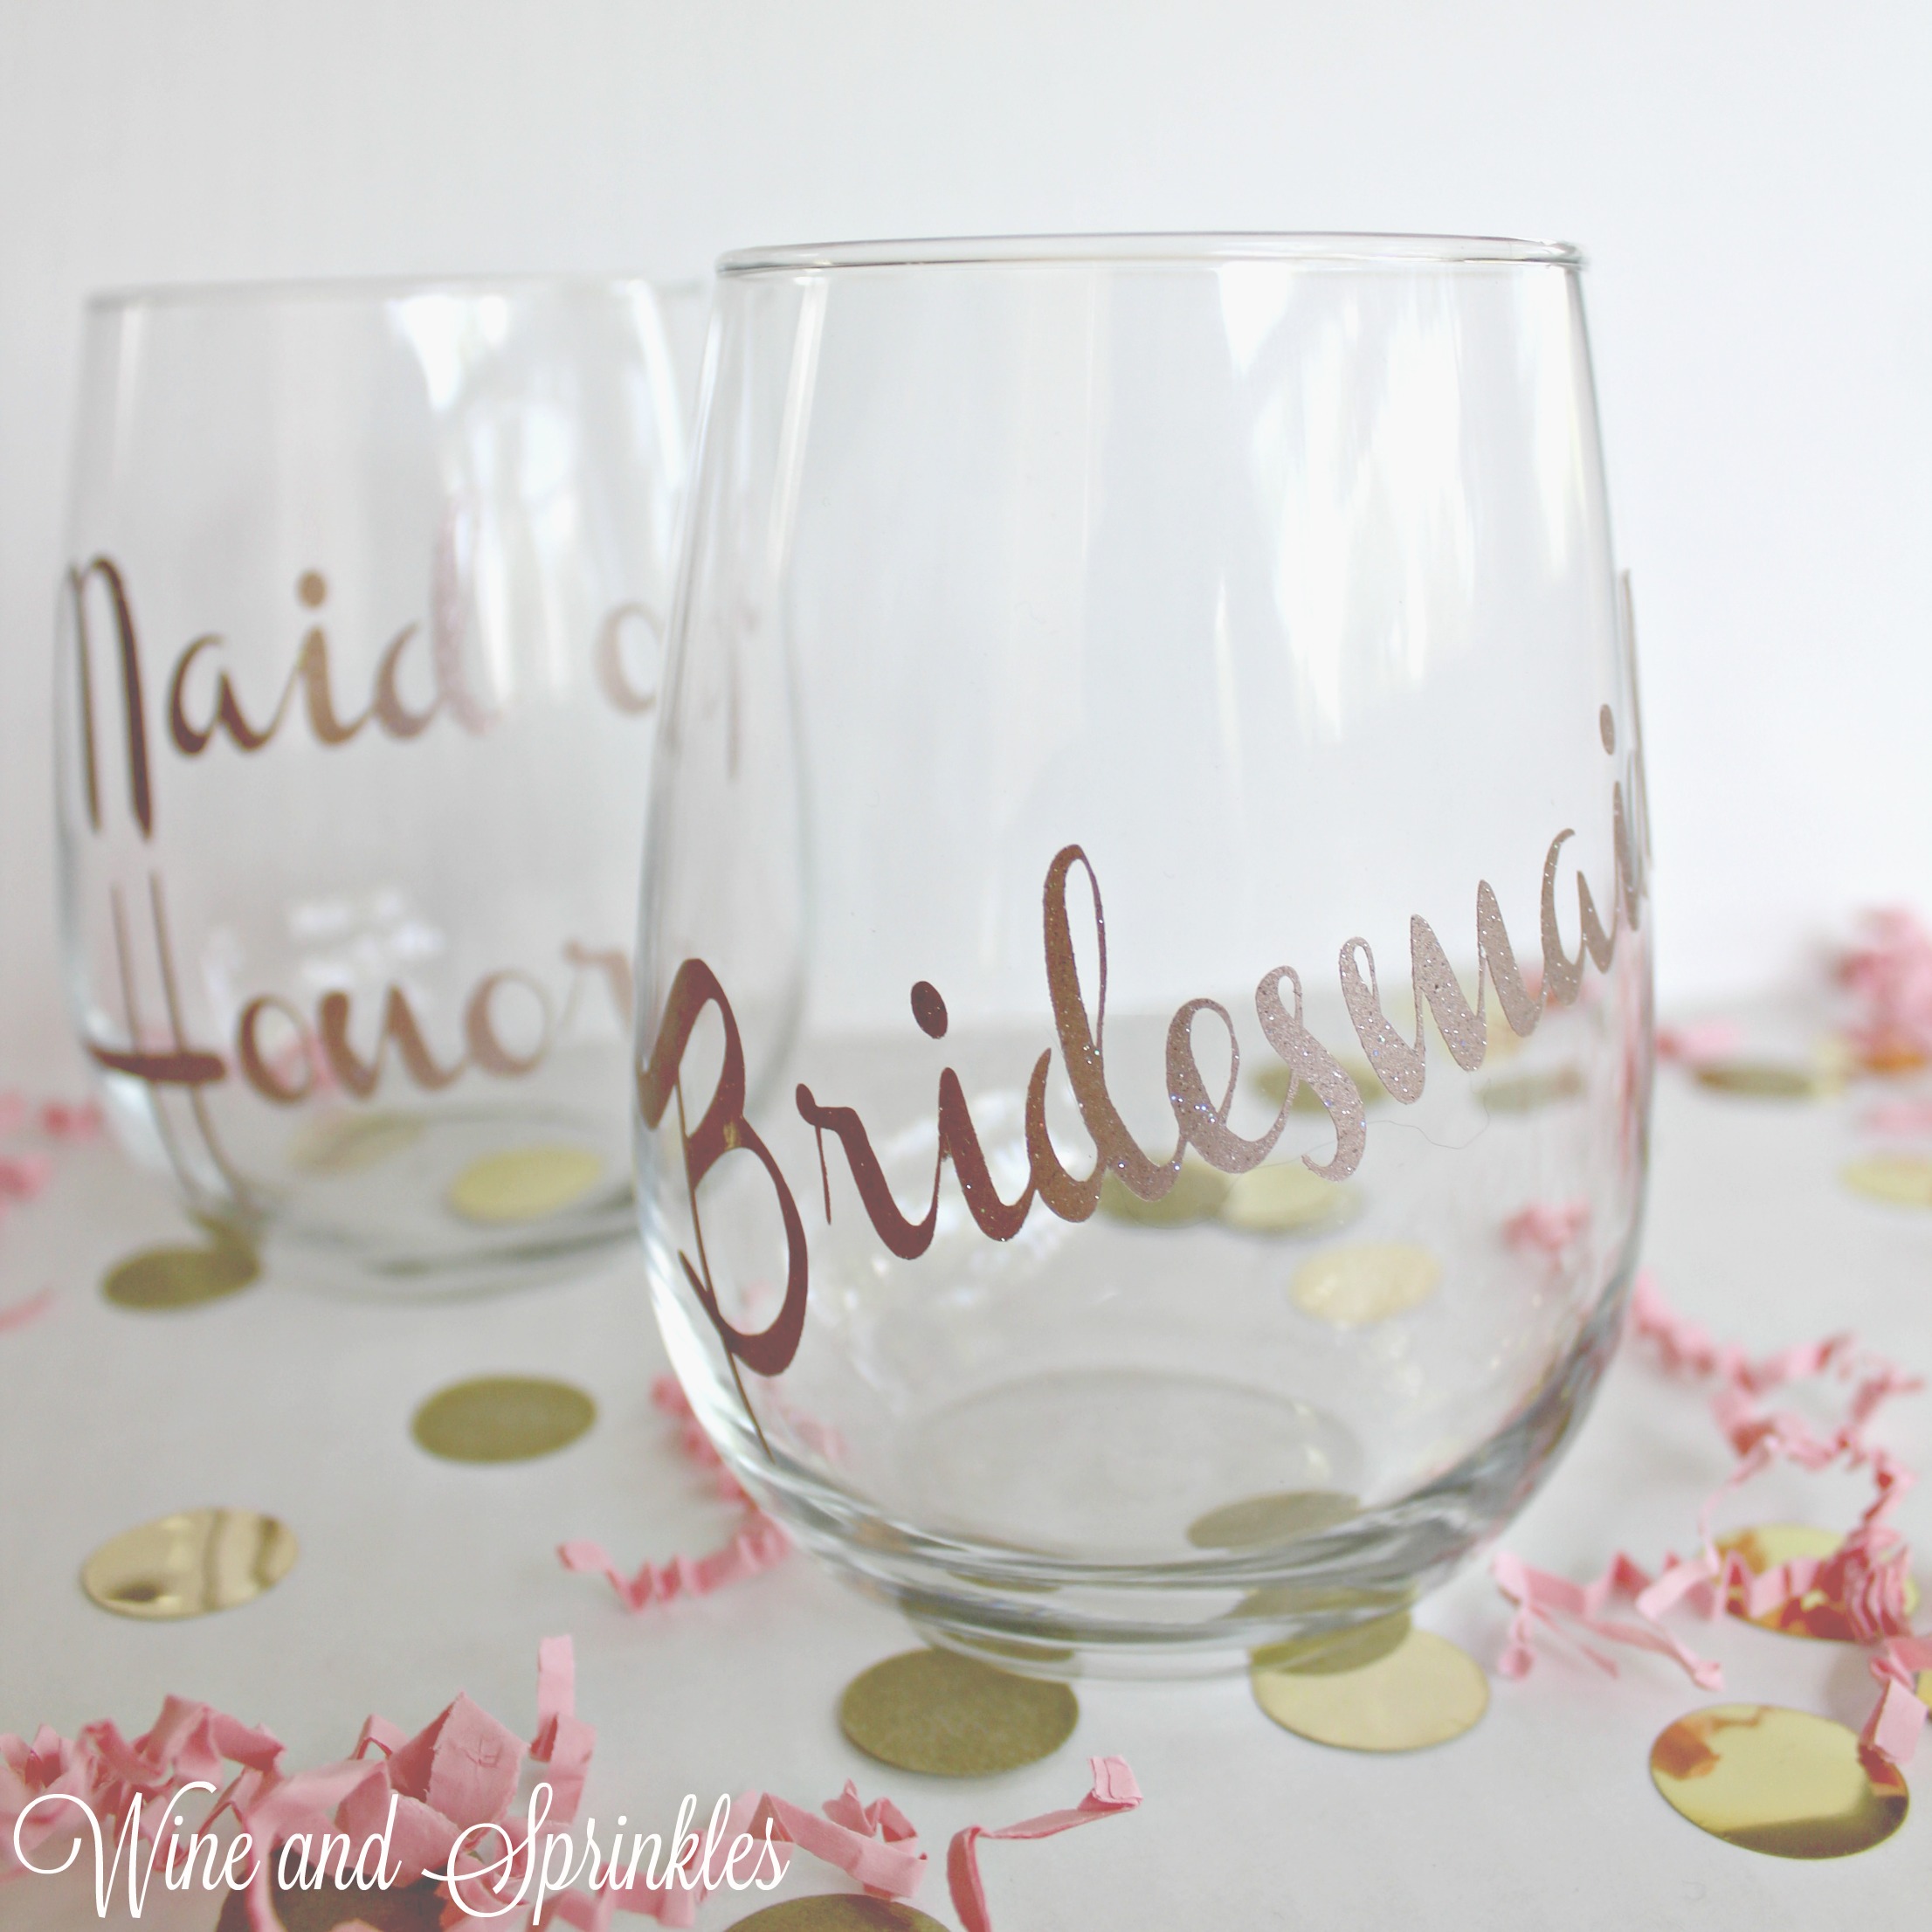
One of my favorite things to make for bridal parties are themed glasses, whether for DIY Nights, Bachelorette Parties, Bridal Showers, or Getting ready on the big day! I will be posting on how to make your own personalized glasses in a bit, but these are more generic and can be easily used for all wedding events by your girls.
I cut out mine using a Champagne Glitter Vinyl, but there are many options to choose from if it's not quite right for wedding party. Also worth noting, when I designed the cut files I kept the text black on a blank canvas, so on my computer then tend to be on a black background and can't be seen very well, you can right click to either copy the file or save it and it should be black text with a clear background. :)
Supplies:
Stemless Wine Glasses
Permanent Adhesive Vinyl
Craft Cutter and Tool Set
Adhesive Mat
Transfer Tape
Bridesmaid Cut File
Maid of Honor Cut File
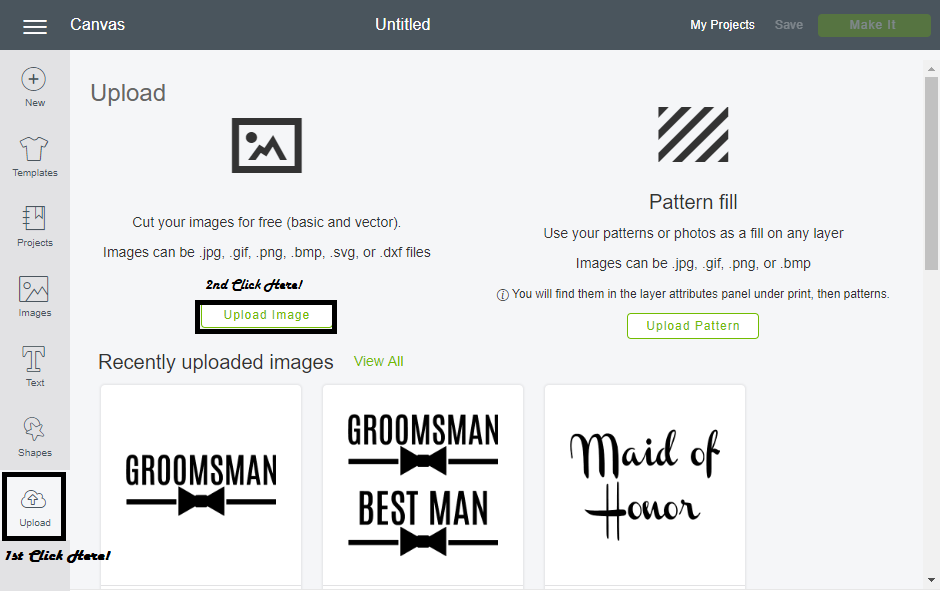
1. Download the Bridesmaid and Maid of Honor Cut File by clicking the links above, which will open the file into a new tab. right click on the picture and select "Save Picture as".
2. Import the files into the Cricut software. You can do this by going to the software; and, after making a new project, click the "Upload Button." Then Select Upload Image
3. Click "Browse" and select the file you want to cut from your saved files. Once the file is selected, a new screen will appear to choose cut complexity. I generally find the best results on the "Moderately Complex" Setting. Click your setting of choice then click "Continue."

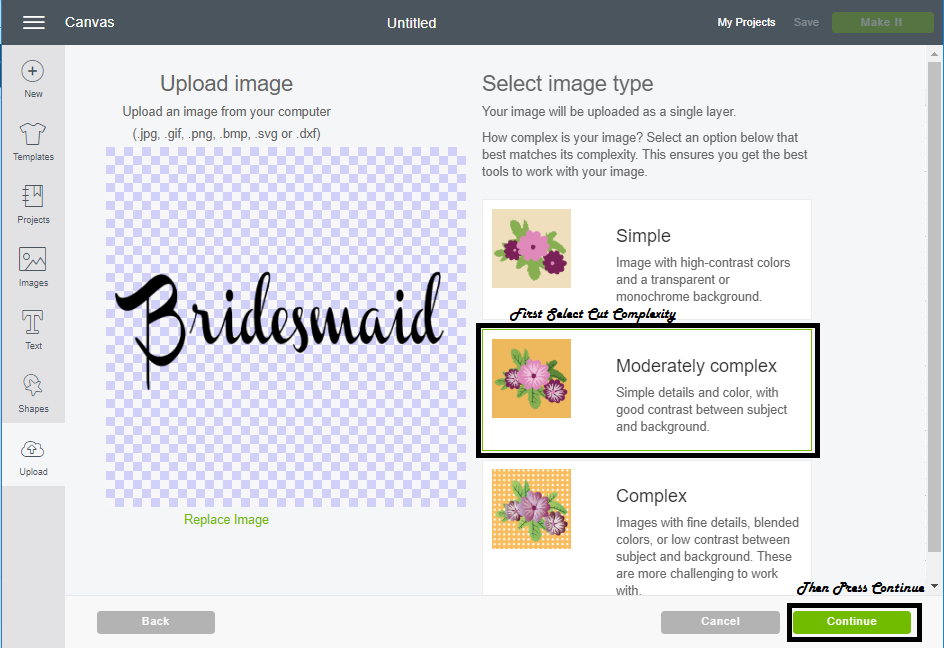
4. You will now be on the "Select and Erase Screen." In this case, there is nothing to erase so just press continue to go to the final screen. Here you can choose whether is is a "Print to cut" file or regular "Cut" File. Select the Cut file, then press "Save."


5. Back on the Upload Screen, Repeat Steps 1 - 4 on the "Maid of Honor" image. Once both images have been uploaded, select them from the main "Upload Screen" and click "Insert Images."

6. Both the "Bridesmaid" and "Maid of Honor" Decals should be on your Project Screen. Size your "Bridesmaid" Image to 4.5" wide and the "Maid of Honor" image to 3" tall to have them be a similar size to the glasses pictured. Then copy and paste additional decals as needed from these resizes ones. Press Continue to go to the Cut Screen.

7. On the Prepare Screen, confirm that your designs are arranged as you would like them on the cutting mat, then press "Continue." You can move any object by dragging and dropping it on the mat. Finally, load your vinyl of choice, select "Vinyl" on your machine, load your craft cutter, then press the Cricut "C" button on the cutter when it blinks.

8. Cut out your files on the adhesive vinyl of your choice and weed the extra vinyl from the design.

9. Press transfer tape along the design, aligning the text with the grid lines of the transfer tape. Use a smoother tool to release any air bubbles and the get the vinyl to stick to the tape.

10. Slowly remove the tape from the vinyl design, making sure that the design transfers from the vinyl backing to the tape.

11. Angle your text such that it leaves about an inch around the top of the glass and stick the middle of the design on the wine glass. From the middle of the glass, smooth the design along the curve of the glass from the middle to the edges. The transfer tape won't perfectly lay on the glass due to its curved surface, but the text can be smoothed on without much fuss.
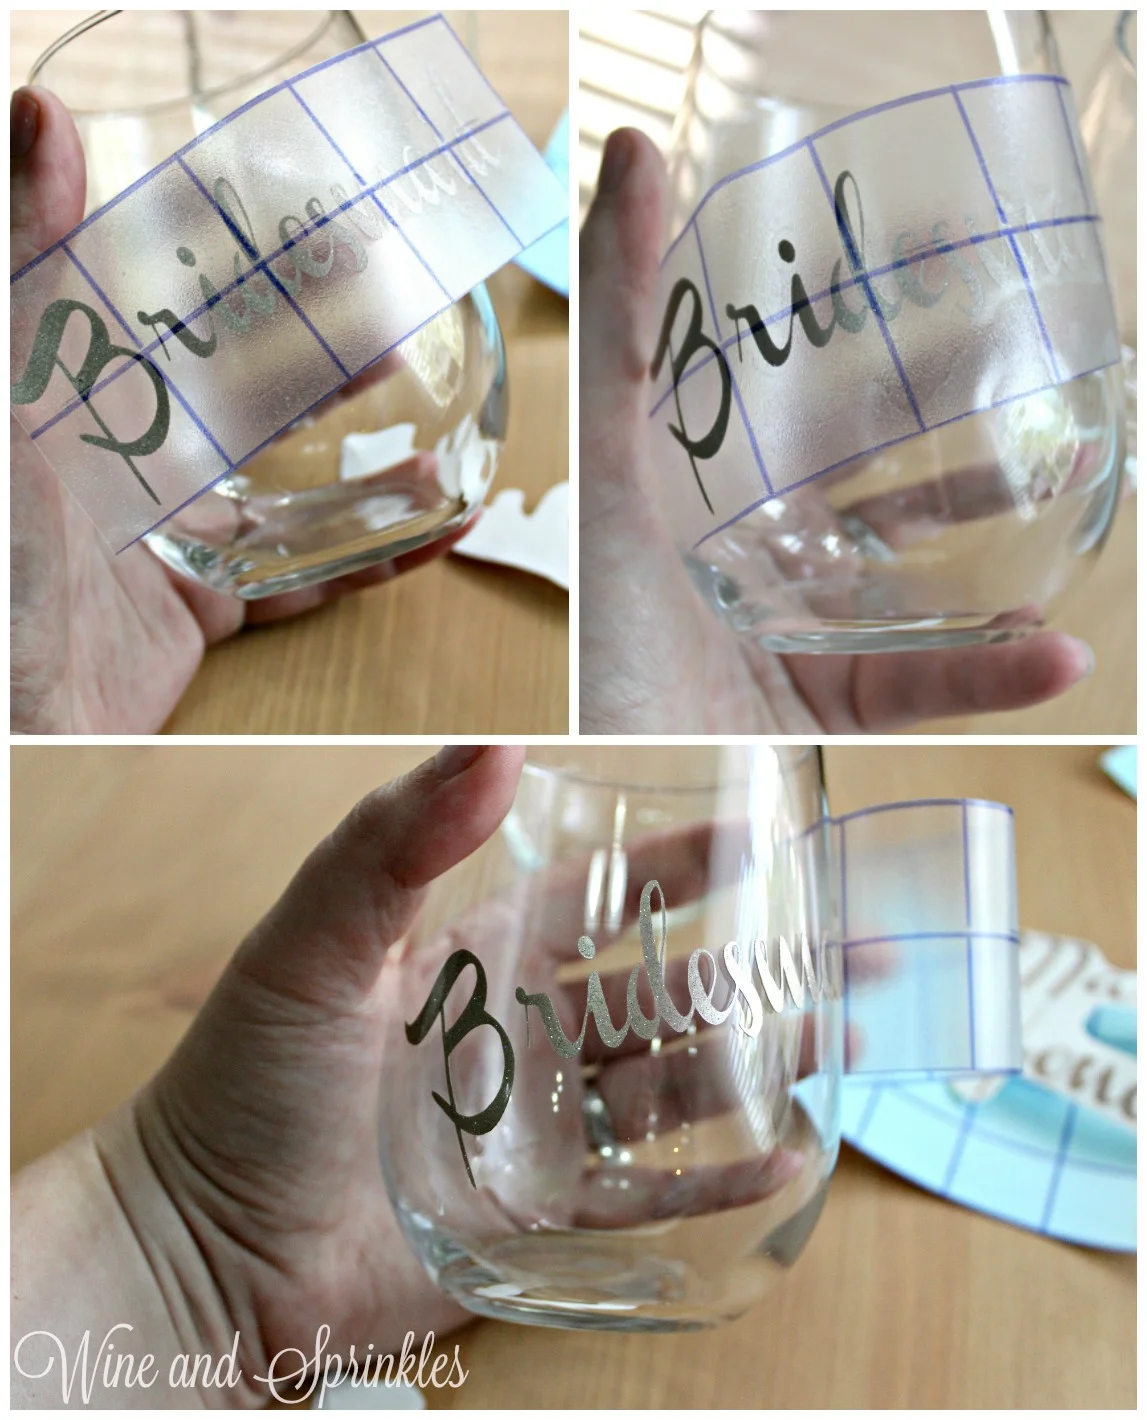
12. Once design has been pressed onto the glass, slowly remove the transfer tape, confirming that the design transfers from the tape to the glass. Repeat with all your remaining glasses.