Menu

Wine & Sprinkles

  • HOME
  • BLOG
  • DIY PROJECTS
  • WEDDINGS
    • Wedding Projects & Posts
    • Bridesmaids & Groomsmen
    • Favors & Guest Bags
    • Decorations & Wedding Details
  • LIFE EVENTS
    • Baby Showers
    • Bachelorette Parties
  • ABOUT ME
    • Who I am!
    • FTC Disclosure
    • Privacy Policy

Subscribe!

Thank you! You have successfully subscribed to our newsletter.

Subscribe!

Sign up below to receive emails for new blog posts, special offers, and party inspiration!


FEATURED
PARTY & EVENT POSTS:

Featured
Cookies and Cocoa Holiday Brunch
How to Plan and Bake Holiday Cookie Boxes for Christmas Gifts
Anime Karaoke Birthday Party
Alice in Wonderland Poker Dinner Party
Bubbly & Bouquets Flower Bar Brunch
Karaoke & Cards Vintage Victorian Cocktail Party


FEATURED BRIDESMAID & GROOMSMEN ROUNDUP POSTS:

Featured
50 Cheap and Unique Groomsman Gifts Under $30
Unique Fall Bridesmaid Gifts Under $35 for an Autumn Wedding
50 Fun and Unique Bridesmaids Gifts Under $25
20 Bridesmaids Gifts Under $20
Spring Bridesmaid Gifts Under $35
50 Groomsmen Proposals Under $15
Bar Themed Groomsman Proposals Under $15


FEATURED WEDDING DETAILS ROUNDUP POSTS:

Featured
Whimsical Spring Wedding Details Under $30
30 Rustic Wedding Details for under $25
Romantic & Elegant Wedding Details Under $25

FEATURED DIY WEDDING PROJECTS:

Featured
DIY Hanging Wisteria Fairy Light Flower Curtain Photo Backdrop
DIY Silk & Wooden Flower Tea Cup Centerpieces
DIY "Spot of Tea" Window Bag Tea Favors
DIY Wax Seal Magnet Favors
DIY Ribbon Tied Honey Stick Favors
DIY Hexagon Paper Tags & Favor Cards
DIY Personalized Wax Seal Gable Gift Boxes

FEATURED FAVOR ROUNDUP POSTS:

Featured
Spring Wedding Favors Under $2
15 Unique Wedding Favors under $1.50
50 Fun & Unique Wedding Favors Under $2

FEATURED COCKTAIL & DRINK RECIPES:

Featured
Spiced Citrus Old Fashioned
London Lemon Old Fashioned
Honey Hibiscus Old Fashioned
Pomegranate Pepper Infused Dirty Martini
Limoncello Citrus Gin and Tonic

DIY Wine Bottle Turkey

November 07, 2015 in DIY Tutorials

One of my favorite pieces of fall decor that I made is Tipsy, my wine bottle turkey! I must admit that going into this project I didn't realize how much time it would take to finish, but it was completely worth the time and a fun chance to use my new Cricut on cardstock. Below I have posted the tutorial of how I made him, in case you are hankering for a Tipsy of your own. :)

Supplies:

Multicolored Card stock (I chose gold glitter and fall colors)
8 inch Cake Circle
Tacky glue or other craft glue
Wine Bottle, Washed out with labels removed
Scissors or Craft Cutter
Adhesive vinyl (Gold for my turkey)

1. First, cut out a myriad of leaves of different sizes and colors from your chosen card stock. In this case my Cricut was a life saver because it saved literally HOURS of cutting out paper leaves. I just took some multi-leaf clipart online and cut out one set of 12 leaves per color, totaling about 50 leaves. You may also be able to just buy card stock leave from crafts stores, but I didn't check this. :)

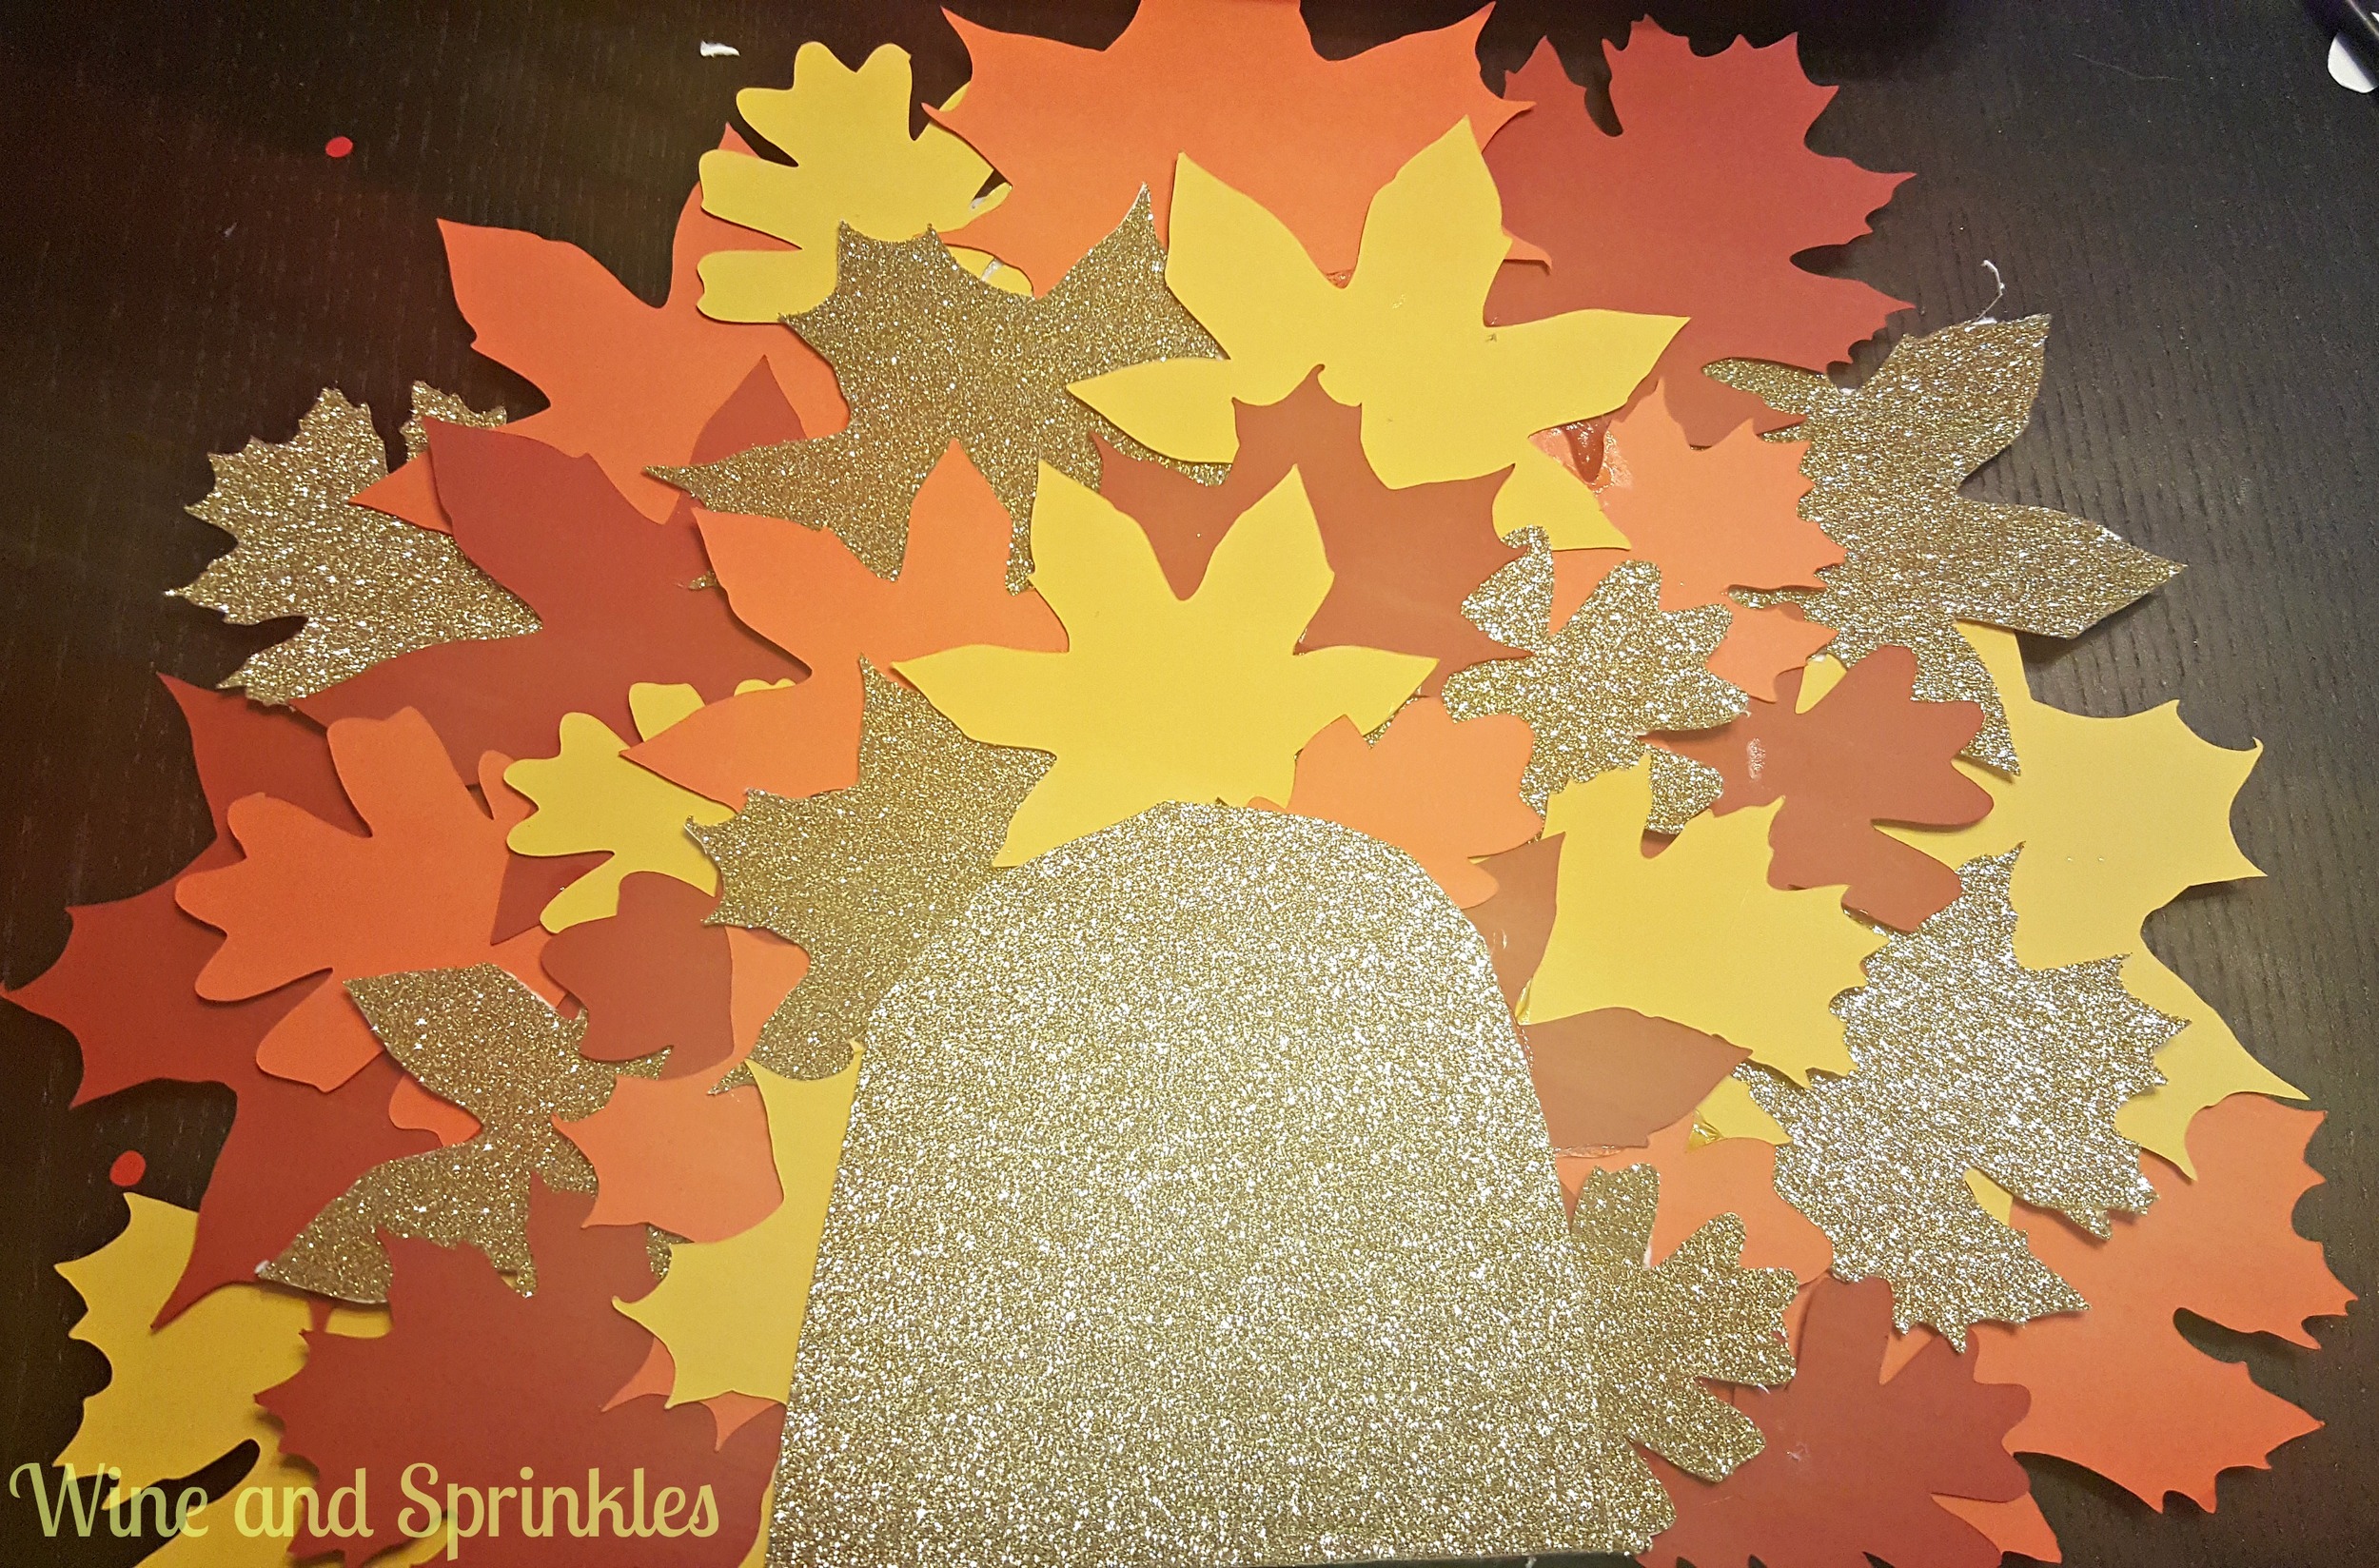
2. First, cut one side of the cake circle to be the botton of the turkey tail that can rest on the floor. Then, squeeze a line of craft glue on the outer edge of your cake circle. Arrange the larger of your leaves on the outside edge as shown below. Once your first layer is done, repeat the glue/leaf semi circle until you have about 4 layers of leaves.

3. Once all the leaves are set to your satisfaction, Cut a final piece of card stock to glue over the unfinished semicircle (in my case semi-oval) and let dry.

4. Once your tail is dry, either hot glue or craft glue the tail to the back of your bottle. Finish off your turkey by making a a card stock turkey face to glue to the top. (sorry no pictures of this, I have full faith in your ability to cut a circle and draw/cutout a beak and eyes :) )

5. Finally, cut out an oval in your adhesive vinyl (I used my Cricut for this) and adhere it to the front of your bottle as its "belly." This helps cover any glue lines from affixing the tail and gives it a little extra color.

And there you have it, A festive turkey to call your own!  Have fun with the colors and textures of your turkey, I may make a peacock-colored one next time. :) Happy Holidays!

← DIY Christmas Canvas ArtThanksgiving Traditions →
Back to Top