This post contains affiliate links, meaning that if you click on a link I will recieve a small comission. This costs you nothing extra and I only promote products I use and love! You can read our full disclosure here

I have a couple friends getting married in 2017 so I have been having oodles of fun thinking of bridal shower and bachelorette themes for them. One I can't seem to get out of my head is a Disney bridal shower, so regardless of if either of them choose it in the end I have started crafting!
First up is an art piece I made for my craft room, but would look great hanging over the food or gift table at and bridal or baby shower, a monogrammed canvas. :) For this version I used Disney Pins to make the first letter of my last name, but you can make it just about any letter you want, depending on the number of pins you have. :)
Note: This page may contain affiliate links, meaning that if you click on the link and buy the product, I will receive a small commission. This will not change your cost at all and I only recommend products I use and love!
Supplies:
Disney Pins (if you don't have a collection already)
20" x 30" Canvas
1/2-1 yard Disney Fabric
Fabric Glue

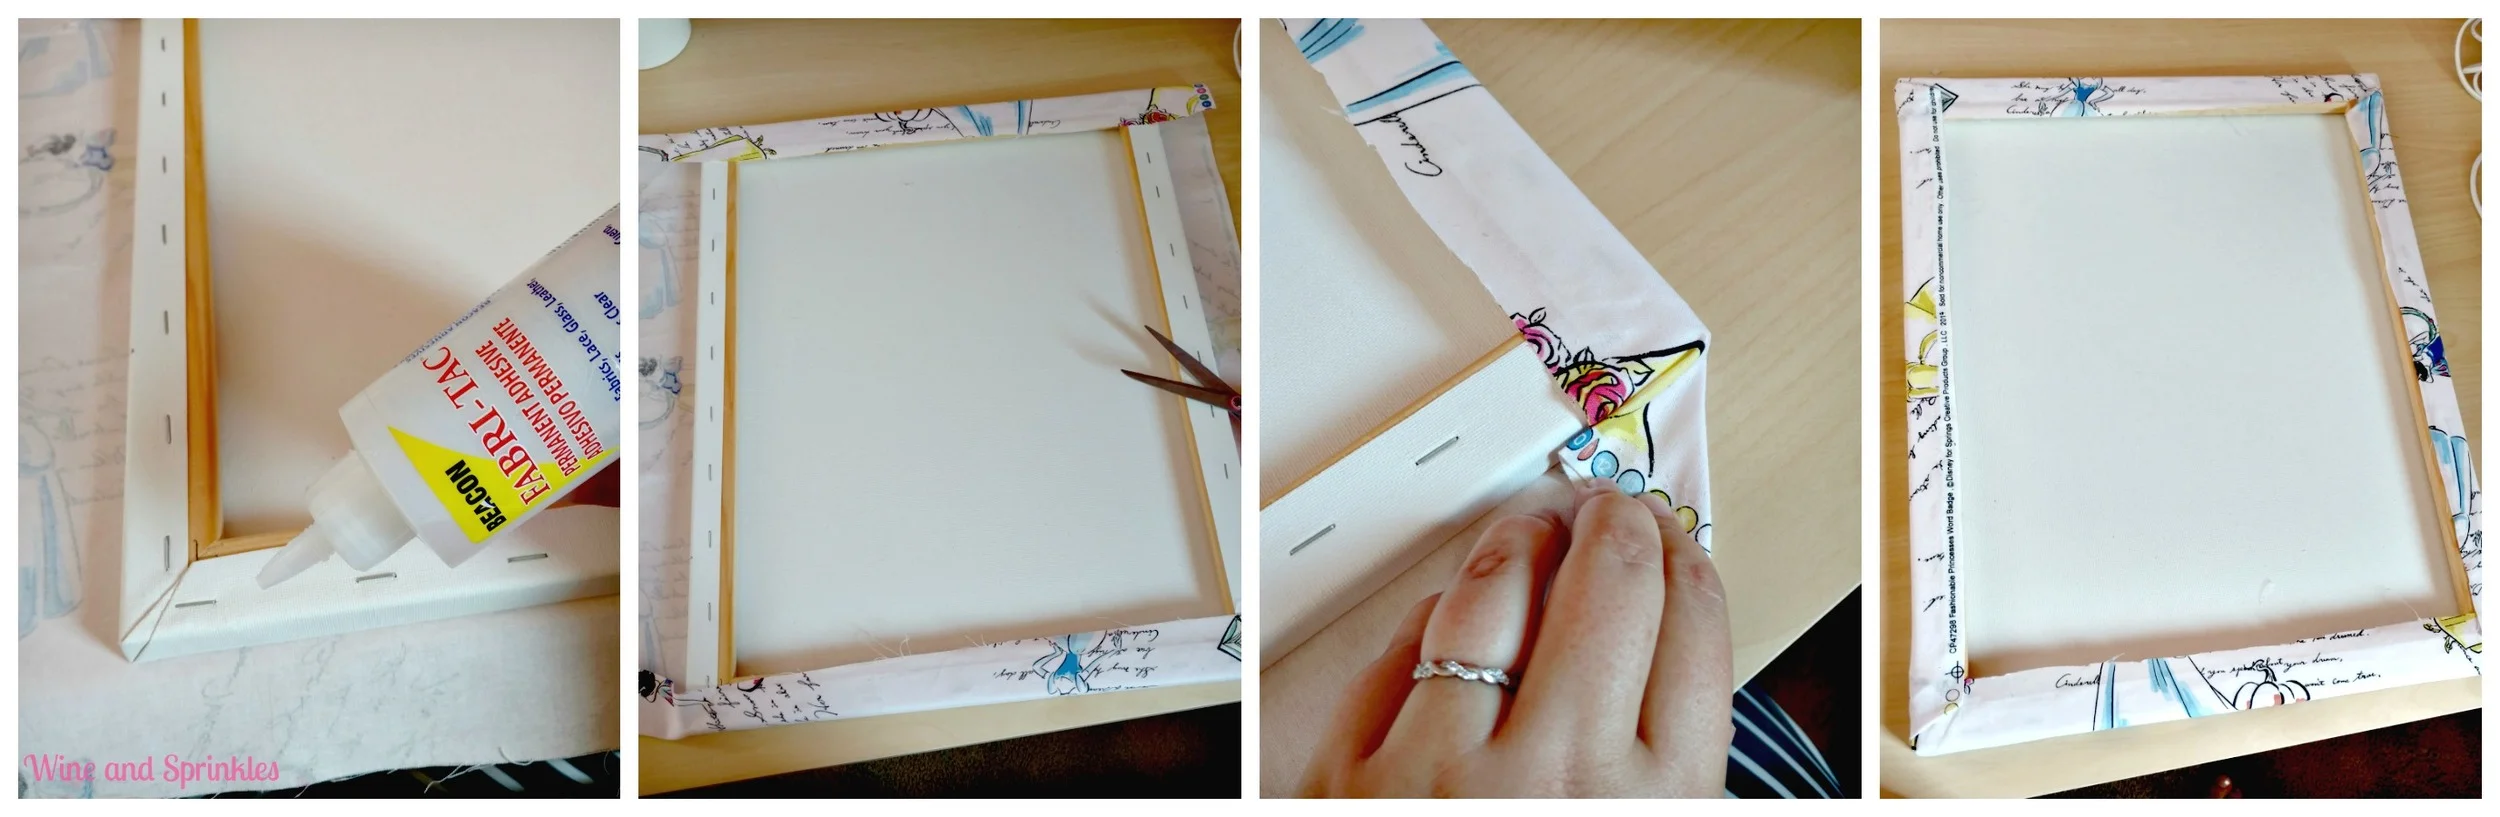
1. First, Iron out your piece of fabric and arrange it over you canvas. I tried to make mine so that my favorite princess wasn't in the center of the fabric so she wouldn't get completely covered up by the pins. :)
2. Once you have you fabric arranged, flip both your fabric and canvas over to the opposite side. trim the edges of the fabric so that they meet up with the edge of the canvas. Using fabric glue, stretch and adhere the short sides of fabric to the canvas. Wait until one side is dry before stretching and gluing the other so that you don't accidentally move you fabric!
3. Finish covering the canvas with the long sides in a similar fashion. I folded the corners in like a Christmas present to give it a nice clean look, as shown below:
4. Now that you canvas is ready, its time to pick what you want to put on it! I did an uppercase C for my last name but you could do the first letter of the bride's/baby's name, the age a child is turning on their birthday; there are lots of choices! Using Microsoft Publisher or Word, make you letter as big as you can to take up an 11" x 17" page and print.
5. If your printer is like mine, it doesn't accept that big of pages. Using the tiled printing, your letter should print onto three separate pages. Once it is printed, cut out the inside of the letter and tape the sheets together.
6. Now comes the fun part, putting on all your pins! I will admit that this is rather time consuming, but still a lot of fun. :) Arrange your letter in the center of the canvas, then start by pushing pins in along the edges of your design. I chose not to put on the pin backs until the end, which saved time in this stage.

7. Once the outline pins are done, fill in the middle. I ended up making one base layer and filled in the holes I had as a top layer. As I collect more pins I will fill it in to define the letter more and more.
8. After you have placed all the pins, remove your paper stencil. Turning the canvas over, put the backs into all the pins, pushing the backs in as much as possible. Once this is done, just reposition any pins that rotated while you were securing them.

I love this project for either a baby or bridal shower, and if the bride or mama-to-be loves Disney, it also makes a great gift to hang on their wall. :) Tune in later for more projects for a Disney themed Bridal Shower!