DIY HTV Best Bridesmaid Ever Tote Bags

This post contains affiliate links, meaning that if you click on a link I will recieve a small comission. This costs you nothing extra and I only promote products I use and love! You can read our full disclosure here

DIY HTV Iron On Best Bridesmaid Ever Getting Ready Wedding Tote Bags #svgfiles #totebags #bridesmaidgifts

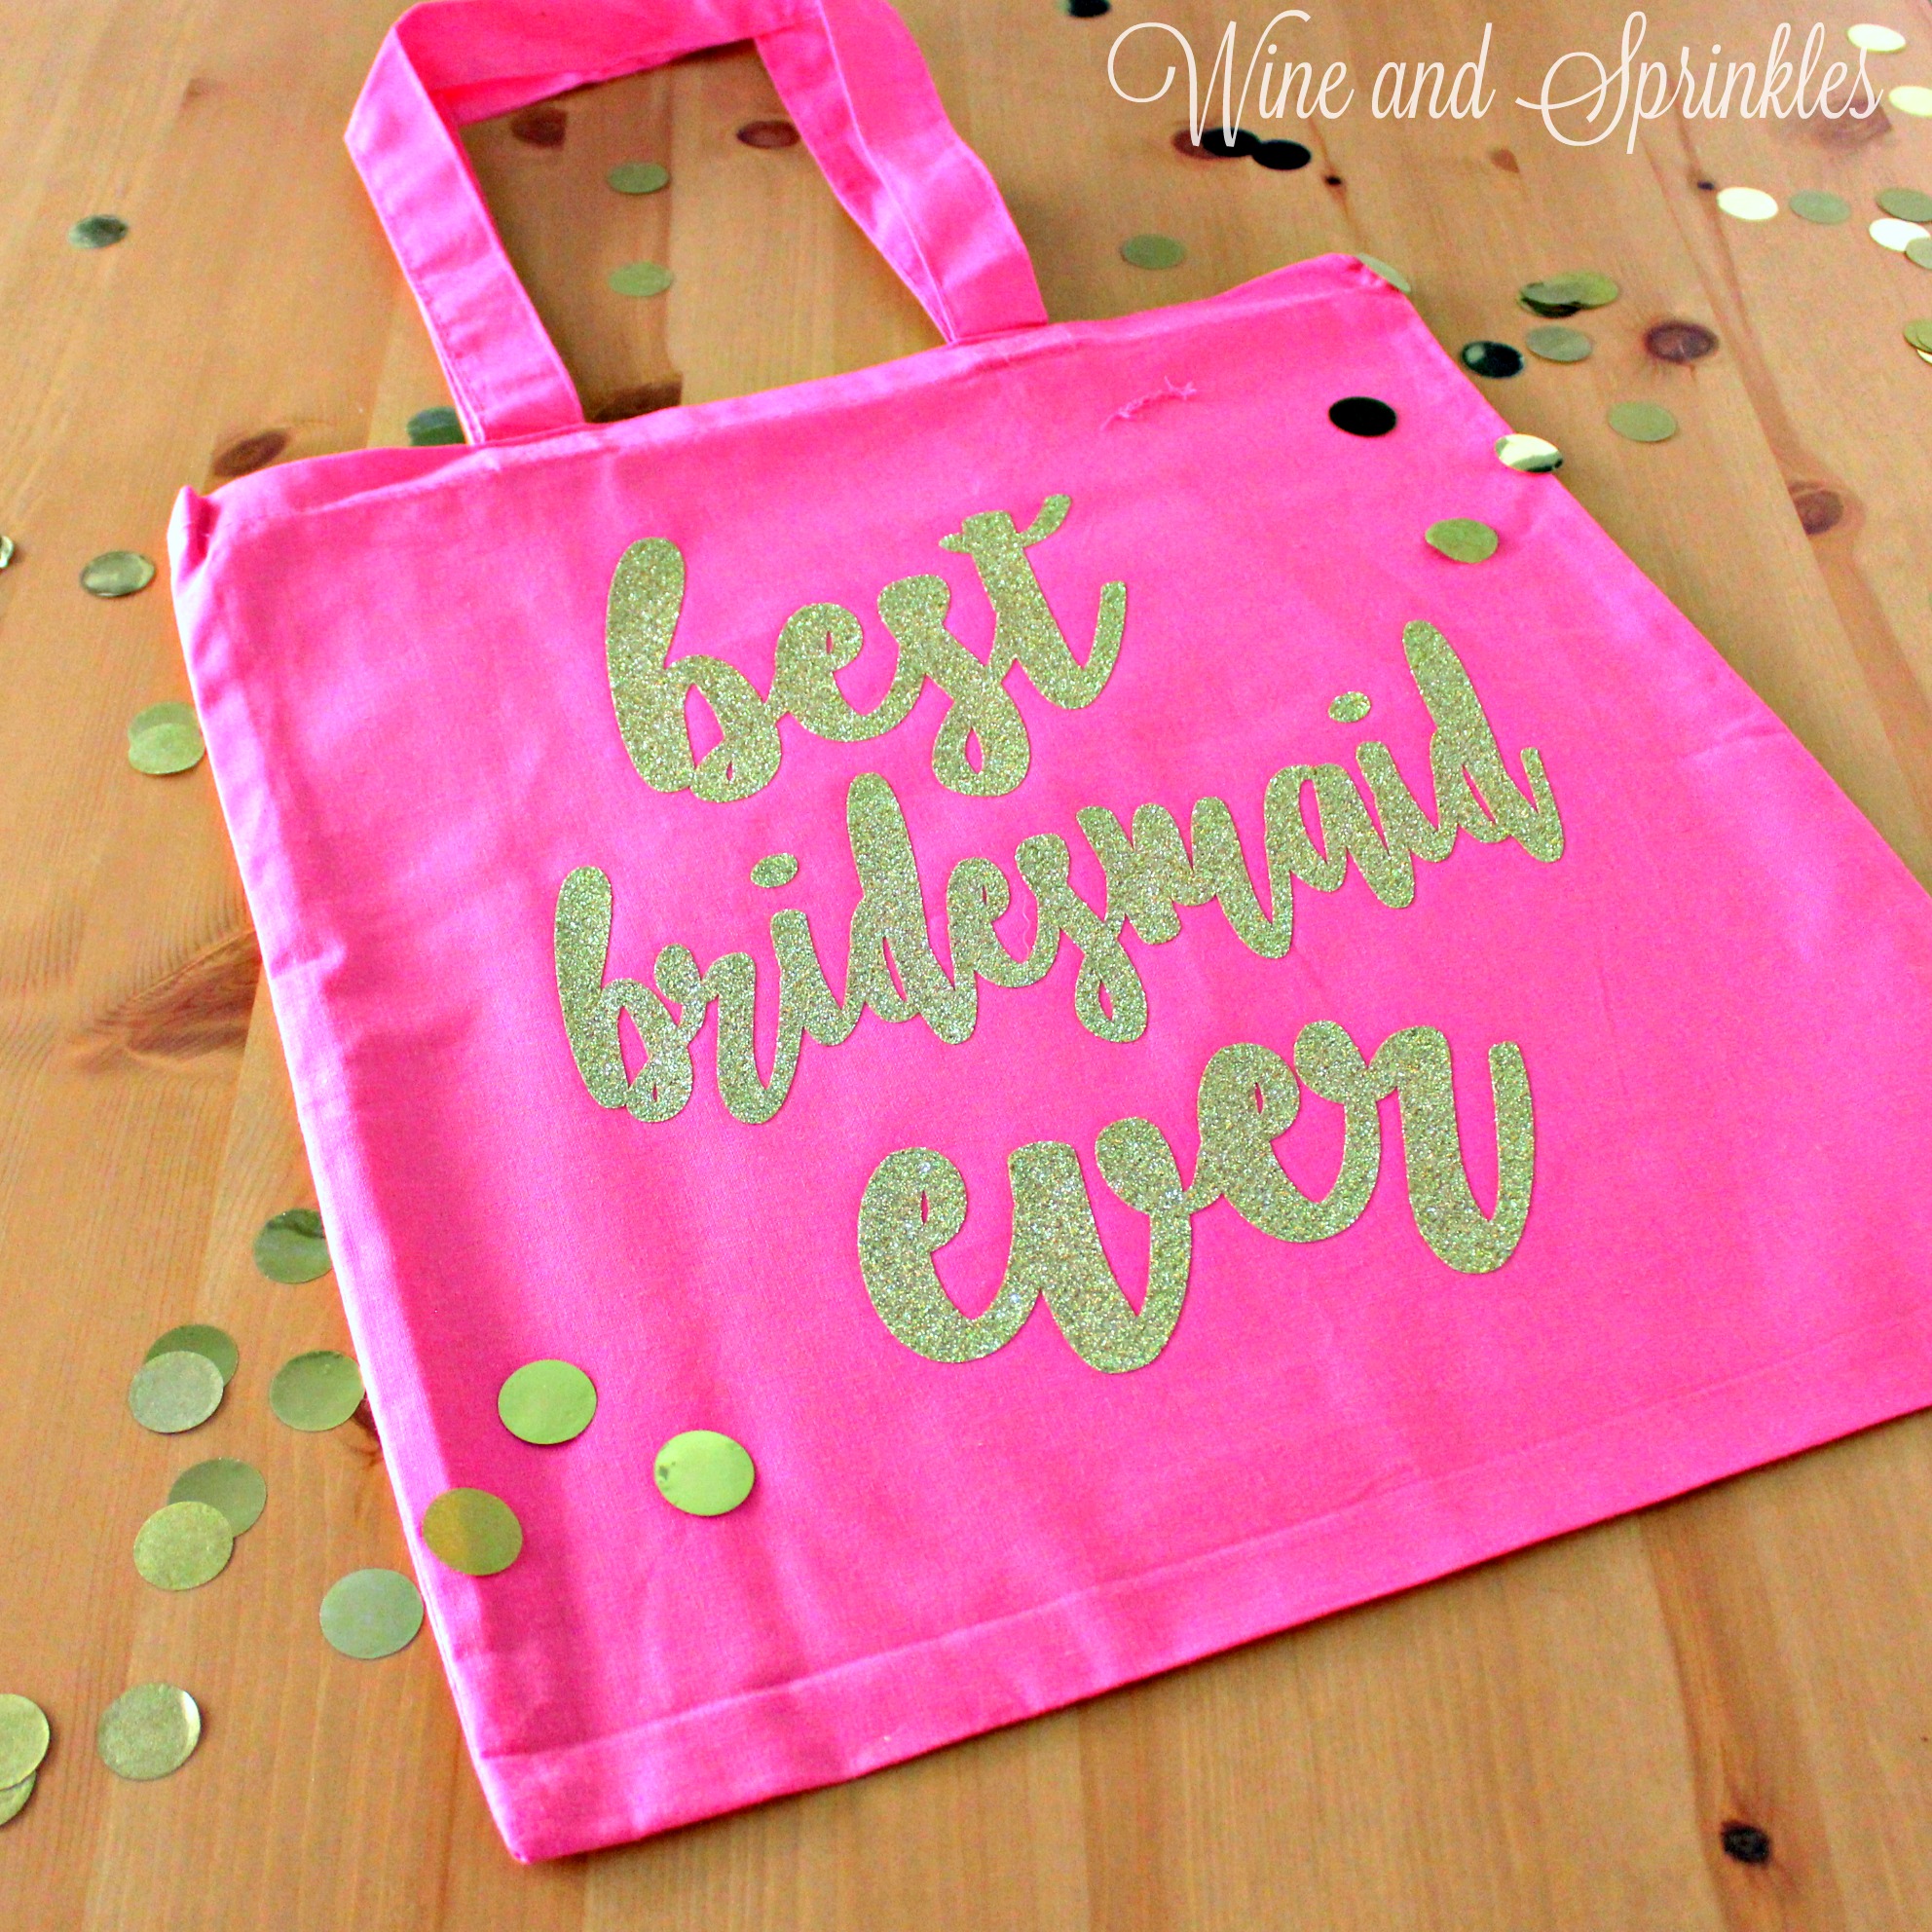
Who doesn’t love tote bags when it comes to Bridesmaid Gifts, they are so useful and perfect for overnight bags and storing toiletries and extras for your wedding day! To go with the other Tote Bags we’ve made, these Best Bridesmaid Ever Totes are great and affordable swag for all your girls!

DIY HTV Iron On Best Bridesmaid Ever Getting Ready Wedding Tote Bags #svgfiles #totebags #bridesmaidgifts

In keeping with our Valentine’s Day Coloring right now, I made mine on Pink Tote Bags with Gold Confetti HTV but I would almost repeat the project with non glitter HTV to help with visibility on the bags in the future

DIY HTV Iron On Best Bridesmaid Ever Getting Ready Wedding Tote Bags #svgfiles #totebags #bridesmaidgifts

I made a total of 4 different bags so you could have one for each of your leading ladies: bridesmaid, maid of honor, mother of the bride and mother of the groom. You can easily customize these for getting ready bags in whatever colors you like, and they are perfect for storing your girl’s clothes when the are getting ready and in their dresses for the wedding!

staged 4 with text.jpgDIY HTV Iron On Best Bridesmaid Ever Getting Ready Wedding Tote Bags #svgfiles #totebags #bridesmaidgifts

1. After downloading the cut files, import them into the Cricut Software. After creating a new project, select Upload Image. Select the file you wish to upload and it will automatically take you to the final upload screen, where you can name the file the select Save. The SVG Files are sized so that they will automatically cut to the size you see in the photos, but if you want to change the size you can do so to fit the Tote Bags the way you like.

2. After selecting “Make It” Make sure to select the Mirror Mode on the cutting screen. Cut the design(s) in your choice of heat transfer vinyl (I used Gold Confetti Glitter HTV) with the Iron On (for Easyweed Vinyl) or Iron On+ (for Glitter Vinyl) Setting on your Cricut, with the shiny side of the material down.

3. Weed the additional material off of the backing material so that, looking down with the shiny side up, you can see your design with the correct orientation.

1. placement with text.jpgDIY HTV Iron On Best Bridesmaid Ever Getting Ready Wedding Tote Bags #svgfiles #totebags #bridesmaidgifts

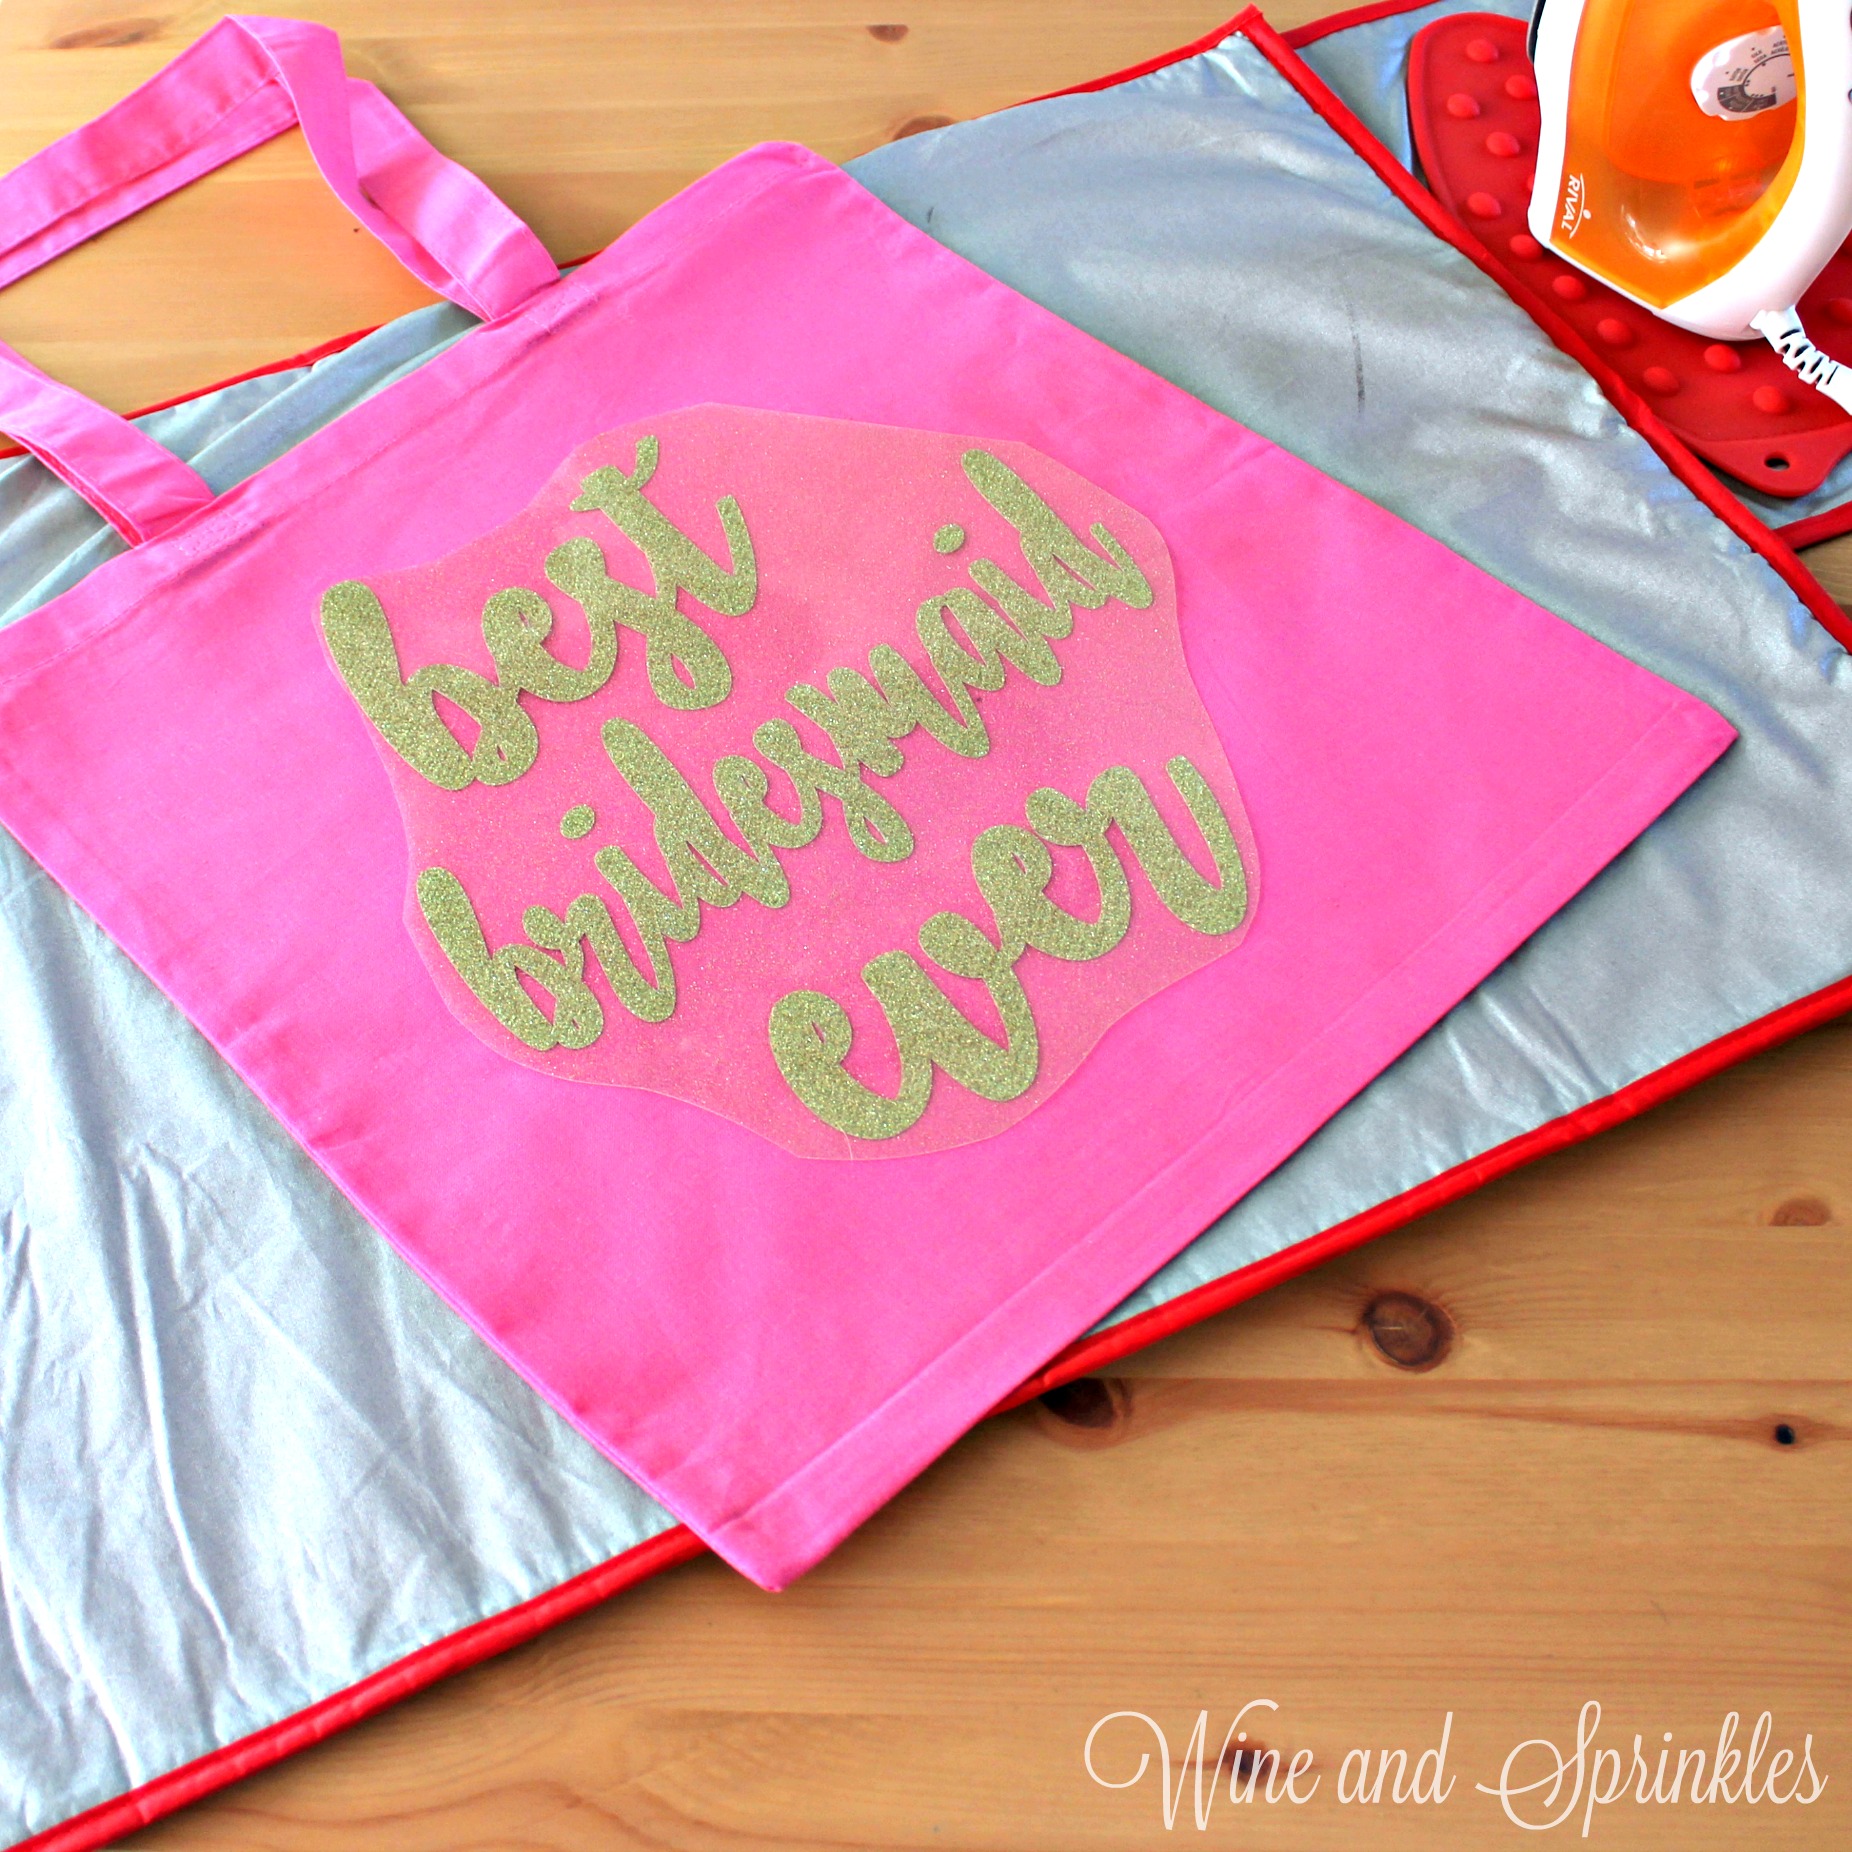
4. Iron your Tote Bag to remove any creases, then arrange the design in the center of the tote bag, using the handles as a guide . Arrange the design shiny side up, then cover with parchment paper. Make sure to keep the parchment paper between the design and the iron.

2. ironing with text.jpgDIY HTV Iron On Best Bridesmaid Ever Getting Ready Wedding Tote Bags #svgfiles #totebags #bridesmaidgifts

5. Set your Iron to the second Highest setting and press the the iron down firmly on the design, not ironing but rather using it as a small heat press. I worked from the upper left to lower right on the design, pressing the iron on each part of the design for at least 30 seconds, then overlapping the last position as you move the iron across the design.

3. backing removal with text.jpgDIY HTV Iron On Best Bridesmaid Ever Getting Ready Wedding Tote Bags #svgfiles #totebags #bridesmaidgifts

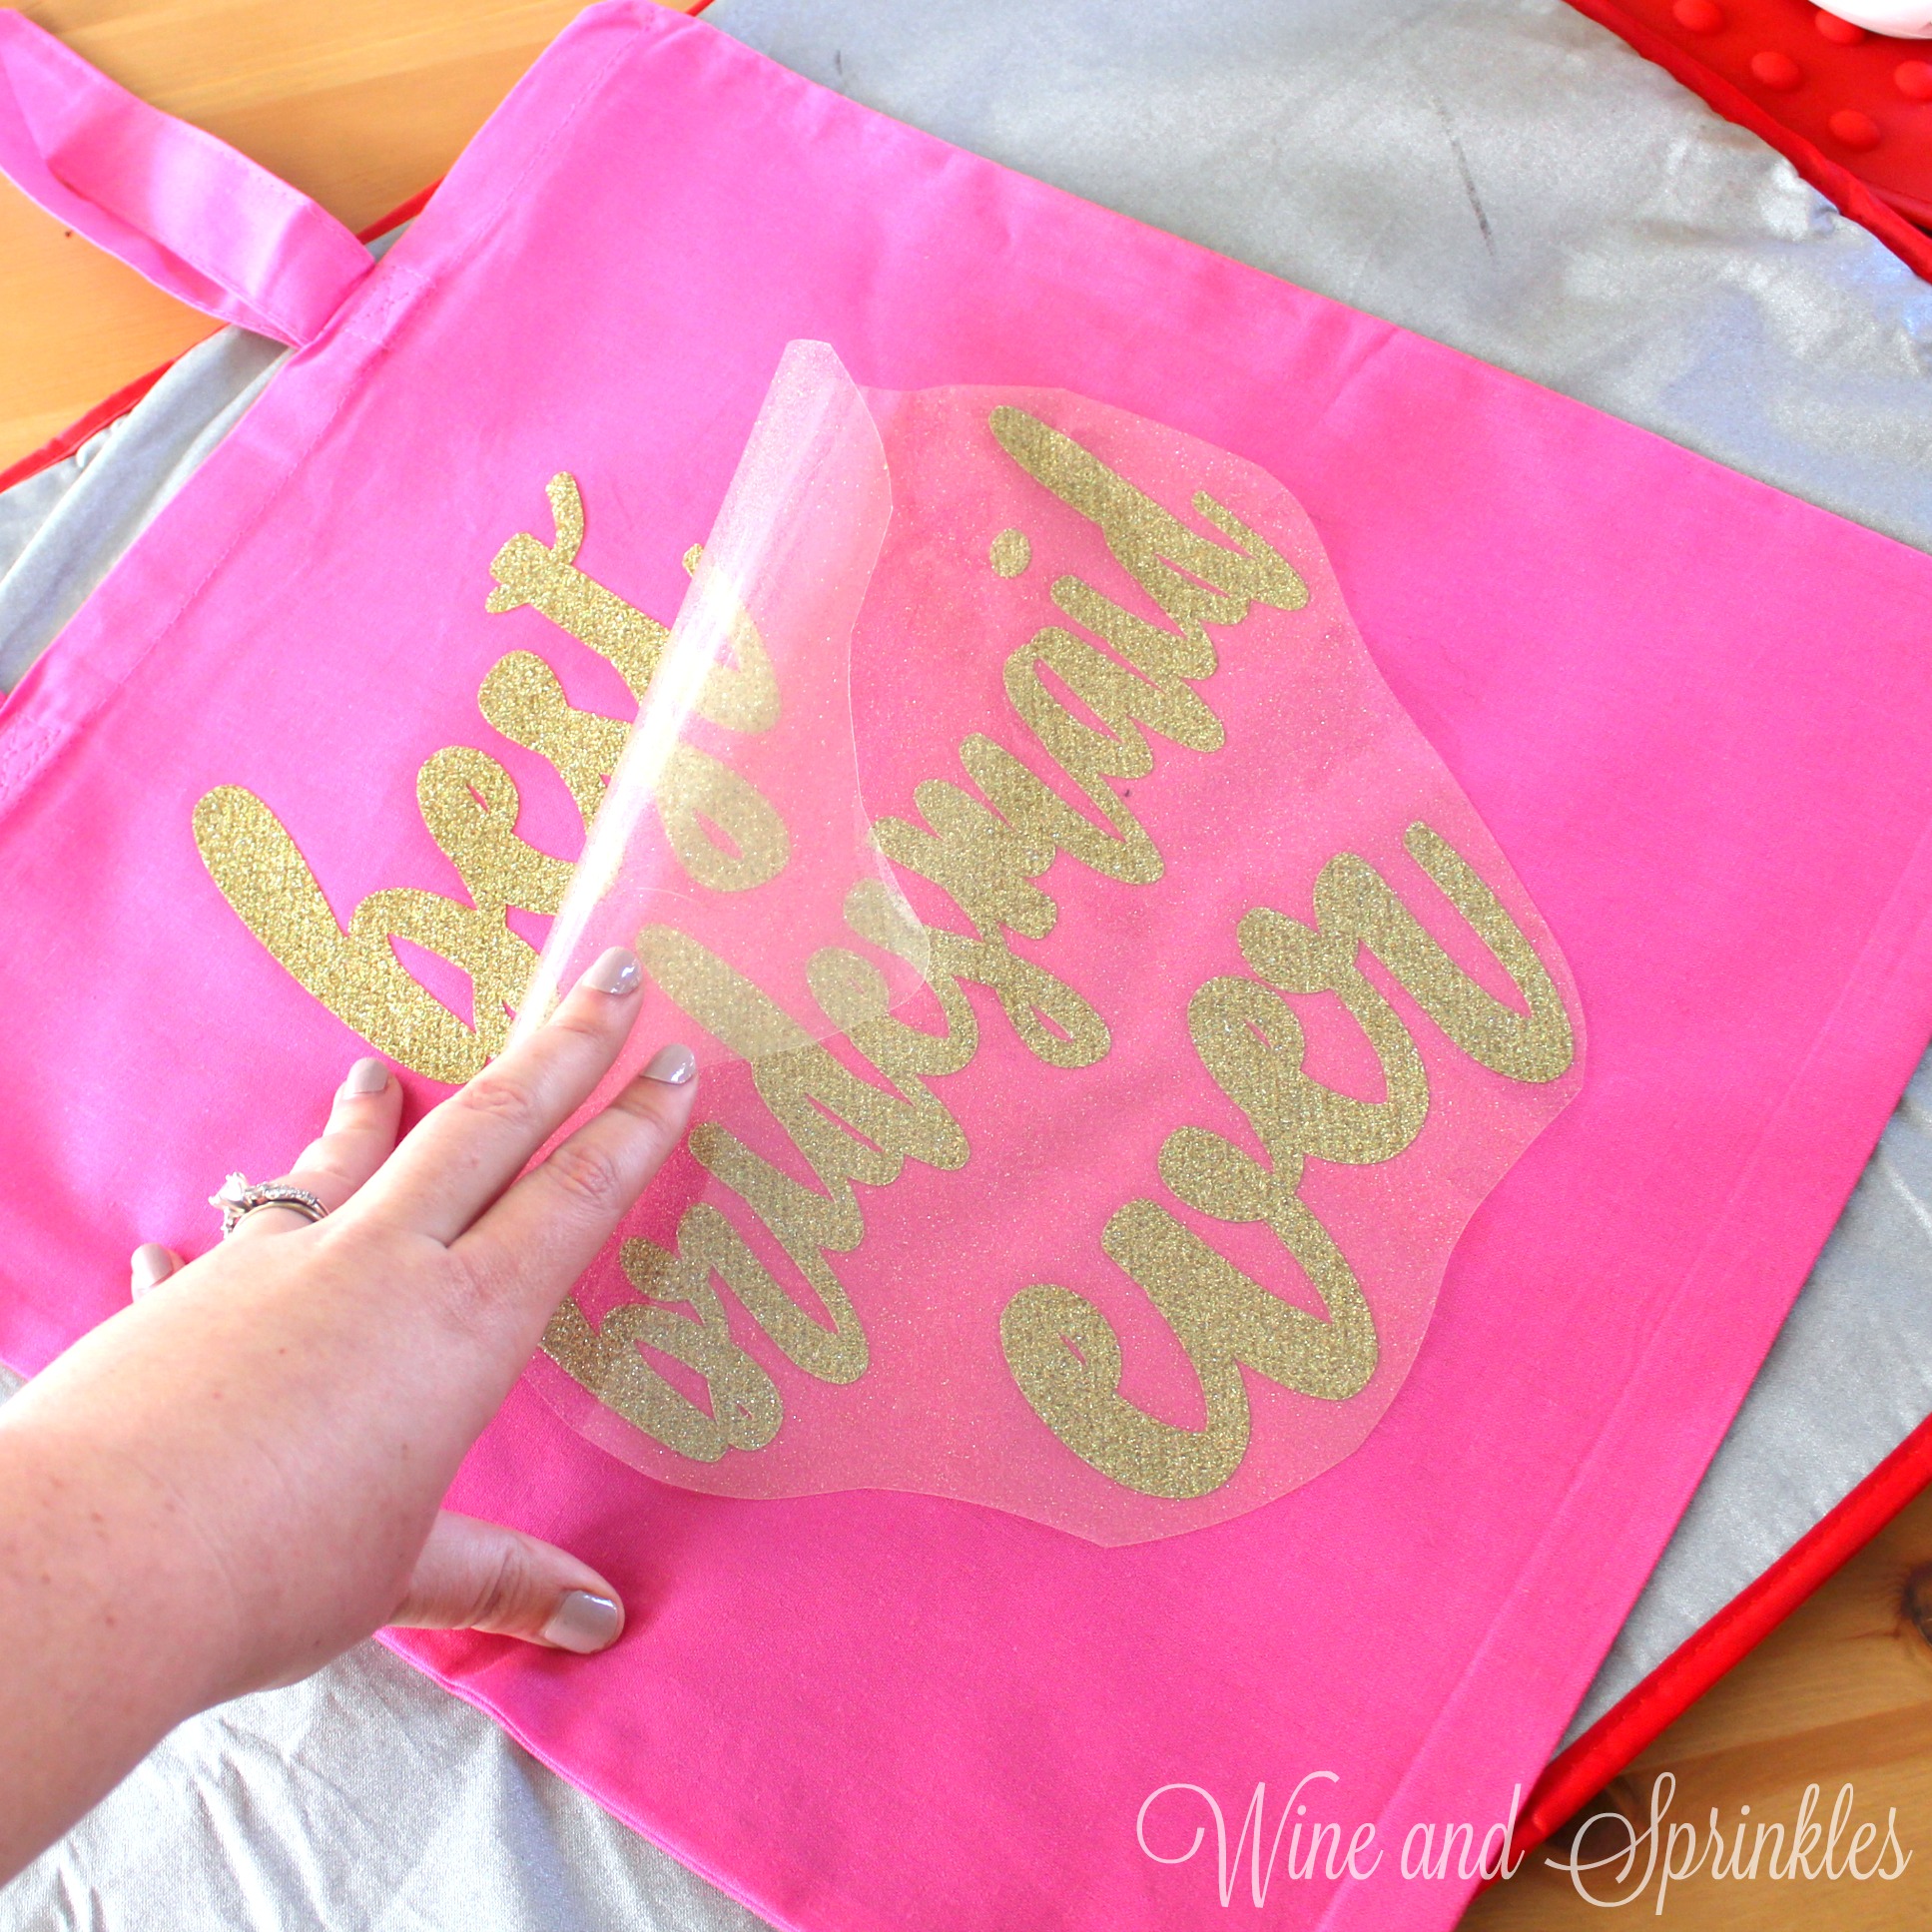
6. Remove the backing from the design, leaving the design on the Tote Bag. Repeat with all the remaining Tote Bags.

DIY HTV Iron On Best Bridesmaid Ever Getting Ready Wedding Tote Bags #svgfiles #totebags #bridesmaidgifts
instagram 1 - with text.jpgDIY HTV Iron On Best Bridesmaid Ever Getting Ready Wedding Tote Bags #svgfiles #totebags #bridesmaidgifts

Love is Sweet Macaroon Favor Boxes

This post contains affiliate links, meaning that if you click on a link I will recieve a small comission. This costs you nothing extra and I only promote products I use and love! You can read our full disclosure here

DIY Love is Sweet Macaroon Box Favor #diyfavor #diywedding #svgfiles

It’s the season of love everyone and nothing says love to me like macaroons! These pretty french cookies are light, sweet, and a perfect classy edible favor!

DIY Love is Sweet Macaroon Box Favor #diyfavor #diywedding #svgfiles

I ended up finding these adorable Macaroon Favor Boxes on Amazon, then is was super easy to measure the window, design a simple sticker, then cut and stick! I chose Oracal 651 Gold Vinyl and Silver Glitter Vinyl for my stickers and ended up picking up some macaroons for the boxes at the local super market. That being said, if you learn to make your own macaroons not only will you be able to customize the flavors and colors, but also will make them far far cheaper to make! :)

DIY Love is Sweet Macaroon Box Favor #diyfavor #diywedding #svgfiles

1. After downloading the cut files, import them into the Cricut Software. After creating a new project, select Upload Image. Select the file you wish to upload and it will automatically take you to the final upload screen, where you can name the file the select Save. 

2. Cut the design(s) in your choice of permanent adhesive vinyl with the Vinyl Setting on your Cricut. The SVG Files are sized so that they will automatically cut to the size you see in the photos, but if you want to change the size you can do so.

DIY Love is Sweet Macaroon Box Favor #diyfavor #diywedding #svgfiles

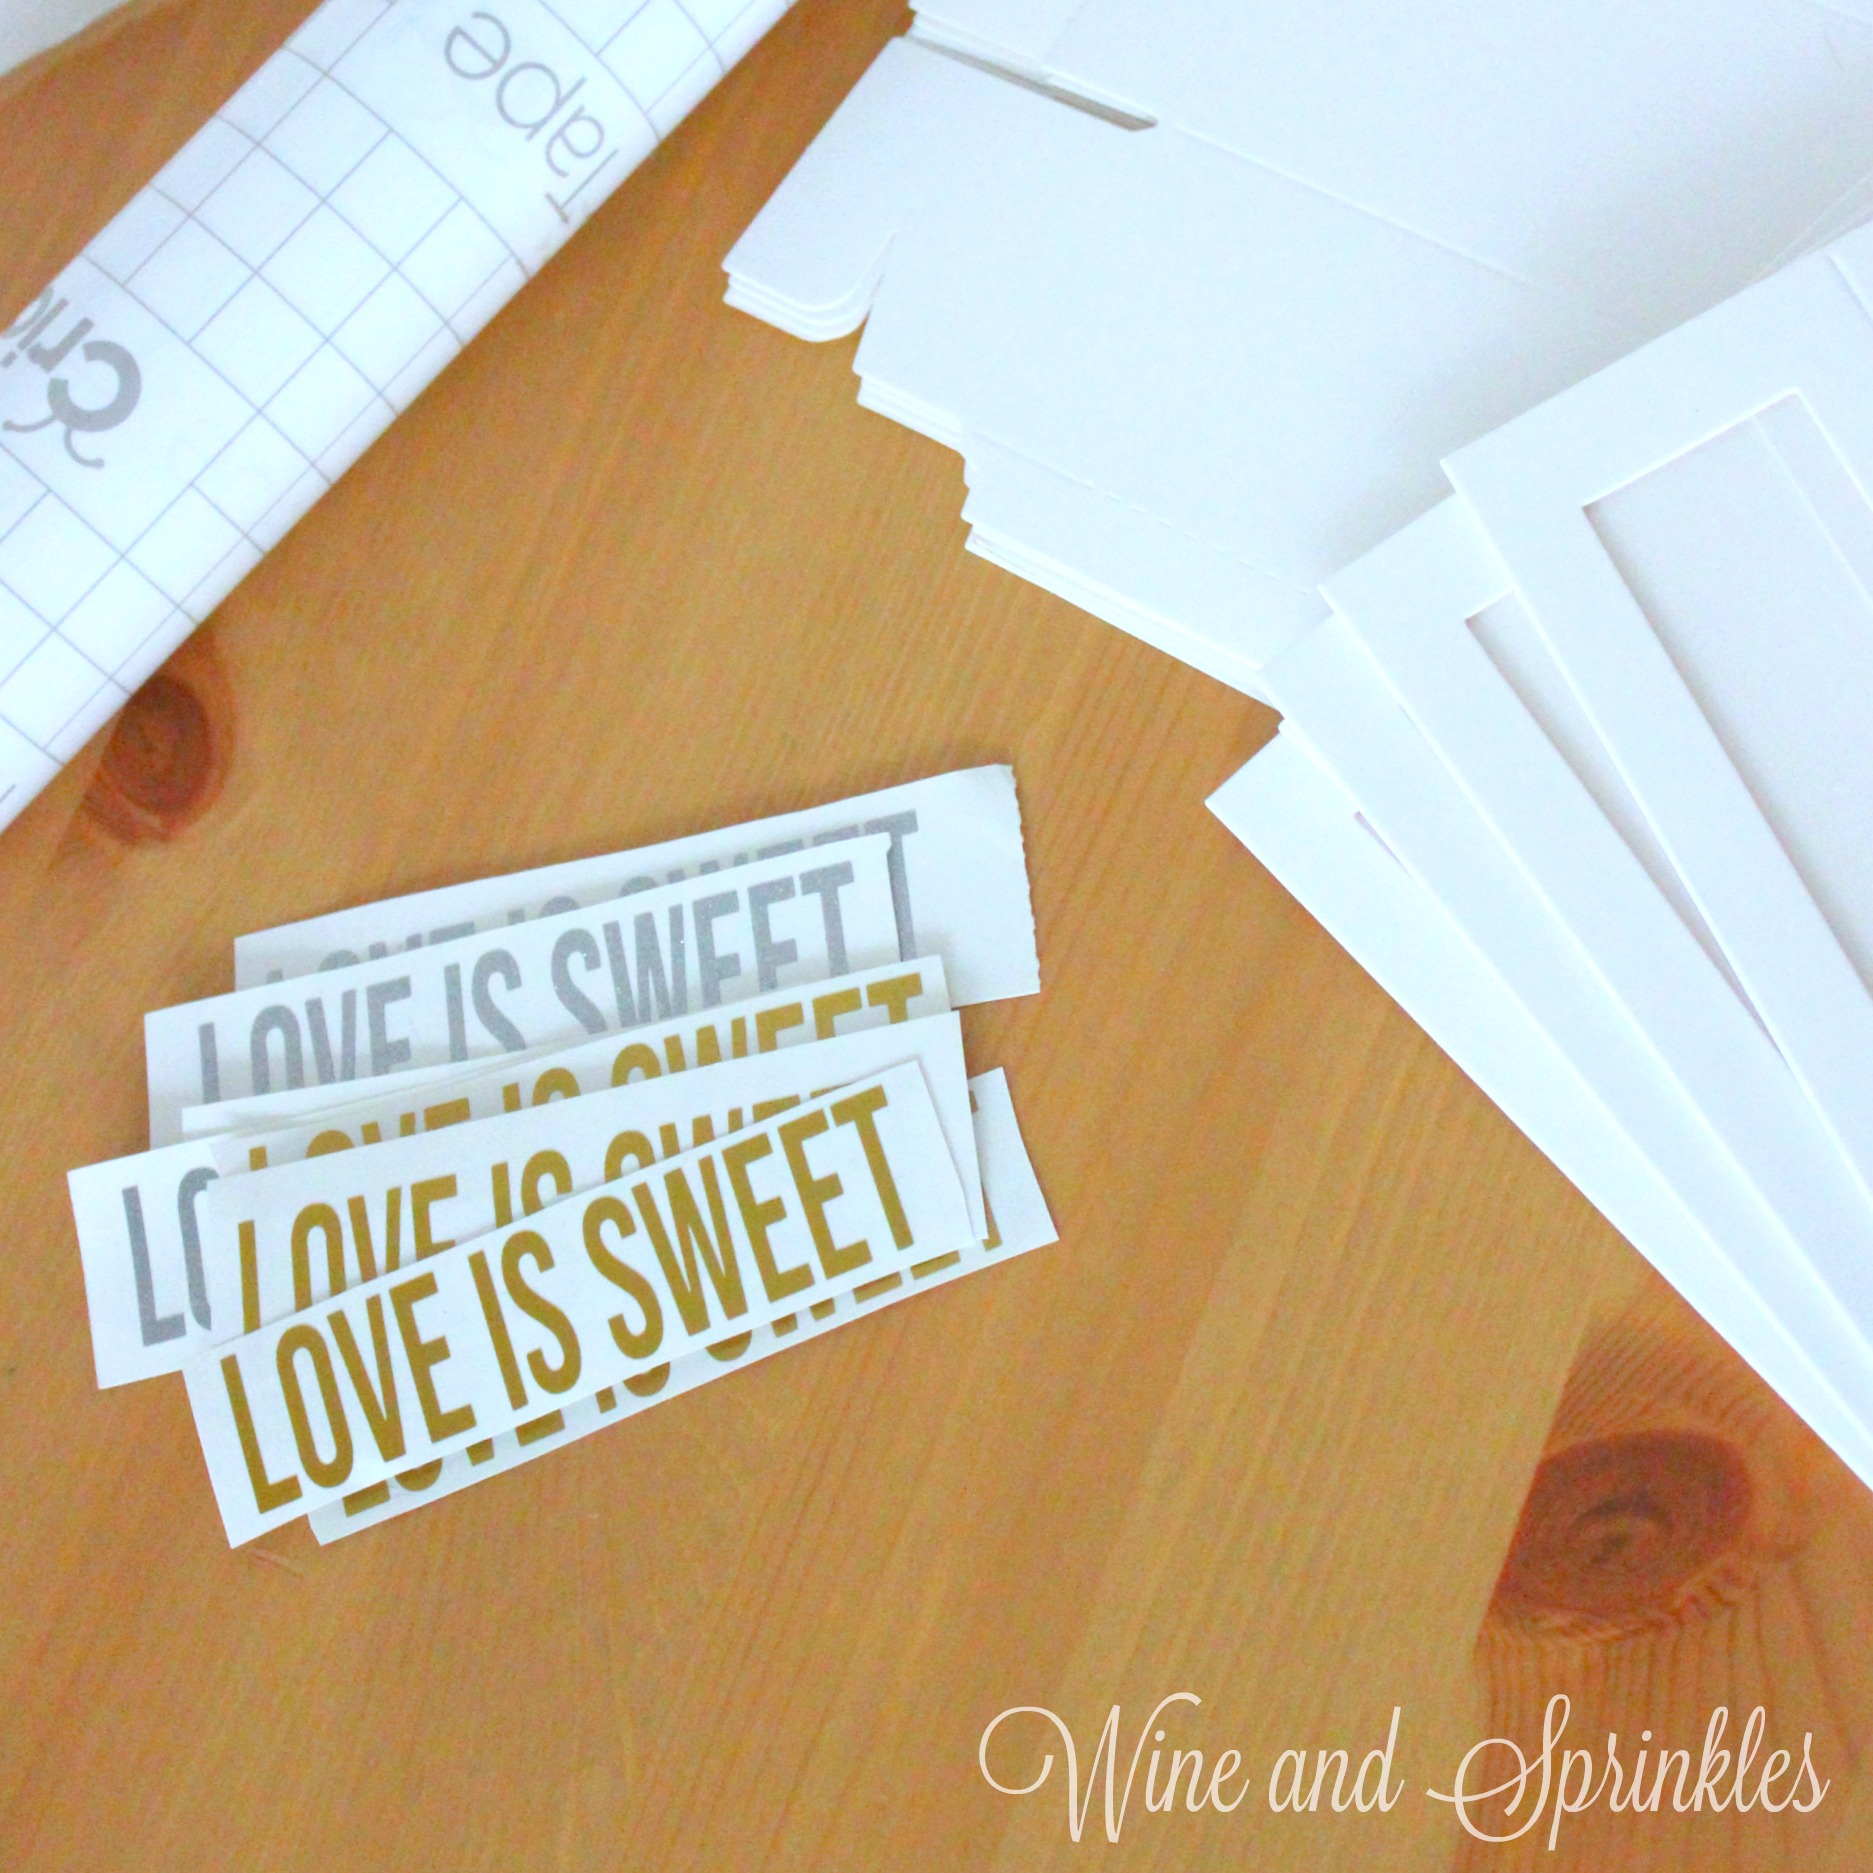
3. Once the designs are cut, weed away the extra vinyl and cut a piece of transfer tape to 1" x 4". Cut away any excess backing from the vinyl design and smooth transfer tape over the design, aligning along the bottom of the text, as shown below. Using the smoother tool, smooth the tape to the vinyl, removing any air bubbles.

DIY Love is Sweet Macaroon Box Favor #diyfavor #diywedding #svgfiles

4. Remove the transfer tape from the backing, lifting the design from the backing to the transfer tape.

DIY Love is Sweet Macaroon Box Favor #diyfavor #diywedding #svgfiles

5. Aligning the transfer tape along the top edge of the clear window on the sleeve of the box, place the design in the middle of the window. With the tape aligning the top, I was able to center it in the window pretty easily and its also decently forgiving if its not exactly right, as long as the top is aligned.

DIY Love is Sweet Macaroon Box Favor #diyfavor #diywedding #svgfiles

6. Smooth the design on the window, using your fingers to smooth each letter onto the plastic.

DIY Love is Sweet Macaroon Box Favor #diyfavor #diywedding #svgfiles

7. Remove the transfer tape, leaving the design on the sleeve.

DIY Love is Sweet Macaroon Box Favor #diyfavor #diywedding #svgfiles

With the sleeves complete, next it is time to fold the boxes that will hold the macaroons! It took me a little trial and error to get it right so I will share it here as well, since my boxes didn’t come with instructions. I did my best on the description and took lots of pictures so hopefully it will help you as well if you are having trouble! :)

Box Assembly

1. Start by folding all of the lines on the box, as shown below. This will make the box easier to bend later and help you see how it goes together.

DIY Love is Sweet Macaroon Box Favor #diyfavor #diywedding #svgfiles

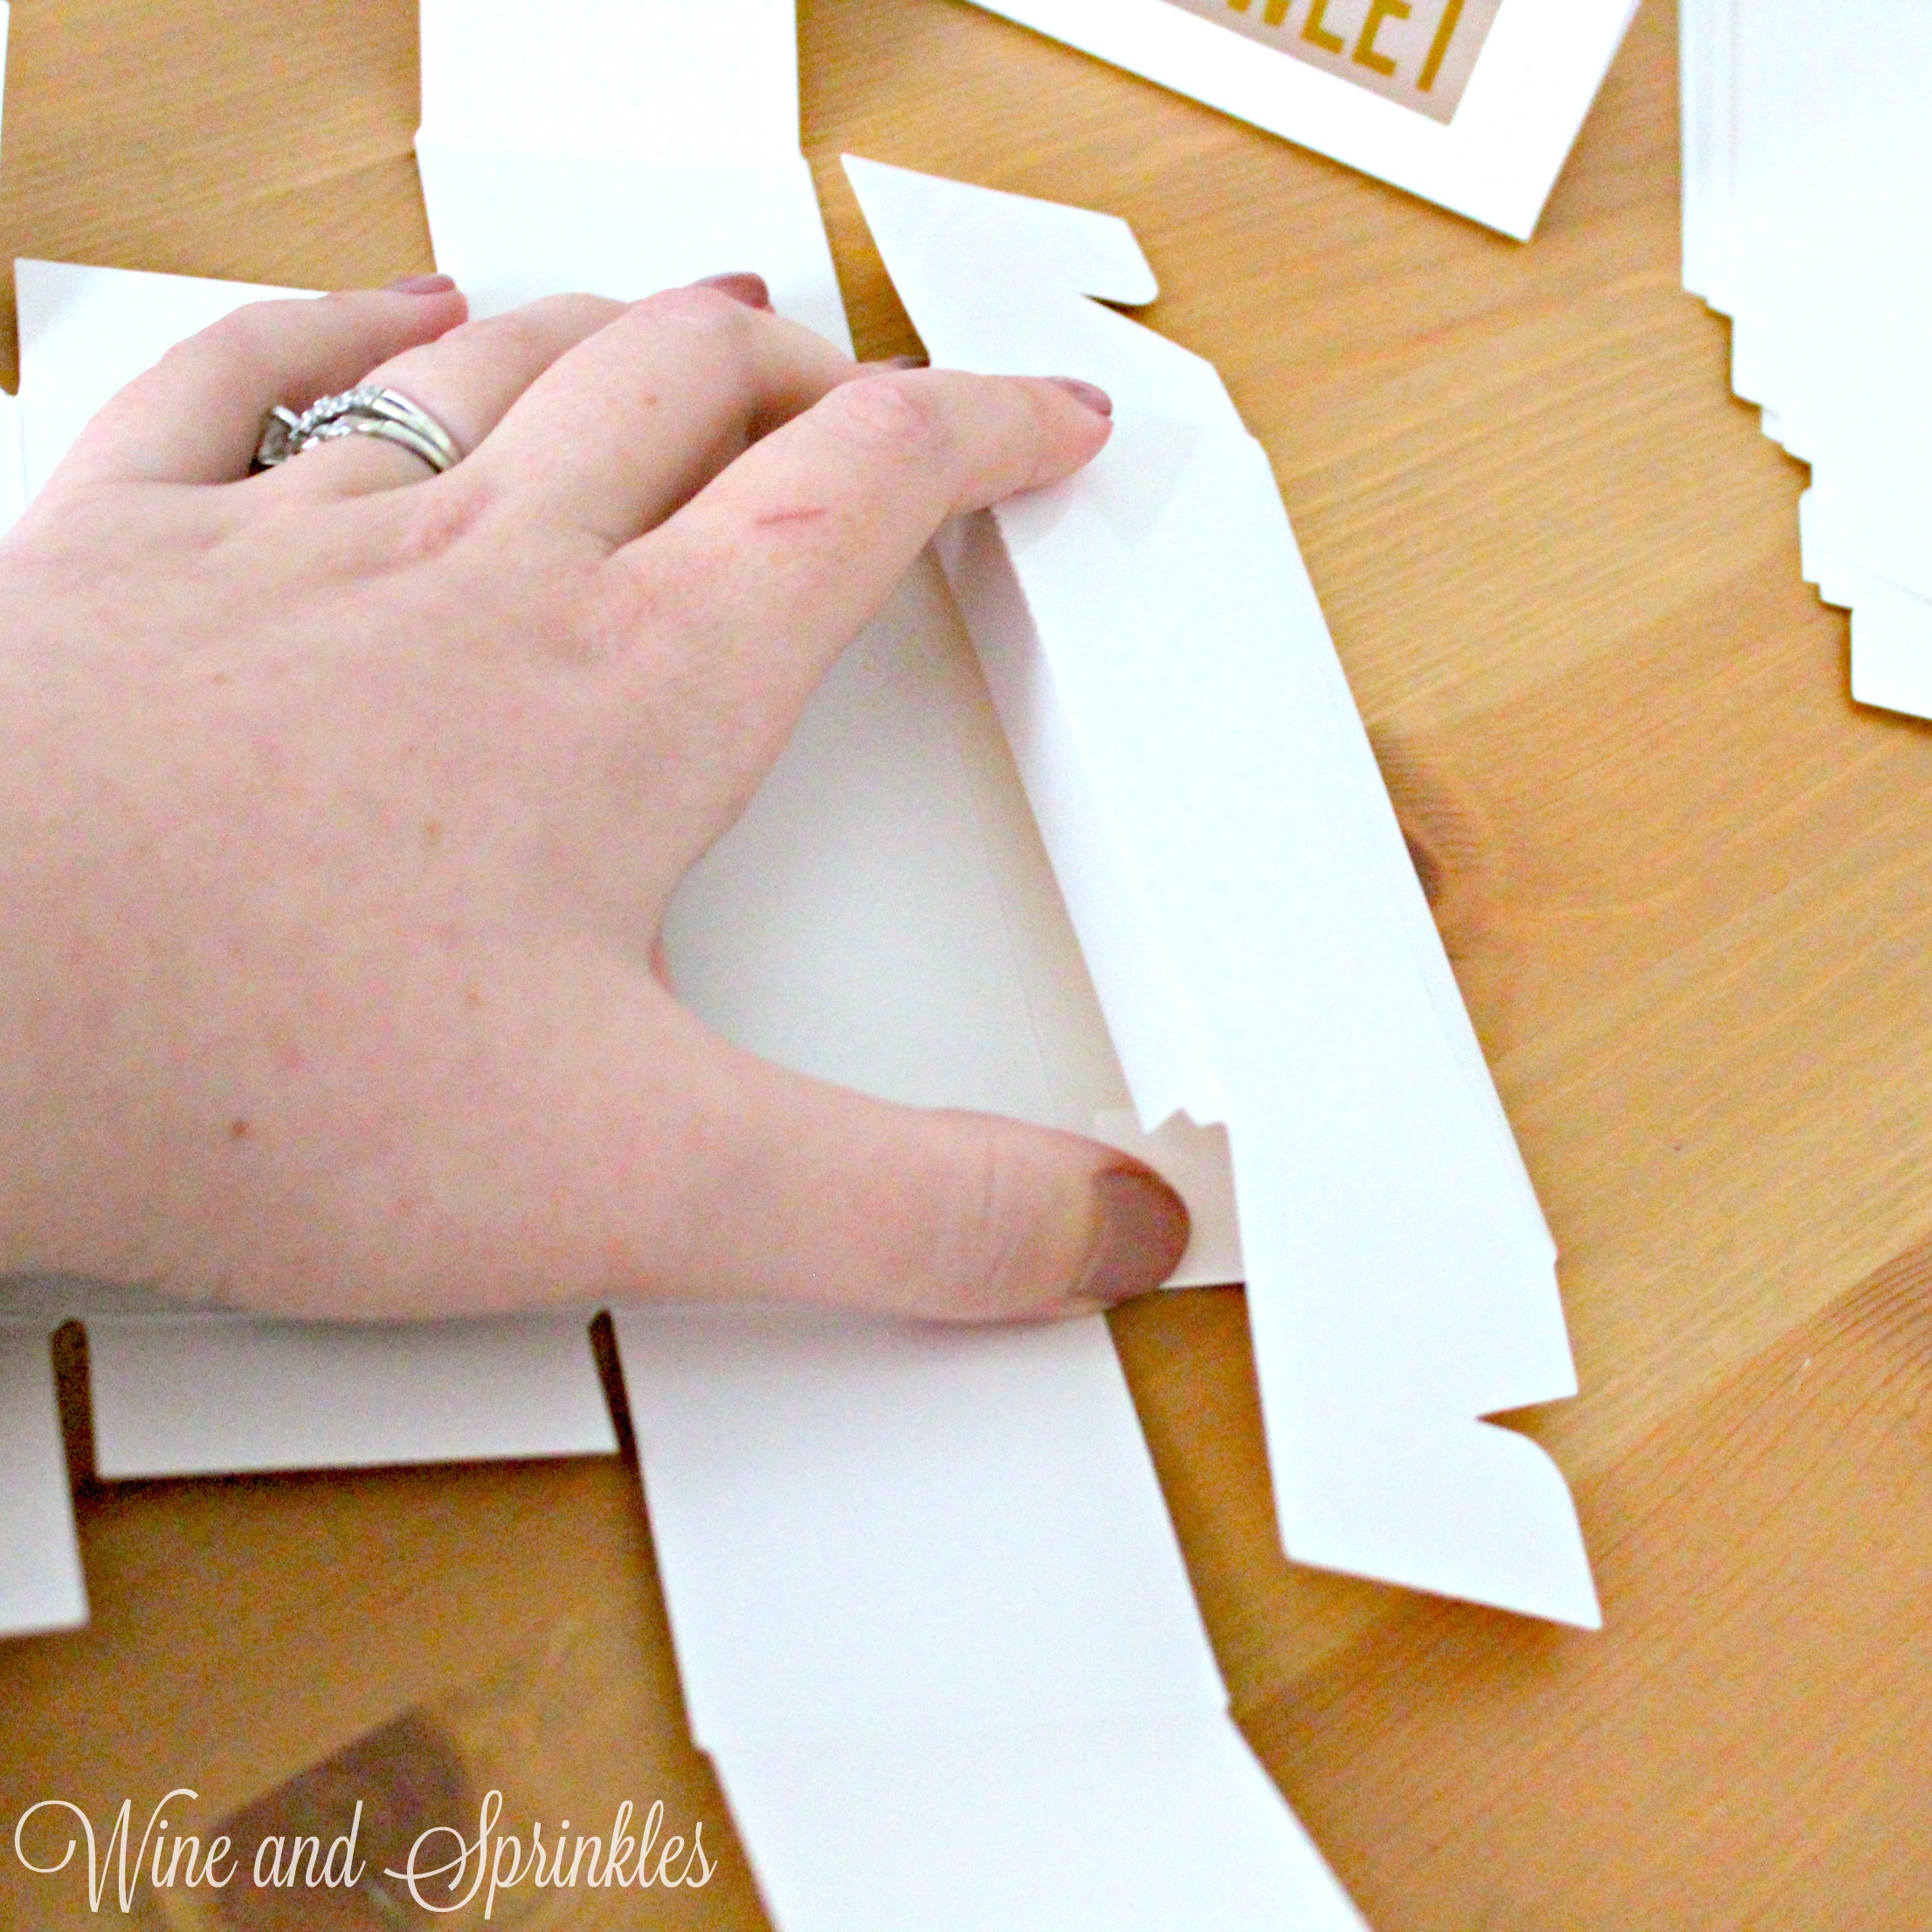
2. Taking the long edge, tuck in the two short middle flaps on the side, then fold over the wall and tuck the edge flap under the wall, forming the lengthwise wall as shown below. Repeat for both lengthwise walls.

8 with text.jpgDIY Love is Sweet Macaroon Box Favor #diyfavor #diywedding #svgfiles
DIY Love is Sweet Macaroon Box Favor #diyfavor #diywedding #svgfiles

3. Taking the end flaps on each of the lengthwise walls, hook them together to form the shorter wall of the box. once they are locked in, fold the last side flap over the wall, tucking the end flap under to complete the short wall of the box.

DIY Love is Sweet Macaroon Box Favor #diyfavor #diywedding #svgfiles
13. with text.jpgDIY Love is Sweet Macaroon Box Favor #diyfavor #diywedding #svgfiles
DIY Love is Sweet Macaroon Box Favor #diyfavor #diywedding #svgfiles

4. Once the boxes are made, fill them with macaroons, and then slide your sleeves over the cookies to finish the favors. I would recommend making all your sleeves and boxes beforehand, then filling them with their cookies the night before or morning of your event. :)

16. Macaroon Supplies with text.jpg
17. Macaroons Box with text.jpg
18. completed with text.jpg

While these boxes are intended for macaroons, they can be filled with any sweets that you like and still work wonderfully for your event, whether its a wedding, bridal shower, or even a Galentines Day Party!

DIY Love is Sweet Macaroon Box Favor #diyfavor #diywedding #svgfiles


DIY Heart Wine Glass Place Cards

This post contains affiliate links, meaning that if you click on a link I will recieve a small comission. This costs you nothing extra and I only promote products I use and love! You can read our full disclosure here

DIY Heart Wine Glass Placecards #svgfiles #cricutprojects #placecards

What better way to adorn your wine glasses in this lovely Valentine’s Season! I’m on a heart kick right now, probably due to really wanting to have a Galentine’s Brunch. :) For Galentine’s Day, Valentines Day, or any Wedding Celebration; these place cards are a cute and fun way to give your guests a glass and their table information.

DIY Heart Wine Glass Placecards #svgfiles #cricutprojects #placecards

I’ve made a couple place cards before but I want to try some Wine Glass Place cards again, but this time cutting them so they could sit on the edge of the glass. I started with a simple heart place cards that can easily be handwritten with your guest information. These ones are super simple, literally cut out, slight fold, and ready to go! :)

DIY Heart Wine Glass Placecards #svgfiles #cricutprojects #placecards

Supplies:
White Cardstock
Craft Cutter and Tool Set
Adhesive Mat
Heart Place Card Design File

DIY Heart Wine Glass Placecards #svgfiles #cricutprojects #placecards

1. After downloading the cut files, import them into the Cricut Software. After creating a new project, select Upload Image. Select the file you wish to upload and it will automatically take you to the final upload screen, where you can name the file the select Save.  Copy and Paste the design for as many placecards as you want (1 standard sheet of paper will fit 6 hearts).

2. Cut the design(s) in your choice of card stock with the Light Card stock Setting on your Cricut. The SVG Files are sized so that they will automatically cut to the size you see in the photos, but if you want to change the size you can. :) Load the Cricut with card stock (portrait orientation) and cut the designs.

Note: You’ll notice that I used a standard mat for this project, but I would recommend the Light Grip Mats for Paper Products. This just happens to be one of my older mats that’s not quite so sticky anymore :)

DIY Heart Wine Glass Placecards #svgfiles #cricutprojects #placecards

3. Remove the card stock from the outer edge, leaving the hearts on the cutting mat.

DIY Heart Wine Glass Placecards #svgfiles #cricutprojects #placecards

4. Peel off each place card from the edge of the design, leaving the extra paper on the cutting mat. Repeat with all hearts, then remove and discard all the card stock left on the cutting mat.

DIY Heart Wine Glass Placecards #svgfiles #cricutprojects #placecards

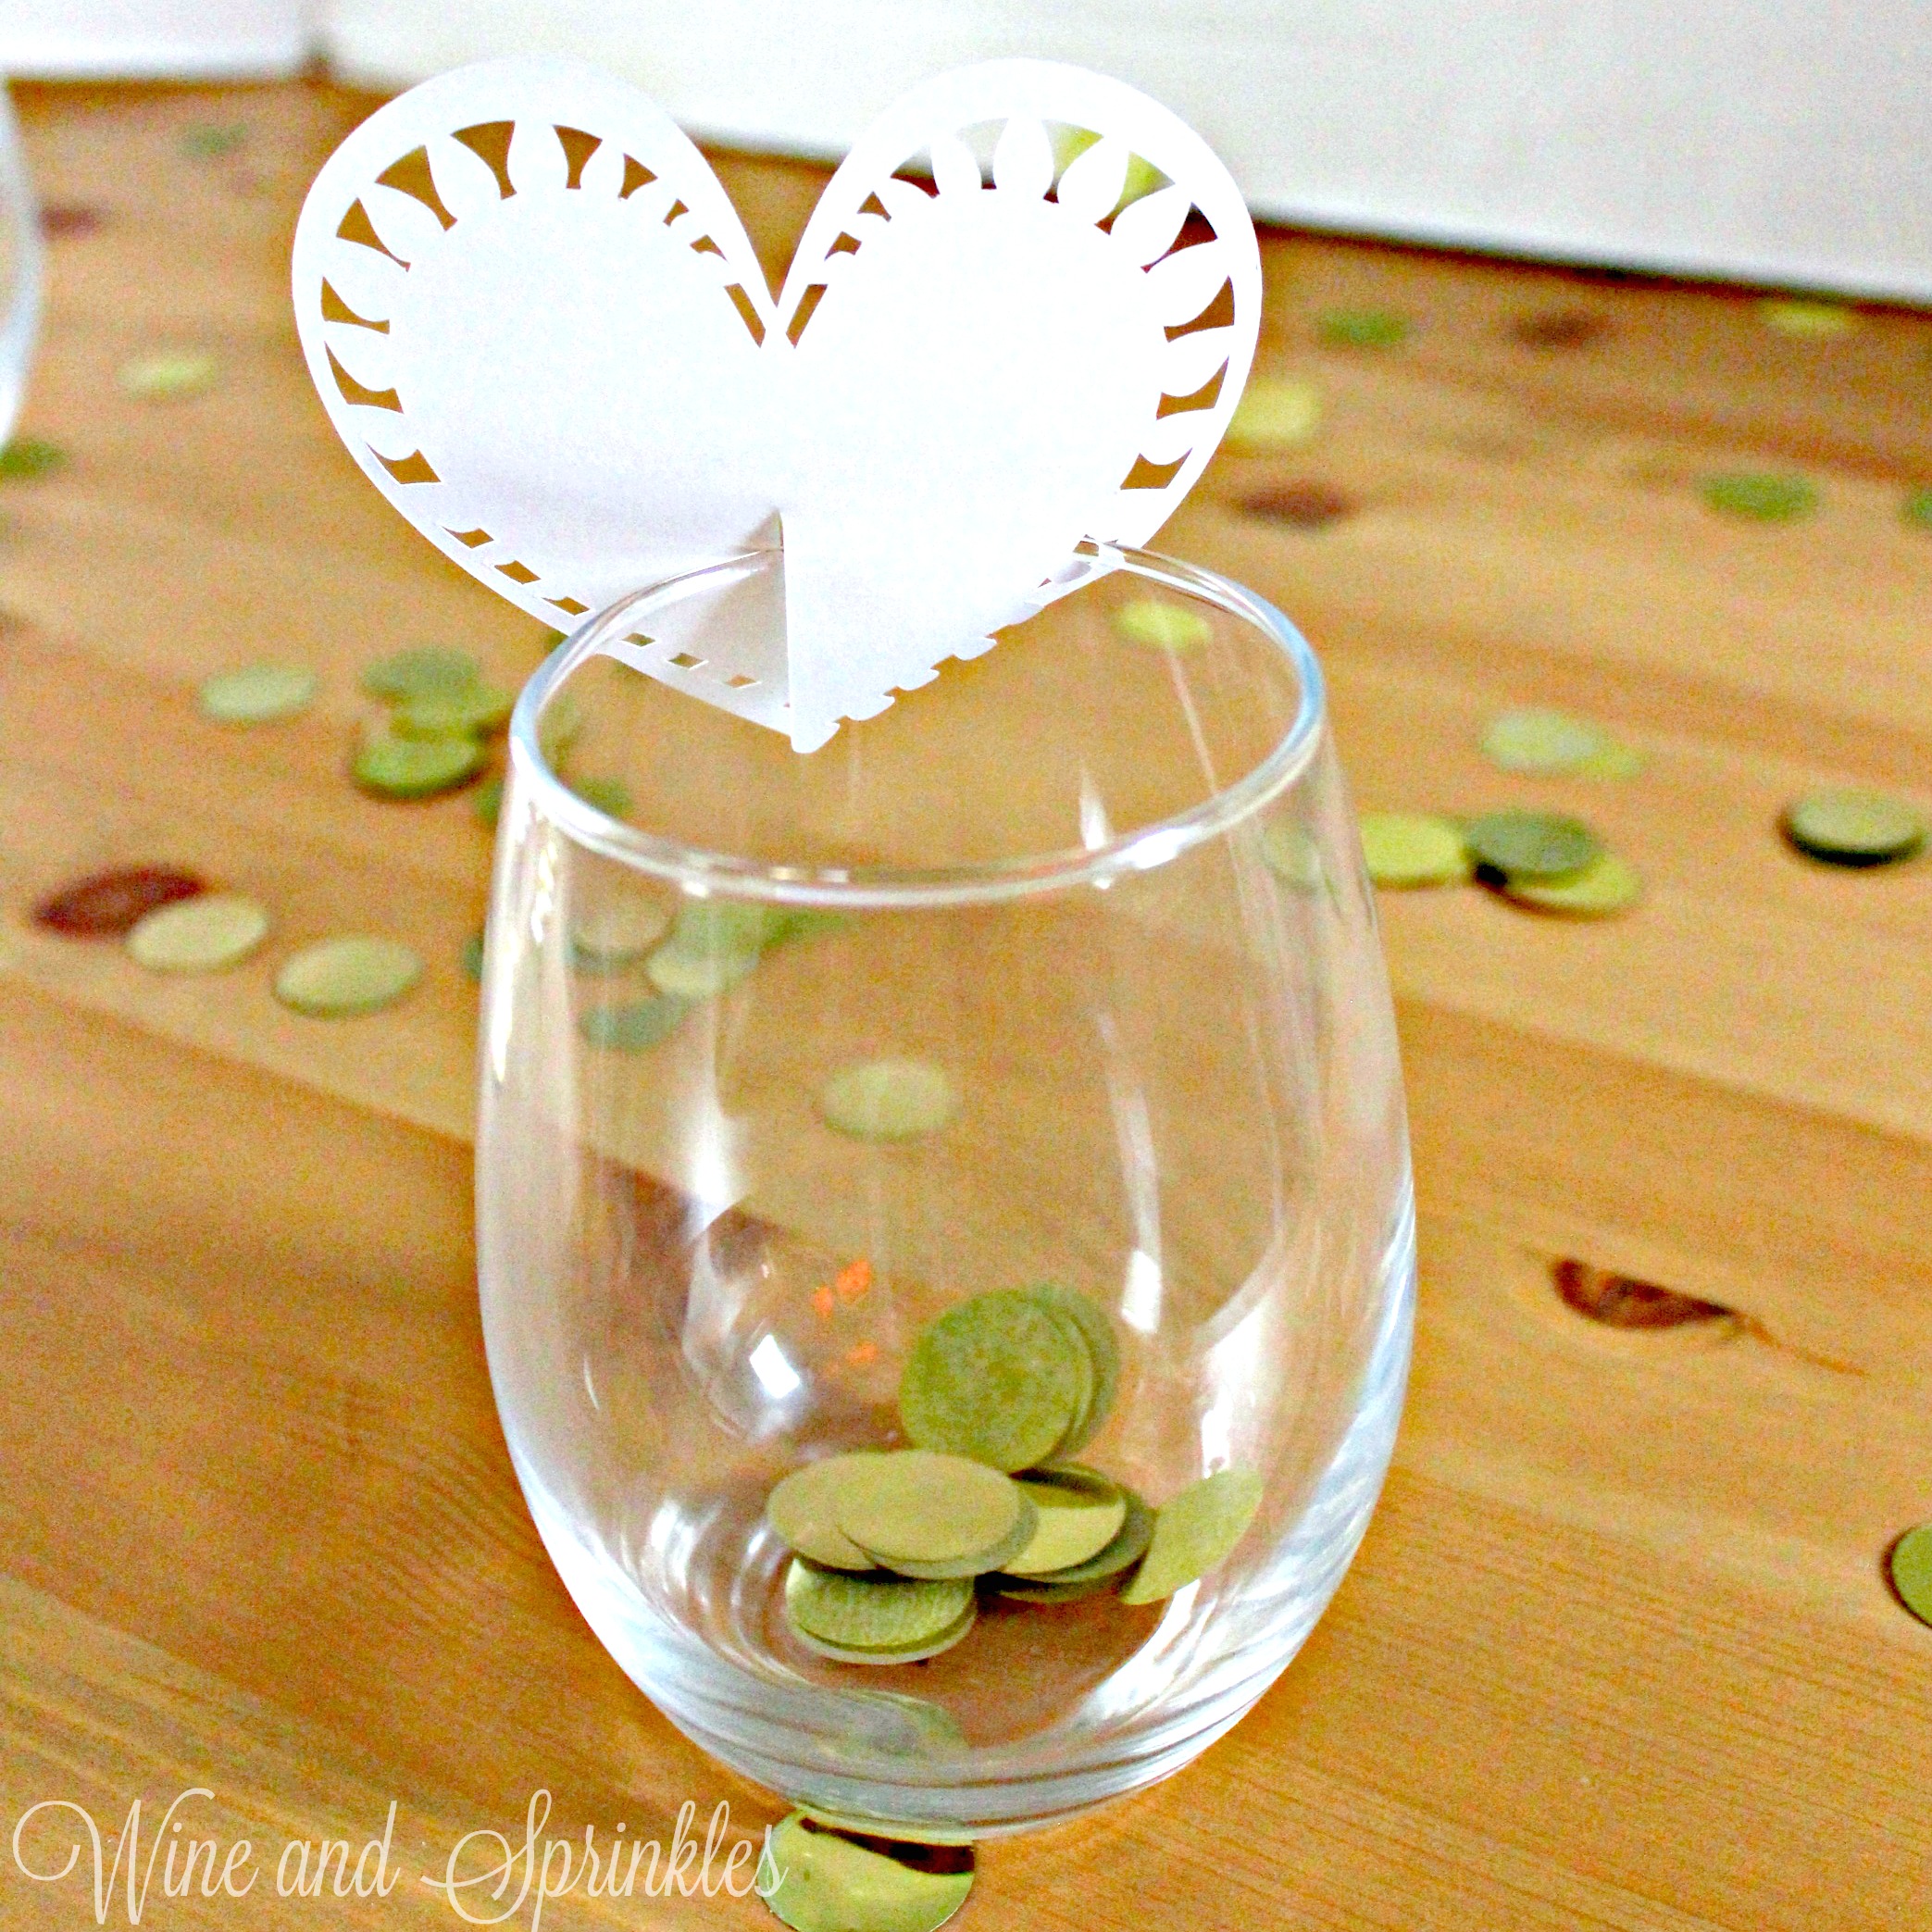
5. Using your finger, create a bend horizontally on the card, not folding the card but pressing it with your fingers into a curved shape. This will make it easier to sit nicely on the glass.

DIY Heart Wine Glass Placecards #svgfiles #cricutprojects #placecards

6. Place on the glass with the cut out “tab” side of the heart on the inside of the glass. Once your guest information has been written, they can be stored until you are ready to place them on the glasses of your event! :)

DIY Heart Wine Glass Placecards #svgfiles #cricutprojects #placecards


DIY Wedding Party Heart Wine Glasses

This post contains affiliate links, meaning that if you click on a link I will recieve a small comission. This costs you nothing extra and I only promote products I use and love! You can read our full disclosure here

DIY Vinyl Bridal Party Heart Stemless Wine Glasses #bridesmaid #svgfiles #cricutprojects

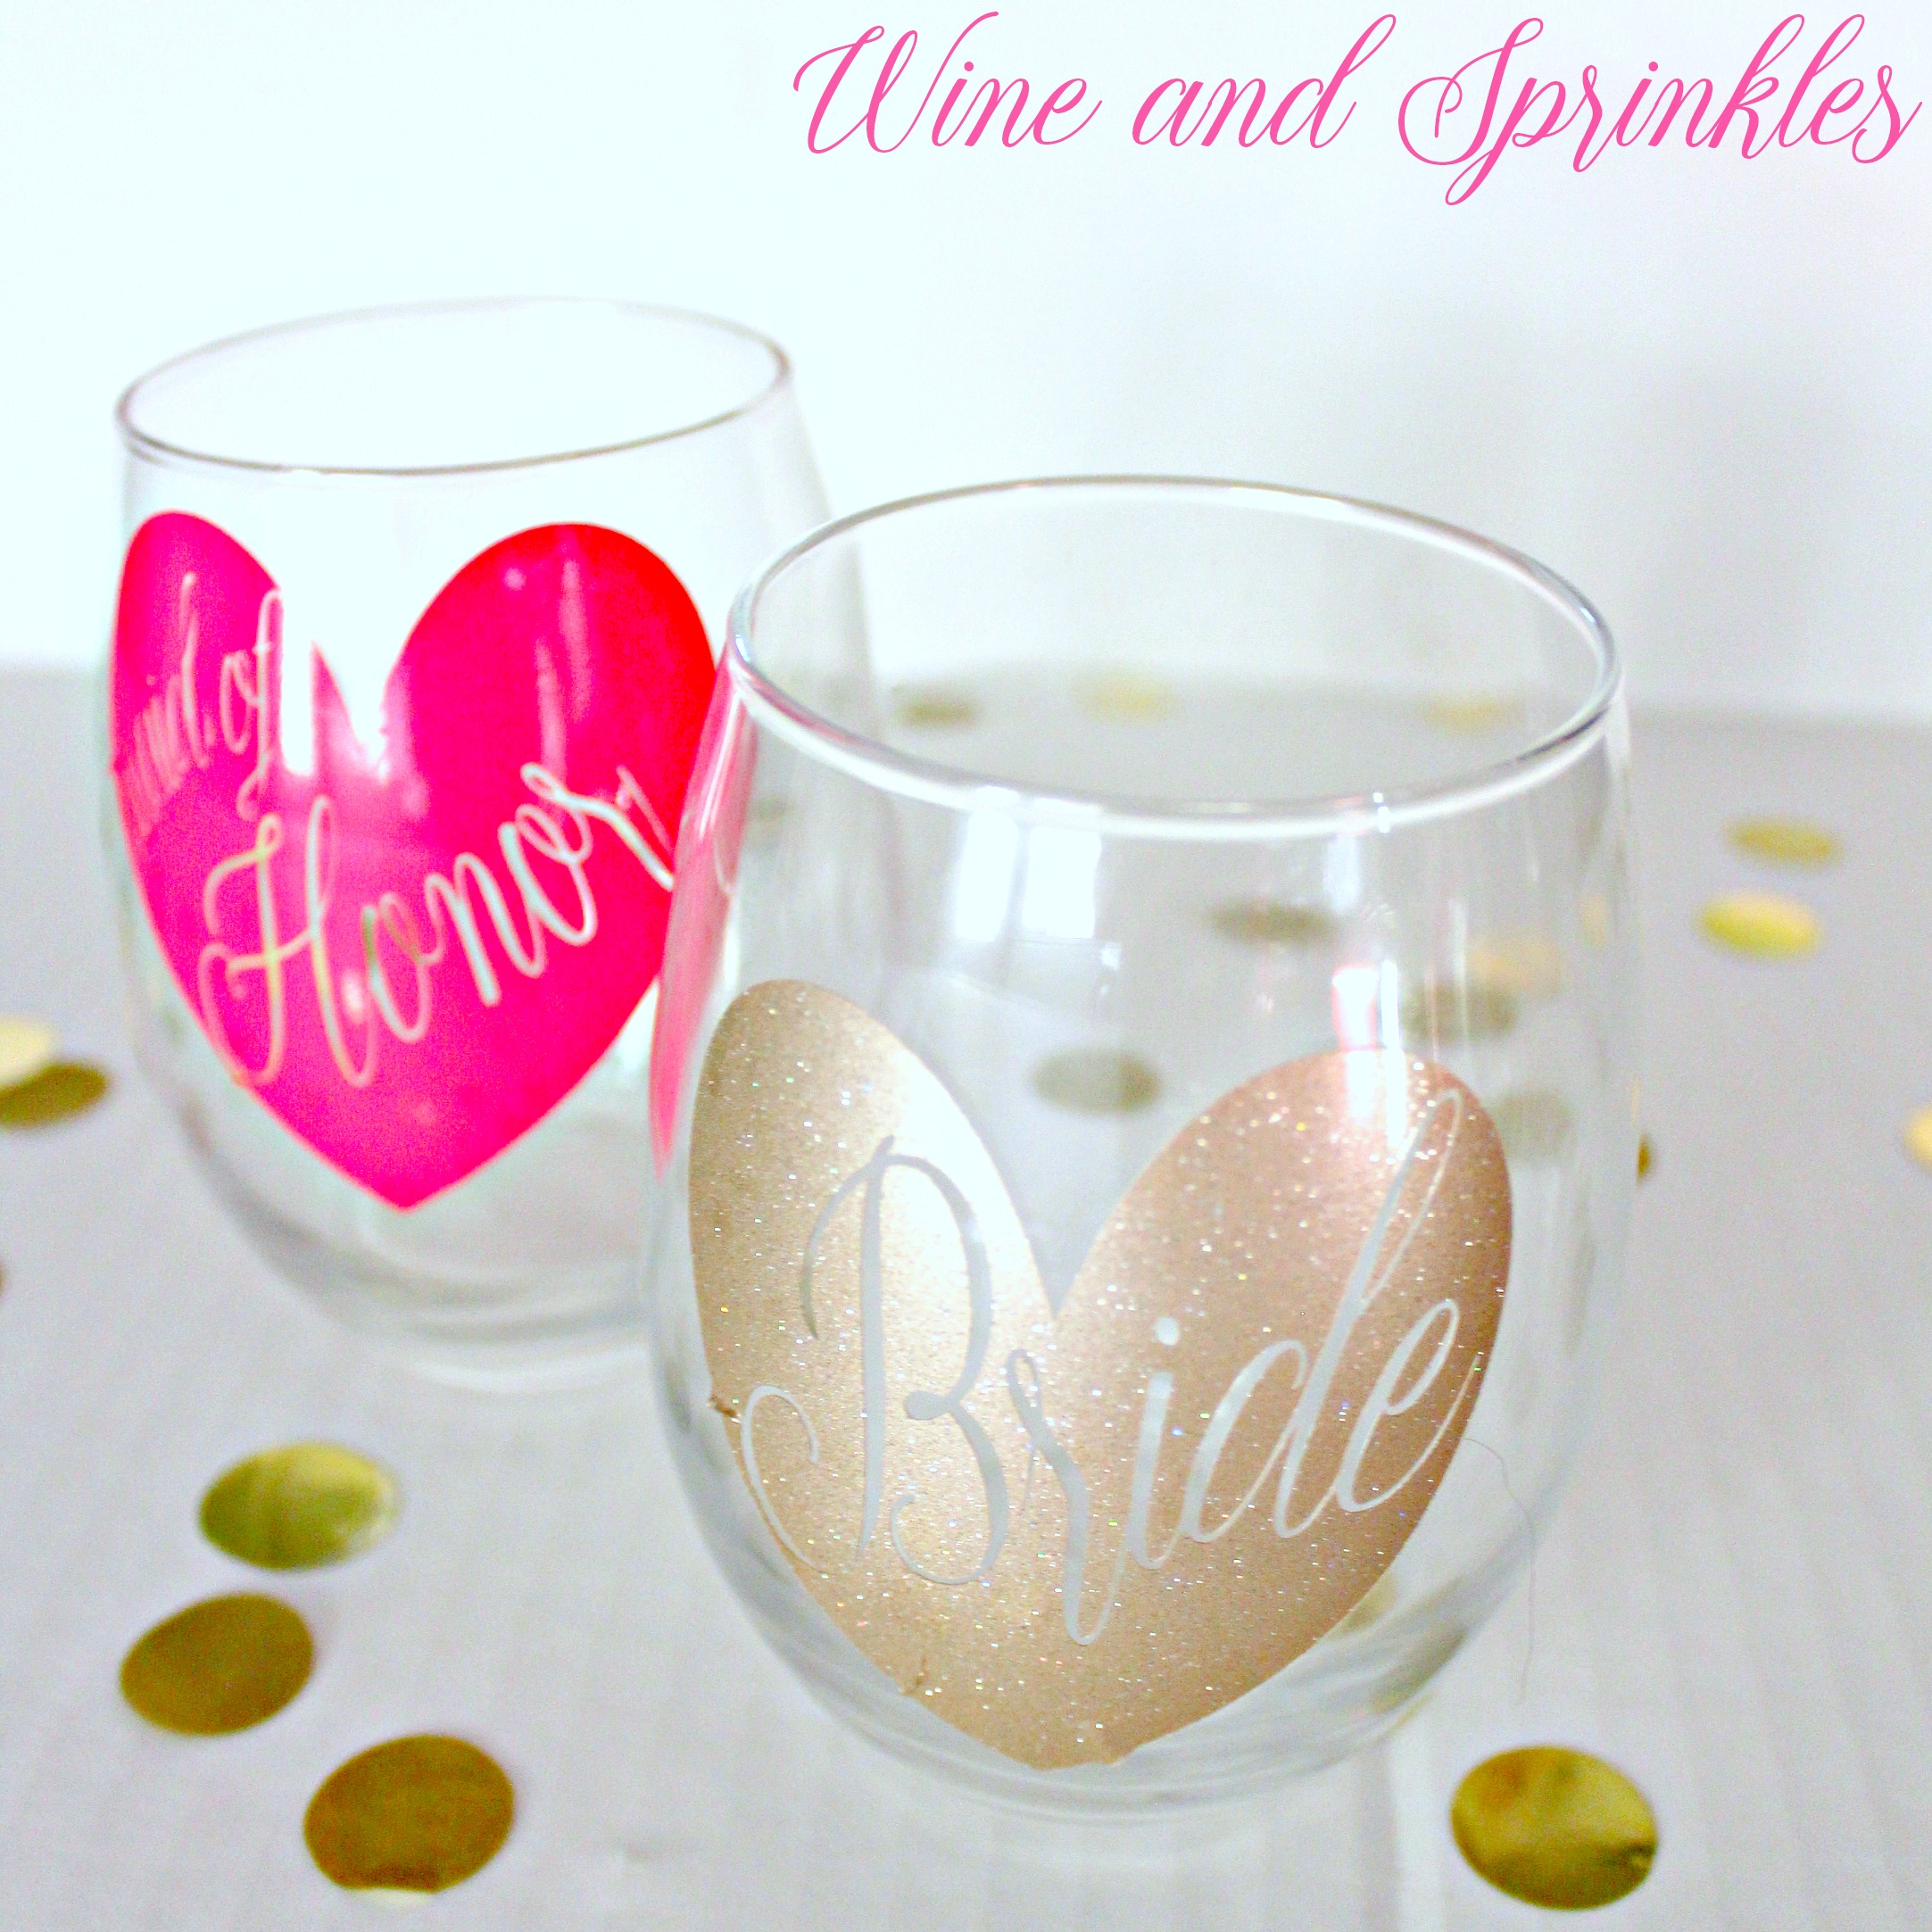
Happy February everyone! To kick off the lovely Valentines Day Season, I started February with some adorable Vinyl Heart Wine Glasses for your Bridal Party! :) These go great for Valentine’s Themed Bridesmaid Proposals, Galentines Brunches with your girls before DIY, or just in general as a cute wine glass to get ready with. :)

DIY Vinyl Bridal Party Heart Stemless Wine Glasses #bridesmaid #svgfiles #cricutprojects

Because of the size of these hearts and the thinness of the fonts, these are a bit tougher to get curved around the glass, so they are a labor of love or for the more intermediate vinyl user. I made mine in Champagne Glitter Vinyl for the Bride Heart and Oracal 651 Pink Vinyl for the Bridesmaid and Maid of Honor Hearts.

DIY Vinyl Bridal Party Heart Stemless Wine Glasses #bridesmaid #svgfiles #cricutprojects

1. After downloading the cut files, import them into the Cricut Software. After creating a new project, select Upload Image. Select the file you wish to upload and it will automatically take you to the final upload screen, where you can name the file the select Save. 

2. Cut the design(s) in your choice of permanent adhesive vinyl with the Vinyl Setting on your Cricut. The SVG Files are sized so that they will automatically cut to the size you see in the photos, but if you want to change the size you can.

DIY Vinyl Bridal Party Heart Stemless Wine Glasses #bridesmaid #svgfiles #cricutprojects

3. Once the designs are cut, weed away the extra vinyl and cut a piece of transfer tape to 3" x 2.5". Cut away any excess backing from the vinyl design and smooth transfer tape over the design, aligning it to the top of the heart. It is more important to cover the text with the transfer tape; the bottom of my heart wasn’t covered and it made it easier to transfer and the heart acts like a giant sticker. Using the smoother tool, smooth the tape to the vinyl, removing any air bubbles. The transfer tape should overlap the backing of the design, so that you can stick the tape to an object with the backing still on the design.

DIY Vinyl Bridal Party Heart Stemless Wine Glasses #bridesmaid #svgfiles #cricutprojects

4. Lift the transfer tape from the backing, making sure that the vinyl transfers itself from the backing to the transfer tape.

3. removal with text.jpgDIY Vinyl Bridal Party Heart Stemless Wine Glasses #bridesmaid #svgfiles #cricutprojects

5. Smooth the design onto the wine glass, putting it higher on the wine glass for easier smoothing. Start in the center of the design, and make sure all the words are pressed into the glass firmly. Then start smoothing from the center to the outside edges until the design is smoothed as much as possible onto the glass. The curve will make these hearts more difficult than some of our other Wine Glass Projects, so try to be patient with it. :) You can remove the transfer tape as soon as you can and then continue smoothing the heart on to the glass.

DIY Vinyl Bridal Party Heart Stemless Wine Glasses #bridesmaid #svgfiles #cricutprojects

6. After the heart has been smoothed as much as possible, pop any air bubbles with a pin. Small creases in the heart where material has overlapped can also be cut with cuticle scissors and smoothed again to give a smoother overall finish. Repeat the process for all the additional wine glasses.

DIY Vinyl Bridal Party Heart Stemless Wine Glasses #bridesmaid #svgfiles #cricutprojects


DIY Mr. and Mrs. Stemless Wine Glass Tumblers

This post contains affiliate links, meaning that if you click on a link I will recieve a small comission. This costs you nothing extra and I only promote products I use and love! You can read our full disclosure here

Do It Yourself Vinyl Mr and Mrs Stemless wine tumblers #svgfiles #cricutprojects #beachbride

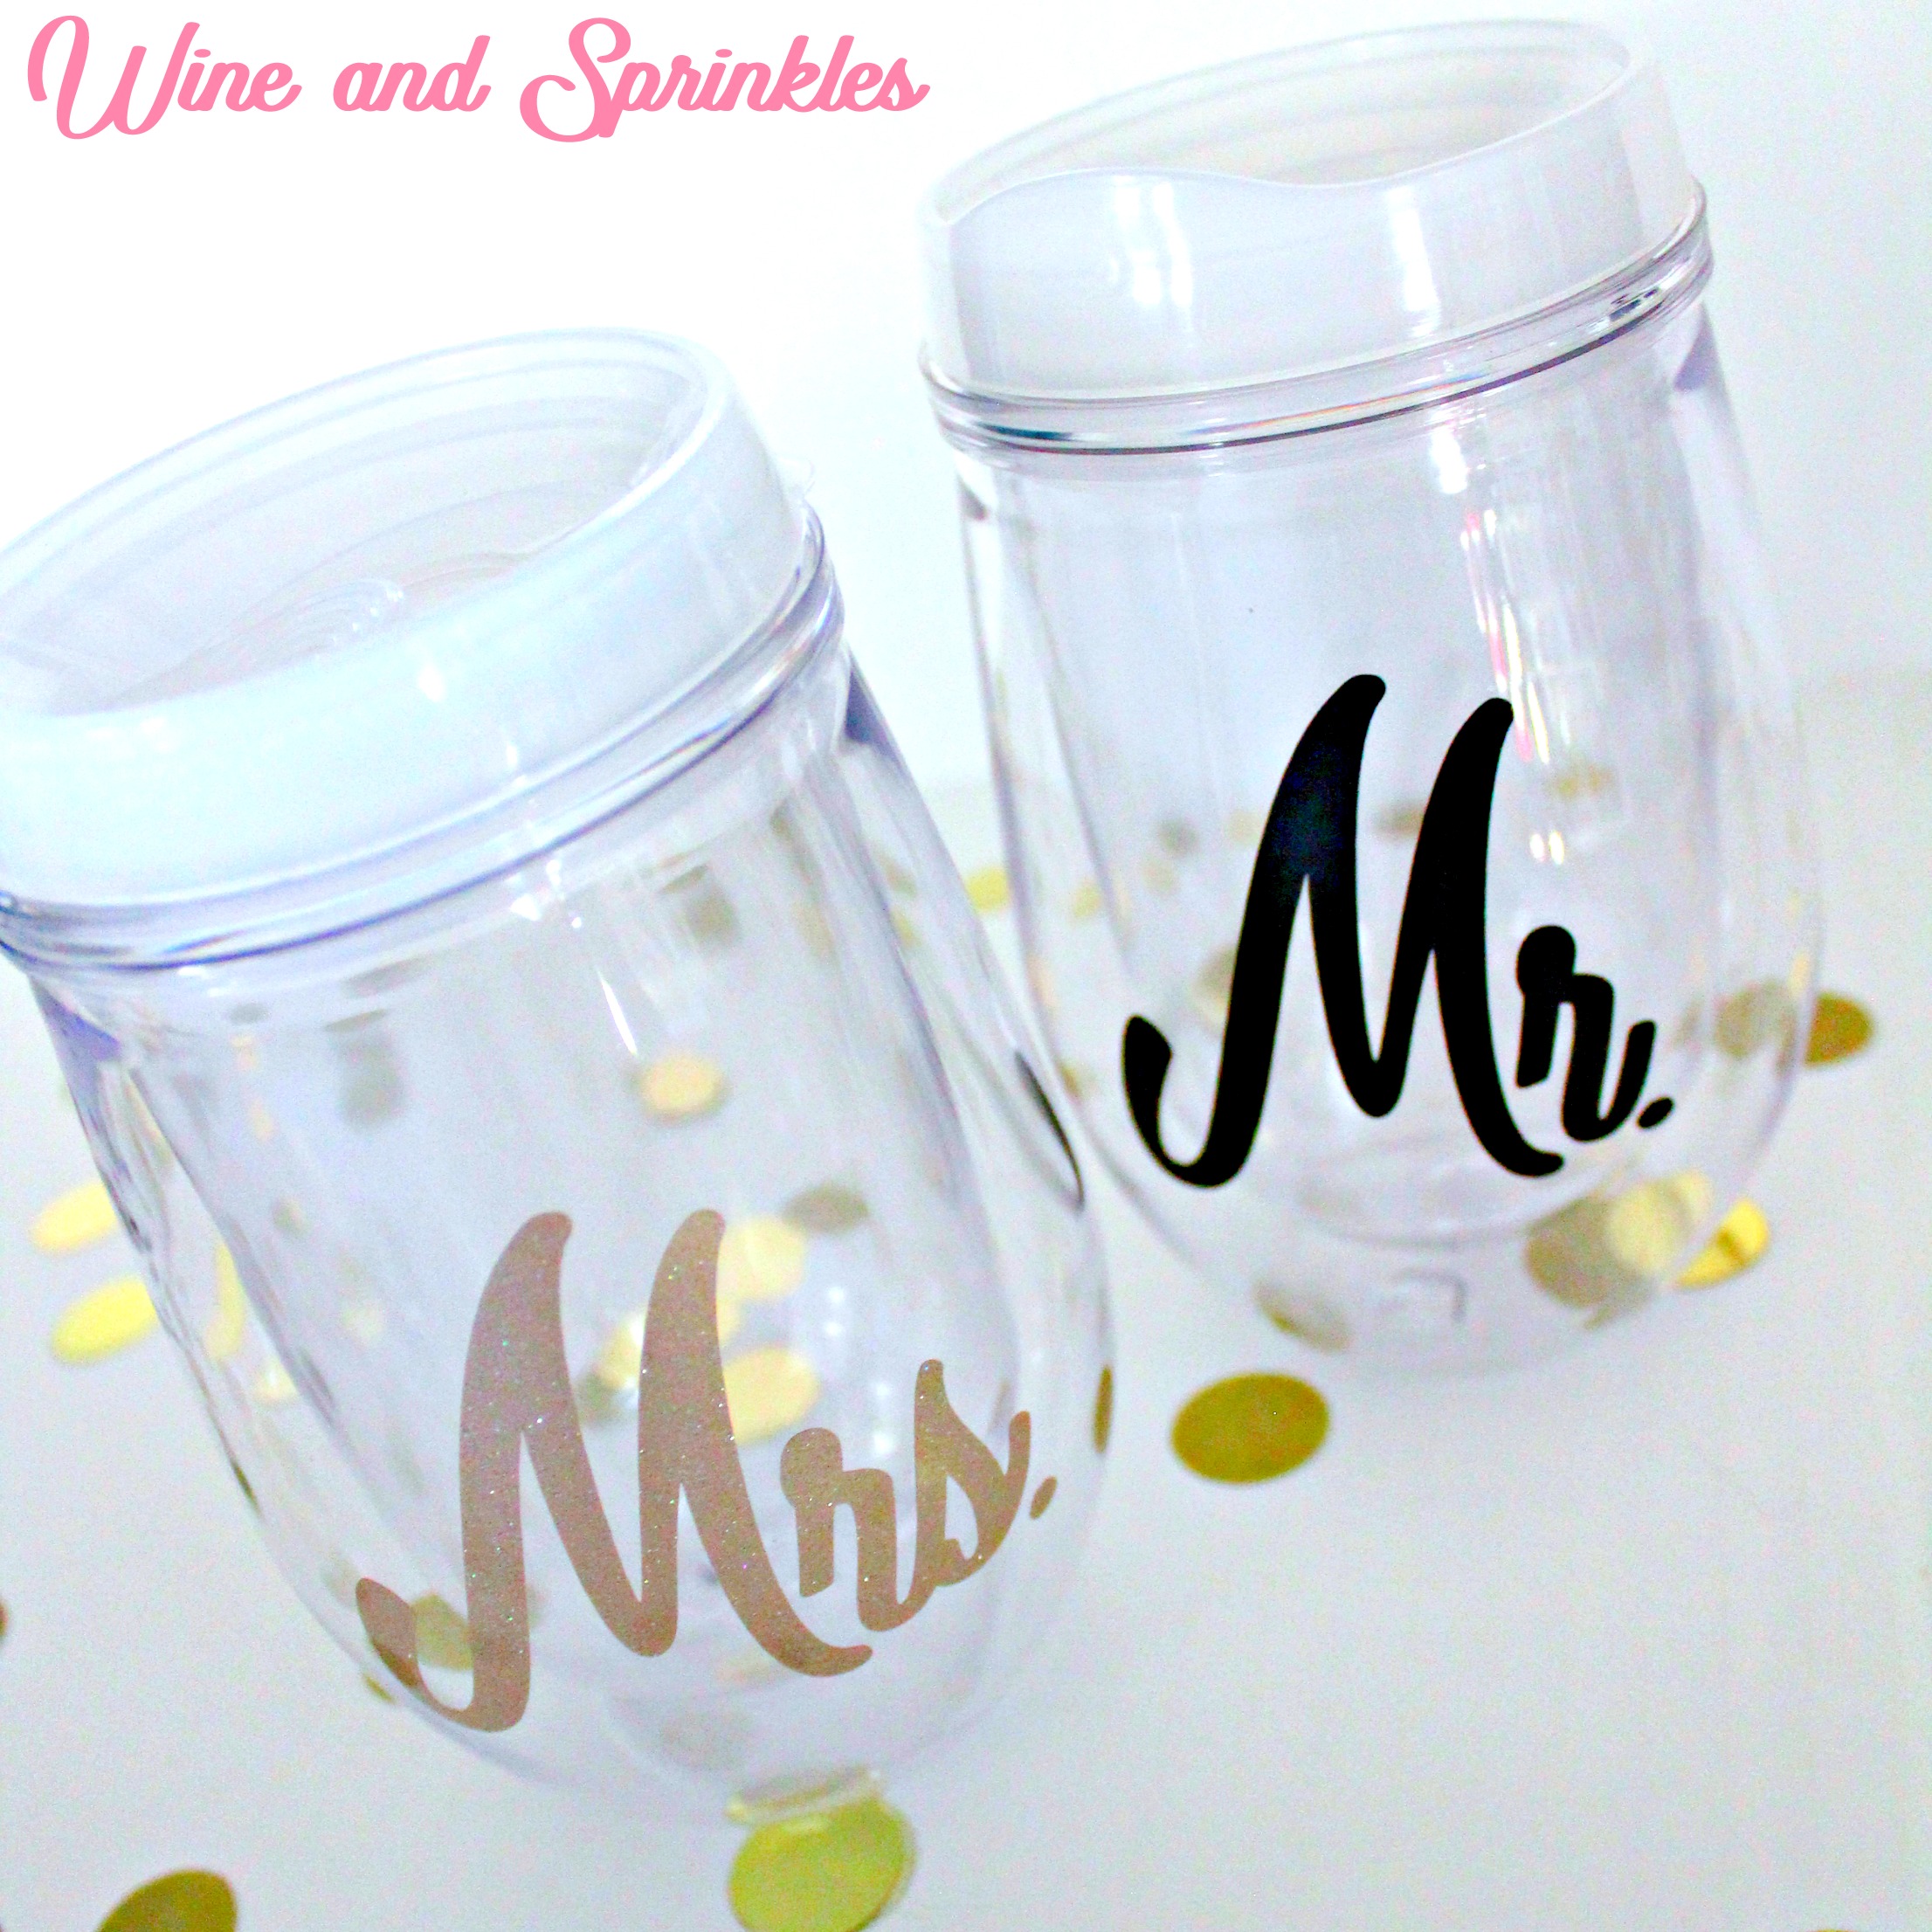
I love getting just married swag for the honeymoon and then thought of these simple Mr. and Mrs. Stemless Wine Tumblers! They are just perfect for going to the beach and can easily be made for yourself or your friends who are getting married soon!

Do It Yourself Vinyl Mr and Mrs Stemless wine tumblers #svgfiles #cricutprojects #beachbride

For my tumblers, I used Champagne Glitter Vinyl for the Mrs. and Oracal 651 Black Vinyl for the Mr. and I love how they turned out! This is a great beginner project if you aren’t used to transferring to curved surfaces, these tumblers are very easy to transfer to for this simple, bold design. And its super easy to weed! :)

Do It Yourself Vinyl Mr and Mrs Stemless wine tumblers #svgfiles #cricutprojects #beachbride

1. After downloading the cut files, import them into the Cricut Software. After creating a new project, select Upload Image. Select the file you wish to upload and it will automatically take you to the final upload screen, where you can name the file the select Save. 

2. Cut the design(s) in your choice of permanent adhesive vinyl with the Vinyl Setting on your Cricut. The SVG Files are sized so that they will automatically cut to the size you see in the photos, but if you want to change the size you can. :)

Do It Yourself Vinyl Mr and Mrs Stemless wine tumblers #svgfiles #cricutprojects #beachbride

3. Once the designs are cut, weed away the extra vinyl and cut a piece of transfer tape to 2.5" x 3". Cut away any excess backing from the vinyl design and smooth transfer tape over the design, aligning it along the bottom of the text. Using the smoother tool, smooth the tape to the vinyl, removing any air bubbles. The transfer tape should overlap the backing of the design, so that you can stick the tape to an object with the backing still on the design.

Do It Yourself Vinyl Mr and Mrs Stemless wine tumblers #svgfiles #cricutprojects #beachbride

4. Now, transfer the design to your tumbler. Remove the tape from the backing and directly place the design on the tumbler. Arrange the design in the middle of the tumbler about an inch from the top of the lip of the tumbler.

Do It Yourself Vinyl Mr and Mrs Stemless wine tumblers #svgfiles #cricutprojects #beachbride

5. Working from the center to the edge of the design, trace the letters to smooth them onto the tumbler. Because the surface is curved, focus on the vinyl smoothly transferring than your transfer tape looking nice and neat. Once the design is set, remove the transfer tape from the tumbler, leaving the design on the tumbler.

Do It Yourself Vinyl Mr and Mrs Stemless wine tumblers #svgfiles #cricutprojects #beachbride

6. Use the smoother tool or your finger to resmooth the design and to remove the air bubbles. Repeat with the Mr. Tumbler. :)

Do It Yourself Vinyl Mr and Mrs Stemless wine tumblers #svgfiles #cricutprojects #beachbride

Write here… 

Do It Yourself Vinyl Mr and Mrs Stemless wine tumblers #svgfiles #cricutprojects #beachbride


DIY Bottoms Up Wine Glass

This post contains affiliate links, meaning that if you click on a link I will recieve a small comission. This costs you nothing extra and I only promote products I use and love! You can read our full disclosure here

DIY Vinyl Bottoms Ups Bachelorette Wine Glasses #svgfiles #cricutprojects #bachelorette

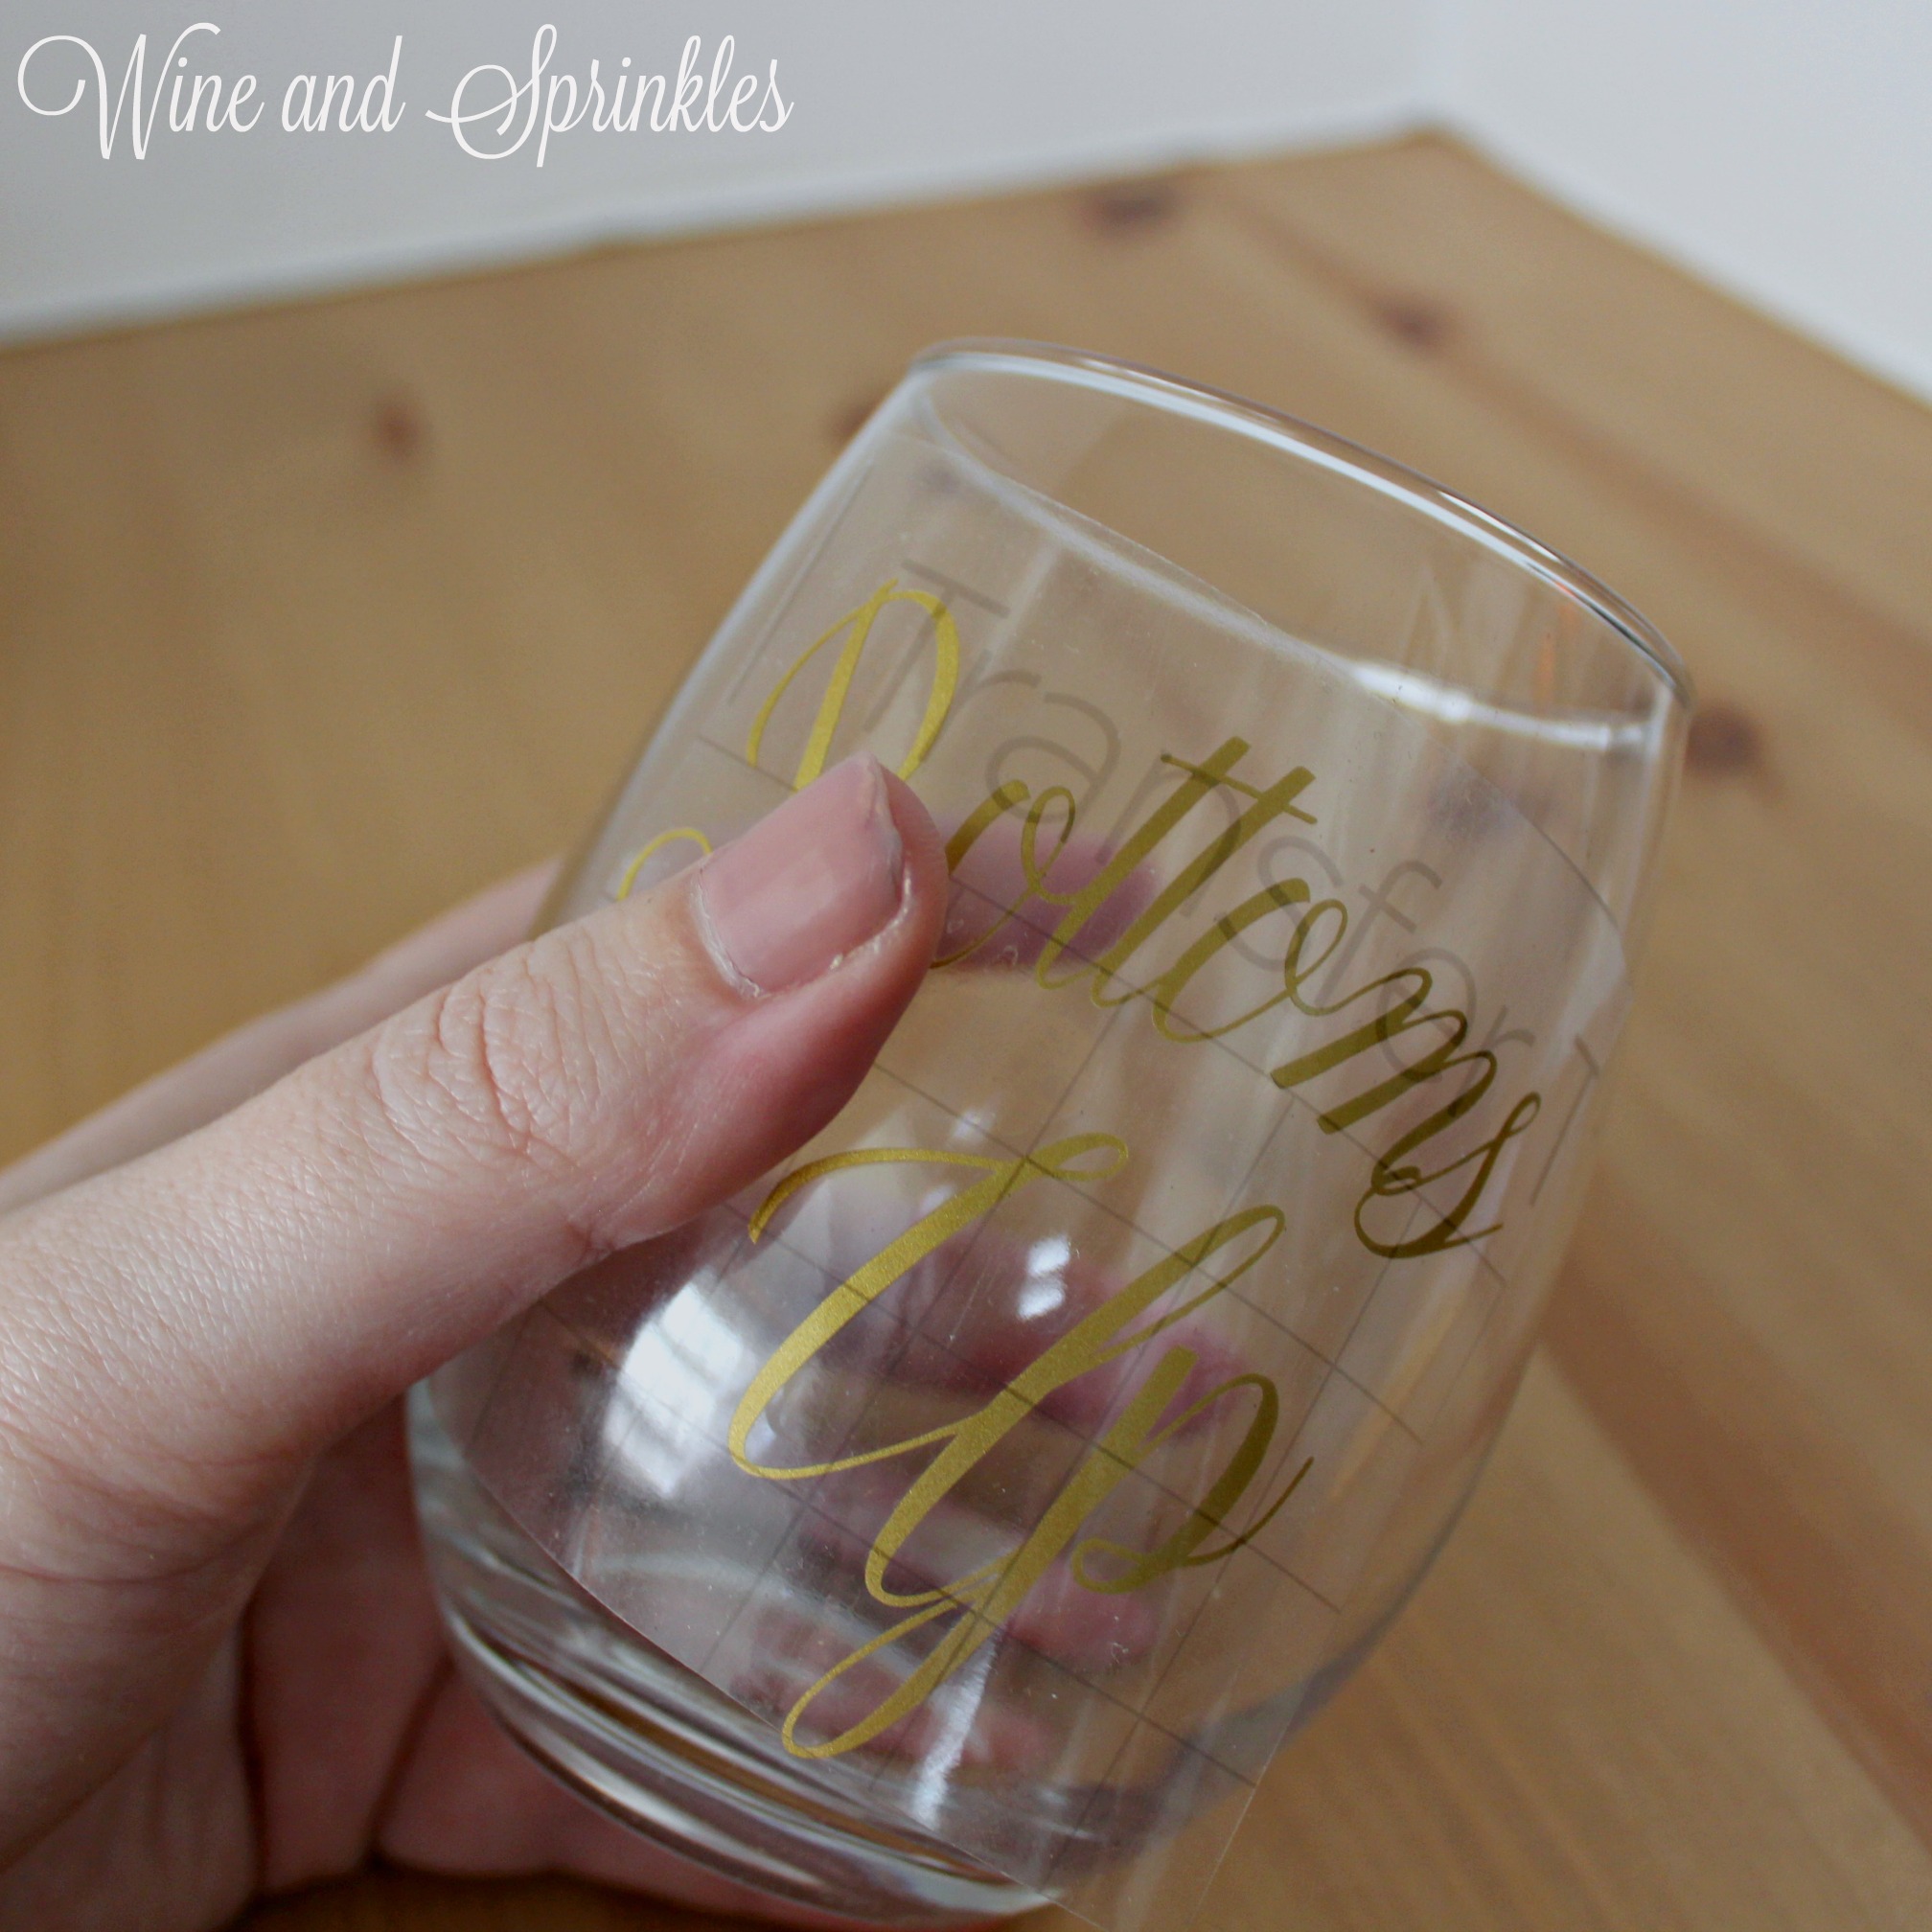
Happy Friday Everyone! Friday always puts me in the mood for a glass of wine so I made this cute little “Bottoms Up” glass to enjoy it in! These are also perfect for bachelorette party gifts, wine nights, or thirtieth birthdays!

DIY Vinyl Bottoms Ups Bachelorette Wine Glasses #svgfiles #cricutprojects #bachelorette

Since the design is thin but curved, its a little harder to weed so I would suggest thinner (not glitter) vinyl for this project. Luckily this makes it easier to put on the glass without the curve of the wine glass affecting your design! :)

DIY Vinyl Bottoms Ups Bachelorette Wine Glasses #svgfiles #cricutprojects #bachelorette

1. After downloading the cut files, import them into the Cricut Software. After creating a new project, select Upload Image. Select the file you wish to upload and it will automatically take you to the final upload screen, where you can name the file the select Save. 

2. Cut the design(s) in your choice of permanent adhesive vinyl with the Vinyl Setting on your Cricut. The SVG Files are sized so that they will automatically cut to the size you see in the photos, but if you want to change the size you can do so.

DIY Vinyl Bottoms Ups Bachelorette Wine Glasses #svgfiles #cricutprojects #bachelorette

3. Once the designs are cut, weed away the extra vinyl and cut a piece of transfer taper to 3" x 3". Cut away any excess backing from the vinyl design and smooth transfer tape over the design, aligning the design in the center of the transfer paper. Using the smoother tool, smooth the tape to the vinyl, removing any air bubbles. The transfer tape should overlap the backing of the design, so that you can stick the tape to an object with the backing still on the design.

DIY Vinyl Bottoms Ups Bachelorette Wine Glasses #svgfiles #cricutprojects #bachelorette

4. Now, transfer the design to your glass Remove the tape from the backing and directly place the design in the middle of the wine glass. working from the middle of the design to outside edges, press the letters into the wine glass. since the surface is curved, the transfer tape wont be perfectly flat on it its more important for the design to be smoothed on. :)

DIY Vinyl Bottoms Ups Bachelorette Wine Glasses #svgfiles #cricutprojects #bachelorette

6. Remove the transfer taper to leave the design on the wine glass, then repeat the process for any additional wine glasses.

DIY Vinyl Bottoms Ups Bachelorette Wine Glasses #svgfiles #cricutprojects #bachelorette


HTV Iron On Sporty Team Bride T Shirts

This post contains affiliate links, meaning that if you click on a link I will recieve a small comission. This costs you nothing extra and I only promote products I use and love! You can read our full disclosure here

DIY HTV Iron On Sporty Team Bride T Shirts #svgfiles #teambride #diywedding

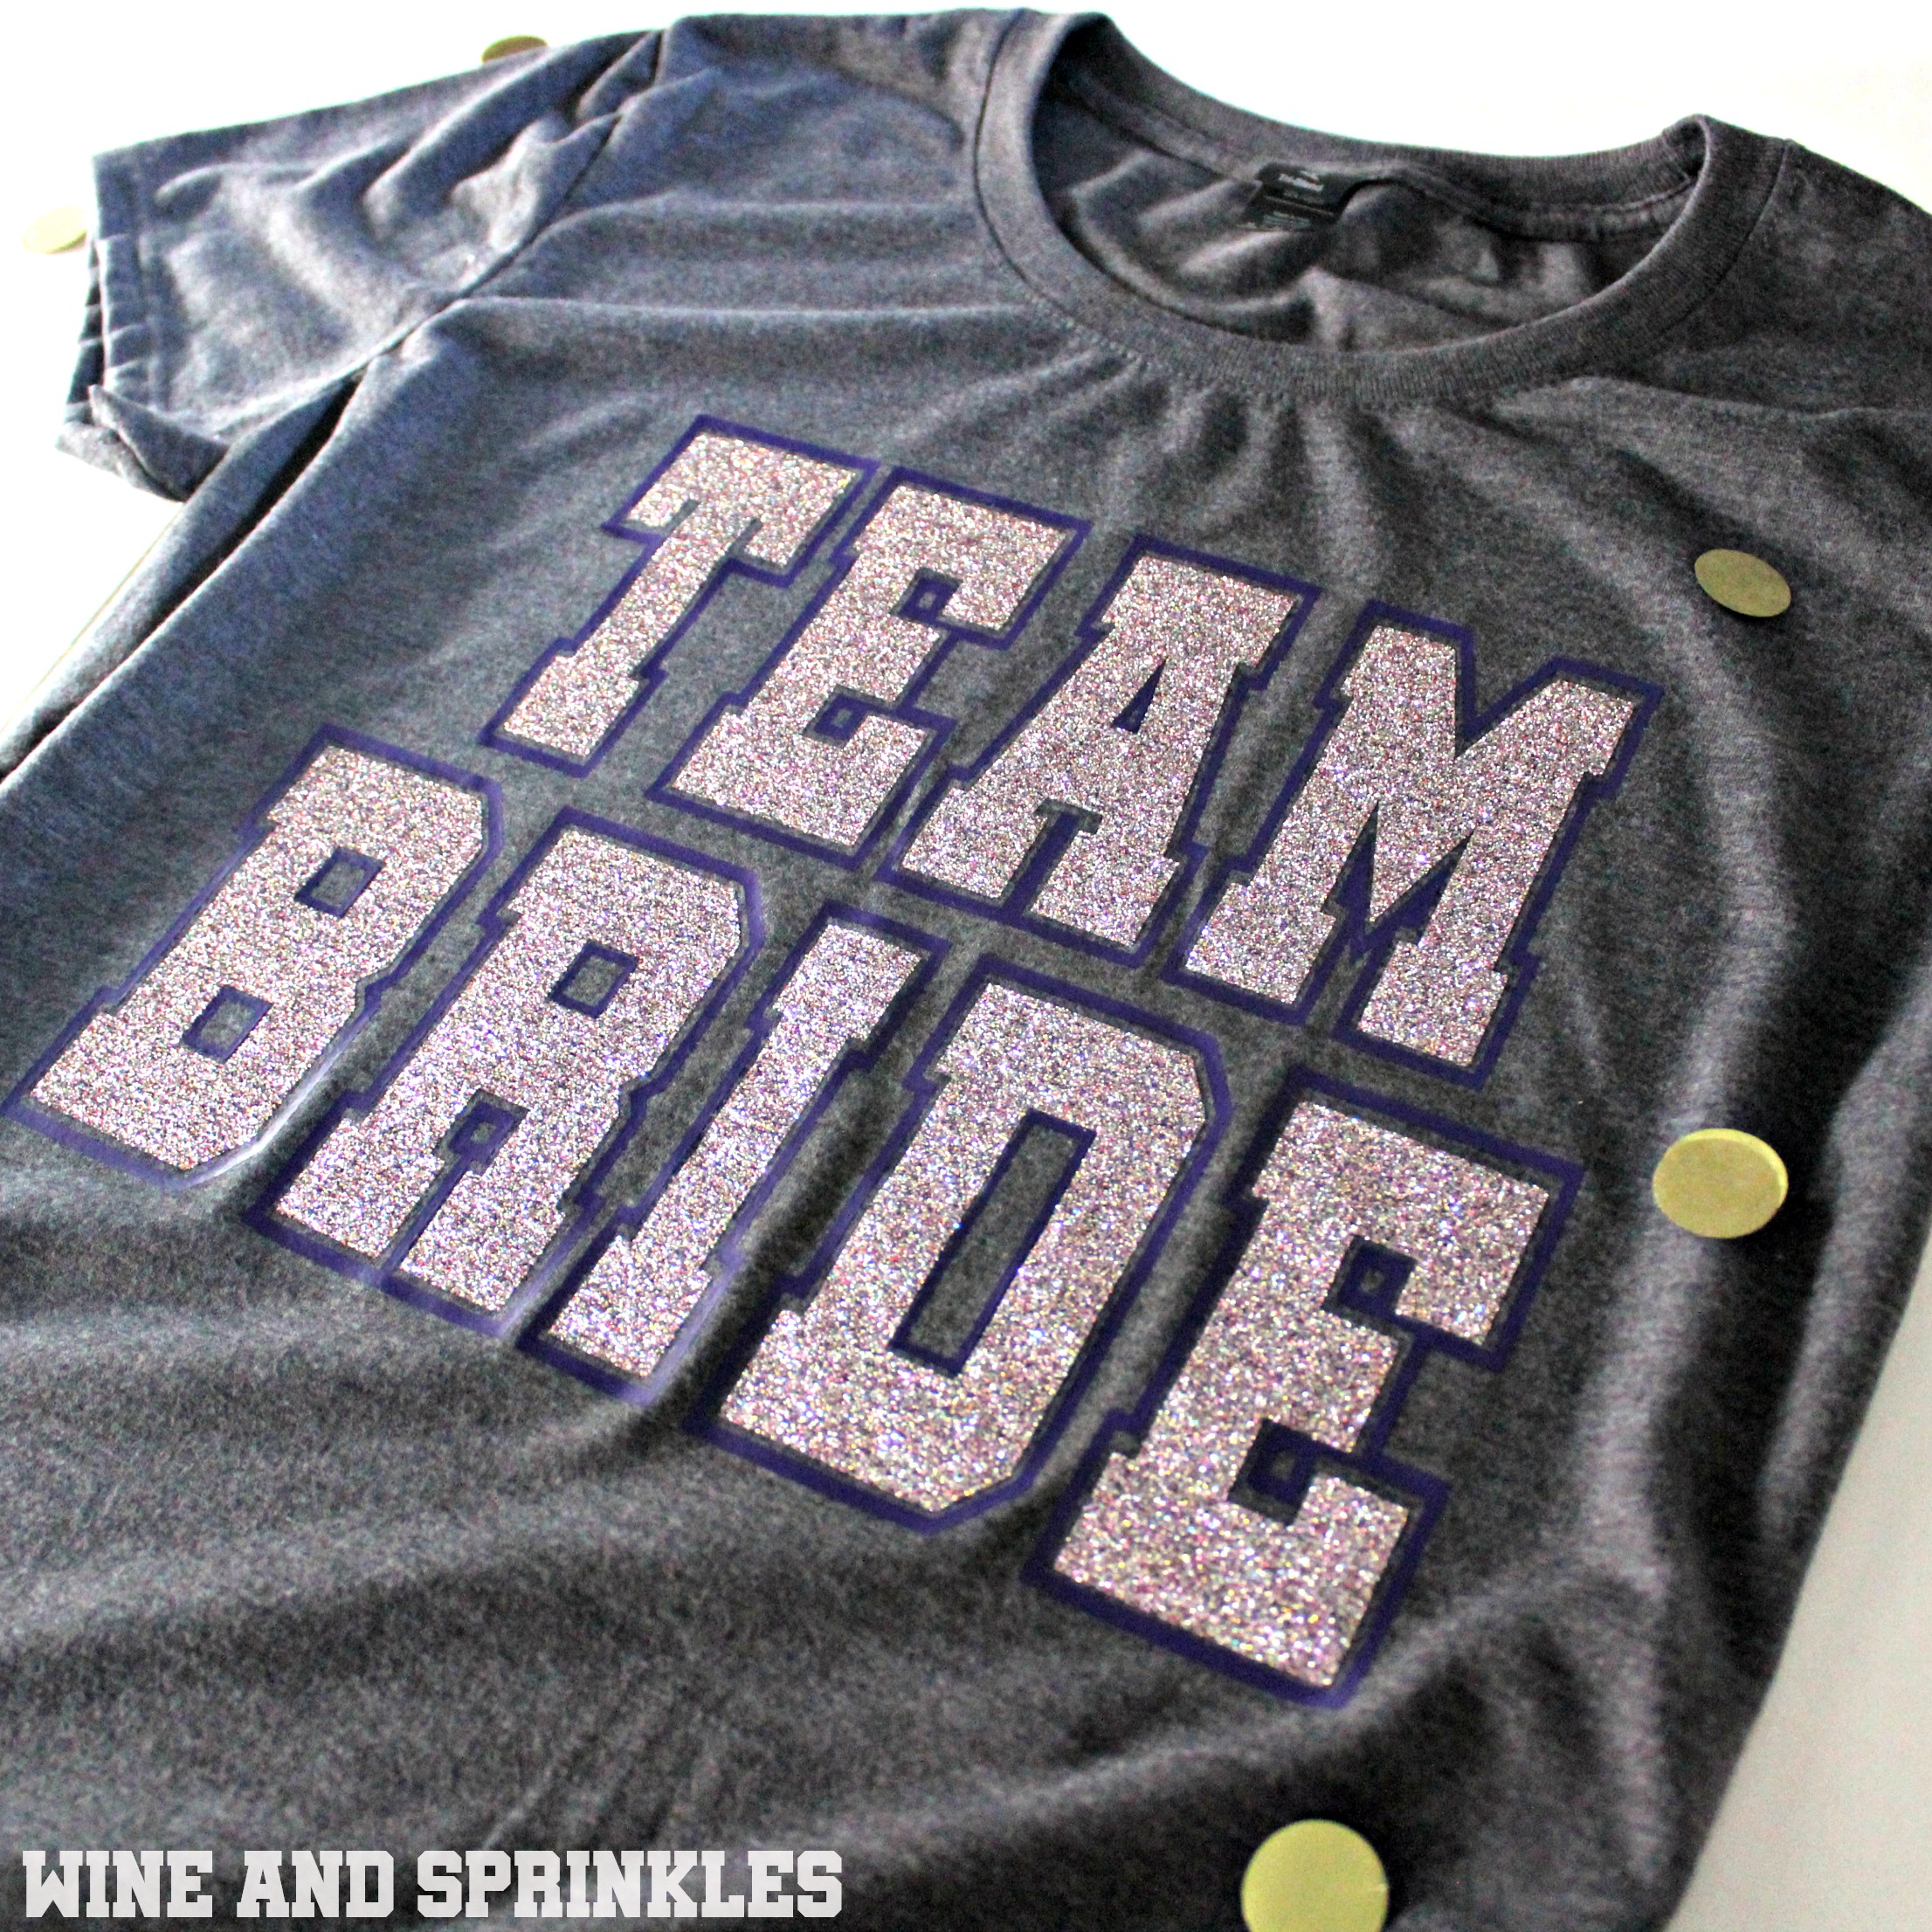
I love crafting for bridal parties and in honor of those sporty college days (and football season I guess) I made these Sporty Team Bride T Shirts!

I made these designs both in one color and two colors, and while I like them both I think that the two color best! I will say that you do have to waste a good amount of vinyl for the outline which does hurt the soul, so the single tone is great for getting the most use out of your HTV with that sporty feel.

DIY HTV Iron On Sporty Team Bride T Shirts #svgfiles #teambride #diywedding

1. After downloading the cut files, import them into the Cricut Software. After creating a new project, select Upload Image. Select the file you wish to upload and it will automatically take you to the final upload screen, where you can name the file the select Save. The SVG Files are sized so that they will automatically cut to the size you see in the photos, but if you want to change the size you can do so to fit the t-shirts the way you like.

Single Color

2. After selecting “Make It” Make sure to select the Mirror Mode on the cutting screen. Cut the design(s) in your choice of heat transfer vinyl (I used Silver Glitter HTV) with the Iron On (for Easyweed Vinyl) or Iron On+ (for Glitter Vinyl) Setting on your Cricut, with the shiny side of the material down.

3. Weed the additional material off of the backing material so that, looking down with the shiny side up, you can see your design with the correct orientation.

4. Iron your T Shirt to remove any creases, then center the design over the top half of the T Shirt. Arrange the design shiny side up, then cover with parchment paper. Make sure to keep the parchment paper between the design and the iron.

1. placement with text.jpgDIY HTV Iron On Sporty Team Bride T Shirts #svgfiles #teambride #diywedding

5. Set your Iron to the second Highest setting and press the the iron down firmly on the design, not ironing but rather using it as a small heat press. I worked from the upper left to lower right on the design, pressing the iron on each part of the design for at least 20-30 seconds, then overlapping the last position as you move the iron across the design.

DIY HTV Iron On Sporty Team Bride T Shirts #svgfiles #teambride #diywedding

6. Remove the backing from the design, leaving the design on the T Shirt. Repeat with all the remaining T Shirts.

DIY HTV Iron On Sporty Team Bride T Shirts #svgfiles #teambride #diywedding

Two Toned

2. After selecting “Make It” Make sure to select the Mirror Mode on the cutting screen. You will notice that the Cricut software divides the design colors into separate mats on its own. Cut the designs in your choice of heat transfer vinyl with the Iron On (for Easyweed Vinyl) or Iron On+ (for Glitter Vinyl) Setting on your Cricut, with the shiny side of the material down. I used Silver Glitter HTV for the inner letters and Purple Easyweed HTV for the outline.

3. Weed the additional material off of the backing material so that, looking down with the shiny side up, you can see your design with the correct orientation.

DIY HTV Iron On Sporty Team Bride T Shirts #svgfiles #teambride #diywedding

4. Iron your T Shirt to remove any creases, then center the inner letters of the design over the top half of the T Shirt. Arrange the design shiny side up, then cover with parchment paper. Make sure to keep the parchment paper between the design and the iron.

DIY HTV Iron On Sporty Team Bride T Shirts #svgfiles #teambride #diywedding

5. Set your Iron to the second Highest setting and press the the iron down firmly on the design, not ironing but rather using it as a small heat press. I worked from the upper left to lower right on the design, pressing the iron on each part of the design for at least 30 seconds, then overlapping the last position as you move the iron across the design.

DIY HTV Iron On Sporty Team Bride T Shirts #svgfiles #teambride #diywedding

6. Remove the backing to leave your first color of HTV on the T Shirt.

DIY HTV Iron On Sporty Team Bride T Shirts #svgfiles #teambride #diywedding

7. Now, arrange the outline design around the ironed on letters as shown below. Arrange the design shiny side up, then cover with parchment paper. Make sure to keep the parchment paper between the design and the iron.

DIY HTV Iron On Sporty Team Bride T Shirts #svgfiles #teambride #diywedding

8. Set your Iron to the second Highest setting and press the the iron down firmly on the design, not ironing but rather using it as a small heat press. Repeat the same ironing process as above for the second design color.

DIY HTV Iron On Sporty Team Bride T Shirts #svgfiles #teambride #diywedding

9. Remove the backing from the design, leaving the completed design on the T Shirt Repeat with all the remaining T Shirts.

DIY HTV Iron On Sporty Team Bride T Shirts #svgfiles #teambride #diywedding

DIY HTV Iron On You Can't Sip with Us Tote Bags

This post contains affiliate links, meaning that if you click on a link I will recieve a small comission. This costs you nothing extra and I only promote products I use and love! You can read our full disclosure here

You Can't Sip with Us Iron On HTV Bachelorette Tote Bags #bachelorette #youcantsipwithus #htvvinyl #svgfiles

To go with my You Can’t Sip with Us Bachelorette Koozies, I couldn’t help but include tote bags too! :) I love to have a both a single color and dual color option, so I did mine in Silver Glitter and Pink HTV and then some in just single Pink HTV. Its a great option to do both if you want your bride to have a slightly more festive bag, while the bridesmaids can sport the super cute single color versions which are easier to transfer.

You Can't Sip with Us Iron On HTV Bachelorette Tote Bags #bachelorette #youcantsipwithus #htvvinyl #svgfiles

1. After downloading the cut files, import them into the Cricut Software. After creating a new project, select Upload Image. Select the file you wish to upload and it will automatically take you to the final upload screen, where you can name the file the select Save. The SVG Files are sized so that they will automatically cut to the size you see in the photos, but if you want to change the size you can do so to fit the totes the way you like.

Single Color

2. After selecting “Make It” Make sure to select the Mirror Mode on the cutting screen. Cut the design(s) in your choice of heat transfer vinyl (I used Pink Easyweed HTV) with the Iron On (for Easyweed Vinyl) or Iron On+ (for Glitter Vinyl) Setting on your Cricut, with the shiny side of the material down.

3. Weed the additional material off of the backing material so that, looking down with the shiny side up, you can see your design with the correct orientation.

You Can't Sip with Us Iron On HTV Bachelorette Tote Bags #bachelorette #youcantsipwithus #htvvinyl #svgfiles

4. Iron your Tote Bag to remove any creases, then center the design over the top half of the tank top. Arrange the design shiny side up, then cover with parchment paper. Make sure to keep the parchment paper between the design and the iron.

2. placement with text.jpgYou Can't Sip with Us Iron On HTV Bachelorette Tote Bags #bachelorette #youcantsipwithus #htvvinyl #svgfiles

5. Set your Iron to the second Highest setting and press the the iron down firmly on the design, not ironing but rather using it as a small heat press. I worked from the upper left to lower right on the design, pressing the iron on each part of the design for at least 30 seconds, then overlapping the last position as you move the iron across the design.

You Can't Sip with Us Iron On HTV Bachelorette Tote Bags #bachelorette #youcantsipwithus #htvvinyl #svgfiles

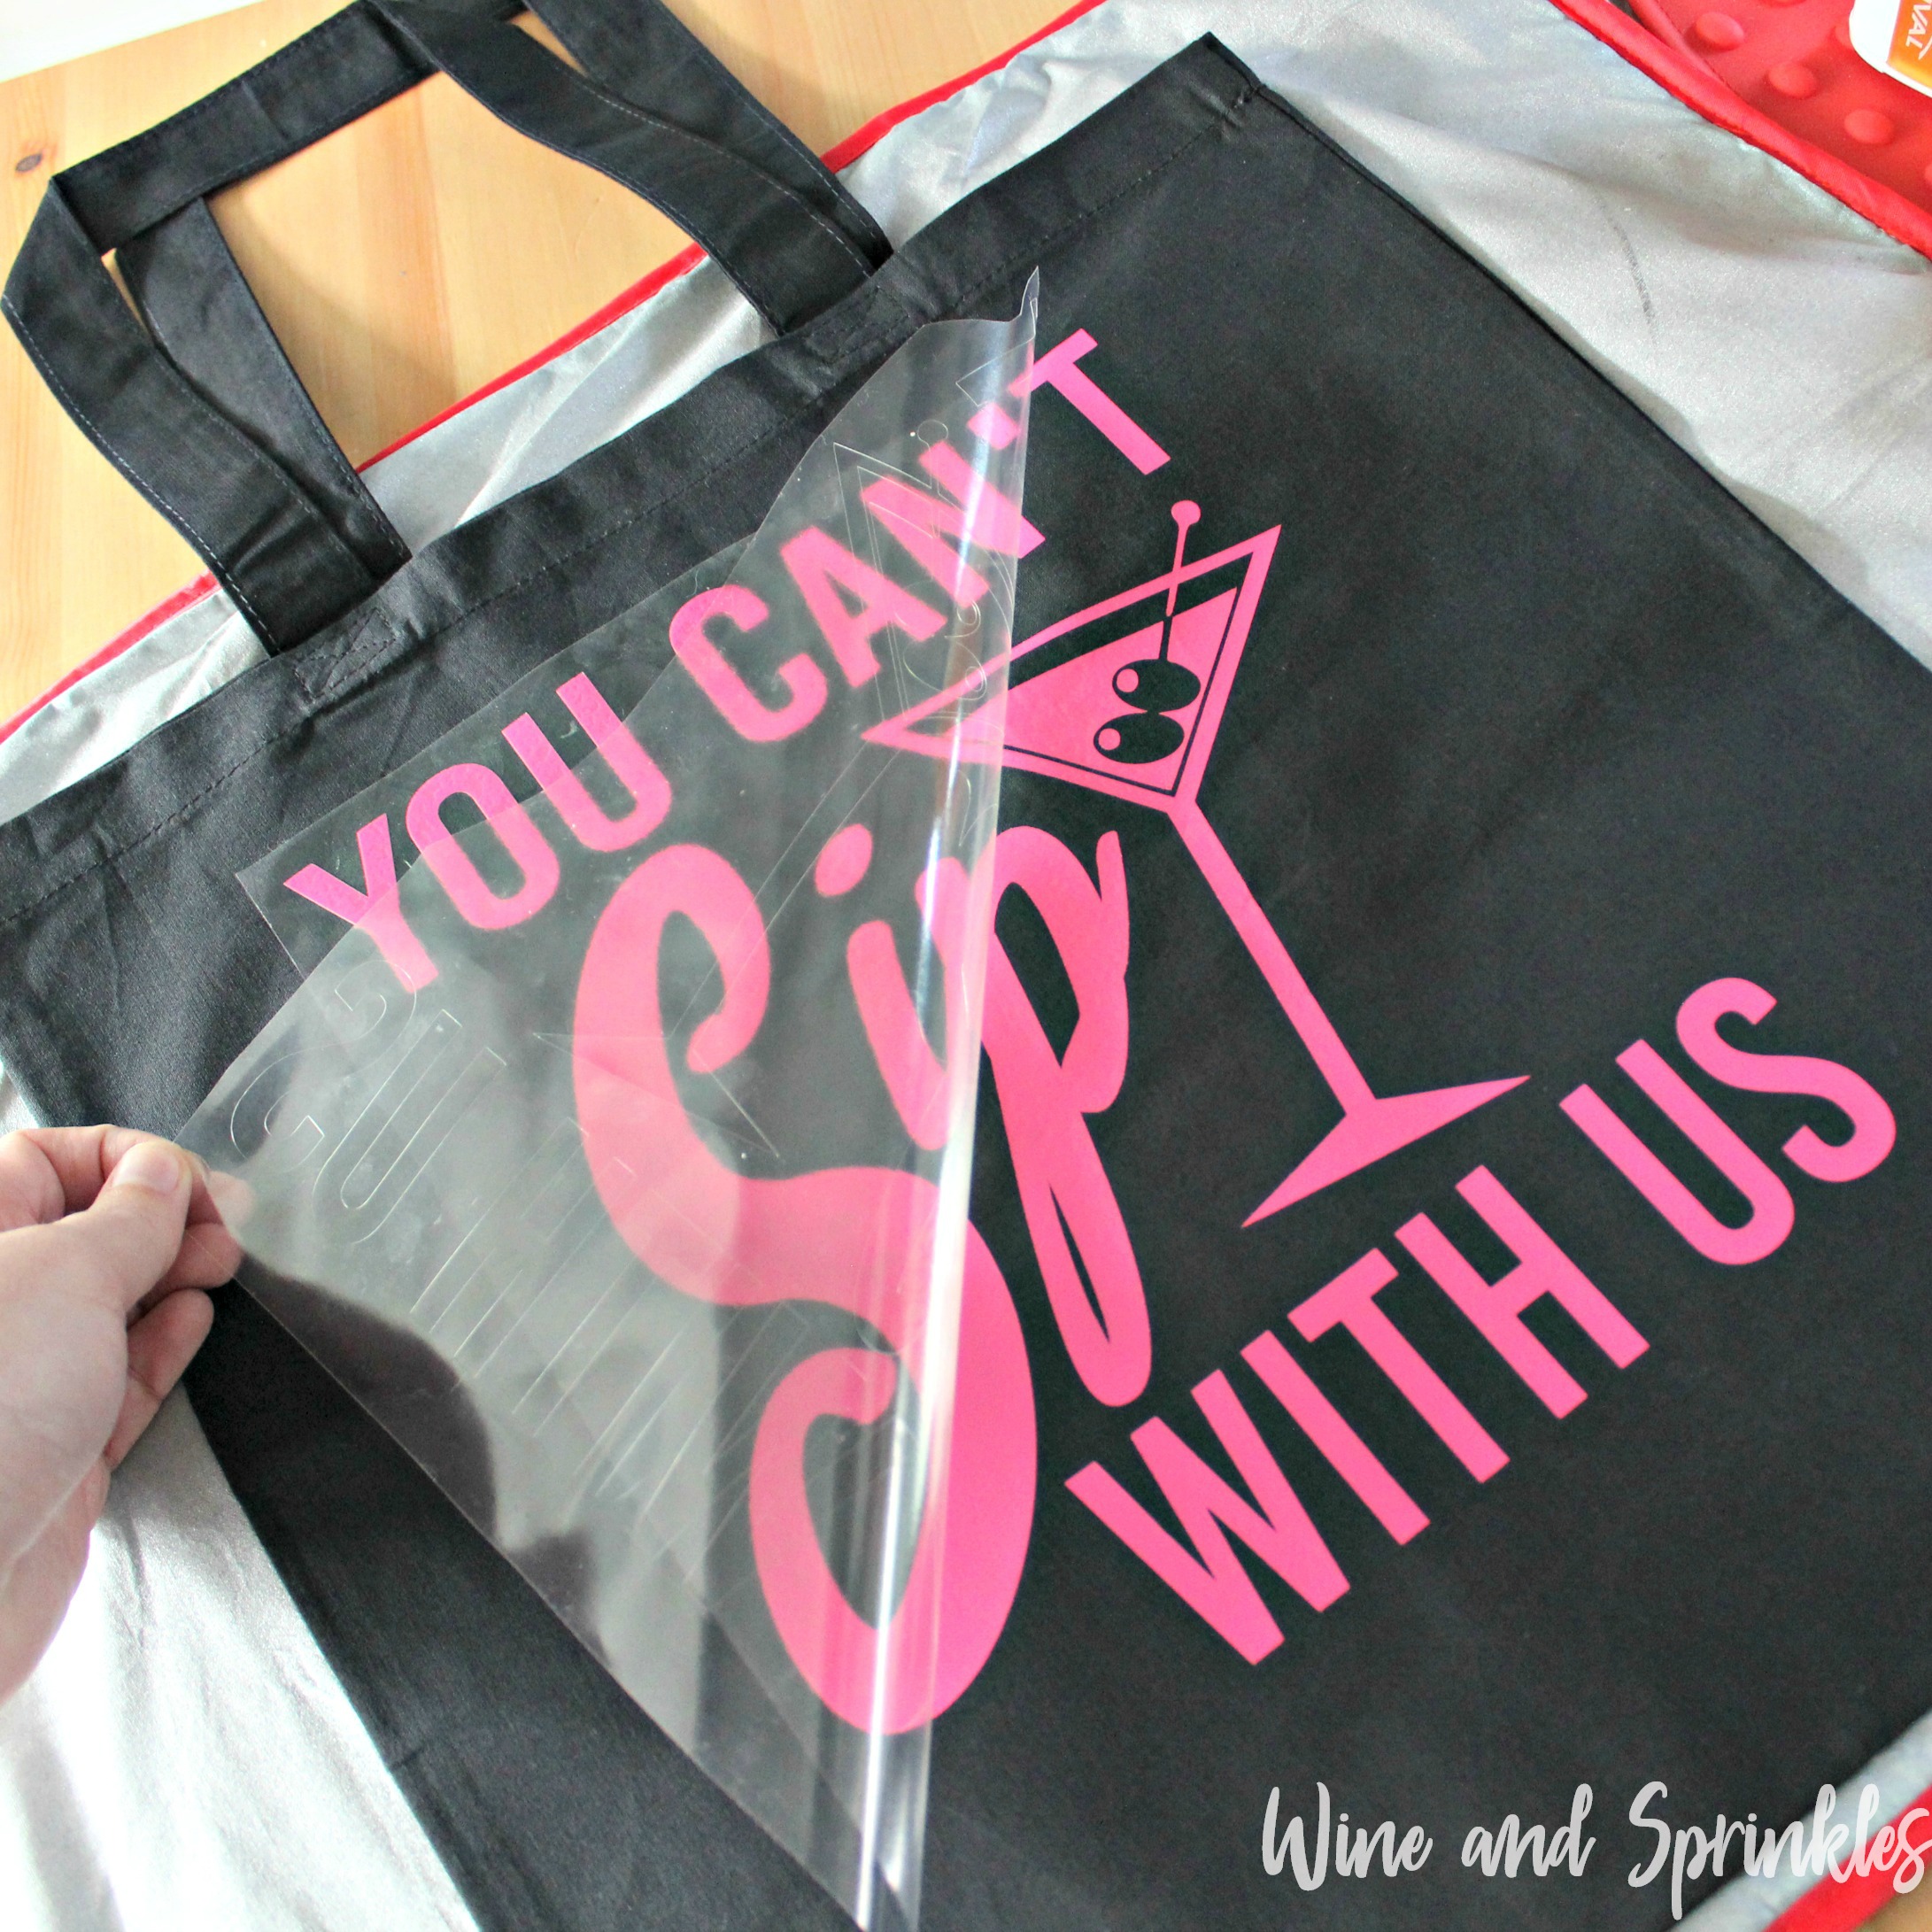
6. Remove the backing from the design, leaving the design on the Totes. Repeat with all the remaining totes.

4. backing removal with text.jpgYou Can't Sip with Us Iron On HTV Bachelorette Tote Bags #bachelorette #youcantsipwithus #htvvinyl #svgfiles

Two Toned

2. After selecting “Make It” Make sure to select the Mirror Mode on the cutting screen. You will notice that the Cricut software divides the design colors into separate mats on its own. Cut the designs in your choice of heat transfer vinyl with the Iron On (for Easyweed Vinyl) or Iron On+ (for Glitter Vinyl) Setting on your Cricut, with the shiny side of the material down. I used Silver Glitter HTV for the bolded lines and Pink for the “Sip” and Martini Glass.

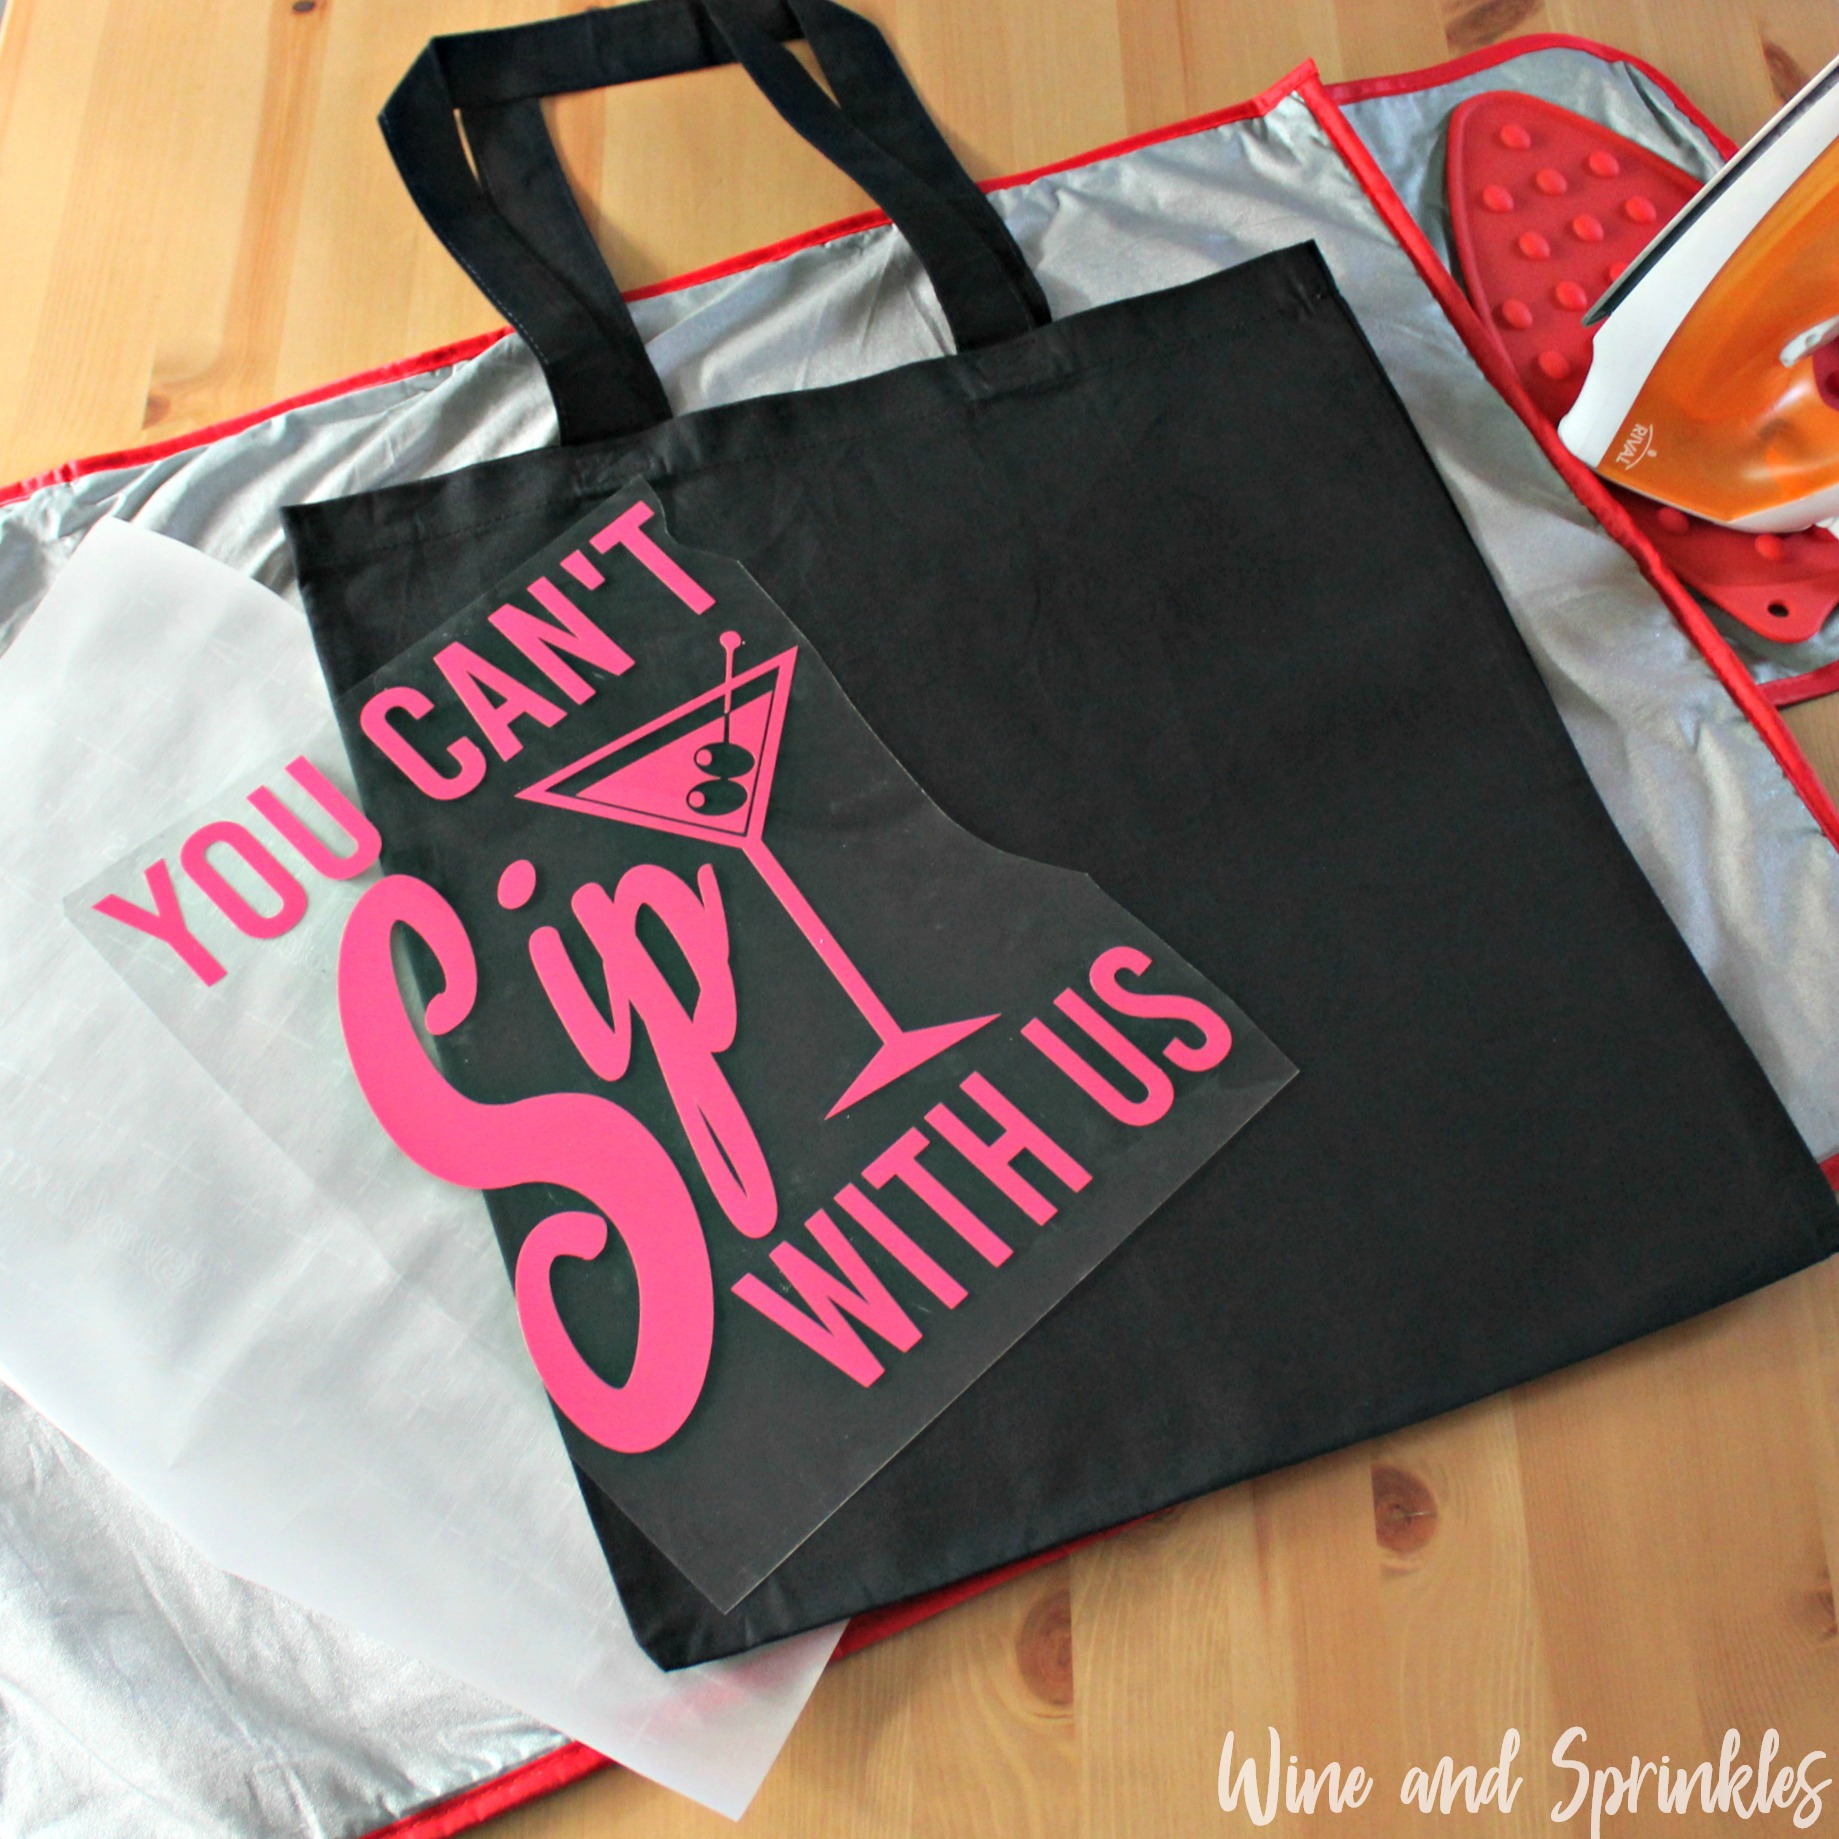
3. Weed the additional material off of the backing material so that, looking down with the shiny side up, you can see your design with the correct orientation. To keep your spacing correct, make sure not to separate your lines (“You can’t” and “with us”) from each other when you are weeding and cutting out your designs. I actually cut the square of material out of the middle before weeding since I could easily use it for something else, and kept them connected with just a little strip of the backing.

You Can't Sip with Us Iron On HTV Bachelorette Tote Bags #bachelorette #youcantsipwithus #htvvinyl #svgfiles

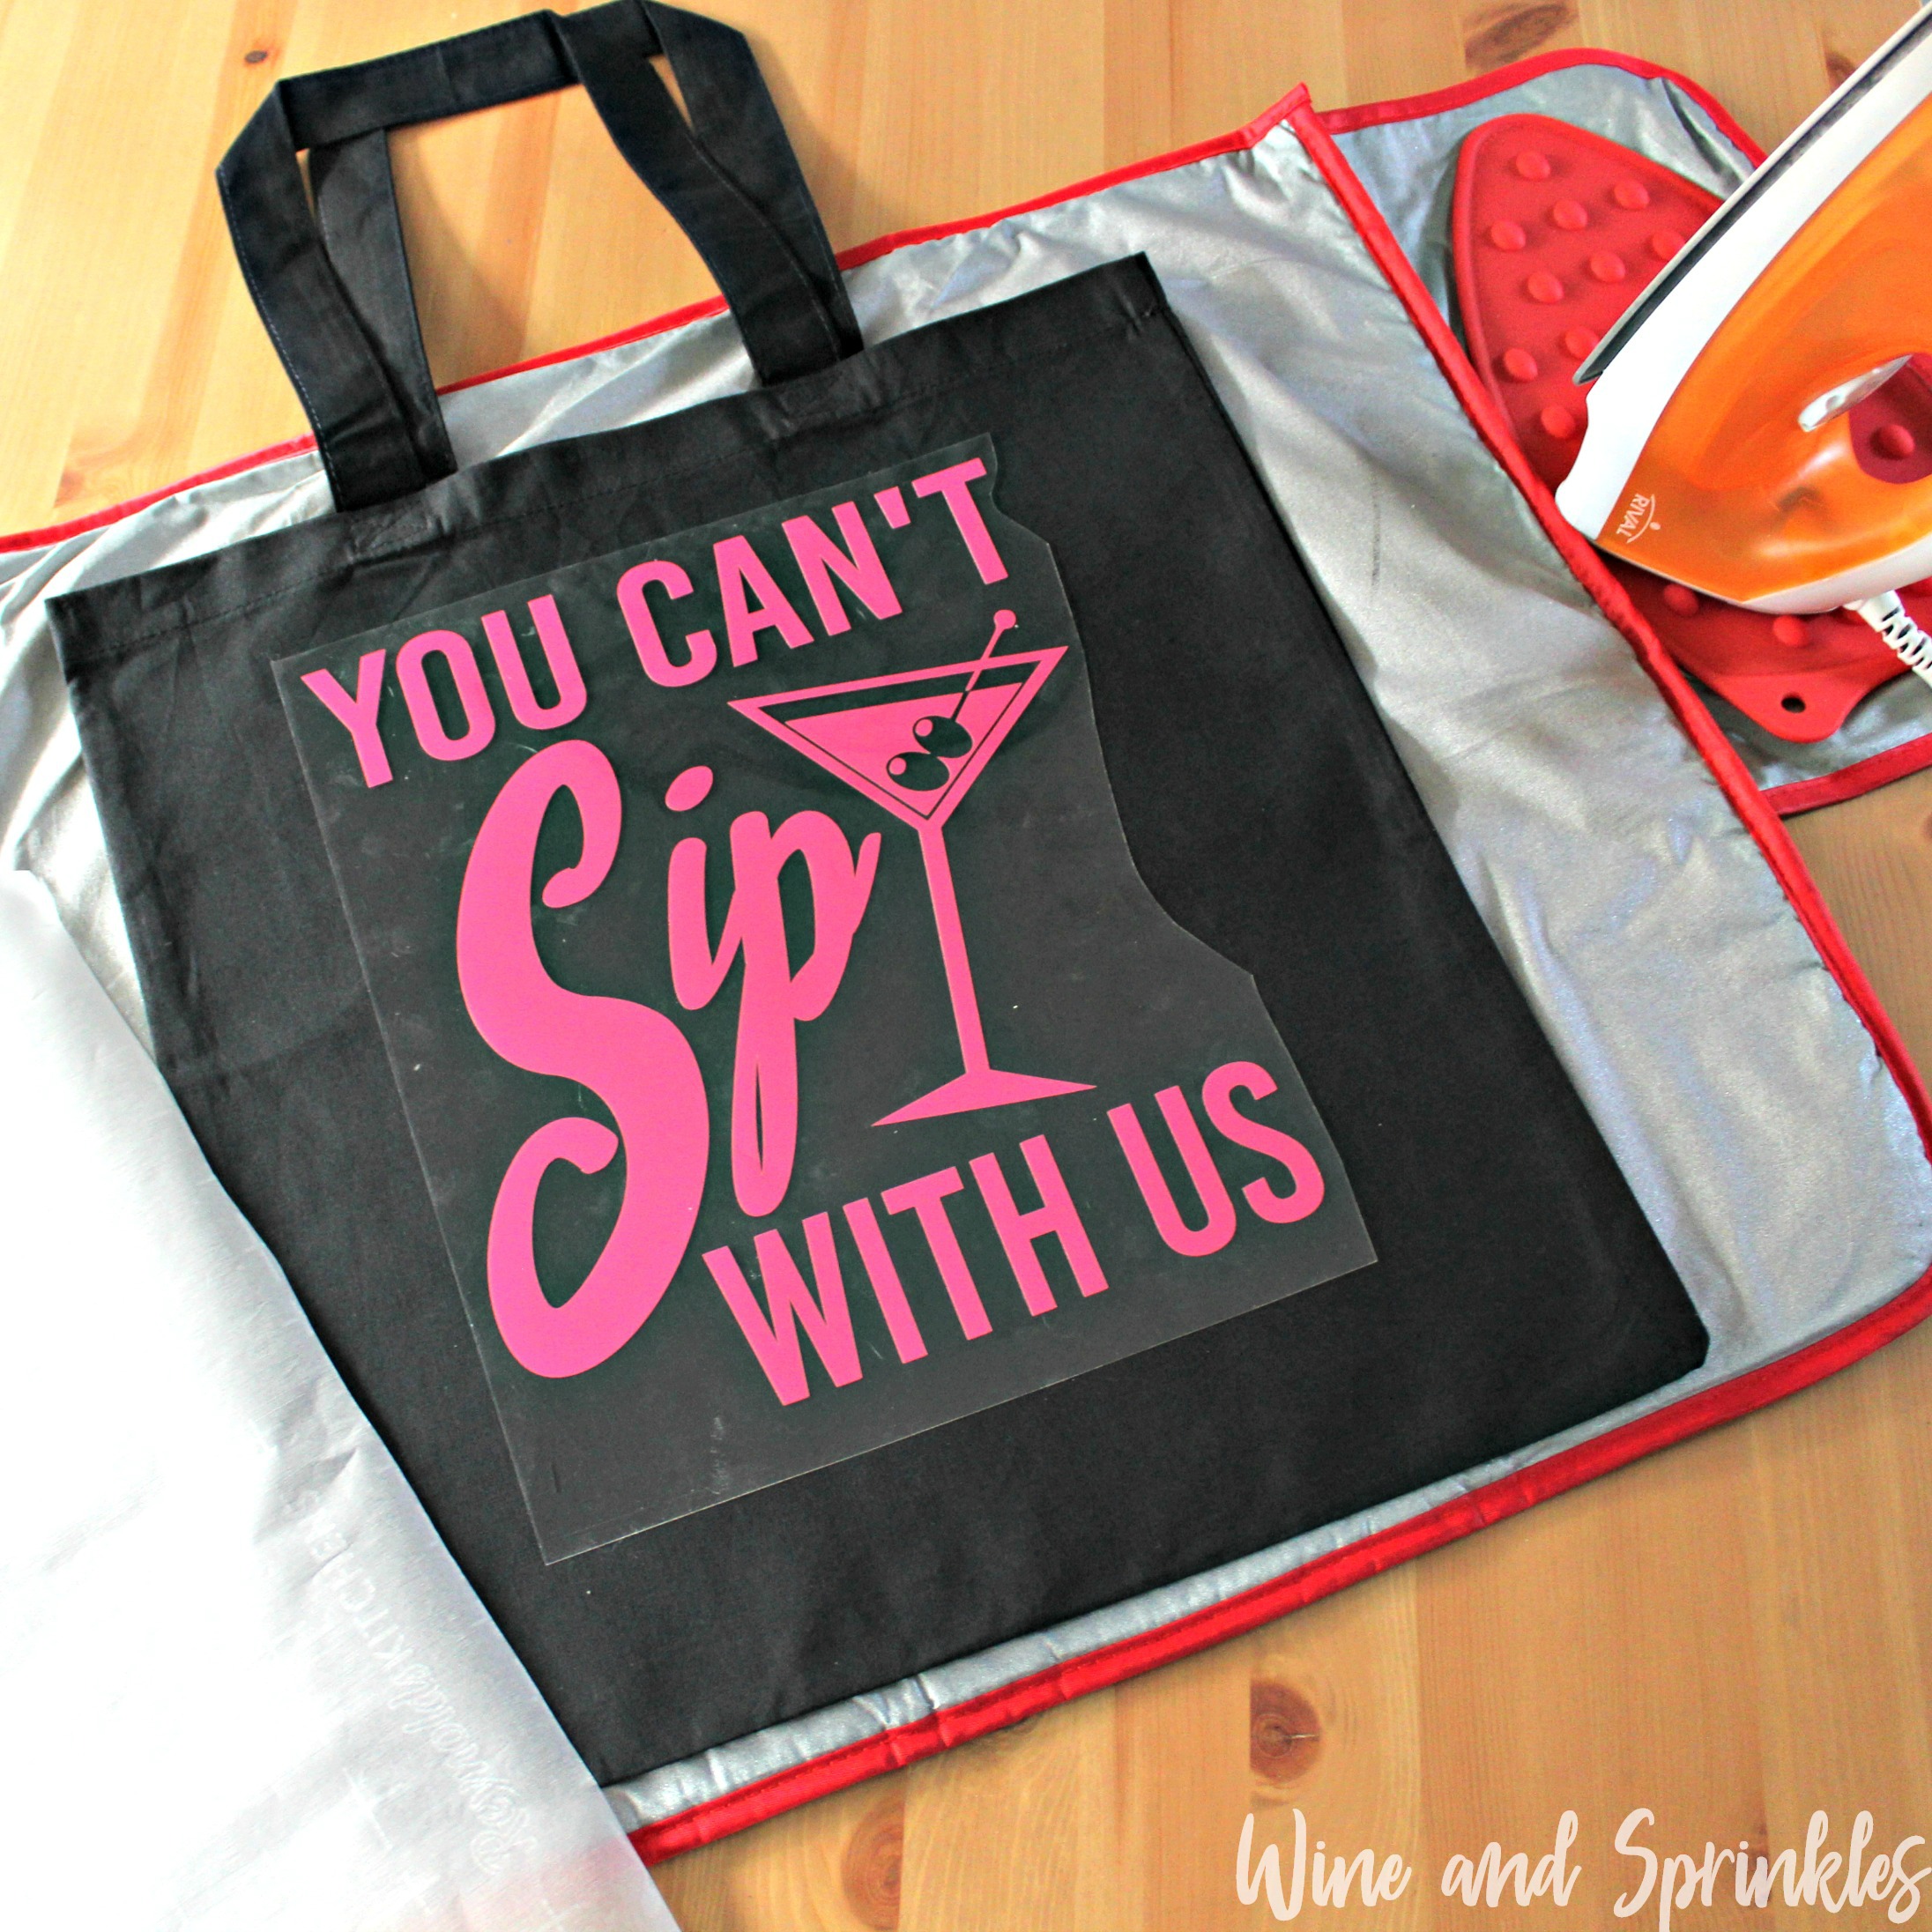
4. Iron your tote bag to remove any creases. Align the top and bottom words (“You can’t” and “with us”) along the top of the tote bag as shown below. It should be arranged such that the top line is following the top of the tote and the bottom line is following the bottom of the tote.

6. silver placement with text.jpgYou Can't Sip with Us Iron On HTV Bachelorette Tote Bags #bachelorette #youcantsipwithus #htvvinyl #svgfiles

5. Set your Iron to the second Highest setting and press the the iron down firmly on the design, not ironing but rather using it as a small heat press. I worked from the upper left to lower right on the design, pressing the iron on each part of the design for at least 30 seconds, then overlapping the last position as you move the iron across the design.

7. ironing with text.jpgYou Can't Sip with Us Iron On HTV Bachelorette Tote Bags #bachelorette #youcantsipwithus #htvvinyl #svgfiles

6. Remove the backing to leave your first color of HTV on the tote bag.

You Can't Sip with Us Iron On HTV Bachelorette Tote Bags #bachelorette #youcantsipwithus #htvvinyl #svgfiles

7. Now, center the middle of the design (“Sip) in between the already ironed on HTV lines of the tote bag as shown below. Arrange the design shiny side up, then cover with parchment paper. Make sure to keep the parchment paper between the design and the iron.

9. pink placement with text.jpgYou Can't Sip with Us Iron On HTV Bachelorette Tote Bags #bachelorette #youcantsipwithus #htvvinyl #svgfiles

8. Set your Iron to the second Highest setting and press the the iron down firmly on the design, not ironing but rather using it as a small heat press. Repeat the same ironing process as above for the second design color.

You Can't Sip with Us Iron On HTV Bachelorette Tote Bags #bachelorette #youcantsipwithus #htvvinyl #svgfiles

9. Remove the backing from the design, leaving the completed design on the tote bag. Repeat with all the remaining totes.

You Can't Sip with Us Iron On HTV Bachelorette Tote Bags #bachelorette #youcantsipwithus #htvvinyl #svgfiles

DIY HTV Iron On You Can't Sip with Us Koozies

This post contains affiliate links, meaning that if you click on a link I will recieve a small comission. This costs you nothing extra and I only promote products I use and love! You can read our full disclosure here

You Can't Sip with Us Iron On HTV Bachelorette Koozies #bachelorette #youcantsipwithus #htvvinyl #svgfiles

One of my favorite bachelorette party themes is a Mean Girls theme, and I actually got to plan one a couple years ago for one of my best friends bachelorette party in Las Vegas! I revisited the idea for these cute koozies, though you could easily use them for almost any bachelorette party theme you like. :) I made them in two different ways, one with only one color and the second in two colors, because I always like the bride to stand out.

You Can't Sip with Us Iron On HTV Bachelorette Koozies #bachelorette #youcantsipwithus #htvvinyl #svgfiles

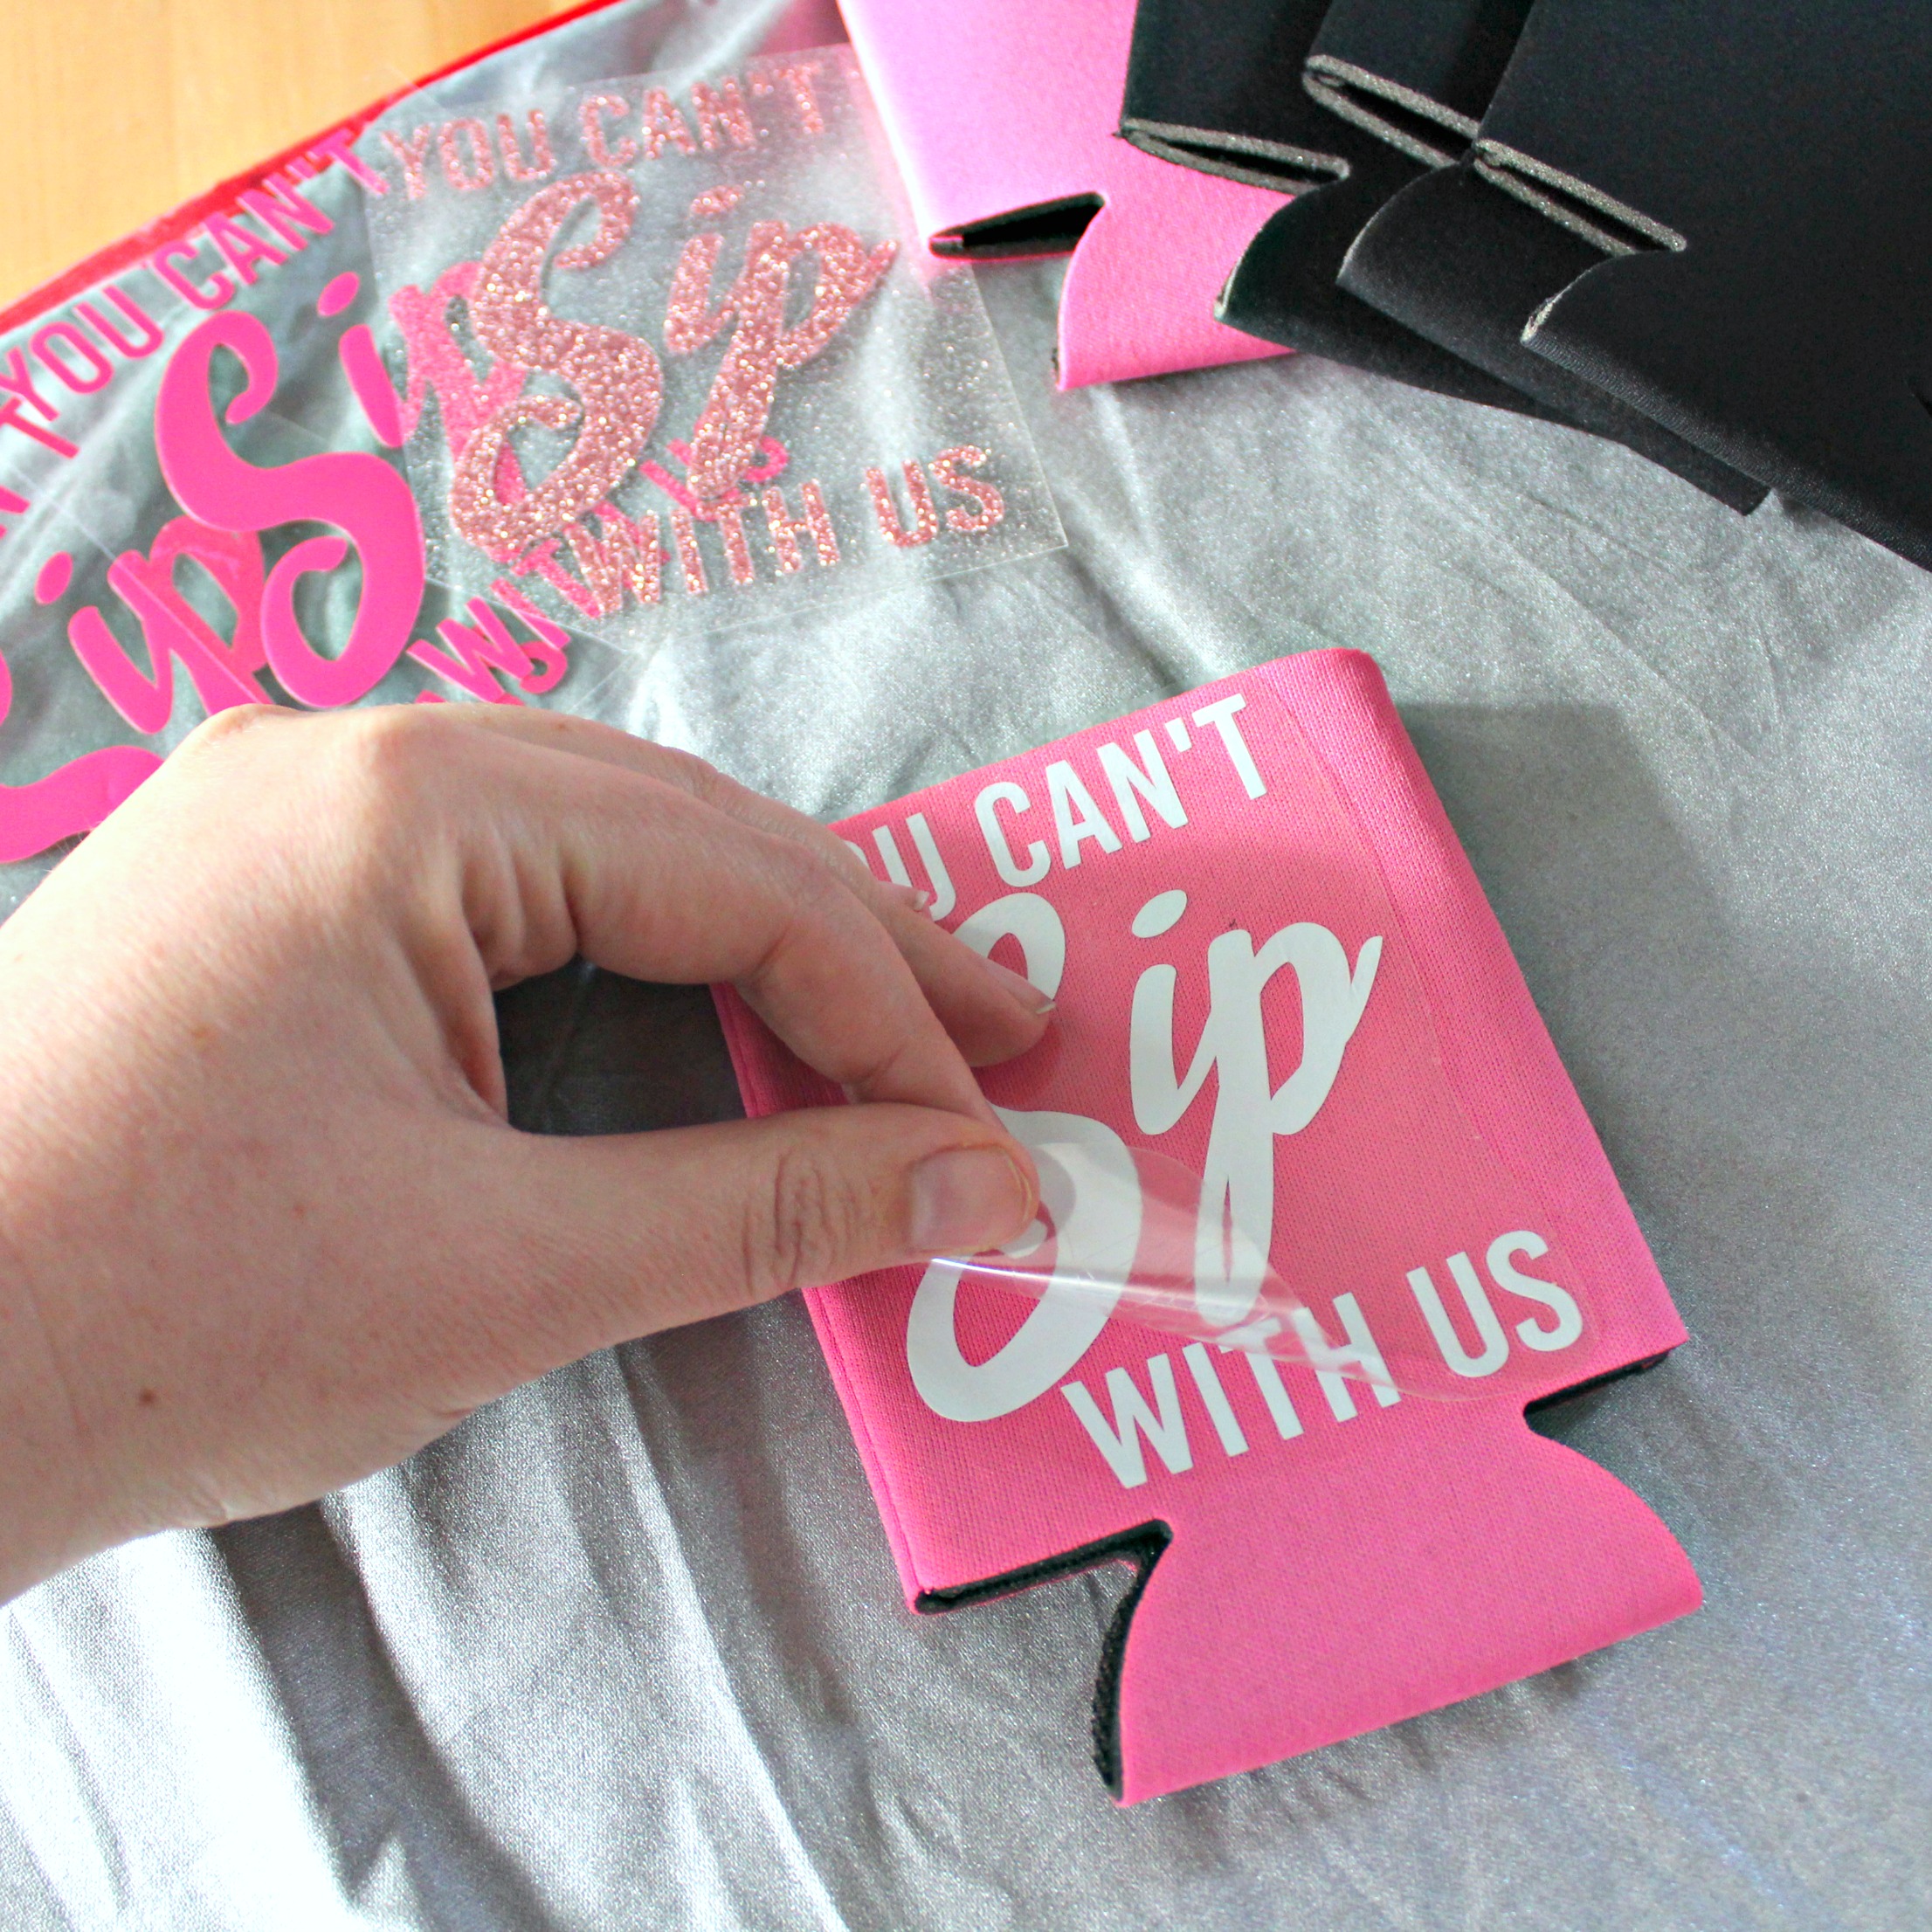
I made these koozies in a variety of colors. For the single color koozies, I used pink HTV and rose gold glitter HTV on black koozies and white HTV on pink koozies. The two colored koozies I had fun with, making them a mix of pink words with a silver confetti “Sip.”

You Can't Sip with Us Iron On HTV Bachelorette Koozies #bachelorette #youcantsipwithus #htvvinyl #svgfiles

1. After downloading the cut files, import them into the Cricut Software. After creating a new project, select Upload Image. Select the file you wish to upload and it will automatically take you to the final upload screen, where you can name the file the select Save. The SVG Files are sized so that they will automatically cut to the size you see in the photos, but if you want to change the size you can do so to fit the koozies the way you like.

Single Colored Koozies

2. After selecting “Make It” Make sure to select the Mirror Mode on the cutting screen. Cut the design(s) in your choice of heat transfer vinyl (I used White Easyweed HTV, Pink Easyweed HTV, and Rose Gold Glitter HTV) with the Iron On (for Easyweed Vinyl) or Iron On+ (for Glitter Vinyl) Setting on your Cricut, with the shiny side of the material down.

3. Weed the additional material off of the backing material so that, looking down with the shiny side up, you can see your design with the correct orientation.

You Can't Sip with Us Iron On HTV Bachelorette Koozies #bachelorette #youcantsipwithus #htvvinyl #svgfiles

4. Center the design in the middle of the koozie. Arrange the design shiny side up, then cover with parchment paper. Make sure to keep the parchment paper between the design and the iron.

You Can't Sip with Us Iron On HTV Bachelorette Koozies #bachelorette #youcantsipwithus #htvvinyl #svgfiles

5. Set your Iron to the second Highest setting and press the the iron down firmly on the design, not ironing but rather using it as a small heat press. The koozie design should be completely covered by the iron. Pressing the iron on the design for 15 - 30 seconds, pressing in 5-10 second intervals and checking. Generally, my koozies took 15-20 seconds but you can always set your iron to a little lower temperature if you are nervous. :)

3. ironing.JPGYou Can't Sip with Us Iron On HTV Bachelorette Koozies #bachelorette #youcantsipwithus #htvvinyl #svgfiles

6. Remove the backing from the design, leaving the design on the koozie. Repeat with all the remaining koozies.

You Can't Sip with Us Iron On HTV Bachelorette Koozies #bachelorette #youcantsipwithus #htvvinyl #svgfiles

Dual Colored Koozies

2. After selecting “Make It” Make sure to select the Mirror Mode on the cutting screen. You will notice that the Cricut software divides the design colors into separate mats on its own. Cut the designs in your choice of heat transfer vinyl with the Iron On (for Easyweed Vinyl) or Iron On+ (for Glitter Vinyl) Setting on your Cricut, with the shiny side of the material down.

3. Weed the additional material off of the backing material so that, looking down with the shiny side up, you can see your design with the correct orientation. To keep your spacing correct, make sure not to separate your lines (“You can’t” and “with us”) from each other when you are weeding and cutting out your designs.

You Can't Sip with Us Iron On HTV Bachelorette Koozies #bachelorette #youcantsipwithus #htvvinyl #svgfiles

4. Start by aligning the top and bottom words (“You can’t” and “with us”) along the top of the koozie as shown below. It should be arranged such that the top line is following the top of the koozie and the bottom line is near the bottom of the koozie.

You Can't Sip with Us Iron On HTV Bachelorette Koozies #bachelorette #youcantsipwithus #htvvinyl #svgfiles

5. Set your Iron to the second Highest setting and press the the iron down firmly on the design, not ironing but rather using it as a small heat press. The koozie design should be completely covered by the iron. Pressing the iron on the design for 15 - 30 seconds, pressing in 5-10 second intervals and checking. Generally, my koozies took 15-20 seconds but you can always set your iron to a little lower temperature if you are nervous. :)

You Can't Sip with Us Iron On HTV Bachelorette Koozies #bachelorette #youcantsipwithus #htvvinyl #svgfiles

6. Remove the backing to leave your first color of HTV on the koozies.

You Can't Sip with Us Iron On HTV Bachelorette Koozies #bachelorette #youcantsipwithus #htvvinyl #svgfiles

7. Now, center the middle of the design (“Sip) in between the already ironed on HTV lines of the koozie as shown below. Arrange the design shiny side up, then cover with parchment paper. Make sure to keep the parchment paper between the design and the iron.

9. silver placement.JPGYou Can't Sip with Us Iron On HTV Bachelorette Koozies #bachelorette #youcantsipwithus #htvvinyl #svgfiles

8. Set your Iron to the second Highest setting and press the the iron down firmly on the design, not ironing but rather using it as a small heat press. Repeat the same ironing process as above for the second design color.

You Can't Sip with Us Iron On HTV Bachelorette Koozies #bachelorette #youcantsipwithus #htvvinyl #svgfiles

9. Remove the backing from the design, leaving the completed design on the koozie. Repeat with all the remaining koozies.

You Can't Sip with Us Iron On HTV Bachelorette Koozies #bachelorette #youcantsipwithus #htvvinyl #svgfiles

HTV Iron On Team Bride Tote Bags

This post contains affiliate links, meaning that if you click on a link I will recieve a small comission. This costs you nothing extra and I only promote products I use and love! You can read our full disclosure here

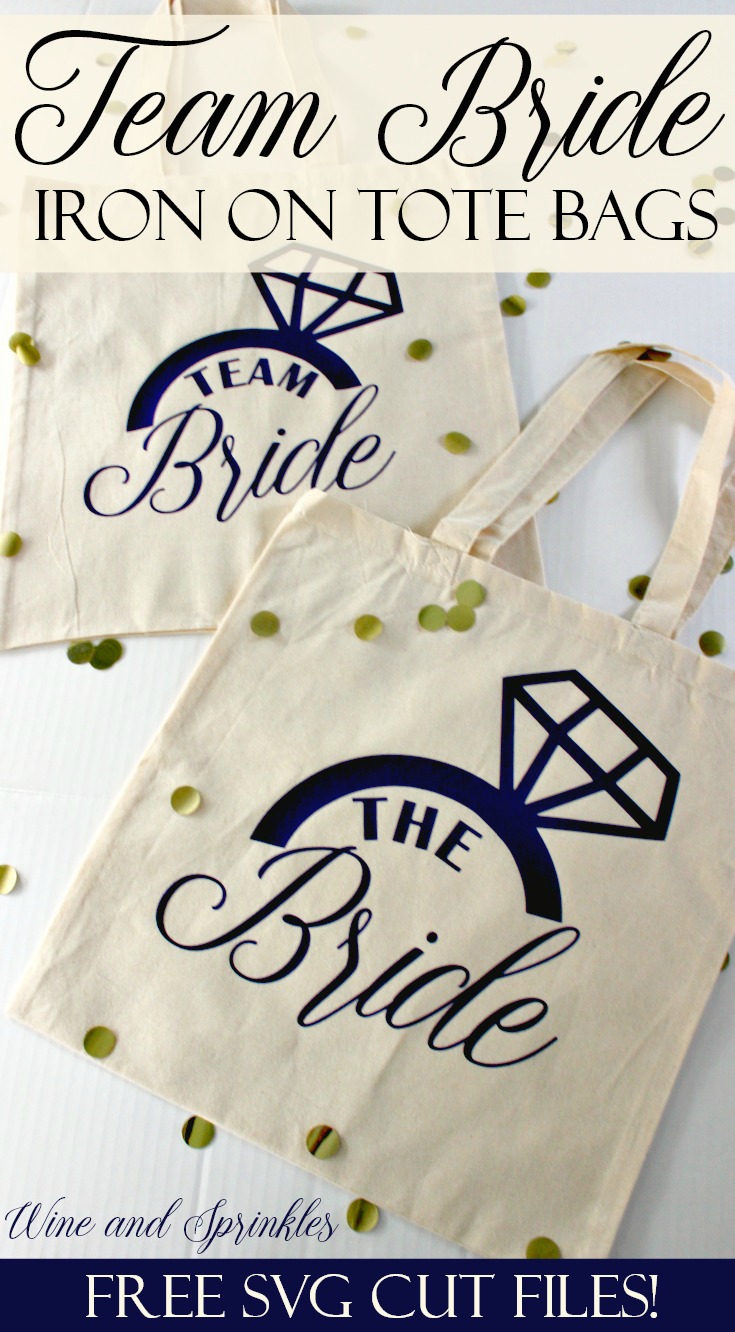
DIY HTV Iron On Team Bride Canvas Tote Bags #teambride #svgfiles #htvvinyl

Now that you’ve got your own bridal tank tops and wine glasses, its time to do some crafting for the leading ladies in your life, you future bridesmaids! I started with tote bags because they are always nice for keeping a bunch of stuff in and moving things back and forth for DIY nights, getting ready the day of, or as overnight bags in general. :) I started with this basic design that can be used for any bridal party and are perfect for getting your dream team together to help you on your special day!

DIY HTV Iron On Team Bride Canvas Tote Bags #teambride #svgfiles #htvvinyl

I made these ones on standard canvas bags with purple vinyl, but the links I included below have bags in a variety of colors as well as HTV in a rainbow of choices! :) You will also notice that the Bride design is bigger than the team bride designs, I just always like the bride to pop a bit, even if the design is the same. :)

DIY HTV Iron On Team Bride Canvas Tote Bags #teambride #svgfiles #htvvinyl

1. After downloading the cut files, import them into the Cricut Software. After creating a new project, select Upload Image. Select the file you wish to upload and it will automatically take you to the final upload screen, where you can name the file the select Save. The SVG Files are sized so that they will automatically cut to the size you see in the photos, but if you want to change the size you can do so to fit the totes the way you like.

2. After selecting “Make It” Make sure to select the Mirror Mode on the cutting screen. Cut the design(s) in your choice of heat transfer vinyl (I used Purple Easyweed HTV) with the Iron On (for Easyweed Vinyl) or Iron On+ (for Glitter Vinyl) Setting on your Cricut, with the shiny side of the material down.

3. Weed the additional material off of the backing material so that, looking down with the shiny side up, you can see your design with the correct orientation.

DIY HTV Iron On Team Bride Canvas Tote Bags #teambride #svgfiles #htvvinyl

4. Iron your tote bag to remove any creases, then center the design in the middle of the tote bag. Arrange the design shiny side up, then cover with parchment paper. Make sure to keep the parchment paper between the design and the iron.

DIY HTV Iron On Team Bride Canvas Tote Bags #teambride #svgfiles #htvvinyl

5. Set your Iron to the second Highest setting and press the the iron down firmly on the design, not ironing but rather using it as a small heat press. I worked from the upper left to lower right on the design, pressing the iron on each part of the design for at least 15-20 seconds, then overlapping the last position as you move the iron across the design.

DIY HTV Iron On Team Bride Canvas Tote Bags #teambride #svgfiles #htvvinyl

6. Remove the backing from the design, leaving the design on the Tote Bags. Repeat with all the remaining totes.

DIY HTV Iron On Team Bride Canvas Tote Bags #teambride #svgfiles #htvvinyl

DIY Engaged AF Bridal Tank Top

This post contains affiliate links, meaning that if you click on a link I will recieve a small comission. This costs you nothing extra and I only promote products I use and love! You can read our full disclosure here

DIY Iron on Engaged AF Bridal Tank Tops #engagedaf #htvvinyl #cricut

What better way to celebrate being engaged than with some fun wearables that you can rock throughout your wedding planning time? Its basically the only time you can wear them and if you make them yourself, they can be very inexpensive too! :) I started this year off with one of my favorite just engaged tank top sayings and it makes me wish I was engaged again and planning a wedding this year! :)

DIY Iron on Engaged AF Bridal Tank Tops #engagedaf #htvvinyl #cricut

I made this tank top with Confetti Glitter HTV and loved the look of it and they have tons of different colors to choose from if this gold isn’t really your color. :) And if you have the Cricut already, this project costs less than $10! Pair it with a Wedding Planning Wine Glass or any of the Swag Under $15 we showed last week for a great just engaged vibe to get you through the fun (or stress) of wedding planning. :)

Supplies:
Blank Tank Tops
Easyweed Heat Transfer Vinyl or Glitter Heat Transfer Vinyl
Craft Cutter and Tool Set
Adhesive Mat
Tank Top Design Cut Files

1. After downloading the cut files, import them into the Cricut Software. After creating a new project, select Upload Image. Select the file you wish to upload and it will automatically take you to the final upload screen, where you can name the file the select Save. The SVG Files are sized so that they will automatically cut to the size you see in the photos, but if you want to change the size you can do so to fit the tank tops the way you like.

2. After selecting “Make It” Make sure to select the Mirror Mode on the cutting screen. Cut the design in your choice of heat transfer vinyl (I used Gold Confetti Glitter HTV) with the Iron On (for Easyweed Vinyl) or Iron On+ (for Glitter Vinyl) Setting on your Cricut, with the shiny side of the material down.

3. Weed the additional material off of the backing material so that, looking down with the shiny side up, you can see your design with the correct orientation.

DIY Iron on Engaged AF Bridal Tank Tops #engagedaf #htvvinyl #cricut

4. Iron your tank top to remove any creases, then center the design over the top half of the tank top. Arrange the design shiny side up, then cover with parchment paper. Make sure to keep the parchment paper between the design and the iron.

DIY Iron on Engaged AF Bridal Tank Tops #engagedaf #htvvinyl #cricut

5. Set your Iron to the second Highest setting and press the the iron down firmly on the design, not ironing but rather using it as a small heat press. I worked from the upper left to lower right on the design, pressing the iron on each part of the design for at least 30 seconds, then overlapping the last position as you move the iron across the design.

DIY Iron on Engaged AF Bridal Tank Tops #engagedaf #htvvinyl #cricut

6. Remove the backing from the design, leaving the design on the tank top.

DIY Iron on Engaged AF Bridal Tank Tops #engagedaf #htvvinyl #cricut

This is a great project to start your journey into DIY wedding crafting, its easy to weed, a good size for a tank top but can be easily ironed on with just a few ironed “presses” to finish it up and not a lot of small or thin lines that could pull up if you didn’t iron it long enough. If you are ready to try more tank tops, check out our other tank top projects here!

DIY Iron on Engaged AF Bridal Tank Tops #engagedaf #htvvinyl #cricut

DIY Wedding Planning Wine Glass

This post contains affiliate links, meaning that if you click on a link I will recieve a small comission. This costs you nothing extra and I only promote products I use and love! You can read our full disclosure here

Do it Yourself Wedding Planning Wine Glass #engaged #svgfiles #cricut #wine

Happy New Year and congratulations to all the new future brides that got engaged over the holiday season! :) What better way than to celebrate and help you get through the wedding planning process than a lovely diy wine glass!

Do it Yourself Wedding Planning Wine Glass #engaged #svgfiles #cricut #wine

I made one in a Champagne Glitter Vinyl and another in a Turquoise Vinyl, but if you are new to weeding small vinyl designs I would recommend not using the glitter vinyl. In addition, its easiest to smooth the design from the middle to the top, then middle to the bottom to deal with the curvature of the glass.

Do it Yourself Wedding Planning Wine Glass #engaged #svgfiles #cricut #wine

1. After downloading the cut files, import them into the Cricut Software. After creating a new project, select Upload Image. Select the file you wish to upload and it will automatically take you to the final upload screen, where you can name the file the select Save. 

2. Cut the design(s) in your choice of permanent adhesive vinyl with the Vinyl Setting on your Cricut. The SVG Files are sized so that they will automatically cut to the size you see in the photos, but if you want to change the size you can do so to fit another sized glass than the ones we recommend. :)

Do it Yourself Wedding Planning Wine Glass #engaged #svgfiles #cricut #wine

3. Once the designs are cut, weed away the extra vinyl and cut a piece of transfer taper to 3" x 3.5". Cut away any excess backing from the vinyl design and smooth transfer tape over the design, aligning it to the top of the text (“this is my”). I also aligned mine so that one set of the 1/2” blocks on the transfer tape were above the text so the it was easy to align on the glass.Using the smoother tool, smooth the tape to the vinyl, removing any air bubbles.

Do it Yourself Wedding Planning Wine Glass #engaged #svgfiles #cricut #wine

4. Remove the transfer tape, making sure that the whole of the design transfers from the vinyl backing to the transfer tape.

Do it Yourself Wedding Planning Wine Glass #engaged #svgfiles #cricut #wine

5. Now, transfer the design to your glass. align the top of the transfer tape to the lip of the glass, as shown below. Smooth down the middle of the transfer tape to about the middle of the design, then smooth the design around the curve of the glass from the middle of the design to the edges. Smooth any air bubbles out of the vinyl, but don’t worry about the crinkling of the transfer tape with the curved surface.

Do it Yourself Wedding Planning Wine Glass #engaged #svgfiles #cricut #wine

6. Remove the transfer tape to leave the design on the glass. Any additional bubbles in the design can now be smoothed out with either your fingers or the smoother tool. The letters are small enough that I only had one to smooth and it did quite easily. :)

Do it Yourself Wedding Planning Wine Glass #engaged #svgfiles #cricut #wine

And now you have the perfect wine glass to help you or your new favorite bride get through the fun and stress of planning a wedding! :)

Do it Yourself Wedding Planning Wine Glass #engaged #svgfiles #cricut #wine


Monogram HTV Iron On Koozies

This post contains affiliate links, meaning that if you click on a link I will recieve a small comission. This costs you nothing extra and I only promote products I use and love! You can read our full disclosure here

DIY Iron On Monogrammed Koozies #cricutprojects #cricut #koozies #monogram

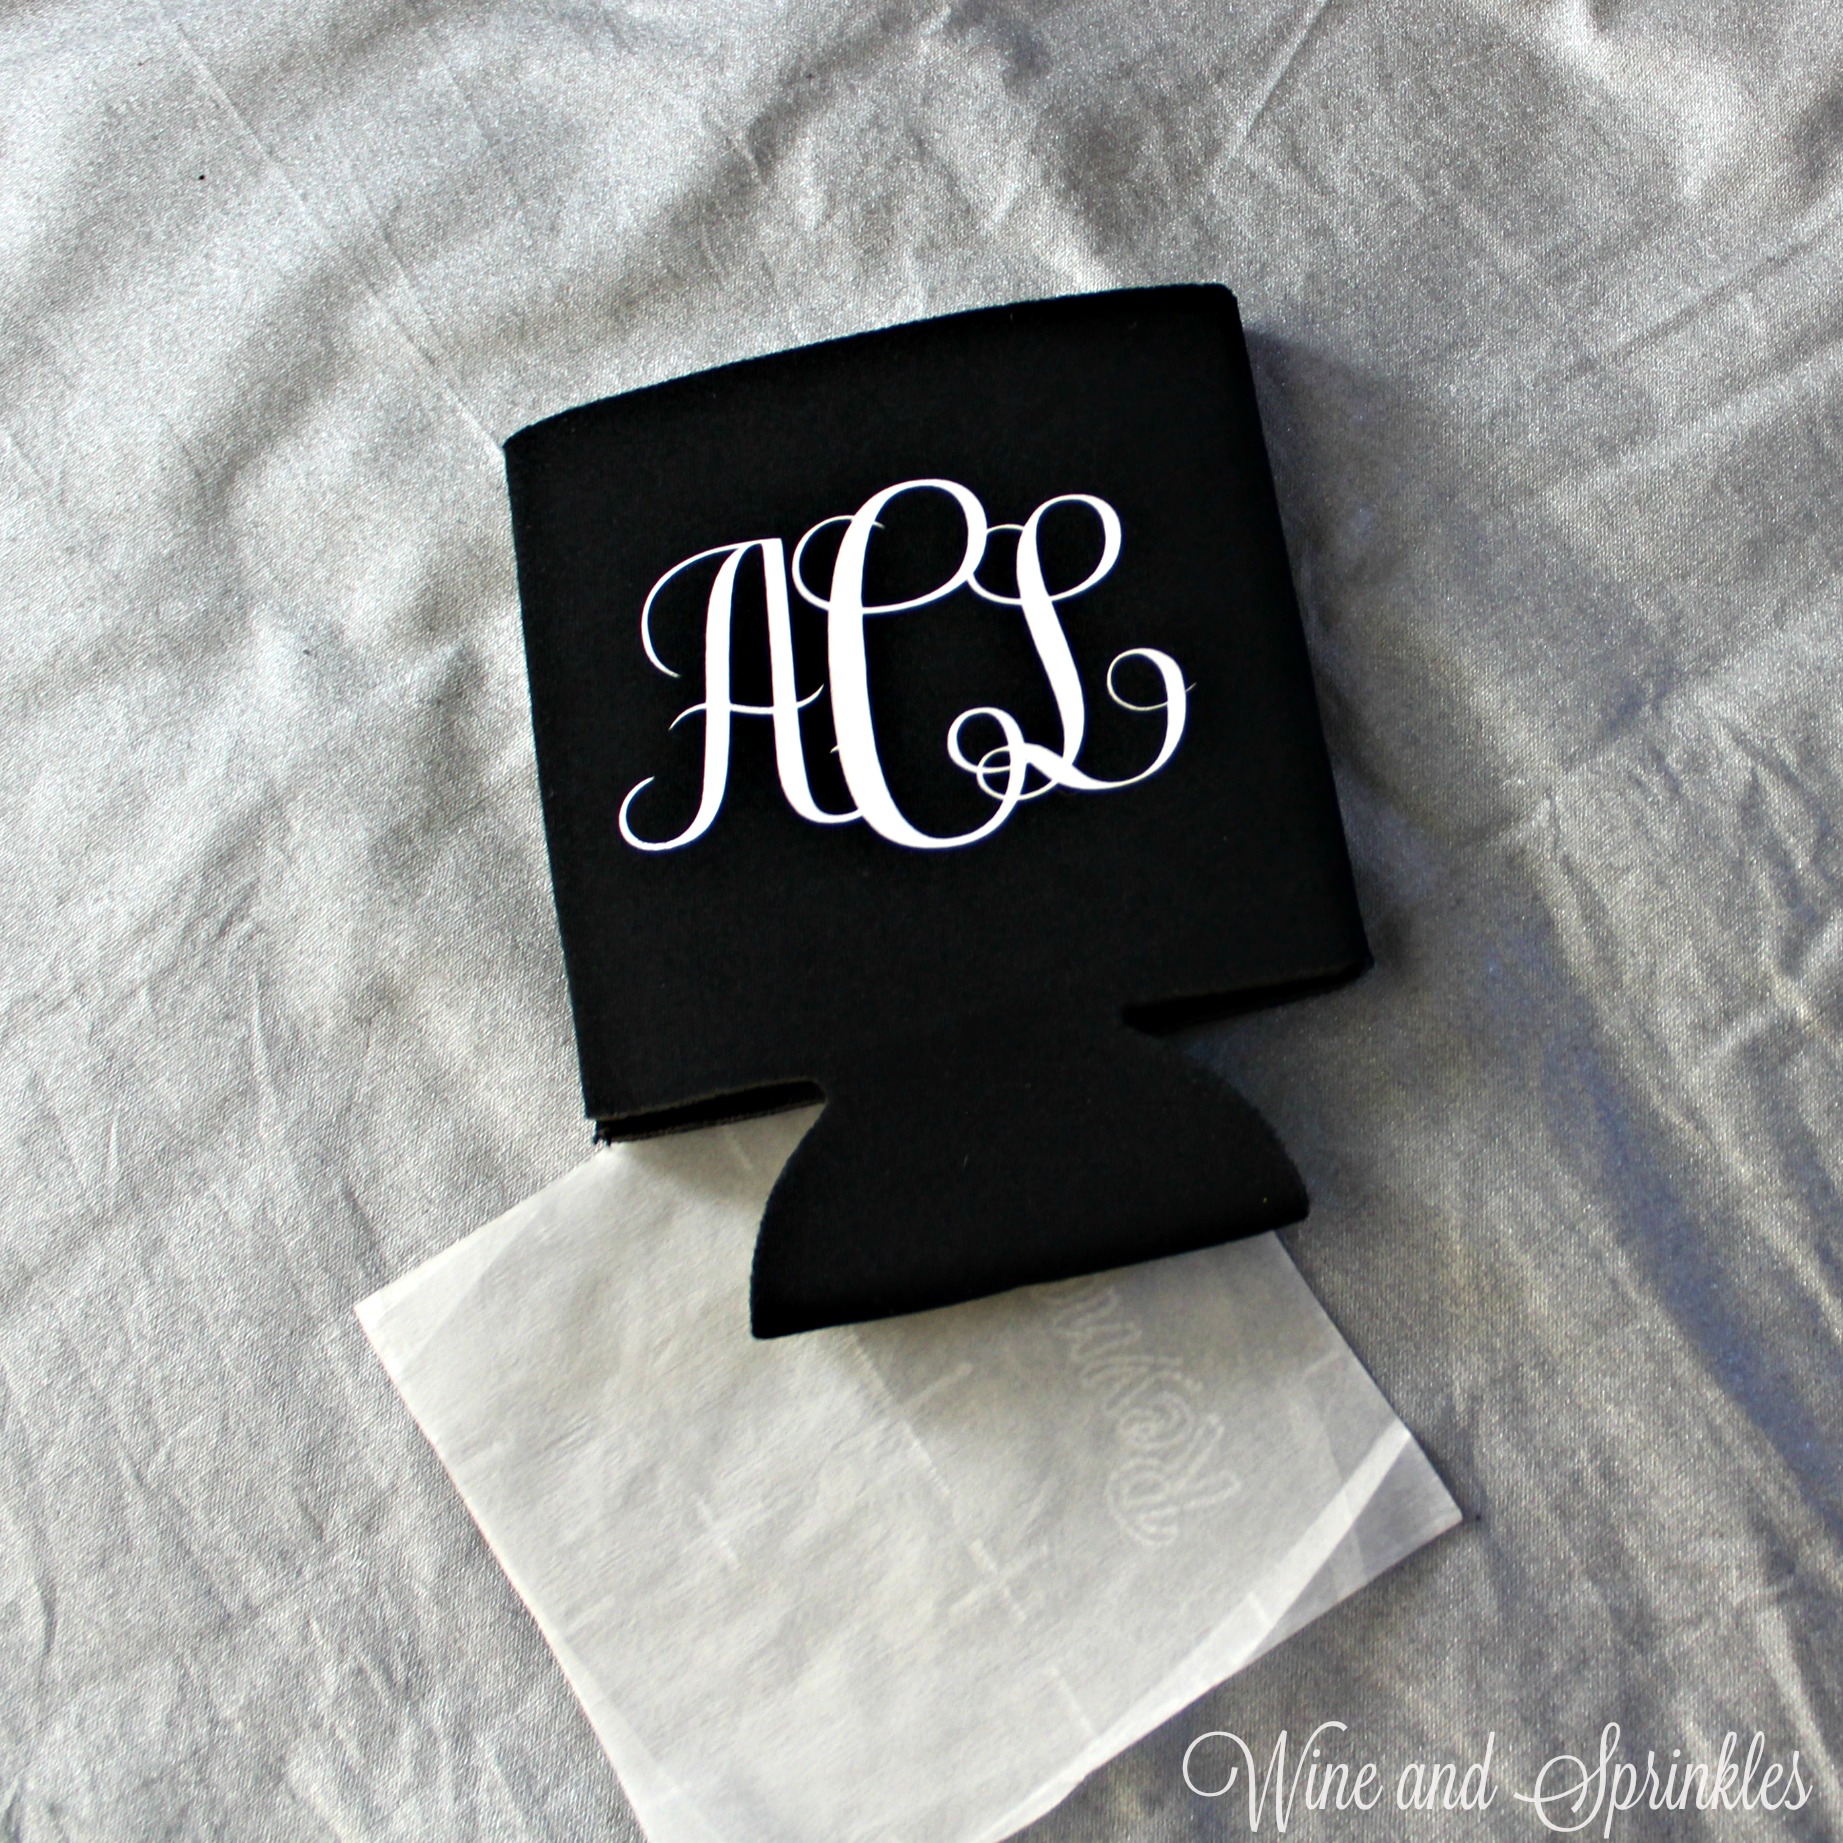
With all the fun I’ve had putting monograms on Tank Tops and Tote Bags, I decided to include koozies in the mix since its such an easy project if you have a little extra HTV lying around, and in my case I also had some extra koozies! Like the other monogram projects, you can easily design them in the Cricut Craft Cutter Software and size them however you like for your koozie. :)

DIY Iron On Monogrammed Koozies #cricutprojects #cricut #koozies #monogram

Supplies:
Blank Koozies
Easyweed Heat Transfer Vinyl or Glitter Heat Transfer Vinyl
Craft Cutter and Tool Set
Adhesive Mat

Designing Your Monogram:

1. First, if you don't already own a Monogram style font, download one. The font I used is called Free Monogram Font from DaFont.com and it worked perfectly for what I wanted, and as the name implies its totally free!

2. Now, open a new project in your Cricut design software and create a text box. Select the Monogram font from your font choices and use it to type the initials for your monogram.

DIY Iron On Monogrammed Koozies #cricutprojects #cricut #koozies #monogram

3. If you are using the font I mentioned, for smaller side letters you use lower case letters and for the center letter you use uppercase letters. For example, my initials on the monogram shown are typed in as "aCl" .

DIY Iron On Monogrammed Koozies #cricutprojects #cricut #koozies #monogram

4. Next, overlap your letters by changing the letter spacing of your font. I chose -2 for the spacing of my letters but it is better to mess with it a little bit to find out what looks best to you.

DIY Iron On Monogrammed Koozies #cricutprojects #cricut #koozies #monogram

5. Once all your letters are spaced to your satisfaction, select the "Weld" tool to combine your letters into a single set of cutting curves. 

DIY Iron On Monogrammed Koozies #cricutprojects #cricut #koozies #monogram

6. Now,  you can size your monogram to whatever size you like best; I made them 3" wide.

7. Finally, cut the monograms on your choice of vinyl. I used the Iron On+ setting for Glitter HTV and the Standard Iron On Setting for regular Easyweed Vinyl. Make sure that you select the "Mirror" Function and load your Iron On material Shiny side down so that your design cuts correctly! :)

Transferring your Design

8. Once your design is cut, weed away the extra material, leaving only your monogram.

9. Arrange the Monogram such that it is in the center of the koozie. Arrange the design shiny side up, then cover with parchment paper. Make sure to keep the parchment paper between the design and the iron.

DIY Iron On Monogrammed Koozies #cricutprojects #cricut #koozies #monogram

10. Set your Iron to the second Highest setting and press the the iron down firmly on the design, not ironing but rather using it as a small heat press. I worked from the upper left to lower right on the design, pressing the iron on each part of the design for about 20 seconds, covering the entire design and parchment paper.

DIY Iron On Monogrammed Koozies #cricutprojects #cricut #koozies #monogram

11. Remove the backing from the design, leaving the Monogram on the Koozie. Repeat with all the remaining Koozies.

DIY Iron On Monogrammed Koozies #cricutprojects #cricut #koozies #monogram

30 Alternative Engagement Rings for Under $350

30 Alternative Engagement Rings for Under $350

Engagement rings are such a romantic way to enliven the holiday season and take the next step in your relationship together! Unfortunately, many such rings are so expensive that they just aren’t affordable for future brides and grooms on a budget! With that in mind, I went searching on Etsy for rings under $500, and ended up with a huge assortment under $350 instead!

Read More

Future Mrs. Bachelorette Flasks

This post contains affiliate links, meaning that if you click on a link I will recieve a small comission. This costs you nothing extra and I only promote products I use and love! You can read our full disclosure here

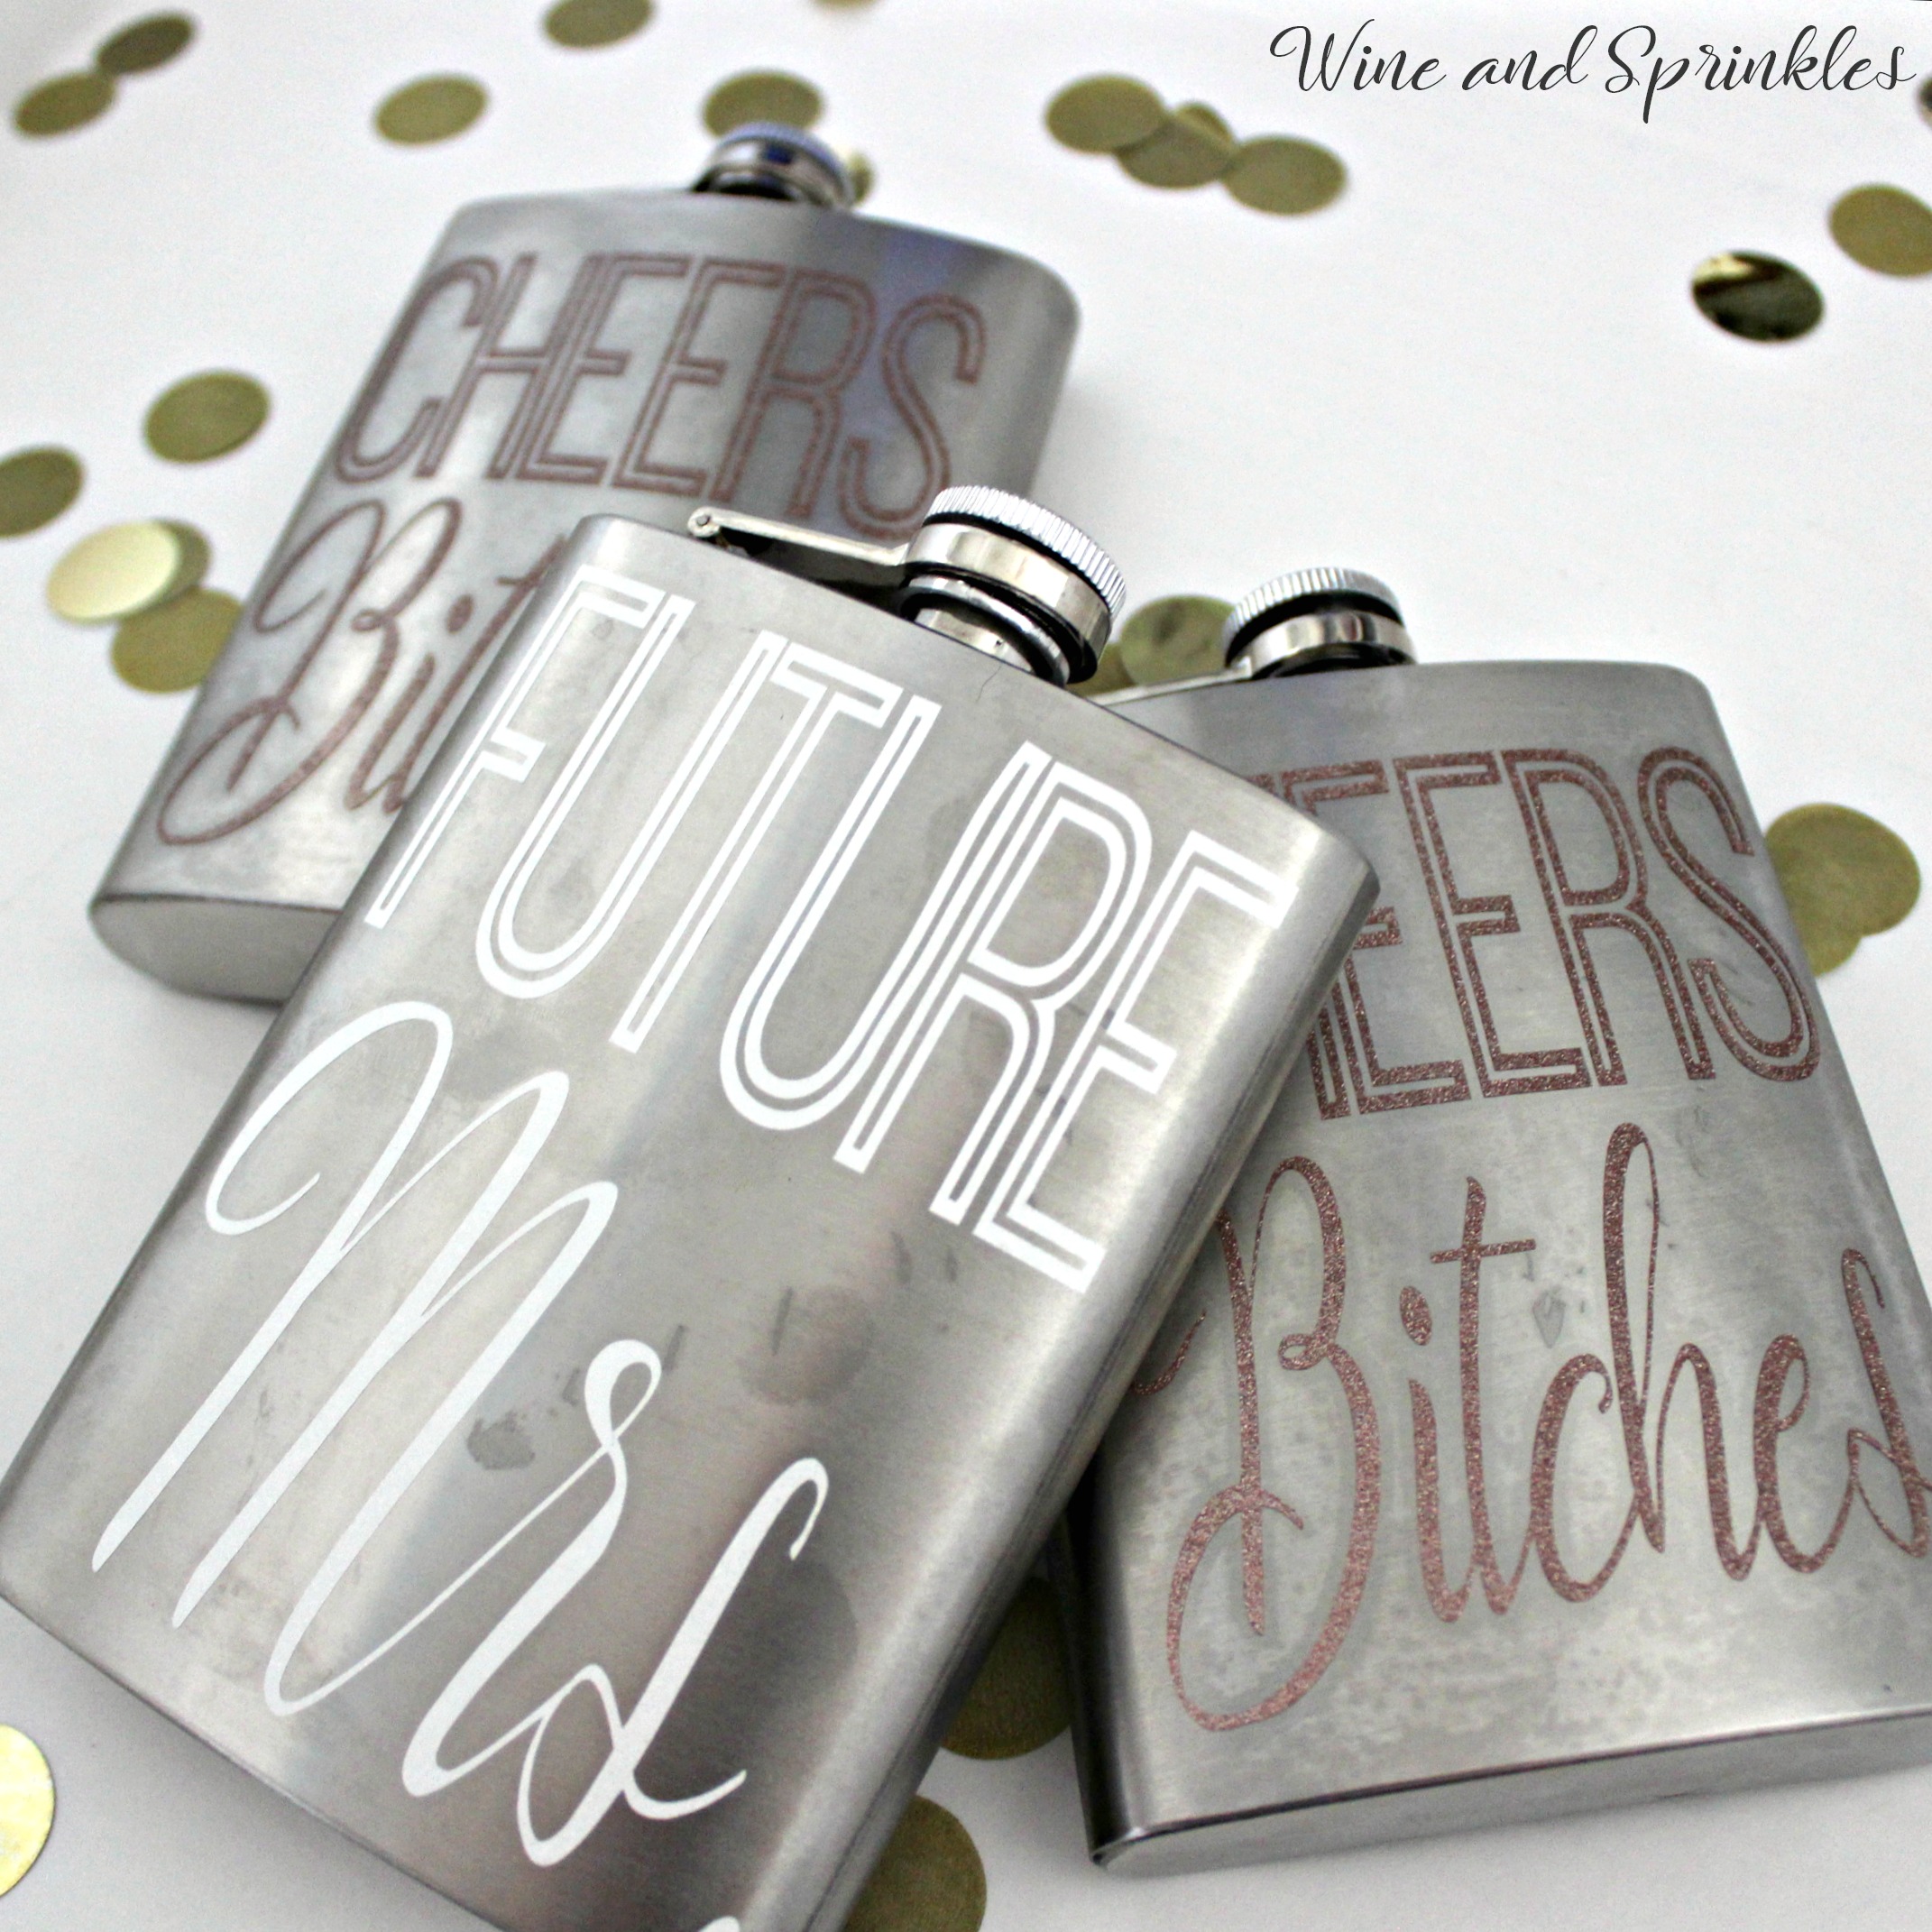
DIY Vinyl Cheer Bitches Bachelorette Party Flasks #bachelorette #cricutprojects #diywedding

More Bachelorette party flasks are here! :) I had so much fun when I first started designing different flasks, I ended up with a whole bunch of different designs that I’ll be publishing every few weeks and will be continuing to design more so there are oodles of options!

DIY Vinyl Cheer Bitches Bachelorette Party Flasks #bachelorette #cricutprojects #diywedding

For these flasks, weeding is what you need to be careful of as both types of text are more delicate than some of the bolder fonts, but the results are well worth it! Just be patient and you shouldn’t have any difficulties. :)

DIY Vinyl Cheer Bitches Bachelorette Party Flasks #bachelorette #cricutprojects #diywedding

1. After downloading the cut files, import them into the Cricut Software. After creating a new project, select Upload Image. Select the file you wish to upload and it will automatically take you to the final upload screen, where you can name the file the select Save. 

2. Cut the design(s) in your choice of permanent adhesive vinyl with the Vinyl Setting on your Cricut. The SVG Files are sized so that they will automatically cut to the size you see in the photos, but if you want to change the size you can do so by BLAH

DIY Vinyl Cheer Bitches Bachelorette Party Flasks #bachelorette #cricutprojects #diywedding

3. Once the designs are cut, weed away the extra vinyl and cut a piece of transfer taper to 3.5" x 5". Cut away any excess backing from the vinyl design and smooth transfer tape over the design, aligning it to the top of the text (i.e. the “Cheers” or “Future”) with 1 -1/2” block above the text, as shown below. Using the smoother tool, smooth the tape to the vinyl, removing any air bubbles. The transfer tape should overlap the backing of the design, so that you can stick the tape to an object with the backing still on the design.

DIY Vinyl Cheer Bitches Bachelorette Party Flasks #bachelorette #cricutprojects #diywedding

4. Now, transfer the design to your flask. If you are comfortable centering the designs you can remove the tape from the backing and directly place the design on the flask. If not, arrange the design to be centered on the flask before removing the backing, sticking it with the overlapping transfer tape.

DIY Vinyl Cheer Bitches Bachelorette Party Flasks #bachelorette #cricutprojects #diywedding

5. Once your design is placed to your satisfaction, carefully peel the tape off the backing, transferring the vinyl to the transfer tape while not unsticking it from the flask. Remove the backing then smooth the design onto the flask, once again using the smoother to remove any air bubbles.

DIY Vinyl Cheer Bitches Bachelorette Party Flasks #bachelorette #cricutprojects #diywedding

6. Remove the transfer tape to leave the design on the flask, then repeat the process for all the additional flasks.

DIY Vinyl Cheer Bitches Bachelorette Party Flasks #bachelorette #cricutprojects #diywedding